Mitsuba2とは
アカデミック向けのフリーの物理ベースレンダラー。微分可能レンダリングや偏光レンダリングなどの新機能がある。
この記事は導入編の続きになります。
Mitsuba2のインストールまで終わっているという前提です。
他に書いた関連記事です。
- 最新物理ベースレンダラー Mitsuba2を触ってみる(1) 導入編
- 最新物理ベースレンダラー Mitsuba2を触ってみる(3) 微分可能レンダリング編
- 最新物理ベースレンダラー Mitsuba2を触ってみる(4) 偏光レンダリング編
- BRDFと偏光BRDF(pBRDF)の違い
PythonからMitsuba2を動かす
公式でも書かれているようにMitsuba2は非常に強力なPythonバインディングを提供していて、ほぼすべての機能をPythonから使うことが可能です。もちろんJupyter Notebook上でimportして、様々な開発をインタラクティブに行うこともできます。更にはPyTorchと連携することも想定していて、とても簡単にPyTorchを使った最適化が記述できます。
まずは何よりも動かしてみる
Windows10での手順になります(2020年3月10時点での情報)。
公式がPythonのレンダリングテストコードを用意してくれています、これを動かせるようになるのが目標です。
今回は導入編(1)が終わっている人ならば、特に引っ掛かるところはないと思います。手順を追って解説します。
Pythonの対応バージョン
公式によると3.6以上に対応しているとの事なので、それ未満の場合はアップデートしておきましょう。
PATHを通す
まず、Pythonでimportできるようにするために、mitsuba2のモジュールにPATHを通す必要があります。
これにはいくつかやり方があるのですが、ここでは公式が用意しているスクリプトを使うことにします。
導入編(1)でビルドしたライブラリや実行ファイルがmitsuba2\build\dist\にあることが前提です。
ルートディレクトリにsetpath.batというバッチファイルがあるので、これをコマンドプロンプト(cmd)から叩きます(Power Shellを使うとbatを叩いても環境変数が返ってこないので、スクリプトを書き直す必要があります)。
mitsuba2> setpath.bat
これで「実行したcmd内では」実行ファイルやPythonモジュールへのPATHが通り、Mitsuba2がどこでも使える状態になります。
試しにipythonを起動して、mitsuba2をimportしてみましょう。
mitsuba2> ipython
Python 3.7.4 (tags/v3.7.4:e09359112e, Jul  8 2019, 20:34:20) [MSC v.1916 64 bit (AMD64)]
Type 'copyright', 'credits' or 'license' for more information
IPython 7.10.1 -- An enhanced Interactive Python. Type '?' for help.

In [1]: import mitsuba
importエラーが出なければ、mitsuba2モジュールへのPATHが通っています。
mitsuba2ですが、importするモジュールは「mitsuba」であることに注意してください。
さて、では早速テストコードを動かしてみましょう。
「スクリプトを実行したcmd」で、公式が用意しているサンプルコードのディレクトリまで移動します。
該当ディレクトリはmitsuba2\docs\examples\01_render_scene\にあります。
mitsuba2> cd docs\examples\01_render_scene\
mitsuba2\docs\examples\01_render_scene>
ディレクトリ内にあるrender_scene.pyがPythonでmitsuba2を叩いてレンダリングを行うサンプルコードです。
適当なエディタで開いてみましょう。
import os
import numpy as np
import mitsuba

# Set the desired mitsuba variant
mitsuba.set_variant('scalar_rgb')

from mitsuba.core import Bitmap, Struct, Thread
from mitsuba.core.xml import load_file

# Absolute or relative path to the XML file
filename = 'path/to/my/scene.xml'

# Add the scene directory to the FileResolver's search path
Thread.thread().file_resolver().append(os.path.dirname(filename))

# Load the actual scene
scene = load_file(filename)

# Call the scene's integrator to render the loaded scene
scene.integrator().render(scene, scene.sensors()[0])

# After rendering, the rendered data is stored in the film
film = scene.sensors()[0].film()

# Write out rendering as high dynamic range OpenEXR file
film.set_destination_file('/path/to/output.exr')
film.develop()

# Write out a tonemapped JPG of the same rendering
bmp = film.bitmap(raw=True)
bmp.convert(Bitmap.PixelFormat.RGB, Struct.Type.UInt8, srgb_gamma=True).write('/path/to/output.jpg')

# Get linear pixel values as a numpy array for further processing
bmp_linear_rgb = bmp.convert(Bitmap.PixelFormat.RGB, Struct.Type.Float32, srgb_gamma=False)
image_np = np.array(bmp_linear_rgb)
print(image_np.shape)
まずはコードの理解をする前に、動かします。
今のままではレンダリング対象のシーンファイルが存在しないので、シーンファイルを用意します。導入編(1)でレンダリングテストを行った方は既にあると思うのですが、サンプルのシーンデータのリポジトリをどこか別の場所でgit cloneします。
git clone https://github.com/mitsuba-renderer/mitsuba-data.git
ここのローカルリポジトリのパスを指定しても良いのですが、わかりやすくするために、今回もmitsuba_data/scenes/cboxをディレクトリごと、現在のテストコードのディレクトリmitsuba2\docs\examples\01_render_scene\にコピーしてください。
そして、コード内でこのシーンファイルを読み込み、適切な場所に書き出すために3か所だけ書き換えます。
# filename = 'path/to/my/scene.xml'
filename = 'cbox/cbox.xml' # l.12
# film.set_destination_file('/path/to/output.exr')
film.set_destination_file('cbox/output.exr') # l.27
# bmp.convert(Bitmap.PixelFormat.RGB, Struct.Type.UInt8, srgb_gamma=True).write('/path/to/output.jpg')
bmp.convert(Bitmap.PixelFormat.RGB, Struct.Type.UInt8, srgb_gamma=True).write('cbox/output.jpg') # l.32
あとは、pythonで実行するだけです。(numpyはpip installしておいてください)
python render_scene.py
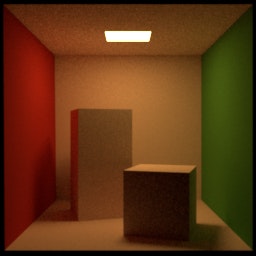
無事レンダリングが終わると、cbox\output.exrとcbox\output.jpgという2つのファイルが生成されています。
exrは導入編(1)と同じで32bit x 3chのレンダリング画像、jpgは8bit x 3chの圧縮画像になります。
サンプルコードを理解する
さて、無事サンプルコードを動かし終わったので、1つ1つコードを順を追って理解していきます。
import os
import numpy as np
import mitsuba
モジュールをimportしています、特に変わったところはないです。
# Set the desired mitsuba variant
mitsuba.set_variant('scalar_rgb')
mitsuba2のバリアント(レンダリング設定)を指定します。バリアントについては導入編(1)で解説しています。
**これは、CMake時に指定したものの中から選ばないといけません。**もしビルドしていない他のバリアントでレンダリングしたい場合はCMakeまで遡ってビルドし直す必要があります。今回は"scalar_rgb"という、SIMD化もない(scalar)、スペクトルと偏光を考慮しないRGBの光線(rgb)という一番基本のバリアントでレンダリングを行います。
from mitsuba.core import Bitmap, Struct, Thread
from mitsuba.core.xml import load_file
mitsuba.coreから、Bitmap, Struct, Threadをimportします。
またmitsuba.core.xmlから、load_fileをimportします。
それぞれ後で使う際に解説します。
# Absolute or relative path to the XML file
filename = 'cbox/cbox.xml'

# Add the scene directory to the FileResolver's search path
Thread.thread().file_resolver().append(os.path.dirname(filename))

# Load the actual scene
scene = load_file(filename)
読み込むxml形式のシーンファイル名を指定して、シーンファイルを読み込む関数load_file()で読み込みます。
Thread.thread().file_resolver()は、名前やパスを指定して検索パスとして設定することで、シーンファイル内のファイルへのリンクが相対パスで書かれていることを解決します。これが無いとオブジェクトファイルが見つかりませんというエラーがでます。
# Call the scene's integrator to render the loaded scene
scene.integrator().render(scene, scene.sensors()[0])
読み込んだシーンをレンダリングするためのインテグレーター(integrator)を呼び出します。
第一引数がシーン(scene)で、第二引数がレンダリングをする(シーンファイルに記述されている)センサー(scene.sensors()[0])です。[0]なのは、センサーがいくつかある場合、どれかを指定できるようにするためです。
# After rendering, the rendered data is stored in the film
film = scene.sensors()[0].film()

# Write out rendering as high dynamic range OpenEXR file
film.set_destination_file('cbox/output.exr')
film.develop()
シーンファイルに記述されているセンサーに対するフィルム(scene.sensors()[0].film())を読み込みます。
フィルムは、データの出力設定や後処理などをする役目があります。
film.set_destination_fileで出力ファイル名を設定します。
film.develop()でcbox\output.extを現像します。
# Write out a tonemapped JPG of the same rendering
bmp = film.bitmap(raw=True)
bmp.convert(Bitmap.PixelFormat.RGB, Struct.Type.UInt8, srgb_gamma=True).write('cbox/output.jpg')
8bit現像処理になります。
film.bitmap(raw=True)で事前にフィルム現像されたコンテンツを保存するビットマップオブジェクトを返します。引数rawの意味は、公式でもまだ記述されていないので不明。
さらにビットマップオブジェクトに対しconvertで8bit現像処理を行います。Bitmap.PixelFormat.RGBでRGBを指定、Struct.Type.UInt8で8bit指定、srgb_gamma=TrueでSRGBのGammaのトーンマップを適用します。
# Get linear pixel values as a numpy array for further processing
bmp_linear_rgb = bmp.convert(Bitmap.PixelFormat.RGB, Struct.Type.Float32, srgb_gamma=False)
image_np = np.array(bmp_linear_rgb)
print(image_np.shape)
# (256, 256, 3)
同じconvertで、8bit圧縮されていない、線形のRGB値をnumpy arrayで取得しています。
出力結果とは関係ないですが、レンダリング結果が容易にnumpy arrayで取得できることがわかります。
まとめ
PythonからMitsuba2を動かす方法について、サンプルコードを動かし、そのコードの中身を見て理解していきました。
とてもシンプルな記述で、基本のレンダリングをPythonで動かせることがわかっていただけたかと思います。
次回からはいよいよ微分可能レンダリングや偏光レンダリングなど新機能の使い方を解説します。
以上です。