SafeAreaVieww
SafeAreaViewは、デバイスのセーフエリア境界内にコンテンツをレンダリングします。
現在、iOSバージョン11以降を搭載したiOSデバイスにのみ適用されます。
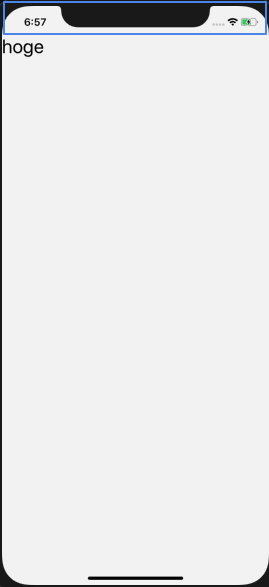
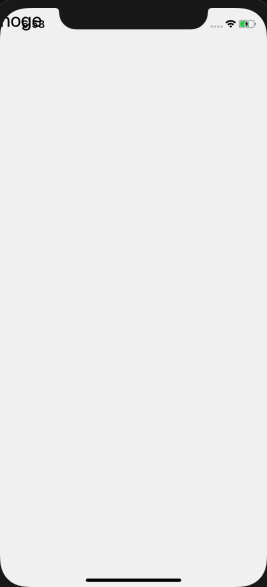
SafeAreaViewコンポーネント使用することでステータスバーにコンテンツが被ることなくレンダリングされます。
| SafeAreaView使用 | SafeAreaView未使用 |
|---|---|
 |
 |
paddingスタイルは効かない
SafeAreaViewに適用されたスタイルのpaddingは無視されます。
解決方法としては、SafeAreaView内のコンテンツに対してpadding適用させます。
export function SafeAreaViewAndStatusBar({}: Props) {
  return (
    <SafeAreaView style={styles.root}>
      <View style={styles.paddingTop}>
        <Text style={styles.text}>hoge</Text>
      </View>
    </SafeAreaView>
  );
}

// SafeAreaView要素に対してpaddingを適用してもスタイルは反映されません
// 代わりにSafeAreaView内のコンテンツにスタイルを適用させる事で問題を解決する。
const styles = StyleSheet.create({
  root: {
    flex: 1
  },
  view: {
    paddingTop: 30
  },
  text: {
    fontSize: 30,
  },
});
ステータスバーのみ余白をとる
下記の画像の通り、SafeAreaViewでコンテンツをラップすると画面下にも余白が生まれてしまいます。
これを解決するには<SafeAreaView />とする必要があります。
export default function Sample2({}) {
  return (
    <View style={{flex: 1}}>
      <SafeAreaView />
      <ScrollView
        scrollEventThrottle={16}
        onScroll={Animated.event([
          {nativeEvent: {contentOffset: {y: scrollY}}},
        ])}>
        <View>
          ....
        </View>
      </ScrollView>
    </View>
  );
}
Android対応
ステータスバーの余白はiOSのみに適用されます。
そのため、Androidに余白を設定させる必要があります。
まずreact-nativeからStatusBarをimportしてそのプロパティであるcurrentHeightからステータスバーの高さを取ります。
PlatfotmがandroidであればStatusBar.currentHeightで取得した高さを余白としてpaddingTopに設定します。
import React from "react";
import {
  SafeAreaView,
  StyleSheet,
  Platform,
  StatusBar,
  Text,
  View,
} from "react-native";

export default function Sample() {
  return (
    <SafeAreaView style={styles.root}>
      <StatusBar />
      <View>
        <Text>status bar</Text>
      </View>
    </SafeAreaView>
  );
}

const styles = StyleSheet.create({
  root: {
    backgroundColor: "white",
    paddingTop: Platform.OS === "android" ? StatusBar.currentHeight : 0,
  },
});