はじめに
前回(ユーザ認証編)で使用したプロジェクトを引き継いで作成する。
開発環境
・Windows10 professional 64bit
・Python 3.7.1
・Django 2.1.2
・MySQL 8.0.12
ユーザ情報
表示と編集
ログインしているユーザの情報を表示するページと,変更できるページを作成する
URL設定
ユーザ情報の表示と変更のURLをaccounts/urls.pyに設定する
urlpatterns = [
                        .
                        .
                        .
    path('profile/<int:pk>/', views.Profile.as_view(), name='profile'),   # 追加
    path('profile/<int:pk>/update/', views.ProfileUpdate.as_view(), name='profile_update'),   # 追加
]
ユーザ情報更新用のフォームを作成
""" アカウント更新フォーム """
class AccountsUpdateForm(forms.ModelForm):

    class Meta:
        model = User
        fields = (
            'username', 'email',
            'last_name', 'first_name',
        )

    def __init__(self, *args, **kwargs):
        super().__init__(*args, **kwargs)
        for field in self.fields.values():
            field.widget.attrs['class'] = 'form-control'
'fields'によって更新できる値を指定できる
views.pyを編集
from django.contrib.auth.mixins import LoginRequiredMixin, UserPassesTestMixin
from django.shortcuts import redirect, resolve_url
from .forms import LoginForm, RegistrationForm, AccountsUpdateForm


""" ユーザ限定クラス """
class UserOnlyMixin(UserPassesTestMixin):
    raise_exception = True

    def test_func(self):
        user = self.request.user
        return user.pk == self.kwargs['pk'] or user.is_superuser


""" ユーザ情報表示ページ """
class Profile(UserOnlyMixin, generic.DetailView):
    model = User
    template_name = 'profile.html'


""" ユーザ情報更新ページ """
class ProfileUpdate(UserOnlyMixin, generic.UpdateView):
    model = User
    form_class = AccountsUpdateForm
    template_name = 'profile_update.html'

    def get_success_url(self):
        return resolve_url('accounts:profile', pk=self.kwargs['pk'])
UserPassesTestMixinを継承したMixinクラスによって,自分以外のユーザがそのページを見れないようにする事が出来るので,
各ページには作成したMixinクラスを継承させる
あとはHTMLを作れば画面に表示される
HTML作成
ユーザ情報へ移動するボタンを作成するので'base.html'の<body></body>内を以下のように修正する
<body>
        <nav class="navbar navbar-dark sticky-top bg-dark flex-md-nowrap p-0">
            <a class="navbar-brand col-sm-3 col-md-2 mr-0" href="/">TaskMan</a>
            <div class="form-control form-control-dark w-100">{% block mainT %}{% endblock %}</div>
            <div class="btn-group">
                <div class="btn dropdown-toggle naviDrop" data-toggle="dropdown" aria-haspopup="true" aria-expanded="false">
                        {% if user.is_authenticated %}
                            User : {{ user.get_username }}
                        {% else %}
                            User
                        {% endif %}
                </div>
                {% if user.is_authenticated %}
                    <div class="dropdown-menu dropdown-menu-right" >
                    <a class="dropdown-item" href="{% url 'accounts:profile' user.pk %}">ユーザ情報</a>
                    <div class="dropdown-divider"></div>
                    <a class="dropdown-item" href="/logout/">ログアウト</a>
                    </div>
                {% endif %}
            </div>
        </nav>

        {% block body %}{% endblock %}

    </body>
また,CSSを追加する
.naviDrop {
    color:white;
    margin-right:20px;
    width:200px;

}
ユーザ情報ページ(profile.html)とユーザ情報更新ページ(profile_update.html)を作成する
{% extends "base.html" %}
{% block title %} TaskMan {% endblock %}
{% block mainT %} アカウント情報 {% endblock %}
{% block body %}
<div style="margin:20px">
    <table class="table">
        <tbody>
            <tr>
                <th>ユーザー名</th>
                <td>{{ user.username }}</td>
            </tr>
            <tr>
                <th>メールアドレス</th>
                <td>{{ user.email }}</td>
            </tr>
            <tr>
                <th>姓</th>
                <td>{{ user.last_name }}</td>
            </tr>
            <tr>
                <th>名</th>
                <td>{{ user.first_name }}</td>
            </tr>
        </tbody>
    </table>
    <a href="{% url 'accounts:profile_update' user.pk %}" class="btn btn-primary ">変更</a>
</div>
{% endblock %}
{% extends "base.html" %}
{% block title %} TaskMan {% endblock %}
{% block mainT %} アカウント情報 更新 {% endblock %}
{% block body %}
<div style="margin:20px">
    <form action="" method="POST">
        {{ form.non_field_errors }}
        <table class="table">
            <tbody>
                {% for field in form %}
                    <tr>
                        <th><label for="{{ field.id_for_label }}">{{ field.label }}</label></th>
                        <td>{{ field }} <span style="color:red">{{ field.errors }}<span></td>
                    </tr>
                {% endfor %}
            </tbody>
        </table>
        {% csrf_token %}
        <button type="submit" class="btn btn-success" >更新</button>
    </form>
</div>
{% endblock %}
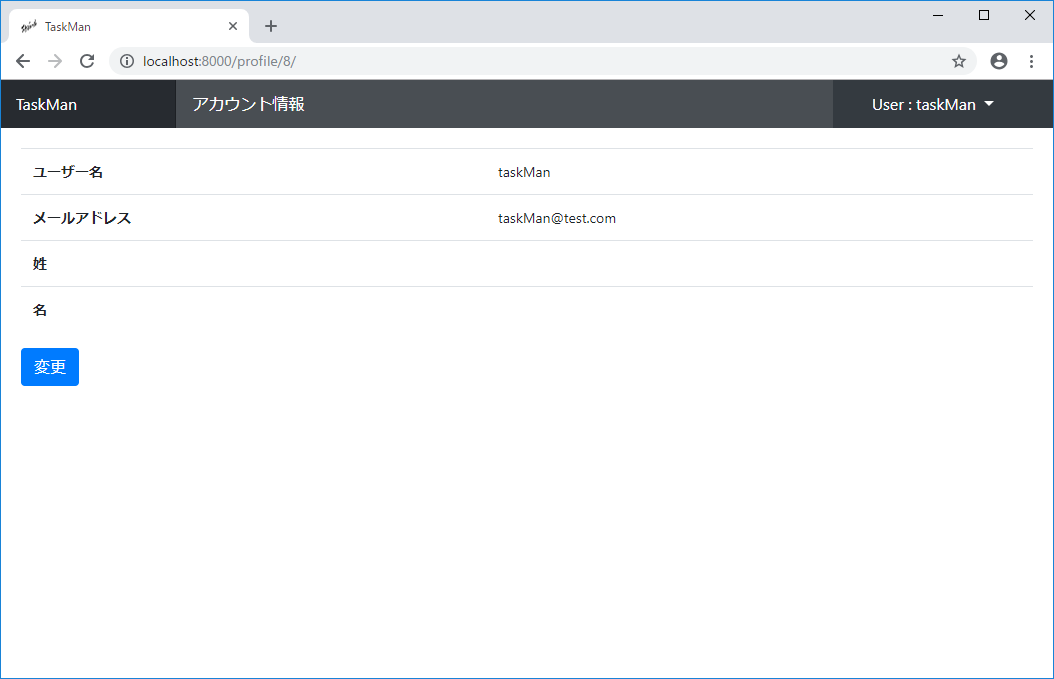
ユーザ情報画面とユーザ情報更新画面の完成
画面確認
作成した画面を確認すると次のようになる
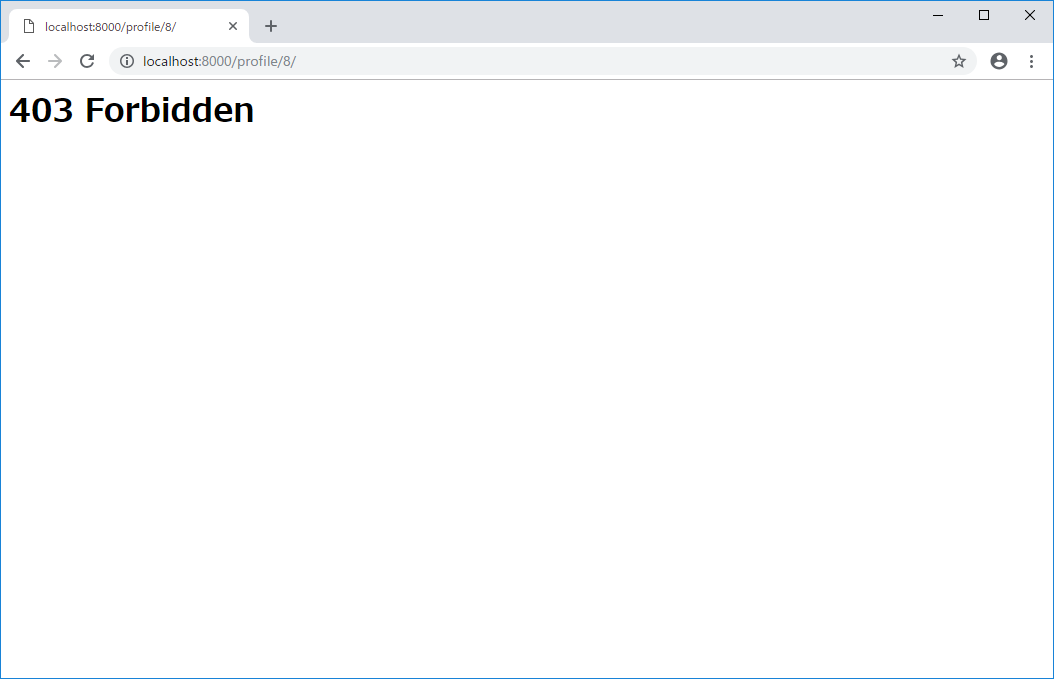
・異なるユーザでログインし同じURLを開こうとする

※superuserだと見れるので注意
期待している動きを確認することができた
パスワード変更
URL設定
パスワード変更用のURLをaccounts/urls.py設定する
urlpatterns = [
              .
              .
              .
    path('profile/<int:pk>/password', views.PasswordChange.as_view(), name='password'),  # 追記
    path('profile/<int:pk>/password/complete', views.PasswordChangeComplete.as_view(), name='password_complete'),  # 追記
]
views.pyの設定も行う
from django.contrib.auth.views import LoginView, LogoutView, PasswordChangeView, PasswordChangeDoneView


""" パスワード変更ページ """
class PasswordChange(UserOnlyMixin, PasswordChangeView):
    model = User
    template_name = 'password_change.html'

    def get_success_url(self):
        return resolve_url('accounts:password_complete', pk=self.kwargs['pk'])


""" パスワード変更完了 """
class PasswordChangeComplete(UserOnlyMixin, PasswordChangeDoneView):
    template_name = 'password_change_complete.html'
HTML作成
ユーザ情報からパスワード変更画面に飛びたいので,`profile.html'を修正する
     .
     .
     .
    </table>
    <a href="{% url 'accounts:profile_update' user.pk %}" class="btn btn-primary ">変更</a>
    <a href="{% url 'accounts:password' user.pk %}" class="btn btn-primary ">パスワード変更</a>  <!-- 追加 -->
</div>
{% endblock %}
パスワード変更画面(password_change.html)と変更完了画面(password_change_complete.html)を作成する
{% extends "base.html" %}
{% block title %} TaskMan {% endblock %}
{% block mainT %} パスワード変更 {% endblock %}
{% block body %}
<div style="margin:20px">
    <form action="" method="POST">
        {{ form.non_field_errors }}
        {% for field in form %}
        <div class="form-group">
            <label class="col-6" for="{{ field.id_for_label }}">{{ field.label_tag }}</label>
            {{ field }}
            <span style="color:red">{{ field.errors }}<span>
        </div>
        {% endfor %}
        {% csrf_token %}
        <div class="form-group row">
            <div class="authElement">
                <button type="submit" class="btn btn-success">変更</button>
            </div>
            <div class="authElement">
                <a href="{% url 'accounts:profile' user.pk %}" class="btn btn-primary">戻る</a>
            </div>
        </div>
    </form>

</div>
{% endblock %}
{% extends "base.html" %}
{% block title %} TaskMan {% endblock %}
{% block mainT %} パスワード変更 {% endblock %}
{% block body %}
<div style="text-align: center; padding-top: 50px;">
    <h2 >パスワードを変更しました</h2>
    <div class="authElement">
        <a href="{% url 'accounts:profile' user.pk %}" class="btn btn-primary">ユーザ情報</a>
    </div>
</div>
{% endblock %}
画面確認
次回ログイン時,変更したパスワードでログインできれば確認完了
ユーザアイコン設定
今後,チャット機能を追加する予定なのであらかじめユーザアイコンを準備しておく
準備
画像を保存するためにはPIL (Pillow)が必要なのでインストールする
> python -m pip install pillow
画像を保存しておくmediaフォルダをmanage.pyと同じ階層に作成し,setting.pyにその場所を記録する
# media root setting
MEDIA_URL = '/mdeia/'
MEDIA_ROOT = os.path.join(BASE_DIR, 'media')
画像用のURLをプロジェクトのurls.py(taskMan/urls.py)に設定する
from django.contrib import admin
from django.urls import path, include
from django.conf import settings  # 追加
from django.conf.urls.static import static  # 追加

urlpatterns = [
    path('admin/', admin.site.urls),
    path('', include('accounts.urls')),
]

if settings.DEBUG:
    urlpatterns += static(settings.MEDIA_URL, document_root = settings.MEDIA_ROOT)  # 追加
Userモデルの変更
ユーザモデルを以下のように変更する
class User(AbstractUser, models.Model):
    icon = models.ImageField(
        upload_to='img/',
        verbose_name='アイコン',
        blank=True,
    )
更新用のフォームにアイコンを追加する
fields = (
            'icon',  # 追加
            'username', 'email',
            'last_name', 'first_name',
        )
urls.pyとviews.pyは変更しない
HTML修正
ユーザ情報画面のテーブルの上に以下のコードを追加する
    <div class="icon">
        {% if user.icon.url != "" %}
            <img src="{{ user.icon.url }}" style="height: 100px; width: 100px;">
        {% else %}
            <img src="/static/img/c0063_6_2.png" style="height: 50px; width: 50px;">
        {% endif%}
    </div>
/static/img/c0063_6_2.pngは画像を登録していないときのデフォルト画像
staticフォルダにimgフォルダを作り,そこに画像を準備する
更新する際に画像をアップロードできるように<form>を変更する
<form action="" method="POST" enctype ="multipart/form-data">
また,ユーザ名の横にアイコンを表示できるようにbase.htmlも変更する
<div class="btn dropdown-toggle naviDrop" data-toggle="dropdown" aria-haspopup="true" aria-expanded="false">
   {% if user.is_authenticated %}
       User : {{ user.get_username }}
       {% if user.icon.url != "" %}
           <img src="{{ user.icon.url }}" style="height: 20px; width: 20px;">
       {% else %}
           <img src="/static/img/c0063_6_2.png" style="height: 20px; width: 20px;">
       {% endif%}
   {% else %}
        User
   {% endif %}
</div>
アイコン調整用のCSSを作成する
.icon {
    text-align: center;
    margin-bottom: 20px;
}
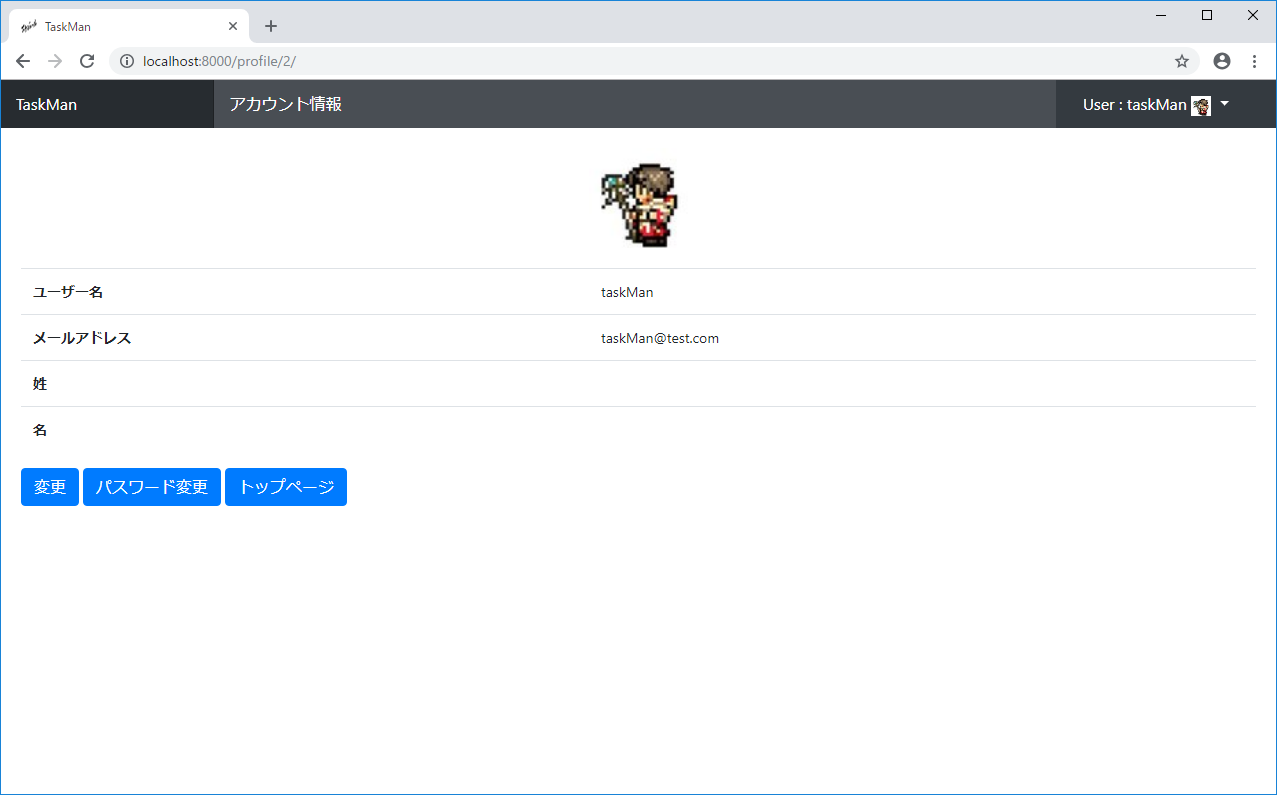
画面確認
アイコン画像が更新されたのが確認できた
今回のまとめ
情報更新やパスワード変更は比較的に早く完成したが,アイコン設定に時間がかかってしまった。本当は画像が更新された際に前の画像を削除したかったが,画像が更新されなくても前の(つまり今の)画像が削除されてしまったので諦めた。しかし,最終的には導入しなくてはいけないと思っているので,もう少しPythonやDjangoになれてから再挑戦しようと思う
シリーズ
・Djangoでタスク管理アプリをつくりたい! 環境構築編
・Djangoでタスク管理アプリをつくりたい! ユーザ認証編
・Djangoでタスク管理アプリをつくりたい! ユーザ情報編
・Djangoでタスク管理アプリをつくりたい! プロジェクト管理編
・Djangoでタスク管理アプリをつくりたい! タスク管理編1


