はじめに
前回の記事の続きです。
前回は、WebページのボタンからAPIを実行させるところまでを実装しました。
今回は実行ログの出力について記載します。
前回作成したAPIは限定された人しか実行できないようにしている訳ではなく、
Webページにアクセスできる人であれば誰でもボタンを押すことで実行できてしまいます。
そのため、どのIPから、どのような端末で、いつ実行したのかが記録として残るように、
API実行ログを出力させる方法にしました。
構成図
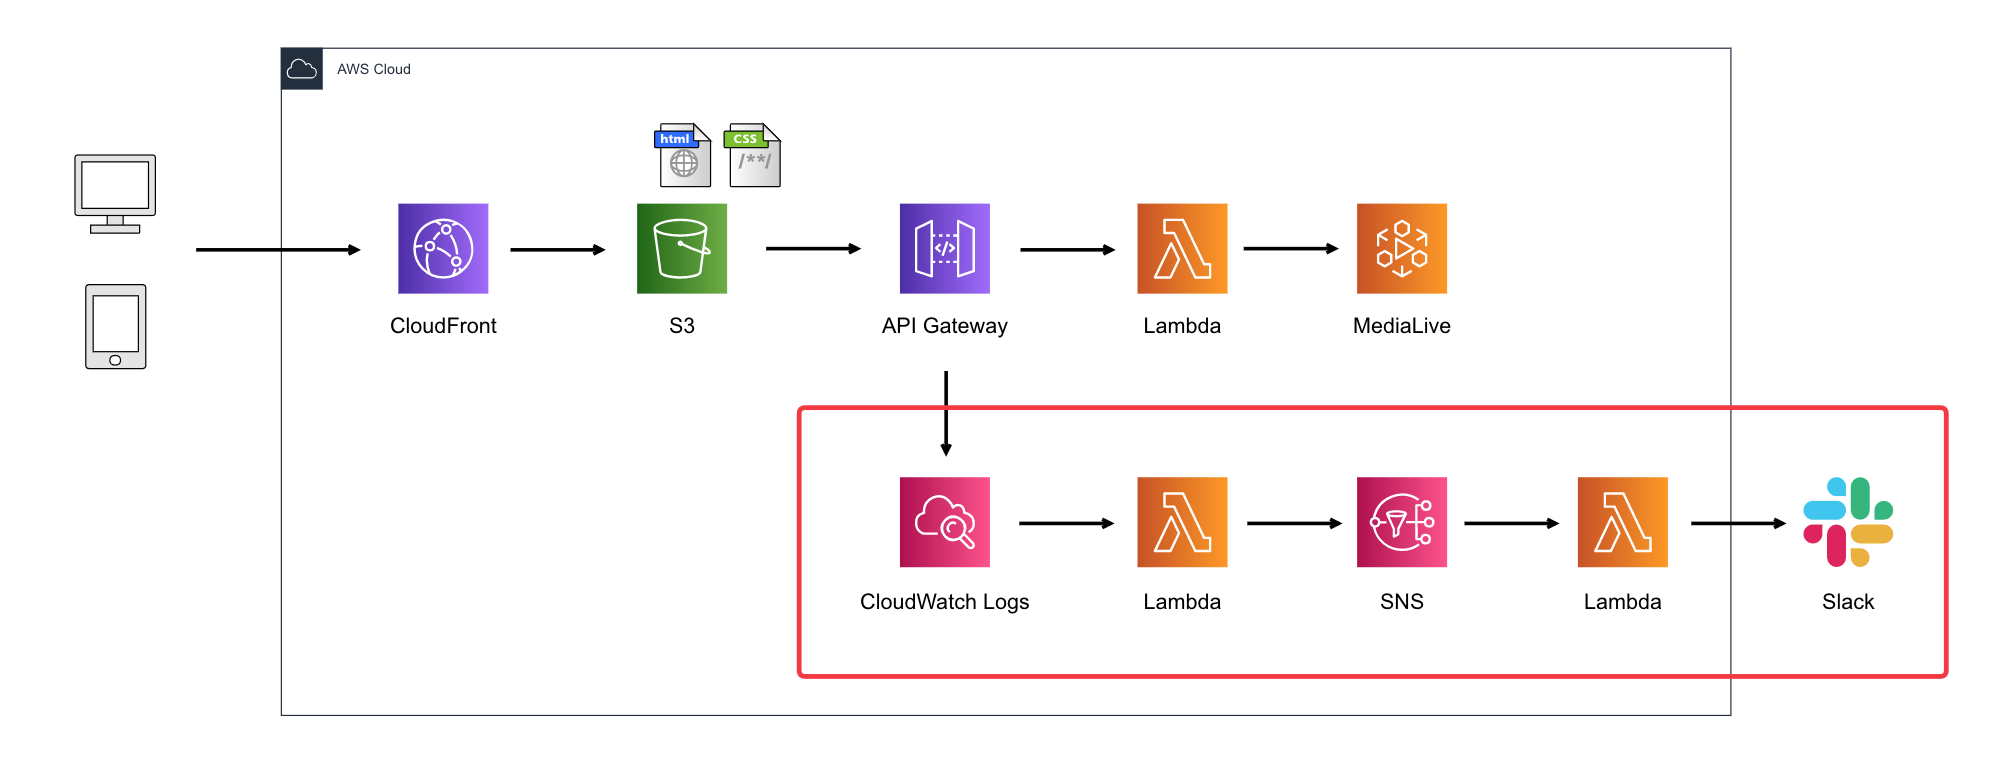
赤枠で囲った部分が、今回のログをSlackに出力する構成です。
2つのLambdaを使って、API GatewayからCloudWatch Logsに出力されたログを整形してSNSに送り、
SNSに来たメッセージをSlackに送信してます。
(もっと効率的な方法があるかもしれませんが)
API Gateway
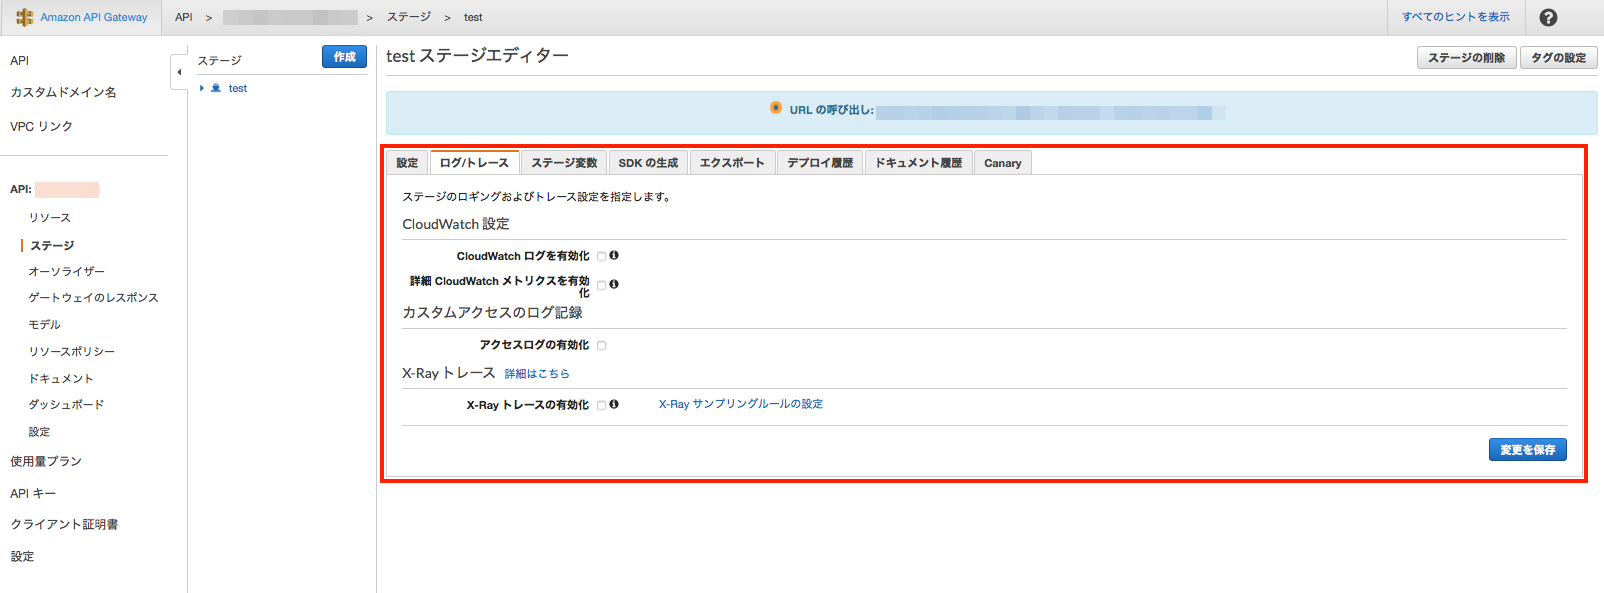
API Gatewayのログはここで設定できます。
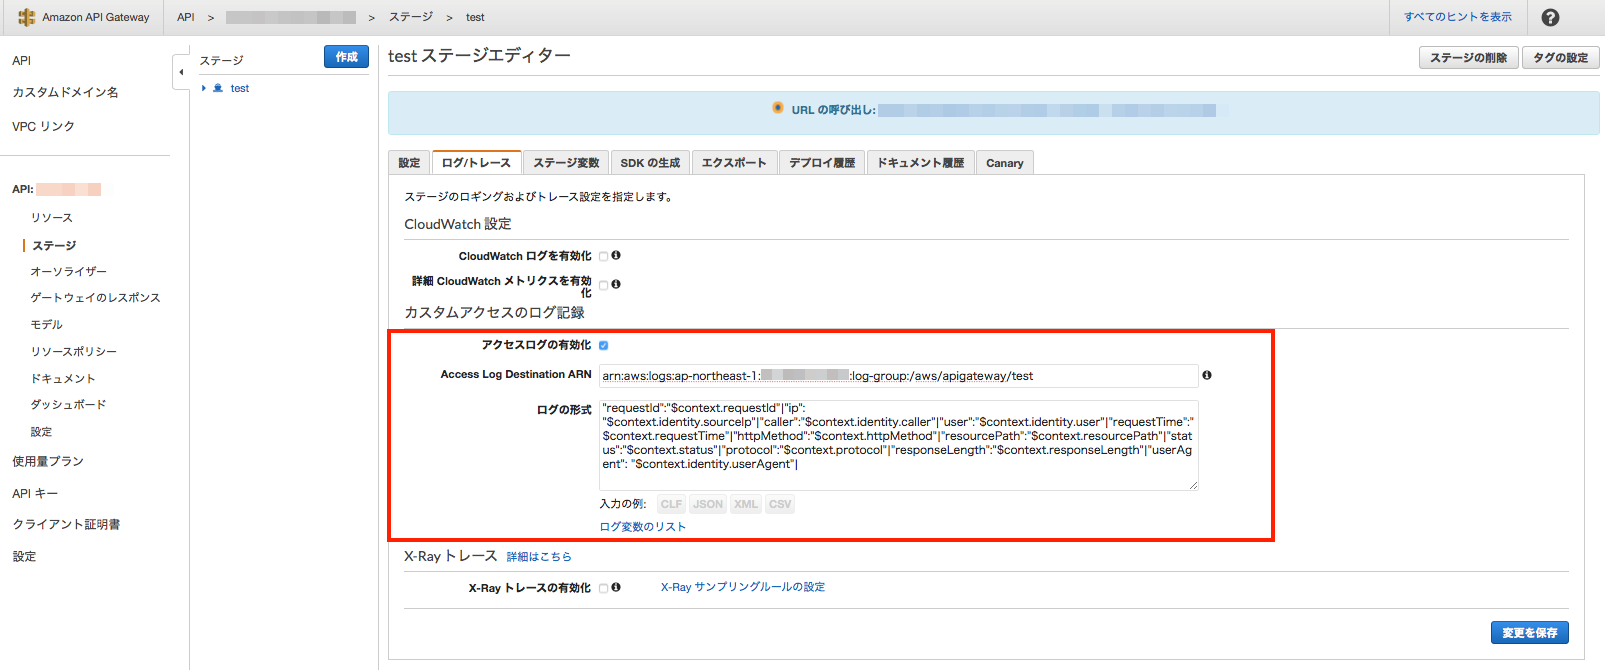
デフォルトは無効になっているので、「アクセスログの有効化」にチェックを入れます。
有効化すると画面表示が変わるので、ARNとログ形式を入力します。
{ "requestId":"$context.requestId"|"ip": "$context.identity.sourceIp"|"caller":"$context.identity.caller"|"user":"$context.identity.user"|"requestTime":"$context.requestTime"|"httpMethod":"$context.httpMethod"|"resourcePath":"$context.resourcePath"|"status":"$context.status"|"protocol":"$context.protocol"|"responseLength":"$context.responseLength"|"userAgent": "$context.identity.userAgent"| }
SNS
整形したログの出力先として、トピックを作っておきます。
Lambda(CWLogs → SNS)
1.CloudWatch Logsに出力されたログを整形するためのLambdaを作ります。
(こちらの記事を参考にさせていただきました)
やや無理やりですが、「|」と「:」の記号でメッセージを分割してリスト化しています。
from __future__ import print_function

import base64
import json
import zlib
import datetime
import boto3
import re

sns = boto3.client('sns')

print('Loading function')

def lambda_handler(event, context):
    data = zlib.decompress(base64.b64decode(event['awslogs']['data']), 16+zlib.MAX_WBITS)
    data_json = json.loads(data)
    log_json = json.loads(json.dumps(data_json["logEvents"][0], ensure_ascii=False))
    if data_json["logGroup"]:
        date = datetime.datetime.fromtimestamp(int(str(log_json["timestamp"])[:10])) + datetime.timedelta(hours=9)
        msg = log_json['message']
        msg_sp = re.split('[|:]',msg)
        sns_body = {}
        sns_body["default"] = ""
        sns_body["default"] += "LogGroup : " + data_json["logGroup"] + "\n"
        sns_body["default"] += "Time : " +  date.strftime('%Y-%m-%d %H:%M:%S') + "\n"
        sns_body["default"] += "RequestId : " + msg_sp[1] + "\n"
        sns_body["default"] += "Ip : " + msg_sp[3] + "\n"
        sns_body["default"] += "HttpMethod : " + msg_sp[14] + "\n"
        sns_body["default"] += "ResourcePath : " + msg_sp[16] + "\n"
        sns_body["default"] += "Status : " + msg_sp[18] + "\n"
        sns_body["default"] += "UserAgent : " + msg_sp[24] + "\n"
        sns_body["default"] += "----------------------------------------" + "\n"

        topic = '<SNSトピックのARN>'
        subject = 'cloudwatchlogs-to-sns'
        region = 'ap-northeast-1'
        response = sns.publish(
            TopicArn=topic,
            Message=json.dumps(sns_body, ensure_ascii=False),
            Subject=subject,
            MessageStructure='json'
        )
    return 'Successfully processed {} records.'.format(len(event['awslogs']))
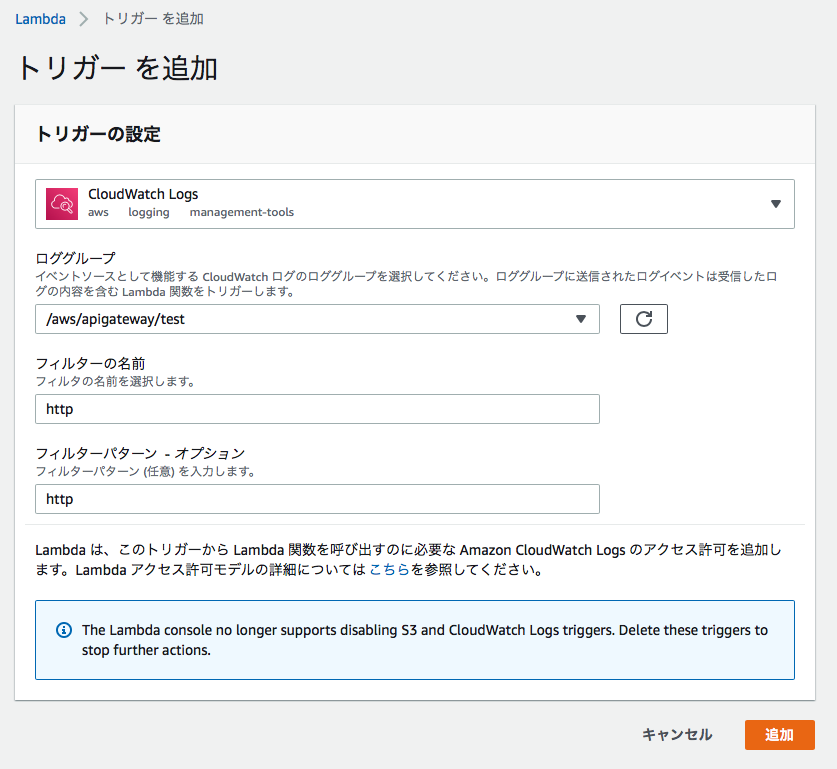
2.トリガーに「CloudWatch Logs」を選択して、下記のように設定します。
Lambda(SNS → Slack)
1.SNSに届いたメッセージをSlackに送るためのLambdaを作ります。
設定方法は下記のAWSページに載っていましたので、こちらをご参照ください。
https://aws.amazon.com/jp/premiumsupport/knowledge-center/sns-lambda-webhooks-chime-slack-teams/
import urllib3
import json

http = urllib3.PoolManager()

def lambda_handler(event, context):
    url = "https://hooks.slack.com/services/xxxxxxx"
    msg = {
        "channel": "#CHANNEL_NAME",
        "username": "WEBHOOK_USERNAME",
        "text": event['Records'][0]['Sns']['Message'],
        "icon_emoji": "page_facing_up"
    }

    encoded_msg = json.dumps(msg).encode('utf-8')
    resp = http.request('POST',url, body=encoded_msg)

    print({
        "message": event['Records'][0]['Sns']['Message'],
        "status_code": resp.status,
        "response": resp.data
    })
2.トリガーには、先程作成したSNSトピックを設定しておきます。
Slack
おわりに
今回はあまり時間がなく、なるべく手軽な方法で実装したかったので、これで良しとします。


