TL;DR
Amazon Linux 2 に Zabbix をインストールしてみたよ。そう遠くないうちに正式リリースされるであろう Zabbix 4.0 をチョイスしたよ。
CentOS6 や(旧) Amazon Linux に Zabbix をインストールしたときはいろいろ追加パッケージをインストールする必要があったけど、 Zabbix の RHEL7 用パッケージを使ったら Amazon Linux 2 にはすんなり入ったよ。
Zabbix 4.0 正式リリース後はこの記事を修正して正式版に対応する予定だよ。
背景
(旧) Amazon Linux に Zabbix をインストールした経験はあったけど、 Amazon Linux 2 に Zabbix をインストールした経験はなかったので Try してみました。
そういえば Amazon Linux 2 は正式リリース前に触っただけで正式リリース後は触ったことがなく、いい加減触ってみるかーという思いもあったりします。
また、 Zabbix 3.0 から約2年半ぶりの LTS リリースという事もあり、2018/08/01現在まだアルファー版の Zabbix 4.0 をターゲットにしています。1
前提条件
対象となる読者
- とりあえず Amazon Linux 2 に Zabbix 4.0 をインストールしてみたい人
- Zabbix 4.0 の新機能について、サクッと自前で環境を構築して自分で試してみたい人
対象にならない読者
- Amazon Linux 2, Zabbix をガッツリチューニングしたい人
- Zabbix 4.0 の新機能について情報を得たい人
バージョン
- Zabbix: 4.0.0 alpha9
- mariadb: 5.5.56
- Amazon Linux 2 (amzn2-ami-hvm-2.0.20180622.1-x86_64-gp2)
環境
- Zabbix は AWS EC2 上に構築する
- Amazon Linux 2 を AMI に指定した EC2 を Launch 済み
- SecurityGroup は、下記の通信を許可済み
- インバウンド: TCP: 22, 80, 10051
- この手順だと、 Zabbix の WebUI がデフォルトパスワードで起動するので、インターネットからアクセスできないように適切に処置してください。
- アウトバウンド: すべて
- インバウンド: TCP: 22, 80, 10051
- (オプション: RDS 利用時のみ) RDS は起動し、 SecurityGroup 等を適切に設定済み
Zabbix のインストール手順
では早速インストールしていきましょう。
基本的な流れは Zabbix 公式サイトのインストール手順 に倣っています。
パッケージインストール
GPG キー追加
Zabbix リポジトリの GPG キーをインポートします。
# rpm -import http://repo.zabbix.com/RPM-GPG-KEY-ZABBIX
リポジトリ追加
ZABBIX SIA の公式リポジトリを追加します。
# rpm -i https://repo.zabbix.com/zabbix/3.5/rhel/7/x86_64/zabbix-release-3.5-1.el7.noarch.rpm
Zabbix 関連パッケージインストール
Zabbix 関連パッケージをインストールします。
# yum install zabbix-server-mysql zabbix-web-mysql zabbix-agent zabbix-web-japanese
Loaded plugins: extras_suggestions, langpacks, priorities, update-motd
Resolving Dependencies
--> Running transaction check
(snip)
Complete!
DB セットアップ
データベースをセットアップします。
Zabbix 用インスタンスに同居させる場合は MariaDB(MySQL) セットアップを、 RDS を利用する場合は RDS(MySQL) への接続準備を実施します。
MariaDB(MySQL) セットアップ
RDS を利用しない場合は、 Zabbix 用 EC2 インスタンスに MariaDB を同居させます。
もちろん、 MariaDB 専用 EC2 インスタンスを作成してそちらと連携させることも可能ですが、そんなことをやるくらいなら RDS を使おうぜという事でここでは扱いません。
MariaDB 関連パッケージインストール
まずは必要パッケージをインストールします。
# yum install mariadb-server mariadb
Loaded plugins: extras_suggestions, langpacks, priorities, update-motd
Resolving Dependencies
--> Running transaction check
(snip)
Complete!
MariaDB の起動と自動起動設定
MariaDB をインストールしたら、 MariaDB を起動します。
(旧) Amazon Linux とは異なり、 Amazon Linux 2 ではシステムの起動に init/Upstart ではなく Systemd が用いられています。
このため、 service コマンドではなく systemctl コマンドを用いてサービスを起動します。
# systemctl start mariadb
# systemctl status mariadb
● mariadb.service - MariaDB database server
   Loaded: loaded (/usr/lib/systemd/system/mariadb.service; disabled; vendor preset: disabled)
   Active: active (running) since Mon 2018-07-30 14:25:00 UTC; 4s ago
  Process: 3864 ExecStartPost=/usr/libexec/mariadb-wait-ready $MAINPID (code=exited, status=0/SUCCESS)
  Process: 3785 ExecStartPre=/usr/libexec/mariadb-prepare-db-dir %n (code=exited, status=0/SUCCESS)
 Main PID: 3863 (mysqld_safe)
   CGroup: /system.slice/mariadb.service
           ├─3863 /bin/sh /usr/bin/mysqld_safe --basedir=/usr
           └─4026 /usr/libexec/mysqld --basedir=/usr --datadir=/var/lib/mysql --plugin-dir=/usr/lib64/mysql/plugin --log-error=/var/log/mariadb/mariadb.log --pid-file=/var/run/mariadb/ma...

Jul 30 14:24:58 ip-172-31-38-131.us-east-2.compute.internal mariadb-prepare-db-dir[3785]: MySQL manual for more instructions.
Jul 30 14:24:58 ip-172-31-38-131.us-east-2.compute.internal mariadb-prepare-db-dir[3785]: Please report any problems at http://mariadb.org/jira
Jul 30 14:24:58 ip-172-31-38-131.us-east-2.compute.internal mariadb-prepare-db-dir[3785]: The latest information about MariaDB is available at http://mariadb.org/.
Jul 30 14:24:58 ip-172-31-38-131.us-east-2.compute.internal mariadb-prepare-db-dir[3785]: You can find additional information about the MySQL part at:
Jul 30 14:24:58 ip-172-31-38-131.us-east-2.compute.internal mariadb-prepare-db-dir[3785]: http://dev.mysql.com
Jul 30 14:24:58 ip-172-31-38-131.us-east-2.compute.internal mariadb-prepare-db-dir[3785]: Consider joining MariaDB's strong and vibrant community:
Jul 30 14:24:58 ip-172-31-38-131.us-east-2.compute.internal mariadb-prepare-db-dir[3785]: https://mariadb.org/get-involved/
Jul 30 14:24:58 ip-172-31-38-131.us-east-2.compute.internal mysqld_safe[3863]: 180730 14:24:58 mysqld_safe Logging to '/var/log/mariadb/mariadb.log'.
Jul 30 14:24:58 ip-172-31-38-131.us-east-2.compute.internal mysqld_safe[3863]: 180730 14:24:58 mysqld_safe Starting mysqld daemon with databases from /var/lib/mysql
Jul 30 14:25:00 ip-172-31-38-131.us-east-2.compute.internal systemd[1]: Started MariaDB database server.
# systemctl enable mariadb
Created symlink from /etc/systemd/system/multi-user.target.wants/mariadb.service to /usr/lib/systemd/system/mariadb.service.
MariaDB の初期セットアップ
起動が完了したら、 MariaDB の初期セットアップを実施します。
MySQL-5.7 で mysql_secure_installation の自動化が楽になっていた - Qiita なんて話もあったので、インタラクティブに入力するところを減らせるかなーとも思ったのですが、残念ながらバージョンが 5.5 だったので減らせませんでした…
インタラクティブに入力する内容は次の通りです。
-
Enter current password for root (enter for none):では何も入力せずにEnterキーを押下します。
※ MariaDB をセットアップしたばかりで、まだrootのパスワードを設定していないので。 -
Set root password? [Y/n]はyを入力します。 -
New password:とRe-enter new password:には MariaDB のrootに設定するパスワードを入力します。 - 以降、
~? [Y/n]と聞かれるものはyを入力(もしくはEnterキーを押下)します。
# mysql_secure_installation

NOTE: RUNNING ALL PARTS OF THIS SCRIPT IS RECOMMENDED FOR ALL MariaDB
      SERVERS IN PRODUCTION USE!  PLEASE READ EACH STEP CAREFULLY!

In order to log into MariaDB to secure it, we'll need the current
password for the root user.  If you've just installed MariaDB, and
you haven't set the root password yet, the password will be blank,
so you should just press enter here.

Enter current password for root (enter for none):
OK, successfully used password, moving on...

Setting the root password ensures that nobody can log into the MariaDB
root user without the proper authorisation.

Set root password? [Y/n]
New password:
Re-enter new password:
Password updated successfully!
Reloading privilege tables..
 ... Success!


By default, a MariaDB installation has an anonymous user, allowing anyone
to log into MariaDB without having to have a user account created for
them.  This is intended only for testing, and to make the installation
go a bit smoother.  You should remove them before moving into a
production environment.

Remove anonymous users? [Y/n]
 ... Success!

Normally, root should only be allowed to connect from 'localhost'.  This
ensures that someone cannot guess at the root password from the network.

Disallow root login remotely? [Y/n]
 ... Success!

By default, MariaDB comes with a database named 'test' that anyone can
access.  This is also intended only for testing, and should be removed
before moving into a production environment.

Remove test database and access to it? [Y/n]
 - Dropping test database...
 ... Success!
 - Removing privileges on test database...
 ... Success!

Reloading the privilege tables will ensure that all changes made so far
will take effect immediately.

Reload privilege tables now? [Y/n]
 ... Success!

Cleaning up...

All done!  If you've completed all of the above steps, your MariaDB
installation should now be secure.

Thanks for using MariaDB!
ここまで完了したら、 Zabbix データベースの準備へ進んでください。
RDS(MySQL) への接続準備
AWS 上で Zabbix を構築するのであれば、フルマネージドなデータベースサービスである RDS を使うのは良い案です。
RDS によりカンタンに得られる高可用性やスケールアップ、ディスク拡張といったオプションは Zabbix のデータベースとして利用する際にも有意義なものになります。
なお、本稿では RDS は既に起動済みの前提ですので、 RDS の作成・起動等につきましては説明を省略します。
MariaDB 関連パッケージインストール
まずは必要パッケージをインストールします。
# yum install mariadb
Loaded plugins: extras_suggestions, langpacks, priorities, update-motd
Resolving Dependencies
--> Running transaction check
(snip)
Complete!
ここまで完了したら、 Zabbix データベースの準備へ進んでください。
(RDS の作成を端折ったらほとんど書くことがなかった。。。)
Zabbix データベースの準備
MariaDB の初期セットアップが完了したら、 Zabbix が利用するデータベース(zabbix)と MariaDB 上のユーザ(zabbix)を作成します。
MariaDB に対して発行する SQL は次の2つです。
-
zabbixデータベースを作成するcreate database zabbix character set utf8 collate utf8_bin; -
zabbixユーザを作成するgrant all privileges on zabbix.* to zabbix@localhost identified by 'password';ここで
passwordは MariaDB 上のzabbixユーザに対して設定するパスワードになります。
任意のパスワードに置き換えてください。
上記2つの SQL は下記のように実行します。
ここで入力するパスワードは次のものを使用してください。
- MariaDB 利用時:
mysql_secure_installationコマンド実行時に指定した MariaDB 上のrootユーザのパスワード - RDS 利用時: RDS 作成時に指定した RDS 上の
rootユーザのパスワード
# mysql -uroot -p # RDS 利用時は -h オプションで RDS のエンドポイント(FQDN)を指定する事。
Enter password:
Welcome to the MariaDB monitor.  Commands end with ; or \g.
Your MariaDB connection id is 11
Server version: 5.5.56-MariaDB MariaDB Server

Copyright (c) 2000, 2017, Oracle, MariaDB Corporation Ab and others.

Type 'help;' or '\h' for help. Type '\c' to clear the current input statement.

MariaDB [(none)]> create database zabbix character set utf8 collate utf8_bin;
Query OK, 1 row affected (0.01 sec)

MariaDB [(none)]> grant all privileges on zabbix.* to zabbix@localhost identified by 'password';
Query OK, 0 rows affected (0.00 sec)

MariaDB [(none)]> quit;
Bye
上記で作成したデータベースに、テーブル定義等を流し込みます。
ここで入力するパスワードは先ほどとは異なり MariaDB 上の zabbix ユーザを作成した際に指定したパスワードであることに注意してください。
# zcat /usr/share/doc/zabbix-server-mysql*/create.sql.gz | mysql -uzabbix -p zabbix # RDS 利用時は -h オプションで RDS のエンドポイント(FQDN)を指定する事。
Enter password:
mysql コマンドがエラーなく完了したら OK です。
Zabbix 基本設定
Zabbix デーモン設定
Zabbix が DB にアクセスできるように Zabbix の設定ファイルを編集します。
# cp /etc/zabbix/zabbix_server.conf{,.org}
# vim /etc/zabbix/zabbix_server.conf
DBPassword に MariaDB や RDS 上の zabbix ユーザのパスワードを指定します。
更に、 RDS を利用している場合は DBHost に RDS のエンドポイント(FQDN)を指定します。
diff をとってみると下記のようになるはずです。
# diff -u /etc/zabbix/zabbix_server.conf{.org,}
--- /etc/zabbix/zabbix_server.conf.org  2018-07-30 14:32:10.593841916 +0000
+++ /etc/zabbix/zabbix_server.conf      2018-07-30 14:32:15.309899259 +0000
@@ -124,6 +124,8 @@
 # Default:
 # DBPassword=

+DBPassword=password
+
 ### Option: DBSocket
 #      Path to MySQL socket.
 #
Zabbix WebUI 設定
WebUI のタイムゾーンを設定します。
日本にいれば大抵は UTC か Asia/Tokyo でしょう。
# cp /etc/httpd/conf.d/zabbix.conf{,.org}
# vim /etc/httpd/conf.d/zabbix.conf
# diff /etc/httpd/conf.d/zabbix.conf{.org,}
--- /etc/httpd/conf.d/zabbix.conf.org   2018-07-30 14:34:20.339419518 +0000
+++ /etc/httpd/conf.d/zabbix.conf       2018-07-30 14:34:46.451737023 +0000
@@ -16,7 +16,7 @@
         php_value upload_max_filesize 2M
         php_value max_input_time 300
         php_value always_populate_raw_post_data -1
-        # php_value date.timezone Europe/Riga
+        php_value date.timezone UTC
     </IfModule>
 </Directory>
すべての設定が完了したら Zabbix 関連の各デーモンを再起動します。
# systemctl restart zabbix-server zabbix-agent httpd
# systemctl enable zabbix-server zabbix-agent httpd
Created symlink from /etc/systemd/system/multi-user.target.wants/zabbix-server.service to /usr/lib/systemd/system/zabbix-server.service.
Created symlink from /etc/systemd/system/multi-user.target.wants/zabbix-agent.service to /usr/lib/systemd/system/zabbix-agent.service.
Created symlink from /etc/systemd/system/multi-user.target.wants/httpd.service to /usr/lib/systemd/system/httpd.service.
ここまでで基本設定は完了です。
あともう少しだけ WebUI の設定を行います。
WebUI 設定
WebUI の設定は、 WebUI 自体を使ってウィザード形式で行うことも、設定ファイルを手動で作成して行うことも可能です。
設定ファイルを手動で作成する場合
資材管理を行っているような場合や、 WebUI のオペレーションを減らしたい場合には WebUI の設定ファイルを手動で作成するのがおすすめです。2
/etc/zabbix/web/zabbix.conf.php というファイルを作成します。
内容は下記の通りです。
<?php
// Zabbix GUI configuration file.
global $DB;

$DB['TYPE']     = 'MYSQL';
$DB['SERVER']   = 'localhost';
$DB['PORT']     = '0';
$DB['DATABASE'] = 'zabbix';
$DB['USER']     = 'zabbix';
$DB['PASSWORD'] = 'password';

// Schema name. Used for IBM DB2 and PostgreSQL.
$DB['SCHEMA'] = '';

$ZBX_SERVER      = 'localhost';
$ZBX_SERVER_PORT = '10051';
$ZBX_SERVER_NAME = 'MyZabbix!';

$IMAGE_FORMAT_DEFAULT = IMAGE_FORMAT_PNG;
本稿の内容でセットアップしていれば、各パラメータは下表のようになります。
| パラメータ名 | MariaDB を利用した場合 | RDS を利用した場合 |
|---|---|---|
| $DB['TYPE'] | MYSQL | MYSQL |
| $DB['SERVER'] | localhost | RDS のエンドポイント(FQDN) |
| $DB['PORT'] | 0 | 0 |
| $DB['DATABASE'] | zabbix | zabbix |
| $DB['USER'] | zabbix | zabbix |
| $DB['PASSWORD'] | Zabbix データベースの準備で指定した DB パスワード | Zabbix データベースの準備で指定した DB パスワード |
| $DB['SCHEMA'] | 空文字列 |
空文字列 |
| $ZBX_SERVER | localhost | localhost |
| $ZBX_SERVER_PORT | 10051 | 10051 |
| $ZBX_SERVER_NAME | 任意の名前 |
任意の名前 |
| $IMAGE_FORMAT_DEFAULT | IMAGE_FORMAT_PNG | IMAGE_FORMAT_PNG |
オーナー、パーミッションは次のように設定します。
# chown apache:apache /etc/zabbix/web/zabbix.conf.php
# chmod 644 /etc/zabbix/web/zabbix.conf.php
# ls -l /etc/zabbix/web/zabbix.conf.php
-rw-r--r-- 1 apache apache 426 Jul 30 14:41 /etc/zabbix/web/zabbix.conf.php
これで WebUI の設定は完了です。 動作確認 を行ってみましょう。
WebUI から設定する場合
WebUI から設定する場合は http://(Zabbix の IP や FQDN)/zabbix/ にアクセスします。
下記のようなインストール画面が表示されますので、 Next Step ボタンをクリックします。

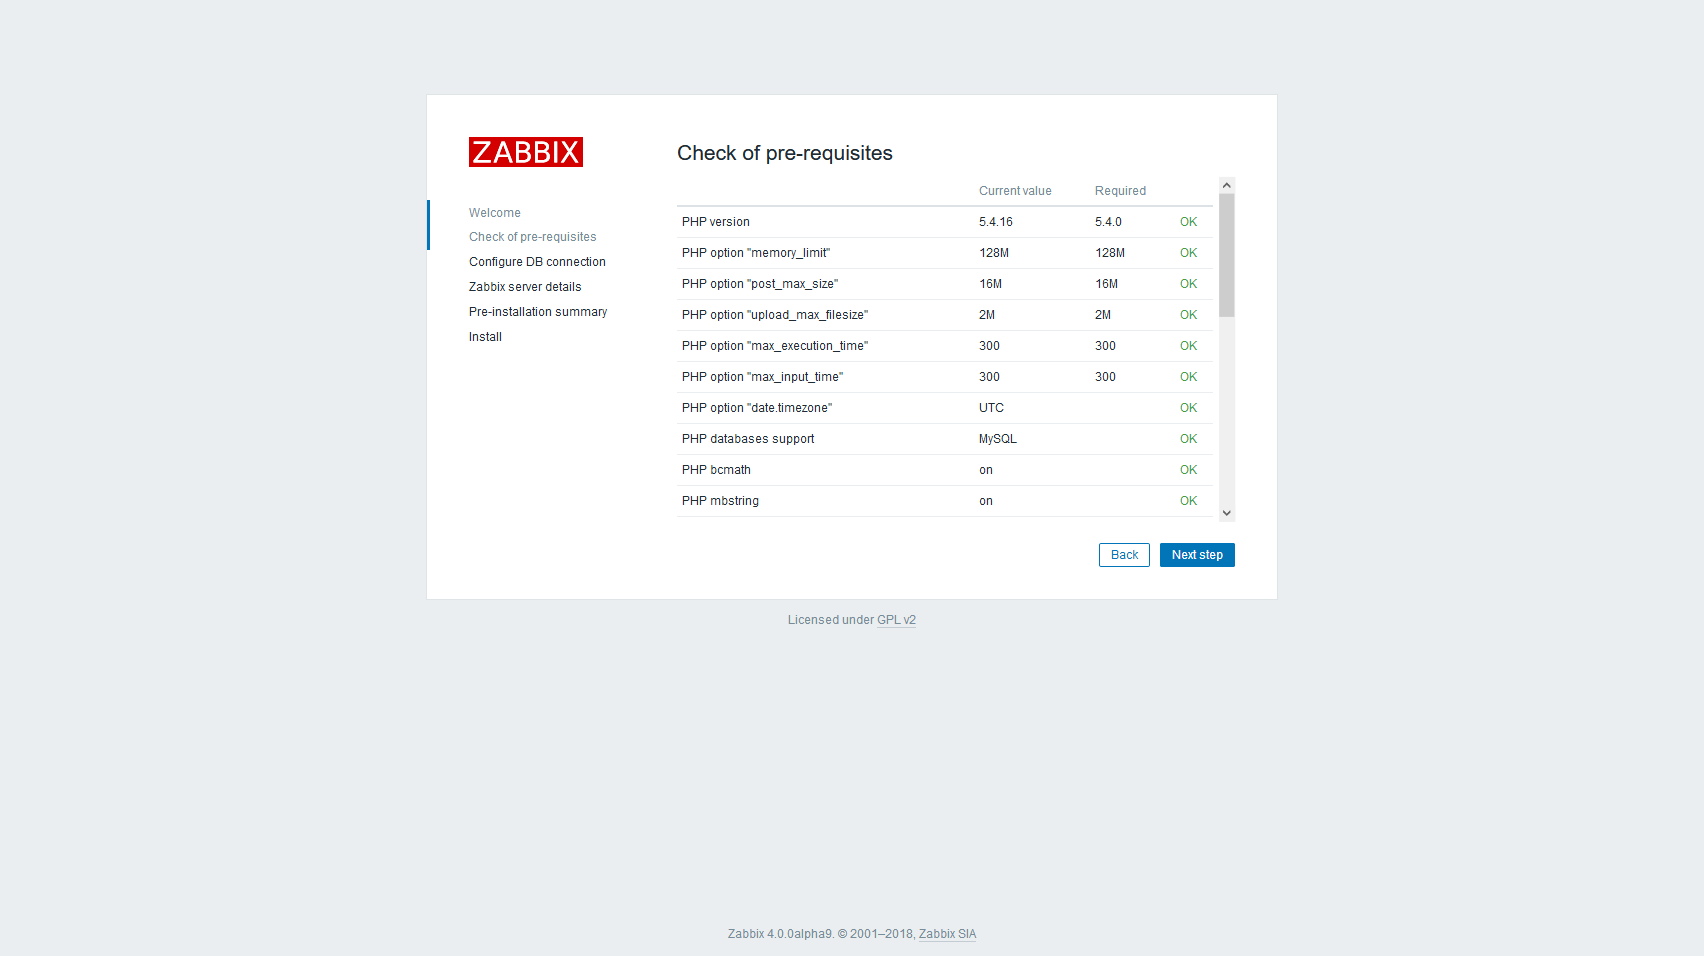
依存性のチェックが実施されます。 Amazon Linux 2 へのインストールであれば、 yum コマンドで依存性を解決しているので、特別にインストールが必要なパッケージはありません。
すべてのモジュールが OK になっていたら、 Next Step ボタンをクリックします。
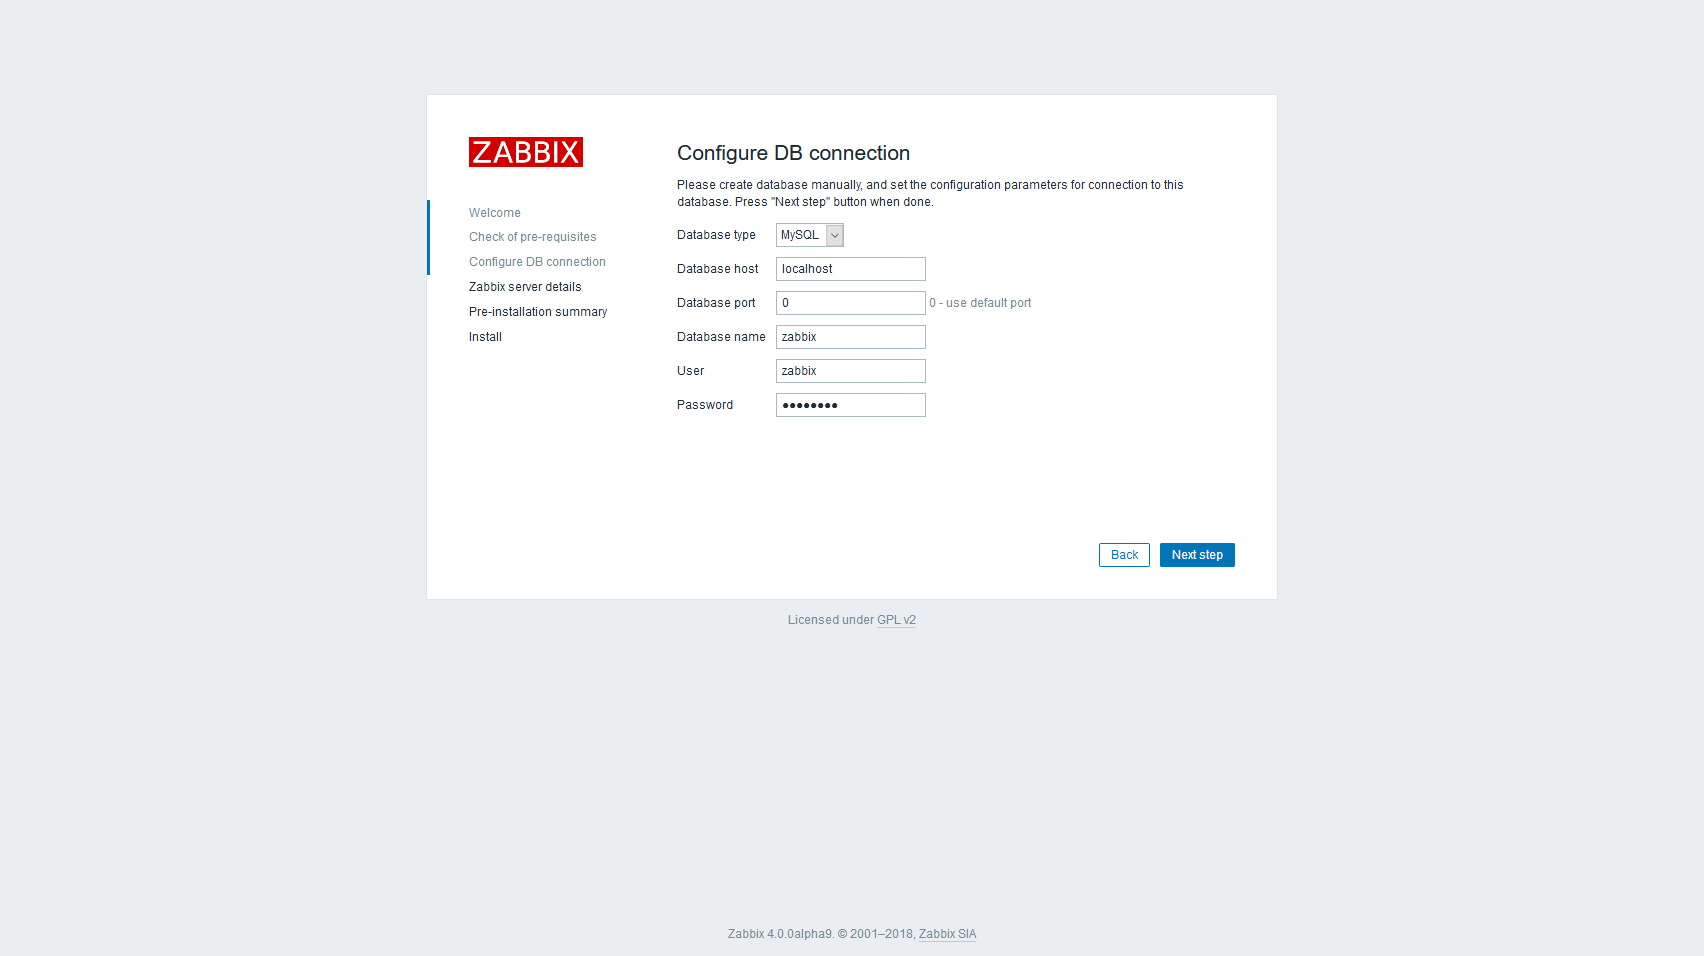
DB への接続設定を行います。本稿の内容でセットアップしていれば、各パラメータは下表のようになります。
| パラメータ名 | MariaDB を利用した場合 | RDS を利用した場合 |
|---|---|---|
| Database type | MySQL | MySQL |
| Database server | localhost | RDS のエンドポイント(FQDN) |
| Database port | 0 | 0 |
| Database name | zabbix | zabbix |
| Database user | zabbix | zabbix |
| Database password | Zabbix データベースの準備で指定した DB パスワード | Zabbix データベースの準備で指定した DB パスワード |
全てのパラメータを入力したら Next Step ボタンをクリックしてください。
Zabbix Server への接続設定を行います。本稿では WebUI と zabbix-server デーモンは同一インスタンス上で動作しているので、デフォルトのままで構いません。 Name には任意の文字列を指定してください。ここに入力した文字列が Web ページのタイトルになります。
全てのパラーメータを入力したら Next Step ボタンをクリックしてください。

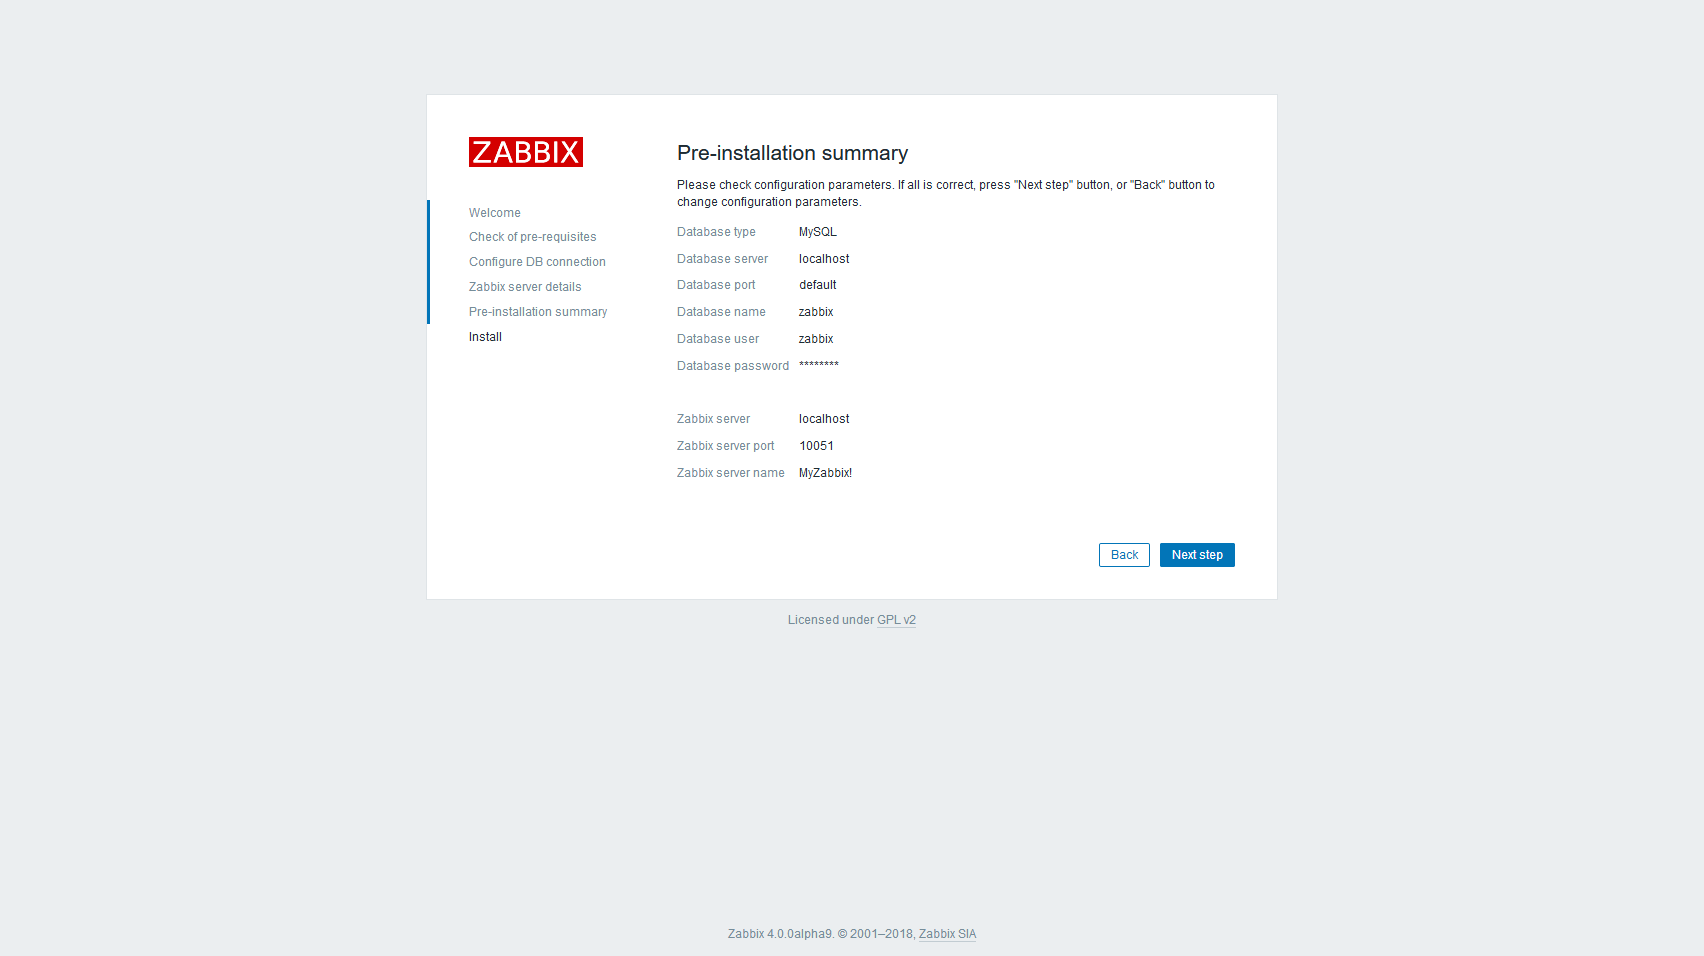
WebUI の設定の確認画面が表示されます。設定内容が正しいことを確認したら、 Next Step ボタンをクリックしてください。
下記の画面が表示されれば WebUI の設定も完了です。 Finish ボタンをクリックするとログイン画面へ遷移します。
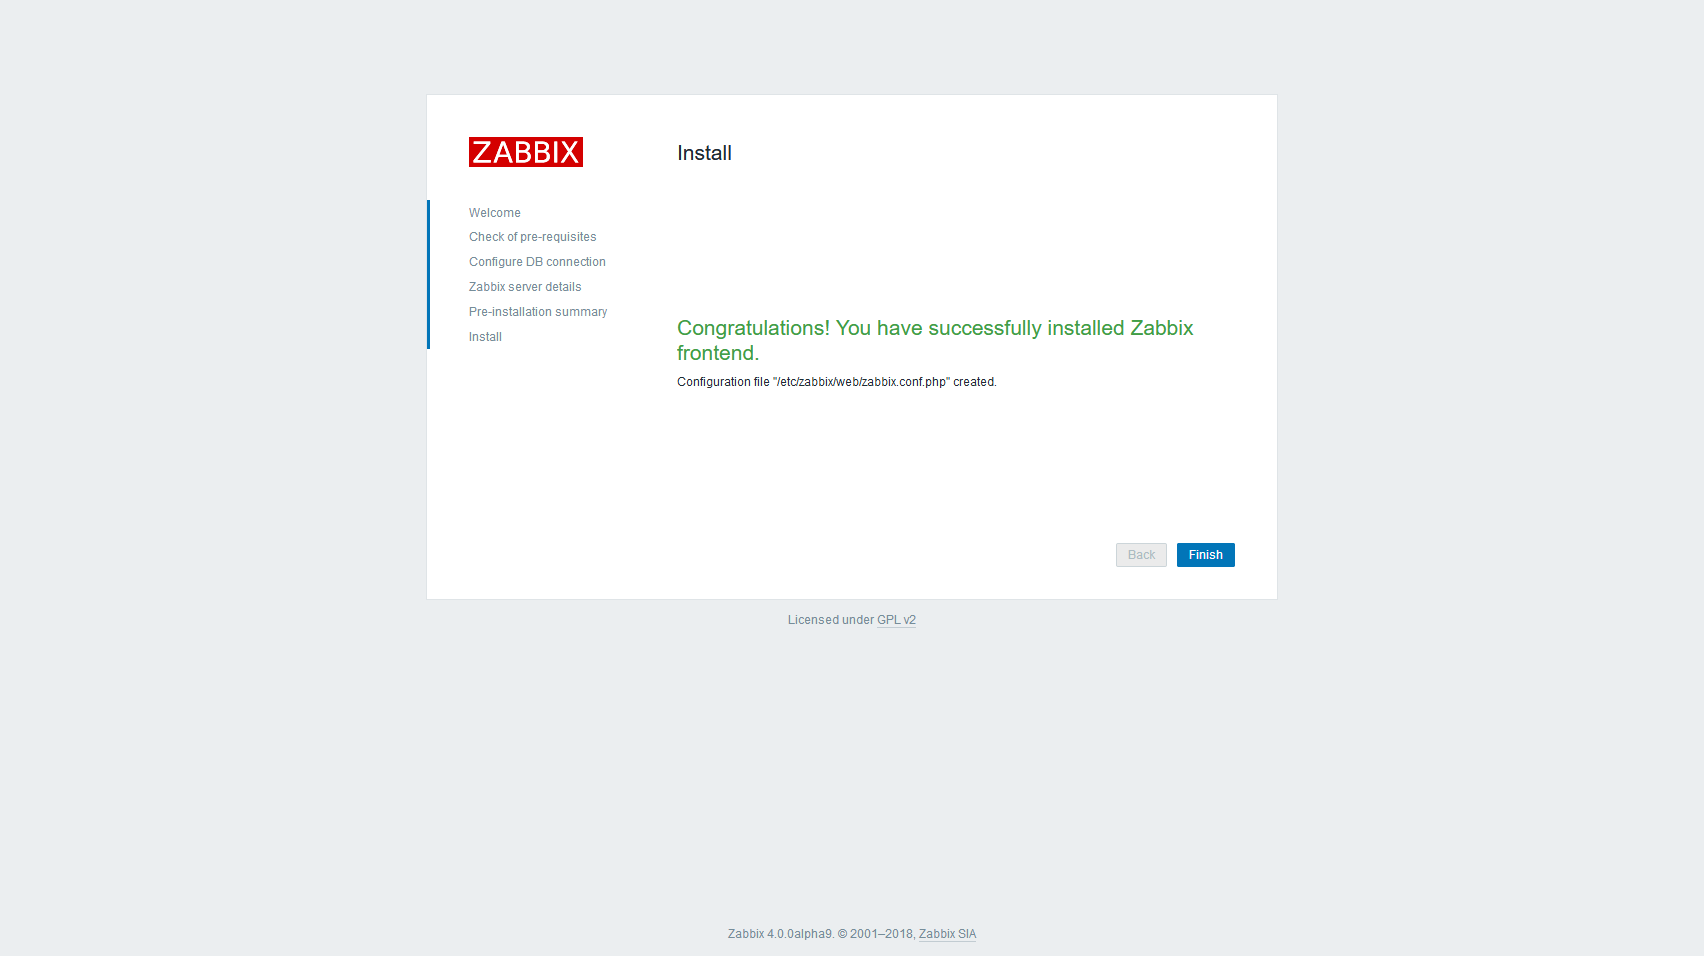
以上で WebUI の設定は完了です。
動作確認
それでは実際に WebUI にログインしてみて動作を確認します。
http://(Zabbix の IP や FQDN)/zabbix/ にアクセスしてください。
次のようなログイン画面が表示されます。
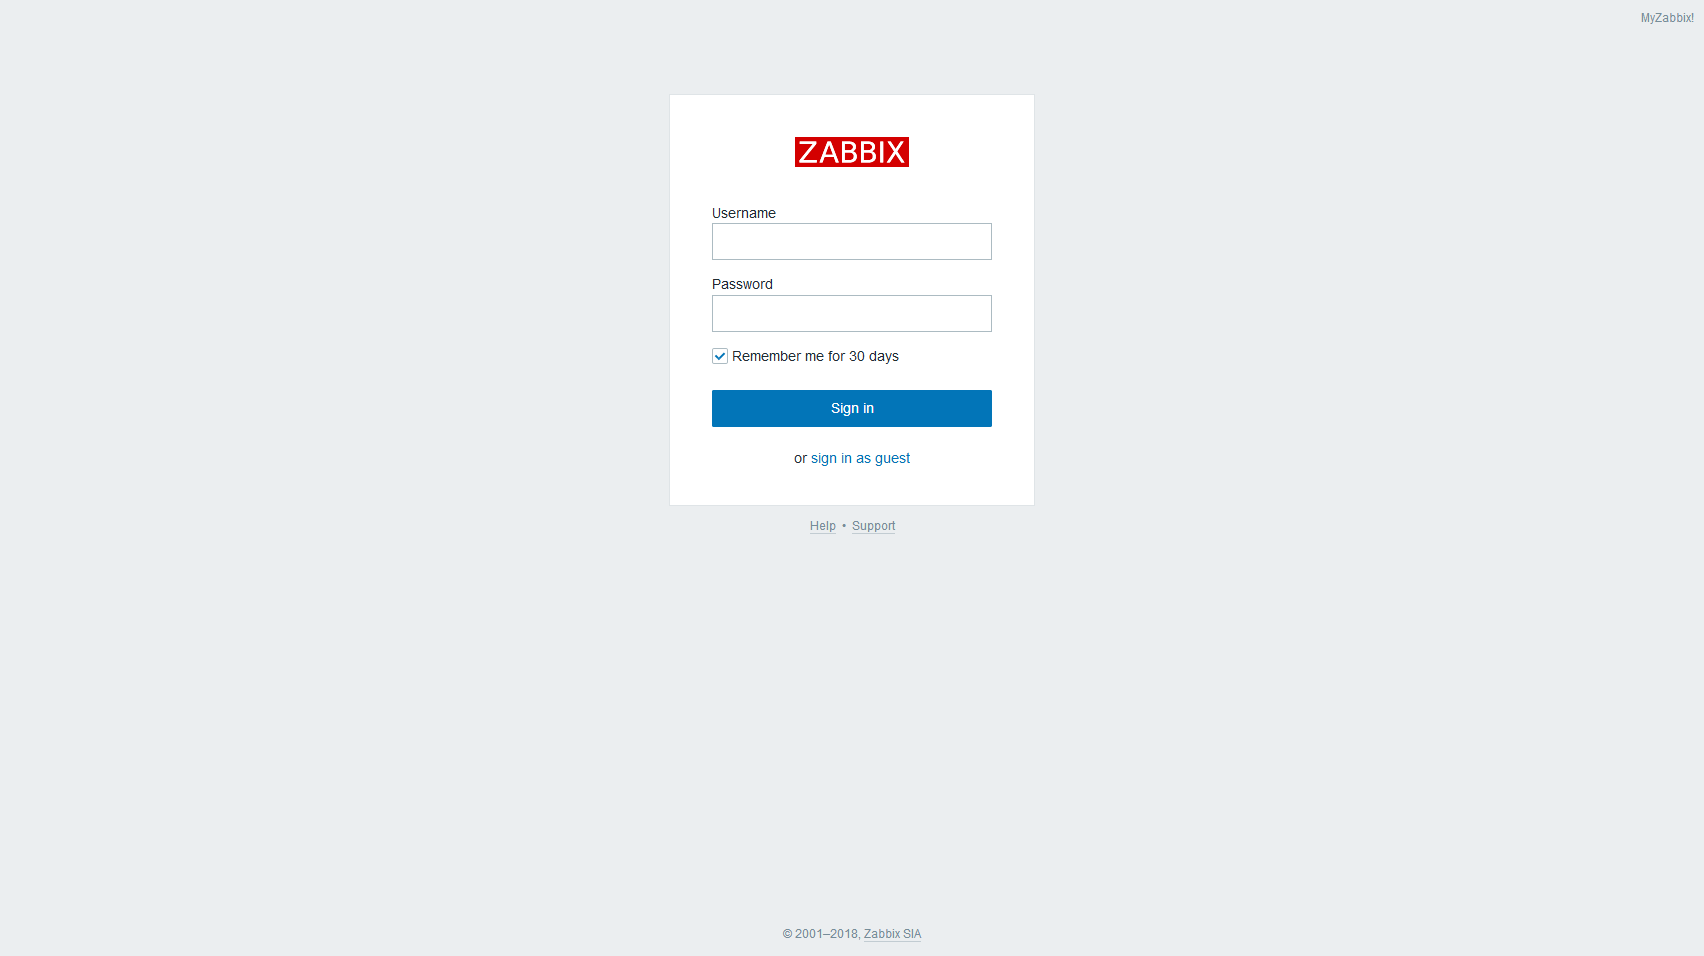
デフォルトのユーザ名は Admin, パスワードは zabbixです。
ログインすると下記のようなダッシュボードが表示されます。
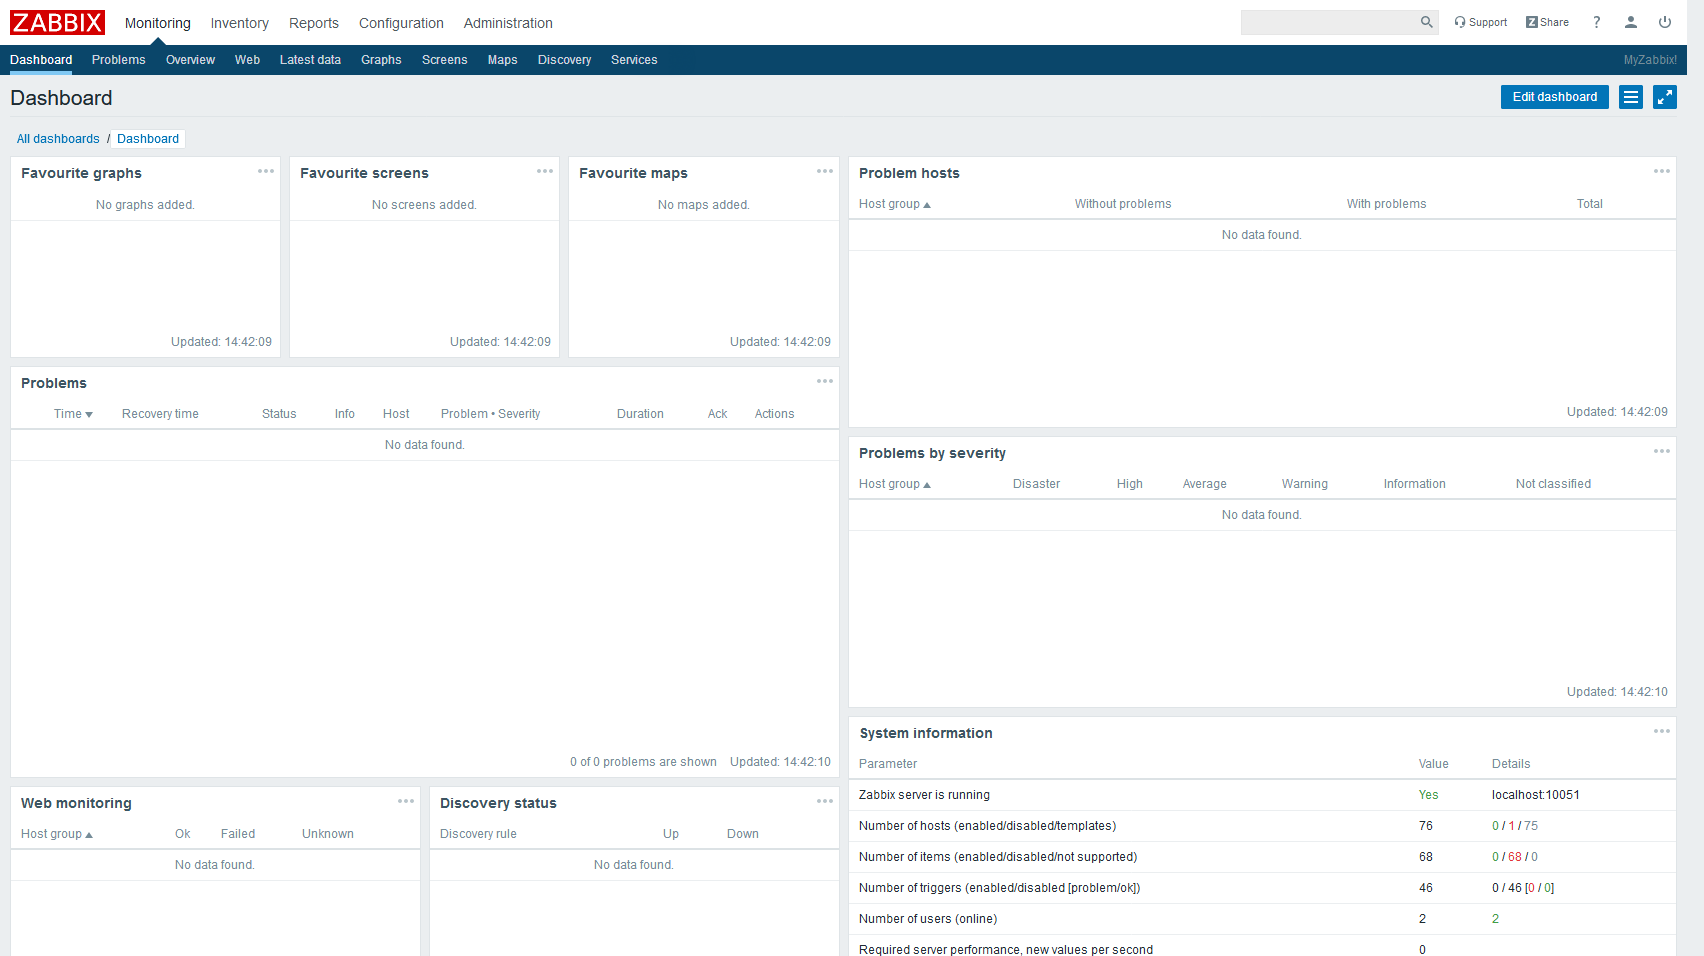
上記のスクリーンショット右下に写っている、 System Information の Zabbix server is running が Yes になっていれば OK です。
以上で Zabbix 4.0 のインストールは完了です。
後は煮るなり焼くなり好きにしてください。
おしまい。
-
Zabbix 3.2, 3.4 はポイントリリースです。ポイントリリースと LTS リリースにつきましては サポート期間とリリースポリシー をご参照ください。 ↩
-
もちろん、 WebUI から設定をしてもこのファイルは作成されるので、 WebUI で生成した設定ファイルを資材管理することも可能です。 ↩