はじめに
FlaskとKerasを使ってCanvasに書いた手書き文字を推論するアプリケーションを作ってみます。
ソースコード → https://github.com/ksk001100/flask-cnn-mnist
プロジェクトの作成
pipenvを使って必要なライブラリをインストールしていきます。
$ mkdir flask-cnn-mnist
$ cd flask-cnn-mnist
$ pipenv install numpy tensorflow keras h5py opencv-python flask flask-cors
ディレクトリ構成
$ tree flask-cnn-mnist
flask-cnn-mnist
├── Pipfile
├── Pipfile.lock
└── app
    ├── app.py
    ├── cnn
    │   ├── __init__.py
    │   ├── model.h5
    │   ├── predict.py
    │   └── train.py
    ├── images
    ├── static
    │   ├── css
    │   │   └── app.css
    │   └── js
    │       └── app.js
    └── templates
        └── index.html
機械学習部分
学習
MNISTの学習はKerasのサンプルから拝借して、最後の行に model.save('model.h5') を追加してモデルを保存します。
app/cnn/train.py
import keras
from keras.datasets import mnist
from keras.models import Sequential
from keras.layers import Dense, Dropout, Flatten
from keras.layers import Conv2D, MaxPooling2D
from keras import backend as K

batch_size = 128
num_classes = 10
epochs = 12

.
.
.
.

model.fit(x_train, y_train,
          batch_size=batch_size,
          epochs=epochs,
          verbose=1,
          validation_data=(x_test, y_test))
score = model.evaluate(x_test, y_test, verbose=0)
print('Test loss:', score[0])
print('Test accuracy:', score[1])
model.save('model.h5') # 追加部分
ターミナルで以下のコマンドを実行して学習
$ cd app/cnn
$ pipenv run python train.py # pipenv shellで仮想環境に入ってpython train.pyでもいいです
推論
学習したモデル(model.h5)を使って推論します。
predictメソッドの戻り値は[0, 0, 0, 1]のようなNumpy配列が返ってくるので1になっているインデックスを返しています。
app/cnn/predict.py
import numpy as np
from keras.models import load_model
from keras import backend as K
import os

def result(x):
    K.clear_session() # セッションを毎回クリア
    model = load_model(os.path.abspath(os.path.dirname(__file__)) + '/model.h5')
    x = np.expand_dims(x, axis=0)
    x = x.reshape(x.shape[0],28,28,1)
    r = np.argmax(model.predict(x))
    return int(r)
Web部分
サーバー
AjaxからのPOSTリクエストを受けて推論結果をjsonで返します。GETリクエストは単純にビューを返すだけです。
@app.route('/', methods=['GET', 'POST'])
def index():
    if request.method == 'POST':
        ans = get_answer(request)
        return jsonify({'ans': ans})
    else:
        return render_template('index.html')
画像の処理は以下のようにします。 1. base64でエンコードされた画像を受け取るのでヘッダー部分を取り除く 2. デコードしてNumpy配列に変換 3. Numpy配列をOpenCVで画像として読み込む 4. 白黒反転 5. 2値化 6. 28×28にリサイズ 7. 一応処理後の画像を保存 8. `app/cnn/predict.py` の`result`関数で推論 9. 推論結果を返す
def get_answer(req):
    img_str = re.search(r'base64,(.*)', req.form['img']).group(1) # 1
    nparr = np.fromstring(base64.b64decode(img_str), np.uint8) # 2
    img_src = cv2.imdecode(nparr, cv2.IMREAD_COLOR) # 3
    img_negaposi = 255 - img_src # 4
    img_gray = cv2.cvtColor(img_negaposi, cv2.COLOR_BGR2GRAY) # 5
    img_resize = cv2.resize(img_gray,(28,28)) # 6
    cv2.imwrite(f"images/{datetime.now().strftime('%s')}.jpg",img_resize) # 7
    ans = predict.result(img_resize) # 8
    return ans # 9
コード全体はこんな感じになります。
app/app.py
from datetime import datetime
import cv2
import re
import base64
from flask import Flask, render_template, request, jsonify
from flask_cors import CORS
import numpy as np
from cnn import predict

app = Flask(__name__)
CORS(app) # ローカルへAjaxでPOSTするため

@app.route('/', methods=['GET', 'POST'])
def index():
    if request.method == 'POST':
        ans = get_answer(request)
        return jsonify({'ans': ans})
    else:
        return render_template('index.html')

def get_answer(req):
    img_str = re.search(r'base64,(.*)', req.form['img']).group(1)
    nparr = np.fromstring(base64.b64decode(img_str), np.uint8)
    img_src = cv2.imdecode(nparr, cv2.IMREAD_COLOR)
    img_negaposi = 255 - img_src
    img_gray = cv2.cvtColor(img_negaposi, cv2.COLOR_BGR2GRAY)
    img_resize = cv2.resize(img_gray,(28,28))
    cv2.imwrite(f"images/{datetime.now().strftime('%s')}.jpg",img_resize)
    ans = predict.result(img_resize)
    return ans

if __name__ == "__main__":
    app.run()
フロント
canvasへの手書き描画の処理はこちらから拝借して、サーバーにPOSTする部分を追加してapp/static/js/app.jsに保存します。
app/static/js/app.js
var can;
var ct;
var ox = 0, oy = 0, x = 0, y = 0;
var mf = false;
function mam_draw_init() {
can = document.getElementById("can");
can.addEventListener("touchstart", onDown, false);
can.addEventListener("touchmove", onMove, false);
can.addEventListener("touchend", onUp, false);
can.addEventListener("mousedown", onMouseDown, false);
can.addEventListener("mousemove", onMouseMove, false);
can.addEventListener("mouseup", onMouseUp, false);
ct = can.getContext("2d");
ct.strokeStyle = "#000000";
ct.lineWidth = 15;
ct.lineJoin = "round";
ct.lineCap = "round";
clearCan();
}
function onDown(event) {
mf = true;
ox = event.touches[0].pageX - event.target.getBoundingClientRect().left;
oy = event.touches[0].pageY - event.target.getBoundingClientRect().top;
event.stopPropagation();
}
function onMove(event) {
if (mf) {
x = event.touches[0].pageX - event.target.getBoundingClientRect().left;
y = event.touches[0].pageY - event.target.getBoundingClientRect().top;
drawLine();
ox = x;
oy = y;
event.preventDefault();
event.stopPropagation();
}
}
function onUp(event) {
mf = false;
event.stopPropagation();
}
function onMouseDown(event) {
ox = event.clientX - event.target.getBoundingClientRect().left;
oy = event.clientY - event.target.getBoundingClientRect().top;
mf = true;
}
function onMouseMove(event) {
if (mf) {
x = event.clientX - event.target.getBoundingClientRect().left;
y = event.clientY - event.target.getBoundingClientRect().top;
drawLine();
ox = x;
oy = y;
}
}
function onMouseUp(event) {
mf = false;
}
function drawLine() {
ct.beginPath();
ct.moveTo(ox, oy);
ct.lineTo(x, y);
ct.stroke();
}
function clearCan() {
ct.fillStyle = "rgb(255,255,255)";
ct.fillRect(0, 0, can.getBoundingClientRect().width, can.getBoundingClientRect().height);
}
// 画像のサーバーへのPOST
function sendImage() {
var img = document.getElementById("can").toDataURL('image/png');
img = img.replace('image/png', 'image/octet-stream');
$.ajax({
type: "POST",
url: "http://localhost:5000",
data: {
"img": img
}
})
.done( (data) => {
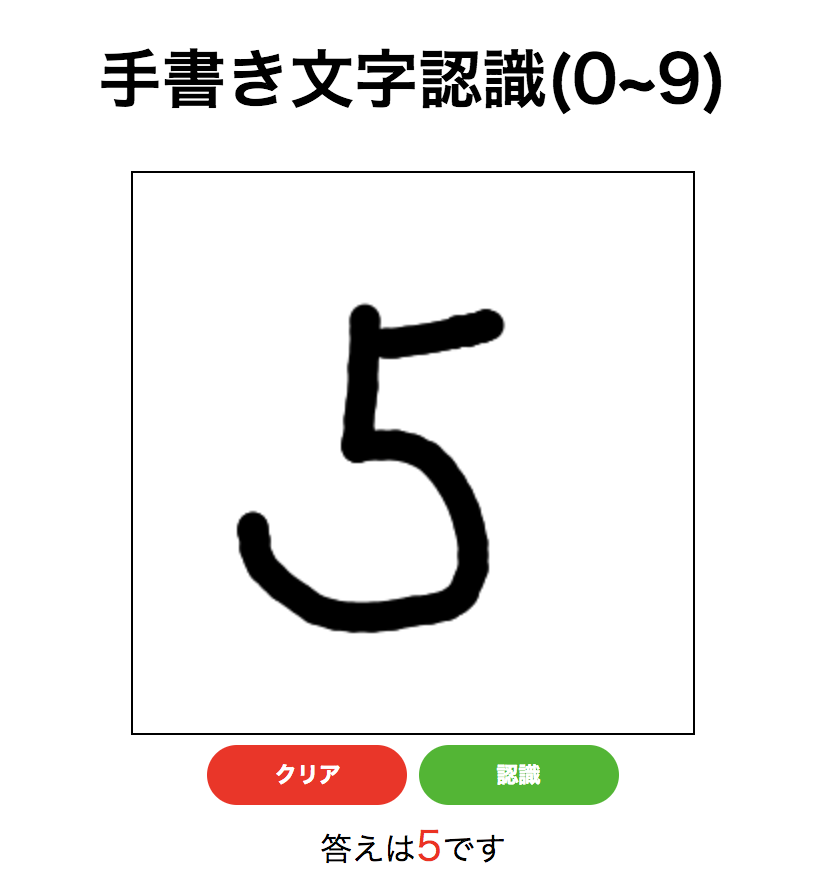
$('#answer').html('答えは<span class="answer">'+data['ans']+'</span>です')
});
}
マークアップは以下の通り
app/templates/index.html
<!DOCTYPE html>
<html>
<head>
<title>Flask+Kerasテスト</title>
<script src="https://code.jquery.com/jquery-3.3.1.js"></script>
<script src="/static/js/app.js"></script>
<link rel="stylesheet" href="/static/css/app.css">
</head>
<body onload="mam_draw_init();">
<div align="center">
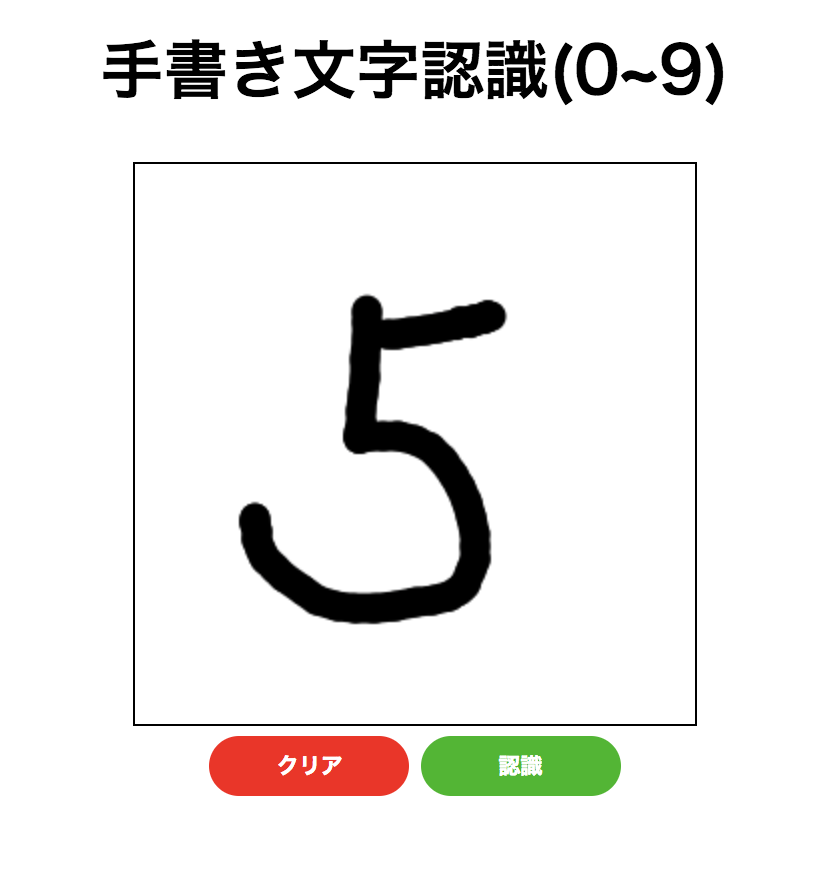
<h1>手書き文字認識(0~9)</h1>
<div class="canvas" id="candiv">
<canvas id="can" width="280px" height="280px"></canvas>
</div>
<form action="/" method="post">
<button type="button" onClick="clearCan();" value="クリア" class="clear-button">クリア</button>
<button type="button" id="img" name="img" onClick="sendImage();" value="認識" class="send-button">認識</button>
</form>
<div id="answer"></div>
</div>
</body>
</html>
app/static/css/app.css
.canvas {
    border: solid 1px black;
    width: 280px;
    height: 280px;
}

.clear-button {
    width: 100px;
    height: 30px;
    background-color: rgb(253, 16, 16);
    color: white;
    margin: 5px 0;
    border-radius: 15px;
    border: none;
    outline: none;
    font-weight: bold;
}

.clear-button:active{
    border:1px solid #334c66;
    background-color: rgb(131, 4, 25);
    color:#e0ebf5;
}

.send-button {
    width: 100px;
    height: 30px;
    background-color: rgb(3, 185, 3);
    color: white;
    margin: 5px 0;
    border-radius: 15px;
    border: none;
    outline: none;
    font-weight: bold;
}

.send-button:active{
    border:1px solid #334c66;
    background-color: rgb(4, 143, 22);
    color:#e0ebf5;
}

.answer {
    color: red;
    font-size: 20px;
}
実行
以下のコマンドでサーバーを立ち上げて、http://localhost:5000にアクセスします。
canvasに0~9の数字を書いて認識のボタンを押すことで推論結果を返してくれます。
$ cd app
$ pipenv run python app.py