|> いいよね!Elixir!
(この記事は Elixir Advent Calendar 2018 6日目です。前回はkikuyutaさんのElixir を使うようになった経緯 〜電力システム制御の現場から〜です!)
前編は「fukuoka.ex Elixir/Phoenix Advent Calendar 2018」の2日目に掲載しています
|> 【Phoenix1.4】(前編)パスワード認証&リレーションあり「ブログチュートリアル」
それでは後半をお楽しみ下さい!
|> 自分自身のuserリソースのみ変更できるように修正
|> userリソース
さて前編までで、基本的なログイン機能はできたのですが、今のままだと他の人のユーザアカウントをeditしたりdeleteすることができてしまいます
userコントローラのshowやindexメソッドは許可してedit, update, deleteメソッドを許可しないような実装にしてみましょう
現状こうなっていますが
defmodule ExBlogWeb.UserController do
  use ExBlogWeb, :controller

  alias ExBlog.Accounts
  alias ExBlog.Accounts.User

  def index(conn, _params) do
    users = Accounts.list_users()
    render(conn, "index.html", users: users)
  end

  def new(conn, _params) do
    changeset = Accounts.change_user(%User{})
    render(conn, "new.html", changeset: changeset)
  end

  def create(conn, %{"user" => user_params}) do
    case Accounts.create_user(user_params) do
      {:ok, _user} ->
        conn
        |> put_flash(:info, "User created successfully.")
        |> redirect(to: Routes.page_path(conn, :index))

      {:error, %Ecto.Changeset{} = changeset} ->
        render(conn, "new.html", changeset: changeset)
    end
  end

  def show(conn, %{"id" => id}) do
    user = Accounts.get_user!(id)
    render(conn, "show.html", user: user)
  end

  def edit(conn, %{"id" => id}) do
    user = Accounts.get_user!(id)
    changeset = Accounts.change_user(user)
    render(conn, "edit.html", user: user, changeset: changeset)
  end

  def update(conn, %{"id" => id, "user" => user_params}) do
    user = Accounts.get_user!(id)

    case Accounts.update_user(user, user_params) do
      {:ok, user} ->
        conn
        |> put_flash(:info, "User updated successfully.")
        |> redirect(to: Routes.user_path(conn, :show, user))

      {:error, %Ecto.Changeset{} = changeset} ->
        render(conn, "edit.html", user: user, changeset: changeset)
    end
  end

  def delete(conn, %{"id" => id}) do
    user = Accounts.get_user!(id)
    {:ok, _user} = Accounts.delete_user(user)

    conn
    |> put_flash(:info, "User deleted successfully.")
    |> redirect(to: Routes.user_path(conn, :index))
  end
end
以下のように変更します
プライベートメソッドであるis_authorizedを定義して、アクセスしたuserリソースのidとログイン中のuserのidが一致するかを確かめます
edit, update, deleteメソッドの実行前にis_authorizedを実行するPlugを定義します(Railsでいうとbefore_actionみたいなの)
各edit, update, deleteの実行はis_authrizedの後、つまりcurrent_userに対する操作だけすればいいのでリクエストのidは気にしなくてよくなります
あと、ついでにuser登録後についでにログインするようにしておきます
defmodule ExBlogWeb.UserController do
  use ExBlogWeb, :controller

  alias ExBlog.Accounts
  alias ExBlog.Accounts.User
+  alias ExBlog.Accounts.Guardian
+
+  plug :is_authorized when action in [:edit, :update, :delete]

  def index(conn, _params) do
    users = Accounts.list_users()
    render(conn, "index.html", users: users)
  end

  def new(conn, _params) do
    changeset = Accounts.change_user(%User{})
    render(conn, "new.html", changeset: changeset)
  end

  def create(conn, %{"user" => user_params}) do
    case Accounts.create_user(user_params) do
-      {:ok, _user} ->
+      {:ok, user} ->
        conn
        |> put_flash(:info, "User created successfully.")
-        |> redirect(to: Routes.page_path(conn, :index))
+        |> Guardian.Plug.sign_in(user)
+        |> redirect(to: Routes.user_path(conn, :show, user))

      {:error, %Ecto.Changeset{} = changeset} ->
        render(conn, "new.html", changeset: changeset)
    end
  end

  def show(conn, %{"id" => id}) do
    user = Accounts.get_user!(id)
    render(conn, "show.html", user: user)
  end

-  def edit(conn, %{"id" => id}) do
-    user = Accounts.get_user!(id)
-    changeset = Accounts.change_user(user)
-    render(conn, "edit.html", user: user, changeset: changeset)
+  def edit(conn, _) do
+    changeset = Accounts.change_user(conn.assigns.current_user)
+    render(conn, "edit.html", user: conn.assigns.current_user, changeset: changeset)
  end

-  def update(conn, %{"id" => id, "user" => user_params}) do
-    user = Accounts.get_user!(id)
+  def update(conn, %{"user" => user_params}) do
+    user = conn.assigns.current_user

    case Accounts.update_user(user, user_params) do
      {:ok, user} ->
        conn
        |> put_flash(:info, "User updated successfully.")
        |> redirect(to: Routes.user_path(conn, :show, user))

      {:error, %Ecto.Changeset{} = changeset} ->
        render(conn, "edit.html", user: user, changeset: changeset)
    end
  end

-  def delete(conn, %{"id" => id}) do
-    user = Accounts.get_user!(id)
-    {:ok, _user} = Accounts.delete_user(user)
+  def delete(conn, _) do
+    {:ok, _user} = Accounts.delete_user(conn.assigns.current_user)

    conn
+    |> Guardian.Plug.sign_out()
    |> put_flash(:info, "User deleted successfully.")
-    |> redirect(to: Routes.user_path(conn, :index))
+    |> redirect(to: Routes.page_path(conn, :index))
  end

+  defp is_authorized(conn, _) do
+    current_user = Accounts.current_user(conn)
+     if current_user.id == String.to_integer(conn.params["id"]) do
+      assign(conn, :current_user, current_user)
+    else
+      conn
+      |> put_flash(:error, "You can't modify that page")
+      |> redirect(to: Routes.page_path(conn, :index))
+      |> halt()
+    end
+  end
end
accountsに現在のユーザを返すメソッドを追加します
+  def current_user(conn) do
+    Guardian.Plug.current_resource(conn)
+  end
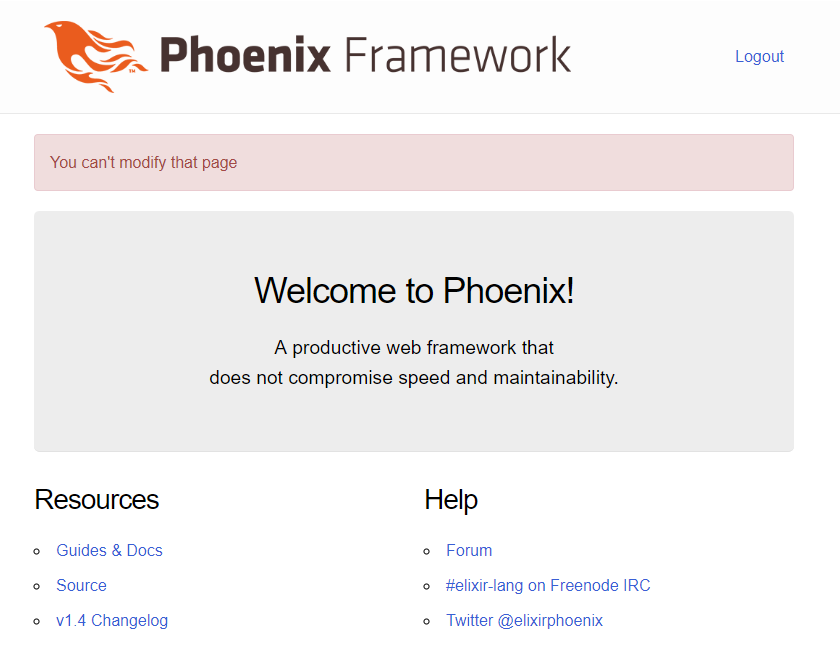
これで自分以外のuserリソースをeditやupdateやdeleteしようとすると以下のようにフラッシュが出ます
articleリソースも同様に権限管理できますが、ログインを実装しarticleのcreateにuserリソースを関連付けることができるようになったので、まずはリレーションから進めていきたいと思います
|> リレーションを使って特定のuserが持つarticleの一覧を表示させる
さて、まずはuserが属するAccountsコンテキストとarticleが属するBlogコンテキストを変更します
articleやuserを取得するときにRepo.preload()をパイプさせることで、リレーション先のテーブルを取得できます
また、create_articleメソッドではuserを引数に取り、そのidをuser_idカラムに追加する処理を追加します
defmodule ExBlog.Accounts do
  @moduledoc """
  The Accounts context.
  """

  import Ecto.Query, warn: false
  alias ExBlog.Repo

  alias ExBlog.Accounts.User
  alias Comeonin.Bcrypt
+  alias ExBlog.Accounts.Guardian

  @doc """
  Returns the list of users.

  ## Examples

      iex> list_users()
      [%User{}, ...]

  """
  def list_users do
-    Repo.all(User)
+    User
+    |> Repo.all()
+    |> Repo.preload(:articles)
  end

  @doc """
  Gets a single user.

  Raises `Ecto.NoResultsError` if the User does not exist.

  ## Examples

      iex> get_user!(123)
      %User{}

      iex> get_user!(456)
      ** (Ecto.NoResultsError)

  """
-  def get_user!(id), do: Repo.get!(User, id)
+  def get_user!(id) do
+    User
+    |> Repo.get!(id)
+    |> Repo.preload(:articles)
+  end


  @doc """
  Creates a user.

  ## Examples

      iex> create_user(%{field: value})
      {:ok, %User{}}

      iex> create_user(%{field: bad_value})
      {:error, %Ecto.Changeset{}}

  """
  def create_user(attrs \\ %{}) do
    %User{}
    |> User.changeset(attrs)
    |> Repo.insert()
  end

  @doc """
  Updates a user.

  ## Examples

      iex> update_user(user, %{field: new_value})
      {:ok, %User{}}

      iex> update_user(user, %{field: bad_value})
      {:error, %Ecto.Changeset{}}

  """
  def update_user(%User{} = user, attrs) do
    user
    |> User.changeset(attrs)
    |> Repo.update()
  end

  @doc """
  Deletes a User.

  ## Examples

      iex> delete_user(user)
      {:ok, %User{}}

      iex> delete_user(user)
      {:error, %Ecto.Changeset{}}

  """
  def delete_user(%User{} = user) do
    Repo.delete(user)
  end

  @doc """
  Returns an `%Ecto.Changeset{}` for tracking user changes.

  ## Examples

      iex> change_user(user)
      %Ecto.Changeset{source: %User{}}

  """
  def change_user(%User{} = user) do
    User.changeset(user, %{})
  end

  def authenticate_user(email, plain_text_password) do
    query = from u in User, where: u.email == ^email
    Repo.one(query)
    |> check_password(plain_text_password)
  end
  defp check_password(nil, _), do: {:error, "Incorrect username or password"}
  defp check_password(user, plain_text_password) do
    case Bcrypt.checkpw(plain_text_password, user.password) do
      true -> {:ok, user}
      false -> {:error, "Incorrect username or password"}
    end
  end

  def current_user(conn) do
    Guardian.Plug.current_resource(conn)
  end
end
defmodule ExBlog.Blog do
  @moduledoc """
  The Blog context.
  """

  import Ecto.Query, warn: false
  alias ExBlog.Repo

  alias ExBlog.Blog.Article
+  alias ExBlog.Accounts.User

  @doc """
  Returns the list of articles.

  ## Examples

      iex> list_articles()
      [%Article{}, ...]

  """
  def list_articles do
-    Repo.all(Article)
+    Article
+    |> Repo.all()
+    |> Repo.preload(:user)
  end

  @doc """
  Gets a single article.

  Raises `Ecto.NoResultsError` if the Article does not exist.

  ## Examples

      iex> get_article!(123)
      %Article{}

      iex> get_article!(456)
      ** (Ecto.NoResultsError)

  """
-  def get_article!(id), do: Repo.get!(Article, id)
+  def get_article!(id) do
+    Article
+    |> Repo.get!(id)
+    |> Repo.preload(:user)
+  end

  @doc """
  Creates a article.

  ## Examples

      iex> create_article(%{field: value})
      {:ok, %Article{}}

      iex> create_article(%{field: bad_value})
      {:error, %Ecto.Changeset{}}

  """
-  def create_article(attrs \\ %{}) do
+  def create_article(%User{} = user, attrs \\ %{}) do
    %Article{}
    |> Article.changeset(attrs)
+    |> Ecto.Changeset.put_change(:user_id, user.id)
    |> Repo.insert()
  end

  @doc """
  Updates a article.

  ## Examples

      iex> update_article(article, %{field: new_value})
      {:ok, %Article{}}

      iex> update_article(article, %{field: bad_value})
      {:error, %Ecto.Changeset{}}

  """
  def update_article(%Article{} = article, attrs) do
    article
    |> Article.changeset(attrs)
    |> Repo.update()
  end

  @doc """
  Deletes a Article.

  ## Examples

      iex> delete_article(article)
      {:ok, %Article{}}

      iex> delete_article(article)
      {:error, %Ecto.Changeset{}}

  """
  def delete_article(%Article{} = article) do
    Repo.delete(article)
  end

  @doc """
  Returns an `%Ecto.Changeset{}` for tracking article changes.

  ## Examples

      iex> change_article(article)
      %Ecto.Changeset{source: %Article{}}

  """
  def change_article(%Article{} = article) do
    Article.changeset(article, %{})
  end
end
create_articleメソッドを変更したので呼び出し側のarticleコントローラも引数を変更します
  def create(conn, %{"article" => article_params}) do
-    case Blog.create_article(article_params) do
+    case Blog.create_article(Guardian.Plug.current_resource(conn), article_params) do
      {:ok, article} ->
        conn
        |> put_flash(:info, "Article created successfully.")
        |> redirect(to: Routes.article_path(conn, :show, article))

      {:error, %Ecto.Changeset{} = changeset} ->
        render(conn, "new.html", changeset: changeset)
    end
  end
これでロジック部分でリレーションを反映させることができました
次はビューを変更しましょう
|> ビューの変更
|> layout
<!DOCTYPE html>
<html lang="en">
  <head>
    <meta charset="utf-8">
    <meta http-equiv="X-UA-Compatible" content="IE=edge">
    <meta name="viewport" content="width=device-width, initial-scale=1">
    <meta name="description" content="">
    <meta name="author" content="">

    <title>Hello ExBlog!</title>
    <link rel="stylesheet" href="<%= Routes.static_path(@conn, "/css/app.css") %>">
  </head>

  <!-- phoenix.cssが邪魔するので暫定的にbodyに直接style -->
  <body style="margin-top: 0px">
    <header class="header">
      <div class="navbar navbar-dark bg-dark shadow-sm">
        <div class="container d-flex justify-content-between">
          <nav role="navigation">
            <ul class="nav nav-pills pull-right">
              <%= if current_user(@conn) do %>
                <li>
                  <%= link to: Routes.user_path(@conn, :show, current_user(@conn)) do %>
                    <button type="button" class="btn btn-default btn-sm">
                      Name: <b><%= current_user(@conn).name %></b>
                    </button>
                  <% end %>
                </li>
                <li>
                  <%= link to: Routes.session_path(@conn, :delete), method: :delete do %>
                    <button type="button" class="btn btn-default btn-sm">
                      Logout
                    </button>
                  <% end %>
                </li>
              <% else %>
                <li>
                  <%= link to: Routes.session_path(@conn, :new) do %>
                    <button type="button" class="btn btn-default btn-sm">
                      Login
                    </button>
                  <% end %>
                </li>
              <% end %>
            </ul>
          </nav>
        </div>
      </div>
    </header>
    <div class= "container">
      <p class="alert alert-success" role="alert"><%= get_flash(@conn, :success) %></p>
      <p class="alert alert-info" role="alert"><%= get_flash(@conn, :info) %></p>
      <p class="alert alert-danger" role="alert"><%= get_flash(@conn, :error) %></p>

      <main role="main">
        <%= render @view_module, @view_template, assigns %>
      </main>

    </div> <!-- /container -->
    <script src="<%= Routes.static_path(@conn, "/js/app.js") %>"></script>
  </body>
</html>
※Phoenix1.4からデフォルトのcssがbootstrapからMilligramに変わりました
上記のコードはbootstrap準拠で書いているのでスタイル崩れちゃいます><
気になる人は適宜スタイル修正するかbootstrap入れるかしてみてください
ただし単純にprev/repo/static/app.cssを置き換えるだけだと、webpackが自動でデフォルトに書き直す処理が入るのでダメみたいですね
今回は見た目後回しでいいと思うので、とりあえず先にすすみましょう
|> page/index
urlに打ち込むのは面倒なので、ログイン/ユーザ登録などへのボタンを追加
<div class="jumbotron">
  <h2>Simple blog by Phoenix</h2>
  <%= unless current_user(@conn) do %>
    <p class="lead">
      <%= link to: Routes.user_path(@conn, :new) do %>
        <button type="button" class="btn btn-primary">
          Sign in!
        </button>
      <% end %>
    </p>
  <% end %>
</div>
defmodule ExBlogWeb.PageView do
  use ExBlogWeb, :view
  alias ExBlog.Accounts
  def current_user(conn) do
    Accounts.current_user(conn)
  end
end
|> user
ログインしているuser自身のリソースのみEdit, Deleteリンクが出るようにしましょう
<h1>Show User</h1>

<ul>

  <li>
    <strong>Name:</strong>
    <%= @user.name %>
  </li>

  <li>
    <strong>Email:</strong>
    <%= @user.email %>
  </li>

</ul>

<%= if @user.id == current_user(@conn).id do %>
  <span><%= link "Edit", to: Routes.user_path(@conn, :edit, @user) %></span>
<% end %>
<span><%= link "Back", to: Routes.user_path(@conn, :index) %></span>

<h2>Listing Articles</h2>
 <table class="table">
  <thead>
    <tr>
      <th>Title</th>
      <th>Content</th>
       <th></th>
    </tr>
  </thead>
  <tbody>
<%= for article <- @user.articles do %>
    <tr>
      <td><%= article.title %></td>
      <td><%= article.content %></td>
       <td class="text-right">
        <span><%= link "Show", to: Routes.article_path(@conn, :show, article), class: "btn btn-default btn-xs" %></span>
        <%= if @user.id == current_user(@conn).id do %>
          <span><%= link "Edit", to: Routes.article_path(@conn, :edit, article), class: "btn btn-default btn-xs" %></span>
          <span><%= link "Delete", to: Routes.article_path(@conn, :delete, article), method: :delete, data: [confirm: "Are you sure?"], class: "btn btn-danger btn-xs" %></span>
        <% end %>
      </td>
    </tr>
<% end %>
  </tbody>
</table>
 <%= if @user.id == current_user(@conn).id do %>
  <span><%= link "New Article", to: Routes.article_path(@conn, :new) %></span>
<% end %>
defmodule ExBlogWeb.UserView do
  use ExBlogWeb, :view
  alias ExBlog.Accounts
  def current_user(conn) do
    Accounts.current_user(conn)
  end
end
|> article
リレーションを反映させたことで@article.user.nameのように対応するuserの情報を取得することができるようになりました
またリレーションをたどることで、articleの所有しているユーザが分かるので、userは自分自身が所有しているarticleのみを削除&編集ボタン表示するようにします
<h2>Listing Articles</h2>

<table class="table">
  <thead>
    <tr>
      <th>User</th>
      <th>Title</th>
      <th>Content</th>

      <th></th>
    </tr>
  </thead>
  <tbody>
<%= for article <- @articles do %>
    <tr>
      <td><%= article.user.name %></td>
      <td><%= article.title %></td>
      <td><%= article.content %></td>

      <td class="text-right">
        <span><%= link "Show", to: Routes.article_path(@conn, :show, article), class: "btn btn-default btn-xs" %></span>
        <%= if article.user.id == current_user(@conn).id do %>
          <span><%= link "Edit", to: Routes.article_path(@conn, :edit, article), class: "btn btn-default btn-xs" %></span>
          <span><%= link "Delete", to: Routes.article_path(@conn, :delete, article), method: :delete, data: [confirm: "Are you sure?"], class: "btn btn-danger btn-xs" %></span>
        <% end %>
      </td>
    </tr>
<% end %>
  </tbody>
</table>

<span><%= link "New Article", to: Routes.article_path(@conn, :new) %></span>
<h2>Show Article</h2>

<ul>

  <li>
    <strong>User:</strong>
    <%= @article.user.name %>
  </li>

  <li>
    <strong>Title:</strong>
    <%= @article.title %>
  </li>

  <li>
    <strong>Content:</strong>
    <%= @article.content %>
  </li>

</ul>
<%= if @article.user.id == current_user(@conn).id do %>
  <span><%= link "Edit", to: Routes.article_path(@conn, :edit, @article) %></span>
<% end %>
<span><%= link "Back", to: Routes.article_path(@conn, :index) %></span>
defmodule ExBlogWeb.ArticleView do
  use ExBlogWeb, :view
  alias ExBlog.Accounts
  def current_user(conn) do
    Accounts.current_user(conn)
  end
end
ここまでで画面を見てみましょう
koyoユーザでログインしlocalhost:4000/articlesに行きます
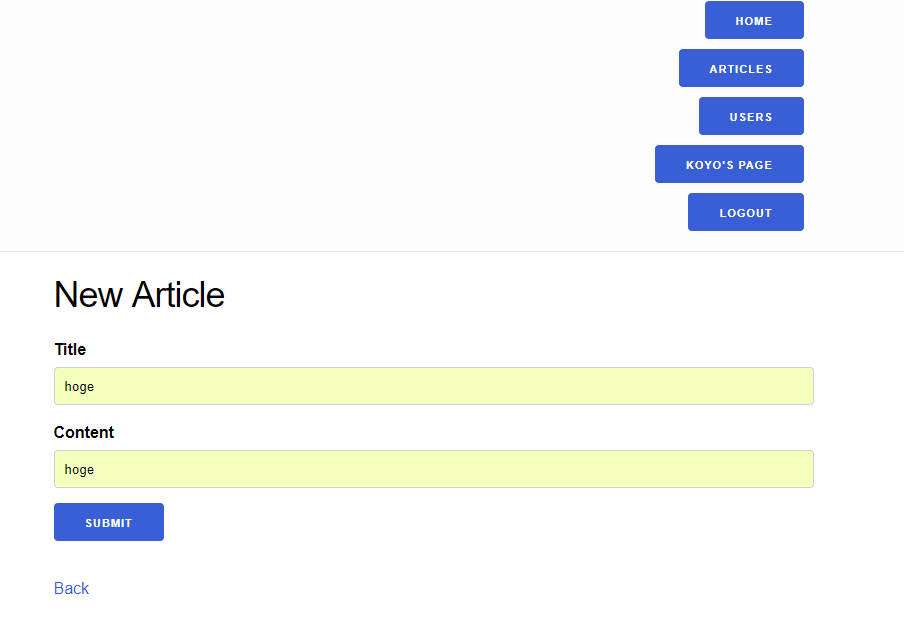
各種リンクボタンがあり、またKOYO'S PAGEを見るとログインユーザ名を反映して動的に描画されていることが分かります
さてnew articleをクリックして適当にarticleを生成します
このフォームにはuser_idを入力する部分はありませんが、先ほど実装したようにログインユーザのidが自動で入るようになっています
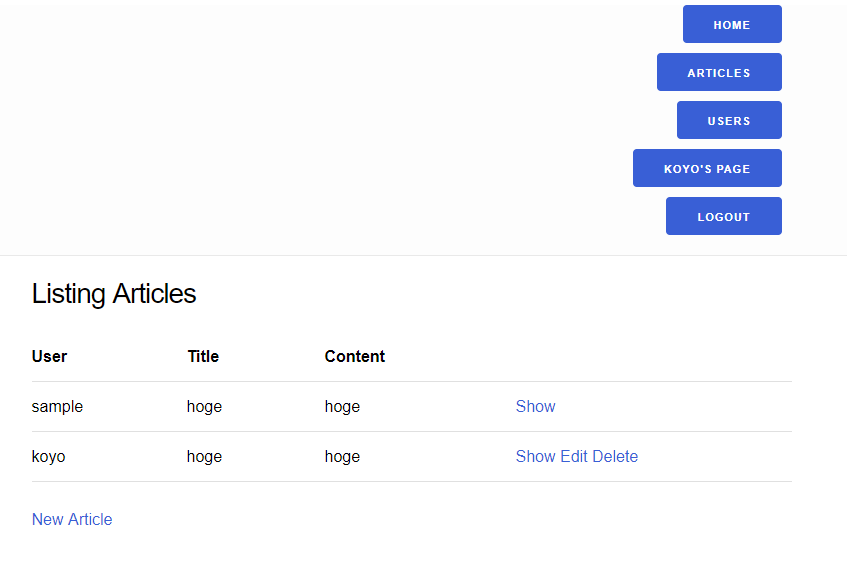
submitしてもう一度戻ると以下のようにuser名が自動登録され、また自分が所有しているarticleのみEdit, Deleteリンクが生成されていますね
さて、今は画面側で表示していないだけなので、直接URL叩けば自分が所有していないarticleを操作できます
試してみましょう
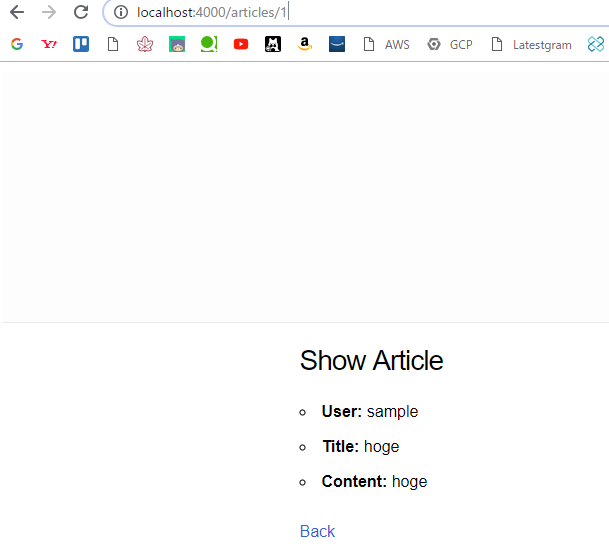
urlからsampleくんのidは1っぽいですね
localhost:4000/articles/1/editとすればeditできそうなので、やってみたらできました
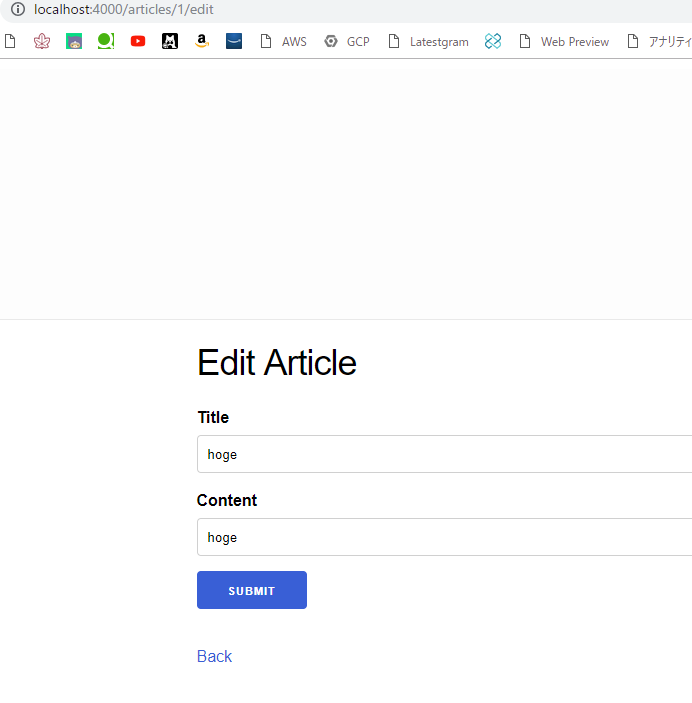
これはセキュリティ的に大変良くないので、コントローラ側で権限があるのかをチェックする必要がありますね
これは先ほどuserリソースでも同じことしているのでおさらいです
|> 自分自身が所有しているarticleのみ編集できるようにする
defmodule ExBlogWeb.ArticleController do
  use ExBlogWeb, :controller

  alias ExBlog.Blog
  alias ExBlog.Blog.Article
  alias ExBlog.Accounts
  alias ExBlog.Accounts.Guardian

  plug :is_authorized when action in [:edit, :update, :delete]

  def index(conn, _params) do
    articles = Blog.list_articles()
    render(conn, "index.html", articles: articles)
  end

  def new(conn, _params) do
    changeset = Blog.change_article(%Article{})
    render(conn, "new.html", changeset: changeset)
  end

  def create(conn, %{"article" => article_params}) do
    case Blog.create_article(Guardian.Plug.current_resource(conn), article_params) do
      {:ok, article} ->
        conn
        |> put_flash(:info, "Article created successfully.")
        |> redirect(to: Routes.article_path(conn, :show, article))
      {:error, %Ecto.Changeset{} = changeset} ->
        render(conn, "new.html", changeset: changeset)
    end
  end

  def show(conn, %{"id" => id}) do
    article = Blog.get_article!(id)
    render(conn, "show.html", article: article)
  end

  def edit(conn, _) do
    article = conn.assigns.article
    changeset = Blog.change_article(article)
    render(conn, "edit.html", article: article, changeset: changeset)
  end

  def update(conn, %{"article" => article_params}) do
    article = conn.assigns.article

    case Blog.update_article(article, article_params) do
      {:ok, article} ->
        conn
        |> put_flash(:info, "Article updated successfully.")
        |> redirect(to: Routes.article_path(conn, :show, article))
      {:error, %Ecto.Changeset{} = changeset} ->
        render(conn, "edit.html", article: article, changeset: changeset)
    end
  end

  def delete(conn, _) do
    article = conn.assigns.article
    {:ok, _article} = Blog.delete_article(article)

    conn
    |> put_flash(:info, "Article deleted successfully.")
    |> redirect(to: Routes.article_path(conn, :index))
  end

  # Current_user can access only own resources
  # Check current_user's id match article.user.id
  defp is_authorized(conn, _) do
    current_user = Accounts.current_user(conn)
    article = Blog.get_article!(conn.params["id"])
    if current_user.id == article.user.id do
      assign(conn, :article, article)
    else
      conn
      |> put_flash(:error, "You can't modify that page")
      |> redirect(to: Routes.page_path(conn, :index))
      |> halt()
    end
  end
end
さてもう一度localhost:4000/articles/1/editを試してみると
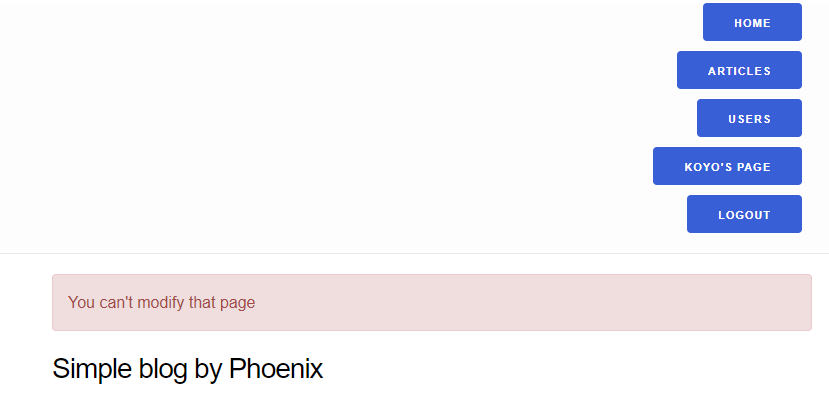
ちゃんと制限されましたね!
|> user/showに所有しているarticleの一覧を表示
これで最後です!
user/showのページに自分が所有しているarticleの一覧を出してみましょう
とはいえ簡単でuser/show.html.eexに以下を追加するだけです
<h2>Listing Articles</h2>
 <table class="table">
  <thead>
    <tr>
      <th>Title</th>
      <th>Content</th>
       <th></th>
    </tr>
  </thead>
  <tbody>
<%= for article <- @user.articles do %>
    <tr>
      <td><%= article.title %></td>
      <td><%= article.content %></td>
       <td class="text-right">
        <span><%= link "Show", to: Routes.article_path(@conn, :show, article), class: "btn btn-default btn-xs" %></span>
        <%= if @user.id == current_user(@conn).id do %>
          <span><%= link "Edit", to: Routes.article_path(@conn, :edit, article), class: "btn btn-default btn-xs" %></span>
          <span><%= link "Delete", to: Routes.article_path(@conn, :delete, article), method: :delete, data: [confirm: "Are you sure?"], class: "btn btn-danger btn-xs" %></span>
        <% end %>
      </td>
    </tr>
<% end %>
  </tbody>
</table>
 <%= if @user.id == current_user(@conn).id do %>
  <span><%= link "New Article", to: Routes.article_path(@conn, :new) %></span>
<% end %>
koyoユーザはhoge, hoge1, hoge2のarticleリソースを持っていて、sampleユーザは別のhogeのarticleリソースを持っていますね
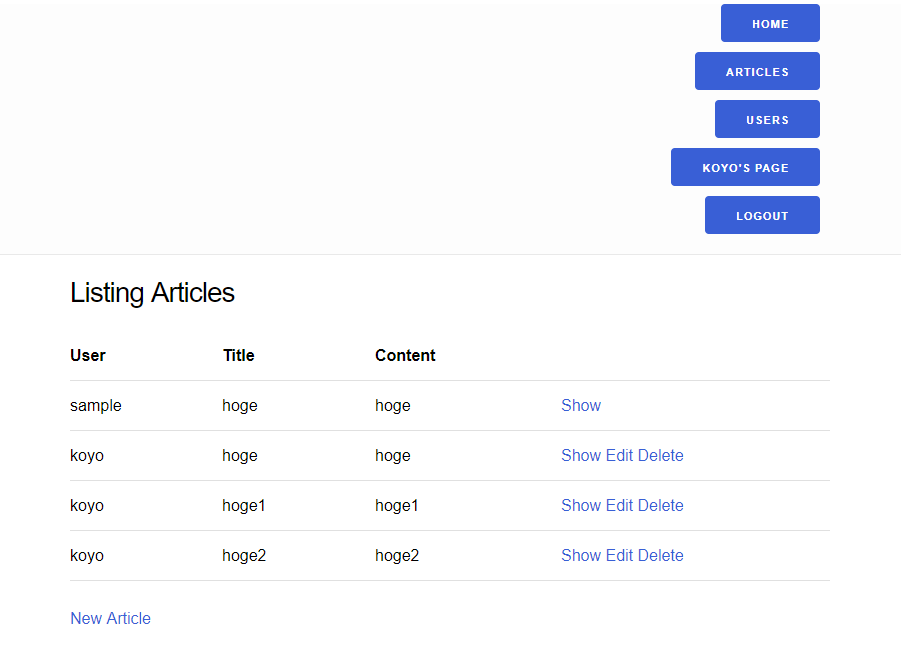
KOYO's PAGEリンクをクリックしてuser/showに遷移すると
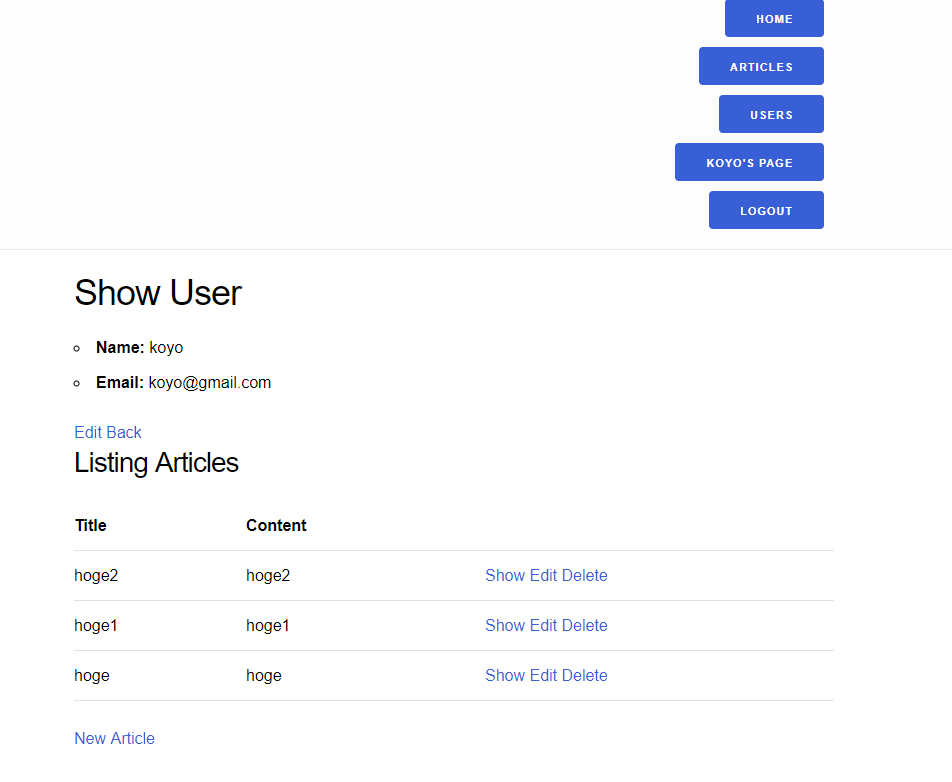
koyoユーザが作成したarticleリソースの一覧が表示されています!
・・・これで一通り完成しました!お疲れ様です!
次はこれ以降の学習のヒントを示したいと思います
|> 追加課題
|> 自分なりの機能を追加してみる
このチュートリアルで簡単なブログアプリができました
ここまでやれば後はPhoenix公式ドキュメントを(英語苦手な人はGoogle翻訳駆使しながら)読んだり、EctoやGurdianのドキュメント読めば大抵のことはできるのではないでしょうか!(例えばarticleに対するcommentリソースを実装してみるといいかもしれないですね)
ぜひ自分のアイデアを実現させてみてください
|> テスト書いてみる
実運用ではテストは必須です!(というより、今回は説明のためテスト書かずに実装しましたが、慣れてきたらテストを先に書くTDDでやった方がいいです)
ElixirにはExUnitというテストフレームワークが標準装備なので、ドキュメント読みながら実装してみましょう!
ちなみにmix phx.gen.htmlで生成したコードにはすでにテストが自動生成されているので、まずはそれを参考にしてみるといいと思います
|> Gigalixirにデプロイしてみる
なんと!Elixirには専門のPaasであるGigalixirが存在します
使い勝手はHerokuみたいな感じです
ちょっと設定すればデプロイできるので、piacereさんの以下の資料を読んでチャレンジしてみてください!
【Gigalixir編①】Elixir/Phoenix本番リリース: 初期PJリリースまで
|> 参考
Phoenix1.3バージョンですが、githubのコードとGigalixirにデプロイしたアプリを置いておきますね!(Gigalixirの方は無料だと1アプリまでなので、そのうち消します・・・リンク切れていたらごめんなさい><)
テストもちょっとだけ書いたので参考になるかもしれません
ちなみに1.3ではpage_path(...)と記述していたところが1.4ではRoutes.page_path(...)というようにRoutesというモジュール名を明示的に書くように変更されているので、バージョンをまたぐ場合は適宜読み替えてください
|>Github
|>ex-blog.gigalixirapp.com
|> まとめ
Elixirのコードは可読性高くまとまりますね!
Phoenixを使えばRailsと遜色ないスピードで開発できて、しかもRailsの悩みである性能問題をある程度解消できます
おまけにアクターモデル由来の軽量プロセスにより耐障害性も高いんです(エッヘン)
このように単一CPU性能の向上を待たずして、メニーコアの性能を生かし切る可能性を秘めたElixir(Phoenix)が新たなトレンドになる日も近いかもしれません
是非触ってみてください!
次回はhykwさんの記事です!
