(この記事は一連の解説記事の一つになります)
先頭記事:入門編
前の記事:1. アイテムの追加
次の記事:3. クリエイティブタブの追加
ブロックの追加
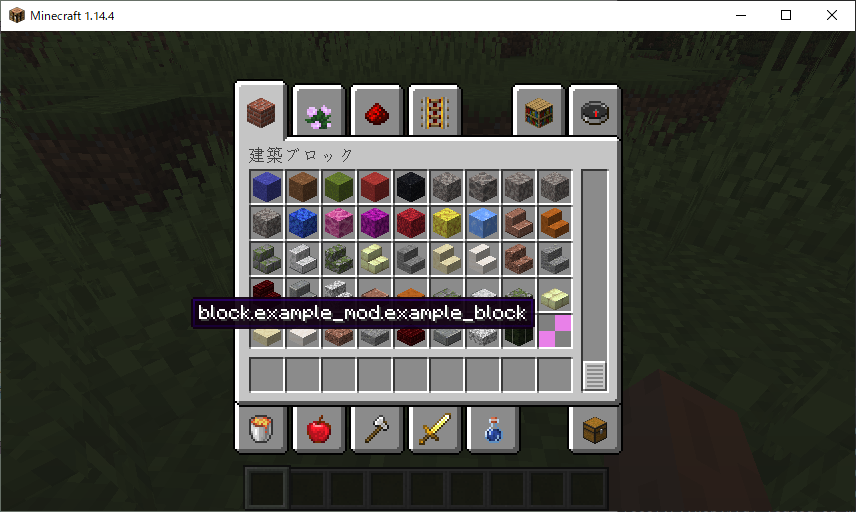
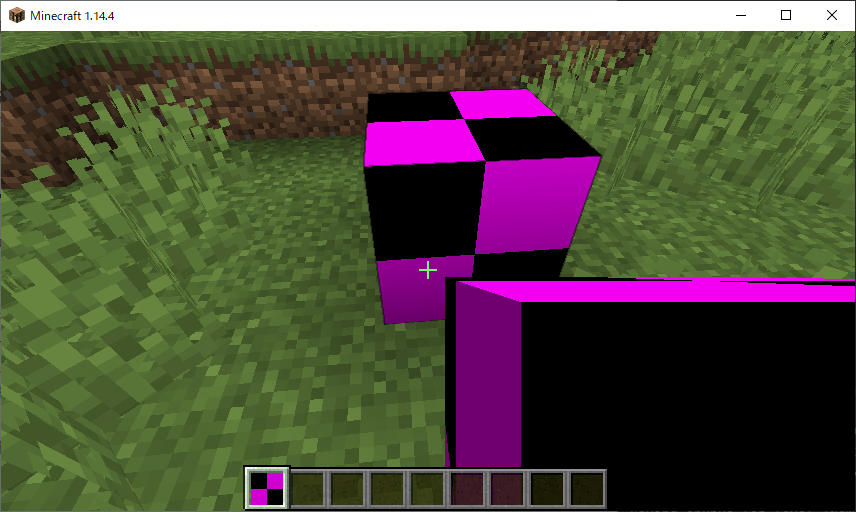
ブロックの追加を行います。ブロックの追加はアイテムの追加と近い作業なので簡単です!
アイテムのとき同様にブロックを管理するクラスを作る方法をとります。
\src\main\java\jp\koteko\example_mod\
   ├ ExampleMod.java
   └ lists
      ├ BlockList.java
      └ ItemList.java
package jp.koteko.example_mod.lists;

import jp.koteko.example_mod.ExampleMod;
import net.minecraft.block.Block;
import net.minecraft.block.material.Material;
import net.minecraft.item.BlockItem;
import net.minecraft.item.Item;
import net.minecraft.item.ItemGroup;
import net.minecraft.util.ResourceLocation;
import net.minecraftforge.event.RegistryEvent;
import net.minecraftforge.eventbus.api.SubscribeEvent;
import net.minecraftforge.fml.common.Mod;

@Mod.EventBusSubscriber(modid = ExampleMod.MOD_ID, bus = Mod.EventBusSubscriber.Bus.MOD)
public class BlockList {
    public static Block ExampleBlock = new Block(Block.Properties.create(Material.IRON))
            .setRegistryName(new ResourceLocation(ExampleMod.MOD_ID, "example_block"));

    @SubscribeEvent
    public static void registerBlocks(RegistryEvent.Register<Block> event) {
        event.getRegistry().registerAll(
                ExampleBlock
        );
    }

    @SubscribeEvent
    public static void registerBlockItems(RegistryEvent.Register<Item> event) {
        event.getRegistry().registerAll(
                new BlockItem(ExampleBlock, new Item.Properties().group(ItemGroup.BUILDING_BLOCKS))
                        .setRegistryName(new ResourceLocation(ExampleMod.MOD_ID, "example_block"))
        );
    }
}
ついでにメインファイルに最初から準備されている登録用の記述は消しておきましょう。
//...
public class ExampleMod
{
    //...

    // ここから削除
    //@Mod.EventBusSubscriber(bus=Mod.EventBusSubscriber.Bus.MOD)
    //public static class RegistryEvents {
    //    @SubscribeEvent
    //    public static void onBlocksRegistry(final RegistryEvent.Register<Block> blockRegistryEvent) {
    //        // register a new block here
    //        LOGGER.info("HELLO from Register Block");
    //    }
    //}
    // ここまで削除
}
コードを見てもらうとわかるように、ブロックの追加はアイテムの追加と基本的に同じですが、一つ注意してほしいのは、ブロックはブロックとして存在すると同時にアイテムとしても存在するので、その登録も必要であるという点です。
コードの簡単な説明
public class BlockList {
    // メンバ変数としてブロックを宣言、初期化しておく
    // Material.IRONはブロックのプロパティとして鉄のようなものを指定
    // setRegistryNameで登録するブロックIDの設定をしている
    // "example_block"の部分が登録されるブロックID 小文字
    public static Block ExampleBlock = new Block(Block.Properties.create(Material.IRON))
            .setRegistryName(new ResourceLocation(ExampleMod.MOD_ID, "example_block"));

    // ブロックの登録
    @SubscribeEvent
    public static void registerBlocks(RegistryEvent.Register<Block> event) {
        event.getRegistry().registerAll(
                ExampleBlock
        );
    }

    // アイテムの登録
    // BlockItemクラスがあるのでこれでnewして登録する 引数は(Block, Item.Propaties)
    @SubscribeEvent
    public static void registerBlockItems(RegistryEvent.Register<Item> event) {
        event.getRegistry().registerAll(
                new BlockItem(ExampleBlock, new Item.Properties().group(ItemGroup.BUILDING_BLOCKS))
                        .setRegistryName(new ResourceLocation(ExampleMod.MOD_ID, "example_block"))
        );
    }
}
\src\main\resources
   └ assets
      └ example_mod
         ├ blockstates
         │  └ example_block.json
         ├ lang
         │  └ en_us.json
         │  └ ja_jp.json
         ├ models
         │  ├ block
         │  │  └ example_block.json
         │  └ item
         │     └ example_block.json
         └ textures
            ├ blocks
            │  └ example_block.png
            └ items
{
  "variants": {
    "": { "model": "example_mod:block/example_block" }
  }
}
"MOD_ID:block/[モデルファイル名]"
ブロックの持つ状態値(state)ごとにテクスチャを設定したりできますが、ここでは省略します。
{
  "item.example_mod.example_ingot": "Example Ingot",
  "block.example_mod.example_block": "Example Block"
}
{
  "item.example_mod.example_ingot": "例インゴット",
  "block.example_mod.example_block": "例ブロック"
}
{
  "parent": "block/cube_all",
  "textures": {
    "all": "example_mod:blocks/example_block"
  }
}
"parent":"block/cube_all"によって単純な立方体を指定。
"all"で全面にテクスチャを指定。
{
  "parent": "example_mod:block/example_block"
}
"parent"にブロックのモデルファイルを指定。
アイテムの追加ができました!
発展
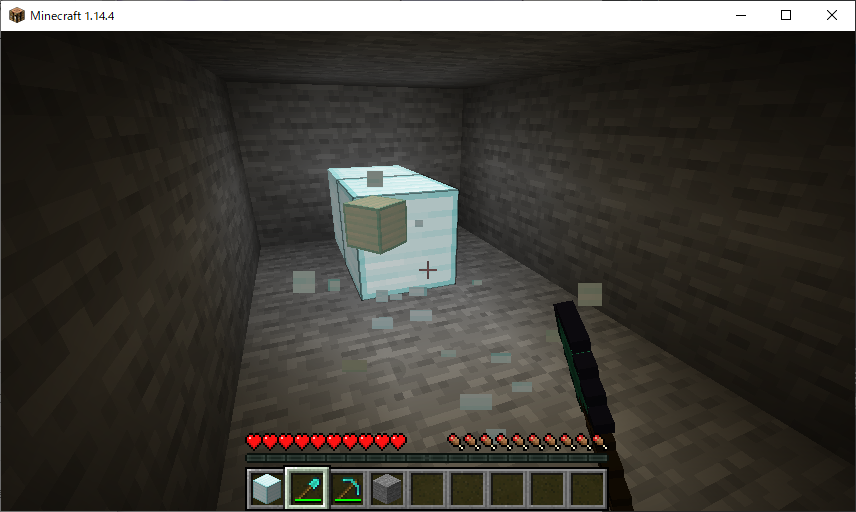
Q. 壊してもアイテム化しないんだけど?
A. loottableを設定しましょう。
\src\main\resources
   ├ assets
   └ data
      └ example_mod
         └ loot_tables
            └ blocks
               └ example_block.json
{
  "type": "minecraft:block",
  "pools": [
    {
      "rolls": 1,
      "entries": [
        {
          "type": "minecraft:item",
          "name": "example_mod:example_block"
        }
      ]
    }
  ]
}
Q. 光源にしたい
Q. 破壊ツールの設定をしたい
A. net.minecraft.block.Blockを観察しましょう。
// ...
   public static class Properties {
      private Material material;
      private MaterialColor mapColor;
      private boolean blocksMovement = true;
      private SoundType soundType = SoundType.STONE;
      private int lightValue;
      private float resistance;
      private float hardness;
      // ...

      // ...
      public Block.Properties doesNotBlockMovement() {
         this.blocksMovement = false;
         return this;
      }

      public Block.Properties slipperiness(float slipperinessIn) {
         this.slipperiness = slipperinessIn;
         return this;
      }

      public Block.Properties sound(SoundType soundTypeIn) {
         this.soundType = soundTypeIn;
         return this;
      }

      public Block.Properties lightValue(int lightValueIn) {
         this.lightValue = lightValueIn;
         return this;
      }

      public Block.Properties hardnessAndResistance(float hardnessIn, float resistanceIn) {
         this.hardness = hardnessIn;
         this.resistance = Math.max(0.0F, resistanceIn);
         return this;
      }
// ...
コンストラクタに与える引数のBlock.Propertiesはブロックの特性にかかわる値を保持しています。またそれらの値のアクセサも定義されています。
これらを参考に以下に例を示します。
public class BlockList {
    public static Block ExampleBlock = new Block(
            Block.Properties.create(Material.IRON)
                    .hardnessAndResistance(2.0f, 3.0f)
                    .lightValue(15)
                    .harvestLevel(3)
                    .harvestTool(ToolType.SHOVEL))
            .setRegistryName(new ResourceLocation(ExampleMod.MOD_ID, "example_block"));
}
Q. 機能を付けたい
A. 発展的な内容のため解説記事は未定です。
参考
Minecraft 1.14.4 Forge Modの作成 その4 【ブロックの追加】
[Solved][1.14.2] Custom Blocks not dropping Items - Modder Support - Forge Forums


