はじめに
CloudWatchアラームでSNS通知を行う際、デフォルト通知内容は以下のようになります。(Eメール通知の場合。)

この内容はLambdaを利用することでカスタマイズすることができます。
構成
カスタマイズ通知を送ることが目的なので構成は以下のようにシンプルです。

準備は、
- SNSの設定
- IAMロールの用意
- Lambda関数の作成
- CloudWatchイベントの設定
の順番に行います。
設定
今回は aws-cli を利用して作成します。
① SNSの設定
検知した際の通知先設定を行います。
まず、トピックの作成です。
$ aws sns create-topic --name customNotification
{
    "TopicArn": "arn:aws:sns:ap-northeast-1:123456789012:customNotification"
}
次は通知先となるサブスクリプションの登録です。
$ aws sns subscribe --topic-arn arn:aws:sns:ap-northeast-1:123456789012:customNotification --protocol email --notification-endpoint test@hogehoge.jp
{
    "SubscriptionArn": "pending confirmation"
}
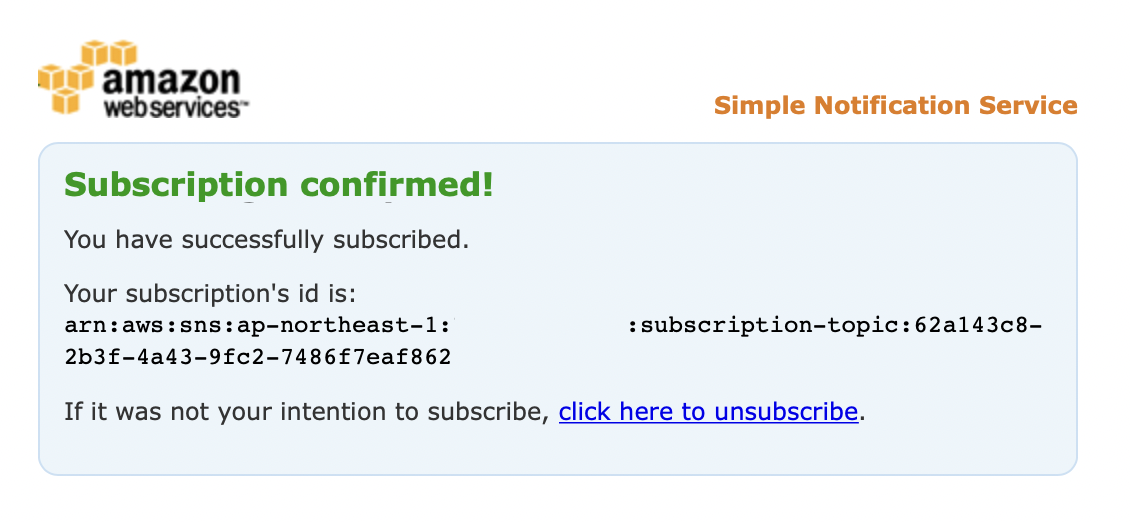
登録先が Email の場合、以下のような確認メールが届きます。

また、このままだとステータスが 「PendingConfirmation」 となっていて送れる状態になっていません。
$ aws sns list-subscriptions-by-topic --topic-arn arn:aws:sns:ap-northeast-1:123456789012:customNotification
{
    "Subscriptions": [
        {
            "SubscriptionArn": "PendingConfirmation",
            "Owner": "123456789012",
            "Protocol": "email",
            "Endpoint": "test@hogehoge.jp",
            "TopicArn": "arn:aws:sns:ap-northeast-1:123456789012:customNotification"
        }
    ]
}
届いたメールの 「Confirm subscription」 のリンクをクリックして承認します。

すると、先ほど 「PendingConfirmation」 となっていた SubscriptionArn がサブスクリプションのARNに置き換わっているのが確認できます。
$ aws sns list-subscriptions-by-topic --topic-arn arn:aws:sns:ap-northeast-1:123456789012:customNotification
{
    "Subscriptions": [
        {
            "SubscriptionArn": "arn:aws:sns:ap-northeast-1:123456789012:subscription-topic:62a143c8-2b3f-4a43-9fc2-7486f7eaf862",
            "Owner": "123456789012",
            "Protocol": "email",
            "Endpoint": "test@hogehoge.jp",
            "TopicArn": "arn:aws:sns:ap-northeast-1:123456789012:customNotification"
        }
    ]
}
これで送信可能な状態となりました。
② IAMロール の用意
ここでは Lambda が SNS を利用するために必要な権限を持つ IAMロール を作成します。
IAMロール を作成するには 信頼ポリシー という定義が必要になります。
$ vim trust-policy.json
jsonファイルに以下の定義をします。
{
  "Version": "2012-10-17",
  "Statement": [
    {
      "Effect": "Allow",
      "Principal": {
        "Service": "lambda.amazonaws.com"
      },
      "Action": "sts:AssumeRole"
    }
  ]
}
ロール の作成を行います。
$ aws iam create-role --role-name customNotification --assume-role-policy-document file://trust-policy.json
{
    "Role": {
        "Path": "/",
        "RoleName": "customNotification",
        "RoleId": "AROA2Z62YJE3UEXRGMVTO",
        "Arn": "arn:aws:iam::123456789012:role/customNotification",
        "CreateDate": "2021-02-20T05:50:54+00:00",
        "AssumeRolePolicyDocument": {
            "Version": "2012-10-17",
            "Statement": [
                {
                    "Effect": "Allow",
                    "Principal": {
                        "Service": "lambda.amazonaws.com"
                    },
                    "Action": "sts:AssumeRole"
                }
            ]
        }
    }
}
次に ポリシー を ロール ヘアタッチします。
ここでは AWSLambdaExecute と AmazonSNSFullAccess をアタッチします。
$ aws iam attach-role-policy --role-name customNotification --policy-arn arn:aws:iam::aws:policy/service-role/AWSLambdaBasicExecutionRole
$ aws iam attach-role-policy --role-name customNotification --policy-arn arn:aws:iam::aws:policy/AmazonSNSFullAccess
以上で IAMロール の準備は完了です。
③ Lambda関数の作成
メインとなる Lambda関数 を作成です。
$ vim customNotification.py
以下のコードを用意します。
import boto3
import json
import os

sns_arn = os.environ['SNS_TOPIC_ARN']
custom_subject = os.environ['CUSTOM_SUBJECT']

def lambda_handler(event, context):
    print(sns_arn)
    client = boto3.client("sns")
    resp = client.publish(TargetArn=sns_arn, Message=json.dumps(event), Subject=custom_subject)
用意したファイルを zipファイル化 します。
$ zip customNotification.zip customNotification.py
それではこの zipファイル と、先ほど用意した IAMロール で Lambda関数 を作成します。
$ aws lambda create-function --function-name customNotification --role arn:aws:iam::123456789012:role/customNotification --runtime python3.8 --handler customNotification.lambda_handler --zip-file fileb://customNotification.zip
{
    "FunctionName": "customNotification",
    "FunctionArn": "arn:aws:lambda:ap-northeast-1:123456789012:function:customNotification",
    "Runtime": "python3.8",
    "Role": "arn:aws:iam::123456789012:role/customNotification",
    "Handler": "customNotification.lambda_handler",
    "CodeSize": 403,
    "Description": "",
    "Timeout": 3,
    "MemorySize": 128,
    "LastModified": "2021-02-20T06:04:08.989+0000",
    "CodeSha256": "X26yWax91NNEr09NDQVU8PDZBNUIuWmWOlTJr3sfilA=",
    "Version": "$LATEST",
    "TracingConfig": {
        "Mode": "PassThrough"
    },
    "RevisionId": "792f557a-454c-4dd1-a854-e612e4e7997d",
    "State": "Active",
    "LastUpdateStatus": "Successful"
}
作成したら 環境変数 の設定を行います。
$ aws lambda update-function-configuration --function-name customNotification --environment Variables='{SNS_TOPIC_ARN="arn:aws:sns:ap-northeast-1:123456789012:customNotification",CUSTOM_SUBJECT="TEST通知"}'
{
    "FunctionName": "customNotification",
    "FunctionArn": "arn:aws:lambda:ap-northeast-1:123456789012:function:customNotification",
    "Runtime": "python3.8",
    "Role": "arn:aws:iam::123456789012:role/customNotification",
    "Handler": "customNotification.lambda_handler",
    "CodeSize": 403,
    "Description": "",
    "Timeout": 3,
    "MemorySize": 128,
    "LastModified": "2021-02-20T06:06:45.523+0000",
    "CodeSha256": "X26yWax91NNEr09NDQVU8PDZBNUIuWmWOlTJr3sfilA=",
    "Version": "$LATEST",
    "Environment": {
        "Variables": {
            "SNS_TOPIC_ARN": "arn:aws:sns:ap-northeast-1:123456789012:customNotification",
            "CUSTOM_SUBJECT": "TEST通知"
        }
    },
    "TracingConfig": {
        "Mode": "PassThrough"
    },
    "RevisionId": "0dd3494e-72af-4e5b-8586-8d464b4b739e",
    "State": "Active",
    "LastUpdateStatus": "Successful"
}
ここではメール件名が TEST通知となるように設定しています。
④ CloudWatchイベント の設定
今回は簡単なテストを行うために S3バケット が 作成/削除 された場合に通知される設定を行います。
$ vim event-pattern.json
{
  "source": [
    "aws.s3"
  ],
  "detail-type": [
    "AWS API Call via CloudTrail"
  ],
  "detail": {
    "eventSource": [
      "s3.amazonaws.com"
    ],
    "eventName": [
      "CreateBucket",
      "DeleteBucket"
    ]
  }
}
$ aws events put-rule --name customNotification --event-pattern file://event-pattern.json
{
    "RuleArn": "arn:aws:events:ap-northeast-1:123456789012:rule/customNotification"
}
aws-cli で設定する際は add-permission で権限追加を忘れずに行いましょう。
% aws lambda add-permission --function-name customNotification --statement-id 1 --principal events.amazonaws.com --action 'lambda:InvokeFunction' --source-arn arn:aws:events:ap-northeast-1:123456789012:rule/customNotification
{
    "Statement": "{\"Sid\":\"1\",\"Effect\":\"Allow\",\"Principal\":{\"Service\":\"events.amazonaws.com\"},\"Action\":\"lambda:InvokeFunction\",\"Resource\":\"arn:aws:lambda:ap-northeast-1:123456789012:function:customNotification\",\"Condition\":{\"ArnLike\":{\"AWS:SourceArn\":\"arn:aws:events:ap-northeast-1:123456789012:rule/customNotification\"}}}"
}
それではターゲットに Lambda を指定します。
% aws events put-targets --rule customNotification --targets "Id"="Target1","Arn"="arn:aws:lambda:ap-northeast-1:123456789012:function:customNotification"
{
    "FailedEntryCount": 0,
    "FailedEntries": []
}
これでテスト準備完了です。
テスト
S3バケット を作成し通知されるかテストします。
% aws s3 mb s3://customnotification-test
make_bucket: customnotification-test
ちゃんと設定ができていると以下のような通知が届きます。
おわりに
今回はメール件名のカスタマイズのみを行いましたが、メッセージ部分をカスタマイズしたい場合は event 部分をカスタマイズすることで可能です。
参考
CloudWatch Events ルールのデフォルトの Amazon SNS メールの件名「AWS 通知メッセージ」を変更するにはどうすればよいですか?
チュートリアル: CloudWatch イベント を使用して AWS Lambda 関数をスケジュールする
イベントパターン
AWS CLI での高レベル (S3) コマンドの使用


