これは何
iOS 9 で Address Book UI frameworks が deprecated になりました。
参考:iOS 9 / watchOS 2 で deprecated になる or 引退していくAPIたち - Qiita
上記の記事にも書いたように、今後は Contacts frameworks および Contacts UI frameworks を使うことが推奨されます。
この記事では、Contacts frameworks を使って iPhone の連絡先アプリからアドレスデータを取得する方法を簡単に解説します。
準備
まずは必要なフレームワークを追加してimportします。
import Contacts
import ContactsUI
後に説明する CNContactPickerDelegate プロトコルにも準拠しておきましょう。
class ViewController: UIViewController, CNContactPickerDelegate {
実装
CNContactPickerViewControllerを表示
連絡先を選択するための CNContactPickerViewController を表示します。
let picker = CNContactPickerViewController()
picker.delegate = self

// Show the picker
self.presentViewController(picker, animated: true, completion: nil)
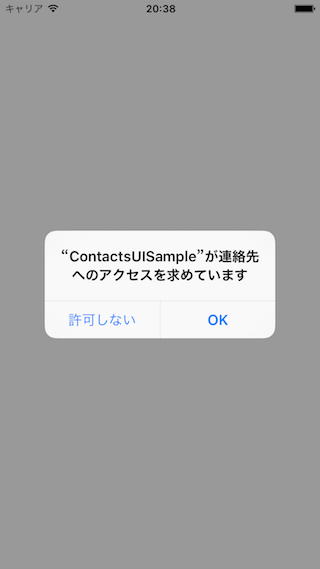
このコードを実行すると、初回時に次のダイアログが出現し、連絡先へのアクセス許可が求められます。
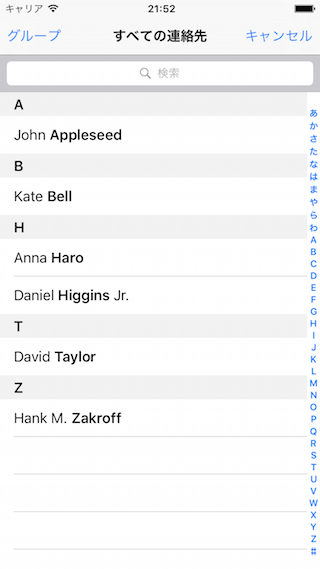
ここで許可すると、iPhoneに登録されている連絡先リストが表示されます。
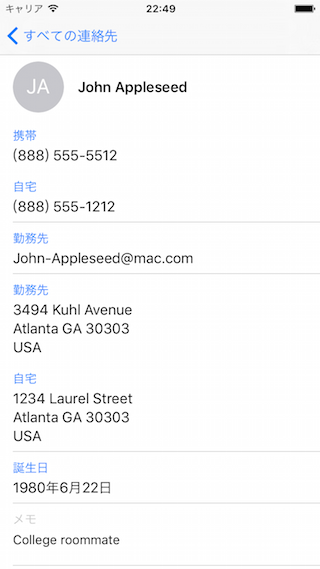
この中から適当な人物を選んでタップすると、次の画面(以下アドレス詳細画面と勝手に呼ぶことにします)が表示されます。
上記の数行を実装するだけで、これだけのUIを用意してくれます。
また、アドレス詳細画面に表示する項目は次のように制限できます。
// 電話番号、メールアドレス、住所のみ表示する
let displayedItems = [CNContactPhoneNumbersKey, CNContactEmailAddressesKey, CNContactPostalAddressesKey]
picker.displayedPropertyKeys = displayedItems
指定できるキーについては
Metadata Keys - CNContact Class Reference
を参照してください。
項目タップ時の処理
アドレス詳細画面の各項目( プロパティ と呼びますが、クラスの"プロパティ"と名前が被ってややこしいので、本記事では普通に「項目」と呼ぶことにします)をタップすると次のメソッドが呼ばれます。
func contactPicker(picker: CNContactPickerViewController, didSelectContactProperty contactProperty: CNContactProperty)
選択された項目は CNContactProperty クラスとして取得できます。
CNContactProperty クラスは次のプロパティを持っています。(一部のみ解説)
- contact:
CNContact- その人物の名前、住所、電話番号など様々な情報 - key:
String- どの項目が選択されたのか(例:Phone) - value:
AnyObject?- 選択された項目の内容(例:03-1234-5678)
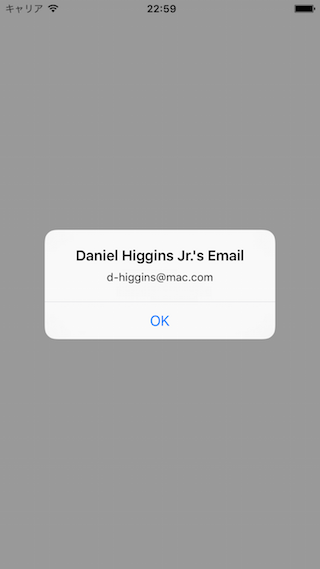
以下は、選択された人物の名前と、どの項目がタップされたかをアラートに表示するサンプルです。
func contactPicker(picker: CNContactPickerViewController, didSelectContactProperty contactProperty: CNContactProperty) {
    let contact = contactProperty.contact
    let contactName = CNContactFormatter.stringFromContact(contact, style: .FullName) ?? ""
    let propertyName = CNContact.localizedStringForKey(contactProperty.key)
    let title = "\(contactName)'s \(propertyName)"

    dispatch_async(dispatch_get_main_queue()) {
        let alert = UIAlertController(title: title,
            message: contactProperty.value?.description,
            preferredStyle: .Alert)
        alert.addAction(UIAlertAction(title: "OK", style: .Default, handler: nil))
        self.presentViewController(alert, animated: true, completion: nil)
    }
}
実行結果:
キャンセルボタンタップ時の処理
キャンセルボタンがタップされると次のメソッドが呼ばれます。
func contactPickerDidCancel(picker: CNContactPickerViewController)
キャンセル後に何か処理を行いたい場合はここに記述すると良いでしょう。(ここで CNContactPickerViewController を dismiss する必要はないようです)
サンプルコード
今回紹介したサンプルコードは以下にアップしてあります。


