記事の概要
最近、ComfyUIをよく触るのですが、環境周りのメンテナンスがめんどうなので、ClaudeCodeにお願いできないかと思いました。(ClaudeCodeの利用には、ClaudeのProプラン($20/月)以上の契約が必要になります。)
試してみたところ、かなり体験がよかったので、手順含めて整理しました。
環境構築
WSL
以下のコマンドを実行して、WSLがインストールされていることを確認する。
wsl --version
以下のようなログが出力されていれば、WSLが既にインストールされています。
C:\Users\XXXXX>wsl --version
WSL バージョン: 2.3.26.0
カーネル バージョン: 5.15.167.4-1
WSLg バージョン: 1.0.65
MSRDC バージョン: 1.2.5620
Direct3D バージョン: 1.611.1-81528511
DXCore バージョン: 10.0.26100.1-240331-1435.ge-release
Windows バージョン: 10.0.26100.4351
上記のような結果にならない場合は、インストールが必要なので、以下のコマンドでインストールしてください。
wsl --install
詳細は以下を確認してください。
Ubuntu
適当に作業フォルダを作成します。
今回は「Cドライブ」直下に「ClaudeCode」フォルダを作成しました。
(念のため、日本語の文字が入らないようにした方がよいです。)
C:\ClaudeCode
コマンドプロンプトを開き、以下のコマンドで、作成したフォルダに移動します。
cd C:\ClaudeCode
以下のようなログになります。
C:\Users\XXXXX>cd C:\ClaudeCode
C:\ClaudeCode>
以下のコマンドでUbuntuをインストールします。
wsl --install -d Ubuntu-22.04
usernameとpasswordの入力を求められるので、入力します。
C:\ClaudeCode>wsl --install -d Ubuntu-22.04
インストール中: Ubuntu 22.04 LTS
Ubuntu 22.04 LTS がインストールされました。
Ubuntu 22.04 LTS を起動しています...
Installing, this may take a few minutes...
Please create a default UNIX user account. The username does not need to match your Windows username.
For more information visit: https://aka.ms/wslusers
Enter new UNIX username: lovemachine
New password:
Retype new password:
passwd: password updated successfully
Installation successful!
To run a command as administrator (user "root"), use "sudo <command>".
See "man sudo_root" for details.

Welcome to Ubuntu 22.04.5 LTS (GNU/Linux 5.15.167.4-microsoft-standard-WSL2 x86_64)

 * Documentation:  https://help.ubuntu.com
 * Management:     https://landscape.canonical.com
 * Support:        https://ubuntu.com/pro

 System information as of Sun Aug 17 00:26:32 JST 2025

  System load:  0.05                Processes:             63
  Usage of /:   0.1% of 1006.85GB   Users logged in:       0
  Memory usage: 6%                  IPv4 address for eth0: XXX.XXX.XXX.XXX
  Swap usage:   0%


This message is shown once a day. To disable it please create the
/home/lovemachine/.hushlogin file.
lovemachine@LAPTOP-07DG8HT2:~$
Node.js
ubuntuにログインしている状態で、以下のコマンドを実行します。
-
1. nvmのインストール
- nvmの公式スクリプトを使ってインストールします:
curl -o- https://raw.githubusercontent.com/nvm-sh/nvm/v0.39.5/install.sh | bash
- nvmの公式スクリプトを使ってインストールします:
-
2. 環境変数の更新
- ターミナルを再起動するか、以下のコマンドで環境変数を読み込み直します:
source ~/.bashrc
- ターミナルを再起動するか、以下のコマンドで環境変数を読み込み直します:
-
3. nvmのインストール確認
- nvmがインストールされているか確認します:
nvm --version
- nvmがインストールされているか確認します:
-
4. Nodeのインストール
- 最新のLTS版をインストール:
nvm install --lts nvm use --lts - 特定のバージョンをインストールしたい場合:
nvm install 18.17.0
nvm use 18.17.0
- 最新のLTS版をインストール:
-
5. インストール確認
- node/npmがインストールされているか確認します:
node --version
npm --version
- node/npmがインストールされているか確認します:
以下のようなログになります。
lovemachine@LAPTOP-07DG8HT2:~$ curl -o- https://raw.githubusercontent.com/nvm-sh/nvm/v0.39.5/install.sh | bash
  % Total    % Received % Xferd  Average Speed   Time    Time     Time  Current
                                 Dload  Upload   Total   Spent    Left  Speed
100 15916  100 15916    0     0  33538      0 --:--:-- --:--:-- --:--:-- 33507
=> Downloading nvm from git to '/home/lovemachine/.nvm'
=> Cloning into '/home/lovemachine/.nvm'...
remote: Enumerating objects: 383, done.
remote: Counting objects: 100% (383/383), done.
remote: Compressing objects: 100% (326/326), done.
remote: Total 383 (delta 43), reused 178 (delta 29), pack-reused 0 (from 0)
Receiving objects: 100% (383/383), 392.12 KiB | 1.01 MiB/s, done.
Resolving deltas: 100% (43/43), done.
* (HEAD detached at FETCH_HEAD)
  master
=> Compressing and cleaning up git repository

=> Appending nvm source string to /home/lovemachine/.bashrc
=> Appending bash_completion source string to /home/lovemachine/.bashrc
=> You currently have modules installed globally with `npm`. These will no
=> longer be linked to the active version of Node when you install a new node
=> with `nvm`; and they may (depending on how you construct your `$PATH`)
=> override the binaries of modules installed with `nvm`:

C:\Users\XXXXX\AppData\Roaming\npm
+-- @anthropic-ai/claude-code@1.0.83
+-- @mermaid-js/mermaid-cli@11.4.2
+-- @modelcontextprotocol/server-filesystem@2025.1.14
=> If you wish to uninstall them at a later point (or re-install them under your
=> `nvm` Nodes), you can remove them from the system Node as follows:

     $ nvm use system
     $ npm uninstall -g a_module

=> Close and reopen your terminal to start using nvm or run the following to use it now:

export NVM_DIR="$HOME/.nvm"
[ -s "$NVM_DIR/nvm.sh" ] && \. "$NVM_DIR/nvm.sh"  # This loads nvm
[ -s "$NVM_DIR/bash_completion" ] && \. "$NVM_DIR/bash_completion"  # This loads nvm bash_completion
lovemachine@LAPTOP-07DG8HT2:~$ source ~/.bashrc
lovemachine@LAPTOP-07DG8HT2:~$ nvm --version
0.39.5
lovemachine@LAPTOP-07DG8HT2:~$ nvm install --lts
Installing latest LTS version.
Downloading and installing node v22.18.0...
Downloading https://nodejs.org/dist/v22.18.0/node-v22.18.0-linux-x64.tar.xz...
################################################################################################################### 100.0%
Computing checksum with sha256sum
Checksums matched!
Now using node v22.18.0 (npm v10.9.3)
Creating default alias: default -> lts/* (-> v22.18.0)
lovemachine@LAPTOP-07DG8HT2:~$ nvm use --lts
Now using node v22.18.0 (npm v10.9.3)
lovemachine@LAPTOP-07DG8HT2:~$ node --version
v22.18.0
lovemachine@LAPTOP-07DG8HT2:~$ npm --version
10.9.3
lovemachine@LAPTOP-07DG8HT2:~$
ClaudeCode
以下のコマンドを実行します。
npm install -g @anthropic-ai/claude-code
以下のようなログが出力されます。
lovemachine@LAPTOP-07DG8HT2:~$ npm install -g @anthropic-ai/claude-code

added 3 packages in 7s

2 packages are looking for funding
  run `npm fund` for details
npm notice
npm notice New major version of npm available! 10.9.3 -> 11.5.2
npm notice Changelog: https://github.com/npm/cli/releases/tag/v11.5.2
npm notice To update run: npm install -g npm@11.5.2
npm notice
lovemachine@LAPTOP-07DG8HT2:~$
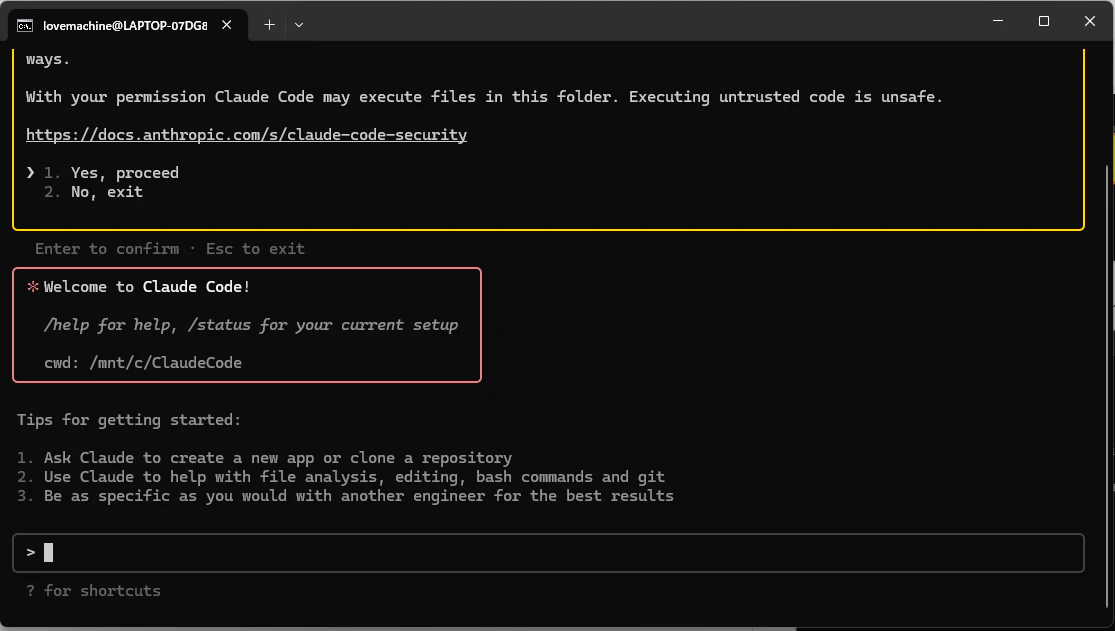
そのまま「claude」と、以下のように入力します。
lovemachine@LAPTOP-07DG8HT2:/mnt/c/ClaudeCode$ claude
以下の画面が表示されたら、ClaudeCodeのインストールはできています。
Claudeにログイン
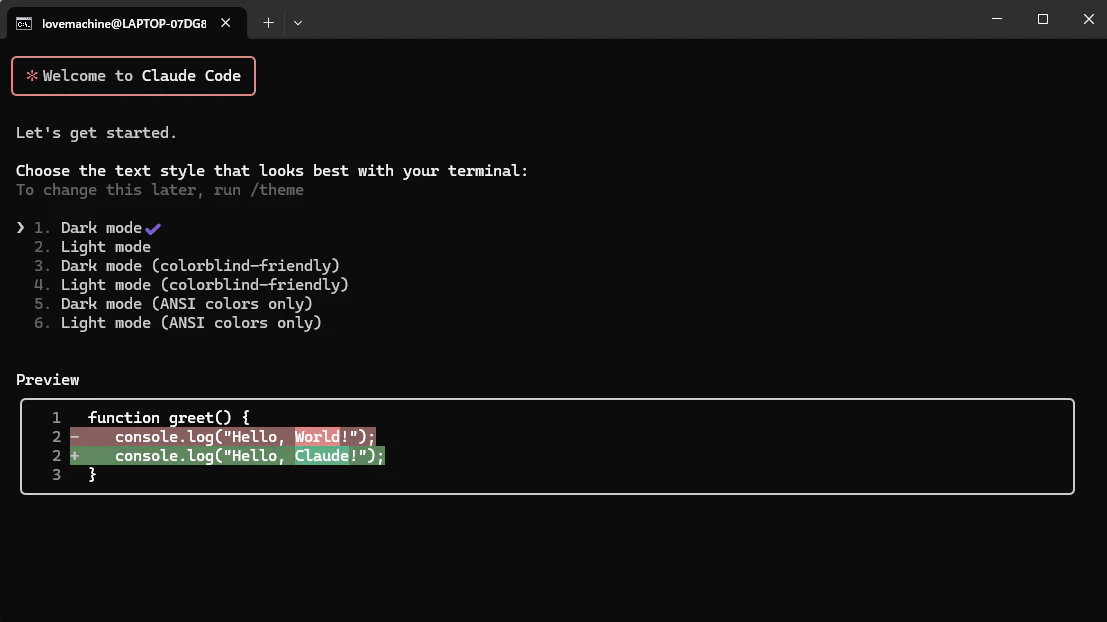
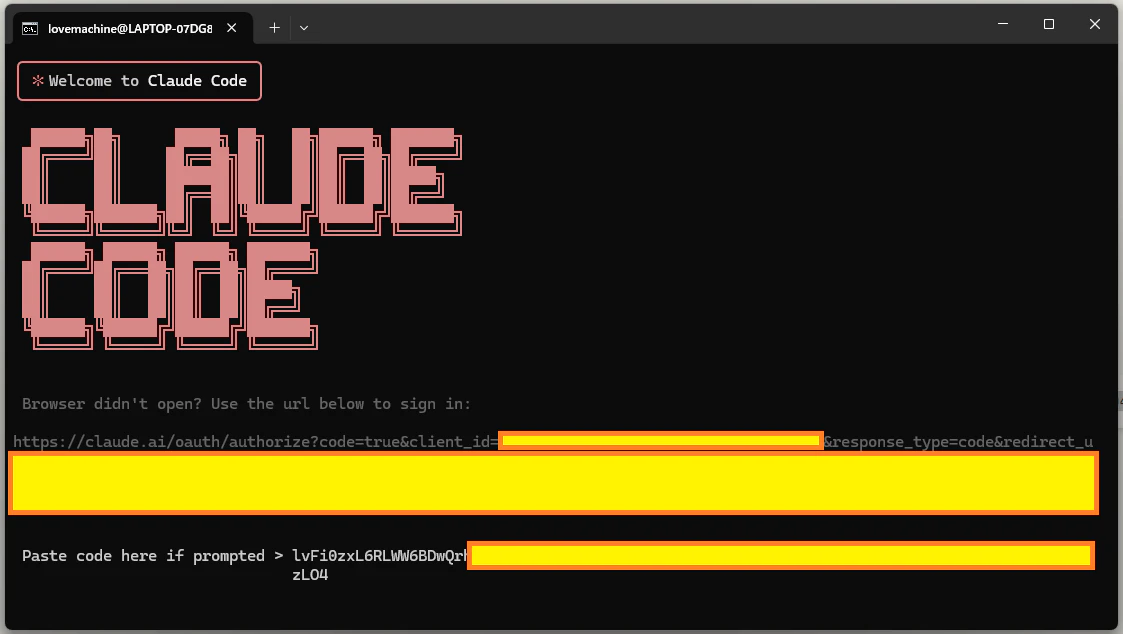
先ほどの画面から「1」を入力すると、「Dark mode」で以下の画面になります。
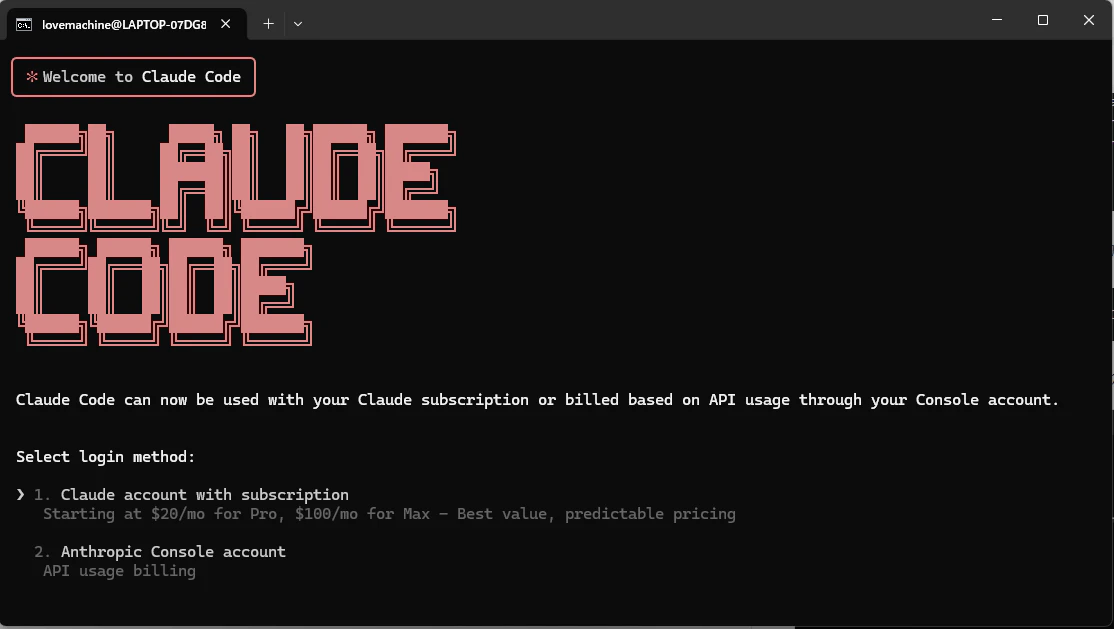
再度、「1」を入力すると、以下の画面になるので、「https://claude.ai.... 」のURLをコピーして、そのURLに画面遷移します。

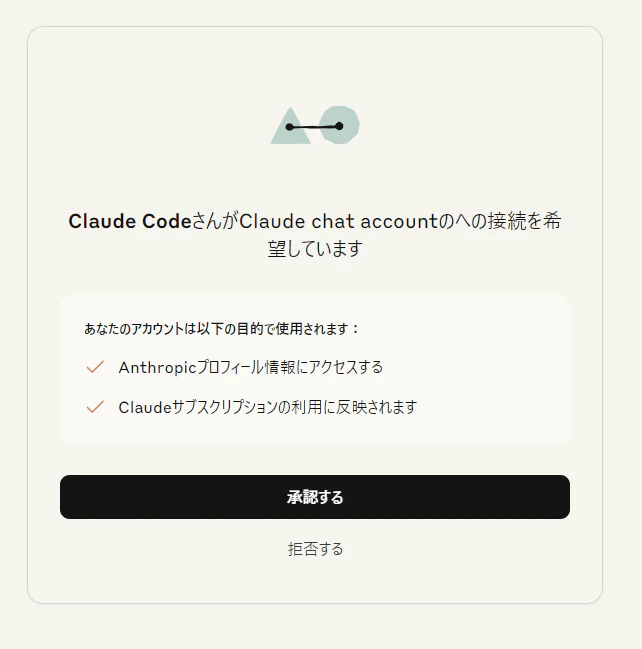
以下の画面が表示されるので、「承認する」をクリックします。
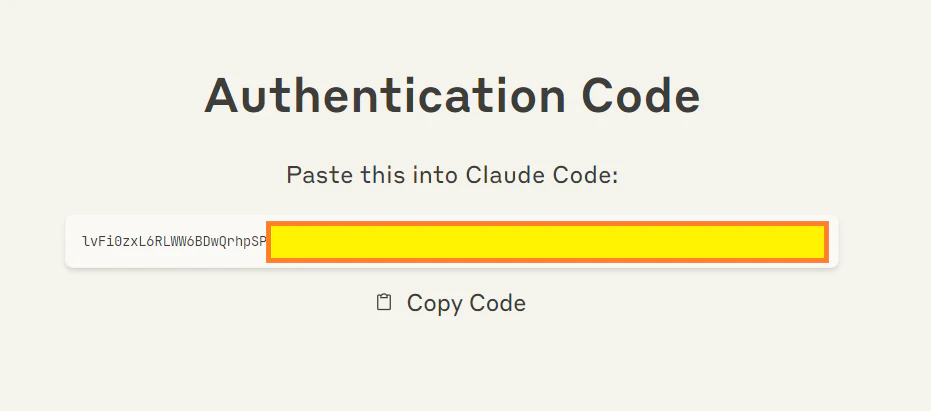
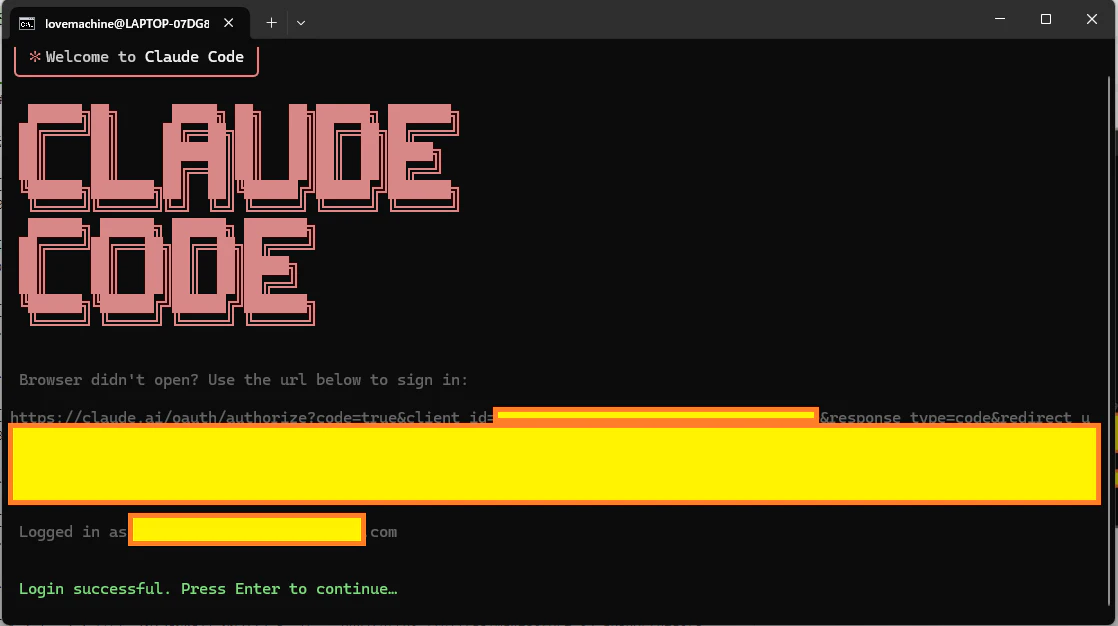
以下の画面になるので、「Copy Code」をクリックします。
以下のように、コードを貼り付けて、Enterをクリックします。
以下のようになったら、認証完了です。
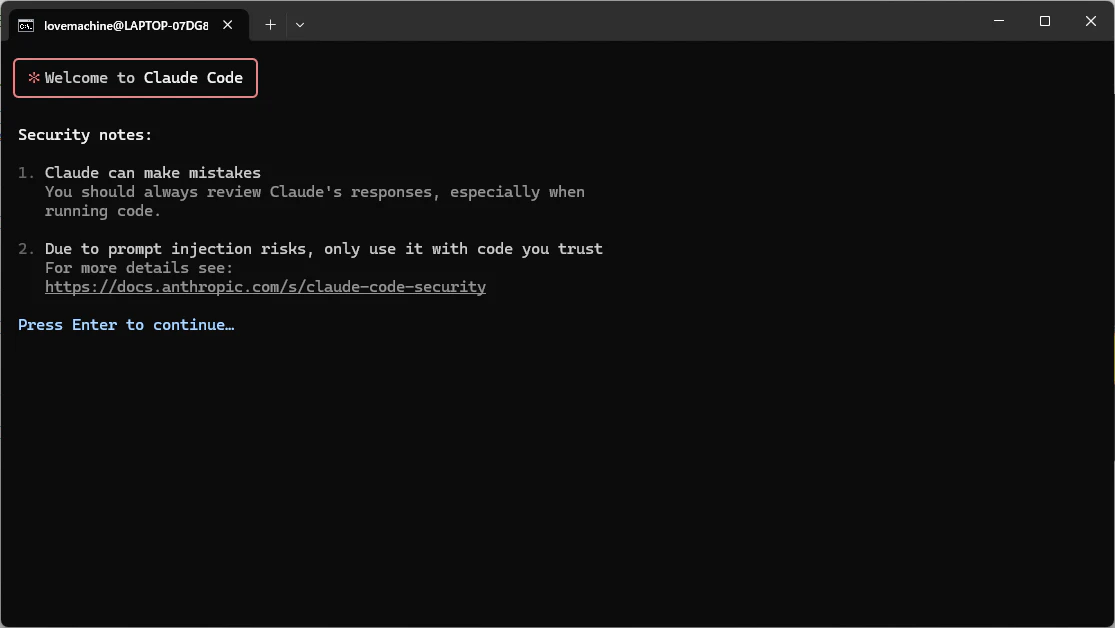
以下の画面になったら、今回はEnterをクリックします。
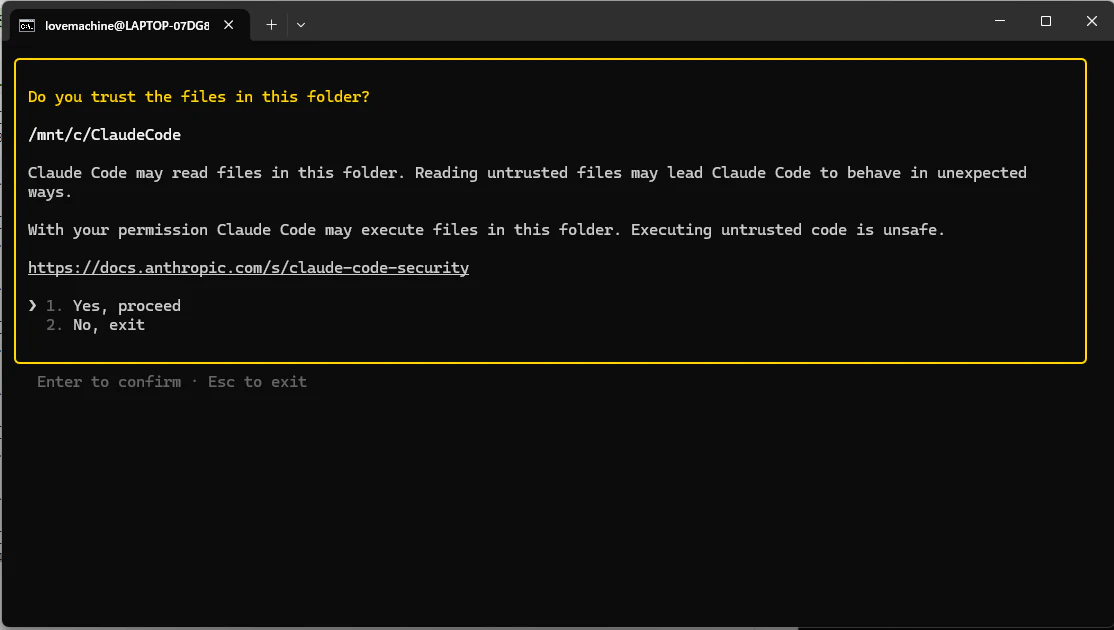
以下の画面もEnterでよいです。
これでClaudeCodeの準備は完了です。
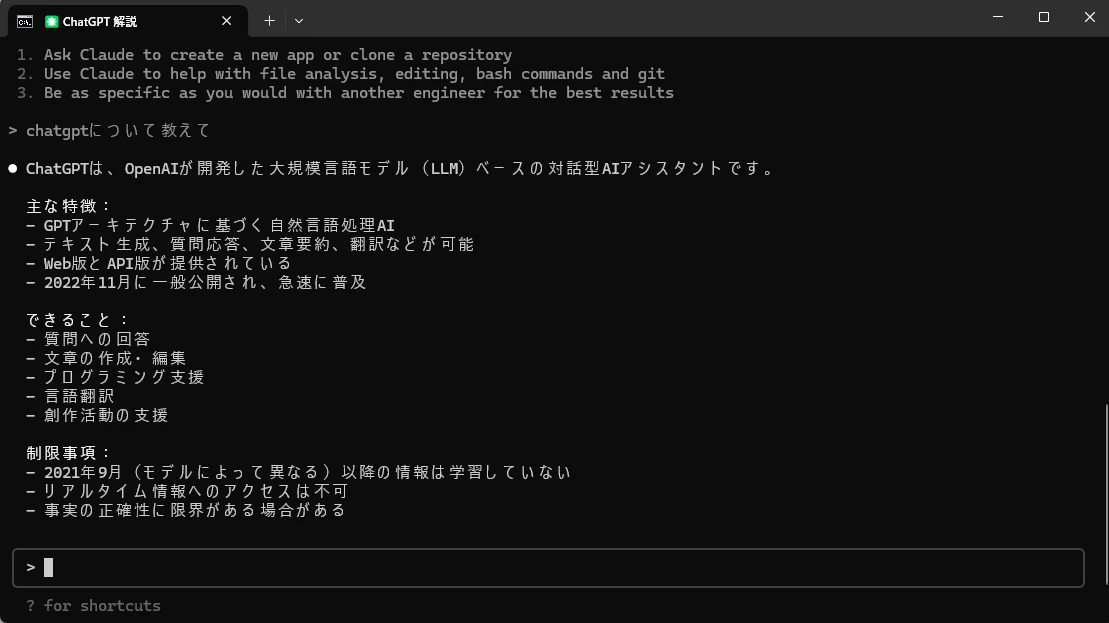
試しに適当に入力してみます。
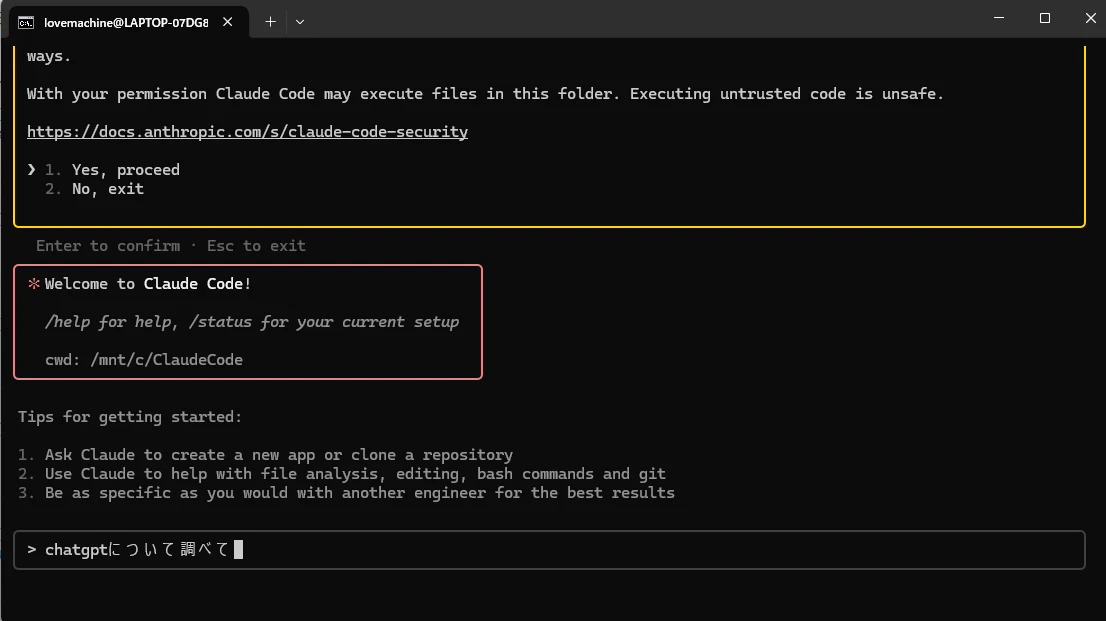
普通に回答が返ってきますね。
ComfyUIをClaudeCodeで構築
ClaudeCodeを別窓で起動
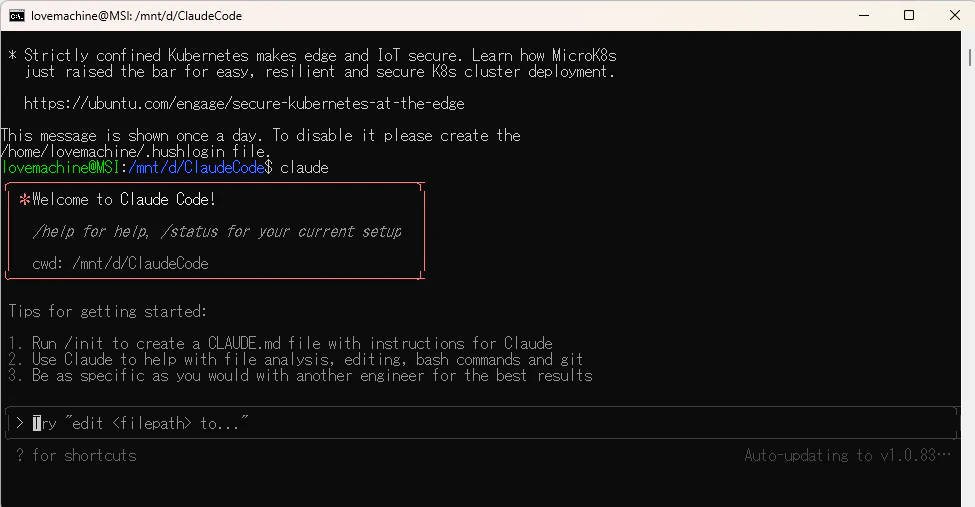
コマンドプロンプトを開き、以下のコマンドで作成したフォルダへ移動します。
cd C:\ClaudeCode
以下のコマンドを実行します。
wsl -d Ubuntu-22.04
以下のようなログになります。
(諸事情により、Dドライブになっています。)
D:\ClaudeCode>wsl -d Ubuntu-22.04
Welcome to Ubuntu 22.04.5 LTS (GNU/Linux 5.15.133.1-microsoft-standard-WSL2 x86_64)

 * Documentation:  https://help.ubuntu.com
 * Management:     https://landscape.canonical.com
 * Support:        https://ubuntu.com/pro

 System information as of Sun Aug 17 01:38:43 JST 2025

  System load:  0.4                 Processes:             69
  Usage of /:   0.2% of 1006.85GB   Users logged in:       0
  Memory usage: 2%                  IPv4 address for eth0: XXX.XXX.XXX.XXX
  Swap usage:   0%

 * Strictly confined Kubernetes makes edge and IoT secure. Learn how MicroK8s
   just raised the bar for easy, resilient and secure K8s cluster deployment.

   https://ubuntu.com/engage/secure-kubernetes-at-the-edge

This message is shown once a day. To disable it please create the
/home/lovemachine/.hushlogin file.
lovemachine@MSI:/mnt/d/ClaudeCode$
以下のコマンドでClaudeCodeにログインします。
claude
以下の画面になります。
ComfyUIの構築
以下のプロンプトをClaudeCodeに入力して実行します。
フォルダを作成し、ComfyUIの環境を構築して
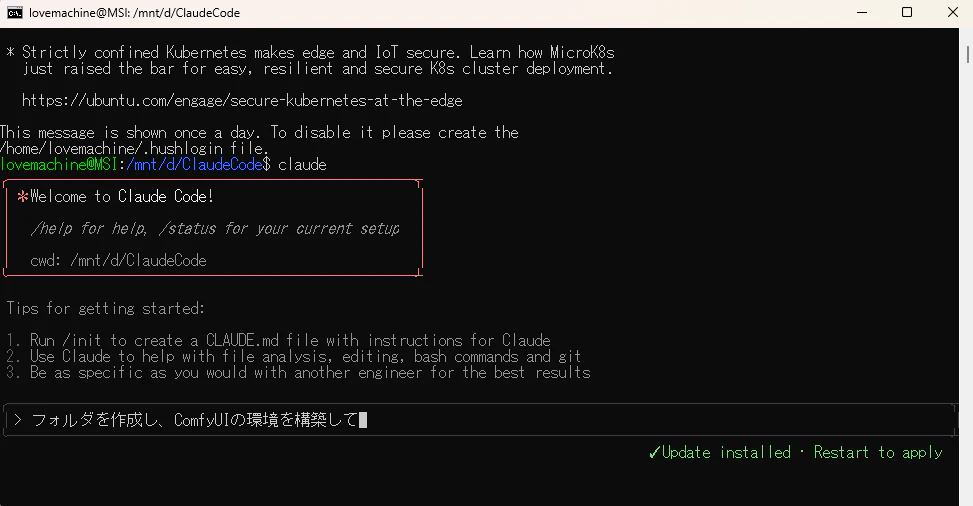
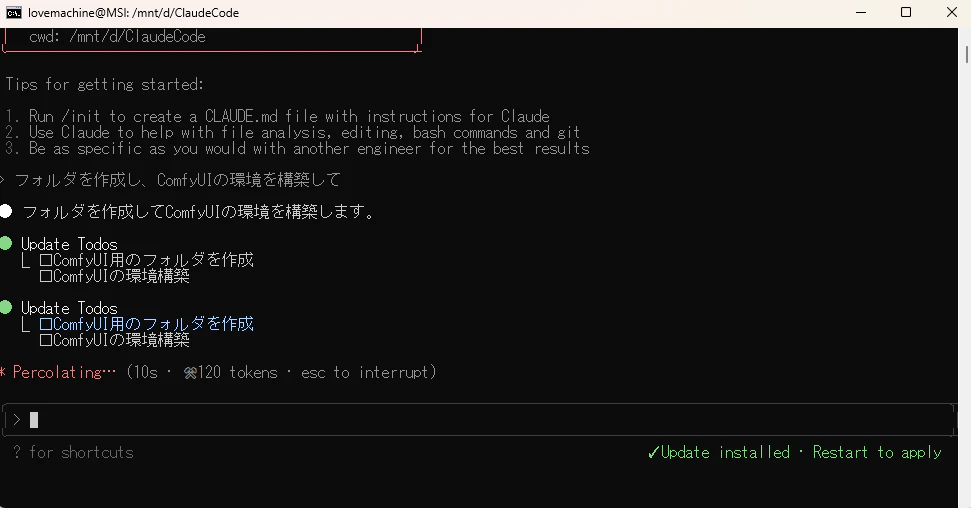
実行すると、以下のようにClaudeCodeが作業を開始します。
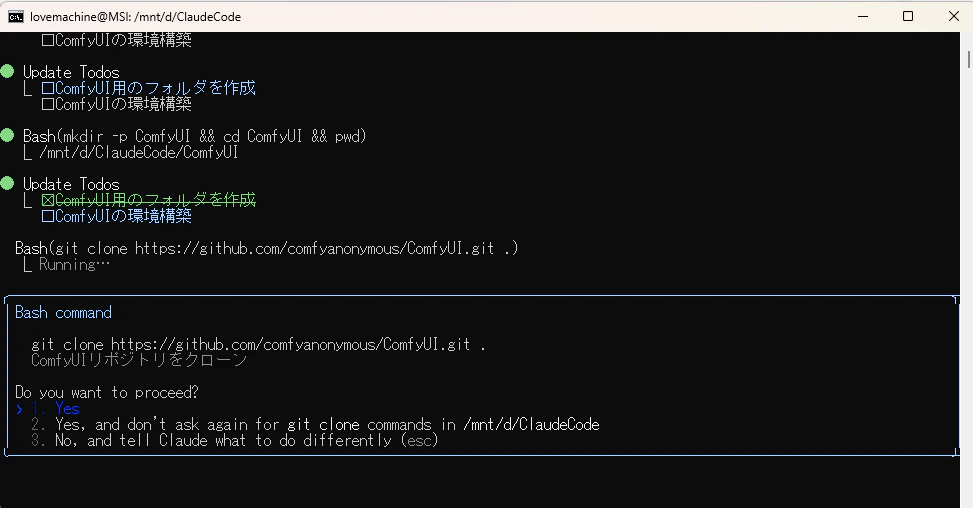
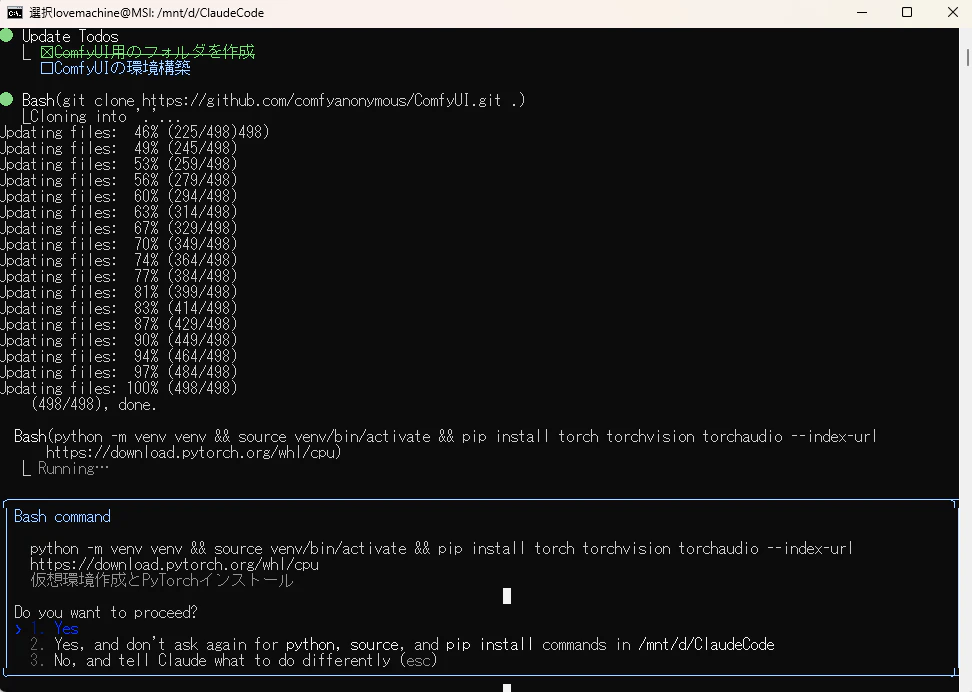
以下のように、gitコマンドを実行してよいか確認されます。
慣れるまでは、基本的に「1」をクリックしてください。
実行に不安がある場合は、「3」をクリックし、「何をするコマンドですか?」みたいな感じで、内容を確認してください。
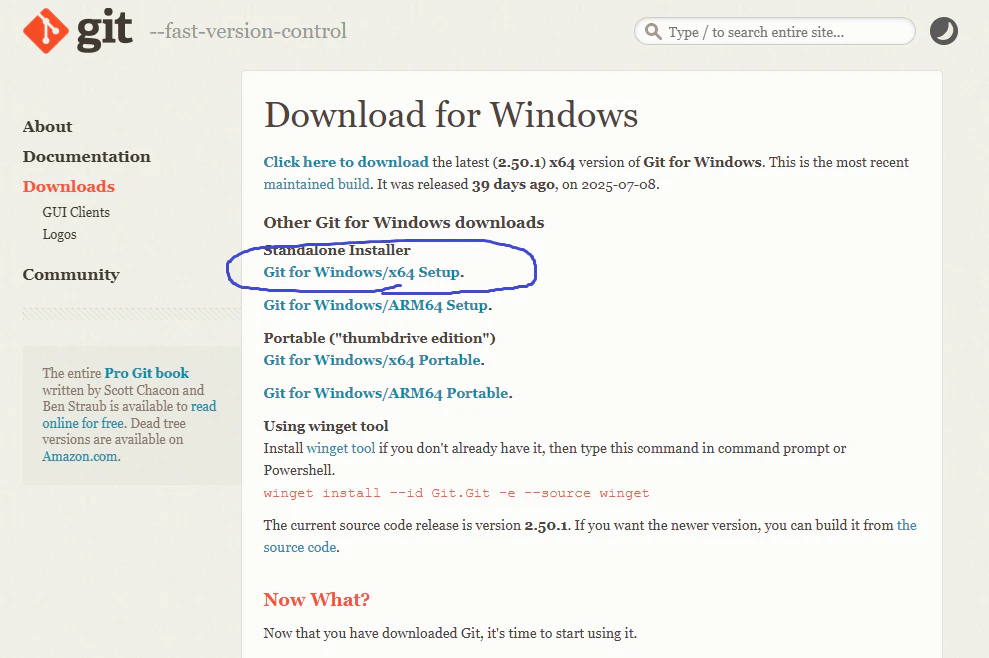
gitがインストールされていない場合は、以下からインストーラーをダウンロードして、gitをインストールしてください。
「1」をクリックすると、処理が進みます。
「2」をクリックすると、問題が発生するまでには、基本的に自動で進みます。(慣れるまでは推奨しません。)

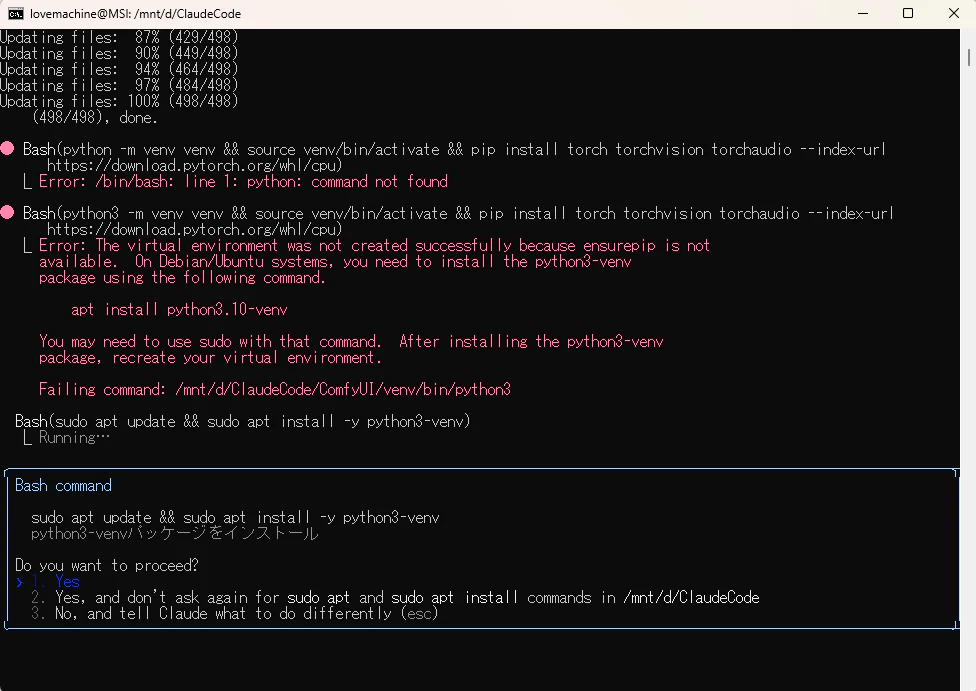
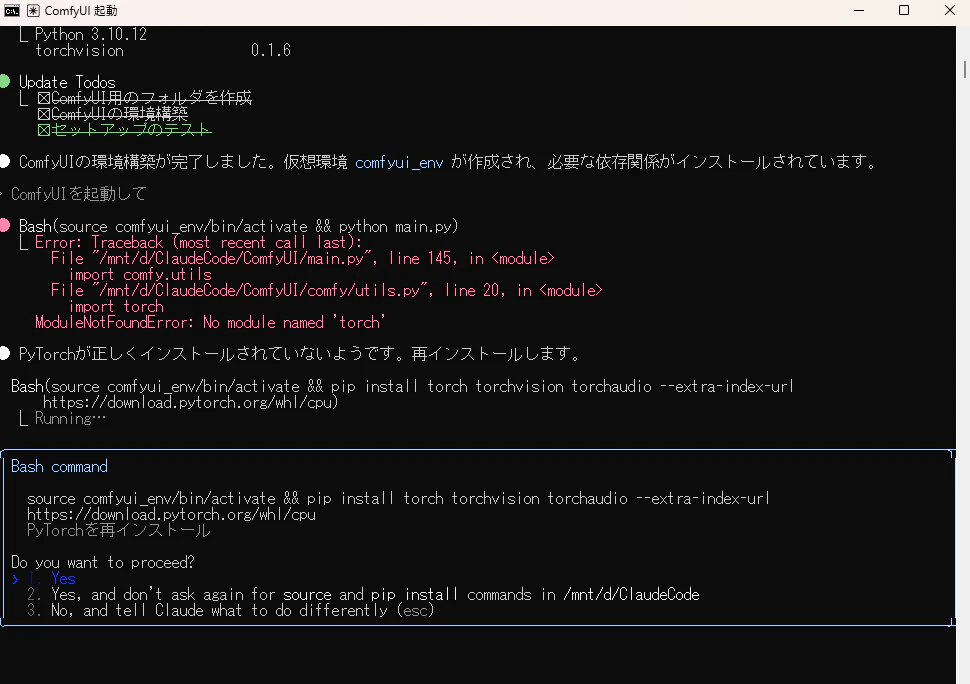
gitコマンドが終わると、pytorchのインストールをしてますね。
これが厄介なので、今回の記事を書いています。
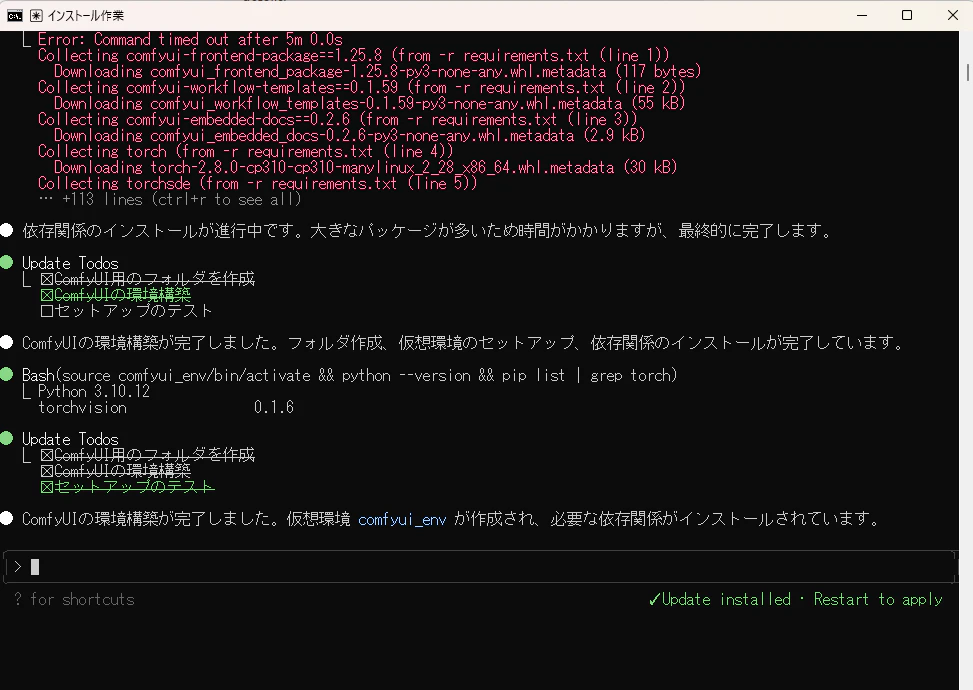
引き続き、「1」をクリックしていると、必要なライブラリをインストールしながら処理が進みます。
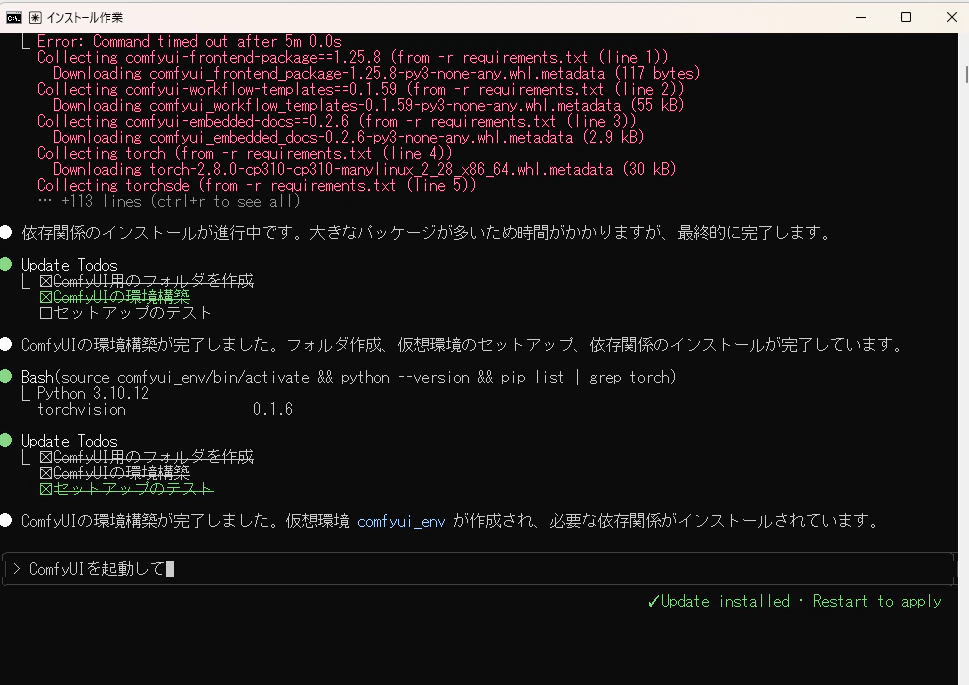
しばらくやり取りをしていると、環境構築が完了しました。
起動してもらいます。
エラーになったみたいなので、「1」をクリックしてエラーシューティングしてもらいます。
妥協し始めてますね。
これは「3」をクリックして、軌道修正が必要です。
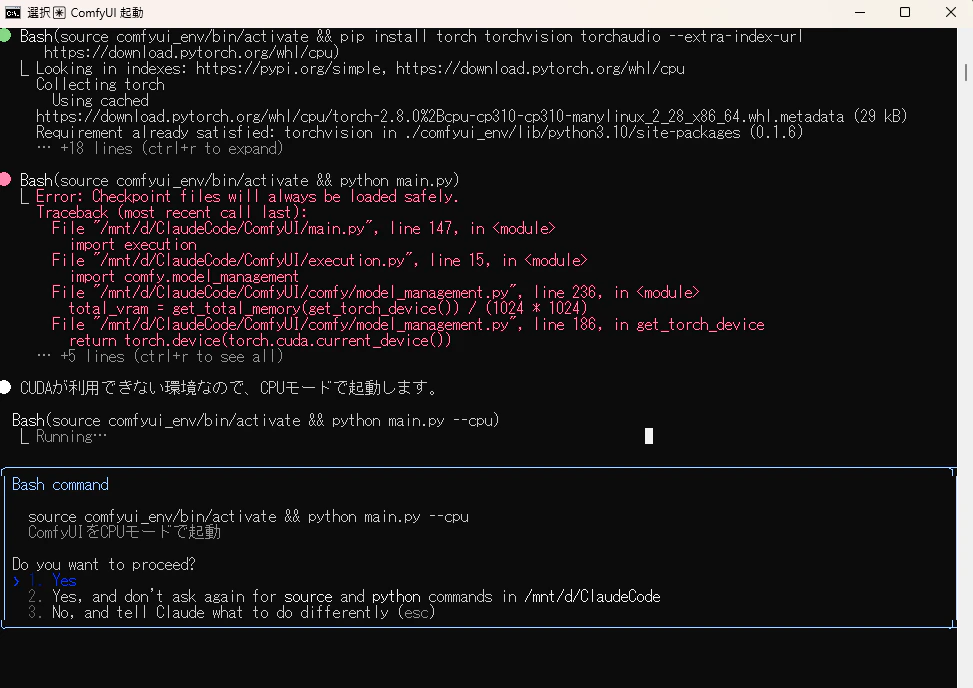
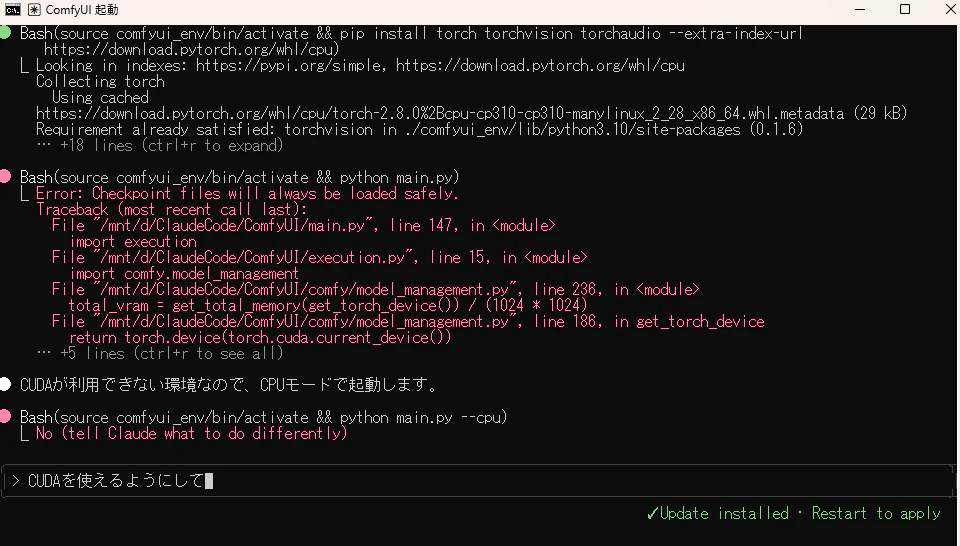
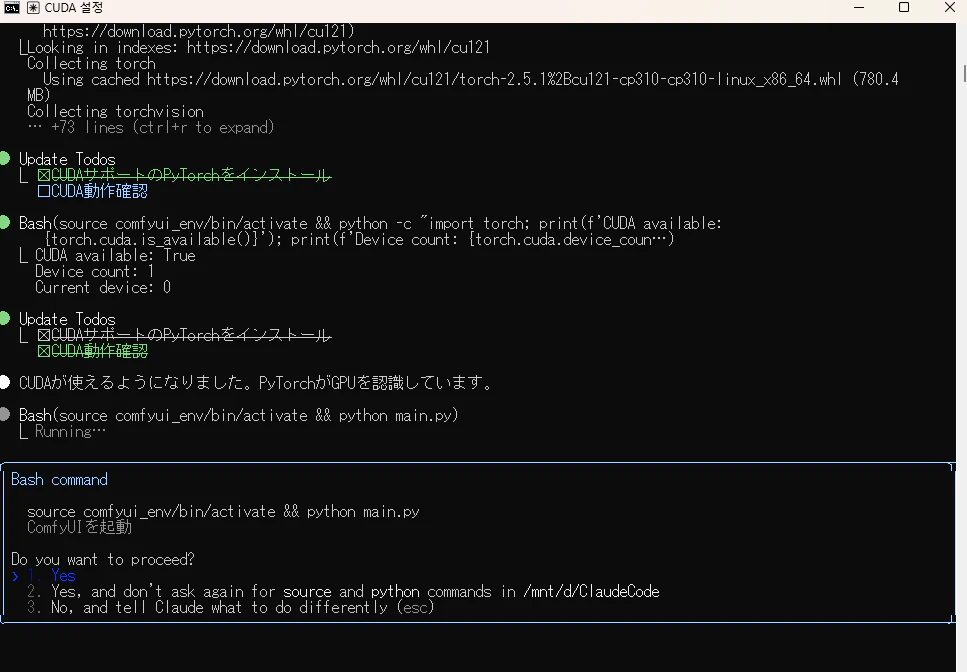
分かりにくくて申し訳ないですが、「CUDAを使えるようにして」と入力して、再調査してもらいます。
今回の場合は、CPU版のpytorchをインストールしてしまってたみたいですね。
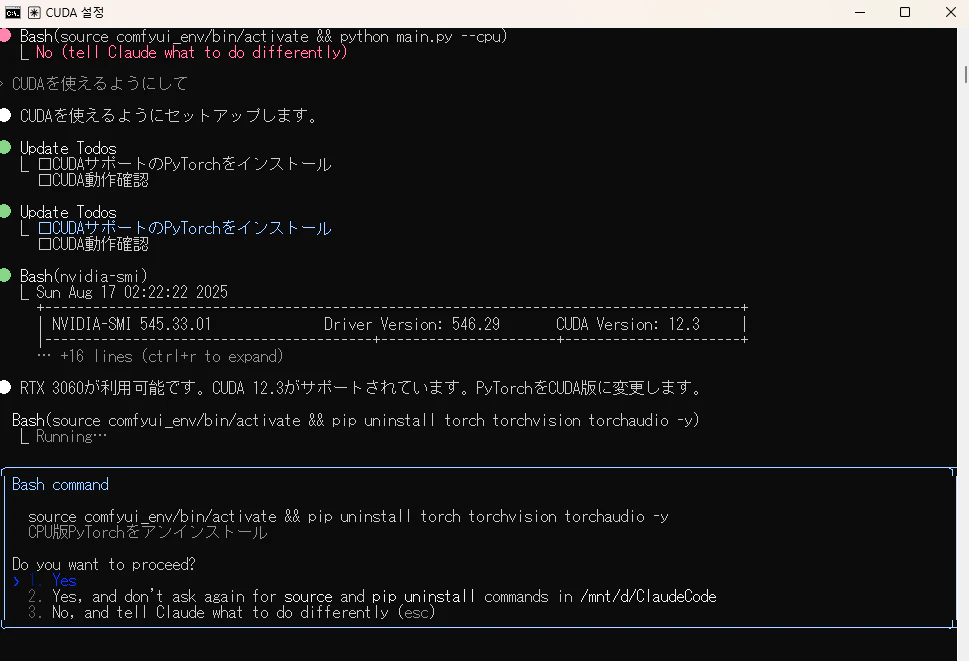
とりあえず、エラーシューティングをやりきったみたいです。
ComfyUIを再度起動すると、ライブラリが足りてないみたいです。
CPU版のpytorchをインストールしていた弊害ですかね。
再度、エラーシューティングしてもらいます。
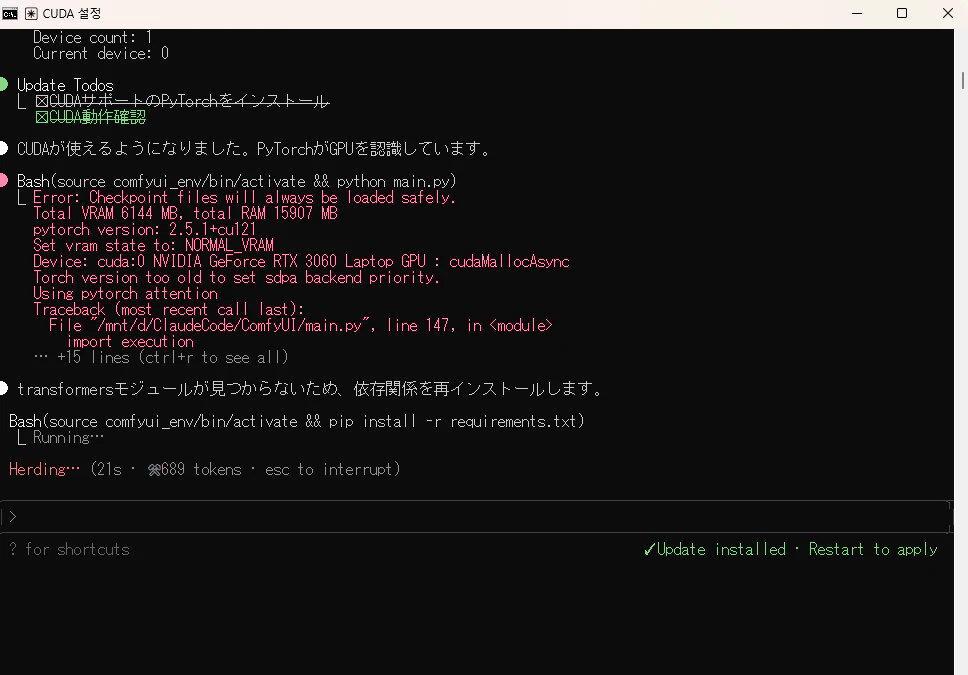
足りてないライブラリをインストールすると、今回は起動できたみたいです。

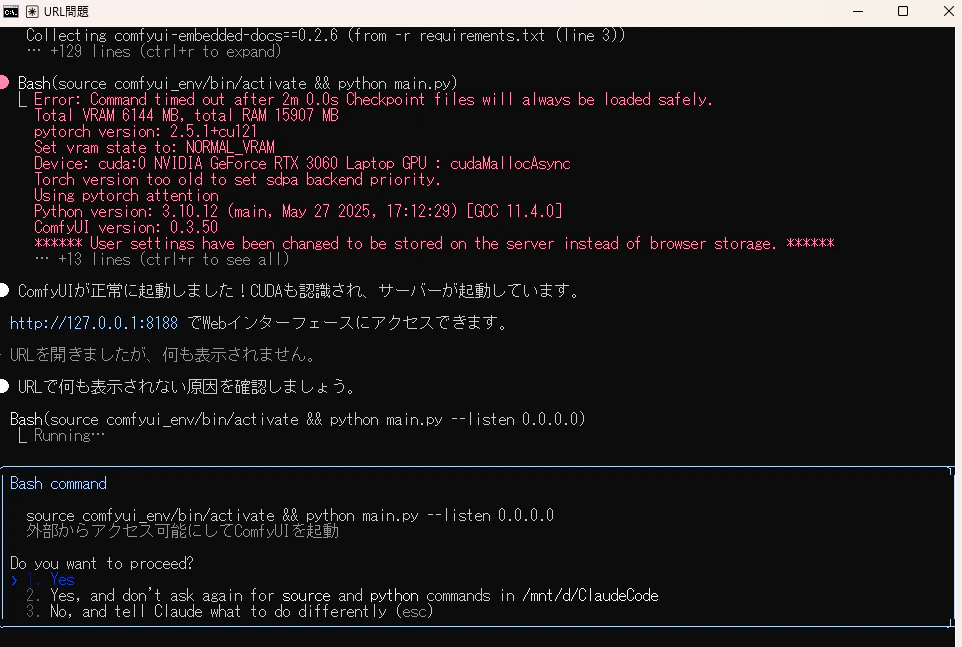
ClaudeCodeが提示しているURLを開いてみます。
ダメですね。何も表示されません。
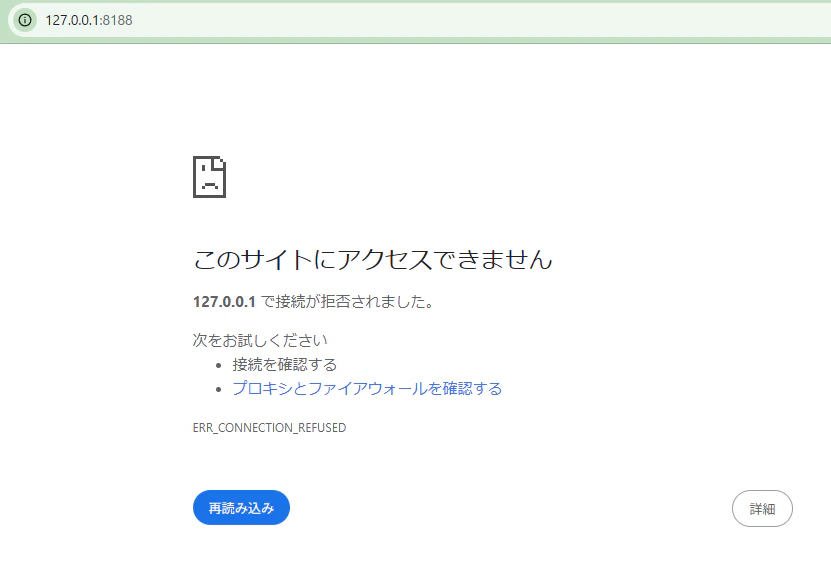
エラーシューティングを依頼します。
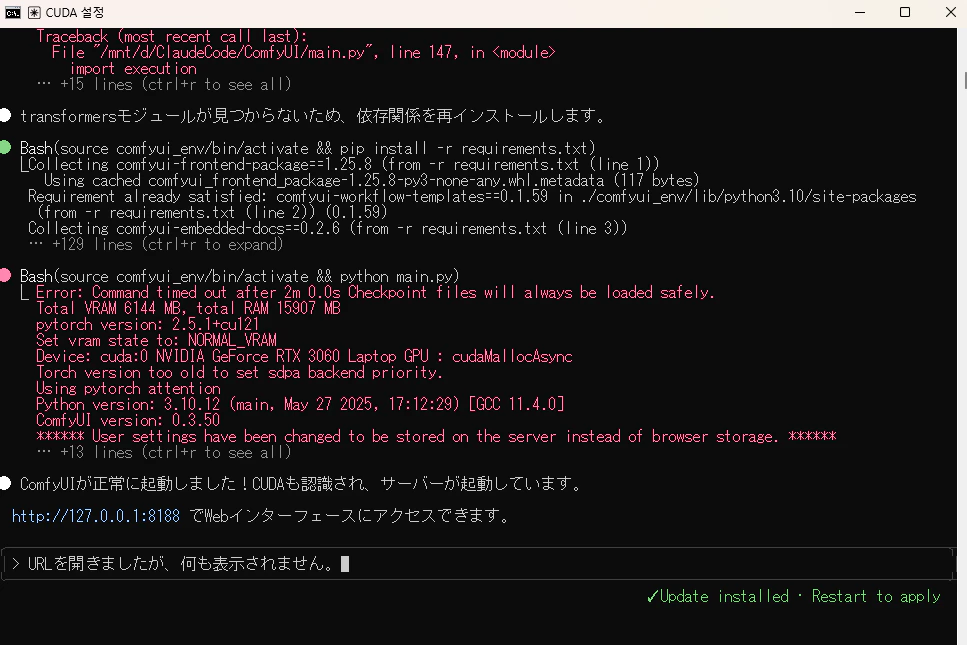
外部からアクセスできるように修正したみたいです。
ClaudeCodeが起動したつもりになっていたComfyUIのプロセスが終了していたみたいですね。
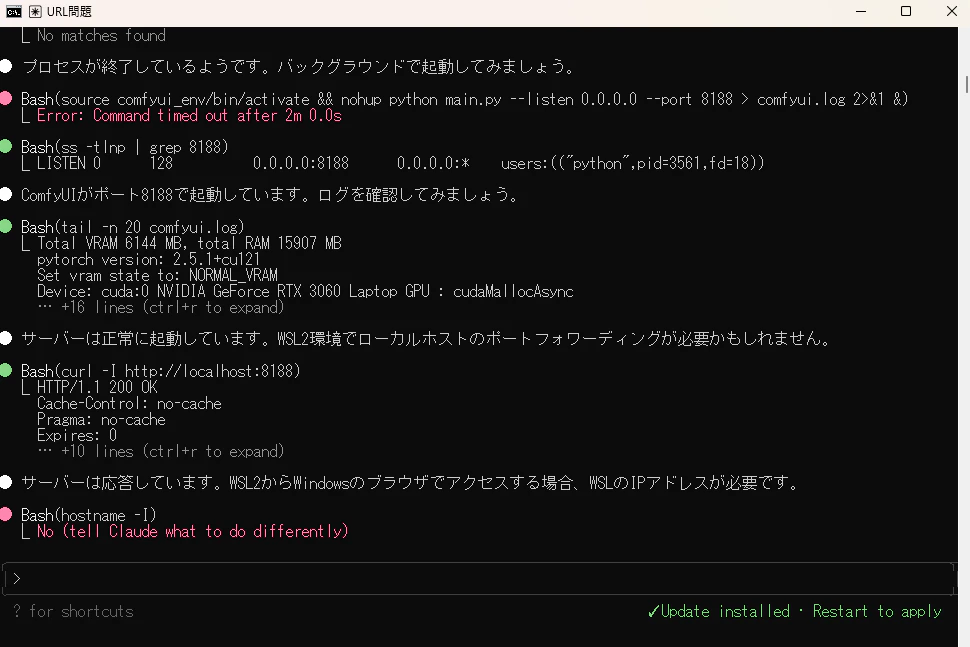
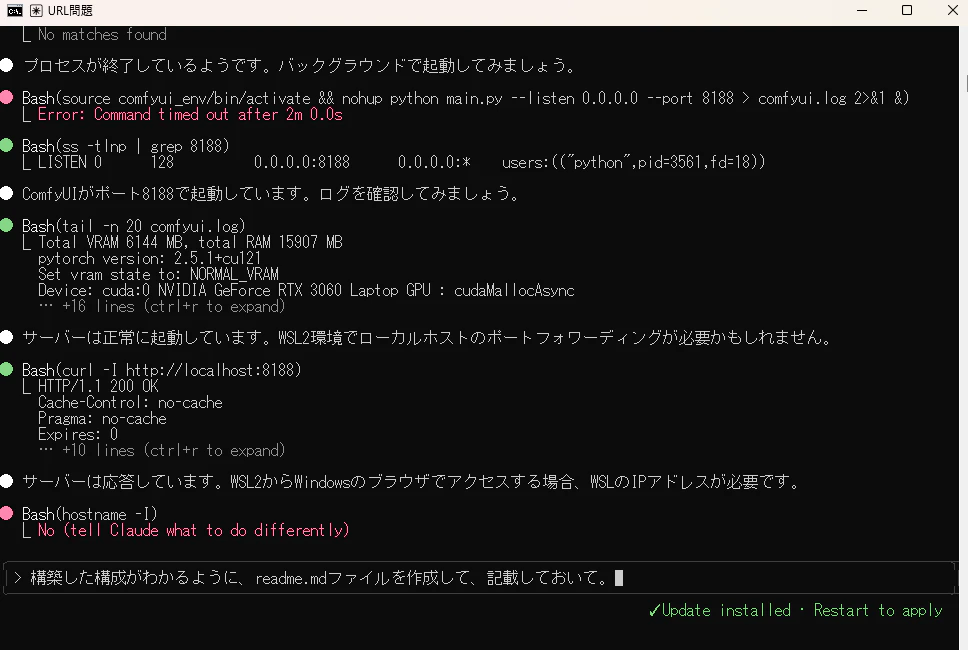
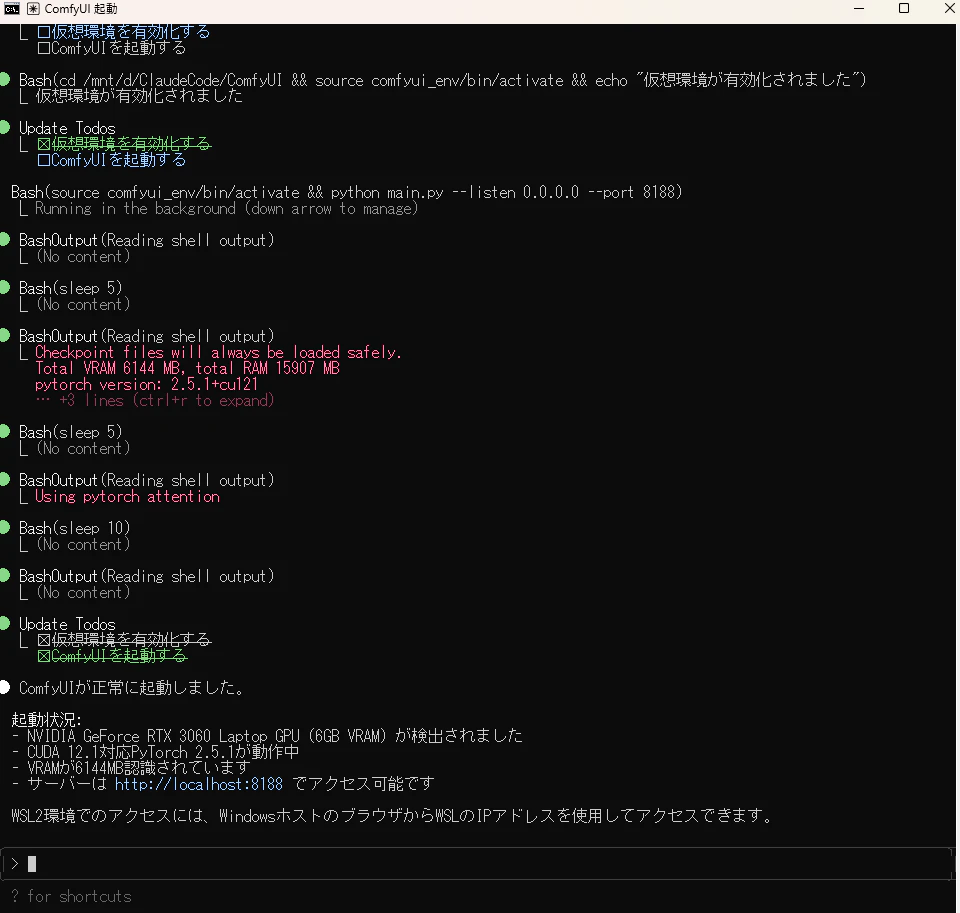
無事、ComfyUIが起動できました。
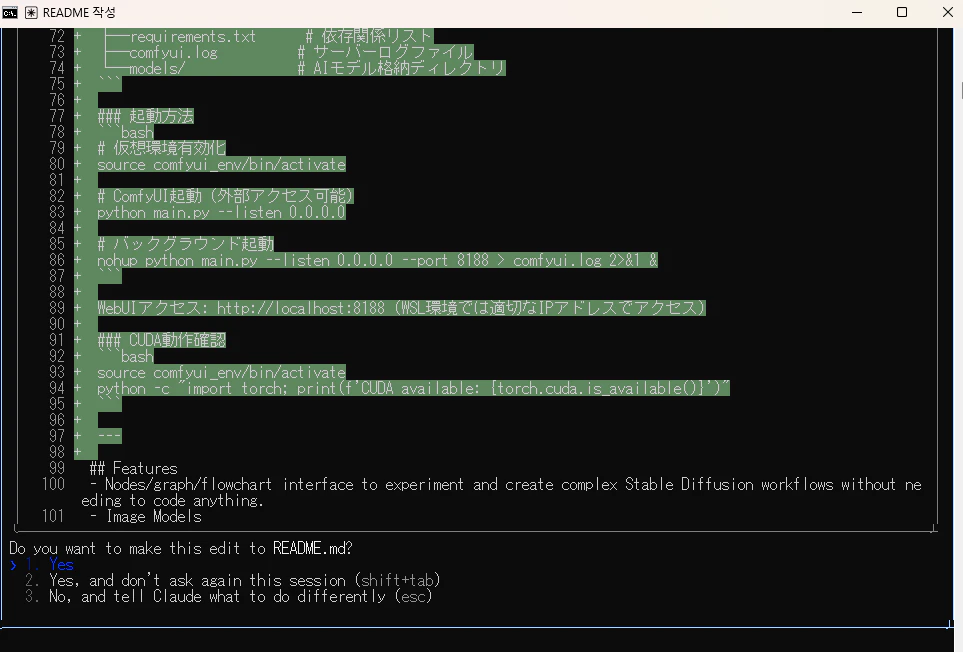
ここで、「構築した構成がわかるように、readme.mdファイルを作成して、記載しておいて。」などで、readme.mdファイルを作成してもらいます。
次回起動時は、このファイルを参照してもらいながら、ComfyUIを起動してもらいます。
適当に書いてくれてそうであれば、「1」をクリックして、ファイルを保存してもらいます。
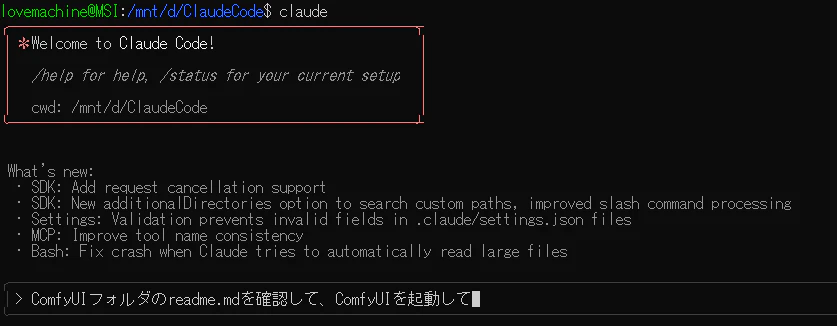
次回起動する時からは、「ComfyUIフォルダのreadme.mdを確認して、ComfyUIを起動して」とかで、起動してもらえれば、エラーなく起動できると思います。
今回の構成であれば、エラーなく起動できました。
ComfyUIの動作確認
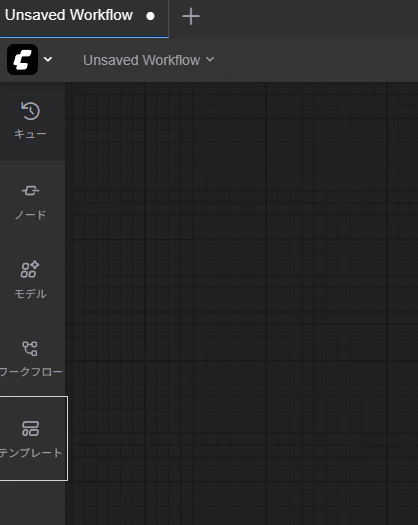
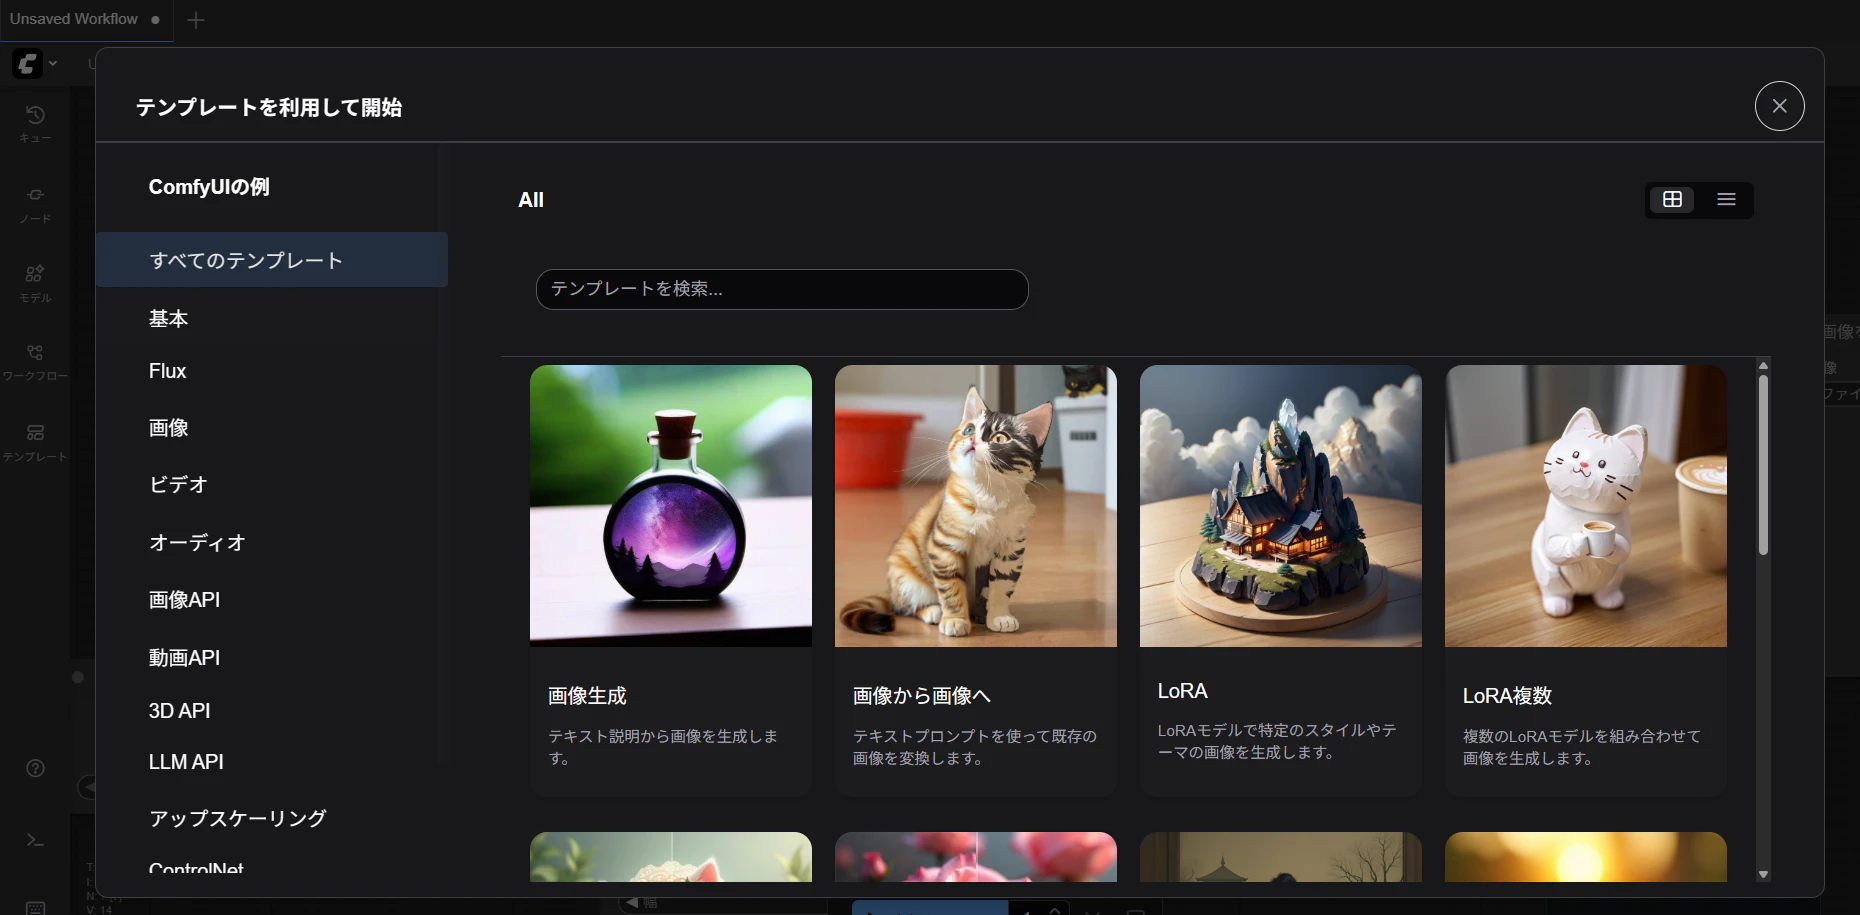
以下の「テンプレート」をクリックし、「テンプレートを利用して開始」画面の「画像生成」をクリックします。
以下のように、足りていないモデルが表示されるので、「URLをコピー」をクリックします。
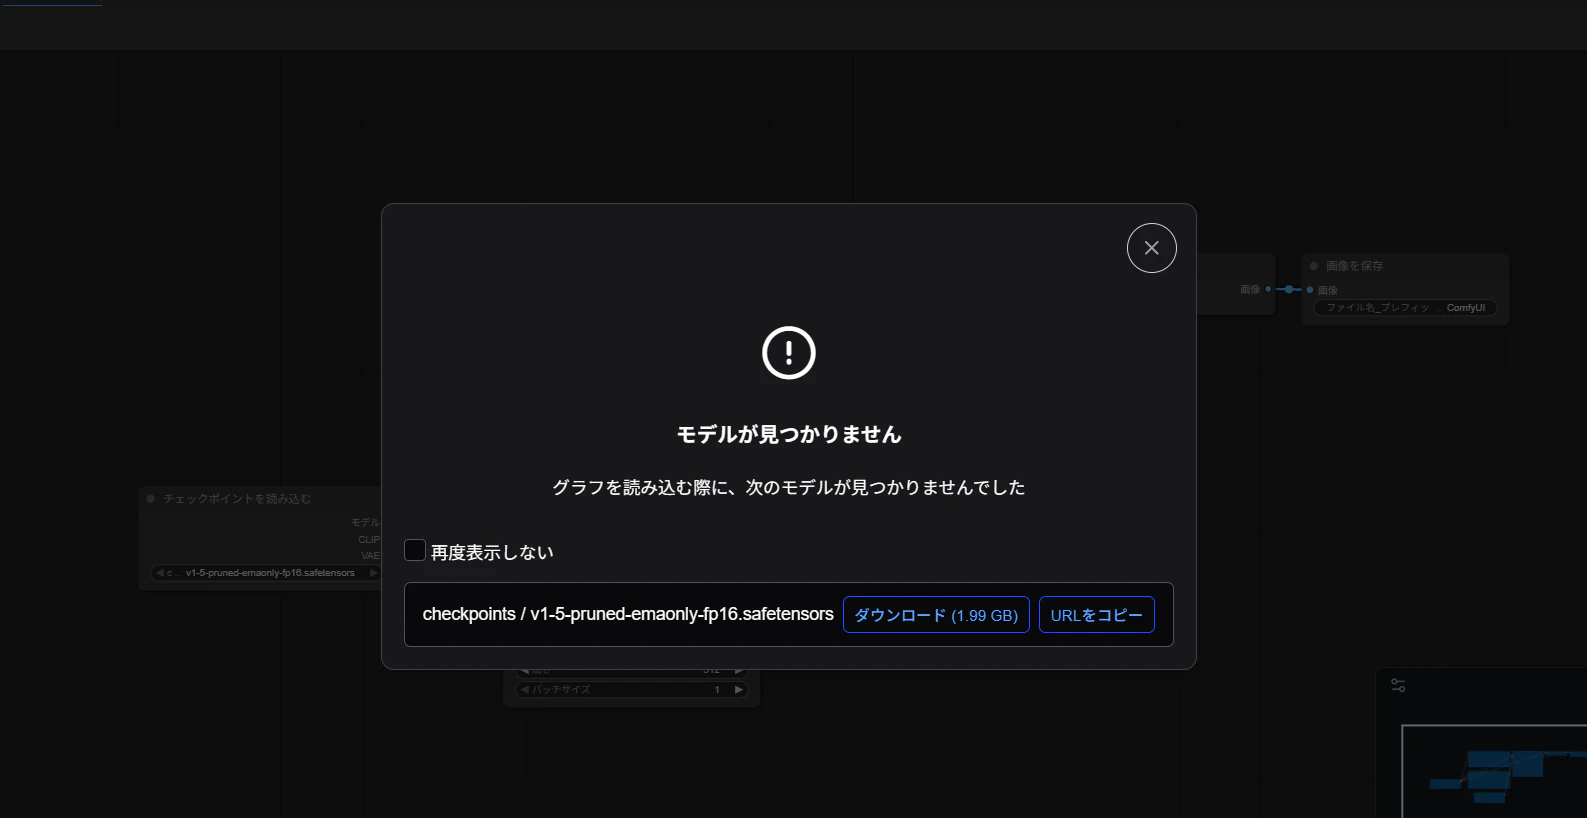
以下のように、URLだけ貼り付けます。

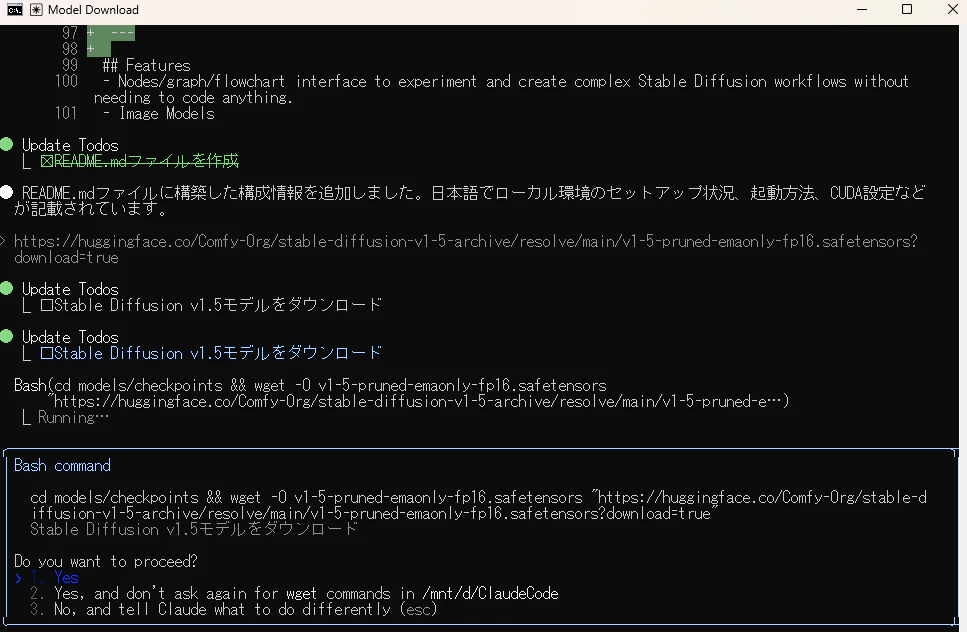
すると、想定通りのフォルダにダウンロードしようとしてくれるので、「1」をクリックし、ダウンロードしてもらいます。
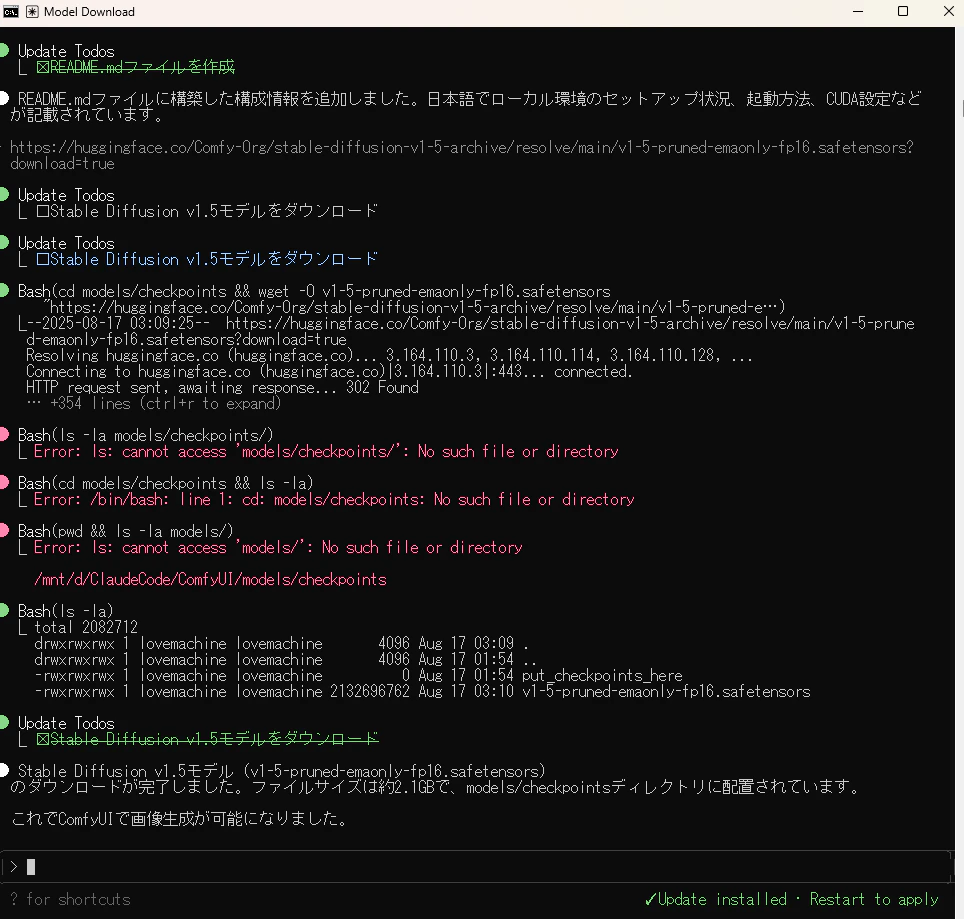
少しすると、想定通りダウンロードが完了しました。
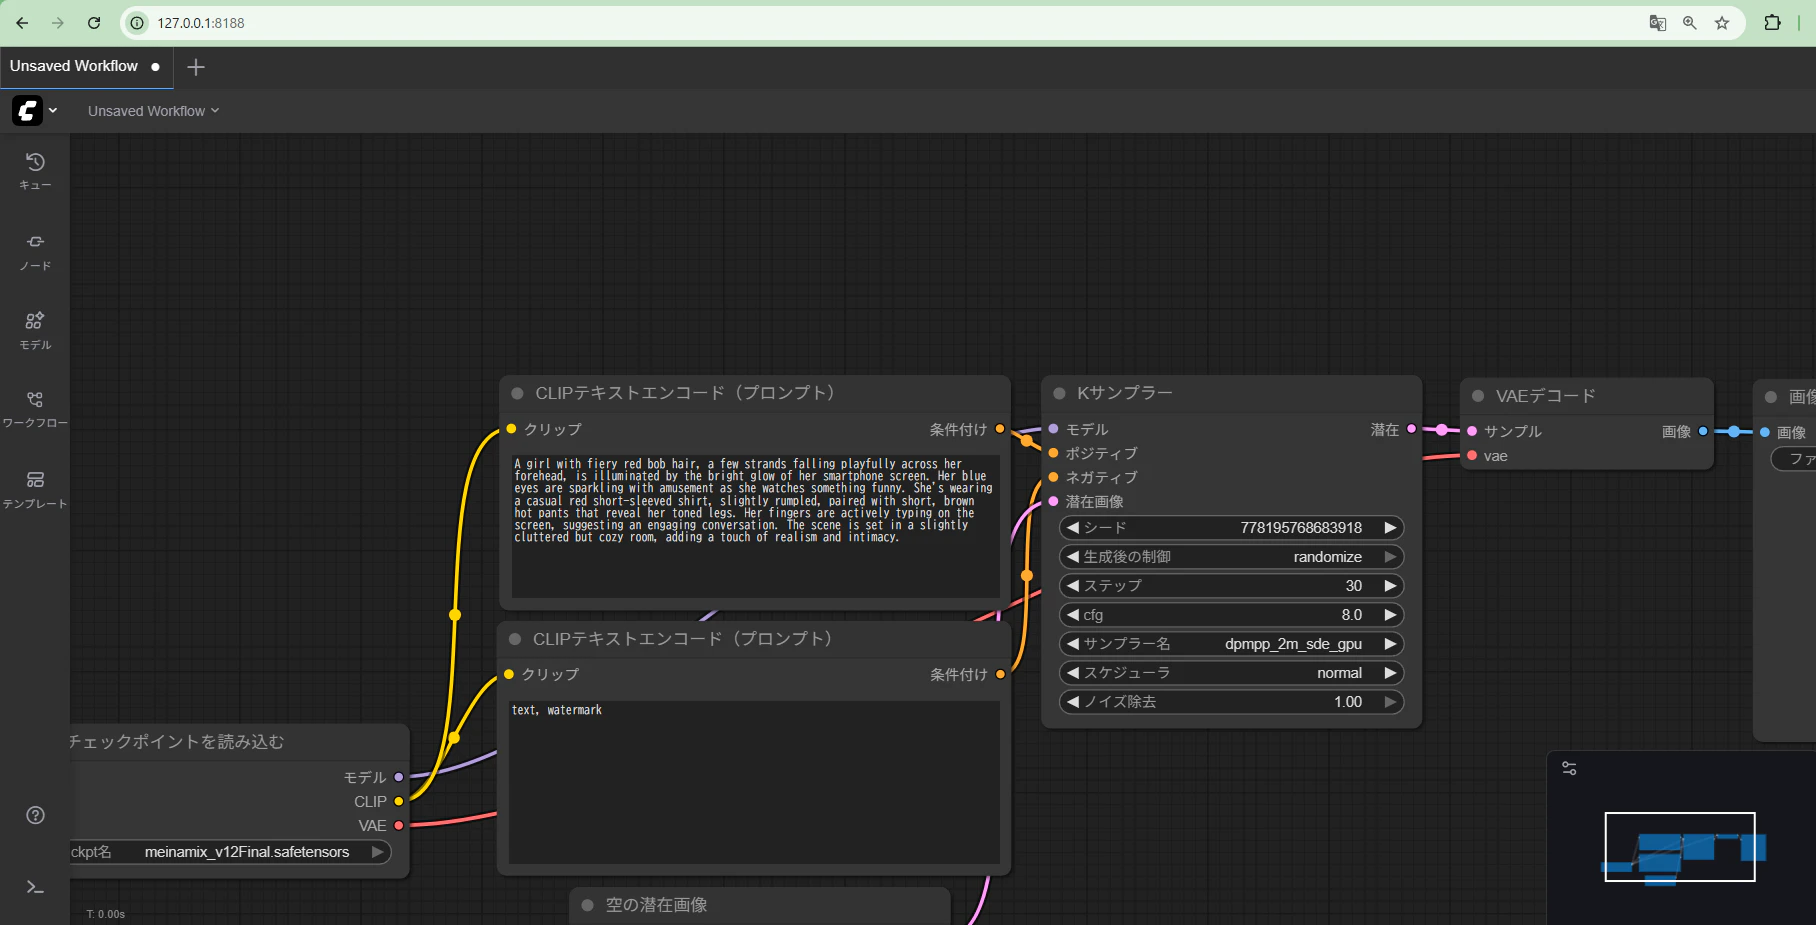
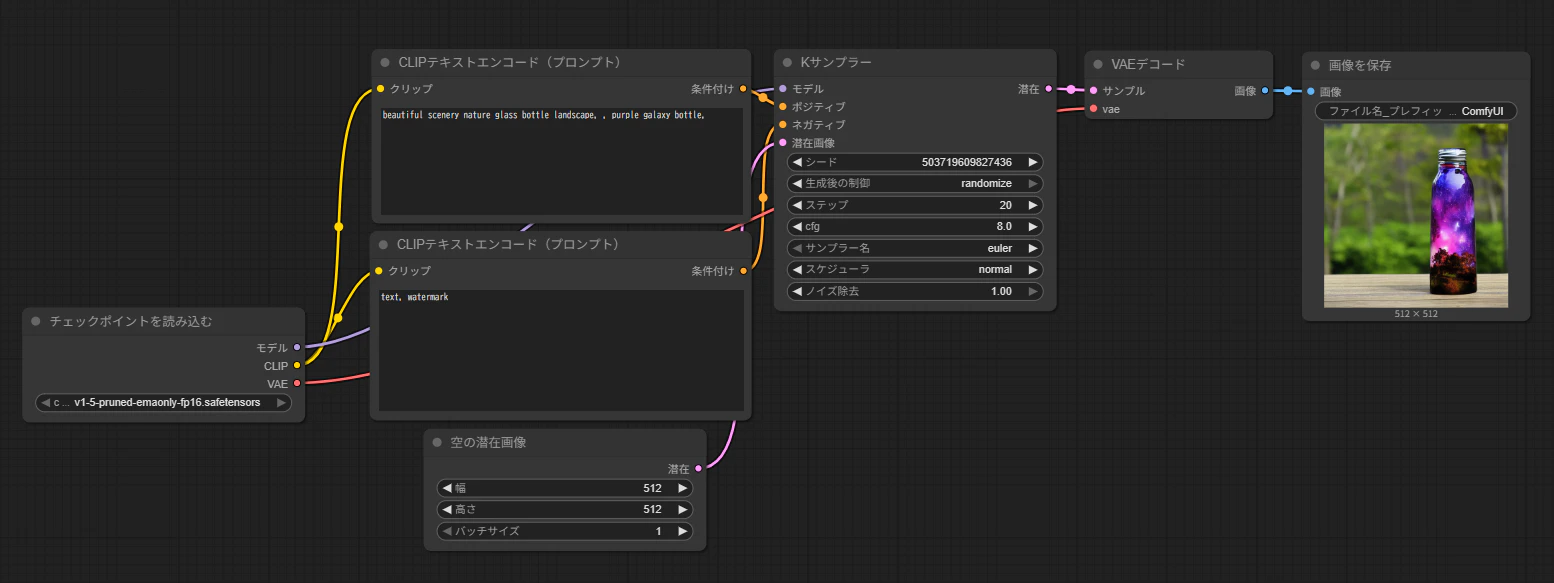
ComfyUIで画像生成してみます。
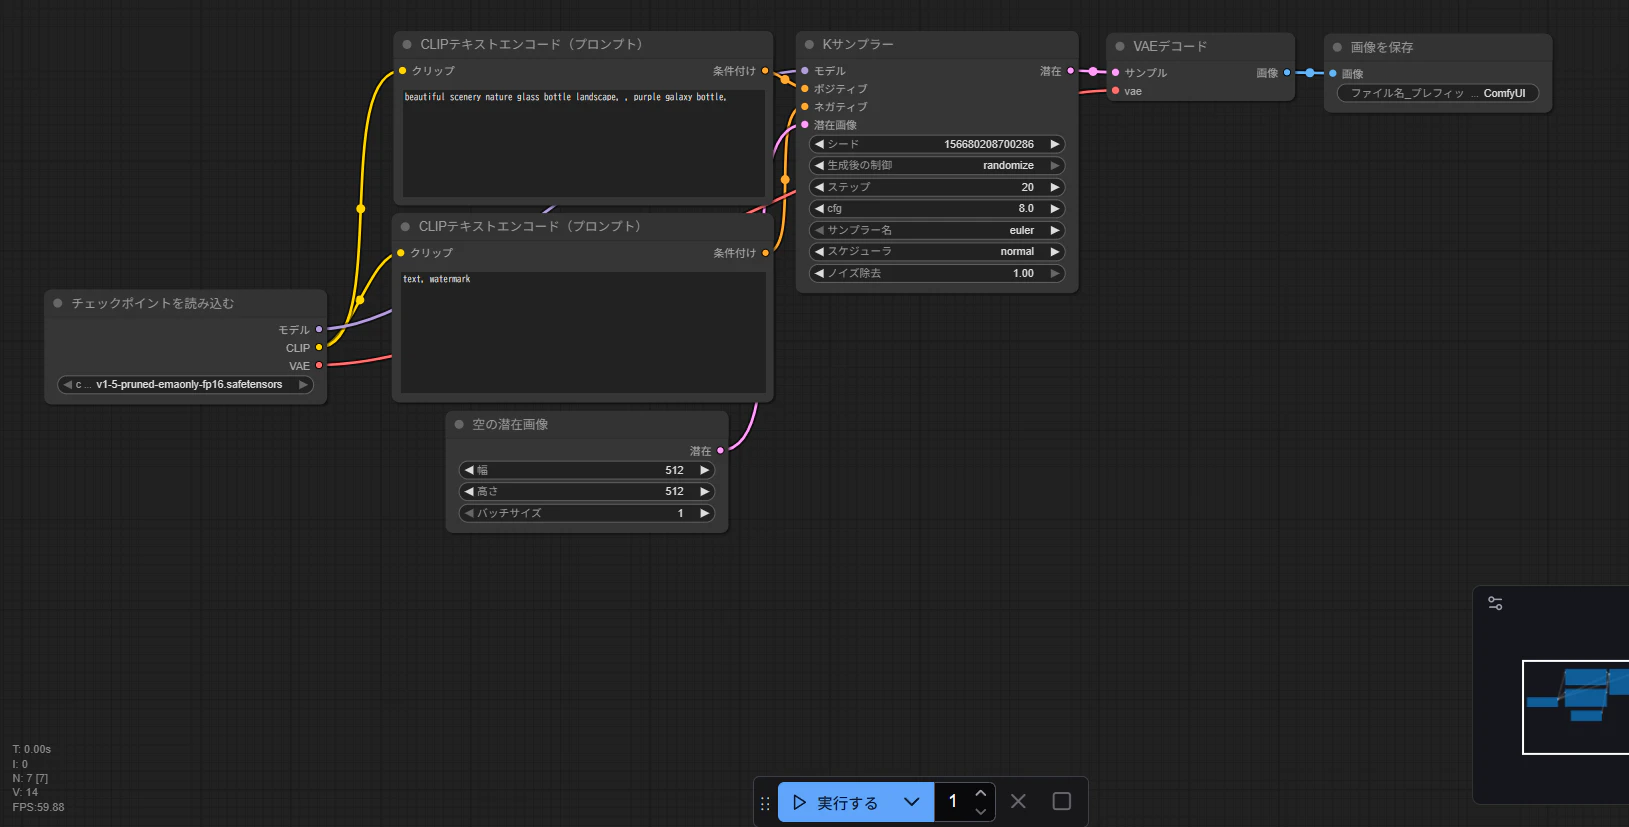
無事画像生成が完了しました。
感想
ComfyUIの起動やモデルのダウンロード、(物にもよりますが)エラーシューティングも、全てClaudeCode上で完結するので、体験が非常によいです。
ComfyUIの環境構築に挫折した方や、環境のメンテナンスに疲れた方は、この手順を試していただけると、何かと楽になるかもしれません。