完成イメージ
こんな感じ。 pic.twitter.com/CvOFjFq2th
— げん げんと (@gento34165638) November 2, 2019
はじめに
環境は以下の通り
・ionic4
・Nativeとの橋渡しにはcapacitorを使用
・カレンダーについてはionic2-calendarというライブラリーを使用
前回は実機でのテストを行った。
![]() 前回の記事はこちら
前回の記事はこちら
Firebaseの設定
こちらを参考にやっていく。
ライブラリを入れる
プロジェクトフォルダ内で
npm install firebase @angular/fire
これでプロジェクトにFirebaseを導入できた。
Firebase側でプロジェクト作成
- Firebase consoleに行く
- プロジェクトを新規作成。
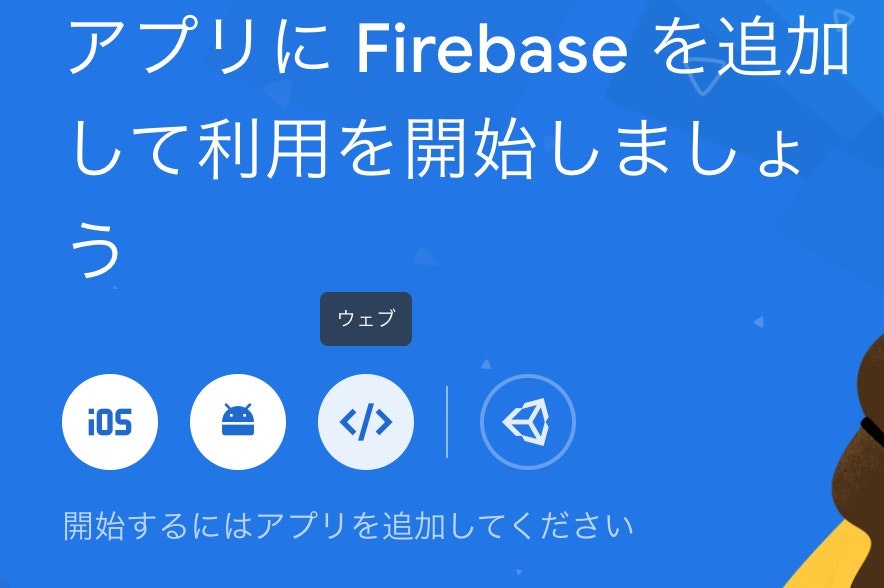
- 作成したプロジェクトにwebアプリを追加
- Firebaseプロジェクトの設定情報を取得
こんな感じの情報があるかと。configの中身が必要な情報だ。この画面を開いたまま、ionicのプロジェクトに戻ろう。

※messagingSenderIdの下にappIdが追加されているかもしれない
- データベースをテストモードで開始。

ionicプロジェクトにFirebase情報を入れる
environmentファイルに追加
src/environments/environment.tsを開く
export const environment = {
  production: true,
  firebase: {
   apiKey: "YOUR_API_KEY",
   authDomain: "YOUR_AUTH_DOMAIN",
   databaseURL: "YOUR_DATABASE_URL",
   projectId: "YOUR_PROJECT_ID",
   storageBucket: "YOUR_STORAGE_BUCKET",
   messagingSenderId: "YOUR_SENDER_ID"
   appId: "YOUR_APP_ID"
  }
};
firebaseという名の変数の中に、情報を入れる
ちなみに、デフォルトで作成される環境ファイルのenvironment.prod.tsをprod環境用(つまり本番用の環境?)、environment.tsを**dev環境用(開発時の環境)**とされてるらしい。。
app.moduleにenvironment情報を入れる
app.module.tsを以下のように変更。
import { NgModule, LOCALE_ID } from '@angular/core';
import { BrowserModule } from '@angular/platform-browser';
import { RouteReuseStrategy } from '@angular/router';

import { IonicModule, IonicRouteStrategy } from '@ionic/angular';
import { SplashScreen } from '@ionic-native/splash-screen/ngx';
import { StatusBar } from '@ionic-native/status-bar/ngx';

import { AppComponent } from './app.component';
import { AppRoutingModule } from './app-routing.module';

//カレンダー関係
import { NgCalendarModule  } from 'ionic2-calendar';
import { registerLocaleData } from '@angular/common';
import localeJa from '@angular/common/locales/ja';

//Firebaseを利用するためのモジュール
import { AngularFireModule } from '@angular/fire';
import { AngularFirestoreModule } from '@angular/fire/firestore';
import { AngularFireAuthModule } from '@angular/fire/auth';

//Firebase設定情報ファイルをインポート
import { environment } from '../environments/environment';

registerLocaleData(localeJa);


@NgModule({
  declarations: [AppComponent],
  entryComponents: [],
  imports: [
    BrowserModule,
    IonicModule.forRoot(),
    AppRoutingModule,
    NgCalendarModule,
    AngularFireModule.initializeApp(environment.firebase, 'myCarendar'),
    AngularFirestoreModule,
    AngularFireAuthModule
  ],
  providers: [
    StatusBar,
    SplashScreen,
    NativeStorage,
    { provide: RouteReuseStrategy, useClass: IonicRouteStrategy },
    { provide: LOCALE_ID, useValue: 'ja-JP' }
  ],
  bootstrap: [AppComponent]
})
export class AppModule {}
AngularFireModule は言うならばFirebase本体。
AngularFirestoreModuleはFirebase本体の中にある機能の1つである、データベースCloud Firestoreの事。
AngularFireAuthModule は今後のユーザー認証(ログインとか)に使う機能の事。
//Firebaseを利用するためのモジュール
import { AngularFireModule } from '@angular/fire';
import { AngularFirestoreModule } from '@angular/fire/firestore';
import { AngularFireAuthModule } from '@angular/fire/auth';
これで使う準備は完了。ふぅ。。
カレンダーにイベントを追加
適当にカレンダーの上にボタンを作る。
<ion-header>
  <ion-toolbar color="primary">
    <ion-title>
      {{ viewTitle }}
    </ion-title>
    <ion-buttons slot="end">
      <ion-button (click)="today()">Today</ion-button>
    </ion-buttons>
  </ion-toolbar>
</ion-header>

<ion-content padding>
<ion-button (click)="addNewEvent()">イベント追加</ion-button>

  <calendar
  [eventSource]="eventSource"
  [calendarMode]="calendar.mode"
  [currentDate]="calendar.currentDate"
    (onCurrentDateChanged)="onCurrentDateChanged($event)"
    (onEventSelected)="onEventSelected($event)"
    (onTitleChanged)="onViewTitleChanged($event)"
    (onTimeSelected)="onTimeSelected($event)"
     step="30">
  </calendar>
</ion-content>
addNewEventを書いて、データベースにイベントを追加させる。
import { Component } from '@angular/core';
import { AngularFirestore } from '@angular/fire/firestore';


@Component({
  selector: 'app-home',
  templateUrl: 'home.page.html',
  styleUrls: ['home.page.scss'],
})
export class HomePage {
  eventSource = [];
  viewTitle;
  selectedDate = new Date();
  calendar = {
    mode: 'month',
    currentDate: new Date(),
    locale: 'ja-JP'
  };

  constructor(
    private db: AngularFirestore,
) { }

  onViewTitleChanged(title) {
    this.viewTitle = title;
  }

  // 選択した日付を取得
  onTimeSelected(ev) {
    this.selectedDate = ev.selectedTime;
  }

  today() {
    this.calendar.currentDate = new Date();
  }

  async onEventSelected() {
    console.log('onEventSelected');
  }

  eventSelected(event) {

  }


  onCurrentDateChanged(event: Date) { }

}

addNewEvent() {
    let start = this.selectedDate;
    let end = this.selectedDate;
    end.setMinutes(end.getMinutes() + 60);

    let event = {
      title: 'イベント' + start.getMinutes(),
      startTime: start,
      endTime: end,
      allDay: false
    };
    console.log(event);
    this.db.collection(`events`).add(event);
  }
これでイベント追加ボタンを押した後Firebaseのデータベースを見ると、eventsというコレクションの中にイベントのドキュメントが入っているかと。
**「コレクション」と「ドキュメント」の意味がわからない場合は、Cloud Firestoreのデータモデルを知ろう。**詳しくはこちら
イベントを取得してカレンダーに表示
home.page.tsのconstructorに以下を追加。
 constructor(
    private db: AngularFirestore,
) {
         this.db.collection(`events`)
          .snapshotChanges()
          .subscribe(colSnap => {
            this.eventSource = [];
            colSnap.forEach(snap => {
              const event: any = snap.payload.doc.data();
              event.id = snap.payload.doc.id;
              event.startTime = event.startTime.toDate();
              event.endTime = event.endTime.toDate();
              this.eventSource.push(event);
            });
          });
 }
とりあえずこれでカレンダーにイベントが表示されるのではないだろうか?
最後に
各ストアで配信されてます。
興味があれば使ってみてください。![]()