はじめに
Ionic AdMobのプラグインをcapacitor-communityのに乗り換えた話【iOSバージョン】
※こちらの記事の続きとなります![]()
元々はcapacitor-admobを使っていたのだが、このプラグインではどうやらCapacitor2にアップグレードした場合、Androidでビルドできない問題が起きた!(2020/8月現在)
なのでAdMobのプラグインを変更することにした。
iOSバージョンは比較的簡単に乗り換えれたのだが、Android版はかなりめんどくさかった!!!![]()
と言う訳で、この記事はAndroidバージョンでcapacitor-communityのAdMobプラグインに乗り換えた話。
Androidの方が難しかった理由
理由はズバリ、Android X!
Capacitor 2.0以降はAndroidXを使うようになった。
「おいおい!AndroidXって何やねん?!」って感じだが、、、実際私もうまく説明はできない。。
AndroidXとは?
AndroidXとSupportライブラリとは
こちら![]() で詳しく解説されています。
で詳しく解説されています。
それをさらに噛み砕いて言うと、「AndroidXはサポートライブラリ!」
で、「サポートライブラリとは?」について一部を引用すると
ザックリ言うと、新しいOSバージョンでしか使えないクラス(ToolBarとか)を古いOSバージョンでも使えるように互換性をもたせるライブラリ(パッケージ)です。
こんな感じ。
AndroidX以前では、名前そのまんまの「Support Library」ってのが存在した。
//Support Libraryはこんな感じ
import android.support.v7.app.AppCompatActivity;

//AndroidXはこんな感じ
import androidx.appcompat.app.AppCompatActivity;
でもSupport Libraryがバージョンアップを繰り返した結果、混乱をもたらしていると言うことで一新されたようだ。。
前提
・Angular
・Capacitorのバージョンは2.X(2以上ってこと)
→ Capacitorのアップグレード方法はこちら
・capacitor-admobを使っていた(capacitor-communityのAdMobプラグインとほぼ同じで、コードを編集する必要はほぼ無かった。)
もしAbMobプラグインの使用手順を1から知りたい人は、こちら![]() を参考に
を参考に
ionic capacitorのAdMobプラグインを使う(capacitor-admob)
AndroidXに移行する
これめっちゃめんどくさいです。。。
大体はこちらのドキュメント通りにやって行く
Migrate to AndroidX
IonicプロジェクトをAndroid Studioで開く。
Refactor -> Migrate to AndroidX→Migrate→Do Refactor
これだけでは終わらない!!!
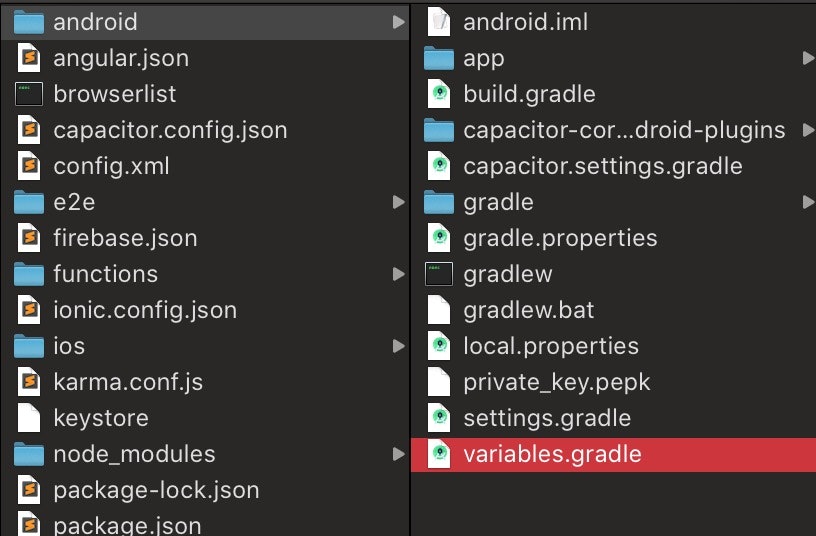
variables.gradleを作成
android/variables.gradleを作成
ドキュメント通りコピペ
ext {
  minSdkVersion = 21
  compileSdkVersion = 29
  targetSdkVersion = 29
  androidxAppCompatVersion = '1.1.0'
  androidxCoreVersion =  '1.2.0'
  androidxMaterialVersion =  '1.1.0-rc02'
  androidxBrowserVersion =  '1.2.0'
  androidxLocalbroadcastmanagerVersion =  '1.0.0'
  firebaseMessagingVersion =  '20.1.2'
  playServicesLocationVersion =  '17.0.0'
  junitVersion =  '4.12'
  androidxJunitVersion =  '1.1.1'
  androidxEspressoCoreVersion =  '3.2.0'
  cordovaAndroidVersion =  '7.0.0'
}
build.gradle(android)を編集
 `android/build.gradle`を開き、下記のようにコードを追加する
参考はこちら
`android/build.gradle`を開き、下記のようにコードを追加する
参考はこちら// Top-level build file where you can add configuration options common to all sub-projects/modules.
buildscript {
repositories {
google()
jcenter()
}
dependencies {
// 共にバージョンを上げておく
classpath 'com.android.tools.build:gradle:3.6.3'
classpath 'com.google.gms:google-services:4.3.3'
// NOTE: Do not place your application dependencies here; they belong
// in the individual module build.gradle files
}
}
// 追加
apply from: "variables.gradle"
allprojects {
repositories {
google()
jcenter()
}
}
task clean(type: Delete) {
delete rootProject.buildDir
}
build.gradle(:app)を編集
 `android/app/build.gradle`を開き、ドキュメント通り編集する(ドキュメントわかりづらいよ〜!!!)
**(コメントアウトしてる部分が古いコード)**
参考はこちら
`android/app/build.gradle`を開き、ドキュメント通り編集する(ドキュメントわかりづらいよ〜!!!)
**(コメントアウトしてる部分が古いコード)**
参考はこちらapply plugin: 'com.android.application'
android {
// compileSdkVersion 28
compileSdkVersion rootProject.ext.compileSdkVersion
defaultConfig {
applicationId "com.sample.app"
// minSdkVersion 21
// targetSdkVersion 28
minSdkVersion rootProject.ext.minSdkVersion
targetSdkVersion rootProject.ext.targetSdkVersion
versionCode 24
versionName "1.3.3"
// testInstrumentationRunner "android.support.test.runner.AndroidJUnitRunner"
testInstrumentationRunner "androidx.test.runner.AndroidJUnitRunner"
}
buildTypes {
release {
minifyEnabled false
proguardFiles getDefaultProguardFile('proguard-android.txt'), 'proguard-rules.pro'
}
}
}
repositories {
maven {
url "https://dl.bintray.com/ionic-team/capacitor"
}
flatDir{
dirs '../capacitor-cordova-android-plugins/src/main/libs', 'libs'
}
}
dependencies {
implementation fileTree(include: ['*.jar'], dir: 'libs')
// implementation 'com.android.support:appcompat-v7:28.0.0'
implementation "androidx.appcompat:appcompat:$androidxAppCompatVersion"
implementation project(':capacitor-android')
// testImplementation 'junit:junit:4.12'
// androidTestImplementation 'com.android.support.test:runner:1.0.2'
// androidTestImplementation 'com.android.support.test.espresso:espresso-core:3.0.2'
testImplementation "junit:junit:$junitVersion"
androidTestImplementation "androidx.test.ext:junit:$androidxJunitVersion"
androidTestImplementation "androidx.test.espresso:espresso-core:$androidxEspressoCoreVersion"
implementation project(':capacitor-cordova-android-plugins')
}
apply from: 'capacitor.build.gradle'
try {
def servicesJSON = file('google-services.json')
if (servicesJSON.text) {
apply plugin: 'com.google.gms.google-services'
}
} catch(Exception e) {
logger.warn("google-services.json not found, google-services plugin not applied. Push Notifications won't work")
}
gradle.propertiesを編集
Capacitorのドキュメントには書いていなかったが、私の場合は必要だった。。。
下記のようにコードを追加
参考はこちら![]()
https://github.com/ionic-team/capacitor/blob/main/android-template/gradle.properties
android.useAndroidX=true
# Automatically convert third-party libraries to use AndroidX
android.enableJetifier=true
AndroidManifest.xmlを編集
android/app/src/main/AndroidManifest.xmlを開き、<provider>の部分を変更する
参考はこちら![]()
https://github.com/ionic-team/capacitor/blob/main/android-template/app/src/main/AndroidManifest.xml
よく見比べながらコピペしてね!
<?xml version="1.0" encoding="utf-8"?>
<manifest xmlns:android="http://schemas.android.com/apk/res/android"
    package="com.sample.app">

    <application
        android:allowBackup="true"
        android:icon="@mipmap/ic_launcher"
        android:label="@string/app_name"
        android:roundIcon="@mipmap/ic_launcher_round"
        android:supportsRtl="true"
        android:theme="@style/AppTheme">

 <!-- 「|smallestScreenSize|screenLayout|uiMode」を追加! -->
        <activity
            android:configChanges="orientation|keyboardHidden|keyboard|screenSize|locale|smallestScreenSize|screenLayout|uiMode"
            android:name="com.hCalendar.app.MainActivity"
            android:label="@string/title_activity_main"
            android:theme="@style/AppTheme.NoActionBarLaunch"
            android:launchMode="singleTask">

            <intent-filter>
                <action android:name="android.intent.action.MAIN" />
                <category android:name="android.intent.category.LAUNCHER" />
            </intent-filter>

            <intent-filter>
                <action android:name="android.intent.action.VIEW" />
                <category android:name="android.intent.category.DEFAULT" />
                <category android:name="android.intent.category.BROWSABLE" />
                <data android:scheme="@string/custom_url_scheme" />
            </intent-filter>

        </activity>

 <!-- androidxに変更 -->
        <provider
            android:name="androidx.core.content.FileProvider"
            android:authorities="${applicationId}.fileprovider"
            android:exported="false"
            android:grantUriPermissions="true">
        <meta-data
                android:name="android.support.FILE_PROVIDER_PATHS"
                android:resource="@xml/file_paths"></meta-data>
        </provider>

        </application>

    <!-- Permissions -->

    <uses-permission android:name="android.permission.INTERNET" />
    <!-- Camera, Photos, input file -->
    <uses-permission android:name="android.permission.READ_EXTERNAL_STORAGE"/>
    <uses-permission android:name="android.permission.WRITE_EXTERNAL_STORAGE" />
    <!-- Geolocation API -->
    <uses-permission android:name="android.permission.ACCESS_COARSE_LOCATION" />
    <uses-permission android:name="android.permission.ACCESS_FINE_LOCATION" />
    <uses-feature android:name="android.hardware.location.gps" />
    <!-- Network API -->
    <uses-permission android:name="android.permission.ACCESS_NETWORK_STATE" />
    <!-- Navigator.getUserMedia -->
    <!-- Video -->
    <uses-permission android:name="android.permission.CAMERA" />
    <!-- Audio -->
    <uses-permission android:name="android.permission.RECORD_AUDIO" />
    <uses-permission android:name="android.permission.MODIFY_AUDIO_SETTINGS"/>
</manifest>
多分これでAndroidへに移行じたはできた(自信ないけど。。。)
インストール
ようやくここからがAdMobプラグインの話ww。いやー長かった・・
まずはプラグインを入れる
npm install --save @capacitor-community/admob
そして以前まで使っていたプラグインを消す
npm uninstall capacitor-admob
プラグインの初期設定
ほぼuninstallしたcapacitor-admobと同じ
MainActivity.java
android/app/src/main/java/**/**/MainActivity.javaを開く
package com.sample.app;

import android.os.Bundle;

import com.getcapacitor.BridgeActivity;
import com.getcapacitor.Plugin;

import java.util.ArrayList;

public class MainActivity extends BridgeActivity {
  @Override
  public void onCreate(Bundle savedInstanceState) {
    super.onCreate(savedInstanceState);

    // Initializes the Bridge
    this.init(savedInstanceState, new ArrayList<Class<? extends Plugin>>() {{
      // Additional plugins you've installed go here
      // Ex: add(TotallyAwesomePlugin.class);

     // 追加
     add(com.getcapacitor.community.admob.AdMob.class);
    }});
  }
}
AndroidManifest.xml
android/app/src/main/AndroidManifest.xmlを開く
<?xml version="1.0" encoding="utf-8"?>
<manifest xmlns:android="http://schemas.android.com/apk/res/android"
    package="com.sample.app">

    <application
        android:allowBackup="true"
        android:icon="@mipmap/ic_launcher"
        android:label="@string/app_name"
        android:roundIcon="@mipmap/ic_launcher_round"
        android:supportsRtl="true"
        android:theme="@style/AppTheme">


<!-- 省略 -->

 <!-- androidxに変更 -->
        <provider
            android:name="androidx.core.content.FileProvider"
            android:authorities="${applicationId}.fileprovider"
            android:exported="false"
            android:grantUriPermissions="true">
        <meta-data
                android:name="android.support.FILE_PROVIDER_PATHS"
                android:resource="@xml/file_paths"></meta-data>
        </provider>

        <!-- AdMobで必要? -->
        <meta-data
                android:name="com.google.android.gms.ads.AD_MANAGER_APP"
                android:value="true"/>
        </application>

         <!-- AdMobで必要 -->
        <meta-data android:name="com.google.android.gms.ads.APPLICATION_ID" android:value="@string/admob_app_id" />


   <!-- 省略 -->
</manifest>
strings.xml
android/app/src/main/res/values/strings.xml
[APP_ID]を入れる
<string name="admob_app_id">[APP_ID]</string>
最後に
AdMobで広告を出す方法はiOS編を参考に!!
Ionic AdMobのプラグインをcapacitor-communityのに乗り換えた話【iOSバージョン】
参考リンクは下記の通り
https://capacitorjs.com/docs/android/updating#from-1-5-1-to-2-0-0
AndroidXにしてしまうと、色々なプラグインで問題が発生しそうなので、十分な時間を確保した上でくれぐれも慎重にやっていきましょう。