はじめに
「前置きはいいから手順だけみてみたいよ!」
という方は以下リンクからどうぞ。
アプリ業務で Android と iOS どちらも触っているのだが、 7 : 3 ぐらいで Android の方が多い。
こないだ久しぶりに iOS アプリをリリースすることがあった。
iOS は [fastlane] (https://docs.fastlane.tools/) というツールを使って、以下の画像にあるようなことを自動化されている。

これがとてもラクチンだった。
一方、Android は Fabric - Beta へのアップロードも、GooglePlay へのアップロードもすべて手動でおこなっている。
iOS の業務から Android の業務に戻ったとき、今まで何とも思っていなかった(慣れすぎて感覚が麻痺していた)が手動で APK ファイルをアップロードするのがとてもめんどうに感じた。
以前から
「Android も自動化してほしいんだけど…」
とチクチク言われてたし、自動化への重い腰を上げたのである。
せっかくなのでそのときの手順やつまったところをまとめておく。
環境
- macOS High Sierra - 10.13.6
- Android Studio - 3.3.2
- fastlane - 2.118.1
- gem - 2.7.6
fastlane とは?
- Fabric - beta への配信、リリース作業を自動でやってくれるツール
- iOS でも使える
- CIサーバとの連携もできるらしい
- 公式ドキュメント
なんで fastlane 使うの?
今回実現しようとしていることは fastlane じゃなくてもできる(gradle、gradle-play-publisherなど)が、以下の理由で fastlane を採用した。
- すでに iOS で fastlane が導入されていた
- iOS エンジニアも Android をリリースする可能性があるので fastlane ならすんなり使ってもらえそう
- 以下の画像にあるとおり、Fabricのページをみると fastlane 推しだったから

Google Playへのデプロイツールを検証してみた。 もとても参考になった。
手順
fastlane のインストール
- 基本的には Getting started with fastlane for Android を見ながらやれば間違いない。
XCode のインストール(が必要らしい)
$ xcode-select --install
fastlane のインストール(RubyGems か Homebrew どちらか選べるっぽい。ぼくは RubyGems でやった)
$ sudo gem install fastlane -NV
・・・
Successfully installed fastlane-2.118.1
7 gems installed
fastlane がちゃんとインストールされたか確認
$ fastlane --version
fastlane installation at path:
/usr/local/lib/ruby/gems/2.5.0/gems/fastlane-2.118.1/bin/fastlane
-----------------------------
[✔] 🚀
fastlane 2.118.1
GooglePlay の APIアクセスキー を作成(後からでもいい)
これがないと Google Play へアップロードできないので最初に作っておく。
※ アカウント所有者でないと作成できない! ※
Collect your Google credentials をみながら作成する。
あとからやる場合は
$ fastlane supply init
で設定できる。
Google Play Console にログインして APIアクセスキー を作っていく。
Google Play Console - 設定 - APIアクセス


- Google API コンソールに遷移する


(ここらへんで jsonファイル をダウンロードした気がするけどメモ忘れ・・・)
「完了」を押して、Google Play Console に戻って、もう一度 設定 - APIアクセス

「アクセスを許可」

「リリースマネージャー」を設定して [保存]
以上でAPIアクセスキーの作成はおわり。
Android プロジェクトに cd して fastlane の初期設定
$ cd [Androidプロジェクトのルート]
$ fastlane init
[✔] 🚀
[20:13:15]: ----------------------------------------
[20:13:15]: --- Step: Verifying fastlane version ---
[20:13:15]: ----------------------------------------
[20:13:15]: Your fastlane version 2.118.1 matches the minimum requirement of 2.18.3  ✅
[20:13:15]: ------------------------------
[20:13:15]: --- Step: default_platform ---
[20:13:15]: ------------------------------

--------- android---------
----- fastlane android test
Runs all the tests

----- fastlane android build_debug
Submit a new Beta Build to Crashlytics Beta

----- fastlane android deploy
Deploy a new version to the Google Play

Execute using `fastlane [lane_name]`
[20:13:15]: ------------------
[20:13:15]: fastlane is already set up at path `./fastlane/`, see the available lanes above
[20:13:15]:
[20:13:15]: It is recommended to run fastlane with a Gemfile set up, do you want fastlane to create one for you? (y/n)
Gemfile に作ってもらうのがオススメだよ っぽいこと言ってるので y
[20:13:15]: It is recommended to run fastlane with a Gemfile set up, do you want fastlane to create one for you? (y/n)
y
[20:15:44]: Installing dependencies for you...
[20:15:44]: $ bundle update
bundle update しろってことなんでやる
(bundler のインストールが必要かも)
$ bundle update
...
Bundle updated!
もっかい fastlane init
$ fastlane init
[✔] 🚀
[✔] Looking for iOS and Android projects in current directory...
...
[20:26:11]: Package Name (com.krausefx.app):
パッケージ名を入力
To automatically upload builds and metadata to Google Play, fastlane needs a service action json secret file
Follow the Setup Guide on how to get the Json file: https://docs.fastlane.tools/actions/supply/
Feel free to press Enter at any time in order to skip providing pieces of information when asked
[20:28:06]: Path to the json secret file:
Google Play にアップロードするために 認証されたjsonファイルが必要 とのこと。
初期設定する前に作成した jsonファイル のパスを指定する。
[20:40:37]: Do you plan on uploading metadata, screenshots, and builds to Google Play using fastlane?
[20:40:37]: We will now download your existing metadata and screenshots into the `fastlane` folder so fastlane can manage it
[20:40:37]: Download existing metadata and setup metadata management? (y/n)
「メタデータ、スクリーンショットを fastlane で管理する?」って聞かれてるので y
[metadata のダウンロード処理]...
[20:42:17]: --------------------------------------------------------
[20:42:17]: --- ✅ Successfully generated fastlane configuration ---
[20:42:17]: --------------------------------------------------------
[20:42:17]: Generated Fastfile at path `./fastlane/Fastfile`
[20:42:17]: Generated Appfile at path `./fastlane/Appfile`
[20:42:17]: Gemfile and Gemfile.lock at path `Gemfile`
[20:42:17]: Please check the newly generated configuration files into git along with your project
[20:42:17]: This way everyone in your team can benefit from your fastlane setup
[20:42:17]: Continue by pressing Enter ⏎
[20:42:24]: fastlane will collect the number of errors for each action to detect integration issues
[20:42:24]: No sensitive/private information will be uploaded, more information: https://docs.fastlane.tools/#metrics
[20:42:24]: ----------------------
[20:42:24]: --- fastlane lanes ---
[20:42:24]: ----------------------
[20:42:24]: fastlane uses a `Fastfile` to store the automation configuration
[20:42:24]: Within that, you'll see different lanes.
[20:42:24]: Each is there to automate a different task, like screenshots, code signing, or pushing new releases
[20:42:24]: Continue by pressing Enter ⏎
[20:46:23]: --------------------------------------
[20:46:23]: --- How to customize your Fastfile ---
[20:46:23]: --------------------------------------
[20:46:23]: Use a text editor of your choice to open the newly created Fastfile and take a look
[20:46:23]: You can now edit the available lanes and actions to customize the setup to fit your needs
[20:46:23]: To get a list of all the available actions, open https://docs.fastlane.tools/actions
[20:46:23]: Continue by pressing Enter ⏎
[20:46:26]: ------------------------------
[20:46:26]: --- Where to go from here? ---
[20:46:26]: ------------------------------
[20:46:26]: 📸 Learn more about how to automatically generate localized Google Play screenshots:
[20:46:26]: https://docs.fastlane.tools/getting-started/android/screenshots/
[20:46:26]: 👩✈️ Learn more about distribution to beta testing services:
[20:46:26]: https://docs.fastlane.tools/getting-started/android/beta-deployment/
[20:46:26]: 🚀 Learn more about how to automate the Google Play release process:
[20:46:26]: https://docs.fastlane.tools/getting-started/android/release-deployment/
[20:46:26]:
[20:46:26]: To try your new fastlane setup, just enter and run
[20:46:26]: $ fastlane test
これで fastlane の初期設定が完了。
念のため、以下ファイルたちができあがっていることを確認。
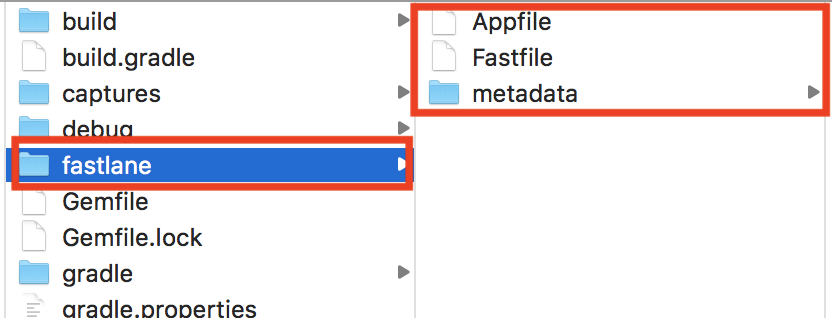
$ git status
Untracked files:
  (use "git add <file>..." to include in what will be committed)

	Gemfile
	Gemfile.lock
	fastlane/Appfile
	fastlane/Fastfile
	fastlane/metadata/

nothing added to commit but untracked files present (use "git add" to track)
fastlane から Fabric - beta にアップロードできるようにする
Fastfile に Crashlytics の api_token 、 build_secret を記述する
-
公式の Fabric - fastlane から fastlane のファイルをダウンロードする
-
以下を選択して
Get your Fastfile!からダウンロード- OS
- アップロード先
- 通知の種類

- ダウンロードした zip ファイルを解凍し、
Fastfileを確認
  # upload to Beta by Crashlytics
  crashlytics(
    # keys for organization: ***
    api_token: "***********************",
    build_secret: "**********************************************"
  )
こんな記述があると思うので、初期設定で作成された Fastfile にコピペする。
こんな感じ ↓。
  lane :beta do
    gradle(task: "clean assembleRelease")
    # upload to Beta by Crashlytics

    ####### ここから
    crashlytics(
      # keys for organization: ***
      api_token: "***********************",
      build_secret: "**********************************************"
    )
    ####### ここまで
  end
Fabric - beta にアップロードしてみる
Android プロジェクトルートで fastlane を実行する
$ fastlane

+--------+----------------+---------------------------------------------+
|                        Available lanes to run                         |
+--------+----------------+---------------------------------------------+
| Number | Lane Name      | Description                                 |
+--------+----------------+---------------------------------------------+
| 1      | android test   | Runs all the tests                          |
| 2      | android beta   | Submit a new Beta Build to Crashlytics Beta |
| 3      | android deploy | Deploy a new version to the Google Play     |
| 0      | cancel         | No selection, exit fastlane!                |
+--------+----------------+---------------------------------------------+
[21:15:42]: Which number would you like run?
こんなのが表示される。
Fabric - beta のアップロードは 2 を入力して Enter
[11:28:51]: Running lane `android beta`. Next time you can do this by directly typing `fastlane android beta` 🚀.
[11:28:51]: Driving the lane 'android beta' 🚀
...
[11:43:47]: fastlane.tools just saved you 15 minutes! 🎉
これでアップロード完了!
fastlane から GooglePlay にアップロードできるようにする
注意:こちらを実行すると製品版としてアップロードされてしまう。
(ドラフト版としてのアップロードする方法がわからなかった。。)
GooglePlay アップロード処理を Fastfile に記述する
Android アプリをリリースするときはいつも割合リリースでクラッシュの様子を見ながら徐々にリリースしている。
fastlane を使って割合リリースができるようだったので 10% リリースするようにしてみた。
  lane :deploy do
    gradle(task: "clean assembleRelease")
    ####### ここから
    supply(
      track: 'rollout',
      rollout: '0.1',
      skip_upload_metadata: true,
      skip_upload_images: true,
      skip_upload_screenshots: true
    )
    ####### ここまで
  end
実行してみる
$ fastlane
[✔] 🚀
[16:23:07]: fastlane detected a Gemfile in the current directory
[16:23:07]: however it seems like you don't use `bundle exec`
[16:23:07]: to launch fastlane faster, please use
[16:23:07]:
[16:23:07]: $ bundle exec fastlane
[16:23:07]:
[16:23:07]: Get started using a Gemfile for fastlane https://docs.fastlane.tools/getting-started/ios/setup/#use-a-gemfile
[16:23:08]: ------------------------------
[16:23:08]: --- Step: default_platform ---
[16:23:08]: ------------------------------
[16:23:08]: Welcome to fastlane! Here's what your app is setup to do:
+--------+----------------+---------------------------------------------+
|                        Available lanes to run                         |
+--------+----------------+---------------------------------------------+
| Number | Lane Name      | Description                                 |
+--------+----------------+---------------------------------------------+
| 1      | android test   | Runs all the tests                          |
| 2      | android beta   | Submit a new Beta Build to Crashlytics Beta |
| 3      | android deploy | Deploy a new version to the Google Play     |
| 0      | cancel         | No selection, exit fastlane!                |
+--------+----------------+---------------------------------------------+
[16:23:08]: Which number would you like run?
3  ← 入力
...
...
...
[16:35:54]: fastlane.tools just saved you 12 minutes! 🎉
どうやら無事に終わったようなので GooglePlay Console でアップロードできたか確認。

アップロードできた!
GooglePlay にアップロード完了したら Slack に通知する
fastlane の Slack に詳しく書いてある。
Incoming WebHook に通知用の設定を追加する
Create an Incoming WebHook and export this as SLACK_URL.
と書いてあるので、Incoming WebHook に通知用の設定を追加する。


Slack 通知処理を Fastfile に記述する
  lane :deploy do
    gradle(task: "clean assembleRelease")

    supply(
      track: 'rollout',
      rollout: '0.1',
      skip_upload_metadata: true,
      skip_upload_images: true,
      skip_upload_screenshots: true
    )

    ####### ここから
    slack(
       slack_url: "[Webhook URL]",
       message: "App successfully released!"
    )
    ####### ここまで
  end
実行してみる
$ fastlane
[15:46:22]: Welcome to fastlane! Here's what your app is setup to do:
+--------+----------------+---------------------------------------------+
|                        Available lanes to run                         |
+--------+----------------+---------------------------------------------+
| Number | Lane Name      | Description                                 |
+--------+----------------+---------------------------------------------+
| 1      | android test   | Runs all the tests                          |
| 2      | android beta   | Submit a new Beta Build to Crashlytics Beta |
| 3      | android deploy | Deploy a new version to the Google Play     |
| 0      | cancel         | No selection, exit fastlane!                |
+--------+----------------+---------------------------------------------+
[15:46:22]: Which number would you like run?
3  ← 入力
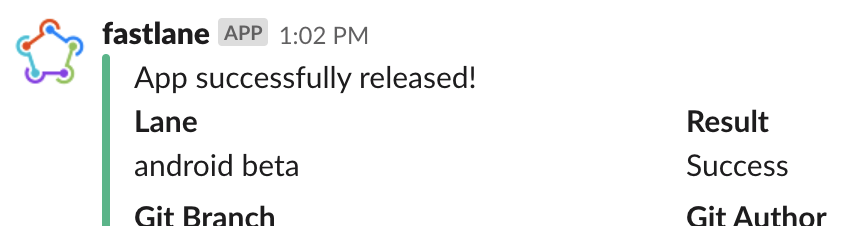
無事に通知きた!
今後やりたいこと
- リリースの割合を徐々に増やす
- fastlane で
versionName、versionCodeの更新 - apk作成、apkのアップロードを別々の処理にして個別でも実行できるようにする
- リリースノートをターミナル上で入力できるようにする
- Google Play へアップロードするときは、リリースブランチを作成する
- リリース後はリリースブランチを develop と master にマージしてリリースブランチを削除する処理を追加する
- Slack の通知に表示する項目を精査