はじめに
GoogleMapを表示する手順のメモ
1. アップデートとバージョンアップ
$ sudo gem update --system
$ sudo gem update cocoapods
もし、上記で下記のようなエラーが起きた場合はコチラを参考にして下さい。
ERROR:  While executing gem ... (Errno::EPERM)
Operation not permitted - /usr/bin/xcodeproj
(アップデートしないでpod installを行ったら
.xcworkspaceが作成されなくて困りましたw)
2. APIキーの作成
下記のサイトへ行きます。
googleDevelopers
そして、以下の手順でAPIキーを取得してください。参考にしたサイト
- プロジェクトを作成
- 作成したプロジェクトを選択する
- Google APIを利用する
- Google Maps SDK for iOSを選択する
- APIを有効にする
- 左側に認証情報があるので選択
- 認証情報を追加を選択
- APIキーを選択しiOSキーを選択
- 適当な名前を入力し、使用するプロジェクトのバンドルキーも入力し、作成ボタンを押す
- APIキーが作成された
このAPIキーはあとで使用する。
3. CocoaPodsでライブラリをダウンロードする
1. プロジェクトの**.xcodeproj**がある階層まで移動する。
2. $ pod initを実行する
3. $ vim PodfileでPodfileの中身を作成する
source 'https://github.com/CocoaPods/Specs.git'
platform :ios, '8.1'
pod 'GoogleMaps'
↓上記だとエラーが起きるため、下記に修正しました (2016/09/07) 参考サイト
# Uncomment this line to define a global platform for your project
source 'https://github.com/CocoaPods/Specs.git'
platform :ios, '9.0'

target 'map_sample' do
  # Comment this line if you're not using Swift and don't want to use dynamic frameworks
  use_frameworks!

  # Pods for map_sample
  pod 'GoogleMaps'

  target 'map_sampleTests' do
    inherit! :search_paths
    # Pods for testing
  end

  target 'map_sampleUITests' do
    inherit! :search_paths
    # Pods for testing
  end

end
※ 上記のmap_sample の部分は個人のプロジェクト名に置き換えて下さい
4. $ pod installを実行する
5. 4で作成された**.xcworkspaceを開く
$ open プロジェクト名.xcworkspace
これからは.xcworkspace**で開発を行っていく。
4. GoogleMapが表示されるか確認
適当に作成したプロジェクトに以下を追加すればGoogleMapを表示させることができる。
実機でも確認できました。
以下の3つをAppDelegate.swiftに追加する
① import GoogleMaps;
② let cGoogleMapsAPIKey = "取得したAPIキー"
③ GMSServices.provideAPIKey(cGoogleMapsAPIKey)
以下のようになります。
import UIKit
import GoogleMaps;  //追記

@UIApplicationMain
class AppDelegate: UIResponder, UIApplicationDelegate {

    var window: UIWindow?

    let cGoogleMapsAPIKey = "取得したAPIキー"  //追記

    func application(application: UIApplication, didFinishLaunchingWithOptions launchOptions: [NSObject: AnyObject]?) -> Bool {
        // Override point for customization after application launch.

        // Google Mapsの初期設定
        GMSServices.provideAPIKey(cGoogleMapsAPIKey) //追記
        return true
    }

    func applicationWillResignActive(application: UIApplication) {
        // Sent when the application is about to move from active to inactive state. This can occur for certain types of temporary interruptions (such as an incoming phone call or SMS message) or when the user quits the application and it begins the transition to the background state.
        // Use this method to pause ongoing tasks, disable timers, and throttle down OpenGL ES frame rates. Games should use this method to pause the game.
    }

    func applicationDidEnterBackground(application: UIApplication) {
        // Use this method to release shared resources, save user data, invalidate timers, and store enough application state information to restore your application to its current state in case it is terminated later.
        // If your application supports background execution, this method is called instead of applicationWillTerminate: when the user quits.
    }

    func applicationWillEnterForeground(application: UIApplication) {
        // Called as part of the transition from the background to the inactive state; here you can undo many of the changes made on entering the background.
    }

    func applicationDidBecomeActive(application: UIApplication) {
        // Restart any tasks that were paused (or not yet started) while the application was inactive. If the application was previously in the background, optionally refresh the user interface.
    }

    func applicationWillTerminate(application: UIApplication) {
        // Called when the application is about to terminate. Save data if appropriate. See also applicationDidEnterBackground:.
    }


}
ViewController.swiftは以下のサイトを参考にして書きました。
参考サイト
import UIKit
import GoogleMaps
class ViewController: UIViewController {
var googleMap : GMSMapView!
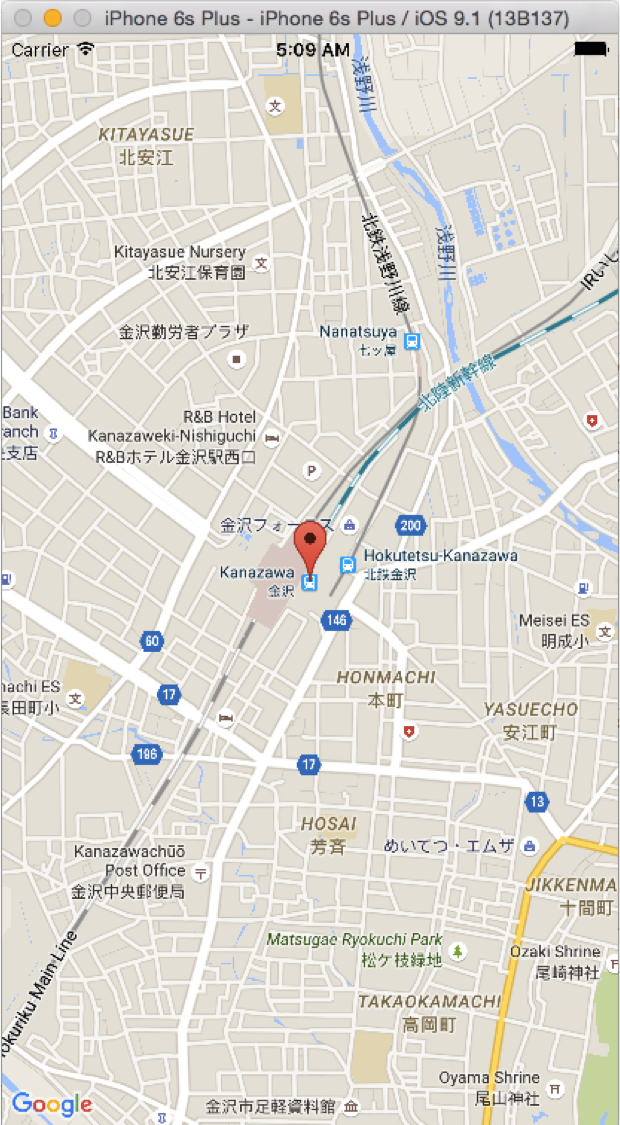
//緯度経度 -> 金沢駅
let latitude: CLLocationDegrees = 36.5780574
let longitude: CLLocationDegrees = 136.6486596
override func viewDidLoad() {
super.viewDidLoad()
// Do any additional setup after loading the view, typically from a nib.
// ズームレベル.
let zoom: Float = 15
// カメラを生成.
let camera: GMSCameraPosition = GMSCameraPosition.cameraWithLatitude(latitude,longitude: longitude, zoom: zoom)
// MapViewを生成.
googleMap = GMSMapView(frame: CGRectMake(0, 0, self.view.bounds.width, self.view.bounds.height))
// MapViewにカメラを追加.
googleMap.camera = camera
//マーカーの作成
let marker: GMSMarker = GMSMarker()
marker.position = CLLocationCoordinate2DMake(latitude, longitude)
marker.map = googleMap
//viewにMapViewを追加.
self.view.addSubview(googleMap)
}
override func didReceiveMemoryWarning() {
super.didReceiveMemoryWarning()
// Dispose of any resources that can be recreated.
}
}
実行結果
うまくGoogleMapを表示させることができました。
実機でも確認済みです。
参考サイト
・Swift Docs
https://sites.google.com/a/gclue.jp/swift-docs/ni-yinki100-ios/googlemap/swiftde-shi-yongsurutameno-she-ding
・[iOS] Google Maps SDK for iOS を使ってみる – GMSMapViewとGMSMarkerの基本
http://dev.classmethod.jp/smartphone/iphone/ios-map-programming-series-1/
・MacOSX El Capitanでcocoapodsインストールが出来ない時の対処法
http://qiita.com/AcaiBowl/items/4bb4708de03e6ee14a4a
・Cocoapods 1.0.0で注意すること
http://qiita.com/ShinokiRyosei/items/7187ffb71862aba7e240