目次
1. はじめに
2. 参考サイト
3. Next.jsの準備
4. コンポーネントの作成
5. useReducerの準備
6. useContextの準備
7. Hooksの実装
8. おわりに
付録
1. はじめに
この記事は主に、初めてNext.js 13でuseContextとuseReducerを使おうとしている方向けになります。
筆者自身、フロントエンドを学習し始めて間もなく、初めてuseContextとuseReducer、Next.js 13を使用したレベルになります(執筆時)。
ところどころ拙い部分があるかと思いますが、ご容赦下さい。
ディレクトリ構成、パッケージのバージョンは付録に記載します。
2. 参考サイト
アールエフェクト
- Next.js 13の解説
https://reffect.co.jp/react/next-js-13/#context
→useContextの設定方法はほとんどそのまま参考にしました。
Next.js 13って何?という方は、先に目を通しておくことをオススメします。 - useContextの解説
https://reffect.co.jp/react/react-usecontext-understanding/
→useContextがよく分からない方向け。 - useReducerの解説
https://reffect.co.jp/react/react-hook-reducer-understanding/
→useReducerがよく分からない方向け。
React公式
- reducer & context
https://ja.react.dev/learn/scaling-up-with-reducer-and-context
3. Next.jsの準備
Next.js公式(下記リンク)の通り。
設定は全部デフォルトです。
https://nextjs.org/docs/app/api-reference/create-next-app
4. コンポーネントの作成
今回作成するのは簡単に数字をカウントするだけのアプリケーションになります。
contextのstateとして、countという値を持たせます。
主なコンポーネントファイル(とその役割)は
- app/page.tsx : countの値を表示
- ComponentA.tsx : <input>の値をcountに足す
- ComponentB.tsx : countを-1する
- ComponentC.tsx : countを+1する
の4つになります。
app/page.tsxはデフォルトで作成されているので、srcディレクトリ直下にcomponents
ディレクトリを作成し、その下にComponentA/B/Cをそれぞれ作成して下さい。
ComponentC→ComponentB→ComponentA→page.tsxとimportしていくので、ComponentCから逆順に説明していきます。
スタイリングにはTailwind CSSを使っています。
"use client";
const ComponentC = () => {
  return (
    <div>
      <p>Component C</p>
      <button className="border border-solid border-gray-300 rounded-sm px-2">
        +
      </button>
    </div>
  );
};

export default ComponentC;
'use client';
import ComponentC from "./ComponentC";

const ComponentB = () => {
  return (
    <div>
      <p>Component B</p>
      <button className="border border-solid border-gray-300 rounded-sm px-2">
        -
      </button>
      <ComponentC />
    </div>
  );
};

export default ComponentB;
"use client";
import ComponentB from "./ComponentB";
import { useState } from "react";

const ComponentA = () => {
  const [value, setValue] = useState<string>();

  return (
    <div>
      <p>Component A</p>
      <form>
        <input type="text" className="border" onChange={(e) => setValue(e.target.value)} />
        <button
          type="submit"
          className="border border-solid border-gray-300 rounded-sm px-1 mx-1"
        >
          Add
        </button>
      </form>
      <ComponentB />
    </div>
  );
};

export default ComponentA;
'use client';
import ComponentA from "../components/ComponentA";

export default function Home() {
  return (
    <div className="text-center">
      <h1 className="font-bold">Learn useContext/useReducer in Next.js 13</h1>
      <p>Count: {/* ここにcountの値が入ります */}</p>
      <ComponentA />
    </div>
  );
}
全てのコンポーネントにおいて、import文の前に"use client"とつけるのを忘れないで下さい(Hooksが使えなくなります。)
また、src/app下にlayout.tsxというファイルがあるかと思いますが、そちらも後々登場するので少し気にしておいて下さい。
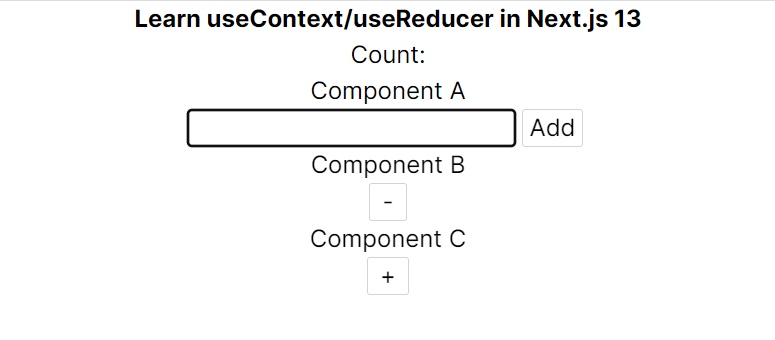
ここまで出来たら下記のような画面になっていると思います。
5. useReducerの準備
srcディレクトリ直下にstoreディレクトリとtypesディレクトリを作成して下さい。
storeという名前は個人的に状態管理関連のファイルがあることが分かりやすいと思っただけなので、適した名前をつけていただければと思います。
storeディレクトリにcounterReducer.tsを、src/typesディレクトリにtypes.tsをそれぞれ以下のように作成して下さい。
import { CounterReducerAction } from "@/types/types";

export const counterInitialstate = 100;

export const counterReducer = (
  state: number,
  action: CounterReducerAction
): number => {
  switch (action.type) {
    case "increase": {
      return state + 1;
    }
    case "decrease": {
      return state - 1;
    }
    case "add": {
      // エラー処理
      if (!action.payload) {
        console.log("Counter action of add require action.payload.");
        // stateを返さないと後々エラーが発生します
        return state;
      } else if (typeof action.payload !== "number") {
        console.log("In using counter action of add, typeof action.payload must be 'number'.");
        // stateを返さないと後々エラーが発生します
        return state;
      }

      return state + action.payload;
    }
    // エラー処理
    default: {
      console.log(`Unknown action type: ${action.type}`);
      // stateを返さないと後々エラーが発生します
      return state;
    }
  }
};
export type CounterReducerAction = {
  type: "increase" | "decrease" | "add";
  // "increase", "decrease"の場合はpayloadは不要
  payload?: number;
};
countのinitialStateとして100を代入しています。
counterReducerはstateとactionを引数に取り、action.typeの値によって処理を分岐しています。
また、エラーが生じた際はstateの値をそのままリターンします。これを行わないと、後々contextファイル内でuseReducerを使う時にエラーが発生してしまいます(戻り値の型に"void"が含まれてしまうため)。
個人的には、今までRedux Toolkitの書き方に慣れていたのでactionの型だったりを自分で定義しなければならなかったことに少し苦労しました。
6. useContextの準備
src/storeディレクトリにCounterContext.tsxを作成して、下記のコードを実装して下さい("use client"を忘れずに!)。
"use client";
import {
  Dispatch,
  ReactNode,
  Reducer,
  createContext,
  useContext,
  useReducer,
} from "react";
import { counterReducer, counterInitialstate } from "./counterReducer";
import { CounterReducerAction } from "@/types/types";

const CounterContext = createContext<
  [number, Dispatch<CounterReducerAction>] | undefined
>(undefined);

export const CounterProvider = ({ children }: { children: ReactNode }) => {
  const [state, dispatch] = useReducer<Reducer<number, CounterReducerAction>>(
    counterReducer,
    counterInitialstate
  );
  return (
    <CounterContext.Provider value={[state, dispatch]}>
      {children}
    </CounterContext.Provider>
  );
};

export const useCounter = () => {
  const context = useContext(CounterContext);
  if (context === undefined)
    throw new Error("Function 'useCounter' must be used in Provider.");
  return context;
};
ファイルの最後のuseCounter()を使用することで、全てのコンポーネントでcountの値とreducerを受け取ることが出来るようになります。
次に、app/layout.tsxを下記のように変更して下さい。
import { CounterProvider } from "@/store/CounterContext";
import "./globals.css";
import { Inter } from "next/font/google";

const inter = Inter({ subsets: ["latin"] });

export const metadata = {
  title: "Counter App",
  description: "Generated by create next app",
};

export default function RootLayout({
  children,
}: {
  children: React.ReactNode;
}) {
  return (
    <html lang="ja">
      <body className={inter.className}>
        <CounterProvider>{children}</CounterProvider>
      </body>
    </html>
  );
}
ここがNext.js 13で一番ユニークな箇所かと思います。
Next.js 13ではappディレクトリ直下のlayout.tsxの設定が、appディレクトリ内の全てのページコンポーネントに適用されることになります。
従って、layout.tsx内でCounterProviderコンポーネントでchildrenを囲むことで、全てのページでcontextフックが使えるようになります。
7. Hooksの実装
ここまで来たら、後は各コンポーネントでHooksを導入するだけです!
まずはapp/page.tsxを下記のように変更して下さい。
'use client';
import { useCounter } from "@/store/CounterContext";
import ComponentA from "../components/ComponentA";

export default function Home() {
  const [count, countDispatch] = useCounter();

  return (
    <div className="text-center">
      <h1 className="font-bold">Learn useContext/useReducer in Next.js 13</h1>
      <p>Count: {count}</p>
      <ComponentA />
    </div>
  );
}
これでページタイトルの下に現在のcountの値が表示されたはずです。
次に、ComponentC.tsxを下記のように変更して下さい。
"use client";
import { useCounter } from "@/store/CounterContext";

const ComponentC = () => {
  const [count, countDispatch] = useCounter();

  return (
    <div>
      <p>Component C</p>
      <button
        onClick={() => countDispatch({ type: "increase" })}
        className="border border-solid border-gray-300 rounded-sm px-2"
      >
        +
      </button>
    </div>
  );
};

export default ComponentC;
useCounter()で現在のcountの値とreducerを受け取ることが出来ました。
これでクリックイベントに"increase"アクションを設定すると、"+"ボタンを押す度にcountの値が1ずつ増えていく筈です。
次に、ComponentB.tsxを下記のように変更して下さい。
'use client';
import { useCounter } from "@/store/CounterContext";
import ComponentC from "./ComponentC";

const ComponentB = () => {
  const [count, countDispatch] = useCounter();
  return (
    <div>
      <p>Component B</p>
      <button
        className="border border-solid border-gray-300 rounded-sm px-2"
        onClick={() => countDispatch({ type: "decrease" })}
      >
        -
      </button>
      <ComponentC />
    </div>
  );
};

export default ComponentB;
同様にcountとreducerを受け取り、クリックイベントで"decrease"アクションを設定することで、
"-"ボタンを押す度にcountの値が1ずつ減っていく筈です。
最後に、ComponentA.tsxを下記のように変更して下さい。
"use client";
import { useCounter } from "@/store/CounterContext";
import ComponentB from "./ComponentB";
import { ChangeEvent, SyntheticEvent, useState } from "react";

const ComponentA = () => {
  const [count, countDispatch] = useCounter();
  const [value, setValue] = useState<string>();

  const handleSubmit = (e: SyntheticEvent) => {
    e.preventDefault();
    // inputのvalueはstring型になるので、number型に変換
    const valueToNum = Number(value);
    // 半角数字以外が入力されてた場合はエラー
    if (Number.isNaN(valueToNum)) {
      alert("半角数字で入力して下さい");
      return;
    }
    countDispatch({ type: "add", payload: valueToNum });
  };

  return (
    <div>
      <p>Component A</p>
      <form onSubmit={handleSubmit}>
        <input type="text" className="border" onChange={(e) => setValue(e.target.value)} />
        <button
          type="submit"
          className="border border-solid border-gray-300 rounded-sm px-1 mx-1"
        >
          Add
        </button>
      </form>
      <ComponentB />
    </div>
  );
};

export default ComponentA;
同様にcountとreducerを受け取り、今度は送信イベントに"add"アクションを設定します。
入力した値が送信されると、入力した分だけcountの値が増えるはずです。
※ただし、半角数字以外を送信するとアラートが表示されます。
お疲れさまでした!これで完成となります!
8. おわりに
今回はNext.js 13でのuseContext/useReducerの練習として、簡単なカウントアプリを作成しました。
もっと良いコードの書き方や型定義の方法があったら、その都度更新出来ればと思います。
ご高覧いただきありがとうございました!
付録
ディレクトリ構成
※src/以下のみ記載
src/
    ├ app/
    │   ├ favicon.ico
    │   ├ global.css
    │   ├ layout.tsx
    │   └ page.tsx
    ├ components/
    │   ├ ComponentA.tsx
    │   ├ ComponentB.tsx
    │   └ ComponentC.tsx
    ├ store/
    │   ├ CounterContext.tsx
    │   └ counterReducer.ts
    └ types/
        └ types.ts
バージョン
- Next.js: 13.4.7
- React: 18.2.0
- TailwindCSS: 3.3.2
- TypeScript: 5.1.6