ほぼ自分用です。参考になる人もいるかもです。
クリーンインストールした時に必ずやることです。
最初に必要なもの
キーボードなどを使いやすくします。
https://qiita.com/ko2ic/items/536c2fa60530e0791f3e
Xcode
AppStoreからXcodeをインスールします。
コマンドラインツールとライセンスの同意をしておきます。
$ xcode-select --install
$ sudo xcodebuild -license accept
homebrew
コマンドでインストール
$ /bin/bash -c "$(curl -fsSL https://raw.githubusercontent.com/Homebrew/install/HEAD/install.sh)"
自分好みの設定
自分用のドットファイルやhomebrewでインストールするものはgithubで管理してシェルを実行すれば、常に同じ環境になって便利です。
こんな感じです。
$ git clone https://github.com/ko2ic/dotfiles.git
$ cd dotfiles
$ ./dotfiles.sh
$ ./brewfile.sh
M1用とIntel用でパスが違うので、環境に合わせたパスに変更する
たとえば、
Intelは、/usr/local/bin/vim.
M1は、/opt/homebrew/opt/vim
シンボリックリンクを貼る
$ sudo ln -s /opt/homebrew/opt/zplug /usr/local/bin/zplug
git設定
コマンドは、適宜自分用に変えてください。
$ git config --global user.name "ko2ic"
$ git config --global user.email ko2ic.dev@gmail.com
$ git config --global core.excludesfile ~/.gitignore
$ git config --global core.editor "/opt/homebrew/bin/vim" <- M1の場合
$ git config --global core.editor "/usr/local/bin/vim"
$ git config --global merge.tool vimdiff
SSH接続
$ ssh-keygen -t rsa -C ko2ic.dev@gmail.com
$ chmod 600 ~/.ssh/id_rsa
$ chmod 600 ~/.ssh/config
$ vim ~/.ssh/config
Host github.com
  HostName github.com
  IdentityFile ~/.ssh/id_rsa
  User git
パーミッションを変えておく
$ chmod 600 ~/.ssh/config
以下の結果をGithubに貼り付ける
$ pbcopy < ~/.ssh/id_rsa.pub
GPG
GPGの公開鍵と秘密鍵もバックアップを取っておいてそれを利用するのが良いです。
作ってない人は他の記事を読んで作っておきましょう。
ここではbackupしている状態前提で進めます。
backupしていた鍵をimportして、確認。
$ gpg --import gpg-private.keys.backup
$ gpg --import gpg-public.keys.backup
$ gpg --import-ownertrust ownertrust.backup
$ gpg --list-secret-keys --keyid-format LONG
GPGをgitに設定
$ git config --global user.signingkey <Key ID>
$ git config --global commit.gpgsign true
NeoBundle
自分は、vimとそのpluginを使っています。
ドットファイル取得時にそれらを利用する設定があります。
$ curl https://raw.githubusercontent.com/Shougo/neobundle.vim/master/bin/install.sh | sh
$ vim .
:NeoBundleInstall
GUI
brewで入れたアプリの設定をしておきます。
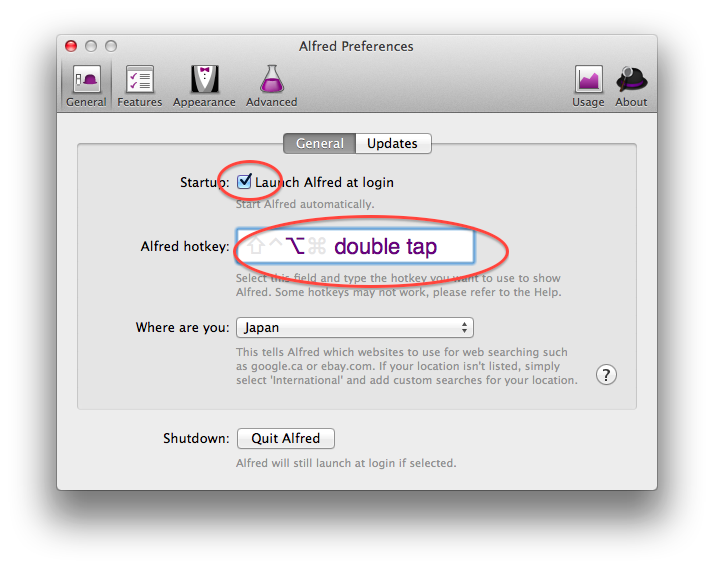
Alfread
ランチャーです。altを二回タップで起動するようにします。
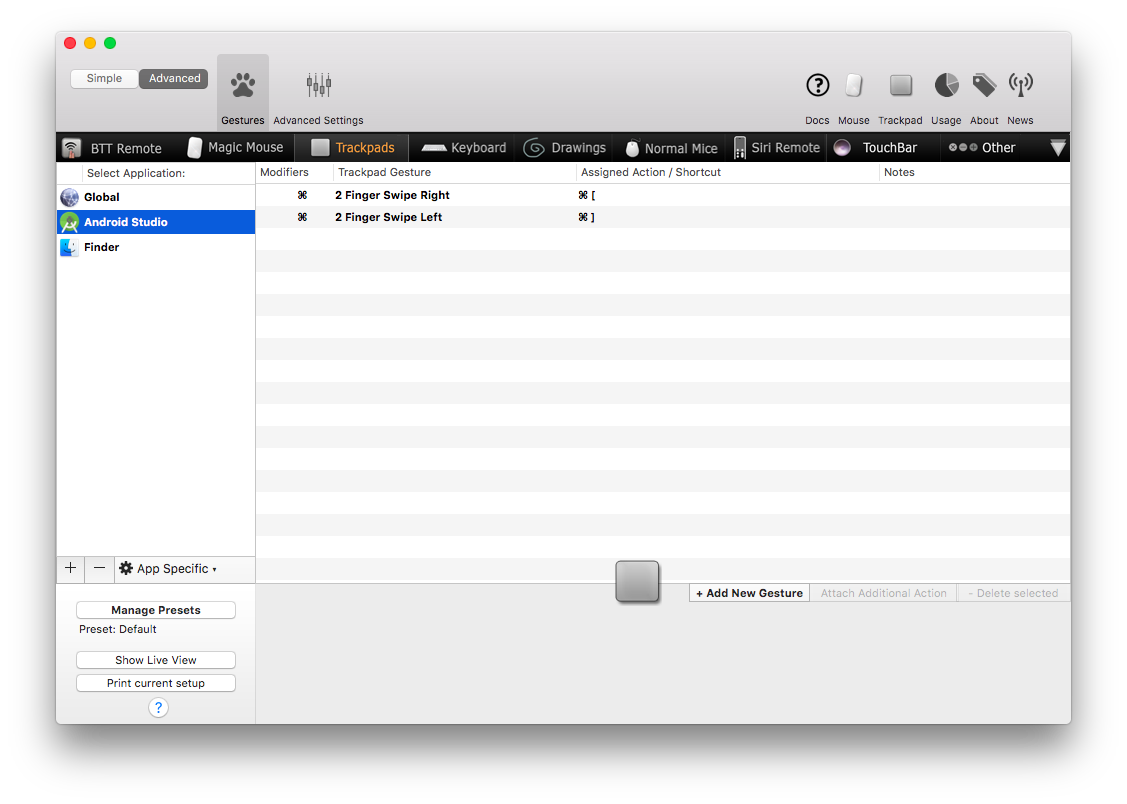
BetterTochtool
Android StudioでXcodeのようにスワイプで、「進む・戻る」ができるようにします。
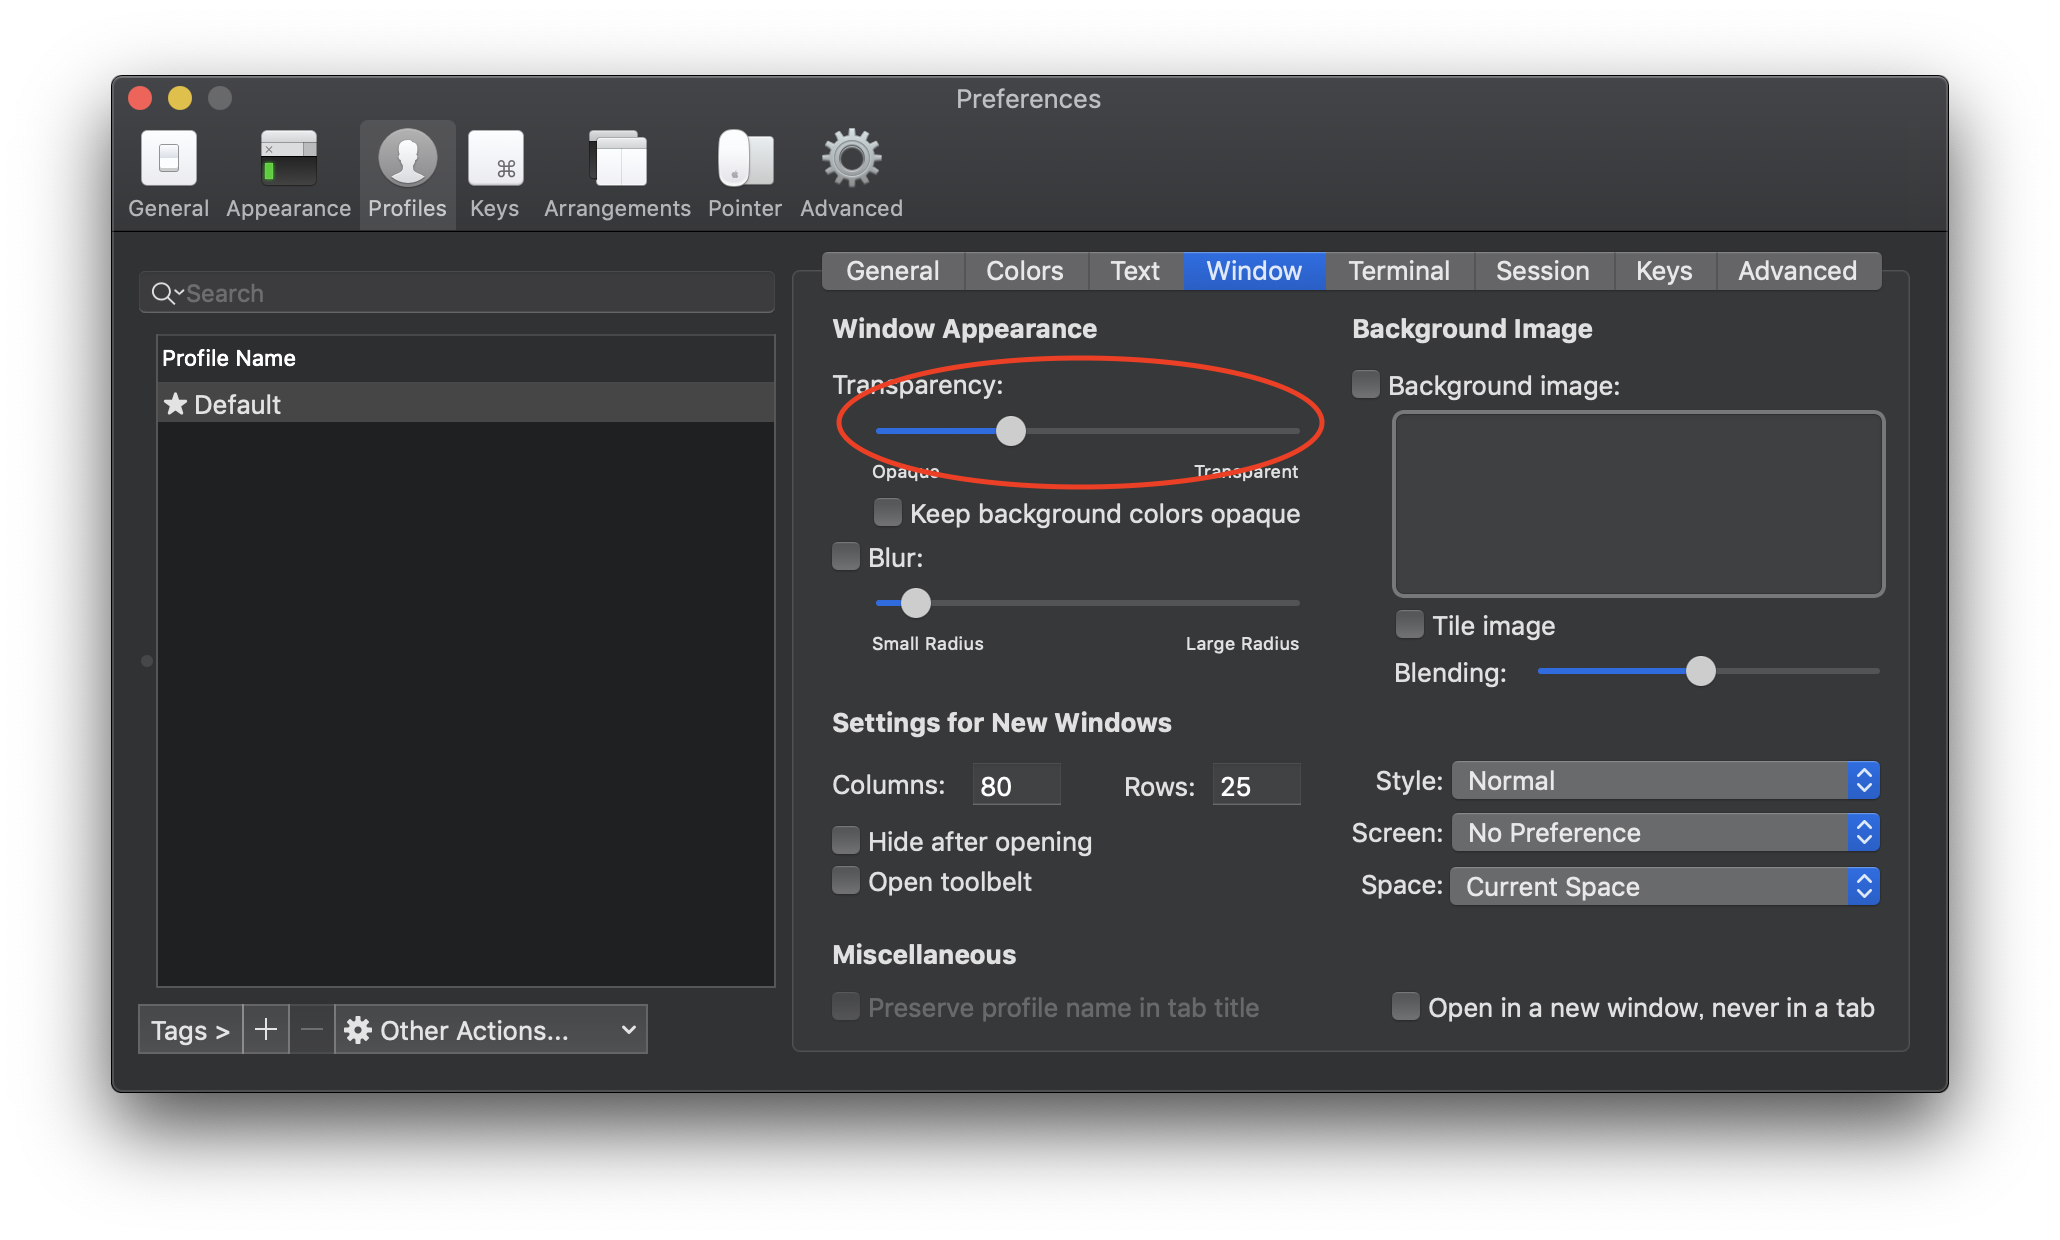
Iterm2
Preferenceで設定します。
背景を透明にします。
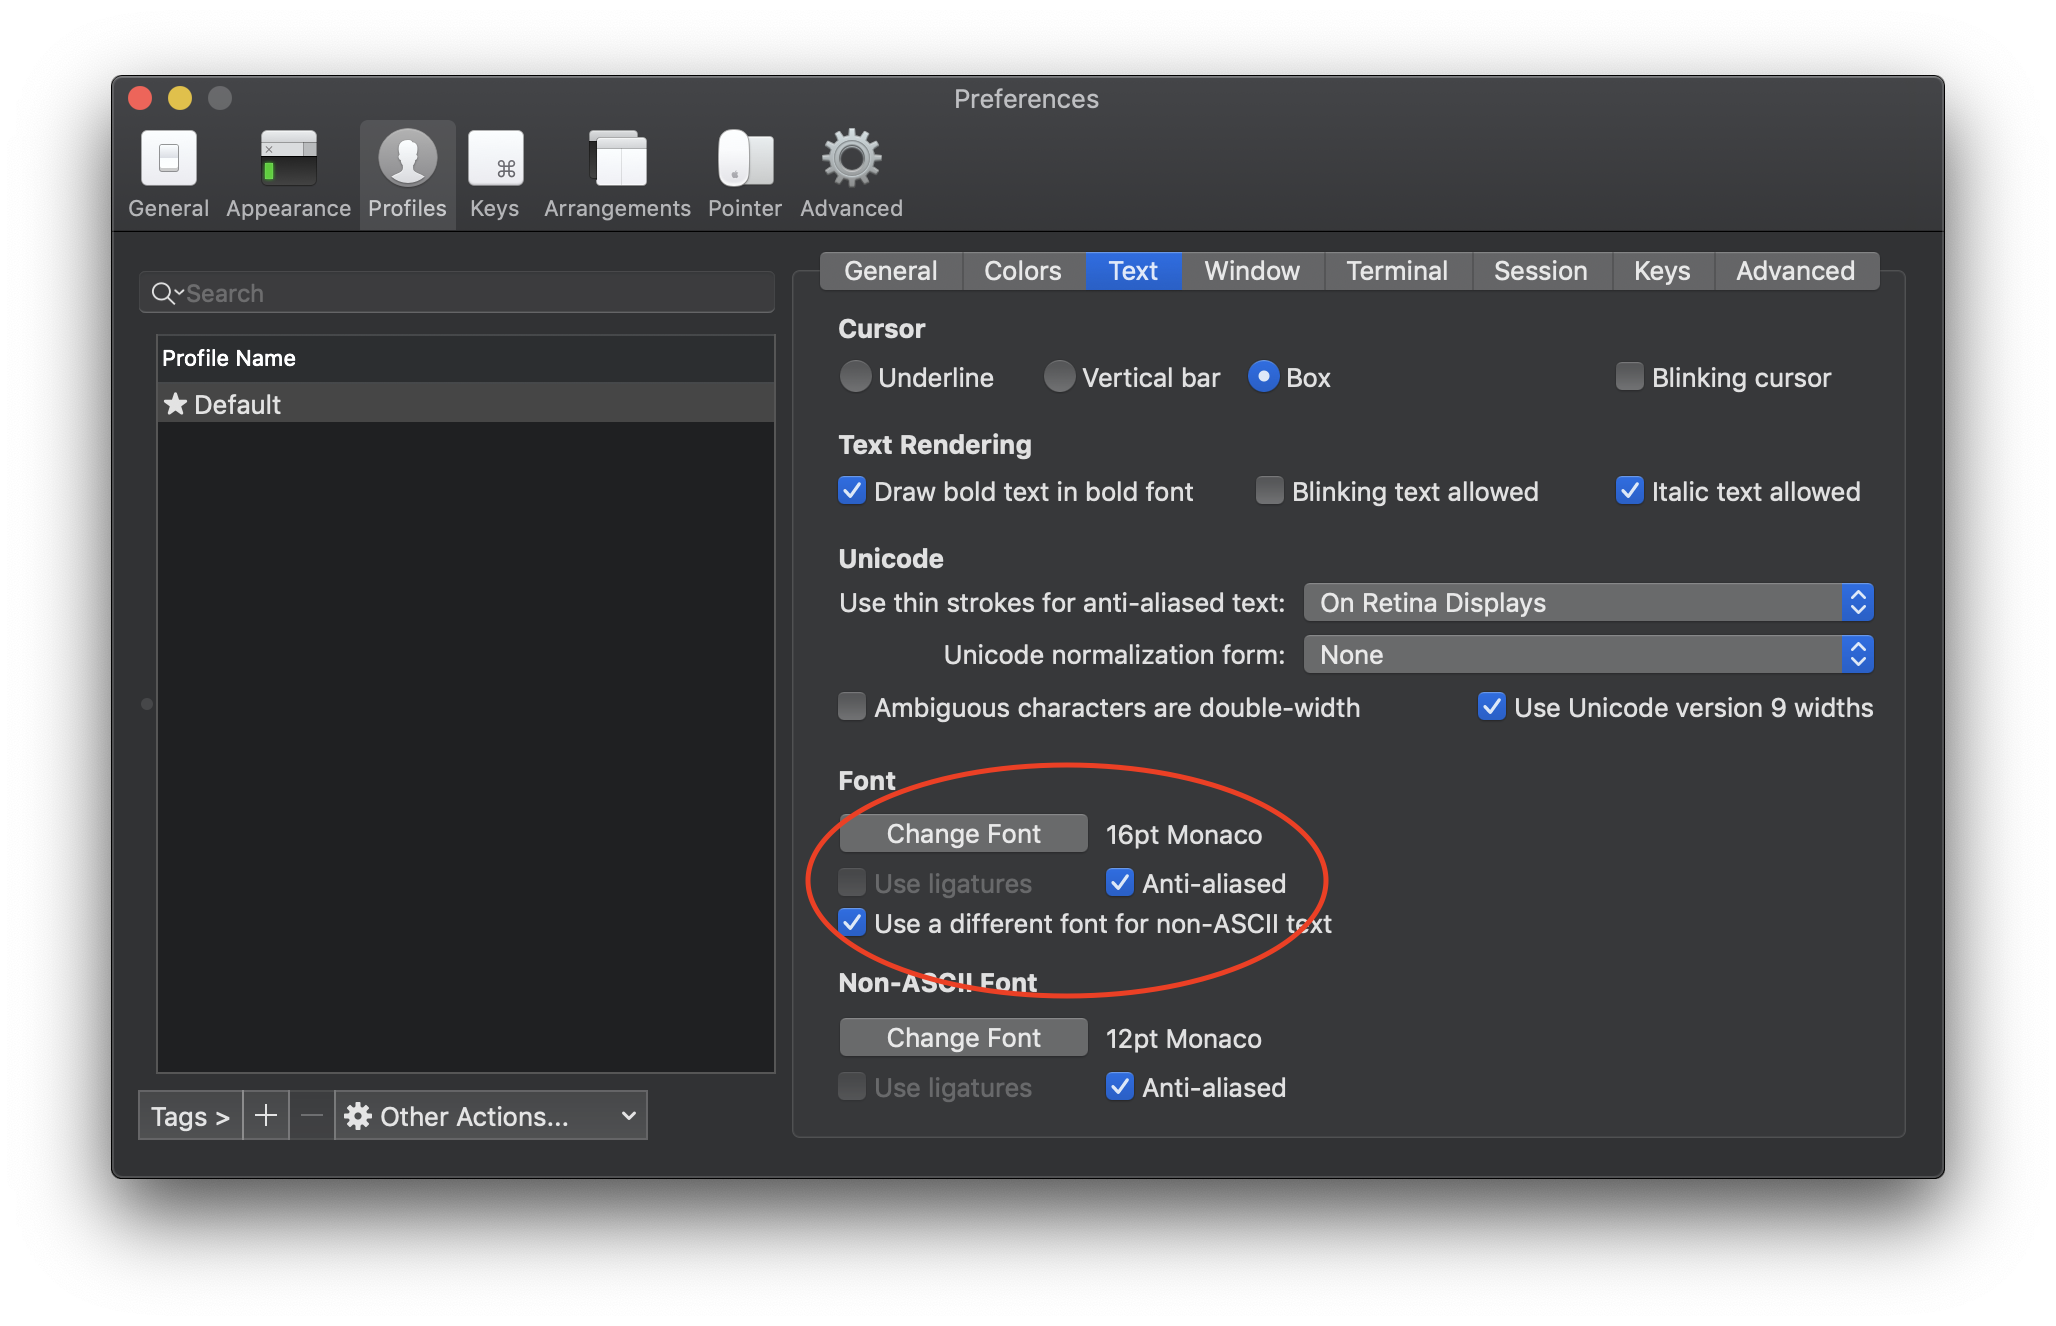
フォント拡大と日本語崩れがないようにします。
SDKMAN! (自分はだいたいJava環境使う)
昔はSDKや周辺ツールを直接インストールしたり、homebrewを使ったりしていました。
現在は、SDKMAN!です。
いわゆるJavaのパッケージマネージャです。rubyで言うところのrbenvです。端的に言うと以下が行えます。
- SDKやツールのバージョンを気楽に切り替えられます。
- gradleなどのツールのインストールを任せられます。
インストール
公式サイト通りです。
SDKMAN!自体をインストールして
$ curl -s "https://get.sdkman.io" | bash
以下のbash_profileを書き換えるシェルを呼べば、SDKMAN!は利用できるようになります。
$ source "$HOME/.sdkman/bin/sdkman-init.sh"
$ source ~/.bash_profile
Javaや周辺ツールのインストール
以下でインストールできるツールが確認できます。
GradleやMavenはもちろん、Scala,sbt,Kotolin,Groovy、またフレームワーク(Spring Boot,Vert.xなど)もインストールできます。
$ sdk list
Java SDK
例えば、Java SDKの場合は、以下でインストール可能なJavaを確認して
$ sdk list java
================================================================================
Available Java Versions for macOS ARM 64bit
================================================================================
 Vendor        | Use | Version      | Dist    | Status     | Identifier
--------------------------------------------------------------------------------
 Zulu          |     | 17.0.2       | zulu    |            | 17.0.2-zulu
               |     | 17.0.2.fx    | zulu    |            | 17.0.2.fx-zulu
               |     | 11.0.14      | zulu    |            | 11.0.14-zulu
               | >>> | 8.0.322      | zulu    | installed  | 8.0.322-zulu
以下でインストール
$ sdk install java 8.0.322-zulu
複数バージョンをインストールしていて、バージョン切り替えをしたい場合は以下です。
$ sdk default java 8.0.322-zulu
gradle, maven
何はともあれ、これは入れておく。
$ sdk install gradle 3.4.1
$ sdk install maven 3.3.9
Spring Boot開発環境
例として、まずはKotlinでのSpring Bootでの開発環境も構築します。その後KotlinでのAndroid開発環境を構築します。
IDE
IDEは、Android開発を考えて、IntelliJ IDEAを利用します。
homebrewでもインストールできますが、結局IDEのupdate機能でアップデートするので、
普通にJetbrainsのページからダウンロード/インストールします。
初期インストール後の設定はお好みですが、自分の場合は以下。
Create Launcher Scriptは作っておく。
Default Pluginsは
- Version Controlは、gitとgithubだけにする
- Testは、TestNGを解除する
- Swingは、Disableにする
Featured Plusingsは
- IdeaVimをいれます
ちなみにアンインストール方法は、
IntelliJ IDEA 2016.3の場合はこちら。
他のバージョンでも同様に公式ページにある。
プロジェクト作成
Ultimate editionの場合は、Create New ProjectでSpring Initializrが組み込まれているのでそれを使うと良さそう。(Ultimate版を使ったことないので知らない)
ただし、Spring Initializrよりもmaven archetypeで作った方がとっかかりは楽なのでそうします。
$ mvn archetype:generate
・・・
2324: remote -> org.springframework.boot:spring-boot-sample-actuator-archetype (Spring Boot Actuator Sample)
2325: remote -> org.springframework.boot:spring-boot-sample-actuator-log4j-archetype (Spring Boot Actuator Log4J Sample)
2326: remote -> org.springframework.boot:spring-boot-sample-actuator-noweb-archetype (Spring Boot Actuator Non-Web Sample)
2327: remote -> org.springframework.boot:spring-boot-sample-actuator-ui-archetype (Spring Boot Actuator UI Sample)
2328: remote -> org.springframework.boot:spring-boot-sample-amqp-archetype (Spring Boot AMQP Sample)
2329: remote -> org.springframework.boot:spring-boot-sample-aop-archetype (Spring Boot AOP Sample)
2330: remote -> org.springframework.boot:spring-boot-sample-batch-archetype (Spring Boot Batch Sample)
2331: remote -> org.springframework.boot:spring-boot-sample-data-jpa-archetype (Spring Boot Data JPA Sample)
2332: remote -> org.springframework.boot:spring-boot-sample-data-mongodb-archetype (Spring Boot Data MongoDB Sample)
2333: remote -> org.springframework.boot:spring-boot-sample-data-redis-archetype (Spring Boot Data Redis Sample)
2334: remote -> org.springframework.boot:spring-boot-sample-data-rest-archetype (Spring Boot Data REST Sample)
2335: remote -> org.springframework.boot:spring-boot-sample-integration-archetype (Spring Boot Integration Sample)
2336: remote -> org.springframework.boot:spring-boot-sample-jetty-archetype (Spring Boot Jetty Sample)
2337: remote -> org.springframework.boot:spring-boot-sample-profile-archetype (Spring Boot Profile Sample)
2338: remote -> org.springframework.boot:spring-boot-sample-secure-archetype (Spring Boot Security Sample)
2339: remote -> org.springframework.boot:spring-boot-sample-servlet-archetype (Spring Boot Servlet Sample)
2340: remote -> org.springframework.boot:spring-boot-sample-simple-archetype (Spring Boot Simple Sample)
2341: remote -> org.springframework.boot:spring-boot-sample-tomcat-archetype (Spring Boot Tomcat Sample)
2342: remote -> org.springframework.boot:spring-boot-sample-traditional-archetype (Spring Boot Traditional Sample)
2343: remote -> org.springframework.boot:spring-boot-sample-web-jsp-archetype (Spring Boot Web JSP Sample)
2344: remote -> org.springframework.boot:spring-boot-sample-web-method-security-archetype (Spring Boot Web Method Security Sample)
2345: remote -> org.springframework.boot:spring-boot-sample-web-secure-archetype (Spring Boot Web Secure Sample)
2346: remote -> org.springframework.boot:spring-boot-sample-web-static-archetype (Spring Boot Web Static Sample)
2347: remote -> org.springframework.boot:spring-boot-sample-web-ui-archetype (Spring Boot Web UI Sample)
2348: remote -> org.springframework.boot:spring-boot-sample-websocket-archetype (Spring Boot WebSocket Sample)
2349: remote -> org.springframework.boot:spring-boot-sample-xml-archetype (Spring Boot XML Sample)
・・・
公式のspring-bootは上記がありました。
今回は、1659のSpring Boot Jetty Sampleを選択します。
適当に以下を指定しました。
groupIdには、ko2ic.spike
artifactIdには、spike-spring-boot-sample-jetty


