2
0

Delete article

Deleted articles cannot be recovered.

Draft of this article would be also deleted.

Are you sure you want to delete this article?

More than 3 years have passed since last update.

xamppでmysqlを使う設定(ポート番号変更~rootパスワード設定まで)

Last updated at Posted at 2020-01-26

##xampp(7.2.4)でmysqlを使うには

sqlite3ではなく、mysqlを使ってみたい。
と思ったのだが、数々の難問が降りかかってきた。
そのうちの幾つかを記録したい。

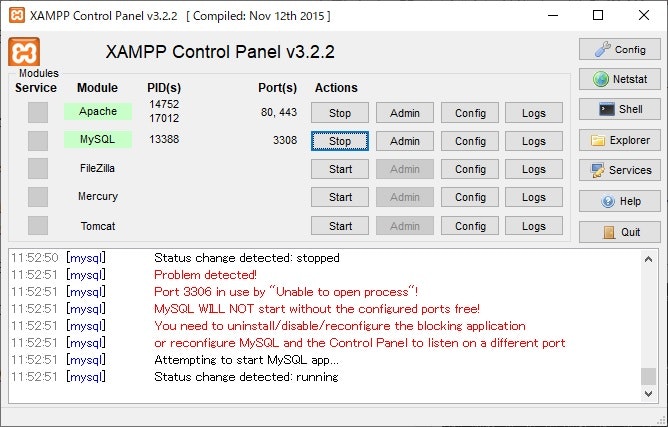
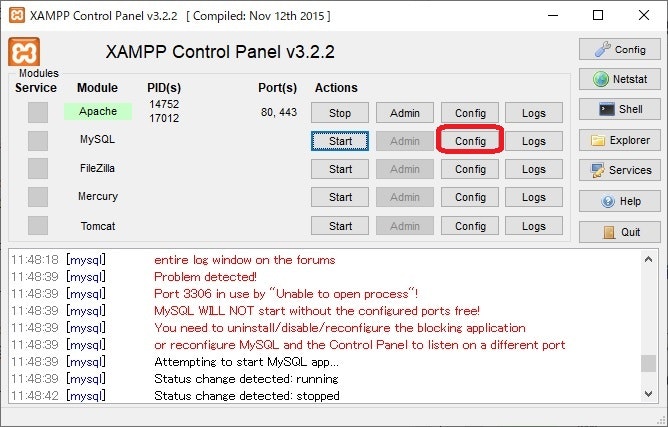
###1.xamppのコントロールパネルからmysqlが起動しない。

※イメージはポート番号変更後

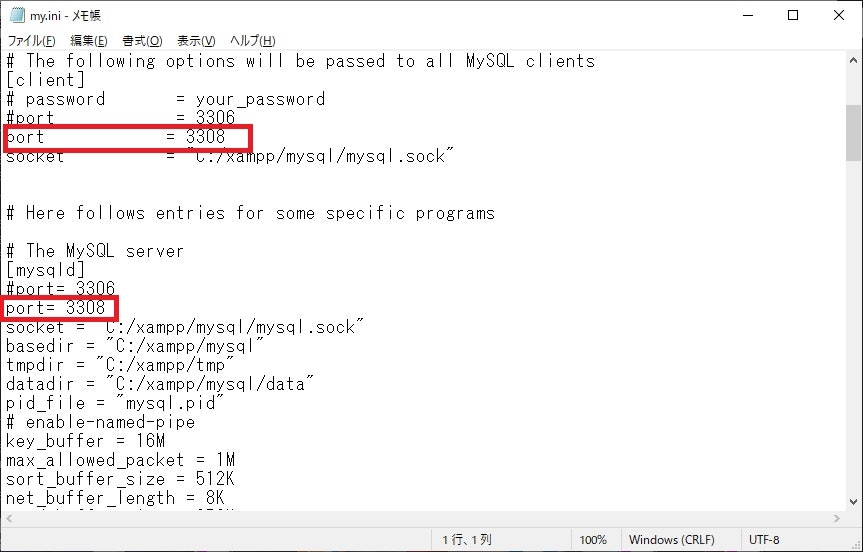
####configを右クリックでmy.iniを表示。

maria_setting1.jpg

####赤枠のようにポート番号を変更

3306がデフォルトらしいが、このままだと起動できないので「3308」に変更

xampp_mysql1.jpg

無事にコンパネから、mysqlサービスが起動できた
maria_setting3.jpg

###2.コンパネのshellから、mysqlのrootパスワードを設定

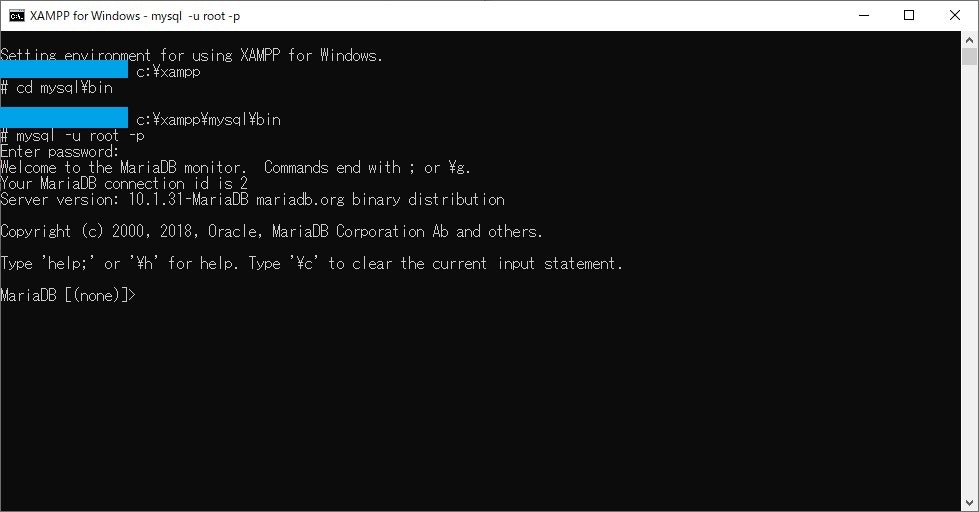
コンパネのshellを起動し、
「xamppのインストールディレクトリ\mysql\bin」まで移動。

ディレクトリに移動後
「mysql -u root -p」を入力後
「Enter password」でエンターキーを押下。(ここは空パスワードでok)

mysql_setting_xampp7_2_4_1.jpg

接続できることが確認できた。

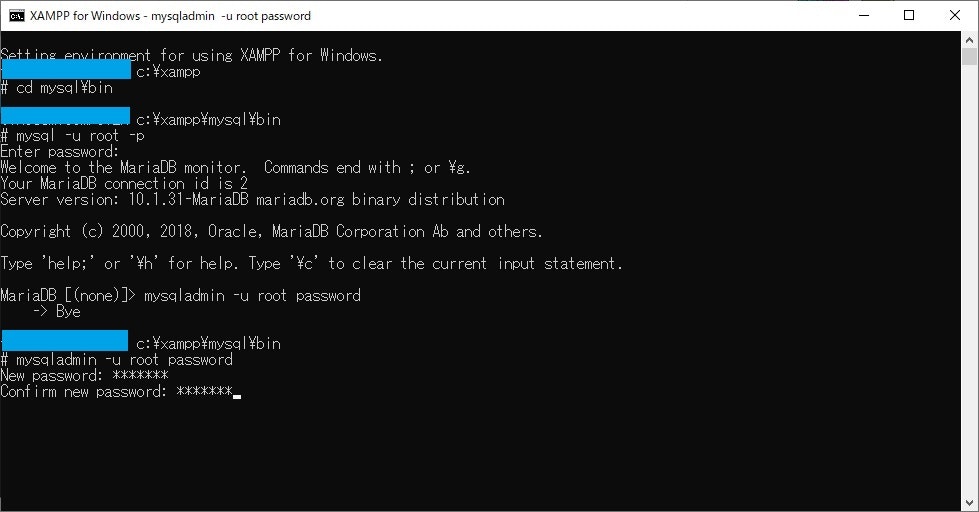
管理者パスワードを設定するために下記コマンドを入力する。
「mysqladmin -u root password」
を入力すると、「New password」が表示されたら、
自分で決めたパスワードを入力する。

mysql_setting_xampp7_2_4_2.jpg

とりあえず、rootパスワードの変更が完了。

※ここから先データベース作成等は、このshell(黒画面)から行うことになる。
2
0
0

Register as a new user and use Qiita more conveniently

  1. You get articles that match your needs
  2. You can efficiently read back useful information
  3. You can use dark theme
What you can do with signing up
2
0

Delete article

Deleted articles cannot be recovered.

Draft of this article would be also deleted.

Are you sure you want to delete this article?