きっかけ
Raspberry piに構築した、Node-redとMQTTへ、外部からアクセスさせたい。
よくあるhttp/httpsだけではなくMQTTプロトコルが使用するTCPポート指定してのトンネリングが行えること。
証明書を使ったサーバー認証を行うため、固定IPで独自ドメイン取得前提。
自宅がマンションタイプの2重ルーターなのでそれを超えられること。
方針検討:
ngrok:有料:TCPポートの開放に対応しているサービス。
試しにsshをTCPトンネルさせてみると、下記の通り。
$ ngrok tcp 22
ngrok by @inconshreveable                                       (Ctrl+C to quit)

Tunnel Status                 online
Version                       2.0.19/2.0.19
Web Interface                 http://127.0.0.1:4040
Forwarding                    tcp://0.tcp.ngrok.io:36198 -> localhost:22

Connections                   ttl     opn     rt1     rt5     p50     p90
                              0       0       0.00    0.00    0.00    0.00
ドキュメントによると、無料のアカウントでは、
<ランダムな数字1桁>.tcp.ngrok.io:<ランダムなポート番号>
これでは証明書が保証できるURLとしては接続できない。
有料だと、
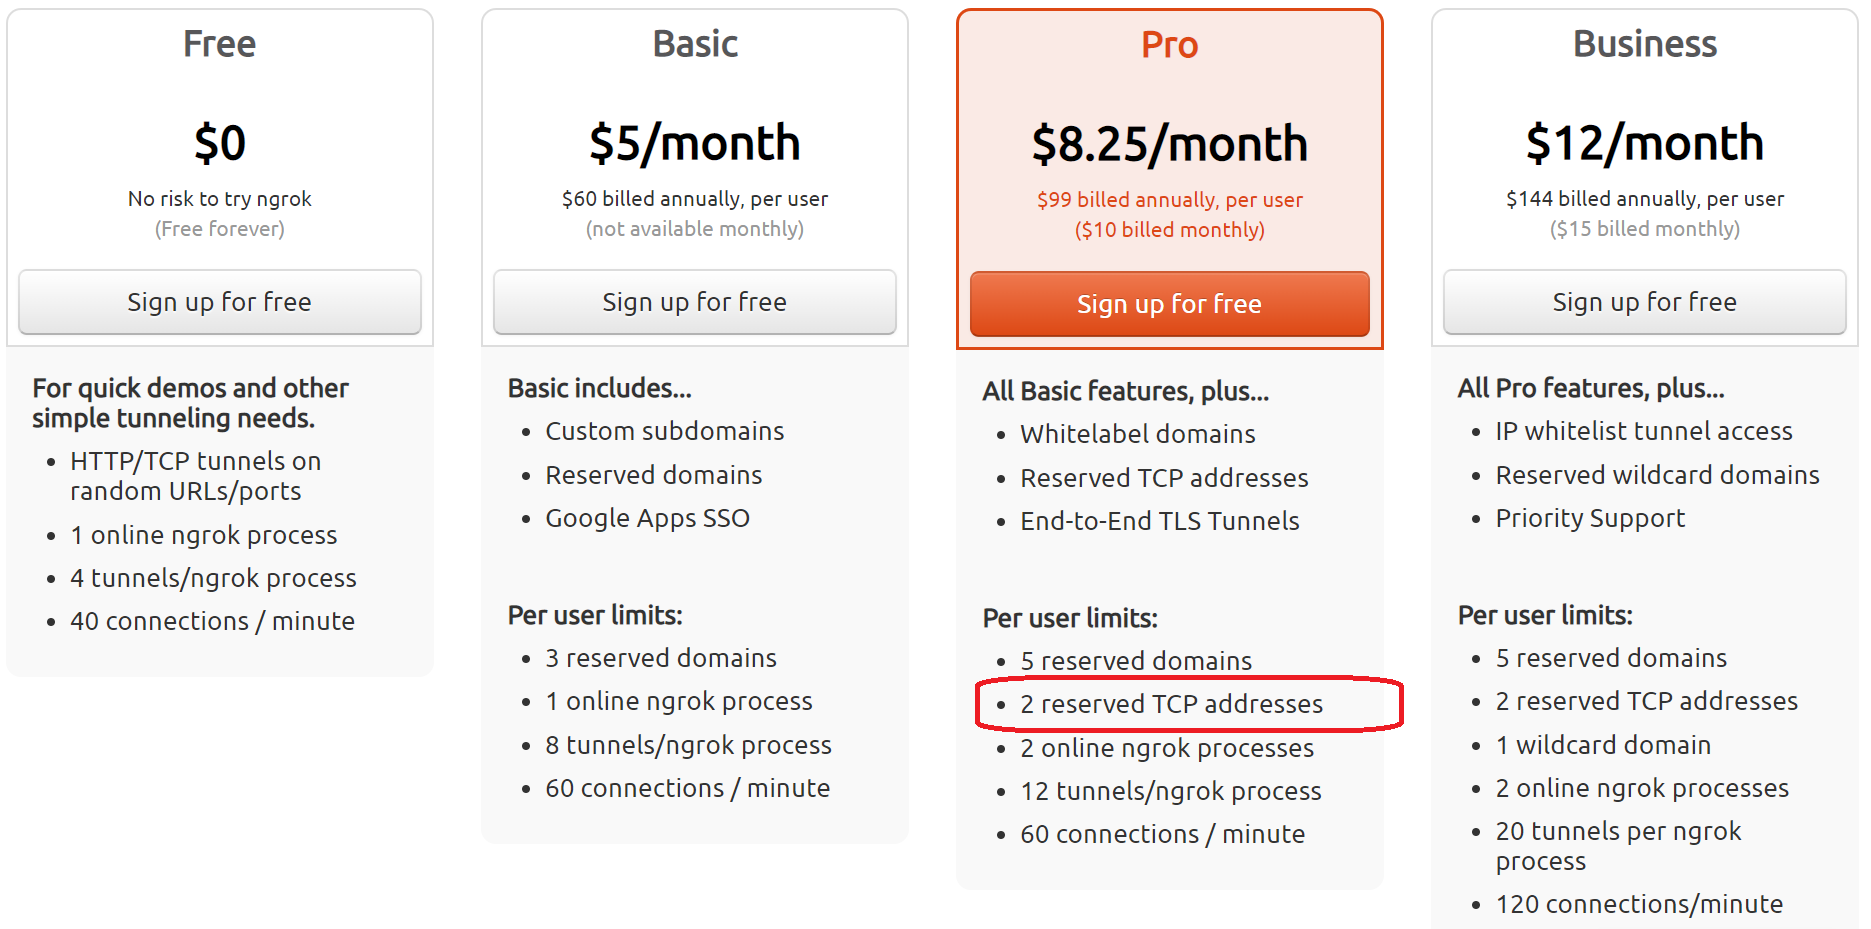
年間99ドルで"2 reserved TCP sddress"とあるが、これも、ポート番号が固定できるだけ。
serveo:無料:まったくアクセスできず使えなかった。
独自ドメインが必要なので自分でサーバーを構築できるものを探してみた。
Softether
VPSなどのパブリック固定IPのサーバーへvpnserverをインストール、それに向かってRaspberry pi側からvpnbridge、もしくはvpnclientで接続するのが基本構成だが、どうやってもうまくいかなかった。Raspberry pi側をマルチNIC(Ether+Wifi)にすればうまくいったかもしれない。
localtunnel
ドキュメントをざっと読んで、インストールしてみたが、httpsしか設定できないのでボツ。
ngrok
旧バージョン(1.7)のngrokがサーバー・クライアント両方ともソースが公開されている。
"DO NOT RUN THIS VERSION OF NGROK (1.X) IN PRODUCTION."と記載されており注意が必要だが、商用版の"ngrok.io"部分を独自ドメインにして使えそう。
これを試してみる。
サーバーの検討
固定IPを使えるVPSサービスを検討。スペックは最低レベル。
■WEBARENA VPSクラウド
月額360円で1コア、SSD20GB、メモリ1GBと申し分なく愛用できるサービスだが、
2019年11月現在、残念ながら在庫なし。
■Conoha VPS
月額630円で1コア、SSD20GB、メモリ512MB,やむなくこちらを選択する。
ドメインの取得
すでにアカウントを持っているバリュードメインで
年間99円の(初年度だけ)ドメインを購入し、下記1~5を参考にし設定。
VALUE-DOMAIN で取得したドメインをConohaで使ってみる
構成
サーバー:Conoha VPS CentOS7
クライアント:Raspberry pi Zero WH Raspbian buster
セットアップ
基本的にサーバー、クライアント側両方ともにGoのセットアップを行う。
下記を参考にGoのセットアップ。
Linux(CentOS, Ubuntu)にGo言語の開発環境を構築する
あまりGoが新しいとエラーになるので、Go1.7をインストールする。
下記を実行する。
git clone https://github.com/inconshreveable/ngrok.git
cd ngrok
# raspbianは下記
GOOS=linux GOARCH=arm make release-client
# CentOS7は下記
GOOS=linux GOARCH=amd64 make release-server
上記でngrok/bin/内にバイナリができる。
自己認証局、サーバー証明書の作成
OpenSSL ECDSAでの自己認証局作成を参考にルートCA,中間CAを作成。
証明書を作成:
サーバー証明書の秘密鍵とCSRを作成
openssl req -new -config openssl.cnf -newkey ec:<(openssl ecparam -name prime256v1) -keyout server.key -out server.csr
サーバー証明書を中間CAで署名
openssl ca -config openssl.cnf -extensions svr_cert -keyfile icacert.key -cert icacert.pem -in server.csr -out server.crt -days 3650
openssl.cnfの主な変更点
[ svr_cert ]
subjectAltName= @alt_names

[ alt_names ]
# SAN対策
DNS.1 = <取得したドメイン>
DNS.2 = *.<所得したドメイン>
証明書チェーンの作成
サーバー証明書として組み込むため、
サーバー証明書+中間CA証明書+自己認証局CA証明書をくっつける。
SSLCertificateChainFile Deprecation Warning on Apache 2.4.8+
./bundle.sh server.crt > server.chain
./bundle.sh icacert.pem >> server.chain
./bundle.sh cacert.pem >> server.chain
サーバー、クライアントへの自己認証局CA証明書の組み込み
下記を参考に信頼されたルート証明書として作成した自己認証局CA証明書を組み込む。
独自のルートCA証明書を追加する方法(Ubuntu, CentOS 7)
ngrokクライアントのCA証明書の入れ替え
クライアント側のngrokroot.crtを、自己認証局CA証明書に入れ替えて
再度GOOS= linux GOARCH=arm make release-clientを実施する。
サーバー、クライアントの実行。
サーバー側
bin/ngrokd -tlsKey=server.key -tlsCrt=server.chain -domain=<取得したドメイン>
クライアント側
設定ファイルを書いて実行する。
vi .ngrok


server_addr: <所得したドメイン>:4443
trust_host_root_certs: false
tunnels:
  mqtt:
    proto:
      tcp: 8883
    remote_port: 8883
  node-red:
    proto:
      https: 1880
    subdomain: nodered


# 実行
bin/ngrok -config=.ngrok start-all
実行確認
クライアント側の状態
ngrok                                                           (Ctrl+C to quit)

Tunnel Status                 online
Version                       1.7/1.7
Forwarding                    https://nodered.<取得したドメイン> -> 127.0.0.1:1880
Forwarding                    tcp://<取得したドメイン>:8883 -> 127.0.0.1:8883
Web Interface                 127.0.0.1:4040
# Conn                        106
Avg Conn Time                 436138.60ms


HTTP Requests
-------------

GET /icons/node-red/rpi.svg   304 Not Modified
GET /icons/node-red/file.svg  304 Not Modified
GET /icons/node-red/file-in.s 304 Not Modified
GET /icons/node-red/watch.svg 304 Not Modified
GET /icons/node-red/parser-ya 304 Not Modified
GET /icons/node-red/file-out. 304 Not Modified
GET /icons/node-red/parser-xm 304 Not Modified
GET /icons/node-red/parser-js 304 Not Modified
GET /icons/node-red/parser-ht 304 Not Modified
問題なくTCP接続が確認できた。