はじめに
obniz 2020年アドベントカレンダー 3日目!
この記事ではパーツライブラリに登録されていない、
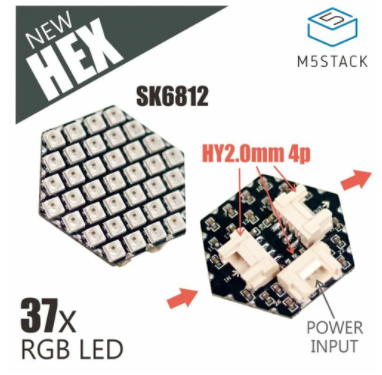
M5Stack用NeoPixel互換LED搭載 六角形ユニットを点灯制御する方法についてご紹介します🎄
↓が点灯制御を行う六角形ユニットです!

できたもの
obnizによる六角LEDユニットの制御デモです!これからQiita記事にまとめます!#obniz pic.twitter.com/kRwb9sL4QB
— まえぷー@出窓菜園 (@kmaepu) December 3, 2020
Hello obniz!#obniz pic.twitter.com/ioxpKGQj9L
— まえぷー@出窓菜園 (@kmaepu) December 3, 2020
(Zが見ずらい...)
接続方法
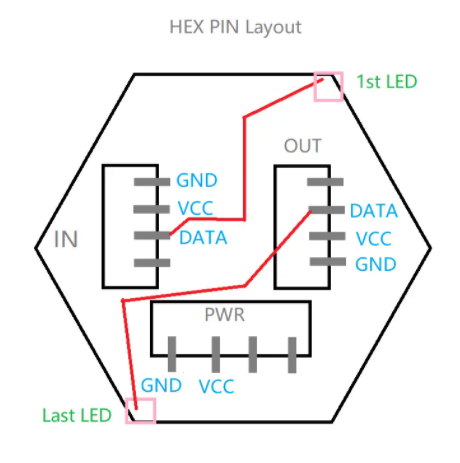
六角LEDユニット次のようにGROVE互換コネクタになっています。信号は次の通りです。

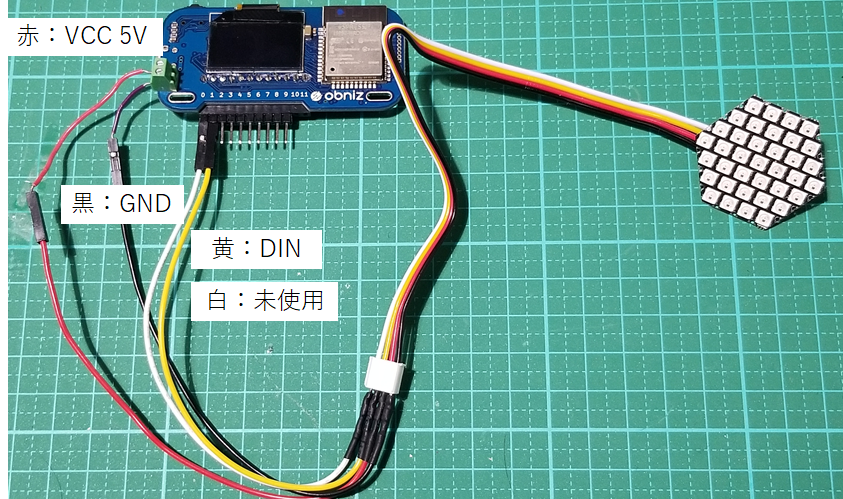
実際には次のように接続しました。
・赤:VCC 5[V]
・黒:GND
・黄:DIN
・白:未使用
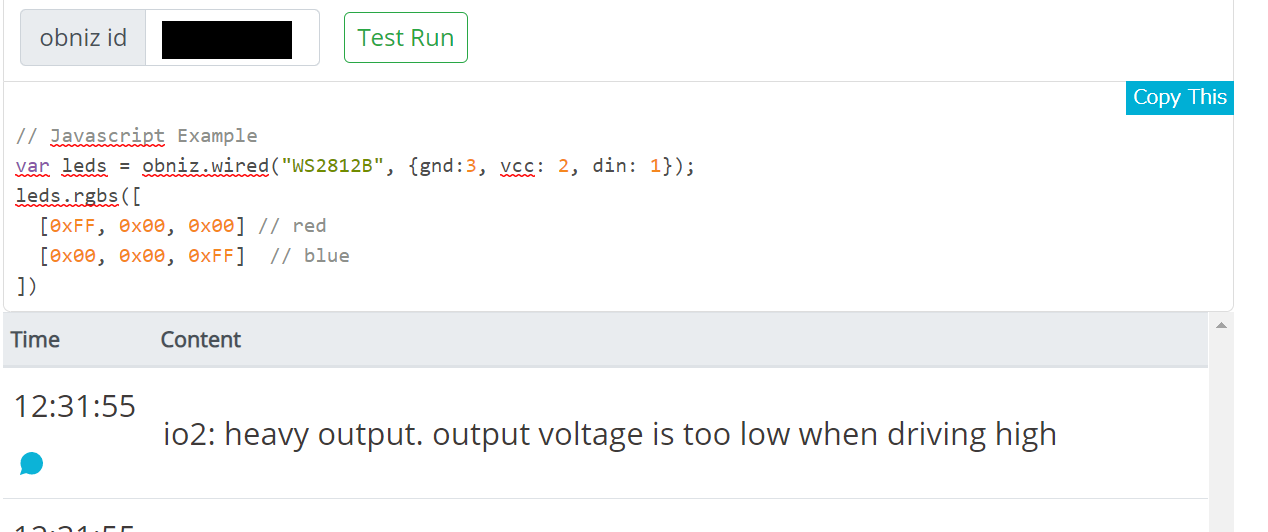
何度か点灯制御を試したときに、obnizのI/O端子からの電源供給では動作しなかったので、USB BUSから供給するようにしました。輝度を下げればI/o端子からの電源供給も可能ではないかと思います。
プログラム
obniz パーツライブラリ ws2812Bを使用しました。
プログラム全体はこちらです。
<html>
<head>
	<meta charset="utf-8" />
	<meta name="viewport" content="width=device-width, initial-scale=1" />
	<link rel="stylesheet" href="https://stackpath.bootstrapcdn.com/bootstrap/4.3.1/css/bootstrap.min.css" />
	<link rel="stylesheet" href="/css/starter-sample.css" />
	<script src="https://code.jquery.com/jquery-3.2.1.min.js"></script>
    <script src="https://unpkg.com/obniz@3.10.1/obniz.js"crossorigin="anonymous"></script>
</head>

<body>
	<div id="obniz-debug"></div>
  <div class="led">
      <h3 class="text-center">Control</h3>
      <button class="btn btn-primary" id="start">Start</button>
      <button class="btn btn-outline-primary" id="reset">Reset</button>
  </div>

	<script>
		var obniz = new Obniz("OBNIZ_ID_HERE");
    obniz.onconnect = async function() {
      var i = 0;
      var leds = obniz.wired("WS2812B", {din: 1});
      var ledarry = new Array(38);    // LEDの配列

      console.log("start");
      for(i=0; i<38; i++){
        ledarry[i] = [0x00, 0x00, 0x00];
      }

      $('#start').click(async function () {
        for(i=0; i<38; i++){
          ledarry[i] = [0x00, 0x02, 0x00];
          leds.rgbs(ledarry);
          await obniz.wait(100); // led ON for 1sec.
        }
      });

      $('#reset').click(async function () {
        for(i=0; i<38; i++){
          ledarry[i] = [0x00, 0x00, 0x00];
        }
        leds.rgbs(ledarry);
      });
      obniz.display.clear();
      obniz.display.print("Hello World");
    };
	</script>
</body>
</html>
【重要なところを抜粋】
次の行でWS28212Bのインスタンス生成をしています。今回は電源供給を外部にしているので、引数にはdinの端子番号のみ与えます。
var leds = obniz.wired("WS2812B", {din: 1});
次にLED色配列を作成し、すべて正当にしています。
六角ユニットのLEDは37個ですが、処理をしやすいように38要素の配列にしています。
var ledarry = new Array(38);    // LEDの配列

console.log("start");
for(i=0; i<38; i++){
    ledarry[i] = [0x00, 0x00, 0x00];
}
次の行では、Web画面からStartボタンを押すとこで配列の要素0から順に緑色点灯させています。
$('#start').click(async function () {
    for(i=0; i<38; i++){
        ledarry[i] = [0x00, 0x02, 0x00];  //  配列の要素に色データを代入
        leds.rgbs(ledarry);   // 実際にLED表示
        await obniz.wait(100);
    }
});
おわりに
WS28212BはメジャーなNeopixel LEDなので、今回の六角ユニット意外にもLEDテープやLEDバー等に応用できます!
obnizでオリジナルの🎄イルミネーションを作ってみてはいかがでしょうか!
それでは良きobnizライフを楽しんでください🎅

