はじめに
今回はこちらの「Set up Auto ML with Python」の記事を参考に、PythonからAzure Auto MLを使用したトレーニングをしてみます。
開発環境
- OS Windows 10(NVIDIA GTX 1650Ti,16GB RAM, i5-10300H CPU)
- Visual Studio Code 1.73.1
- Python 3.7
【Auto ML】Pythonからトレーニングをしてみる
前準備
まずは記事に載っているURLから学習データのダウンロードを行います。


カラム名はこのようなものがありますが、今回はClassの結果がFalseとTrueのどちらになるかを予測していきます。
実行
そしてAuto MLの記事を参考にこちらのコードを動かしていきます。
from azureml.train.automl import AutoMLConfig
from azureml.core.dataset import Dataset
from azureml.core.experiment import Experiment
from azureml.core import Workspace
from azureml.core import ComputeTarget
from azureml.core import Datastore
from azureml.core import Dataset
import pandas as pd

#ワークスペースへの接続
ws = Workspace.get(name="ワークスペース名",
            subscription_id='サブスクリプションID',
            resource_group='リソースグループ')

#コンピューティングクラスター
cluster_name = 'コンピューティングクラスタ名'
cluster = ComputeTarget(workspace=ws, name=cluster_name)

#データソース
df = pd.read_csv("creditcard.csv")
datastore_name = "workspaceblobstore"
datastore = Datastore.get(ws, datastore_name)
datastore_paths = [(datastore,"creditcard.csv")]
train_data = Dataset.Tabular.from_delimited_files(path=datastore_paths)
label = "Class"

#学習の設定
automl_classifier=AutoMLConfig(
    task='classification',
    iterations = 5,
    compute_target=cluster,
    primary_metric='AUC_weighted',
    experiment_timeout_minutes=30,
    blocked_models=['XGBoostClassifier'],
    training_data=train_data,
    label_column_name=label,
    n_cross_validations=2)

#実行
experiment_name = '実験名'
experiment = Experiment(ws, experiment_name)
run = experiment.submit(automl_classifier)
print(run)
ワークスペースへの接続
まず、作成したワークスペースへ接続します。
ws = Workspace.get(name="ワークスペース名",
            subscription_id='サブスクリプションID',
            resource_group='リソースグループ')
ワークスペース名やサブスクリプションID、リソースグループはそれぞれAzureの右上のアカウント名をクリックすると取得できます。
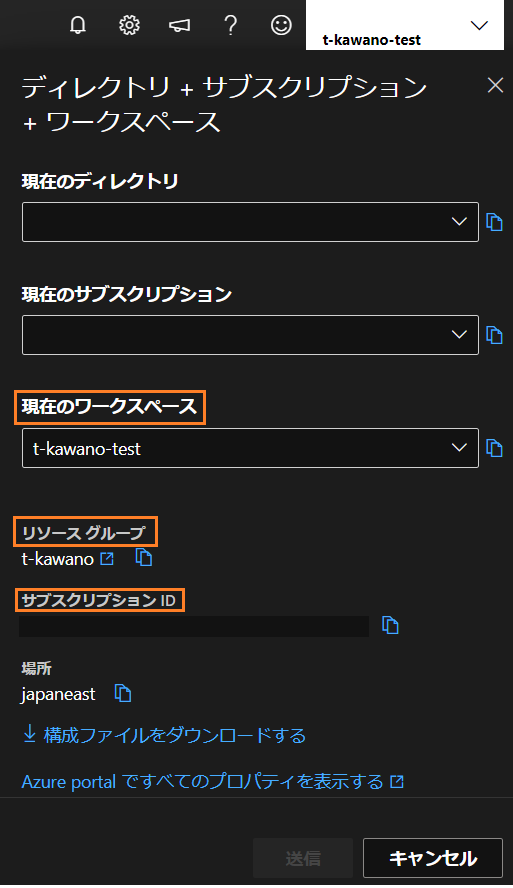
もしくは、同じ「構成ファイルをダウンロードする」でconfig.jsonをダウンロードしたら、同じプロジェクト直下において
ws = Workspace.from_config()
これ1行で済ませることもできますが、今回はワークスペース名などを入れるやり方を採用しました。
コンピューティングクラスター
cluster_name = 'コンピューティングクラスター名'
cluster = ComputeTarget(workspace=ws, name=cluster_name)
cluster_nameには「コンピューティング」タグで作成したコンピューティングクラスターの名前を入れます。
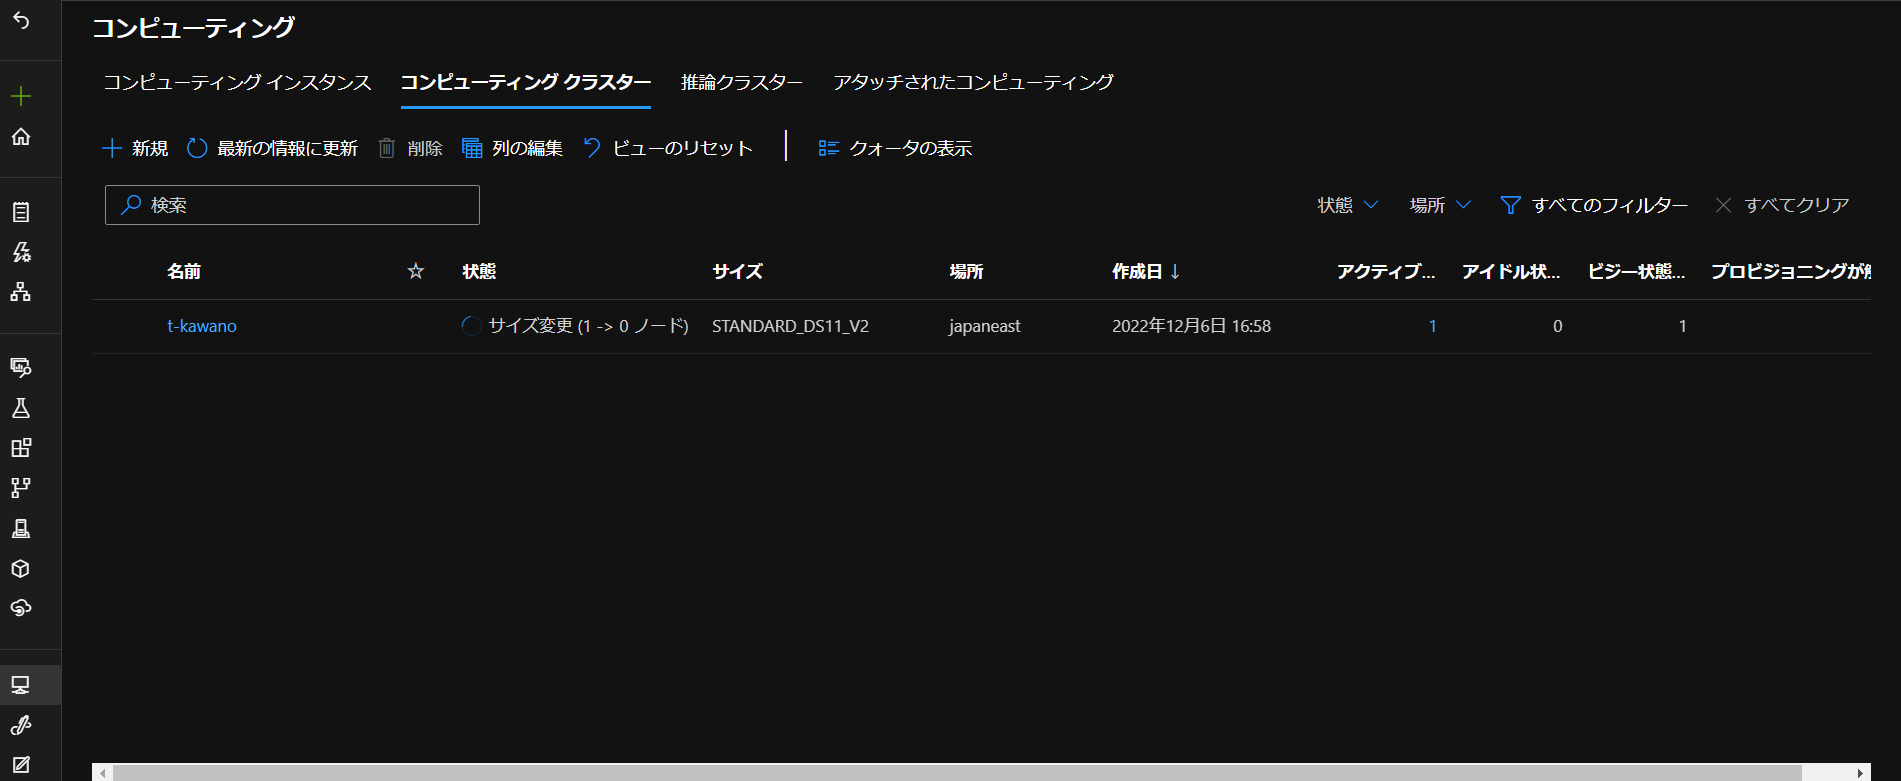
(作成方法は前の記事をご覧ください。)
データソース
冒頭で取得した学習データを相対パスで読み込み、labelでは予測対象となるカラム名を設定します。
from sklearn.model_selection import train_test_split
df = pd.read_csv("ローカルにある学習データのファイル名.csv")
train_data, test_data = train_test_split(df, test_size=0.1, random_state=42)
label = "Class"
しかし、このまま実行した際に
"message": "Input of type '<class 'pandas.core.frame.DataFrame'>' is not supported. Supported types: [azureml.data.tabular_dataset.TabularDataset]Please refer to documentation for converting to Supported types: https://docs.microsoft.com/en-us/python/api/azureml-core/azureml.core.dataset.dataset?view=azure-ml-py",
というエラーが出てきたので、
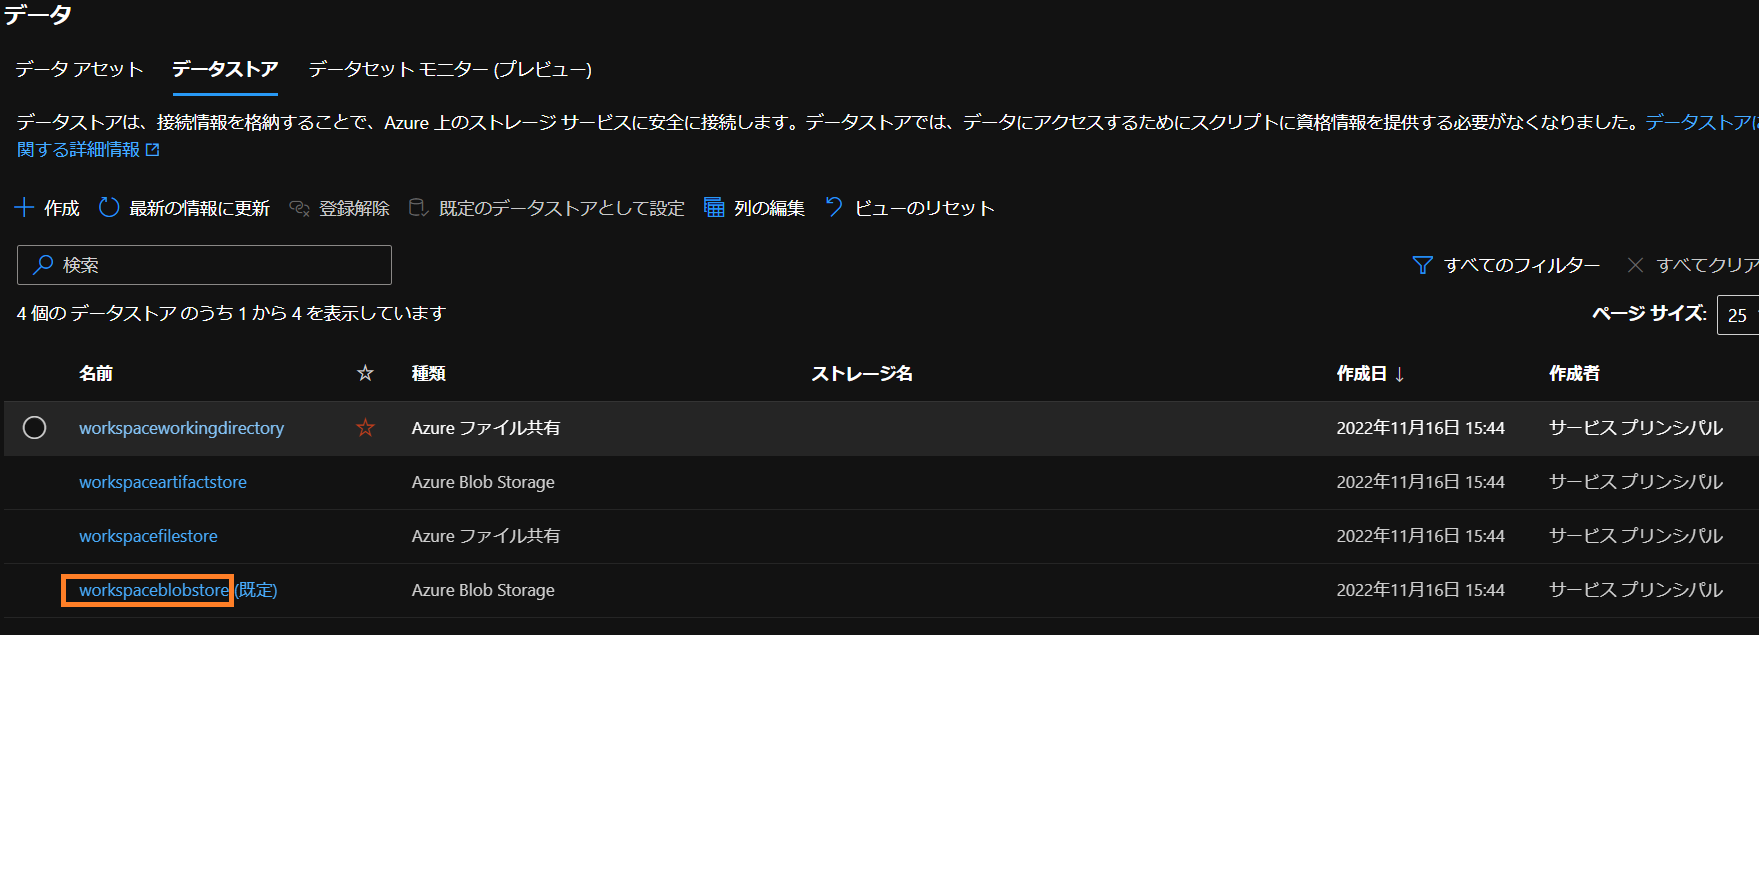
datastore_name = "workspaceblobstore"#データストア名
datastore = Datastore.get(ws, datastore_name)
datastore_paths = [(datastore,"creditcard.csv")]#学習データを置いたパス名を入力(コンテナー名は不要)
train_data = Dataset.Tabular.from_delimited_files(path=datastore_paths)
これで学習データをTablular型へ変換すると使えました。
データストア名は「データストア」タブのworkspaceblobstoreを入力。
そして、パス名の設定ではBLOBコンテナーを開いてすぐの
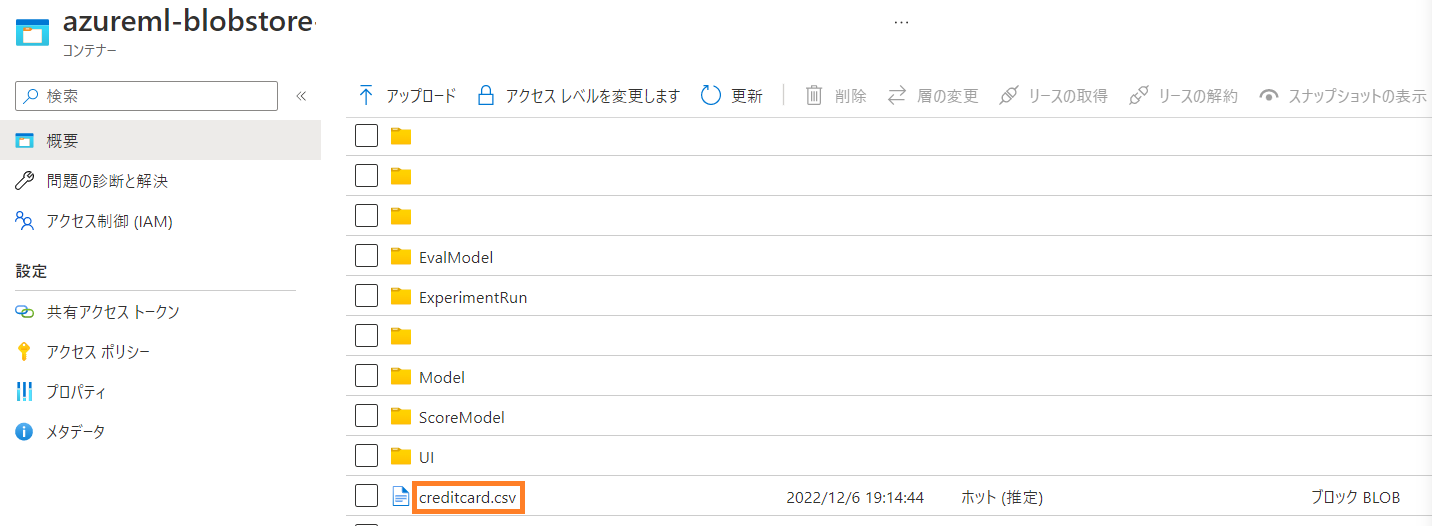
ここにcreditcard.csvを置きました。
設定
次に学習の設定を行います。
automl_classifier=AutoMLConfig(
    task='classification',
    iterations = 5,
    compute_target=cluster,
    primary_metric='AUC_weighted',
    experiment_timeout_minutes=30,
    blocked_models=['XGBoostClassifier'],
    training_data=train_data,
    label_column_name=label,
    n_cross_validations=2)
taskでは分類(classification)・回帰(regression)・時系列(forecasting)を選択することができます。
今回は2項分類タスクなので、classificationを選択。
iterationsでは学習アルゴリズムとパラメータの組数を設定できます。
primary_metricでは最適モデルを選ぶ際の指標を指定できます。
experiment_timeout_minutesは実験終了するまでの最大の時間(分)を指定できます。
今回は30分としました。
blocked_modelsは実験で無視する学習アルゴリズムを設定できます。
n_cross_validationsは交差検証の数を設定できます。
training_dataで学習データを指定し、label_column_nameには先ほど決めたターゲット列を設定します。
それぞれのパラメータのデフォルトと指定できるものをまとめるとこんな感じ。
| パラメータ | デフォルト・指定できるもの |
|---|---|
| task | classification、regression、 forecasting から選択可 |
| primary_metric | accuracy、AUC_weighted、average_precision_score_weighted、norm_macro_recall、precision_score_weightedから選択可 指定しない場合は分類タスクでは精度が用いられる |
| experiment_timeout_hours | 6日 |
| n_cross_validations | 20,000行以上:トレーニングの10% 1,000~20,000行:3個のフォールド 1,000行未満:10個のフォールド |
| label_column_name | 列名もしくは列番(インデックス)を使用 |
| test_size | すべてトレーニングデータで学習 |
| iterations | 1000回 |
| blocked_models | AveragedPerceptronClassifier、BernoulliNB、DecisionTree、ExtraTrees、GradientBoosting、KNearestNeighborsClassifier、LightGBMClassifier、LinearSupportVectorMachine、LogisticRegression、MultinomialNB、RandomForest、SGDClassifier、SupportVectorMachine、TabNetClassifier、TensorFlowDNNClassifier、TensorFlowLinearClassifier、XGBoostClassifierから選択可 |
今回は上記のパラメーターで学習させましたが、もちろん他にも設定できます。AutoMLConfigのリファレンスについてはこちらから参照ください。
実行
Experimentクラスでワークスペースにある実験を取得し、実験を実行します。
experiment_name = '実験名'
experiment = Experiment(ws, experiment_name)
run = experiment.submit(automl_classifier)
実行されると
Submitting remote run.
という表示がでてきます。
しかし、途中で
"message": "Install the required versions of packages using the requirements file. Requirements file location:
とパッケージのバージョンを適切なものにインストールしてくださいというエラーが出てきたので、
azure-core<=1.26.0
colorama<=0.4.5
cryptography<=38.0.1
dask<=2.30.0
dill<=0.3.5.1
distributed<=2.30.1
docker<=6.0.0
flatbuffers<=22.9.24
fsspec<=2022.10.0
gitdb<=4.0.9
jsonschema<=4.16.0
knack<=0.10.0
mlflow-skinny<=1.29.0
paramiko<=2.11.0
pathspec<=0.10.1
pkginfo<=1.8.3
psutil<=5.9.3
pyrsistent<=0.18.1
pytz<=2022.5
pywin32<=304
termcolor<=2.0.1
urllib3<=1.26.12
websocket-client<=1.4.1
zipp<=3.9.0
エラーで言われたものを全部まとめたファイルを作り、
pip install -r requirements.txt
これで一括でインストールしました。
これで再度実行すると、今度はうまくいきました^^
Azureに戻って確認してみると…

ちゃんとPythonから実行し、学習を進んだことを確認できました。
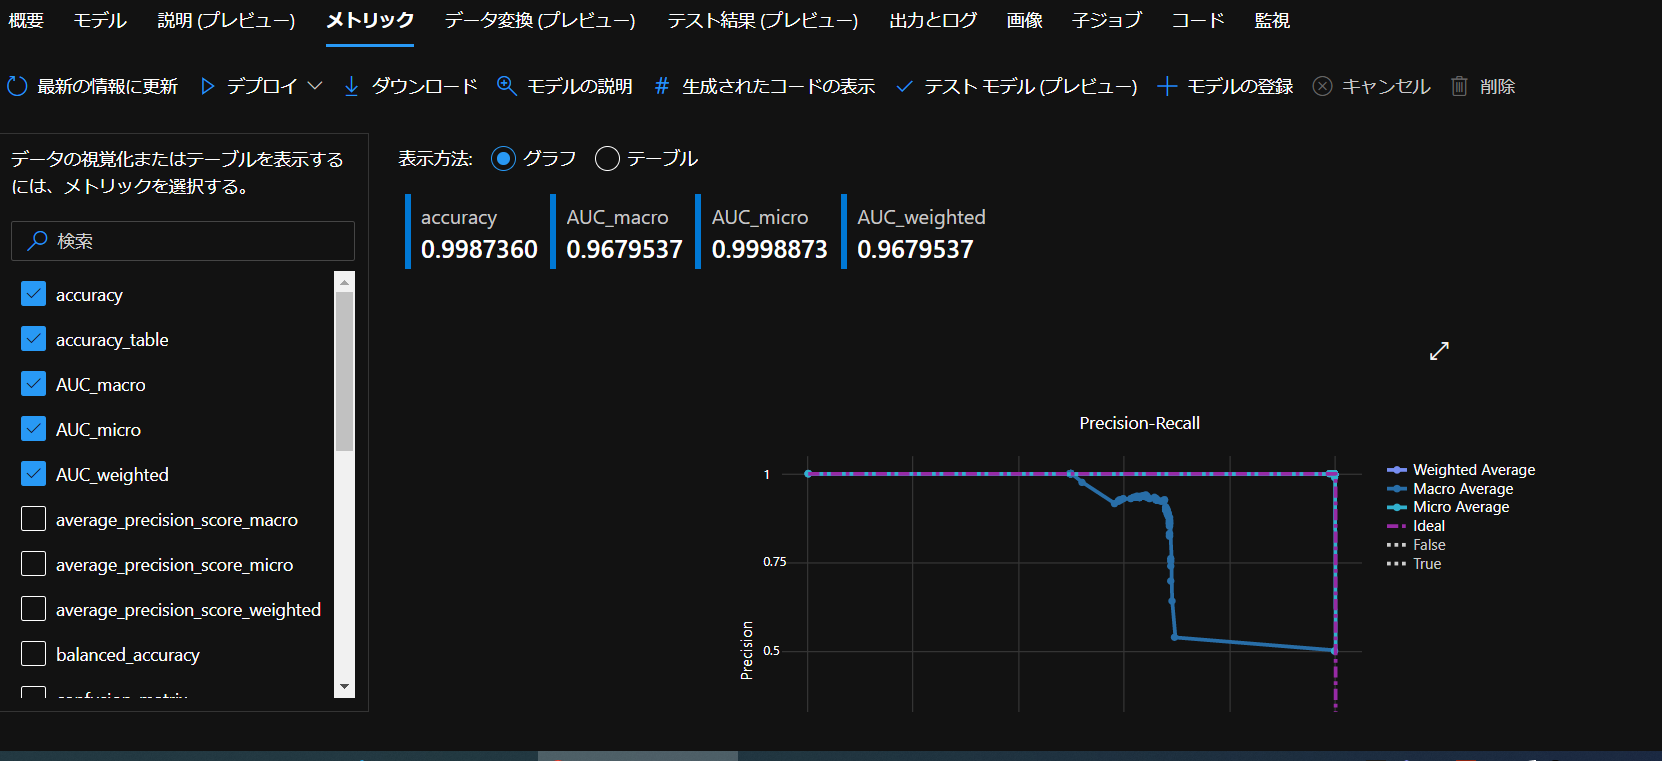
実行完了すると、
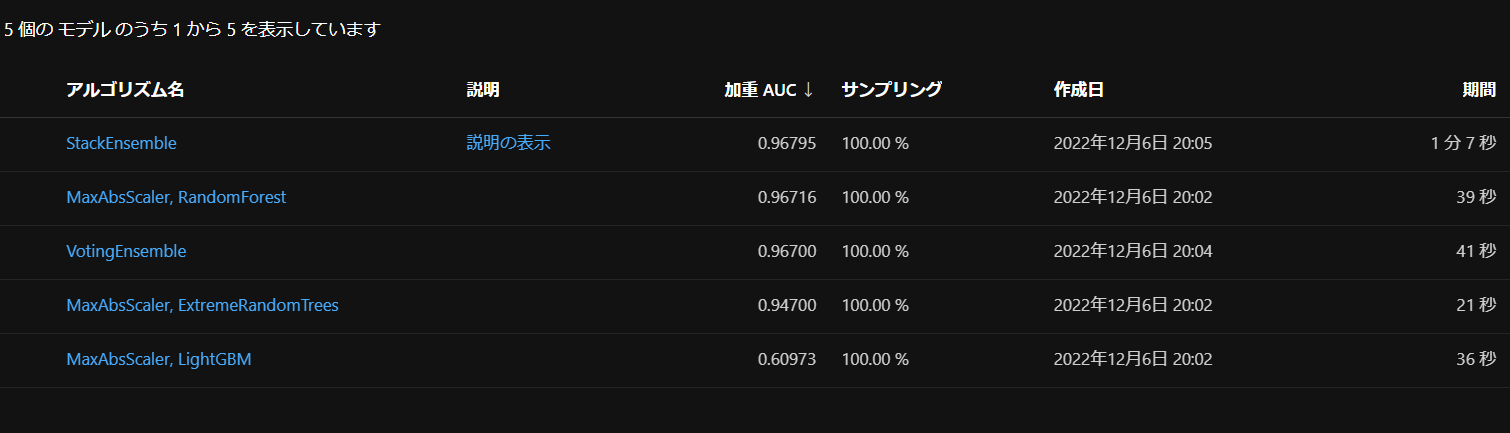
このようにモデルが作成され、一番結果が良いものは「説明の表示」で詳細を見ることができます。
まとめ
Azure Auto MLをPythonからトレーニングを実行してみました。途中、エラーで躓きまくりでしたが何とかできました…!今度Pythonから実行する際に出たエラーをまとめた記事を出そうと思います。