はじめに
今回はKaggleの「Tabular Playground Series - Aug 2022」のコンペをAzure MLを使って予測してみようと思います。
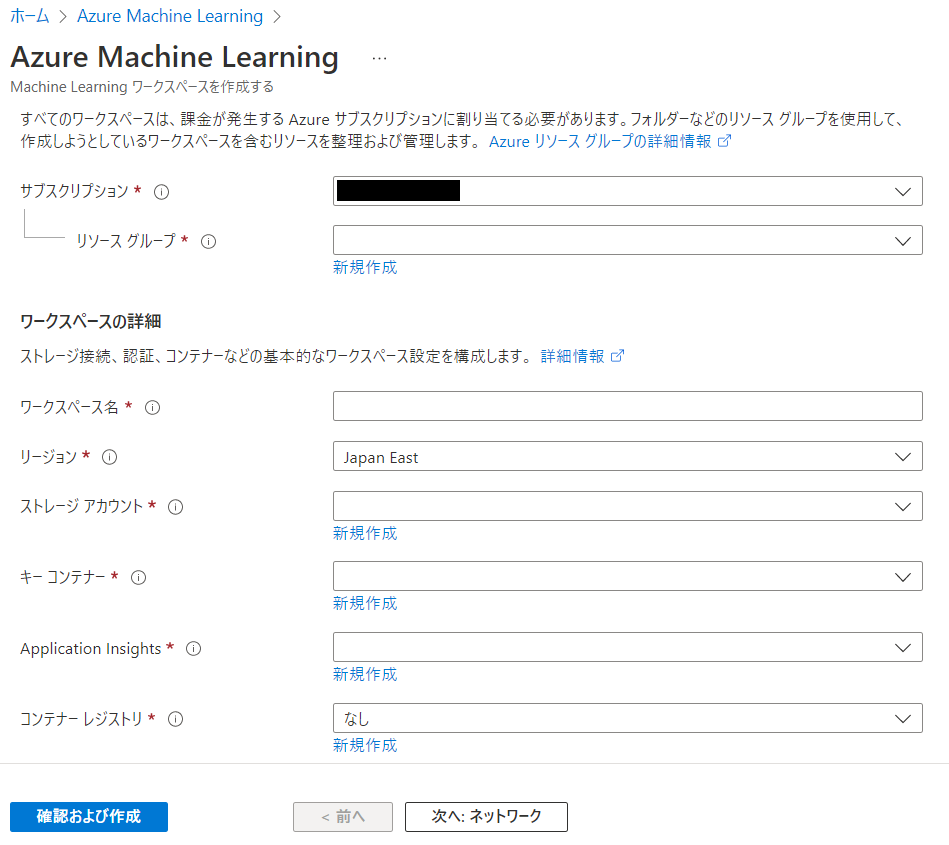
ワークスペースの作成
- 「Create」をクリックします
- サブスクリプションの選択をし、リソースグループで新規作成を行います。
- ワークスペース名の入力をします。(今回は「t-kawano-test」としました)
- 「確認および作成」をしたら続けて「作成」を選びます。
これでワークスペースの作成が完了です!
デザイナーの作成
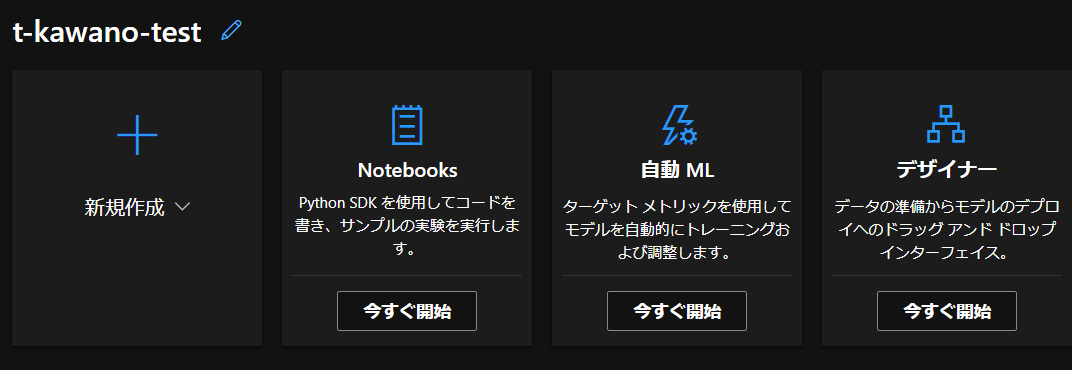
ワークスペースの作成が完了したら、「スタジオ Web URL」をクリックしたら、次のような画面に移ります。
今回は「デザイナー」という機能を使ってモデルを作成していきます。
デザイナーを「今すぐ開始」で起動します。
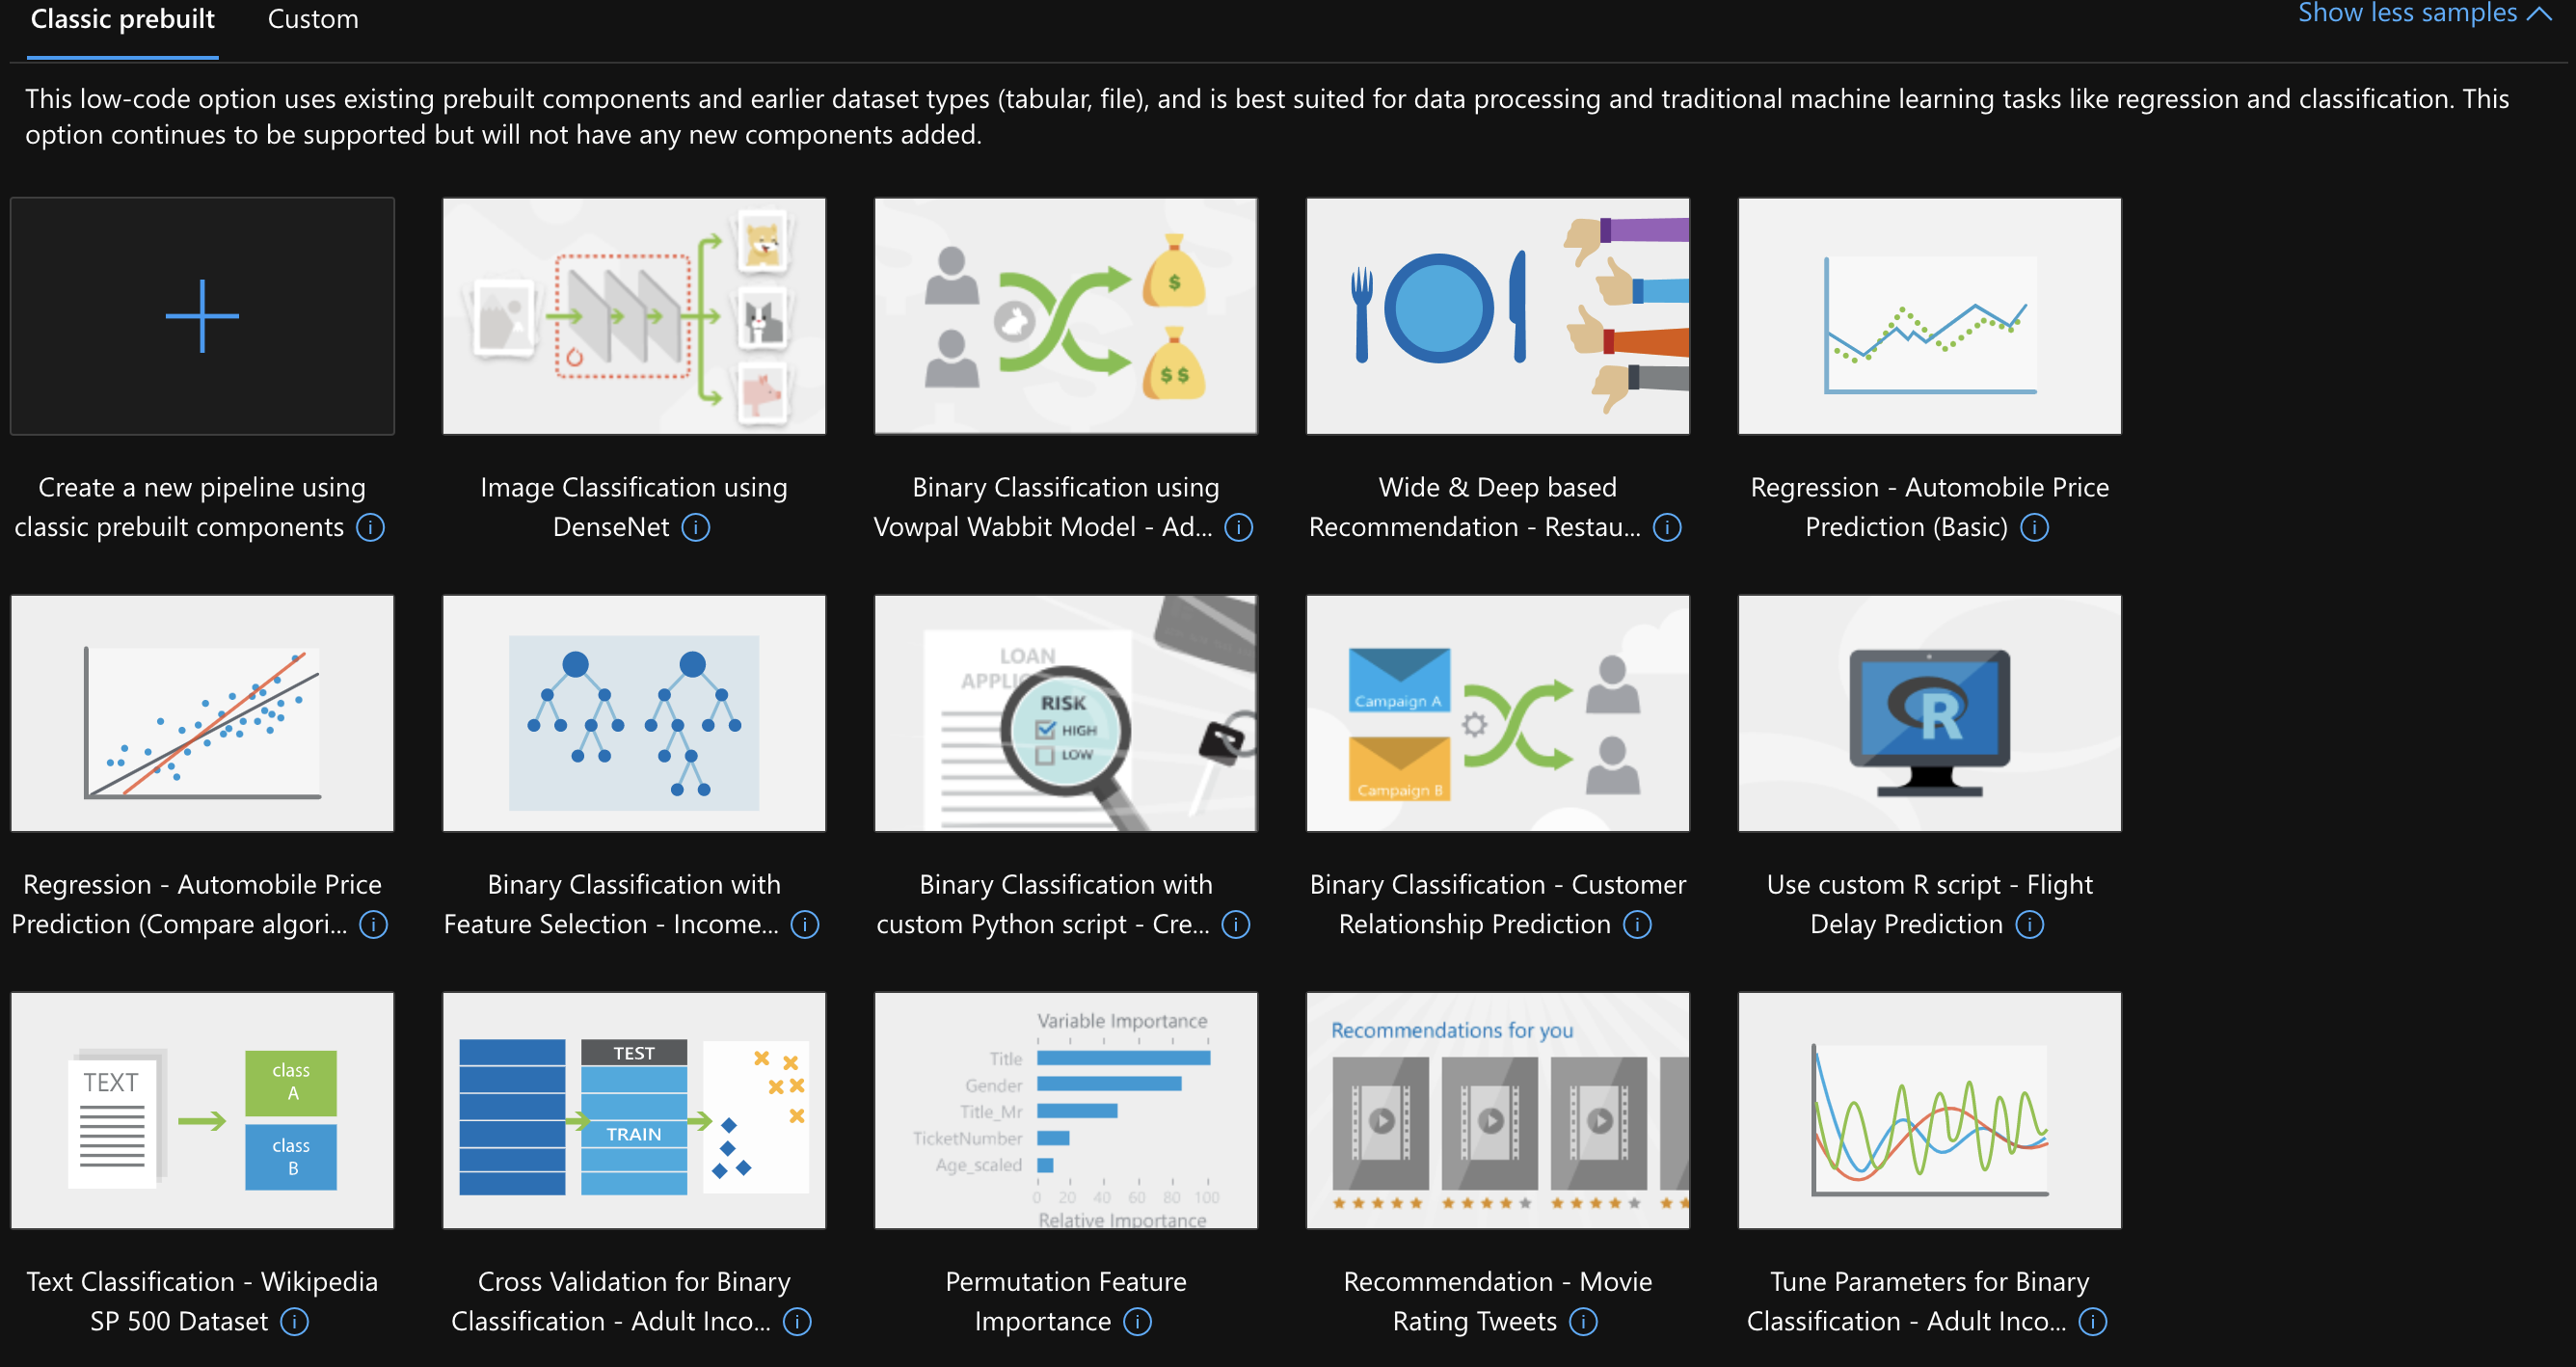
このようにサンプルがズラリと並んだ画面に移ります。
これらは既にブロックが組み上がっているものです。
TPS AUG 2022は製品の故障を予測するというコンペです。
つまり、failureの結果が0と1どちらなのかを予測するというもの(二項分類)なので、今回はこちらのサンプルの中の「Cross Validation for Binary Classification」を用いてやってみます。
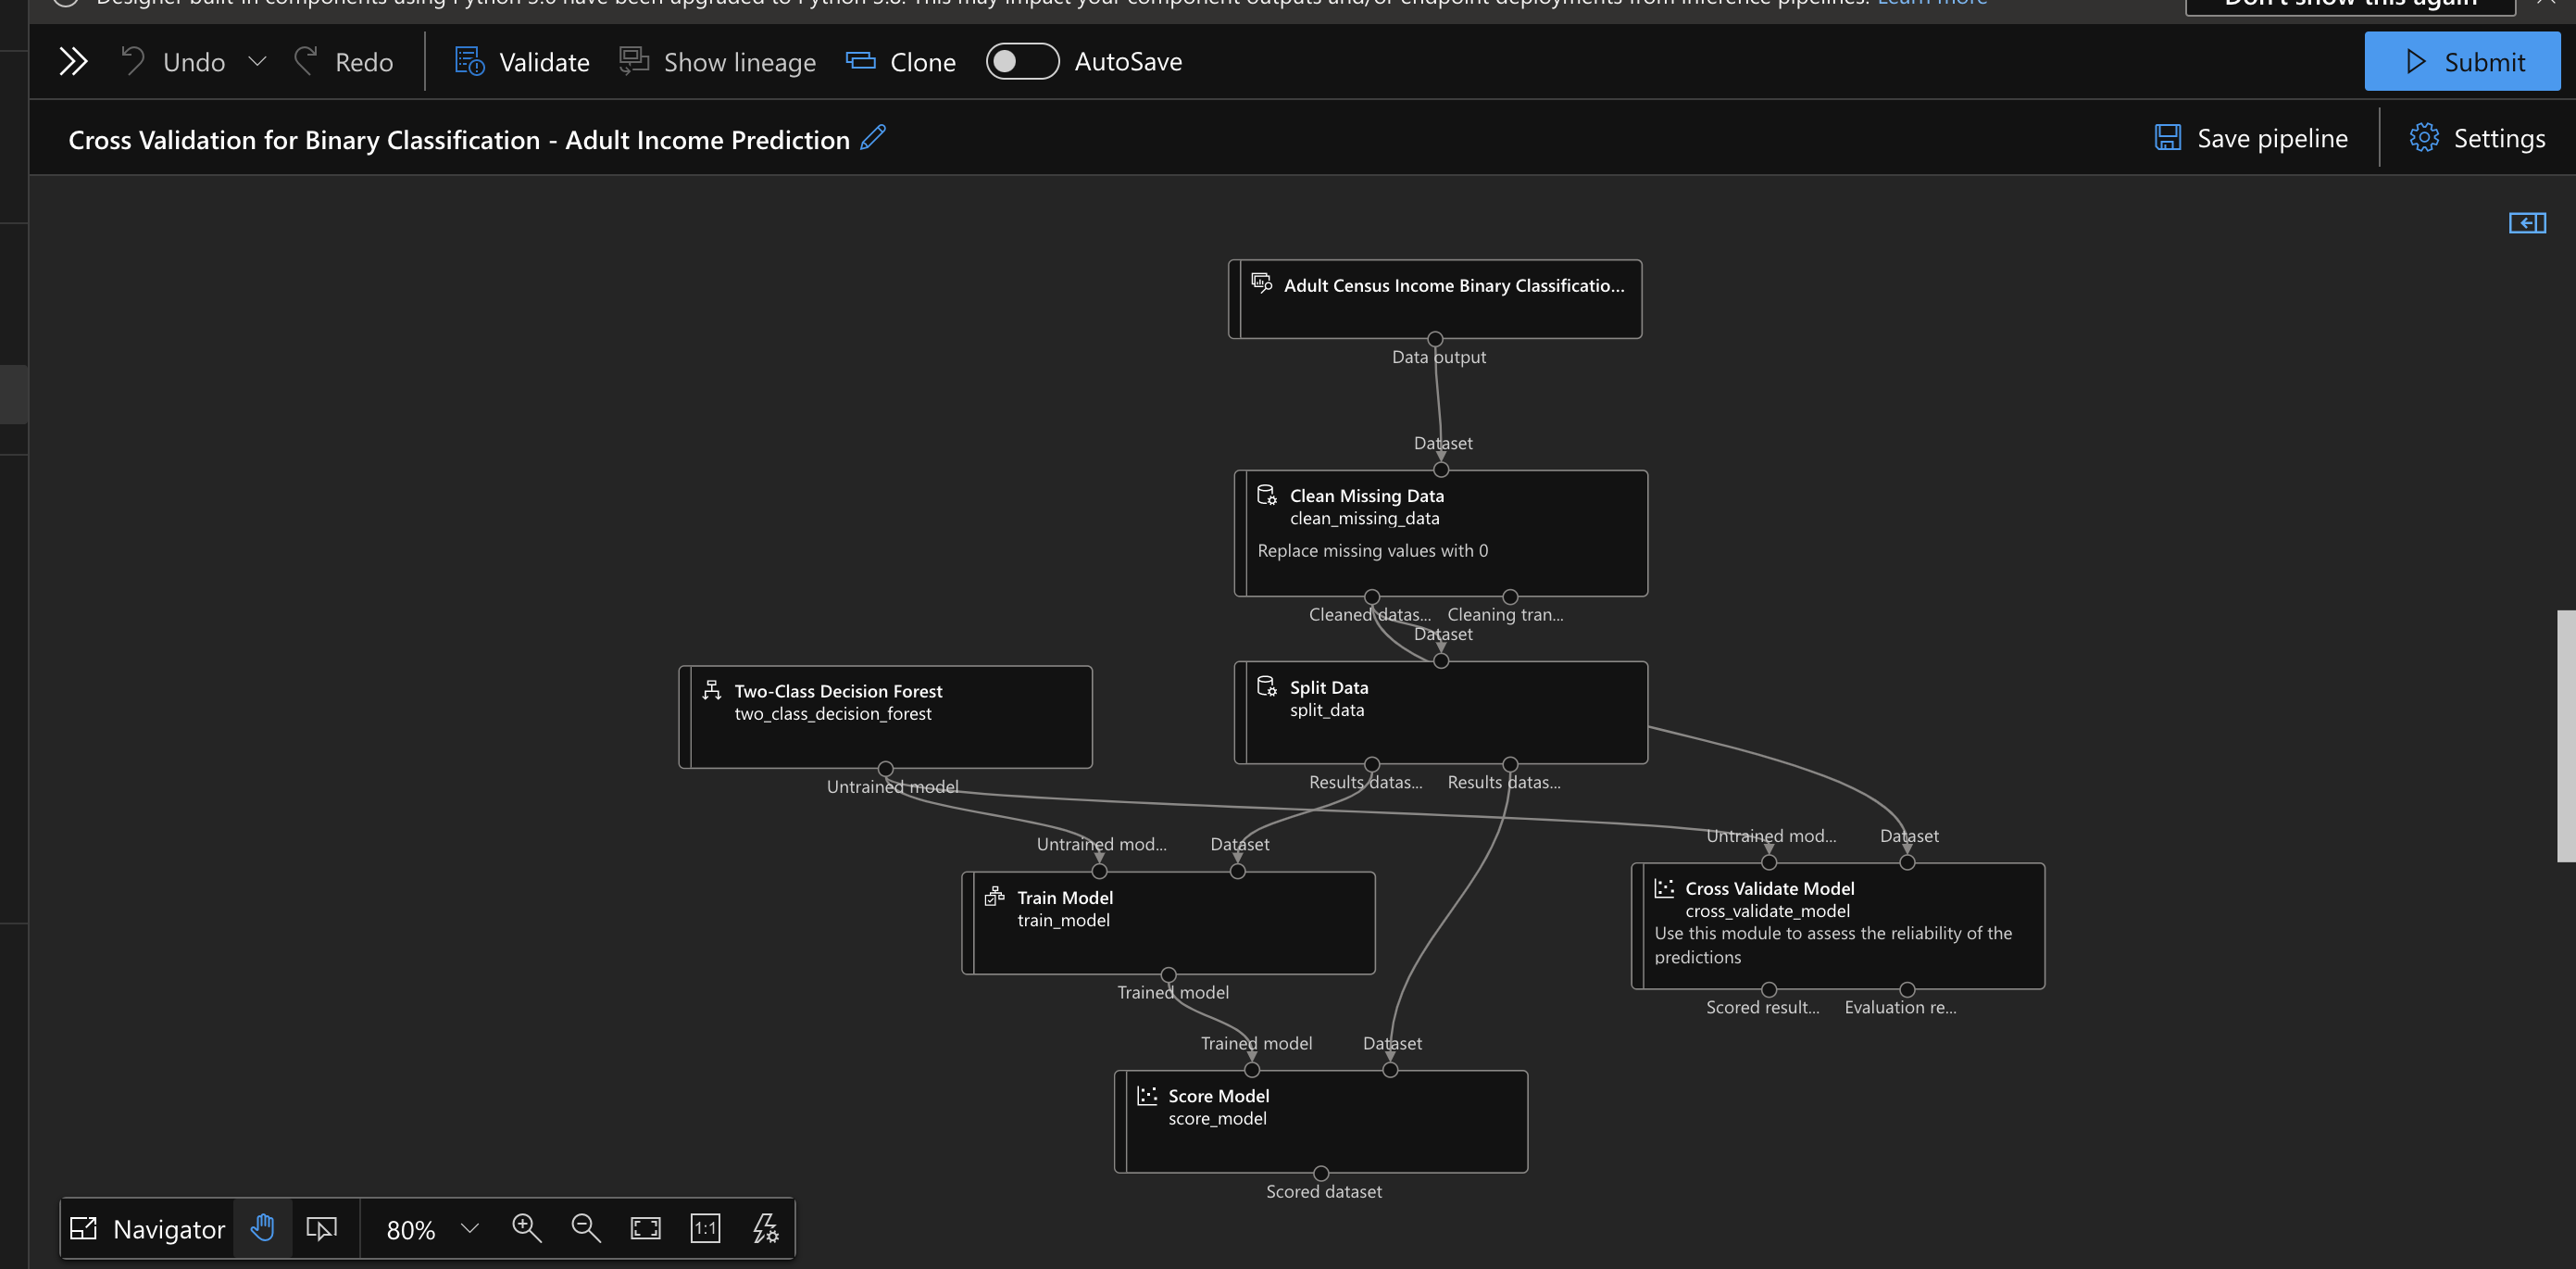
開いてみると、すでにブロックができあがっているのがわかります。
今回はデータセットだけKaggleのものへ入れ替えてやってみましょう!
データセットの追加
事前準備として
Kaggleのデータセットをダウンロードするには、そのコンペに参加する必要があります。
参加したら「Data」タブからSample、Train、Testの3つのファイルをダウンロードします。
Azure MLにデータセットを追加する
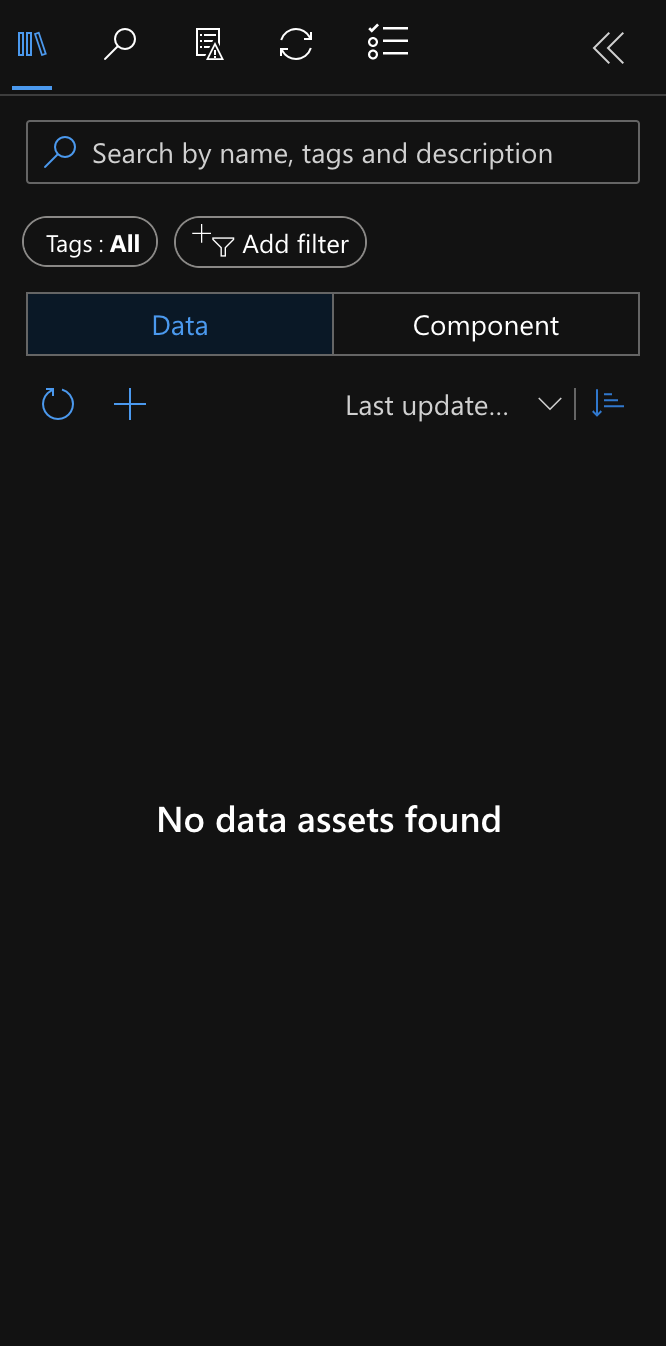
まずは「Data」タブを左側で開き、「+」をクリックします。
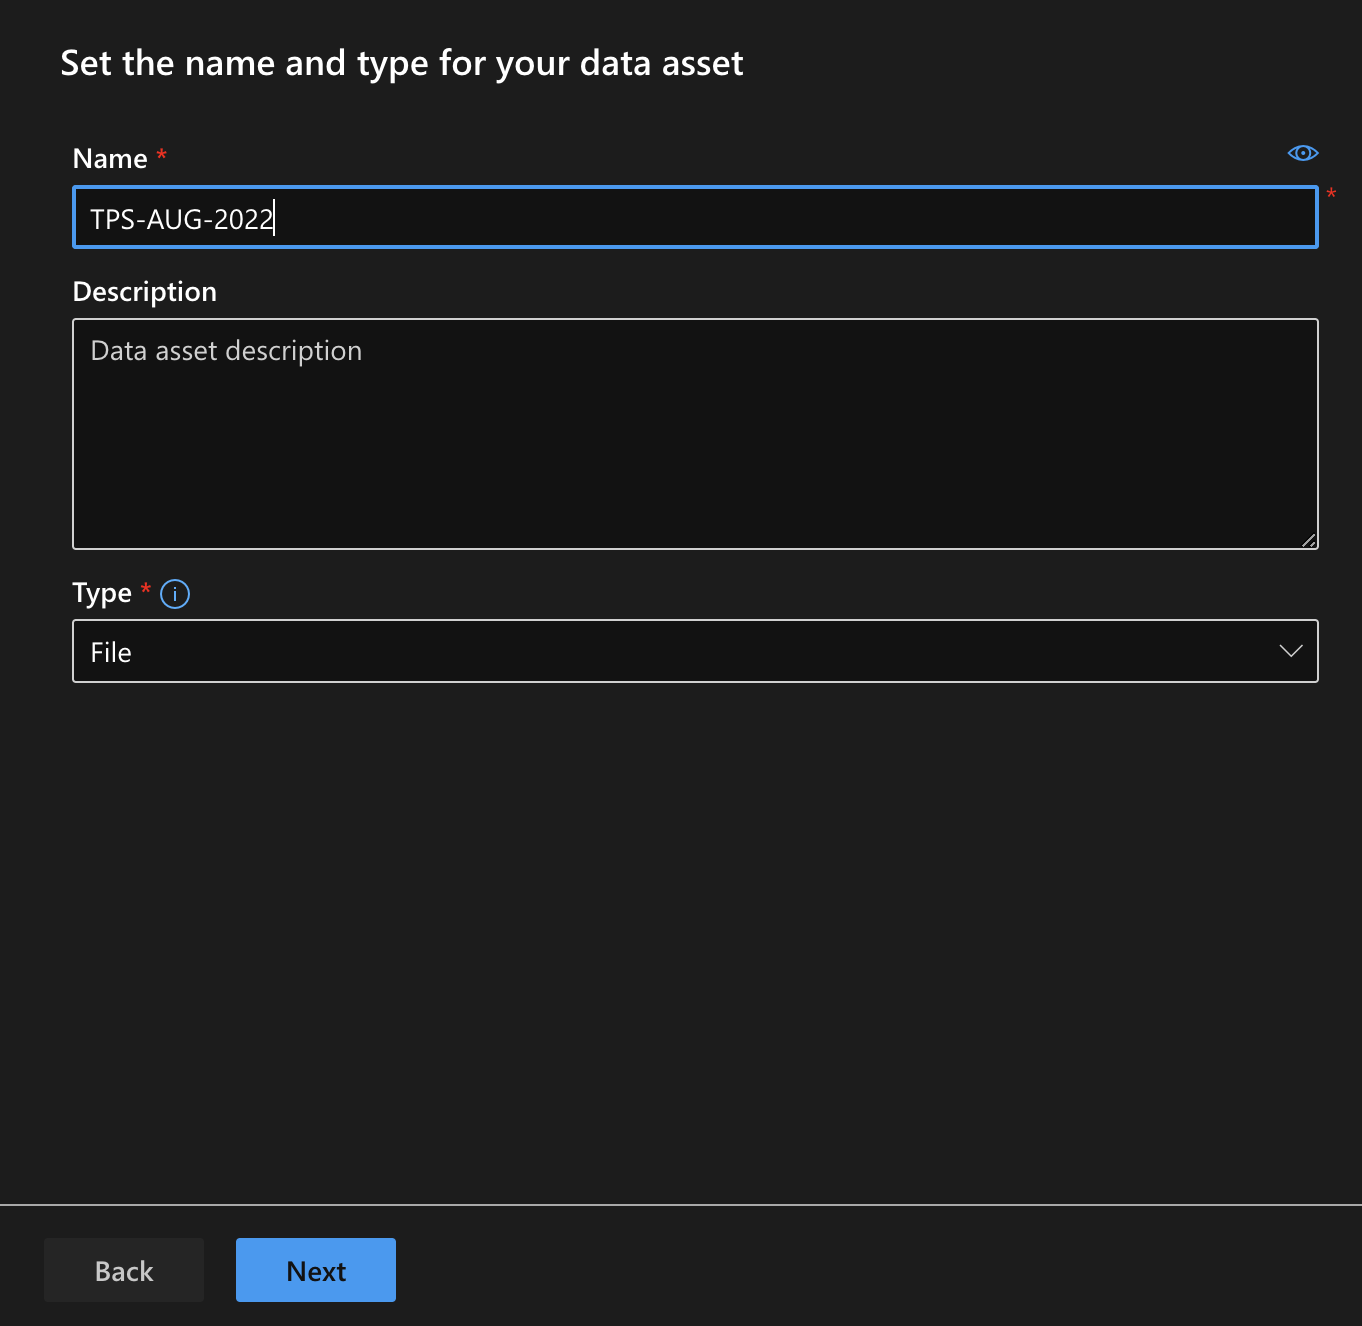
名前を設定し、ローカルのファイルからアップロードすればOK!
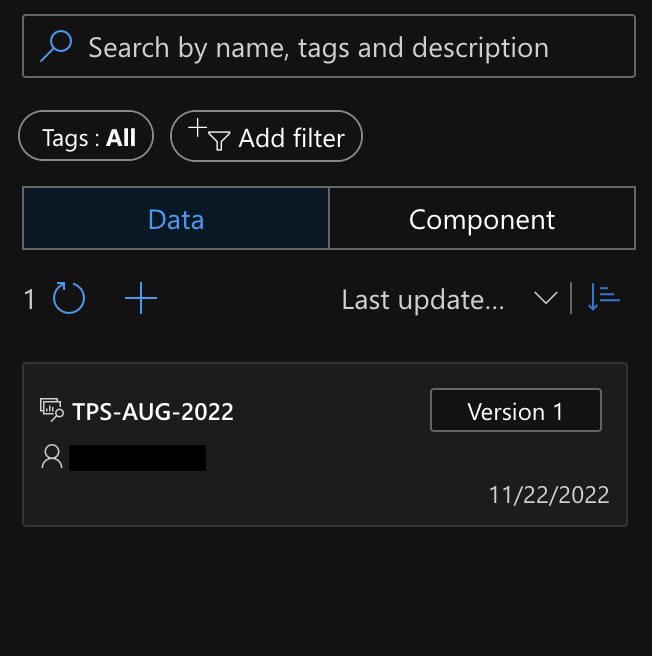
これで追加ができました^^
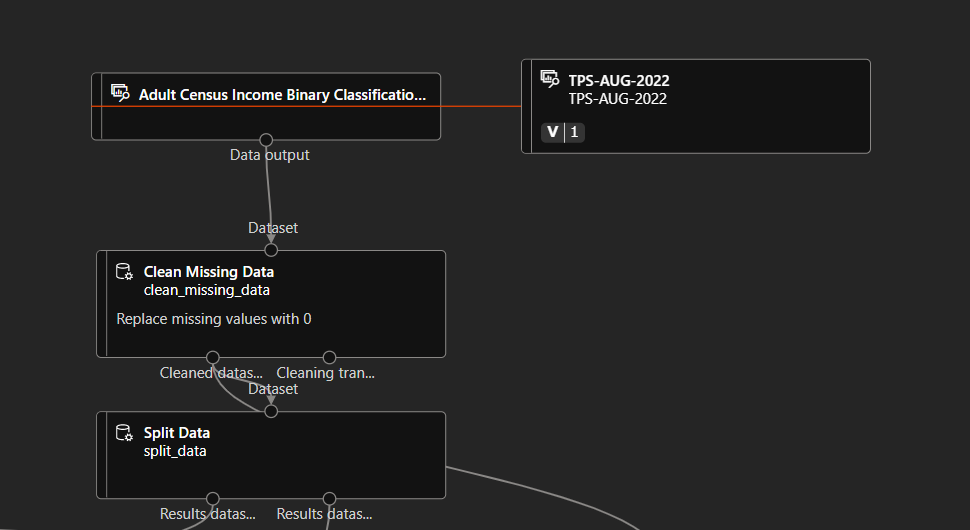
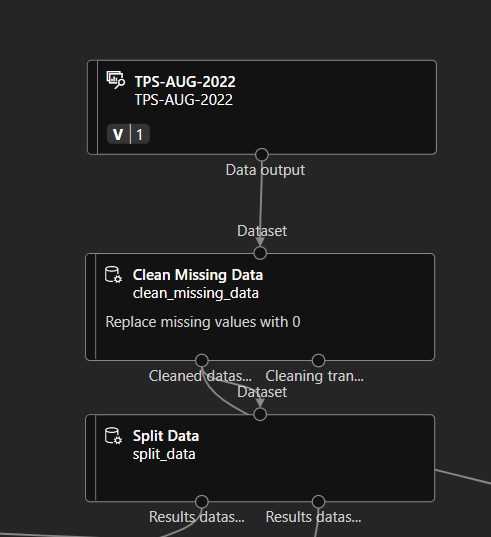
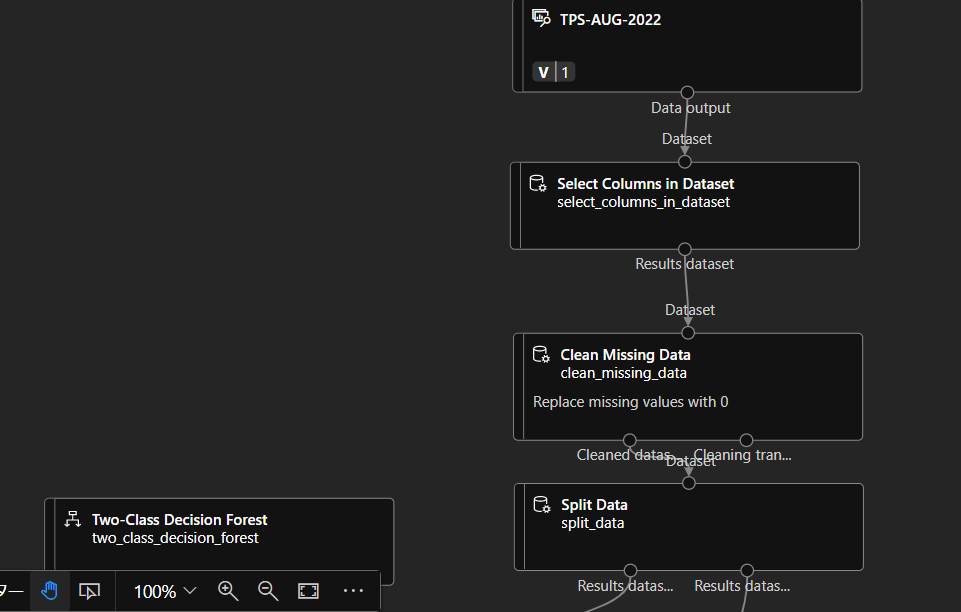
追加したTPS-AUG-2022のtrainデータを置いて、
Cleaning Missing DataにつなげればOK!
(元々あったデータセットについては、もう使わないので削除をしておきます。)
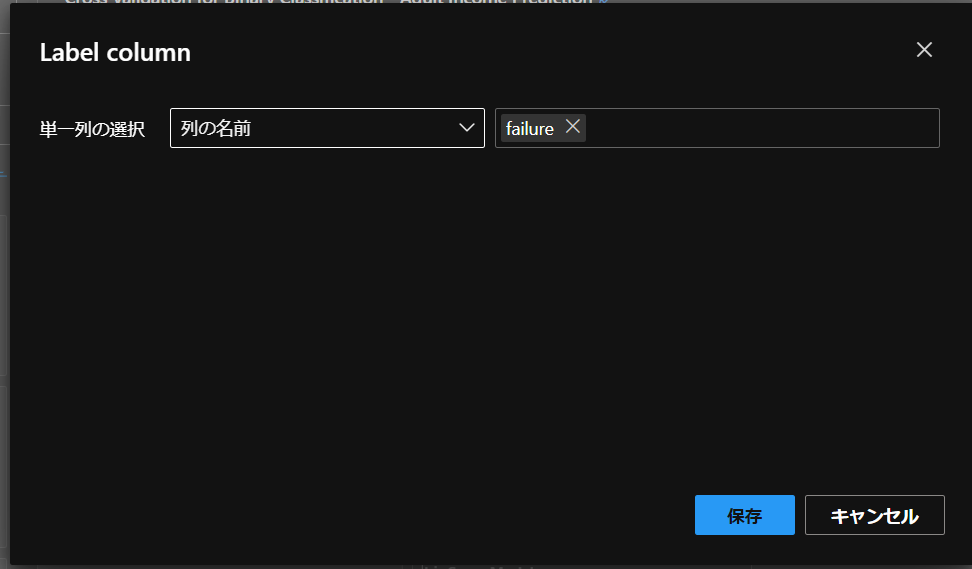
そして最後にターゲットの列を選択します。
Train ModelとCross validate Modelそれぞれのコンポーネントをダブルクリックすると設定できます。
列を変更後、保存をして完了です。
コンポーネントの追加
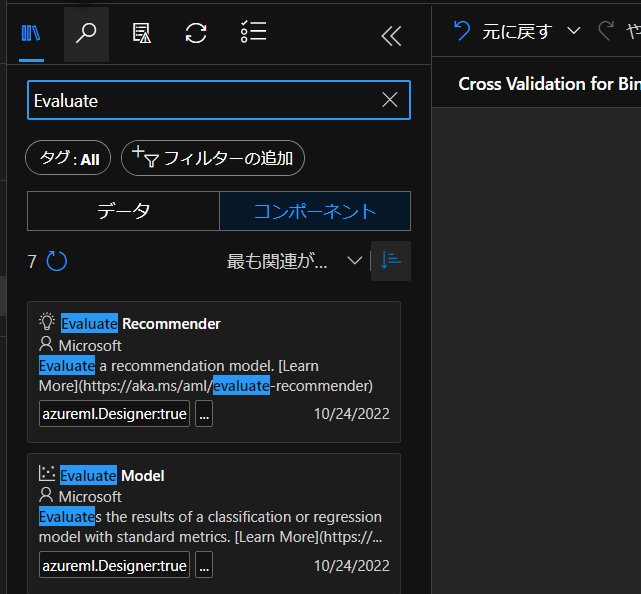
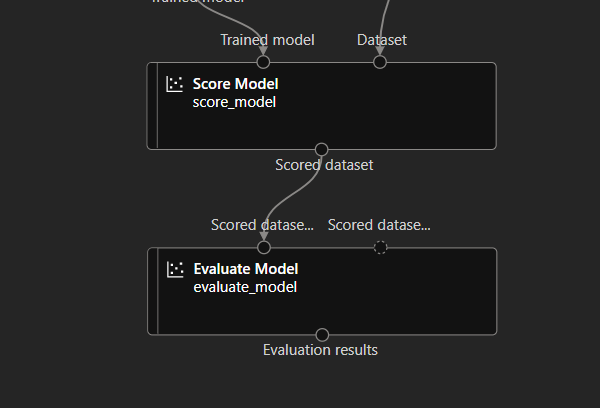
学習して出た結果を評価するために、Evaluate Modelコンポーネントを追加します。
データセットを追加したときと同じように、今度はコンポーネントタブを開き、検索欄で探します。
そして、Score Modelとつなげます。
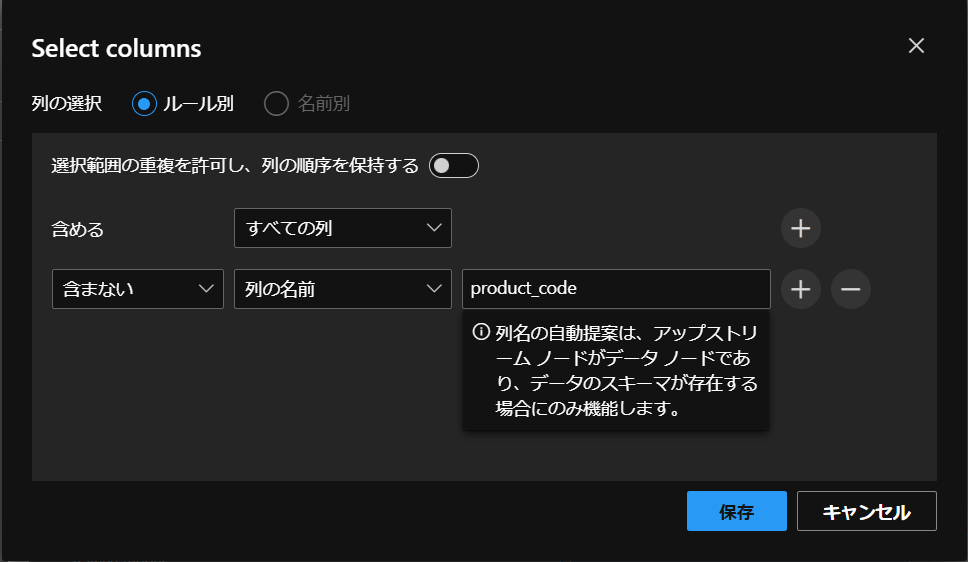
また、データの中身を見てみると、product_codeがtrainとtestデータで全く違うものが使われているので今回は削除します。この列を削除するためにはSelect Columns in Datasetコンポーネントを追加します。
trainデータの下にコンポーネントを置いたら
使用する列を指定したら、product_code列が削除されます。
実行
コンピューティング先を設定
「設定」をクリックし、「Azure MLコンピューティングクラスターを選択する」でクラスターを選択します。

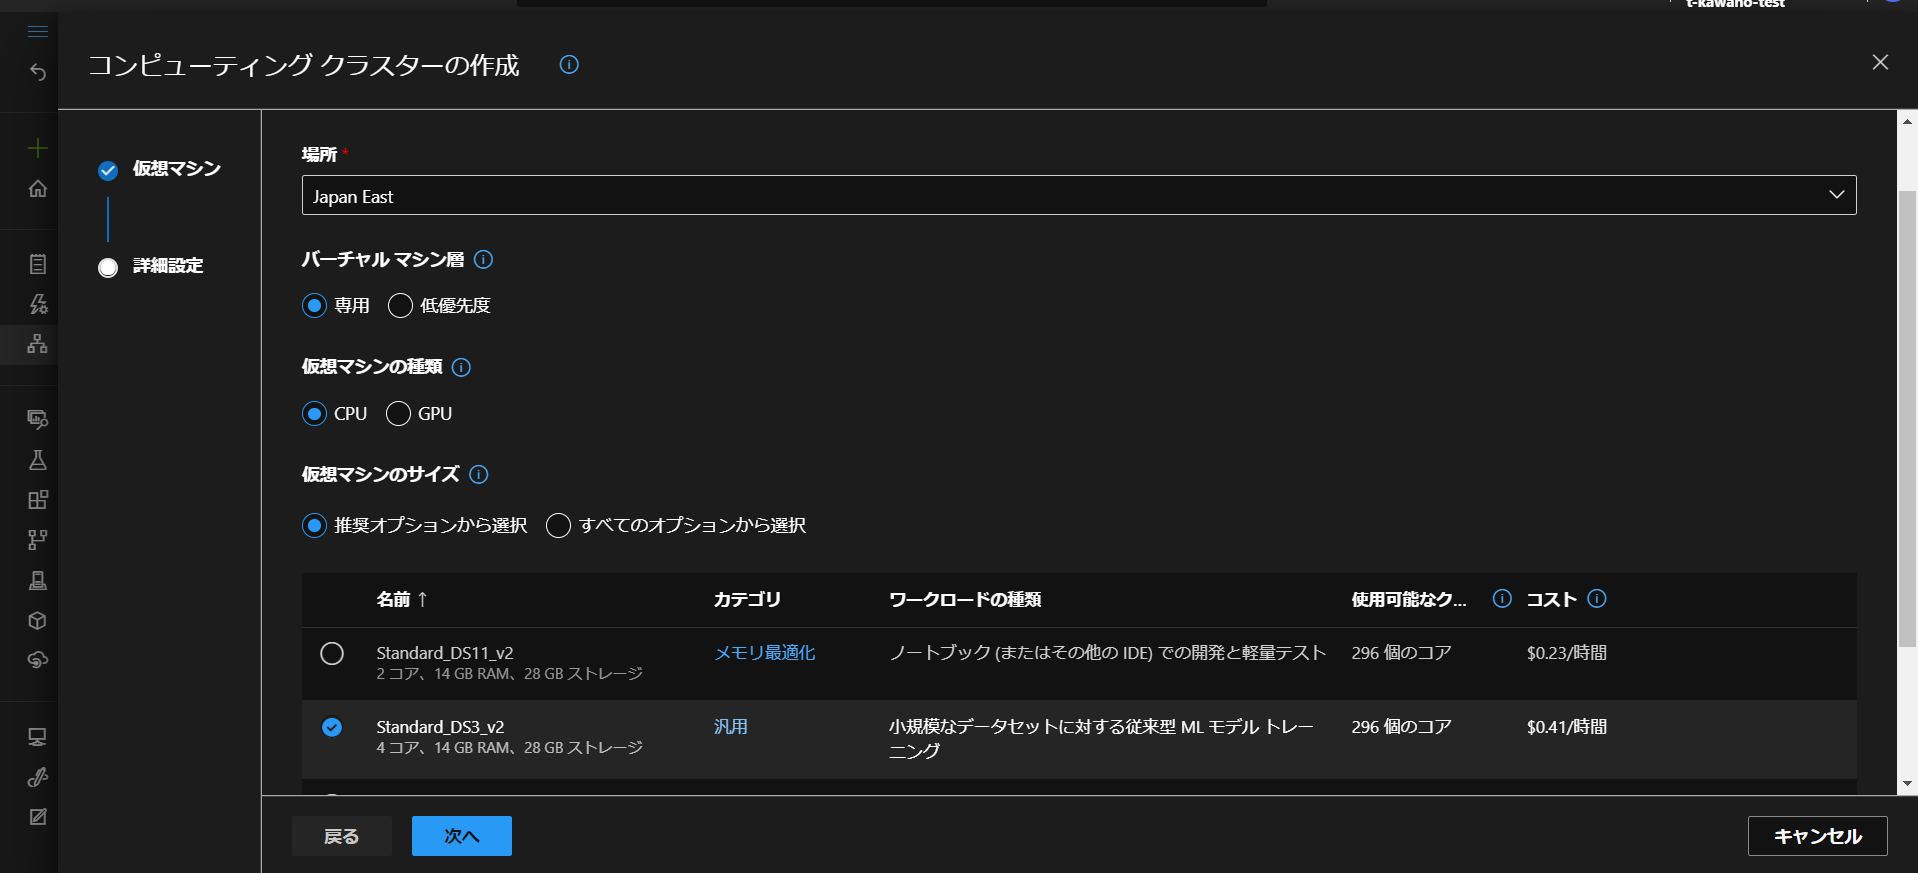
ここが選択できない場合は、その下にある「Azure MLコンピューティングクラスターを作成する」をクリックし、
場所や仮想マシンの種類、サイズを選択します。
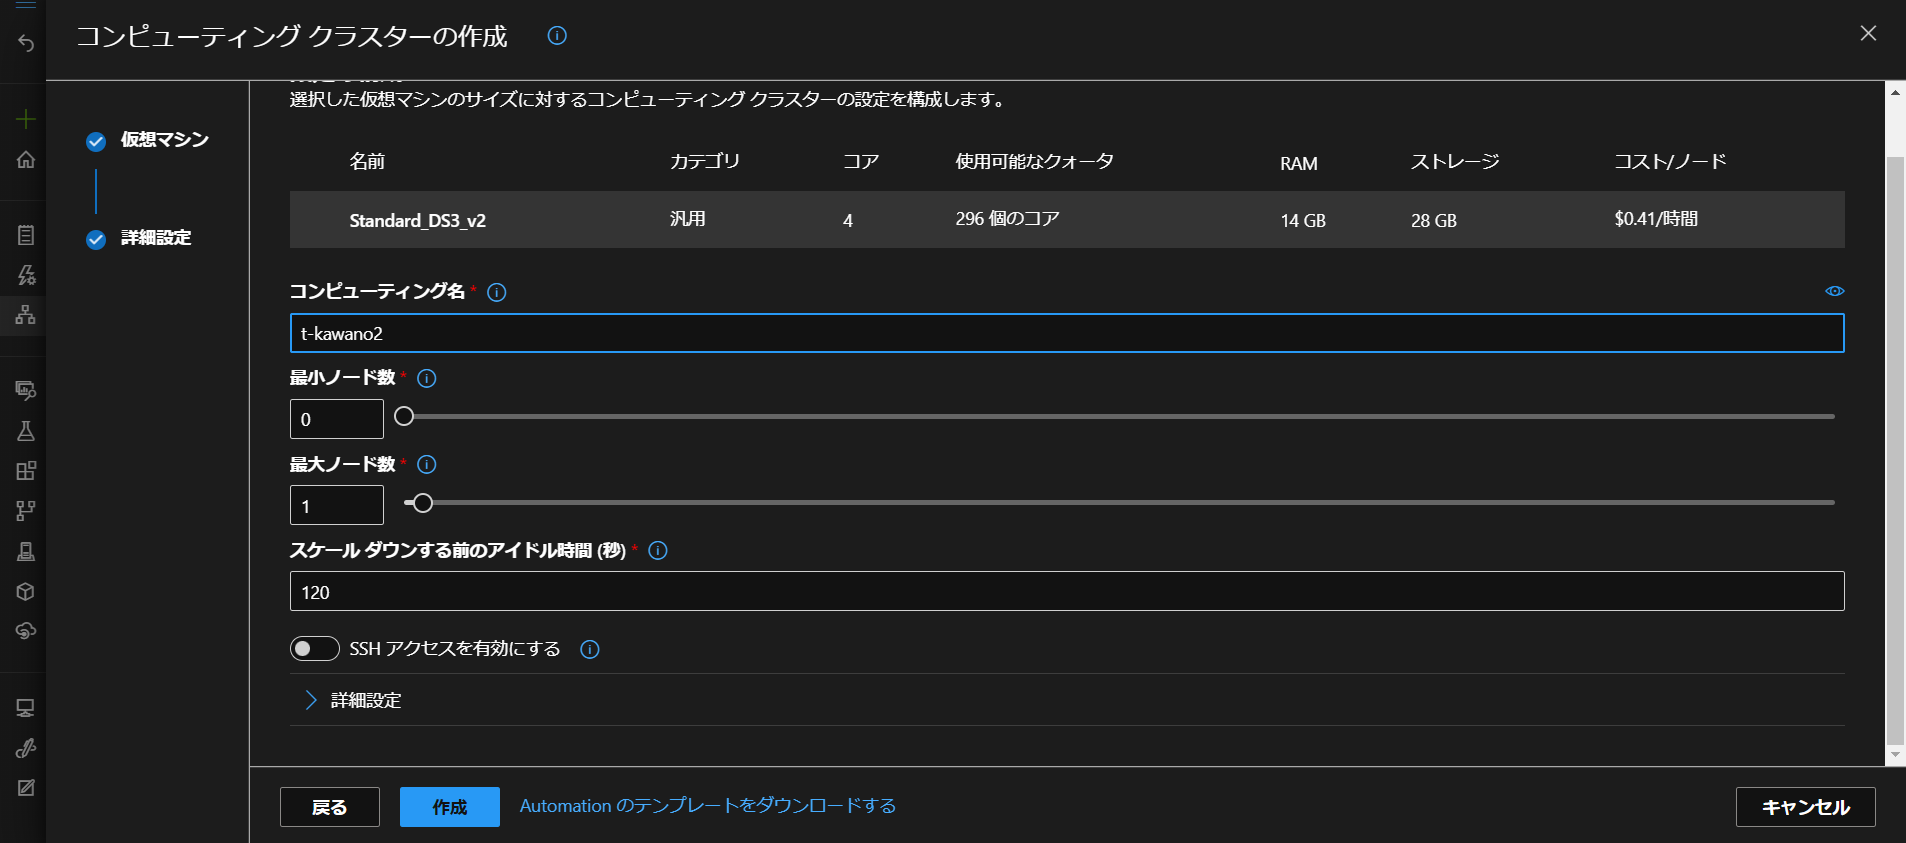
さらに進んで、コンピューティング名を入力したら作成完了!
ジョブの実行
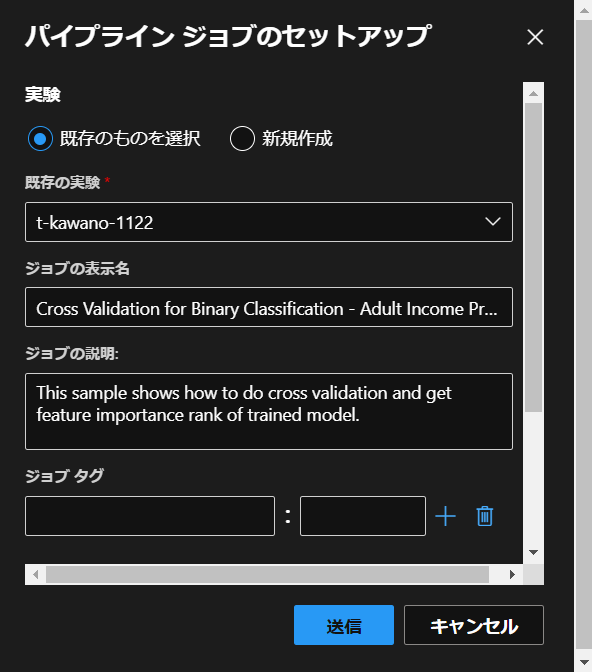
画面右上の「送信」をクリックしたら、ジョブのセットアップ画面が出てきます。
「新規作成」で実験名を入力、「送信」をクリック!
これでジョブの実行ができます。
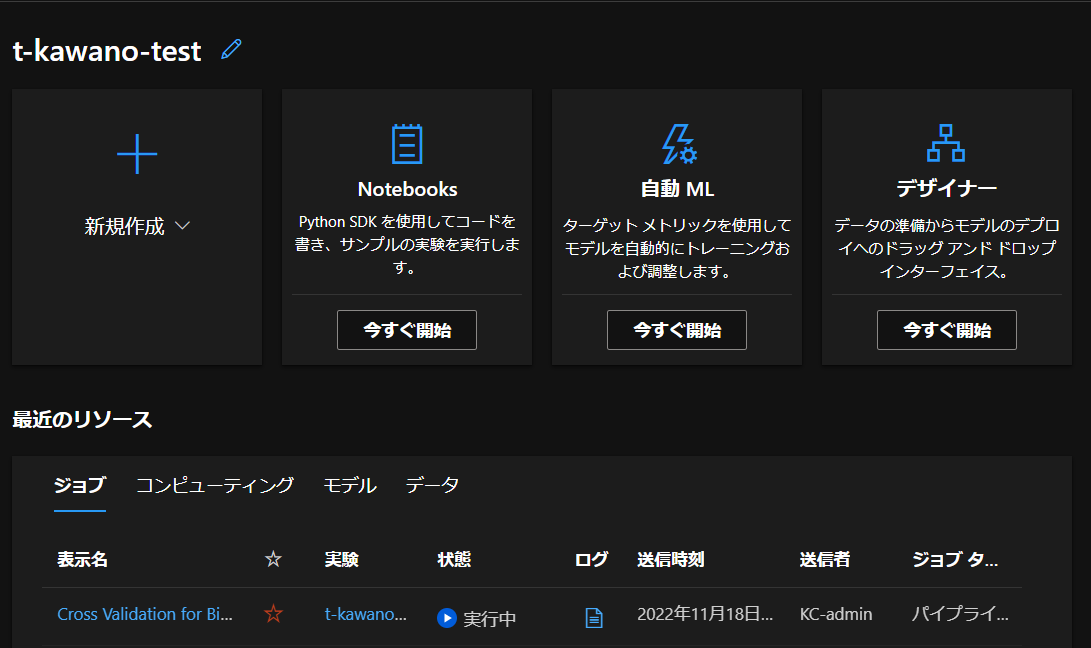
ワークスペースに戻ってみると、状態が「実行中」になっています。
実行完了したら、ワークスペースの状態は「完了」に変化します。
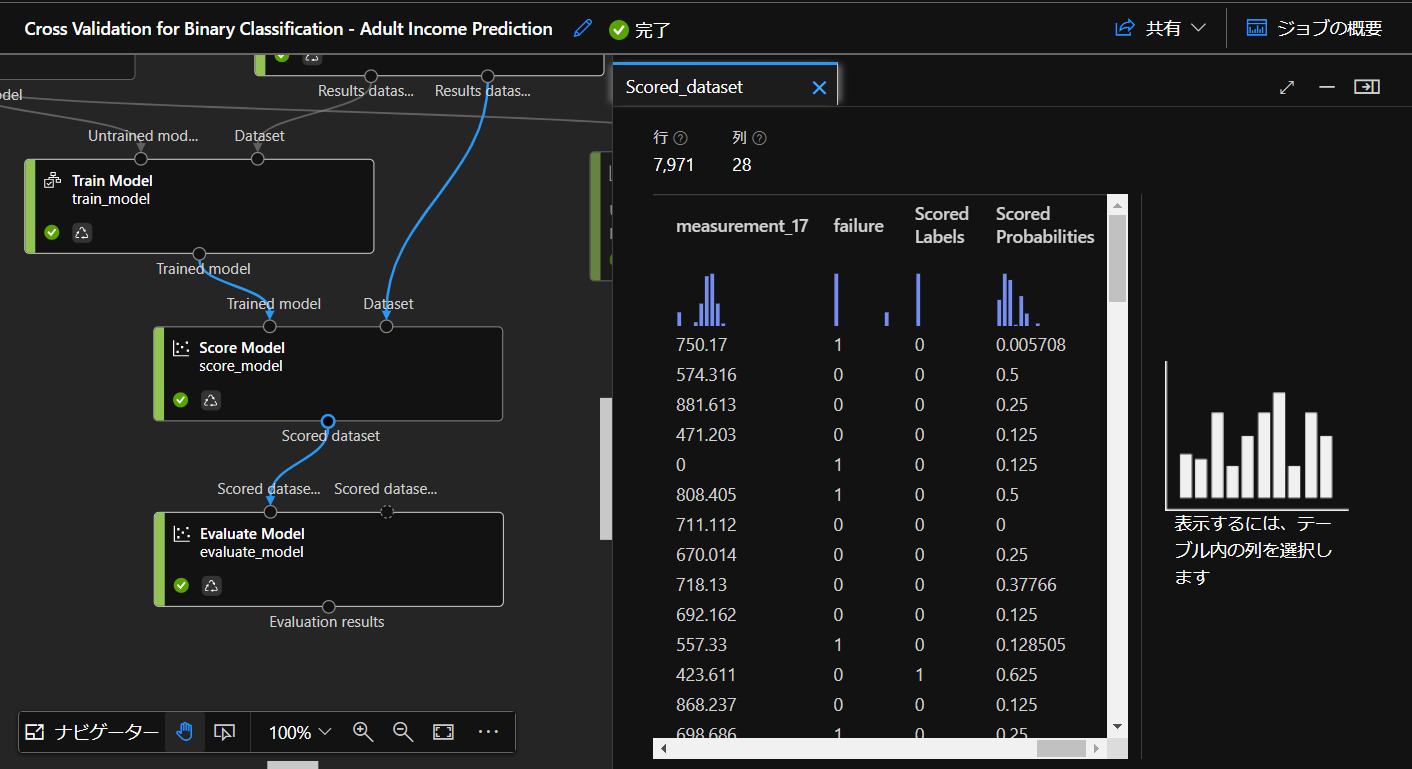
ジョブを開き、Score Modelの結果を見てみましょう!
Scored Probabilitiesはその結果の信頼性を表すもので、1に近いほど信頼度が高いということです。
結果の一部を見てみても、あまり良くはなさそうです笑
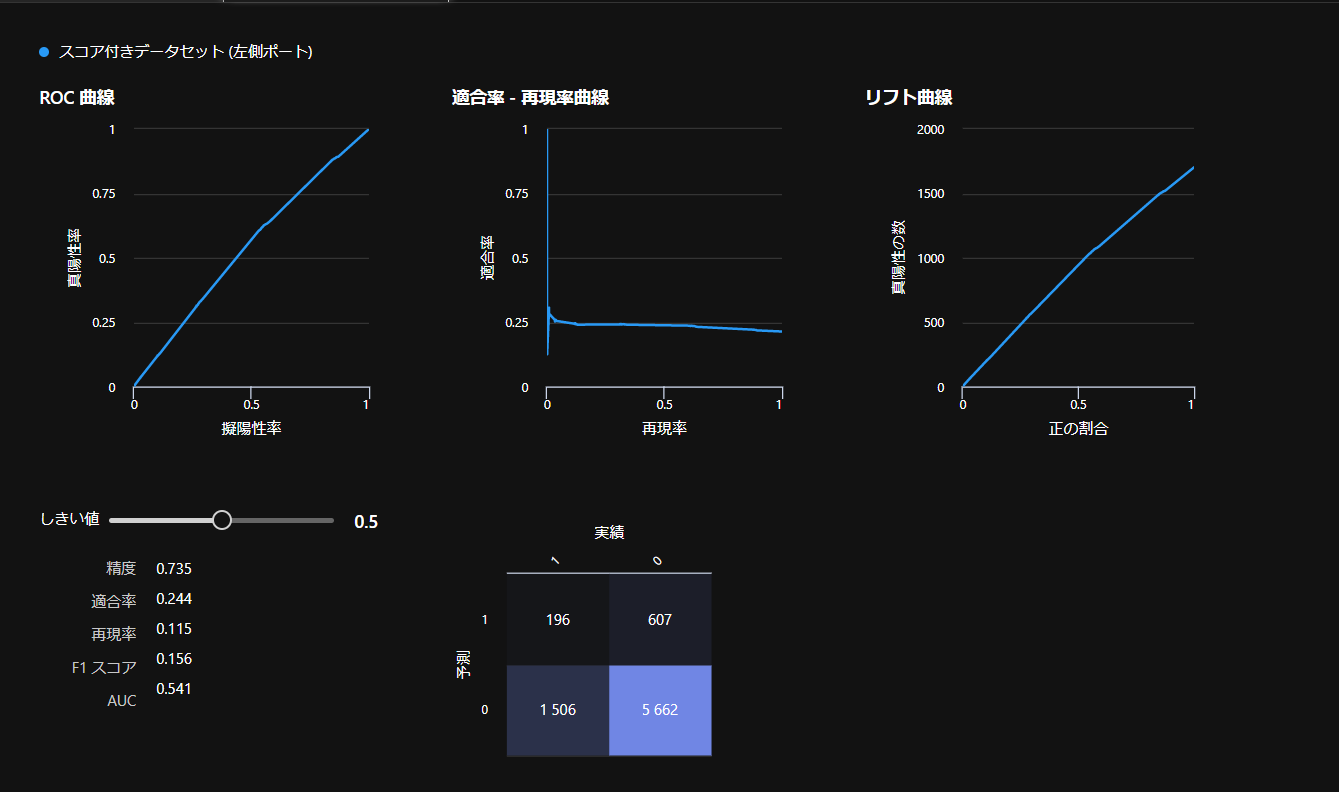
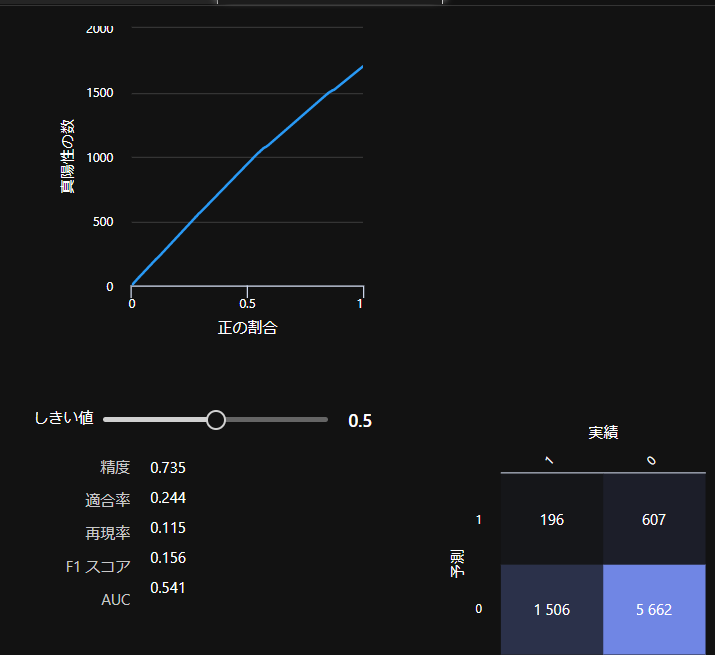
次にEvaluate Modelの結果も見てみましょう。
今回のKaggleの評価指標はROCが使われていましたが、大体0.5なので、やはりあまり精度は高くなさそうです。
testデータを使ってやってみる
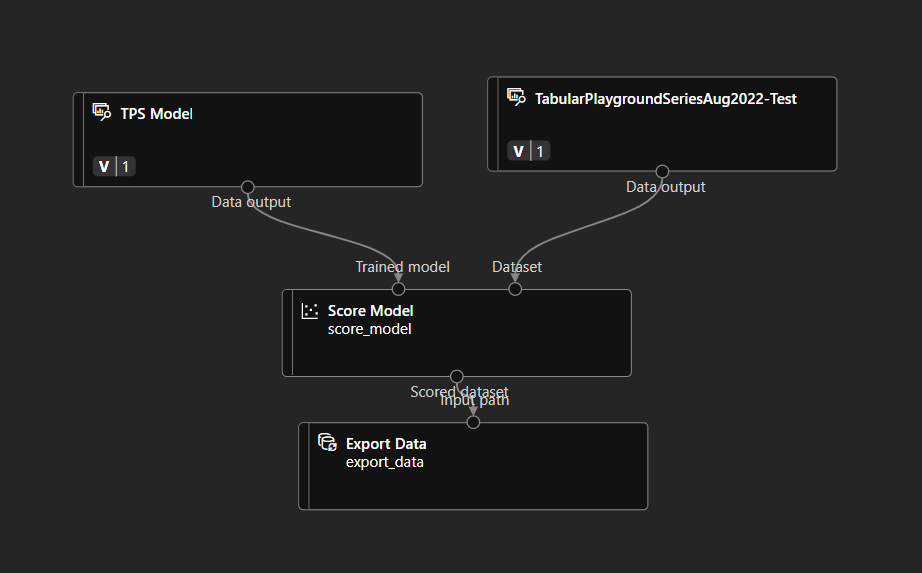
Azure MLでは一度推論したモデルは登録し、呼び出すことができるのでこれを使ってtestデータでfailureの予測を行います。
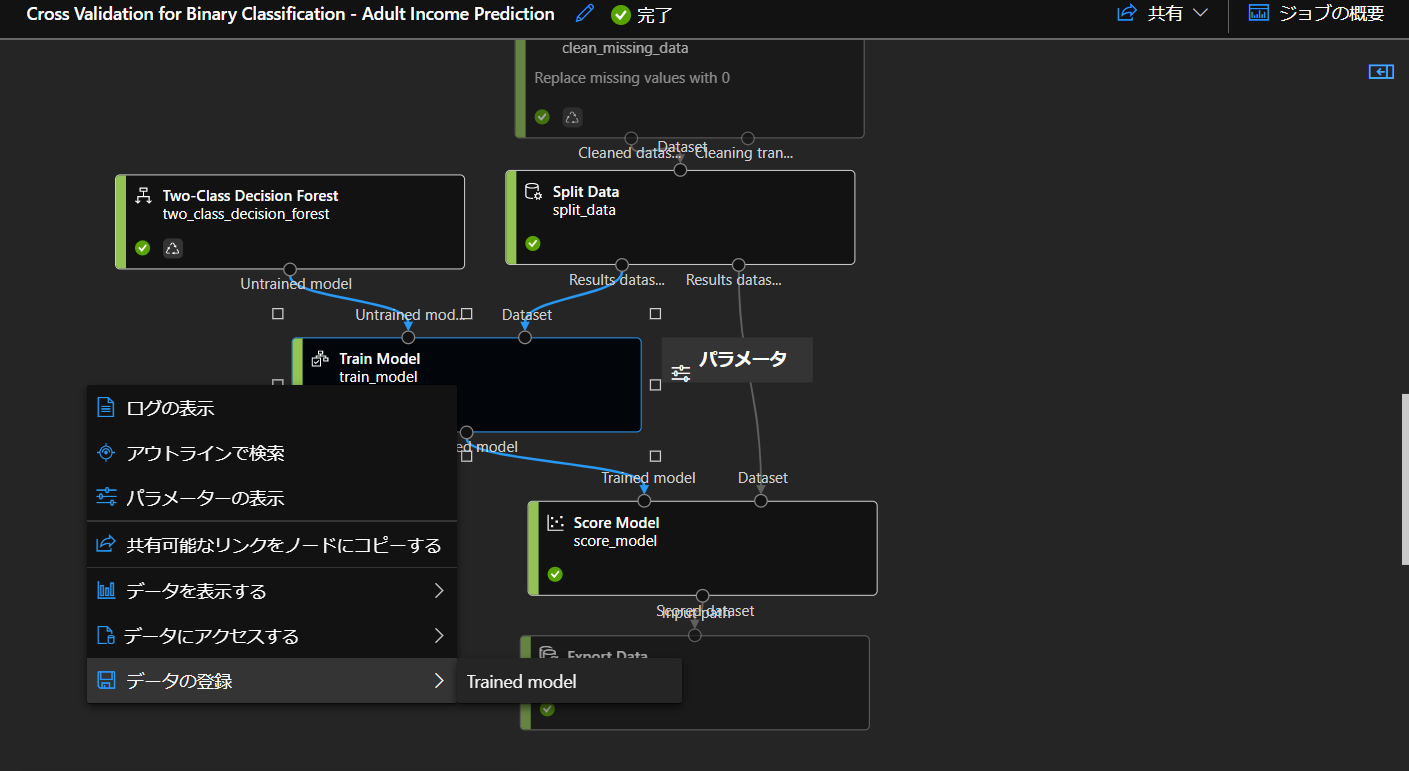
ジョブに戻り、Train Modelで「データの登録」をします。
これで実行してみます!
結果のデータを取り出す
実行完了したら、予測した結果を取り出したいので、Export Dataコンポーネントを追加します。
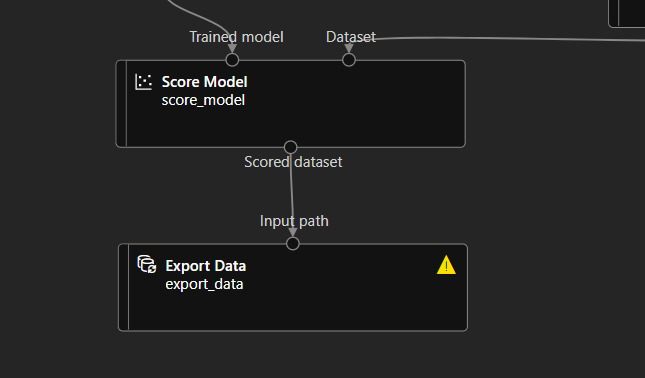
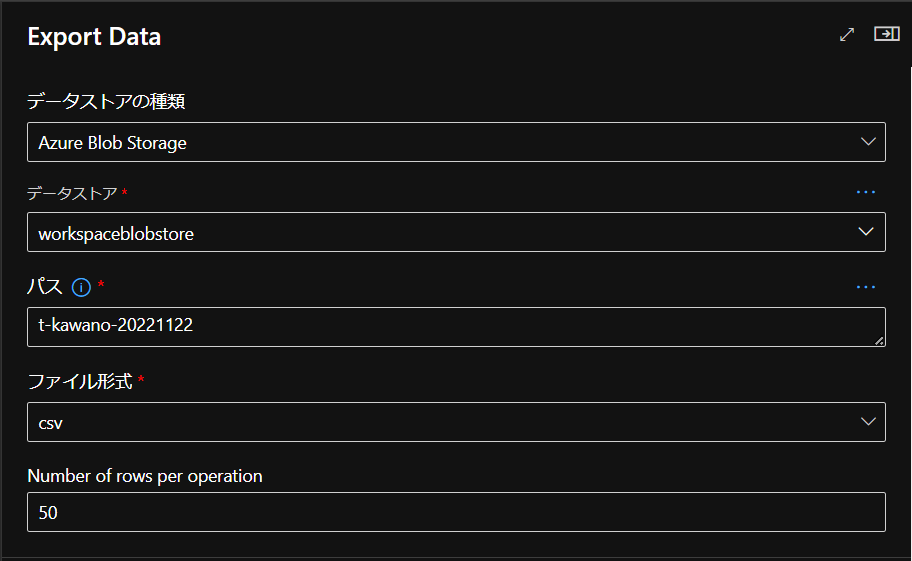
csv形式で取り出したいので次のようにExport Dataを設定します。
これでジョブを実行し、完了したら
- 左側の「データ」をクリック
- 「データソース」で先ほどExport Dataで指定したデータストアを選択
- 「プレビューを参照」の下にある該当のファイルをクリック
最後に「・・・(三点リーダー)」から「ダウンロード」をクリックすれば結果を取り出すことができます。
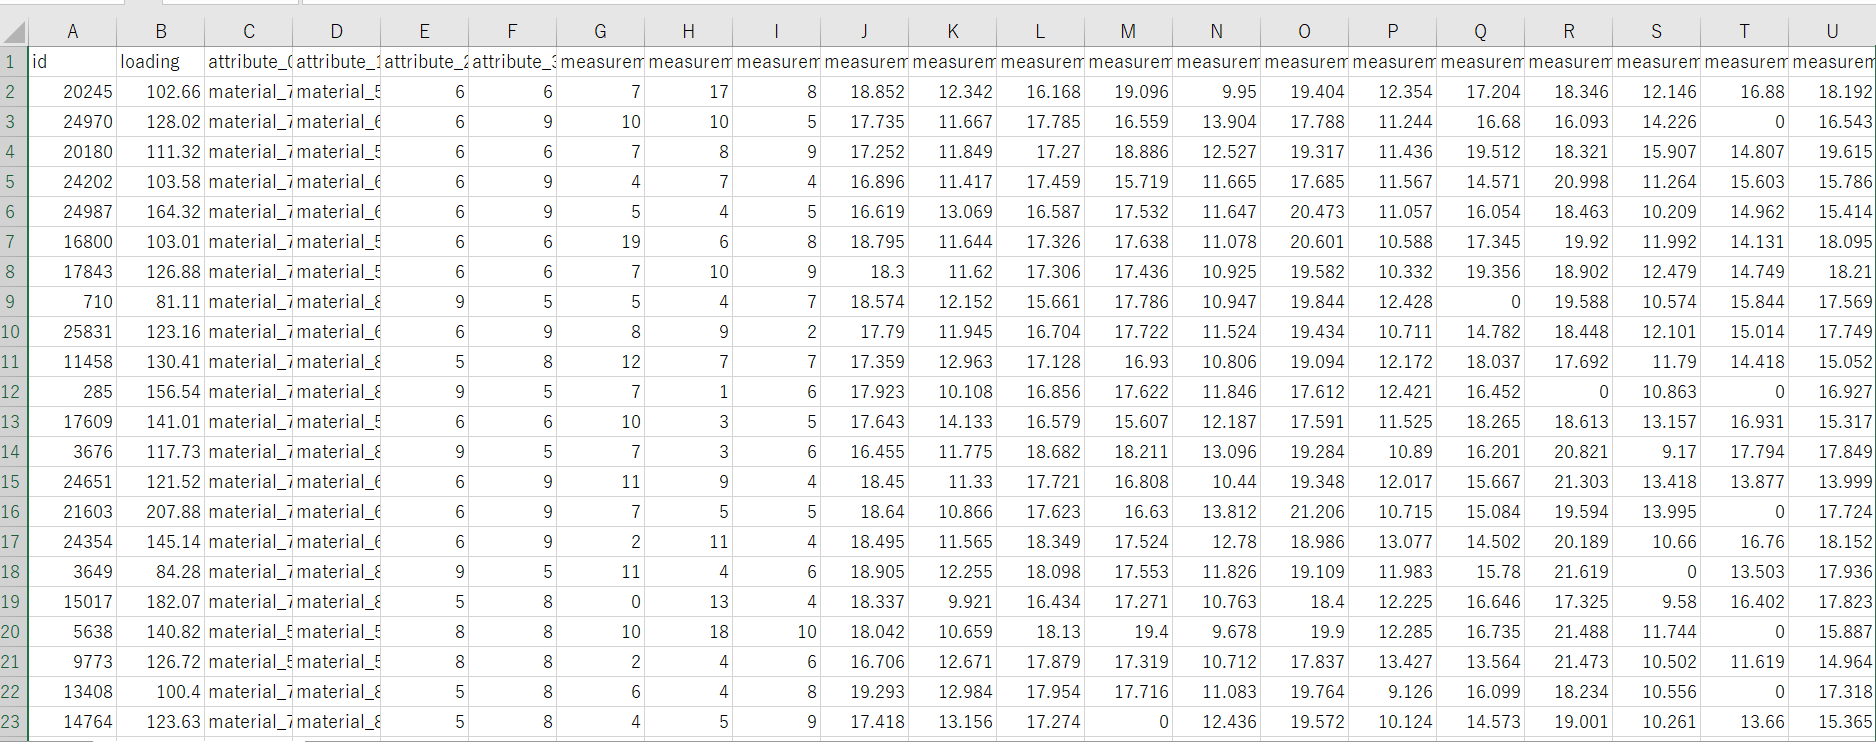
Excelで開いてみるとこんな感じ。
コンペ提出
取り出したデータはそのままだと提出できないので、Kaggleで指定された形式に加工します。

idとfailureだけ残し、
保存したらいよいよKaggleに提出してみます。
結果
無事、ちゃんと提出することができました!
リアルタイム推論
左タブの「コンピュータ」から「推論クラスター」で新規作成を行います。
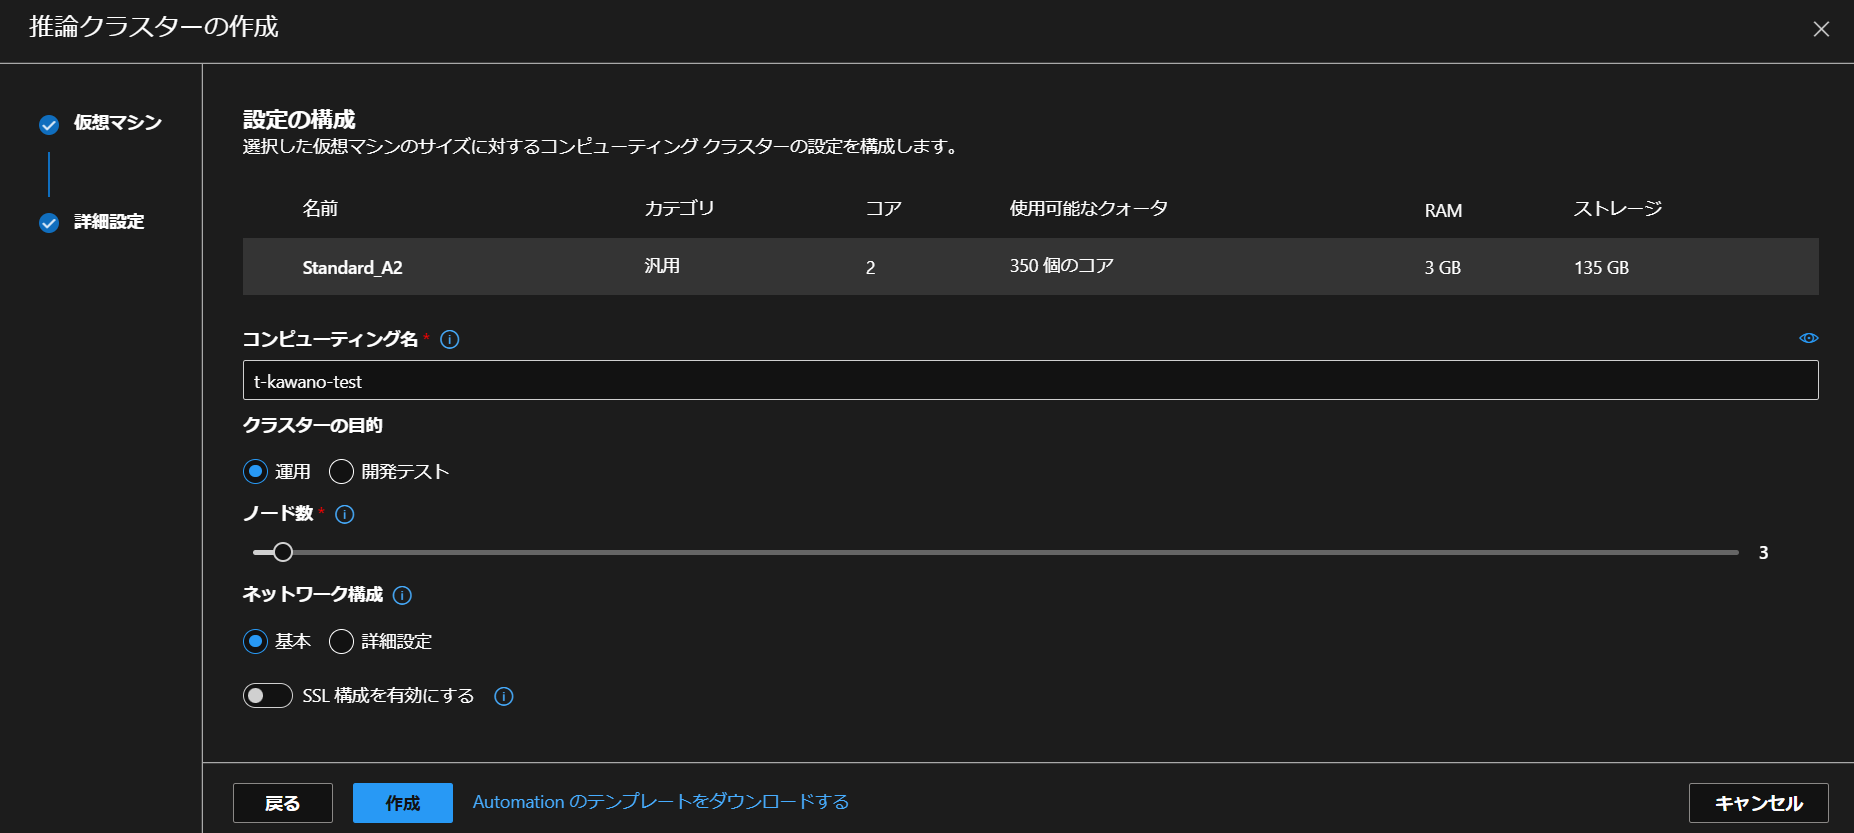
仮想マシンの選択をし、コンピューティング名を入力したら作成できます。
作成には少し時間がかかるので、終わるまで待ちましょう♪
終わったら再びジョブに戻り、
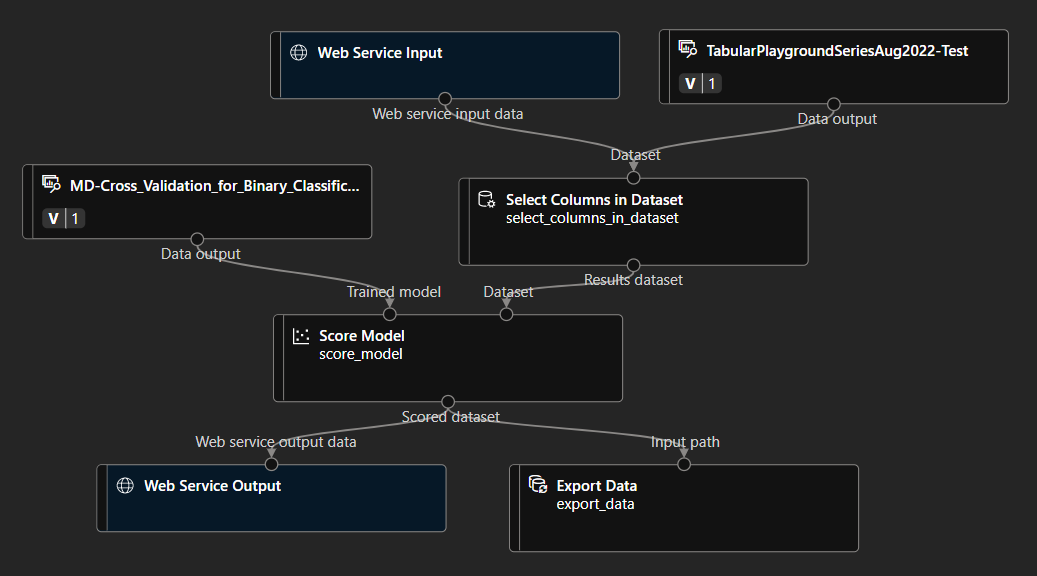
「推論パイプラインの作成」から「リアルタイム推論パイプライン」を選択すると自動的にパイプラインが変わるので、Web Service Inputコンポーネントを追加し、ジョブの実行を行います。
そして実行が終わったら、ジョブで「デプロイ」がクリックできるようになります。
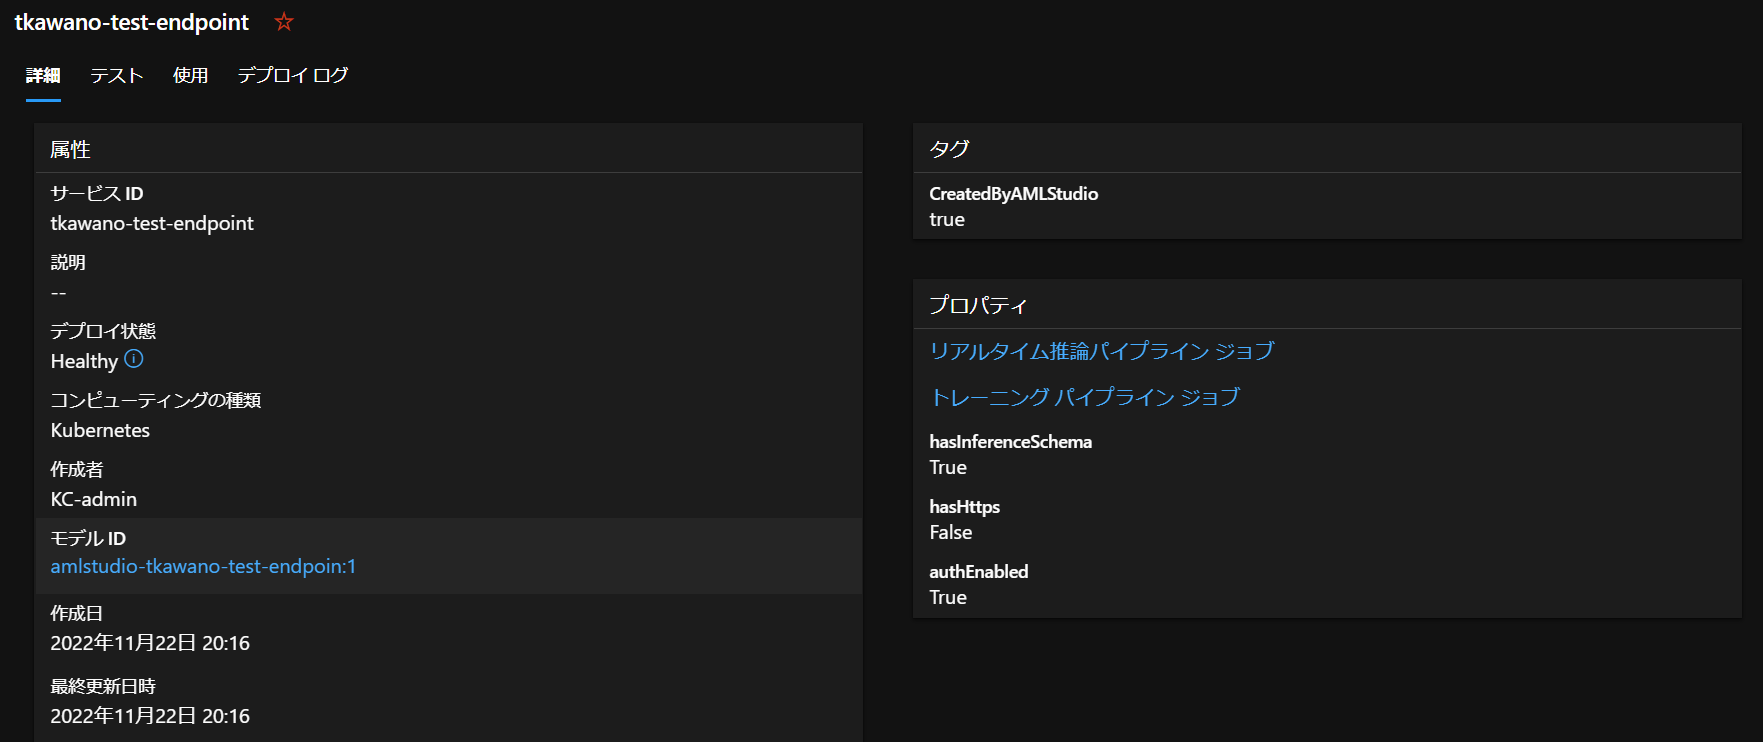
これでデプロイが完了したらエンドポイントの作成ができます!
PythonからAPIを叩いてみる!
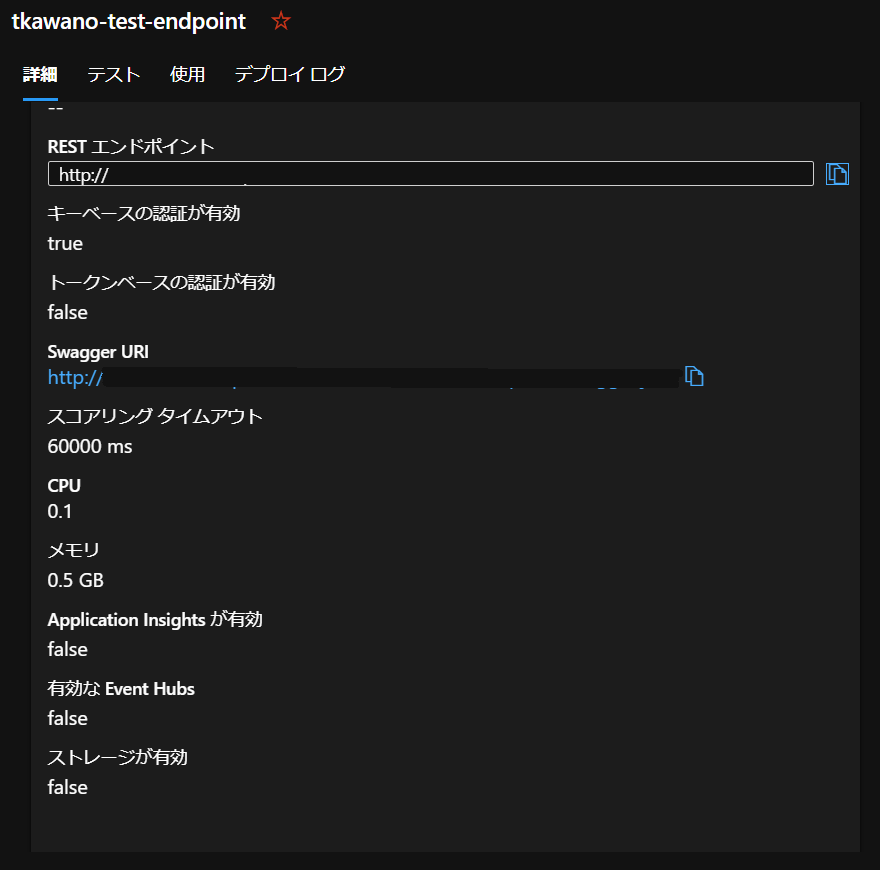
コードが自動的に生成されるので、これを使ってPythonから叩いてみます。
まず、左の「エンドポイント」に入ります。
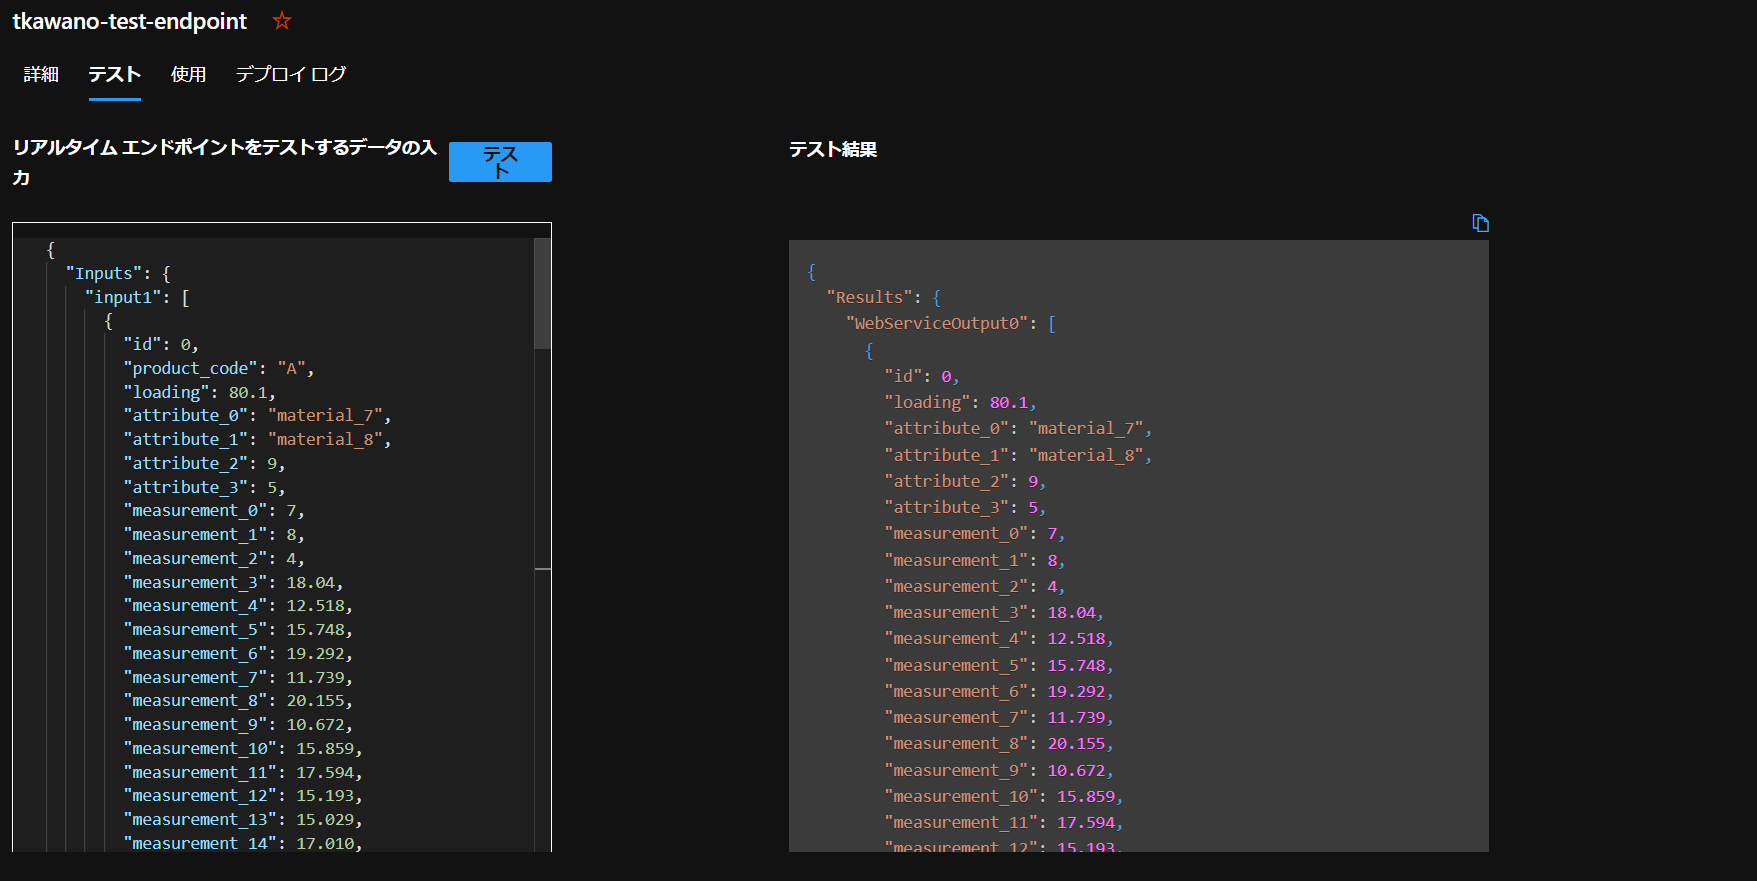
「テスト」タグに移り、"0__FloatingPointVal__"をFloat型の数値に変更します。

テストを行うと…
成功できました!
Pythonから
コードをコピーして、PythonでAPIを叩いてみましょう。
import urllib.request
import json
import os
import ssl
def allowSelfSignedHttps(allowed):
    # bypass the server certificate verification on client side
    if allowed and not os.environ.get('PYTHONHTTPSVERIFY', '') and getattr(ssl, '_create_unverified_context', None):
        ssl._create_default_https_context = ssl._create_unverified_context
allowSelfSignedHttps(True) # this line is needed if you use self-signed certificate in your scoring service.
# Request data goes here
# The example below assumes JSON formatting which may be updated
# depending on the format your endpoint expects.
# More information can be found here:
# https://docs.microsoft.com/azure/machine-learning/how-to-deploy-advanced-entry-script
data =  {
  "Inputs": {
    "input1": [
      {
        "id": 26570,
        "product_code": False,
        "loading": 119.57,
        "attribute_0": "material_5",
        "attribute_1": "material_6",
        "attribute_2": 6,
        "attribute_3": 4,
        "measurement_0": 6,
        "measurement_1": 9,
        "measurement_2": 6,
        "measurement_3": 19.305,
        "measurement_4": 10.178,
        "measurement_5": 17.534,
        "measurement_6": 18.168,
        "measurement_7": 11.598,
        "measurement_8": 18.654,
        "measurement_9": 10.802,
        "measurement_10": 15.909,
        "measurement_11": 18.07,
        "measurement_12": 13.772,
        "measurement_13": 13.659,
        "measurement_14": 16.825,
        "measurement_15": 13.742,
        "measurement_16": 17.71,
        "measurement_17": 634.612
      },
      {
        "id": 26571,
        "product_code": False,
        "loading": 113.51,
        "attribute_0": "material_5",
        "attribute_1": "material_6",
        "attribute_2": 6,
        "attribute_3": 4,
        "measurement_0": 11,
        "measurement_1": 8,
        "measurement_2": 0,
        "measurement_3": 17.883,
        "measurement_4": 11.927,
        "measurement_5": 17.228,
        "measurement_6": 16.033,
        "measurement_7": 11.179,
        "measurement_8": 19.368,
        "measurement_9": 12.032,
        "measurement_10": 13.998,
        "measurement_11": 13.000,
        "measurement_12": 12.473,
        "measurement_13": 17.468,
        "measurement_14": 16.708,
        "measurement_15": 14.776,
        "measurement_16": 14.102,
        "measurement_17": 537.037
      },
      {
        "id": 26572,
        "product_code": False,
        "loading": 112.16,
        "attribute_0": "material_5",
        "attribute_1": "material_6",
        "attribute_2": 6,
        "attribute_3": 4,
        "measurement_0": 8,
        "measurement_1": 12,
        "measurement_2": 4,
        "measurement_3": 18.475,
        "measurement_4": 10.481,
        "measurement_5": 16.619,
        "measurement_6": 18.189,
        "measurement_7": 12.126,
        "measurement_8": 17.774,
        "measurement_9": 11.743,
        "measurement_10": 17.046,
        "measurement_11": 18.086,
        "measurement_12": 10.907,
        "measurement_13": 13.363,
        "measurement_14": 15.737,
        "measurement_15": 17.065,
        "measurement_16": 16.021,
        "measurement_17": 658.995
      },
      {
        "id": 26573,
        "product_code": False,
        "loading": 112.72,
        "attribute_0": "material_5",
        "attribute_1": "material_6",
        "attribute_2": 6,
        "attribute_3": 4,
        "measurement_0": 8,
        "measurement_1": 11,
        "measurement_2": 10,
        "measurement_3": 16.518,
        "measurement_4": 10.888,
        "measurement_5": 15.293,
        "measurement_6": 18.592,
        "measurement_7": 11.304,
        "measurement_8": 18.948,
        "measurement_9": 11.79,
        "measurement_10": 18.165,
        "measurement_11": 16.163,
        "measurement_12": 10.933,
        "measurement_13": 15.501,
        "measurement_14": 15.667,
        "measurement_15": 12.62,
        "measurement_16": 16.111,
        "measurement_17": 594.301
      },
      {
        "id": 26574,
        "product_code": False,
        "loading": 208.0,
        "attribute_0": "material_5",
        "attribute_1": "material_6",
        "attribute_2": 6,
        "attribute_3": 4,
        "measurement_0": 14,
        "measurement_1": 16,
        "measurement_2": 8,
        "measurement_3": 17.808,
        "measurement_4": 12.693,
        "measurement_5": 17.678,
        "measurement_6": 15.814,
        "measurement_7": 13.431,
        "measurement_8": 19.141,
        "measurement_9": 12.37,
        "measurement_10": 14.578,
        "measurement_11": 17.849,
        "measurement_12": 11.941,
        "measurement_13": 16.07,
        "measurement_14": 16.183,
        "measurement_15": 13.324,
        "measurement_16": 17.15,
        "measurement_17": 801.044
      }
    ]
  },
  "GlobalParameters": {}
}
body = str.encode(json.dumps(data))
url = 'http://XXX'
api_key = 'YYY' # Replace this with the API key for the web service
# The azureml-model-deployment header will force the request to go to a specific deployment.
# Remove this header to have the request observe the endpoint traffic rules
headers = {'Content-Type':'application/json', 'Authorization':('Bearer '+ api_key)}
req = urllib.request.Request(url, body, headers)
try:
    response = urllib.request.urlopen(req)
    result = response.read()
    print(result)
except urllib.error.HTTPError as error:
    print("The request failed with status code: " + str(error.code))
    # Print the headers - they include the requert ID and the timestamp, which are useful for debugging the failure
    print(error.info())
    print(error.read().decode("utf8", 'ignore'))
こちらも"0__FloatingPointVal__"をFloat型の数値に変更と、falseをFalseに変更しました。
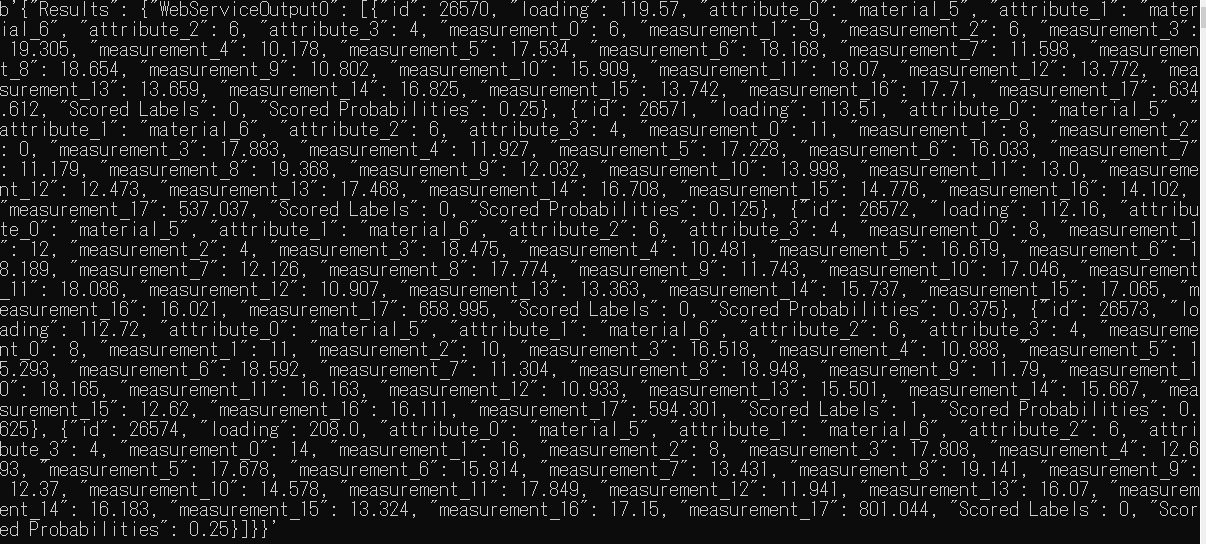
これを実行したら
同じように結果が返ってきました!
推論結果がScored Labelsに、信頼スコアがScored Probabilitiesに入っています。
まとめ
- Azure MLのデザイナーを使ってみた
- KaggleのTPS Aug 2022をAzure MLを使って提出
- エンドポイントを作成し、Pythonでたたいてみた

