February 19, 2021
←前回:Day 36 Hello Django!を表示させよう
「Djangoを一から学びたい」とのことでありましたら[Day 1]Djangoの開発環境から読むことをおすすめします。
#はじめに
今回は移動できるWebサイトを作成していきます。
クリックすると指定のページにアクセスでき、戻ってこれるものを作ります。
今回は新しいプロジェクトを作ります。名前は「django_webiste02」にします。
前回と同様に、自分でアプリを作って、その中にtemplatesフォルダを作成して、htmlファイルを作成していきます。
ここまでの流れは前回行ったのでわからなければ復習してください。
待ってます。
あと、これはどっちでもいいのですが、筆者はエラーを確認しながら作業を進めていくのが好きなので、サーバも一緒に立ち上げます。setting.pyで前回のものを行います。
ドメインの許可とアプリの追加です。
#HTML作成
ここではindex.htmlとabout.htmlを作成していきます。
ページを二つ作るということです。
<!doctype HTML>
<html>
    <head>

    </head>
    <body>
      <h1>ホーム</h1>
    </body>
</html>
<!doctype HTML>
<html>
    <head>

    </head>
    <body>
      <h1>自己紹介</h1>
    </body>
</html>
#Viewの変更
viewを書き換えます。
from django.views.generic import TemplateView

class IndexView(TemplateView):
  template_name = 'index.html'

class AboutView(TemplateView):
  template_name = 'about.html'urls.py
#urlの設定
from django.contrib import admin
from django.urls import path

from .views import IndexView, AboutView

urlpatterns = [
    path('', IndexView.as_view()),
    path('about/', AboutView.as_view()),
]
from django.contrib import admin
from django.urls import path, include

urlpatterns = [
    path('admin/', admin.site.urls),
    path('',include('website.urls')),
]
#ページを移動できるようにする
    <body>
      <div class='navber'>
        <a href="/">トップ</a>
        <a href="/about">自己紹介</a>
      </div>
      <h1>ホーム</h1>
    </body>
about.htmlも同様なのですが、これだとただのhtmlで効率が悪いです。(後々わかります)
なので、今作成した箇所をパーツ化します。
templatesに_navber.htmlを作成します。
<div class='navber'>
  <a href="/">トップ</a>
  <a href="/about">私たちについて</a>
</div>
で、indexとaboutの方も変更していきます。
    <body>
      {% include '_navber.html' %}
      <h1>ホーム</h1>
    </body>
{% タグ名 %}にすることによりコードをシンプルにできます。
#完成!
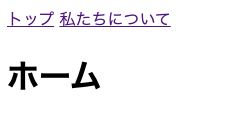
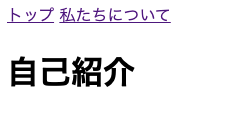
このようになっているかと思います。
これで移動できるWebサイトが完成しました。
#おわりに
Qiitaに書きながらだとかなり進みが遅くなります。
これだけで1時間半かかりました。
今後は対策を考えながら進めていきます。
それではまたまた