テキストエディタ  :sublime Text
google Chrome
これからやること
google map APlを使って、 htmlに google mapを表示させる方法を書きます。
1日あたり25,000回以上の読み込みがあり、その状態が90日間以上連続している場合のみお金がかかります。
http://www.site-shokunin.com/blog/other/1347.html
google map APlのキー取得
googleでgoogle map APlを調べてください
google map APlのリンク
そしてら図1の画面出てきます。
赤丸のウェブをクリックしてください
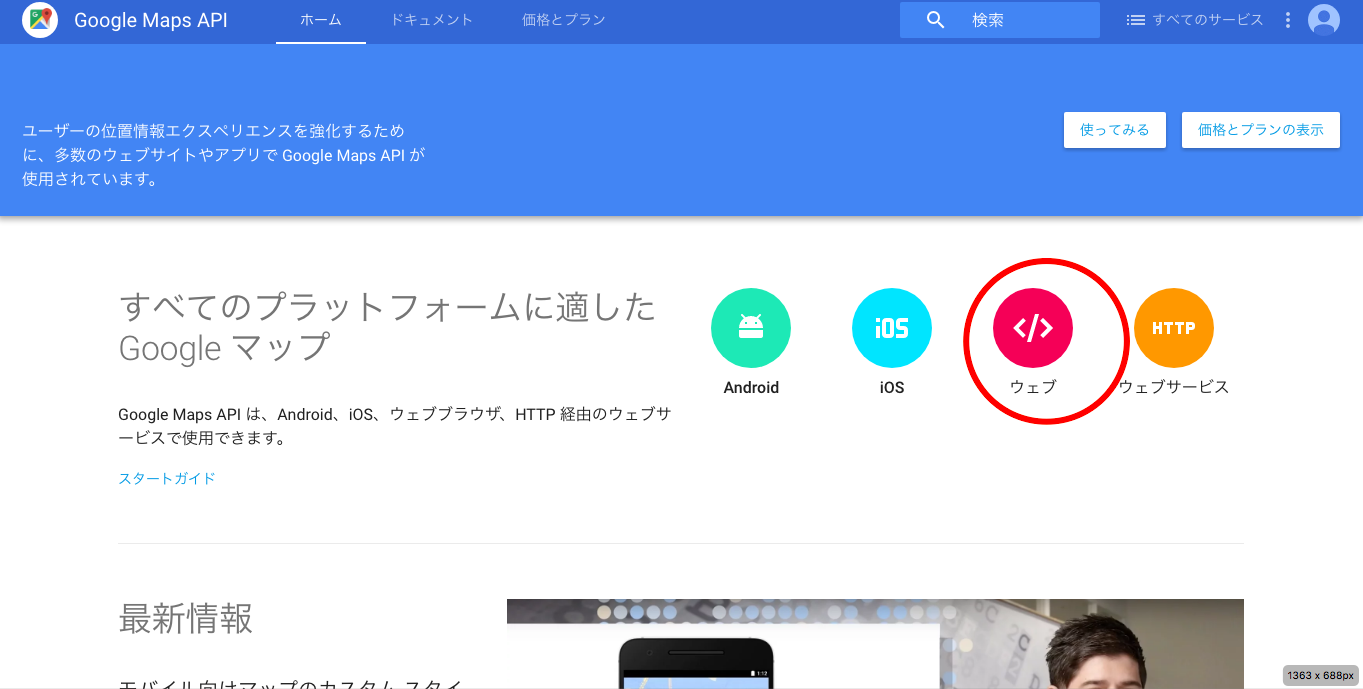
図1
キー取得のクリック
次に図2が出てきます。次も赤丸の囲ってあるキー取得をクリックしてください
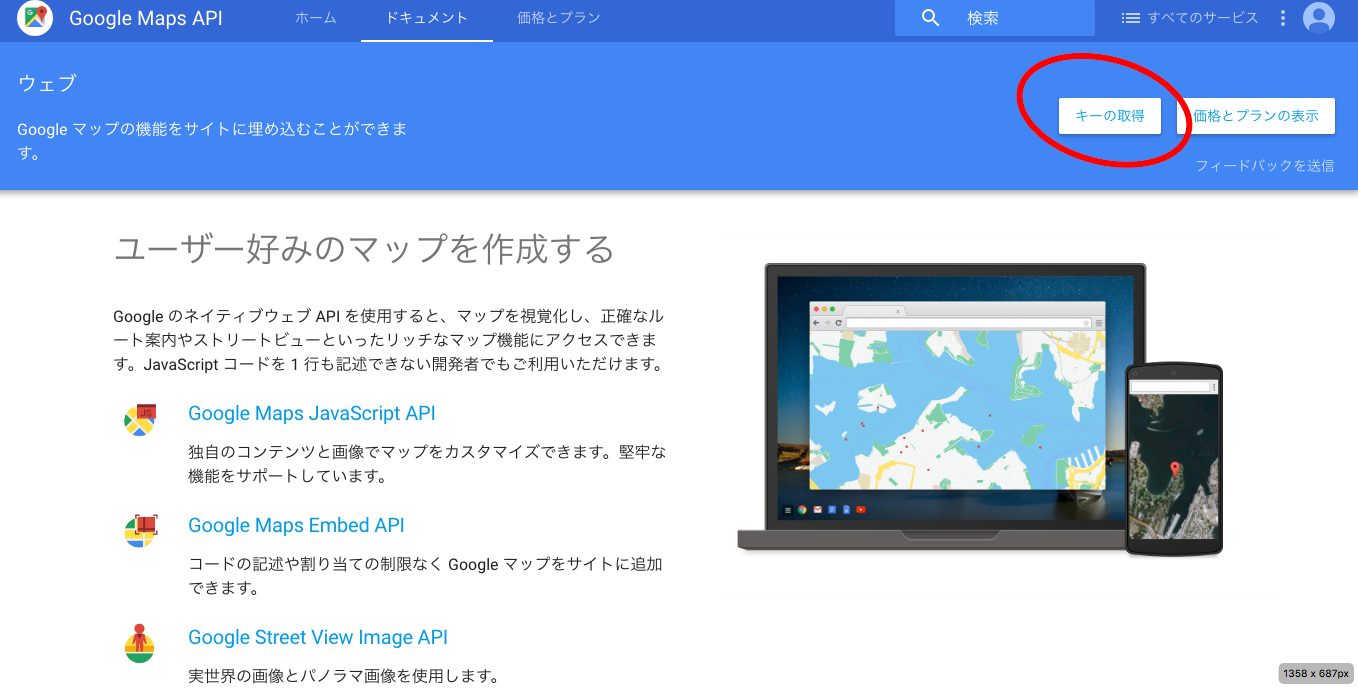
図2
次に図3が出てきます。そしたら、create a new projectをクリックしてください。自分は、いくつかやっているの上に出てきます。
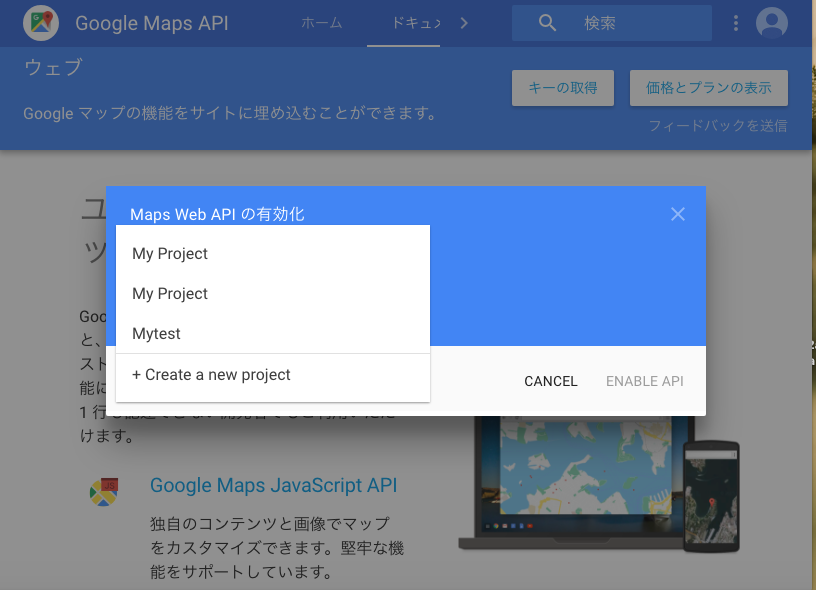
図3
次に図4が出てきます。プロジェクトの名前を記入してください。
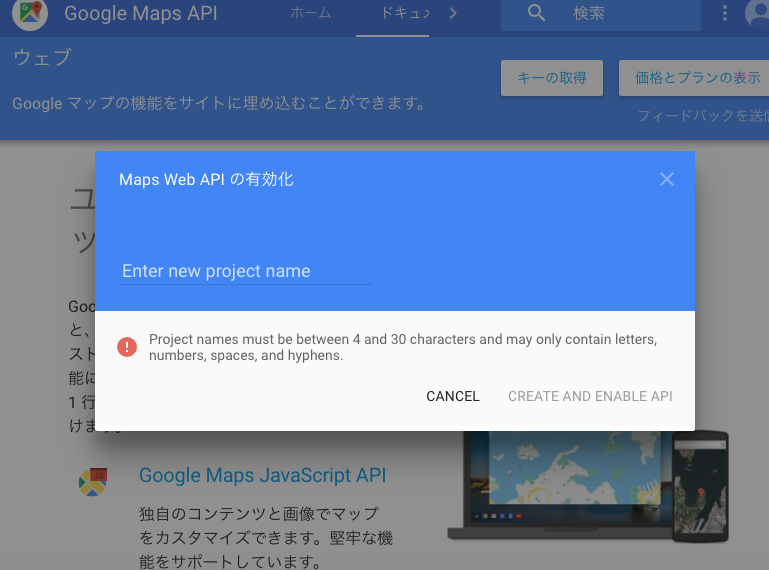
図4
しばらく時間がかかります。図5の画面が出てきます。
APl keyが出てきます。自分は、赤い文字で隠してあるところです。APl keyは、すごく大切です。だからMACならメモ機能とかに、キーをコピーしましょう。これでキー取得は完了です。
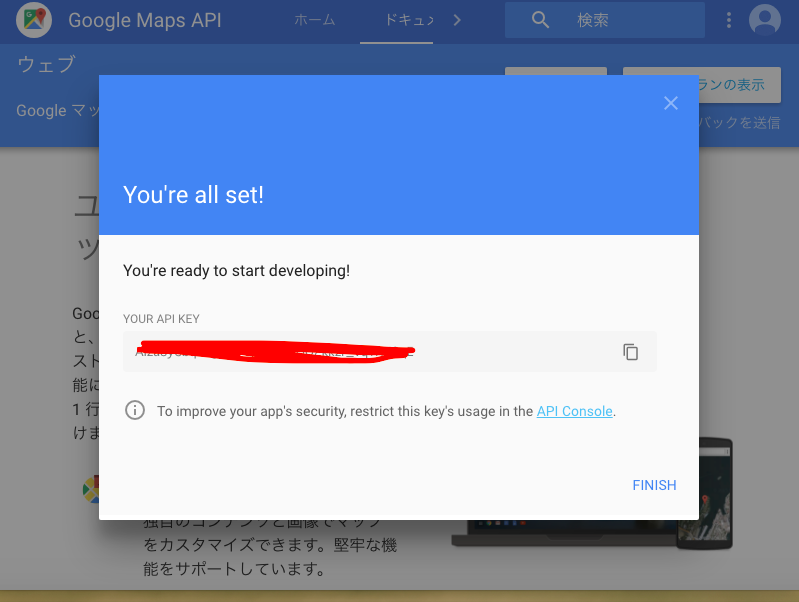
図5
htmlの作成
テキストエディタを開き、ください ここでは、index.htmlとしておきます。
 <!DOCTYPE html>
<html>
  <head>
    <title>Simple Map</title>
    <meta name="viewport" content="initial-scale=1.0">
    <meta charset="utf-8">
    <style>
      /* Always set the map height explicitly to define the size of the div
       * element that contains the map. */
      #map {
        height: 100%;
      }
      /* Optional: Makes the sample page fill the window. */
      html, body {
        height: 100%;
        margin: 0;
        padding: 0;
      }
    </style>
  </head>
  <body>
    <div id="map"></div>
    <script>
      var map;
      function initMap() {
        map = new google.maps.Map(document.getElementById('map'), {
          center: {lat: 35.000, lng: 135.000},
          zoom: 14
        });
      }
    </script>
    <script src="https://maps.googleapis.com/maps/api/js?key=YOUR_API_KEY
&callback=initMap"
    async defer></script>
  </body>
</html>
上のコードをコピーしてください。ポイントは、2つあります。
一つ目 YOUR_API_KEYの入力
下から5番目のコードのscriptの間に、YOUR_API_KEYと思います。
YOUR_API_KEYは、先ほど取得したAPl keyを入れてください
二つ目は、下から10番目の
center: {lat: 35.000, lng: 135.000}
です。このコードで地図の場所を決定しています。具体的に言うと、緯度と経度です。
latが緯度を、lng:経度の数字を記入しています。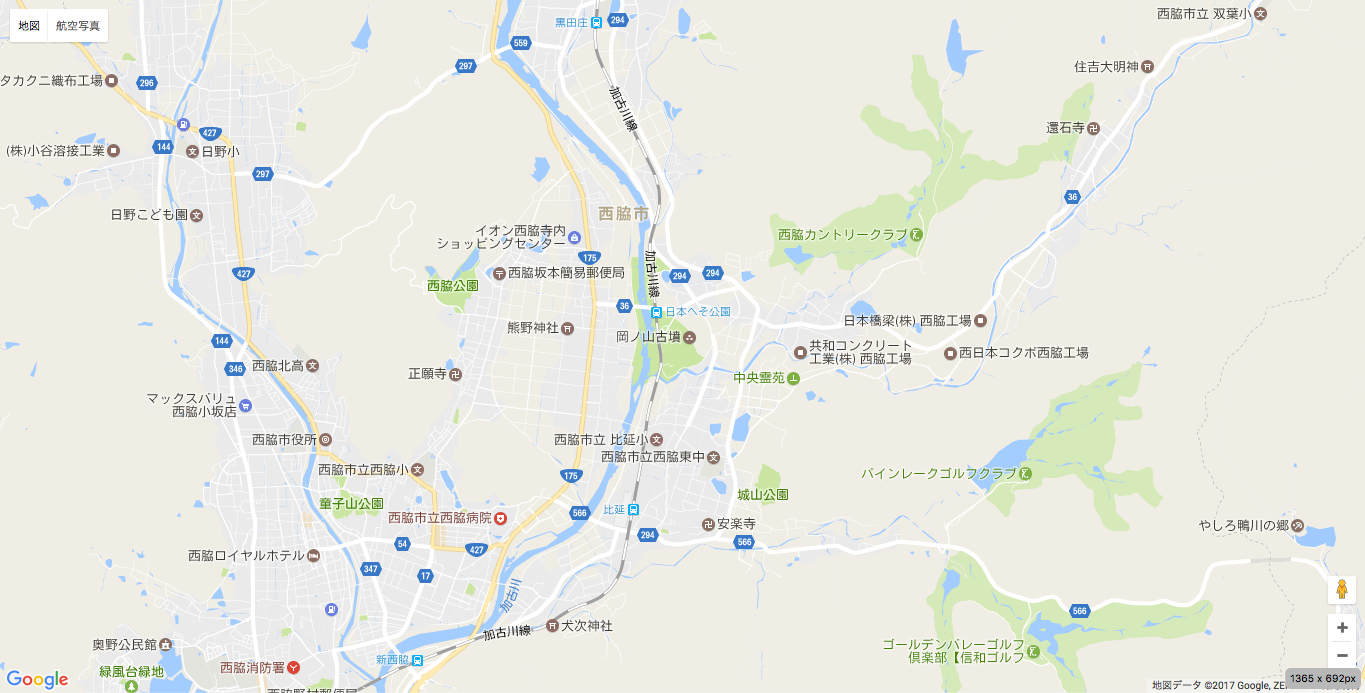
今回は、緯度35度、経度135度にしていて、場所は、日本のへそ公園を出しています。
緯度、経度の調べた方
地図を表示するのに、緯度、経度は必要です。下のリンクにアクセスすると、住所や目的地を入れるだけで、緯度、経度が出ます。
次の図が出ます。
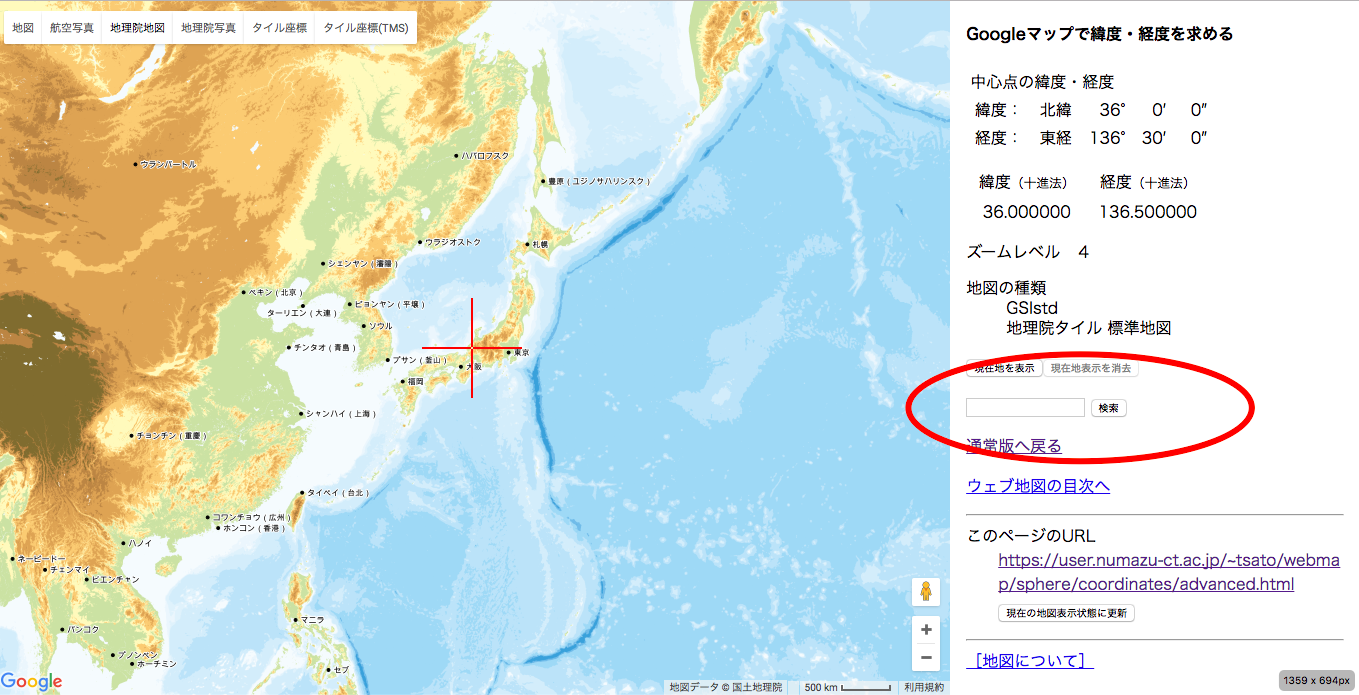
検索のところで、住所や目的地をうってください。
ここでは、京都駅を打ちました。
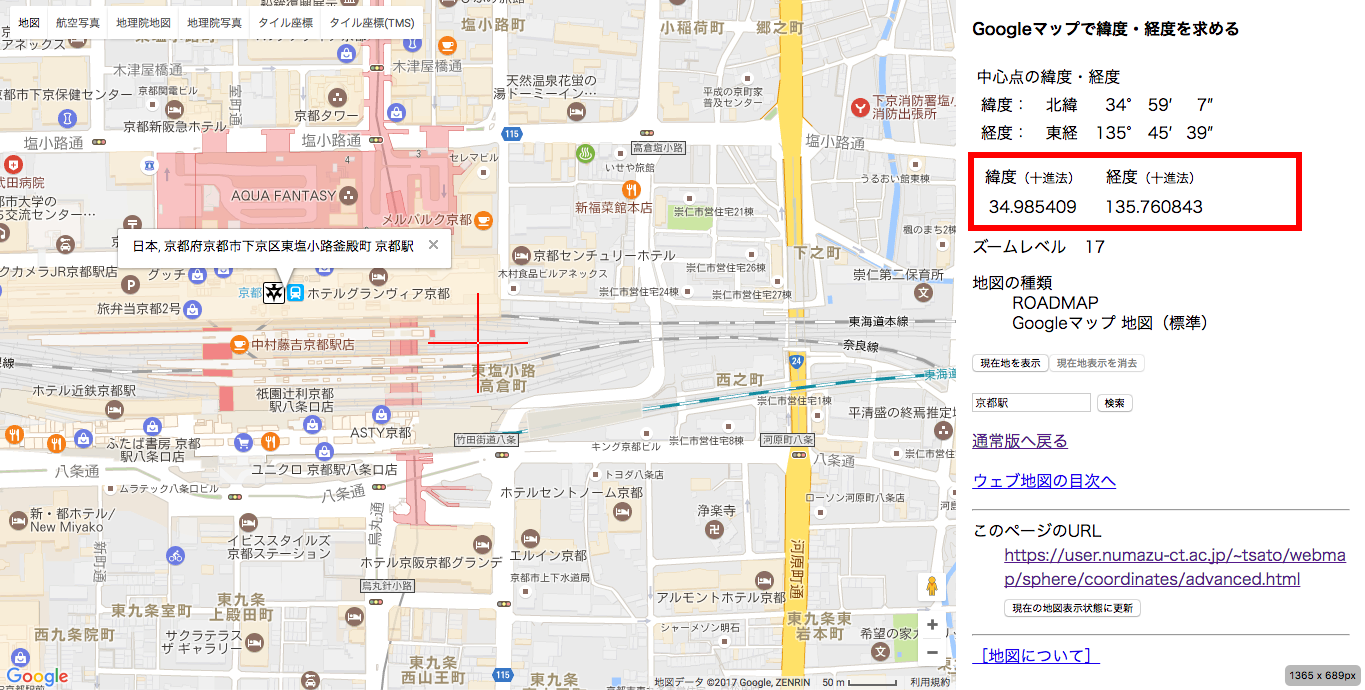
すると次の図です。
ここで注意点です。緯度経度で二つの表示が出てきます。ここでは、赤い丸で囲ってある10進法でやってください。
京都駅の場合は、緯度34.985849 経度135.758767ですね。
京都駅の地図のコードこうなります。
 <!DOCTYPE html>
<html>
  <head>
    <title>Simple Map</title>
    <meta name="viewport" content="initial-scale=1.0">
    <meta charset="utf-8">
    <style>
      /* Always set the map height explicitly to define the size of the div
       * element that contains the map. */
      #map {
        height: 100%;
      }
      /* Optional: Makes the sample page fill the window. */
      html, body {
        height: 100%;
        margin: 0;
        padding: 0;
      }
    </style>
  </head>
  <body>
    <div id="map"></div>
    <script>
      var map;
      function initMap() {
        map = new google.maps.Map(document.getElementById('map'), {
          center: {lat: 34.985849, lng: 135.758767
},
          zoom: 14
        });
      }
    </script>
    <script src="https://maps.googleapis.com/maps/api/js?key=YOUR_API_KEY&callback=initMap"
    async defer></script>
  </body>
</html>
これで終わりです。
参考資料
https://developers.google.com/maps/documentation/javascript/