

📅 note公開日:2025-09-14 20:59
🔁 この記事はnoteで公開していた内容をQiitaへ移行・再掲したものです。(必要に応じて加筆修正しています)
Home 画面の記事一覧の下に「Create」ボタンを配置し、ボタンを押すと Create 画面に遷移する
Create 画面で「Publish Article」を押すと、入力した内容がデータベースに保存され、Home 画面のリストに表示される
Home 画面の記事をクリックすると、該当の記事の Article 画面に遷移する
Article 画面で「Edit Article」ボタンを押すと Edit 画面に遷移し、各項目には記事の内容が入力済みで表示される
Edit 画面で内容を変更して「Publish Article」を押すと、データベースが更新され、Home 画面でも更新後の内容が表示される
「Delete Article」ボタンを押すと記事がデータベースから削除され、Home 画面のリストからも削除される
1、Home 画面の記事一覧の下に「Create」ボタンを配置し、ボタンを押すと Create 画面に遷移する
1-1,作業場に移動
1-2,コードを追加すべき場所を特定
1-3,コードを追加
1-1,作業場に移動
Home画面のUIを見せているのは
app>views>articles>index.html.erbにあるので、まずここへ移動
1-2,コードを追加すべき場所を特定
今回のは記事一覧というボタンはなく、ホームページっぽく見せるためにhtmlとcssだけでかかれた画面のため、どのあたりが一番したかな?と探す。以下の写真の様な場所にcreateボタンを作りたい。
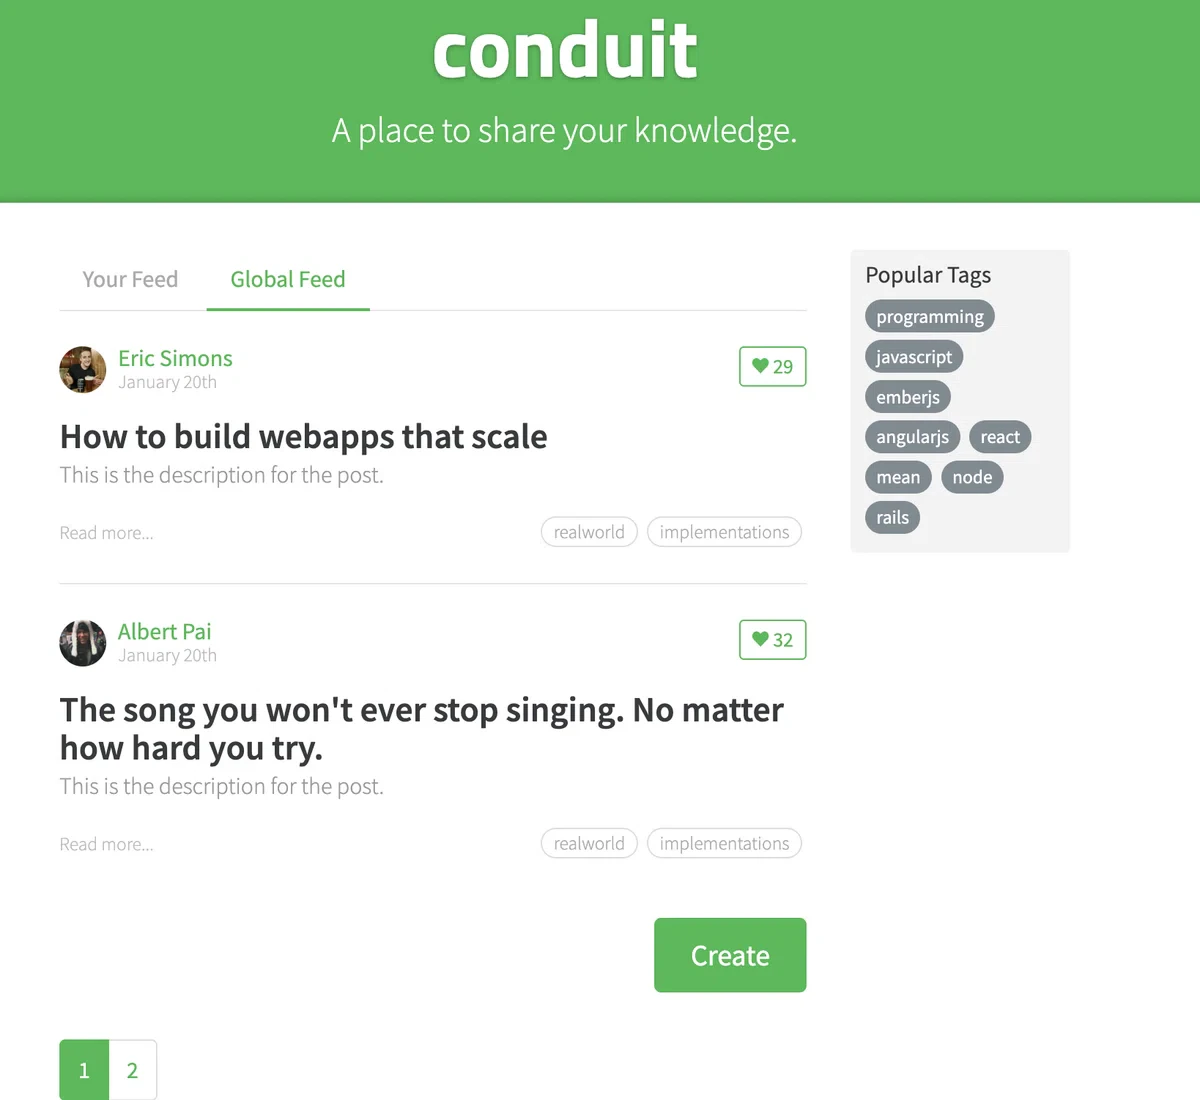
以下、htmlの画面。Albert Paiの記事を表示させているhtmlの行です。
この一塊の直下にボタンを配置すればいいと思います。
<div class="article-preview">
  <div class="article-meta">
    <a href="/profile/albert-pai"><img src="http://i.imgur.com/N4VcUeJ.jpg" /></a>
    <div class="info">
      <a href="/profile/albert-pai" class="author">Albert Pai</a>
      <span class="date">January 20th</span>
    </div>
    <button class="btn btn-outline-primary btn-sm pull-xs-right">
      <i class="ion-heart"></i> 32
    </button>
  </div>
  <a href="/article/the-song-you" class="preview-link">
    <h1>The song you won't ever stop singing. No matter how hard you try.</h1>
    <p>This is the description for the post.</p>
    <span>Read more...</span>
    <ul class="tag-list">
      <li class="tag-default tag-pill tag-outline">realworld</li>
      <li class="tag-default tag-pill tag-outline">implementations</li>
    </ul>
  </a>
</div>
1-3,コードを追加
移動先に似せたいボタンがあるので取ってこれるかやってみます。
Publish Articleボタンと同じ様にしたいので、app>views>articles>new.html.erbに移動しCSSを探します。
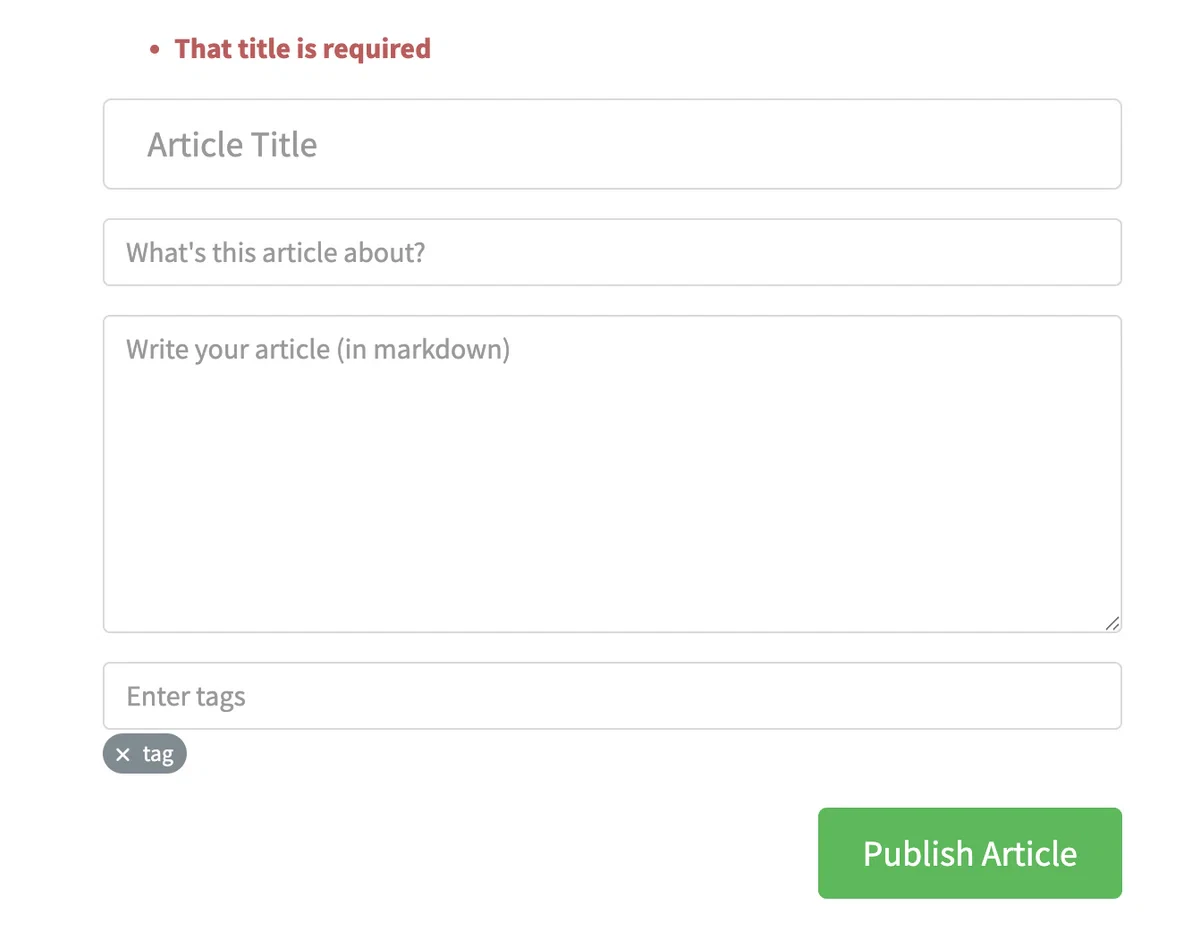
あった!
<%= link_to "Publish Article", "/articles/show", class: "btn btn-lg pull-xs-right btn-primary" %>
copy
これを拝借で中身を書き換えでどうかしら。
<%= link_to "Create", "/articles/new",class: "btn btn-lg pull-xs-right btn-primary" %>
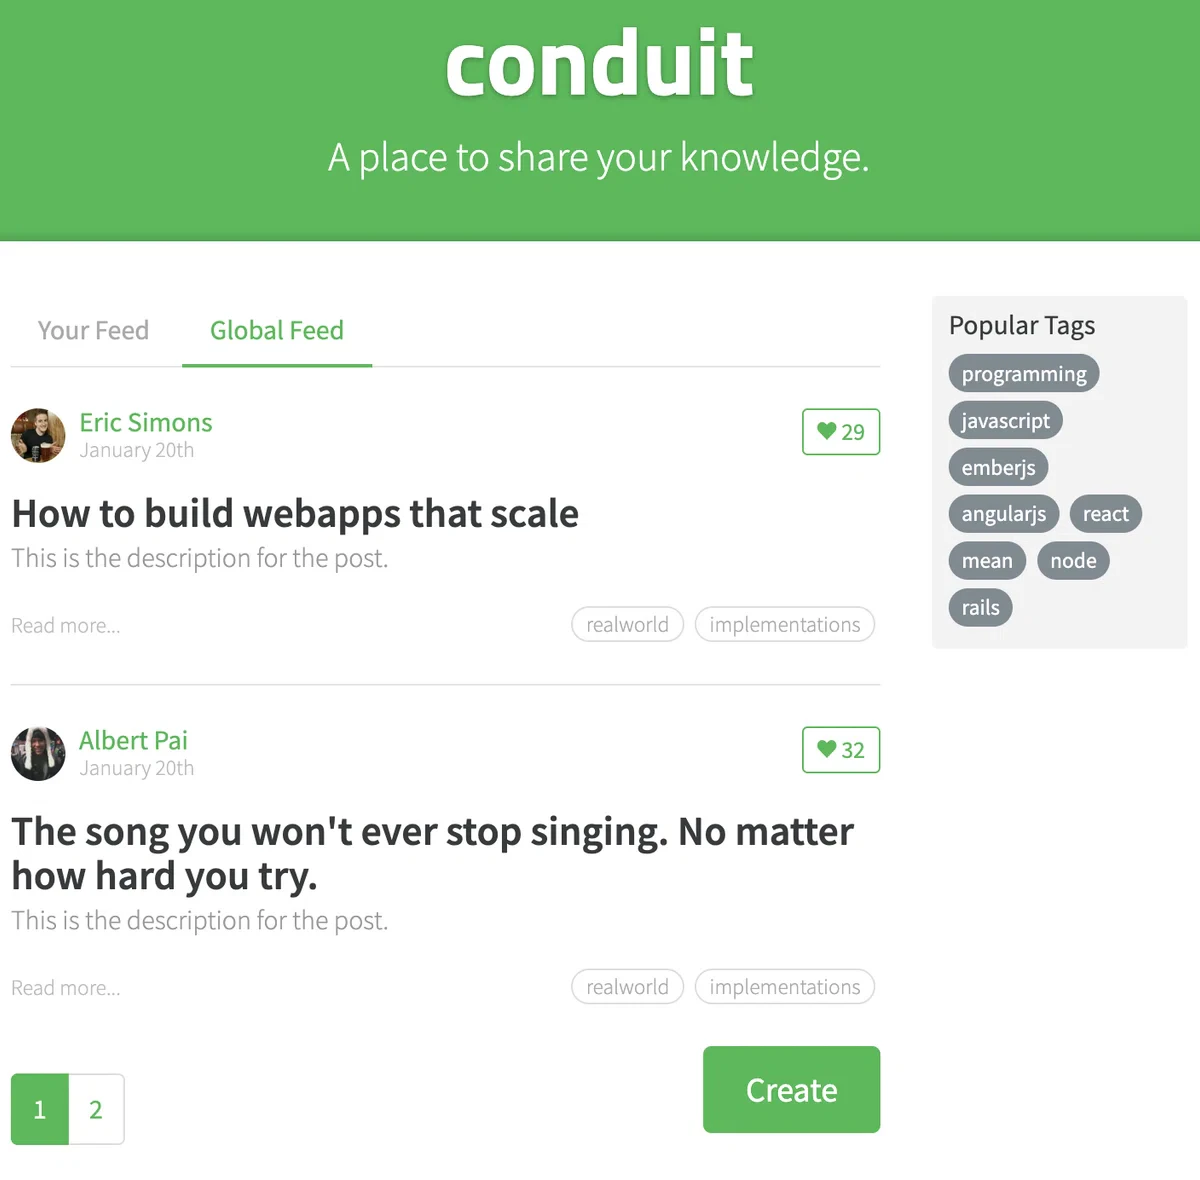
成功です!動作も問題ありませんでした。
2、Create 画面で「Publish Article」を押すと、入力した内容がデータベースに保存され、Home 画面のリストに表示される
2-0,前知識MVCモデル
2-1,rails generate model で Article モデルを作る
2-2,コントローラに create アクションを追加
2-3,ルーティングに create を追加
2-4,new.html.erb のフォームを form_with に書き換える
(ここまでできれば、「フォーム入力 → Publish Articleクリック → createアクションにPOST → 保存 → Homeへリダイレクト」がつながる。)
2-5,index.html.erb に保存された記事を表示する
2-0,前知識MVCモデル
1、フォームから要求が出される
ユーザーが「Publish Article」を押す
→ HTTPリクエスト(POST /articles)がサーバに送られる
2、コントローラが受け取る
ArticlesController#create が呼ばれる
params にフォームの入力値が入っている
3、モデルへ送信 & DB保存
Article.new(params) でモデルのオブジェクトを作成
.save を呼ぶと ActiveRecord が DB(MySQL/SQLiteなど)にINSERTする
4、DBから呼び出し(読み込み)
保存したデータをもう一度 Article.all などで取り出せる
5、コントローラがviewへ渡す
コントローラで @articles = Article.all を用意
この @articles がビューで使える変数になる
6、ビューで表示
index.html.erb が @articles を使ってリストをレンダリング
ユーザーに「新しい記事が一覧に追加された!」と見える
MVCモデルの画像を一緒に載せるべきなんですが、著作権かかっているものしかなく載せれません。MVCモデルと検索し画像からもまずはデータの流れを確認し理解して取り組んだほうがいいと思います。
2-1,rails generate model で Article モデルを作る
<なぜモデルを作る必要があるのか?>-----------------------
-
モデルがないとどうなる?
Rails でフォームから記事を送って「Publish Article」を押しても、
受け取ったデータを保存する 入れ物(テーブル) が存在しない。
つまり「保存先がない=データは一切残らない」状態。 -
モデルがあると何ができる?
モデルの役割
-DBのテーブルと1対1で対応する
-Article モデル → articles テーブル
-カラム(title, description, body)を属性として扱える
ターミナルで以下のコマンドを入力し、
app/models/article.rb
db/migrate/XXXXXXXXXXXX_create_articles.rb
を作成する。
bin/rails   generate   model   Article   title:string   description:string   body:text
└実行バイナリ └ジェネレータ └種類     └モデル名    └属性:型         └属性:型              └属性:型
コードの解説
bin/rails:このアプリのRailsを実行(プロジェクト直下で使うのが安全)。generate(短縮形g):雛形を作るコマンド。
model:作る雛形の種類=モデル。
Article:モデル名(単数・CamelCase)。→ テーブル名は自動で複数形 articles になります。
title:string description:string body:text:作るカラム名と型。コロンで区切る。(string=短文、text=長文。)
まだDBには反映されていないので、この後に
bin/rails db:migrate
これでテーブルが作成され、db/schema.rb が更新されます。
Point
・区切りはすべて半角スペース。
・コロンは半角で name:type の形。
・型を省くと既定で string。
・モデル名は単数、テーブルは複数になる(Railsの規約)。
・途中で迷ったら bin/rails g model --help で使える型やオプションを確認。
2-2,コントローラに create アクションを追加
まずapp/controllers/articles_controller.rbに移動する。
編集前;ここに必要なコードを足していきます。
class ArticlesController < ApplicationController
  def index
  end

  def show
  end

  def new
  end

  def create
  end

  def edit
  end
end
編集後
class ArticlesController < ApplicationController

<!-- ①ホーム画面表示用 -->
  def index
    @articles = Article.all
  end
<!-- ①ここまで -->
  def show
  end
<!-- ②記事作成画面表示用 -->
  def new
    @article = Article.new
  end
<!-- ②ここまで -->

<!-- ③DB保存用 -->
  def create
    @article = Article.new(article_params)
    if @article.save
      redirect_to articles_path
    else
      render :new
    end
  end
<!-- ③ここまで -->

  def edit
  end
end
解説
①
DBに入っているすべての記事を取得 (Article.all)
インスタンス変数 @articles をビュー (index.html.erb) に渡す
ビュー側で <% @articles.each do |article| %> ... <% end %> と書けば一覧表示ができる
「保存した記事を確認できる」ための処理
②
空の Article オブジェクトを生成
ビュー (new.html.erb) で form_with model: @article を使うと、この空オブジェクトを元にフォームが作られる
フォームから入力して送信すると、次は create アクションが呼ばれる
「記事作成画面を表示する」ための処理
③
フォームから受け取った値で Article を作成して DBに保存。
成功すれば true を返す。
その場合は redirect_to articles_path が実行されて、Home画面に戻る。
保存できなかった(false が返った)とき。
render :new
→ 「新規作成フォーム(new.html.erb)をもう一度表示しなさい」という命令
2-3,ルーティングに create を追加
ルーティングの目的
今のままだと new.html.erb のフォームが送信されても、
送信先(POST /articles)のルートが存在しません。
つまり create アクション用のルートを追加する必要があります。
ルート追加方法
config/routes.rbへ移動&編集する。
編集前
Rails.application.routes.draw do
  get "articles/index"
  get "articles/show"
  get "articles/new"
  get "articles/edit"
  # Define your application routes per the DSL in https://guides.rubyonrails.org/routing.html

  # Reveal health status on /up that returns 200 if the app boots with no exceptions, otherwise 500.
  # Can be used by load balancers and uptime monitors to verify that the app is live.
  get "up" => "rails/health#show", as: :rails_health_check

  # Render dynamic PWA files from app/views/pwa/* (remember to link manifest in application.html.erb)
  # get "manifest" => "rails/pwa#manifest", as: :pwa_manifest
  # get "service-worker" => "rails/pwa#service_worker", as: :pwa_service_worker

  # Defines the root path route ("/")
  # root "posts#index"
end
編集後
Rails.application.routes.draw do
root "articles#index"

  resources :articles, only: [:index, :show, :new, :edit, :create]
  # Define your application routes per the DSL in https://guides.rubyonrails.org/routing.html

  # Reveal health status on /up that returns 200 if the app boots with no exceptions, otherwise 500.
  # Can be used by load balancers and uptime monitors to verify that the app is live.
  get "up" => "rails/health#show", as: :rails_health_check

  # Render dynamic PWA files from app/views/pwa/* (remember to link manifest in application.html.erb)
  # get "manifest" => "rails/pwa#manifest", as: :pwa_manifest
  # get "service-worker" => "rails/pwa#service_worker", as: :pwa_service_worker

  # Defines the root path route ("/")
  # root "posts#index"
end
解説
-get "articles/index" などは 不要(resources が全部カバーする)
-resources :articles, only: [...] が create 用の POST /articles を生んでくれる
-root "articles#index" を入れると、http://localhost:3000/ で Home が開ける
⚠️resources:articlesに変更したために、以降、アクセスするリンクが変わります。
正しいURLで確認
Home(index):http://localhost:3000/
Create(new):http://localhost:3000/articles/new
Edit(edit):http://localhost:3000/articles/1/edit(ダミーIDでOK)
Show(show):http://localhost:3000/articles/1
copy
2-4,new.html.erb のフォームを form_with に書き換える
編集前;このままではコントローラーに届かないため、form_with形式に書き換えます。
<form>
  <fieldset>
    <fieldset class="form-group">
      <input type="text" class="form-control form-control-lg" placeholder="Article Title" />
    </fieldset>
    <fieldset class="form-group">
      <input type="text" class="form-control" placeholder="What's this article about?" />
    </fieldset>
    <fieldset class="form-group">
      <textarea
        class="form-control"
        rows="8"
        placeholder="Write your article (in markdown)"
      ></textarea>
    </fieldset>
    <fieldset class="form-group">
      <input type="text" class="form-control" placeholder="Enter tags" />
      <div class="tag-list">
        <span class="tag-default tag-pill"> <i class="ion-close-round"></i> tag </span>
      </div>
    </fieldset>
    <%= link_to "Publish Article", "/articles/show", class: "btn btn-lg pull-xs-right btn-primary" %>
  </fieldset>
</form>
編集後
<%= form_with model: @article, local: true do |f| %>
  <fieldset class="form-group">
    <%= f.text_field :title, class: "form-control form-control-lg", placeholder: "Article Title" %>
  </fieldset>

  <fieldset class="form-group">
    <%= f.text_field :description, class: "form-control", placeholder: "What's this article about?" %>
  </fieldset>

  <fieldset class="form-group">
    <%= f.text_area :body, class: "form-control", rows: 8, placeholder: "Write your article (in markdown)" %>
  </fieldset>

  <%= f.submit "Publish Article", class: "btn btn-lg pull-xs-right btn-primary" %>
<% end %>
解説
タグを Rails が自動生成してくれる(action="/articles" method="post" にしてくれる) f.text_field :title → @article.title に紐付く f.text_area :body → @article.body に紐付く f.submit → DB保存のための「Publish Article」ボタン2-5,index.html.erb に保存された記事を表示する
元々投稿記事っぽく表示する様にhtmlで書かれていた記事欄(article-preview)を削除して、コントローラーから渡されたDB保存済みviewを呼び出してきて表示させる物に書き換えます。
編集前
<div class="article-preview">
  <div class="article-meta">
    <a href="/profile/eric-simons"><img src="http://i.imgur.com/Qr71crq.jpg" /></a>
    <div class="info">
      <a href="/profile/eric-simons" class="author">Eric Simons</a>
      <span class="date">January 20th</span>
    </div>
    <button class="btn btn-outline-primary btn-sm pull-xs-right">
      <i class="ion-heart"></i> 29
    </button>
  </div>
  <a href="/article/how-to-build-webapps-that-scale" class="preview-link">
    <h1>How to build webapps that scale</h1>
    <p>This is the description for the post.</p>
    <span>Read more...</span>
    <ul class="tag-list">
      <li class="tag-default tag-pill tag-outline">realworld</li>
      <li class="tag-default tag-pill tag-outline">implementations</li>
    </ul>
  </a>
</div>

<div class="article-preview">
  <div class="article-meta">
    <a href="/profile/albert-pai"><img src="http://i.imgur.com/N4VcUeJ.jpg" /></a>
    <div class="info">
      <a href="/profile/albert-pai" class="author">Albert Pai</a>
      <span class="date">January 20th</span>
    </div>
    <button class="btn btn-outline-primary btn-sm pull-xs-right">
      <i class="ion-heart"></i> 32
    </button>
  </div>
  <a href="/article/the-song-you" class="preview-link">
    <h1>The song you won't ever stop singing. No matter how hard you try.</h1>
    <p>This is the description for the post.</p>
    <span>Read more...</span>
    <ul class="tag-list">
      <li class="tag-default tag-pill tag-outline">realworld</li>
      <li class="tag-default tag-pill tag-outline">implementations</li>
    </ul>
  </a>
</div>
編集後
<% if @articles.any? %>
<% @articles.each do |article| %>
    <div class="article-preview">
    <a href="<%= article_path(article) %>" class="preview-link">
        <h1><%= article.title %></h1>
        <p><%= article.description %></p>
        <span>Read more...</span>
    </a>
    </div>
<% end %>
<% else %>
<div class="article-preview">
    <p>まだ記事がありません。右下の「Create」から作成してね!</p>
</div>
<% end %>
解説
@articles.any? の意味
-@articles はコントローラで @articles = Article.all として渡された記事の配列(ActiveRecordのコレクション)。
-.any? は 「中に要素が1つでもあるか?」をチェックするメソッド。
もし記事が1件以上あれば → true
記事が0件なら → false
かなり長くなりそうなので、一旦ここで次の章に引き継ぎます💦
Conclusion
今回のStep2では、Createボタンの配置から始めて、Articleモデル作成 → createアクション追加 → ルーティング追加 → form_with化 → indexでDB記事表示 までを一連でつなげました。
「フォーム送信 → DB保存 → Home表示」の流れが通ると、以降のEdit/Deleteも同じ考え方で進められるので、まずはこの導線を作るのが大事だと感じました。