前回の続き
本題
Tutorial用のサンプルを導入(チュートリアル2)
ここからTutorial AssetsをDL
Importする

Cube
Assets/MRTK.Tutorials.GettingStarted/PrefabsにあるCubeをSceneに配置
positionをz = 0.5にする

CubeのAdd ComponentよりObject ManipulatorとNearInteractionGrabbableを追加する
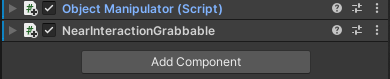
これでobjectをつかんで移動させることができる
シーンを実行するとエミュレータ内で動作させることができる
動作のさせ方は以下の通り
| Key | 動作 |
|---|---|
| w | 前進 |
| a | 左へ |
| s | 後退 |
| d | 右へ |
| e | 上昇 |
| q | 下降 |
| t | 左手表示・非表示 |
| y | 右手表示・非表示 |
| Shift長押し&マウス | 左手操作 |
| Space長押し&マウス | 右手操作 |
| 左クリック | 指タップ(クリック) |
| 右クリック長押し&マウス | 視点操作 |
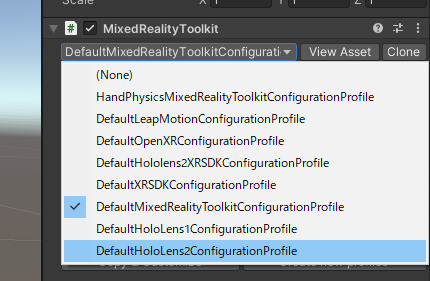
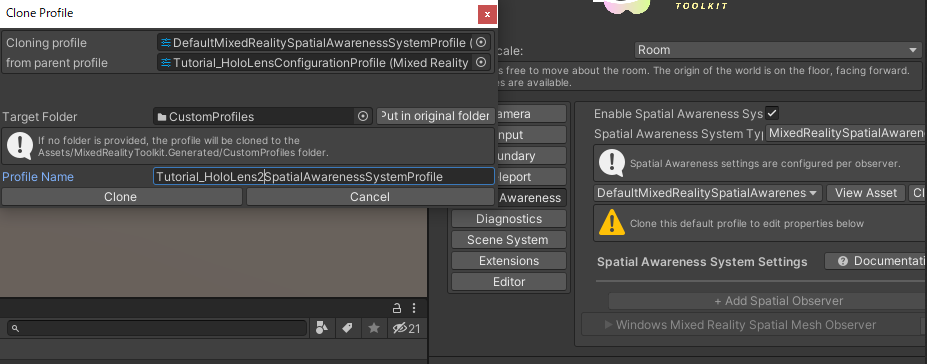
Profileの設定(チュートリアル3)
HoloLens2で使用するのでデフォルトをHoloLens2用に変更
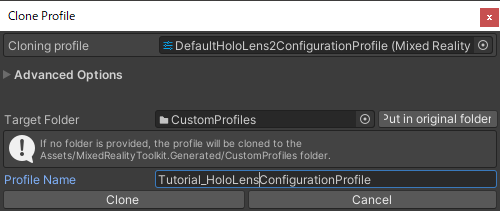
詳細な設定を変更するためクローンを生成
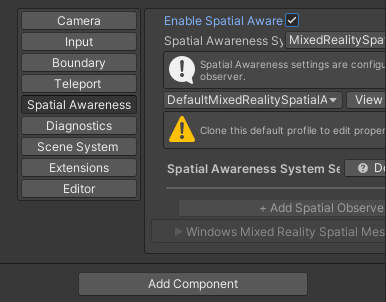
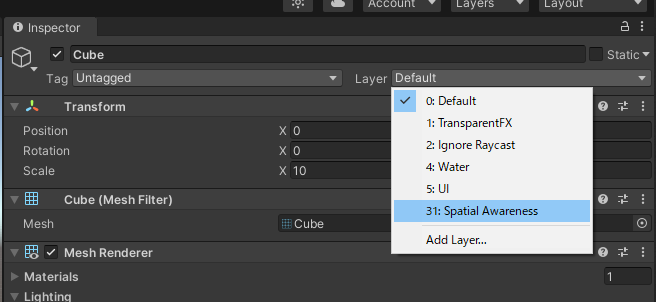
Spatial Awareの欄をクリックして有効化する
(Spatial Aware:空間認識機能に関する設定)
Spatial Awareness System Profileも生成する
Mesh Observer Profile
TypeはTry Repairを押したら赤いのが消えた
Mesh Observer Profileもクローン

Display OptionをOcclusionに変更
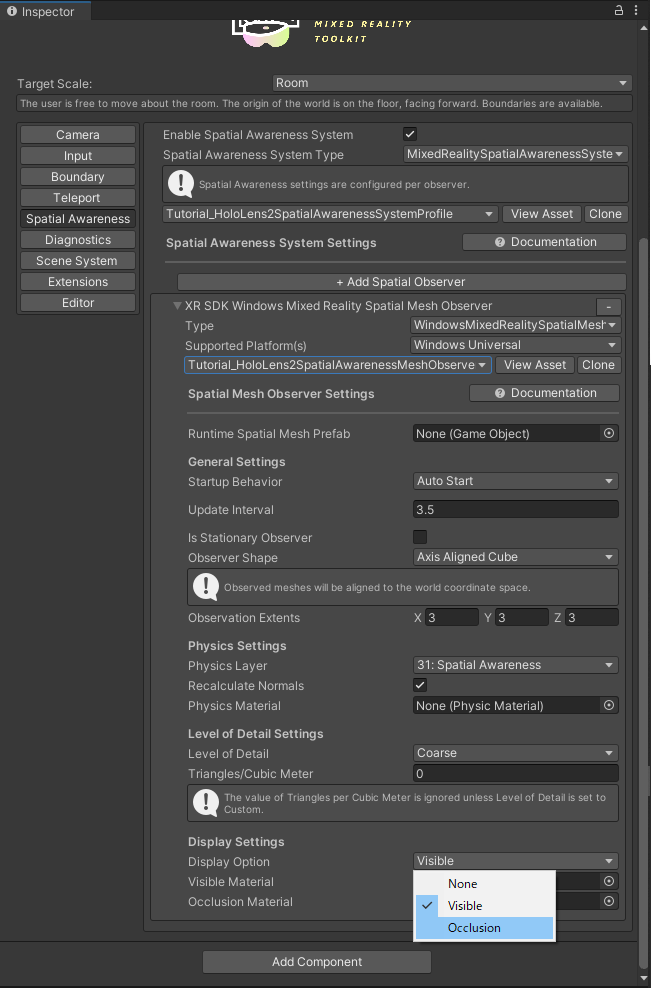
これで一通りの設定は終了
オブジェクトの配置(チュートリアル4)
サンプルを用いてアプリケーションを作る
Roverとpartsの配置
空のオブジェクトを作成(RoverExplorer)
座標を変更する
Transform Position x=0, y=-0.6, z=2

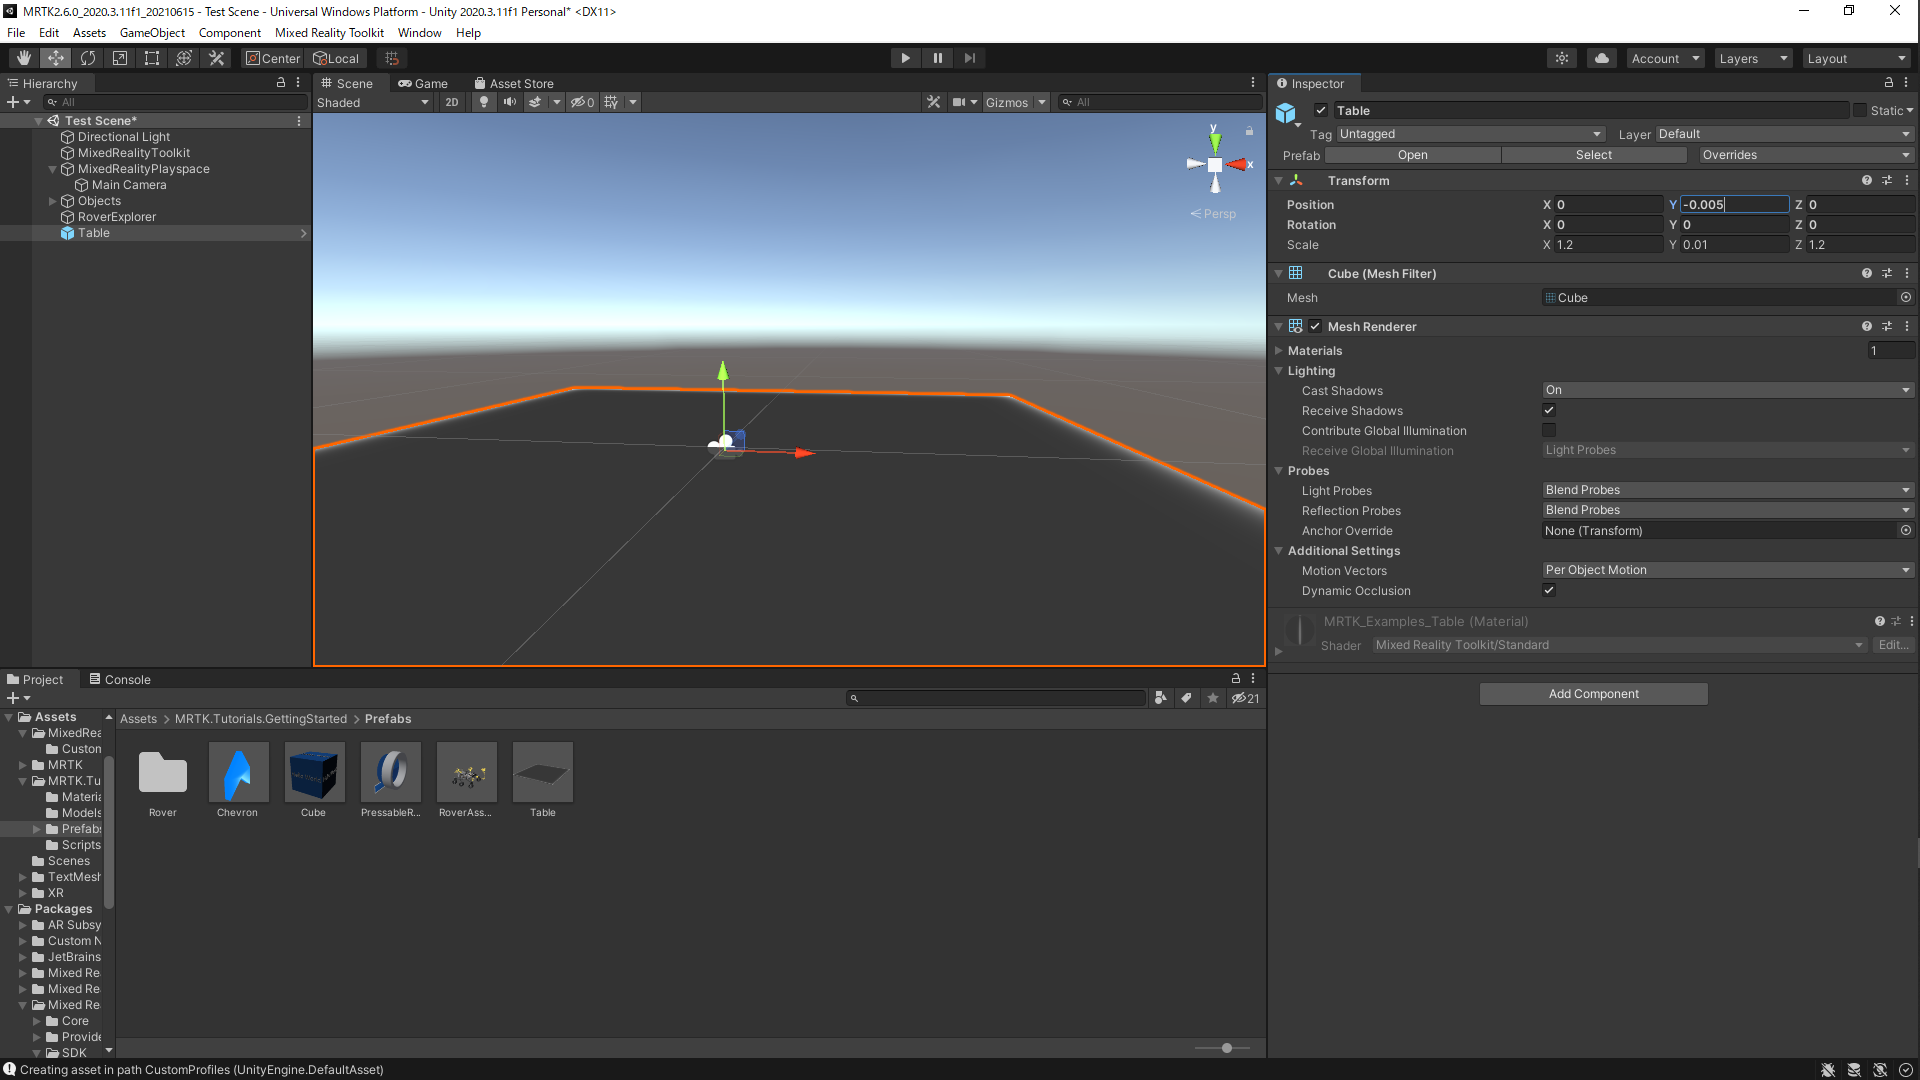
Asset > MRTK.Tutorials.GettingStarted > PrefabsにあるPrefabからTableをRoverExplorer内に配置する

Tableの座標を変更
Transform Position x=0,y=-0.005,z=0
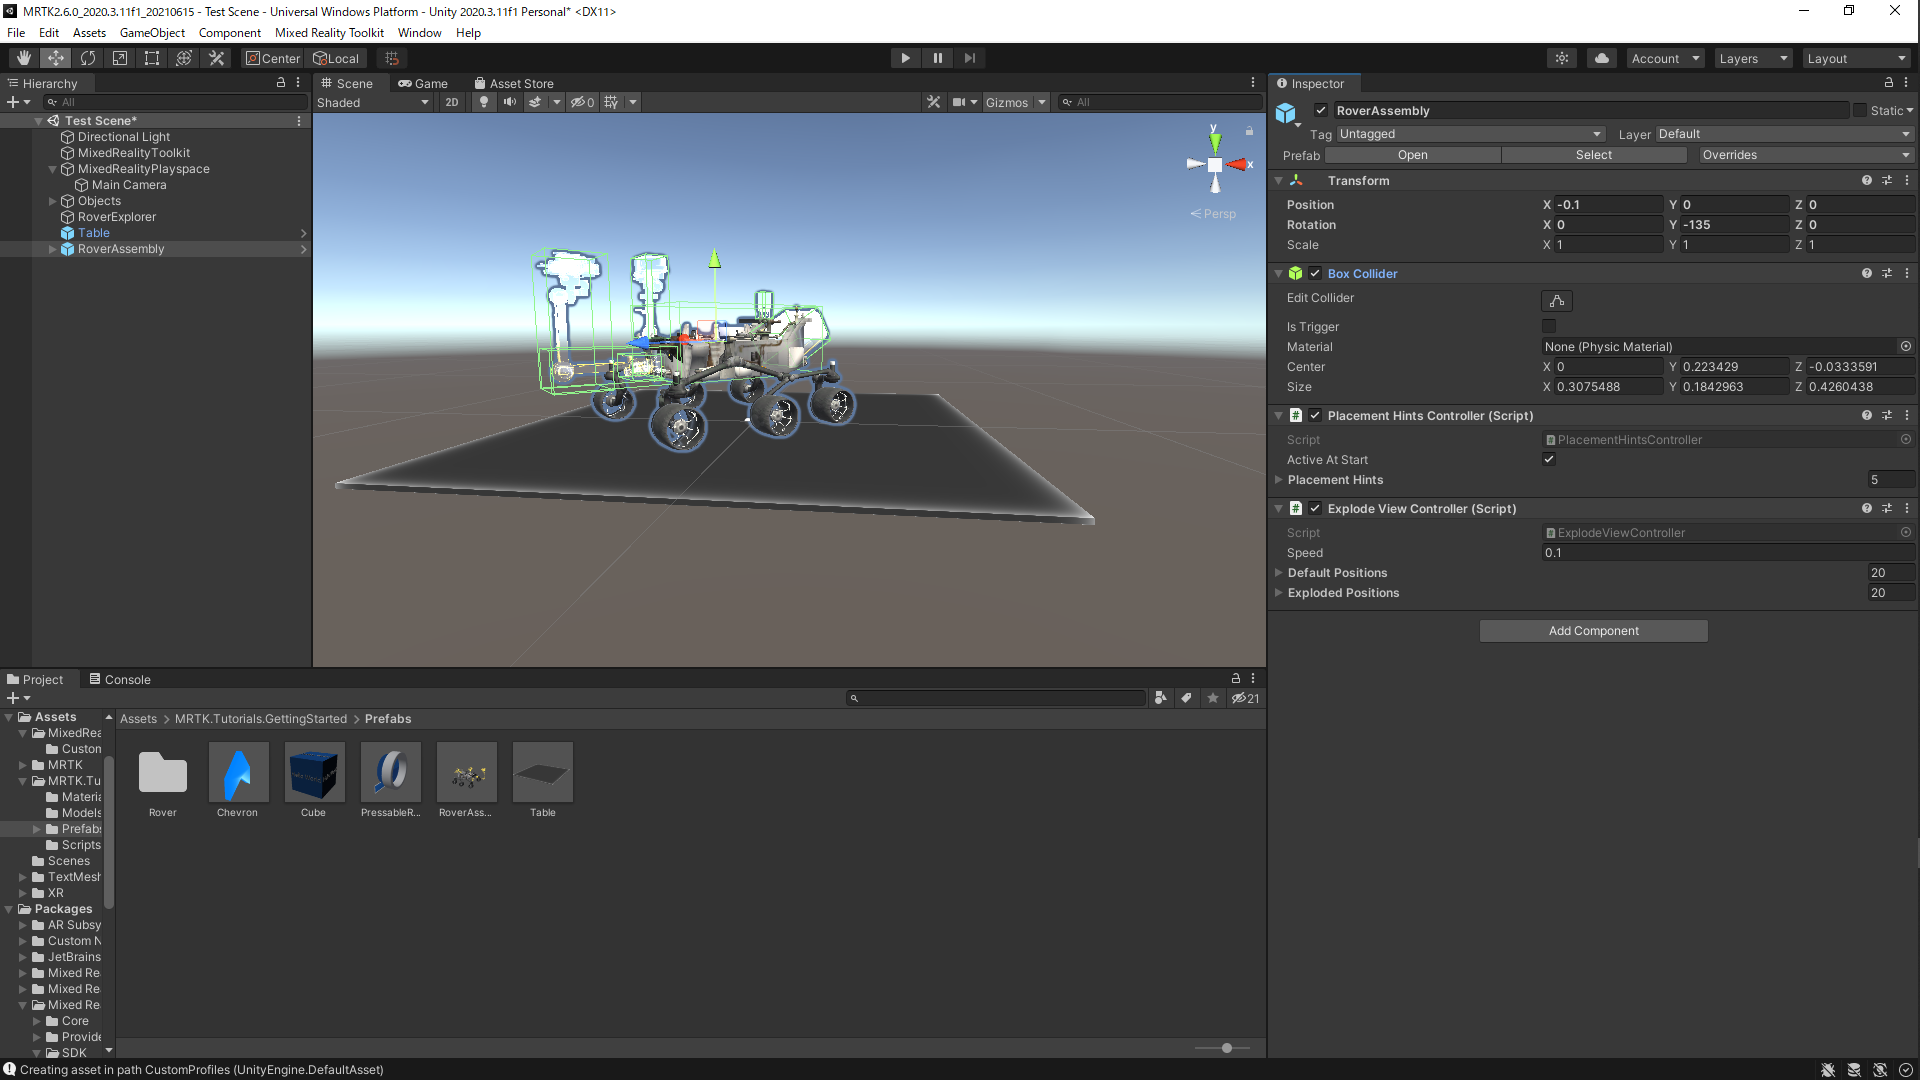
同じようにRoverAssemblyをRoverExplorer内に配置する
座標,回転を変更する
Transform
・Position x=-0.1, y=0, z=0
・Rotation x=0, y=-135, z=0
空のオブジェクトを作成(RoverParts)
RoverExplorer内に配置する
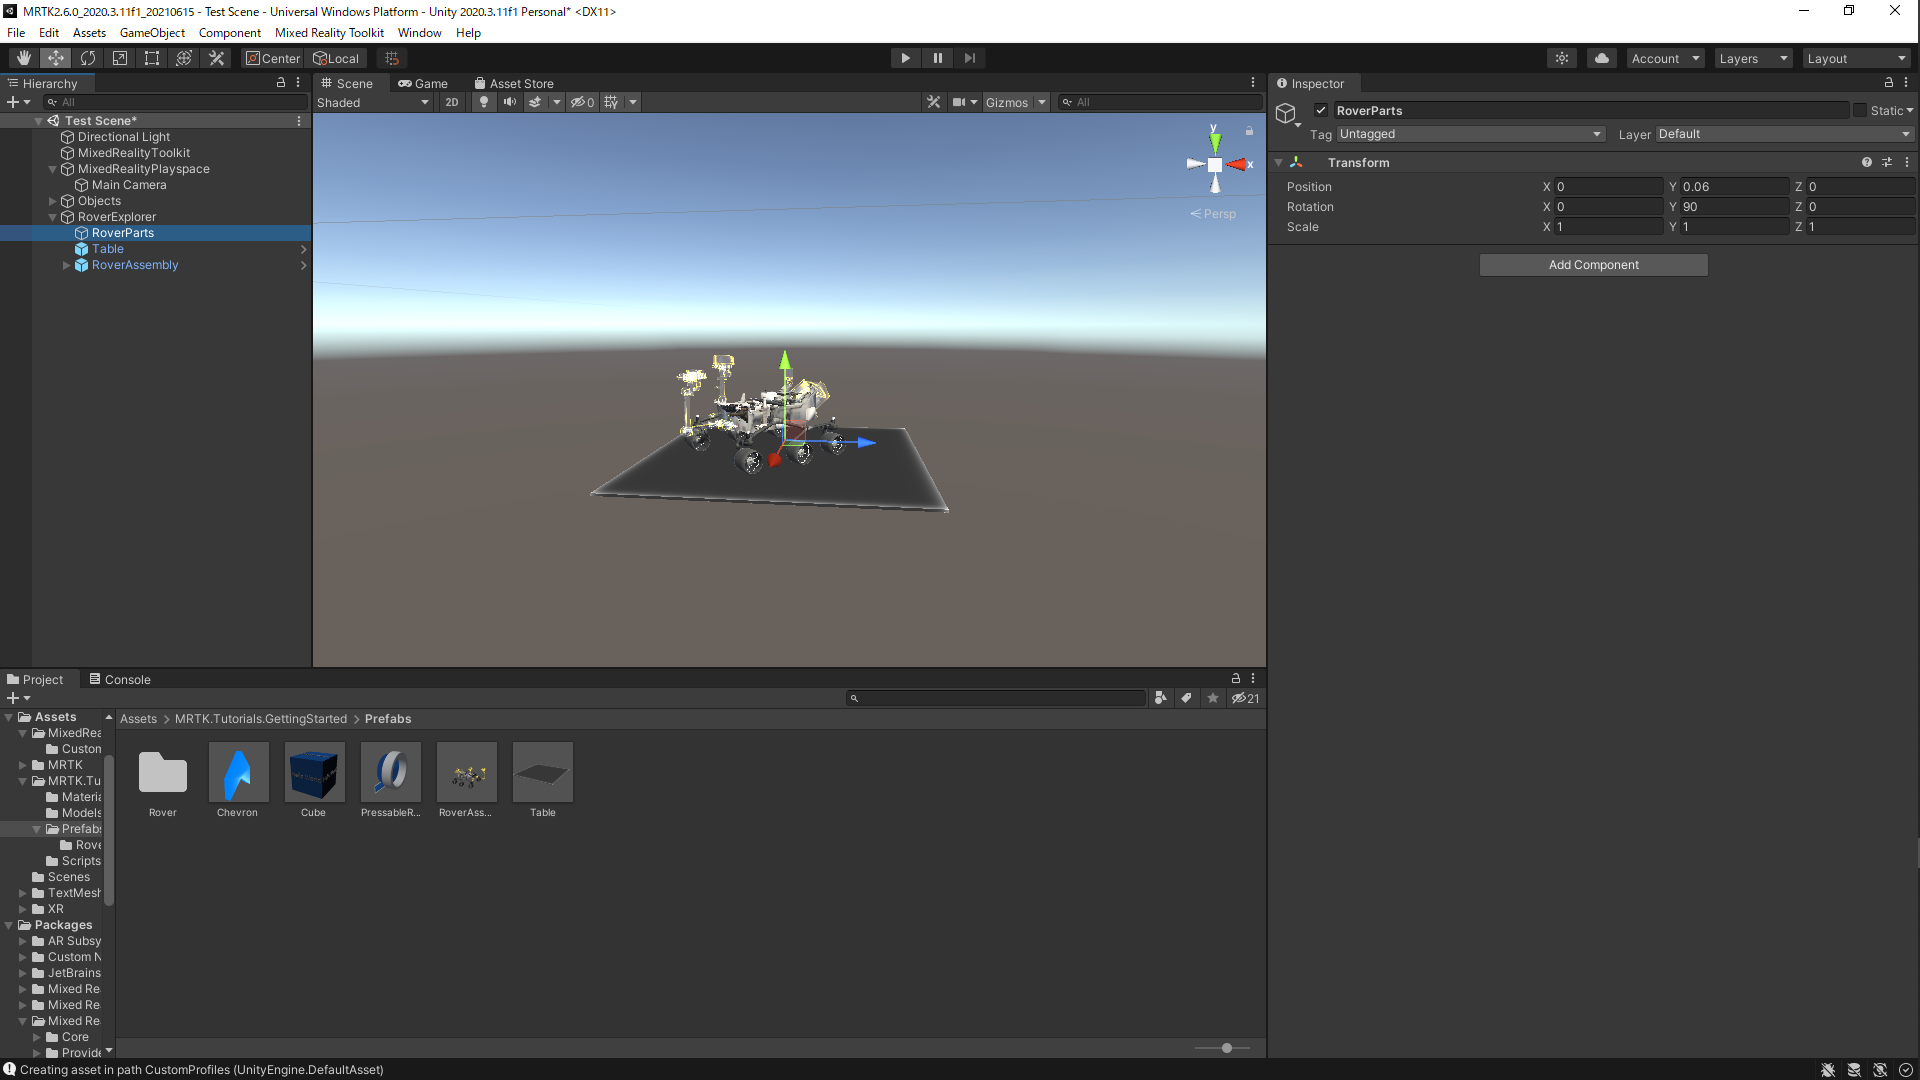
RoverAssembly/RoverModel/Partsの中にあるオブジェクトをすべてコピーする

RoverPartsの中にペースト
名前を変更しておく(後ろに_Partをつけた)

RoverPartsを選択してAdd ComponentからGrid Object Collectionを追加
以下のように設定する
Sort Type:Alphabetical
Layout:Horizontal
Cell Width:0.25
Distance from parent:0.38

設定ができればUpdate Collectionを押す
オブジェクトの配置が変更される

Solver(チュートリアル5)
Chevronの配置
続いてオブジェクトを見失った際に場所を示してくれる機能を追加する
Asset > MRTK.Tutorials.GettingStarted > PrefabsからChevronをScene上に配置する
座標を変更
Transform position z=2

Add ComponentからDirectionalIndicatorを追加
(付随してSolverHandlerも追加される)
Directional TargetにRoverExplorerを当てる(Drag&Drop)
View Offset:0.2に変更

これで実装完了
オブジェクトの移動
RoverAssemblyを選択してAdd ComponentからTap to Placeを追加
(付随してSolverHandlerも追加される)
変更は以下の通り
Use Default Surface Nomal Offset:チェックを外す
Keep Orientation Vertical:チェック
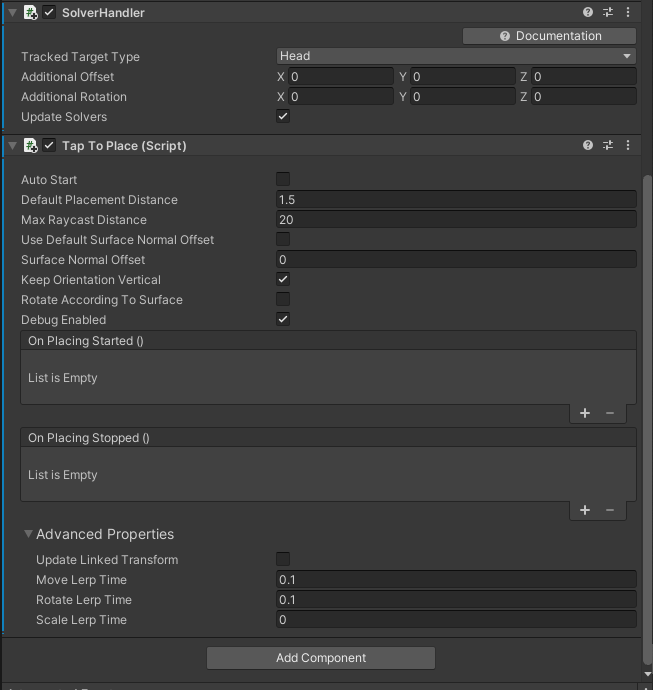
On Placeing Started()で+を押して追加
Runtime OnlyでRoverAssemblyを当てる
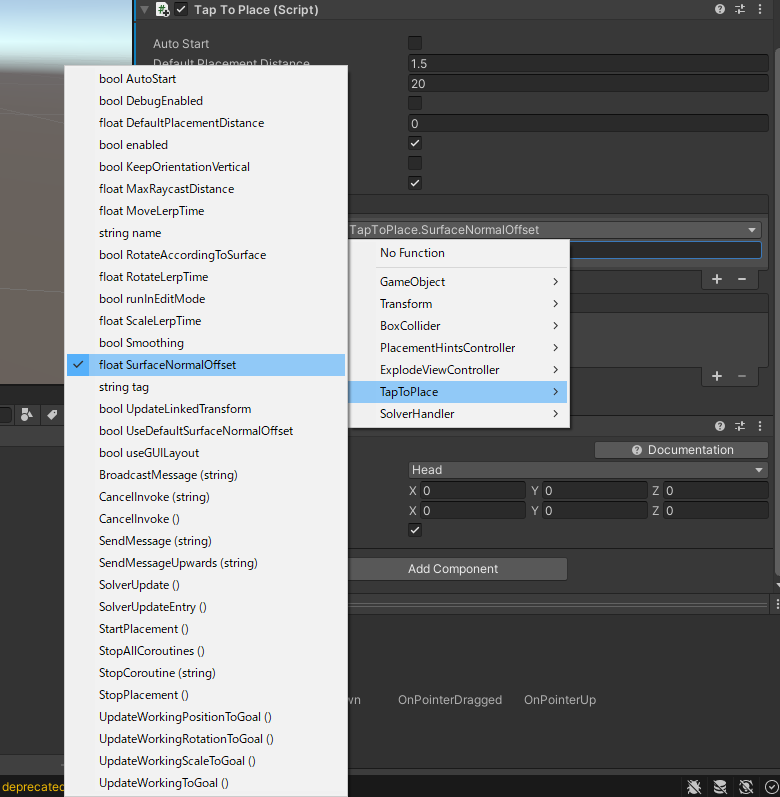
Tap to Placeのfloat SurfaceNormalOffsetを選択

地面として白いBoxを作成
Transform
・Position: X = 0, Y = -1.65, Z = 6
・Rotation: X = 0, Y = 0, Z = 0
・Scale: X = 10, Y = 0.2, Z = 10
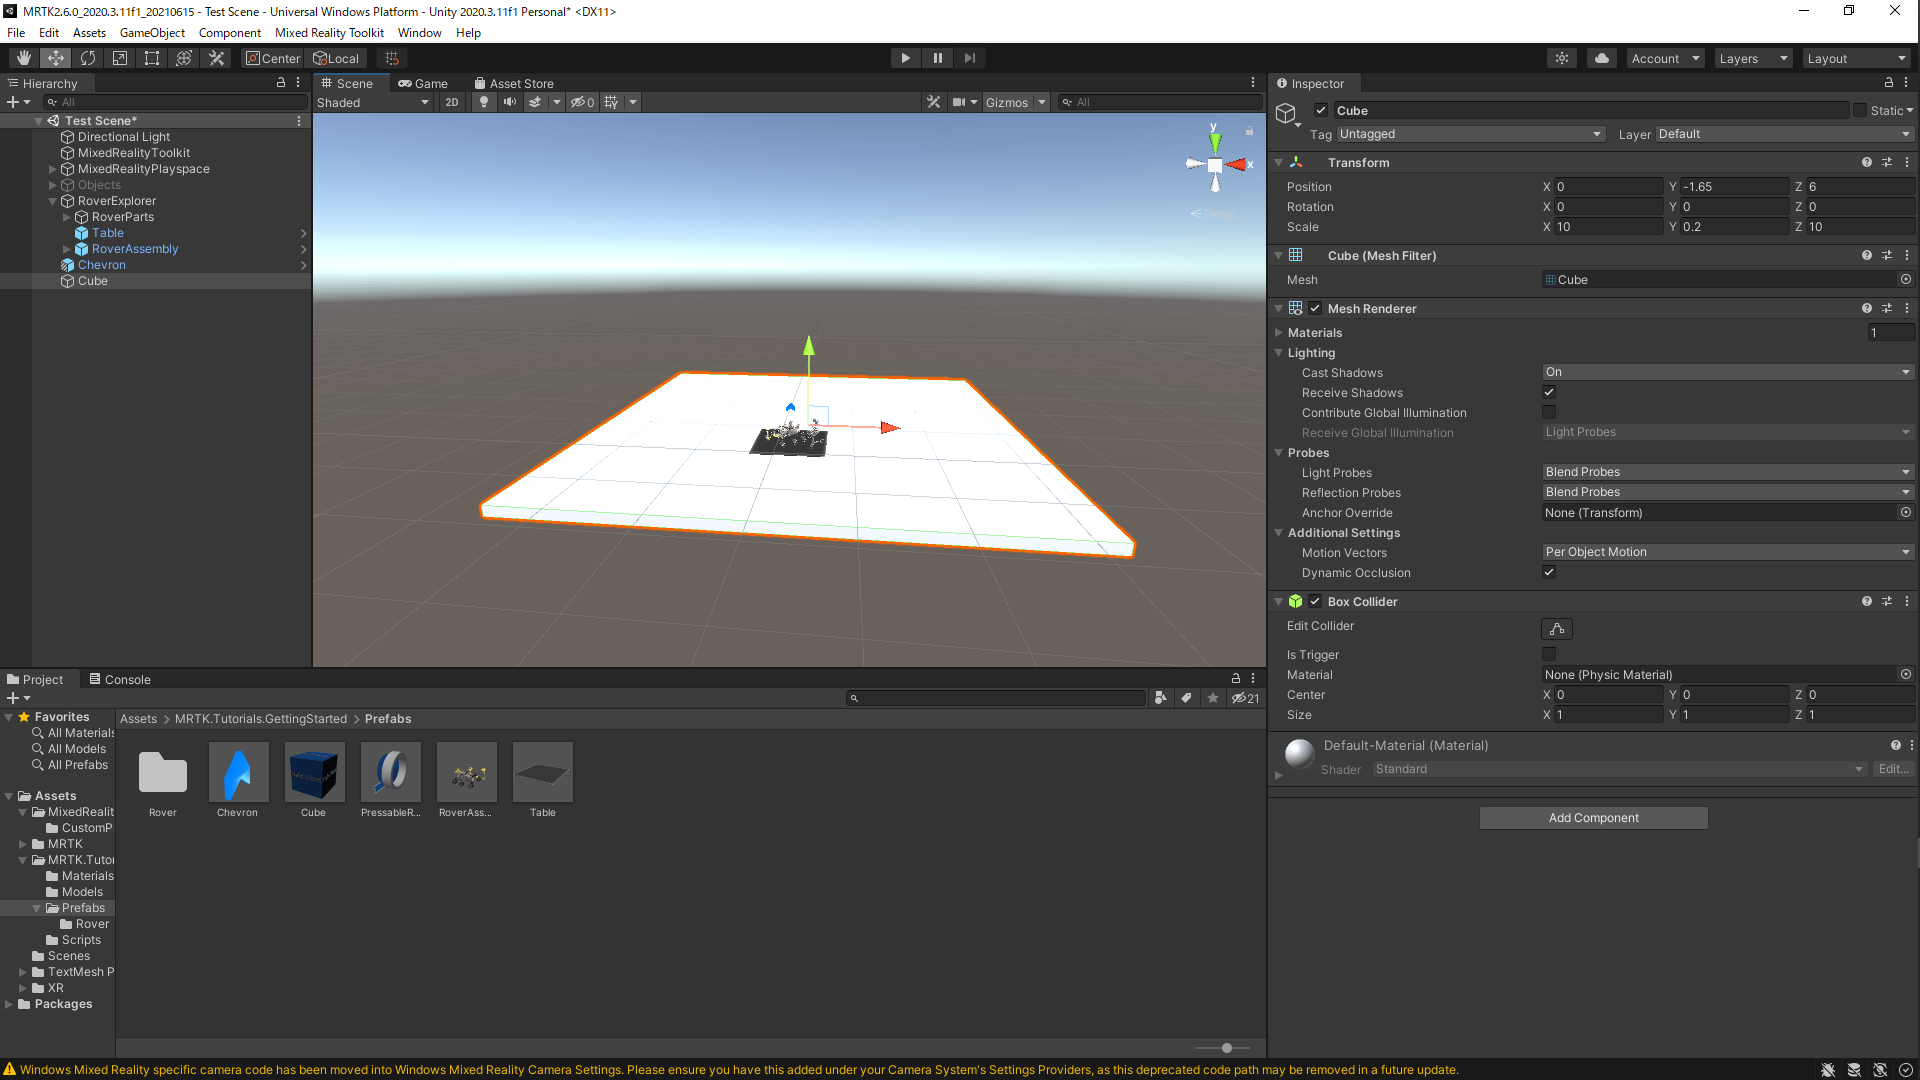
CubeのLayerをSpatial Awarenessに変更する
実行するとRoverAssemblyをクリックで持つ,離すことができる
また地面に沿わせて配置することができる
(試すことができたらCubeは削除してよいとされている)
UI(チュートリアル6)
Button
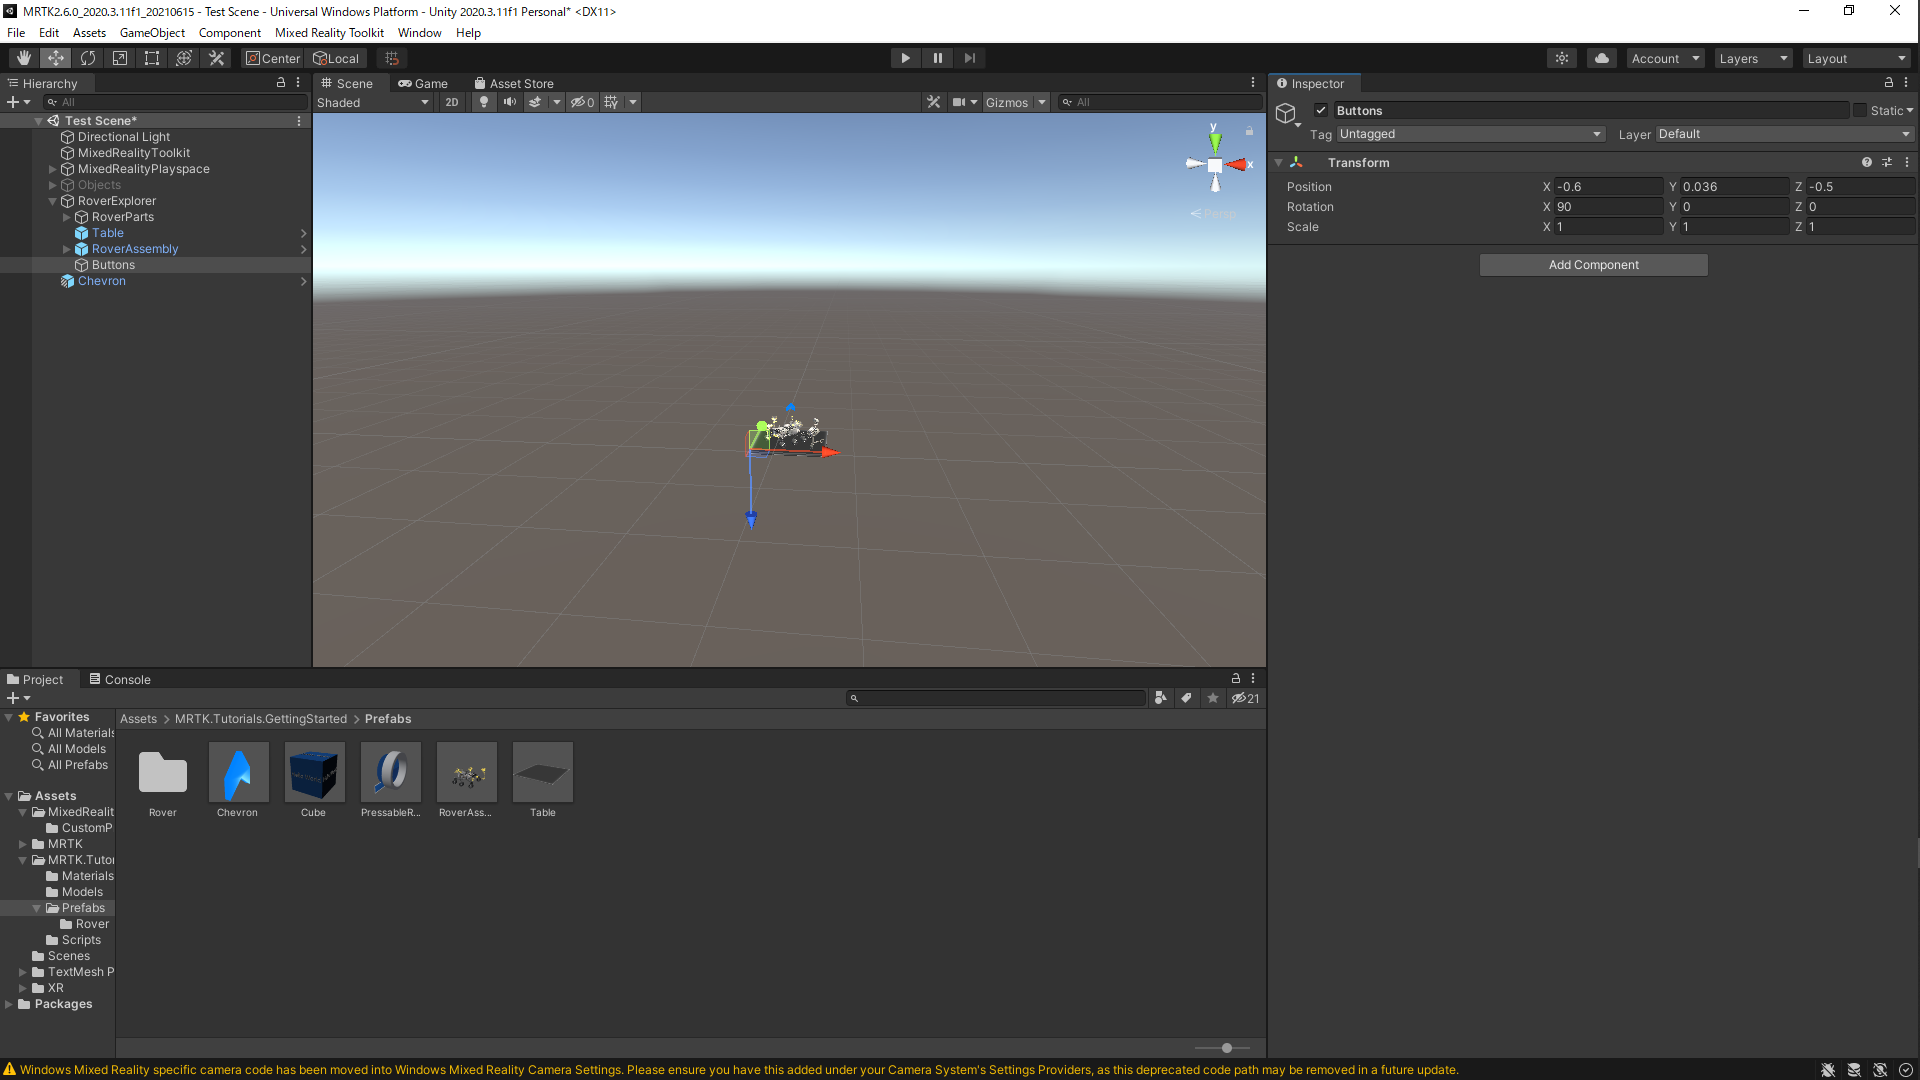
RoverExplorerの中に空のオブジェクトを作成する
名前をButtonsとし,座標と回転を変更する
Position: X = -0.6, Y = 0.036, Z = -0.5
Rotation: X = 90, Y = 0, Z = 0
Asset > MRTK.Tutorials.GettingStarted > PrefabsからPressableRoundButtonをButtonsの中に配置する
配置したPressableRoundButtonをDuplicateで3つ複製する

Buttonsを選択し,Add ComponentからGridObjectCollectionを追加する
変更は以下の通り
Sort Type: Child Order
Layout: Horizontal
Cell Width: 0.2
Anchor: Middle Left
設定できたらUpdate Collectionを押す
すると配置が完了する
ボタンの名前をそれぞれHints,Explode,Resetと変更する
またそれに伴って[ボタンの名前]/SeeltSayltLabel/TextMeshProからTextMeshPro-Textで名前と同じ表記に変更する

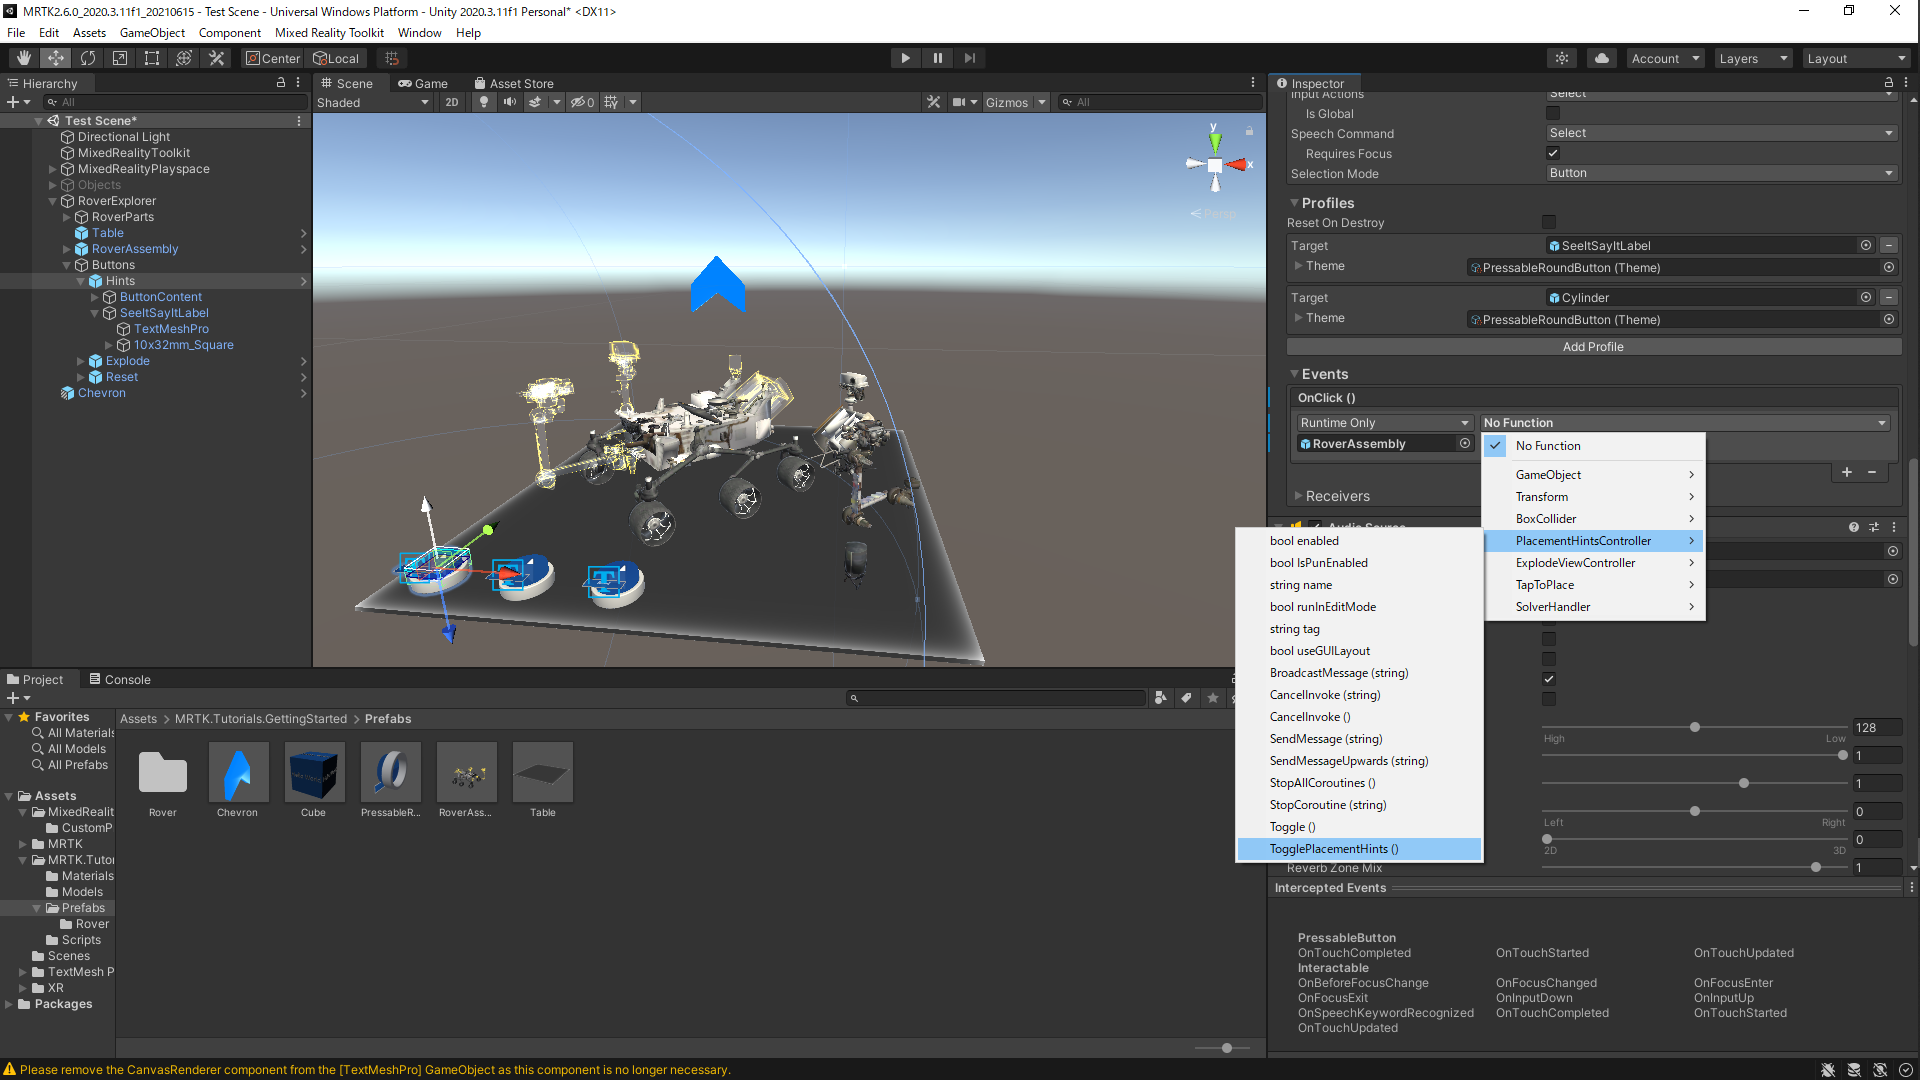
Hintsを選択し,Interactable.OnClick()の+を押す
Runtime OnlyでRoverAssemblyを当てる
PlacementHintsControllerのTogglePlacementHints()を選択
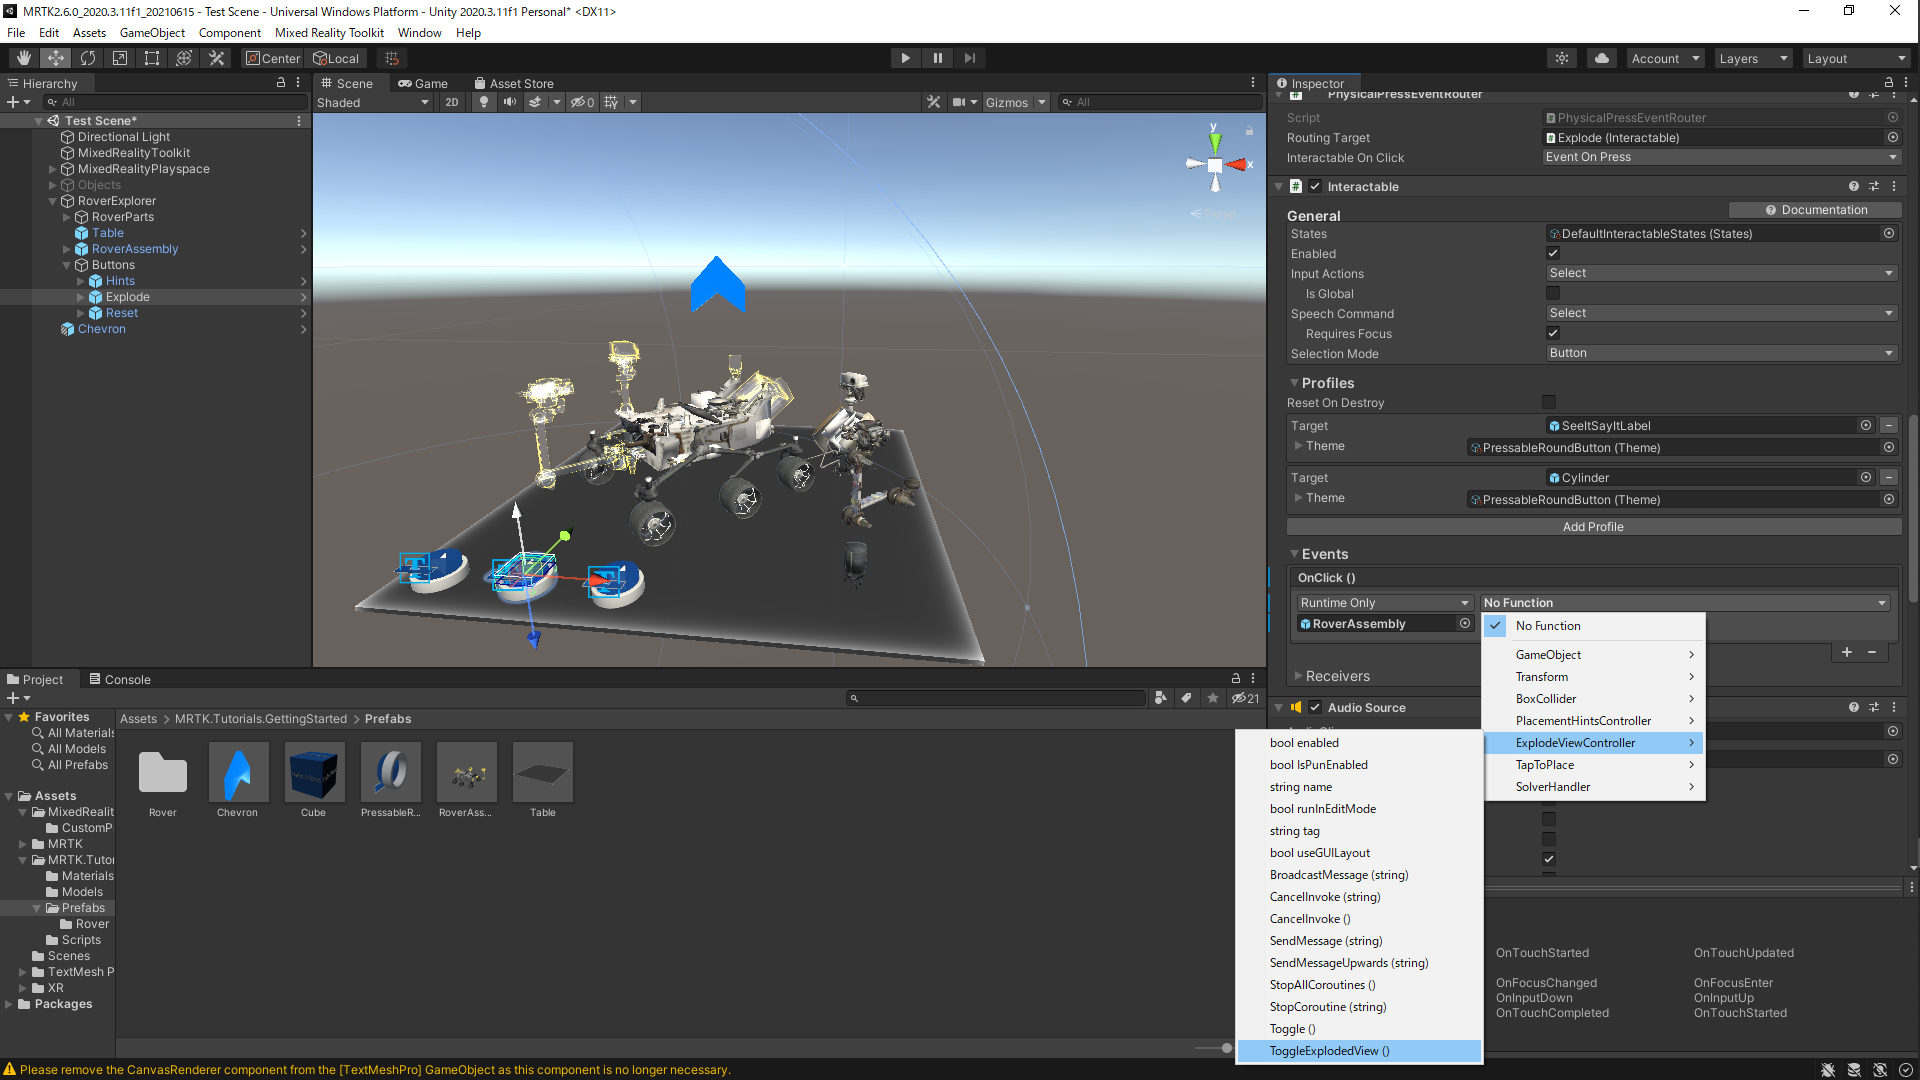
同様にExploadeを選択,Interactable.OnClick()の+を押す
Runtime OnlyでRoverAssemblyを当てる
ExploadeViewControllerのToggleExploadeView()を選択
これでHintsを押すと配置する場所を示す表示がON/OFFできる
Exploadeを押すとパーツが広がり構造が見やすい表示となる
Menu
追従するMenuを作成する
Package > MRTK Reality Toolkit Foundation > SDK > Features > UX > Prefabs > MenuからNearMenu4x1をシーン上に配置,座標を変更する
Transform Position X = 0, Y = -0.4, Z = 0
NearMenu4x1のRadialViewをチェックして有効にする
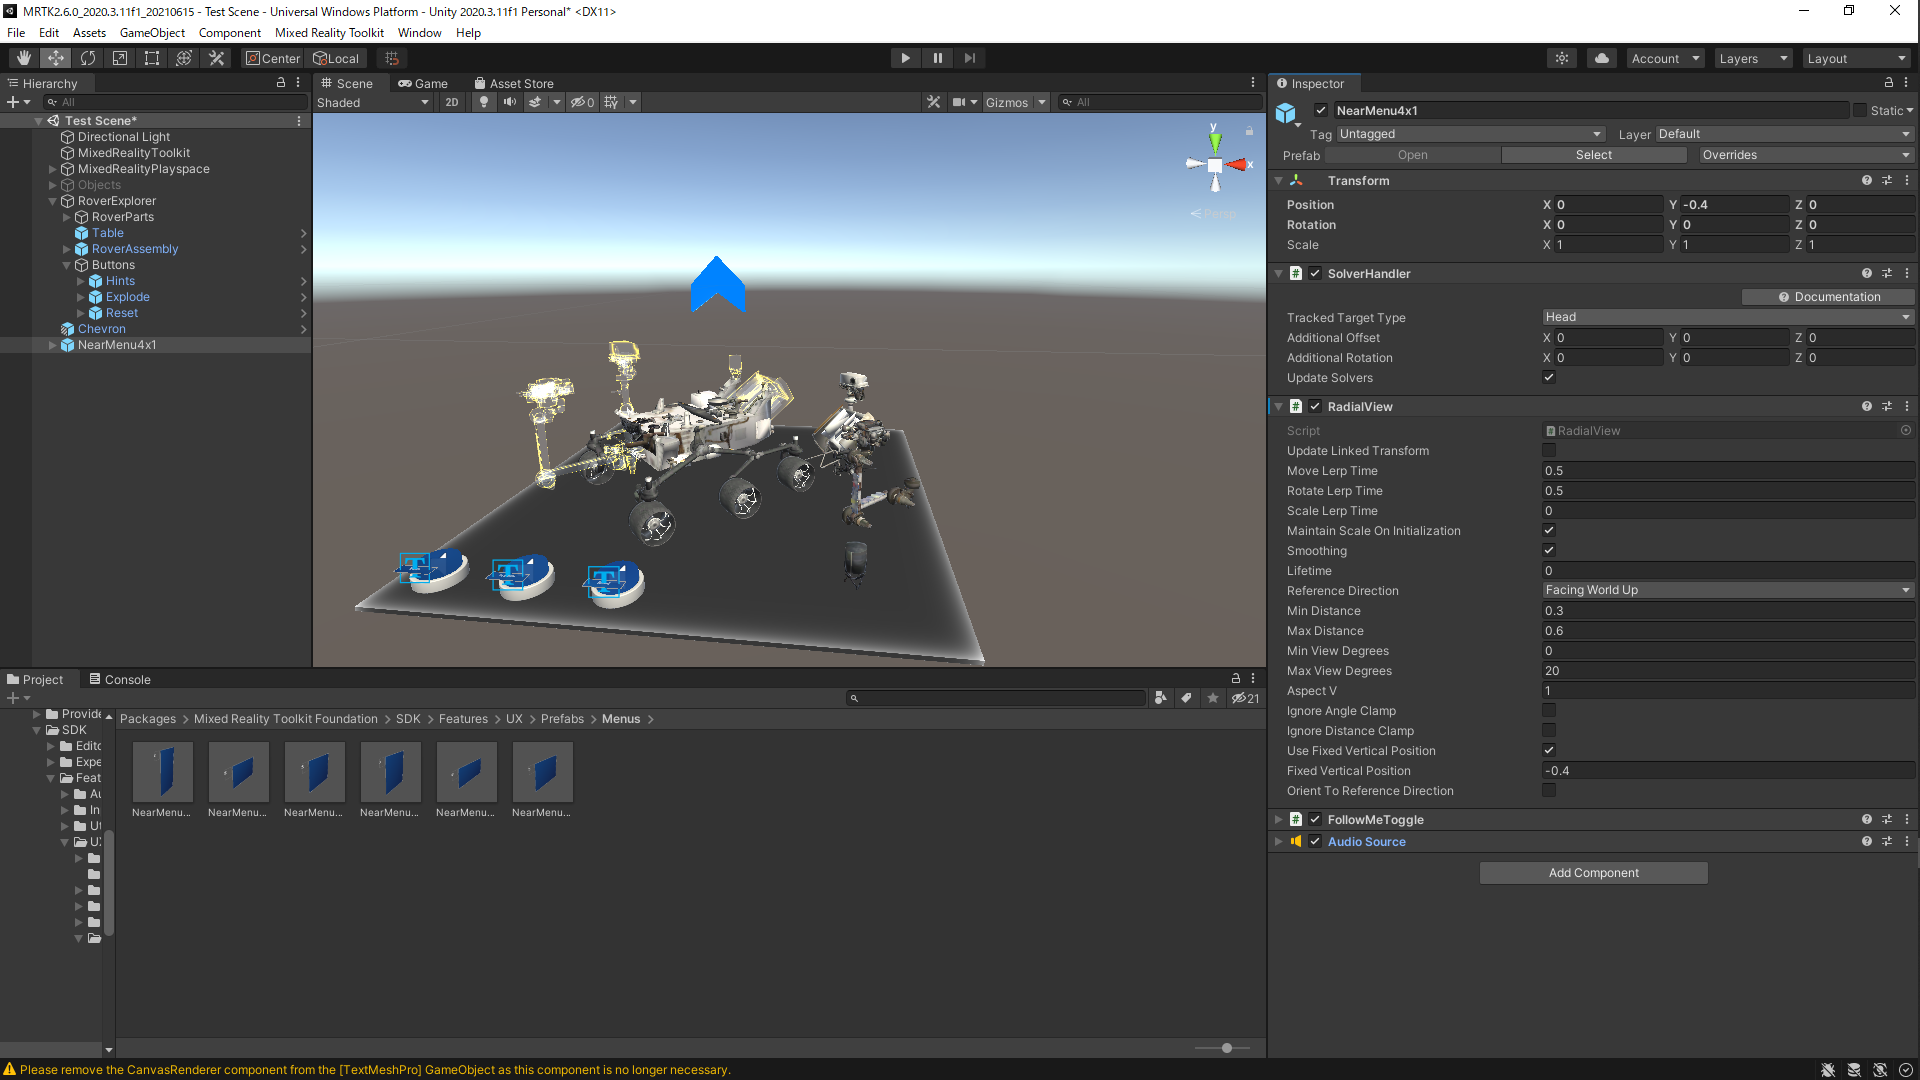
Menu/ButtonCollection/ButtonOneを選択する
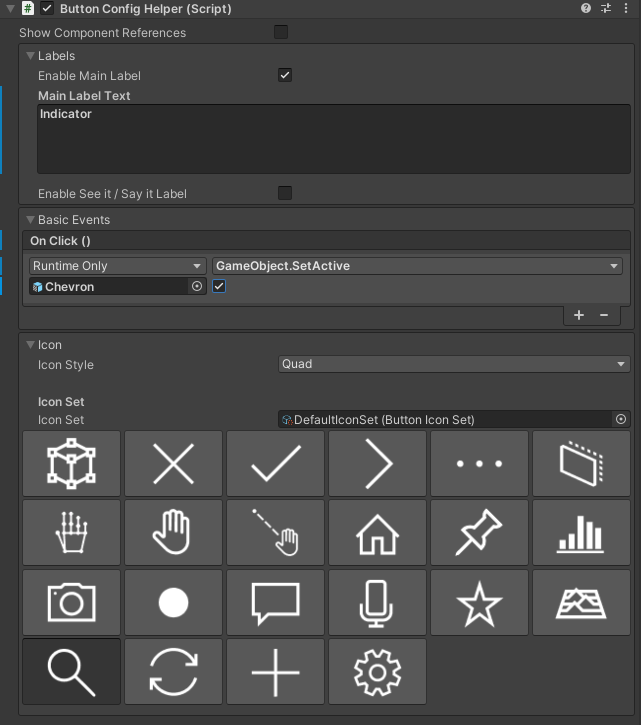
名前をIndicatorに変更
Button Config HelperのLabels/Main Label TextにIndicatorを記入
OnClick()のNone(Object)にChevronを当てる
GameObjectのSetActive(bool)を選択
下のチェックボックスをチェックする
アイコンをSearchにしておく

これでMenuからボタンを押した際にChevronが有効になるようになった
DefaultではOFFになっていてほしいのでChevronのチェックをはずす
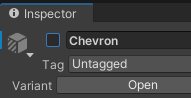
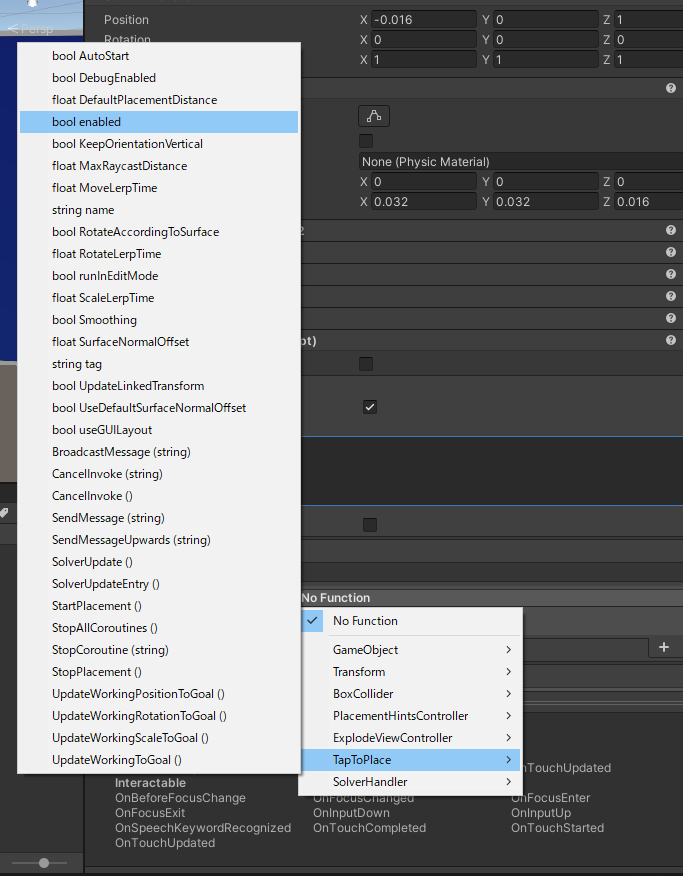
またChevronを選択して
Add ComponentからDirectional Indicator Controllerを追加する

Menu/ButtonCollection/ButtonTwoを選択する
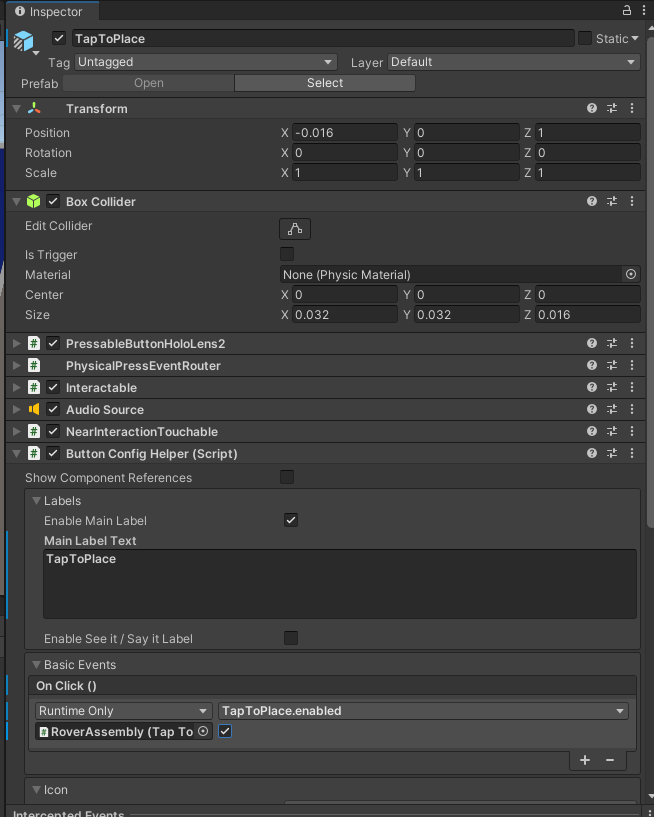
名前をTapToPlaceに変更
Button Config HelperのLabels/Main Label TextにTapToPlaceを記入
OnClick()のNone(Object)にRoverExplorer/RoverAssemblyを当てる
TapToPlaceのbool Enabledを選択
下のチェックボックスをチェックする
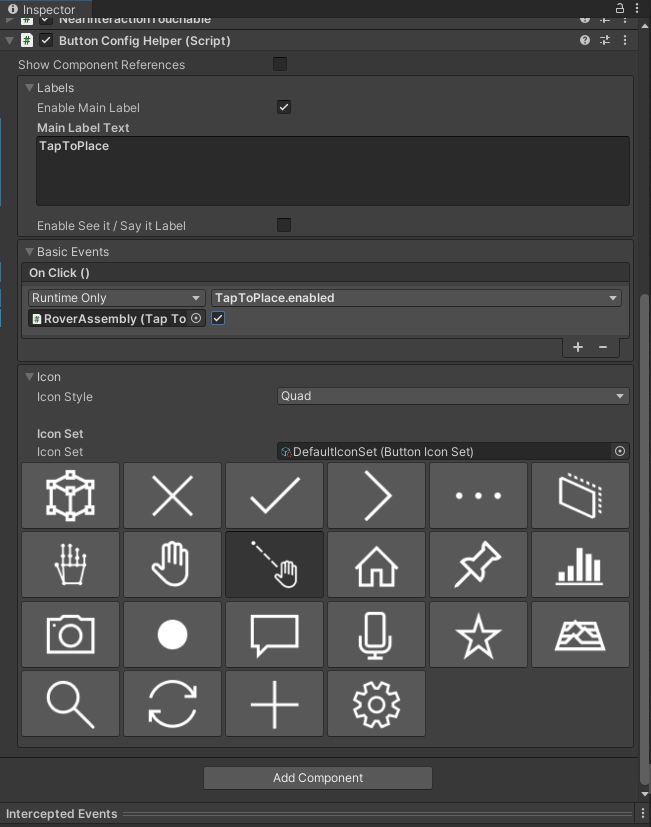
アイコンをhand with rayにしておく
RoverAssemblyを選択する
Tap To Placeの設定を以下のように変更する
・デフォルトで機能しないようにチェックをはずす
・On Placing Stopped ()の+を押して,None(Object)にRoverExplorer/RoverAssemblyを当てる
・TapToPlaceのbool Enabledを選択
・下のチェックボックスはチェックしない
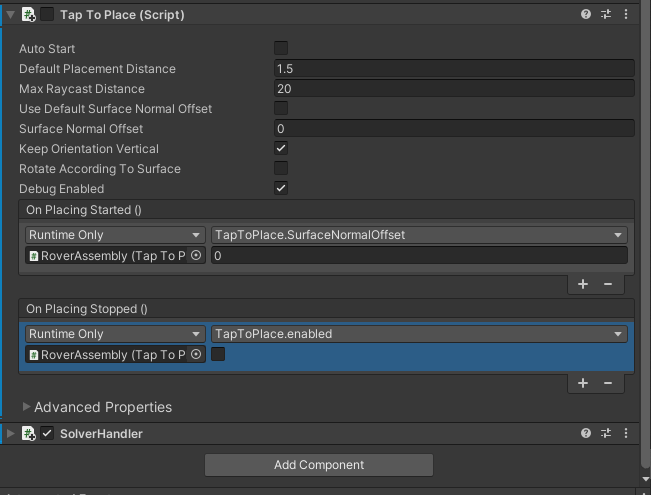
これでデフォルトはOFF
ボタンを押したらONになる
テキストを追加する
Tableで右クリックして3D Object/Text - TextMeshProを追加する
Rect Transformを以下のように変更する
・Pos Y:1
・Width:1
・Height:1
・Rotation X:90
TextMeshPro - Textを以下のように変更する
・Text:Rover Explorer
・Font Style:Bold
・Font Size:1
・Extra Settings > Margins(Left, Top, Right, Bottom):0.03

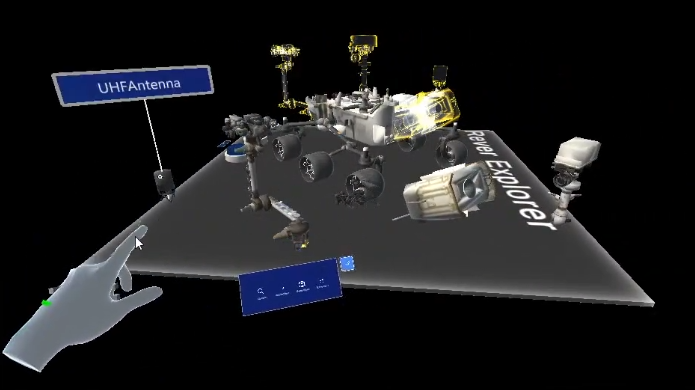
tooltips
Packages > Mixed Reality Toolkit Foundation > SDK > Features > UX > Prefabs > ToolTipを開いておく
RoverExplorer/RoverPartsの中の子オブジェクトすべてを選択する
選択した状態でAdd ComponentからToolTipSpawnerを追加
以下のように設定する
・Focus Enabledのチェックをいれる
・Prefabに開いておいたToolTipからSimple Line ToolTipを当てる
・ToolTip Override Settings > Settings Mode:Override
・ToolTip Override Settings > Manual Pivot Local Position Y:1.5
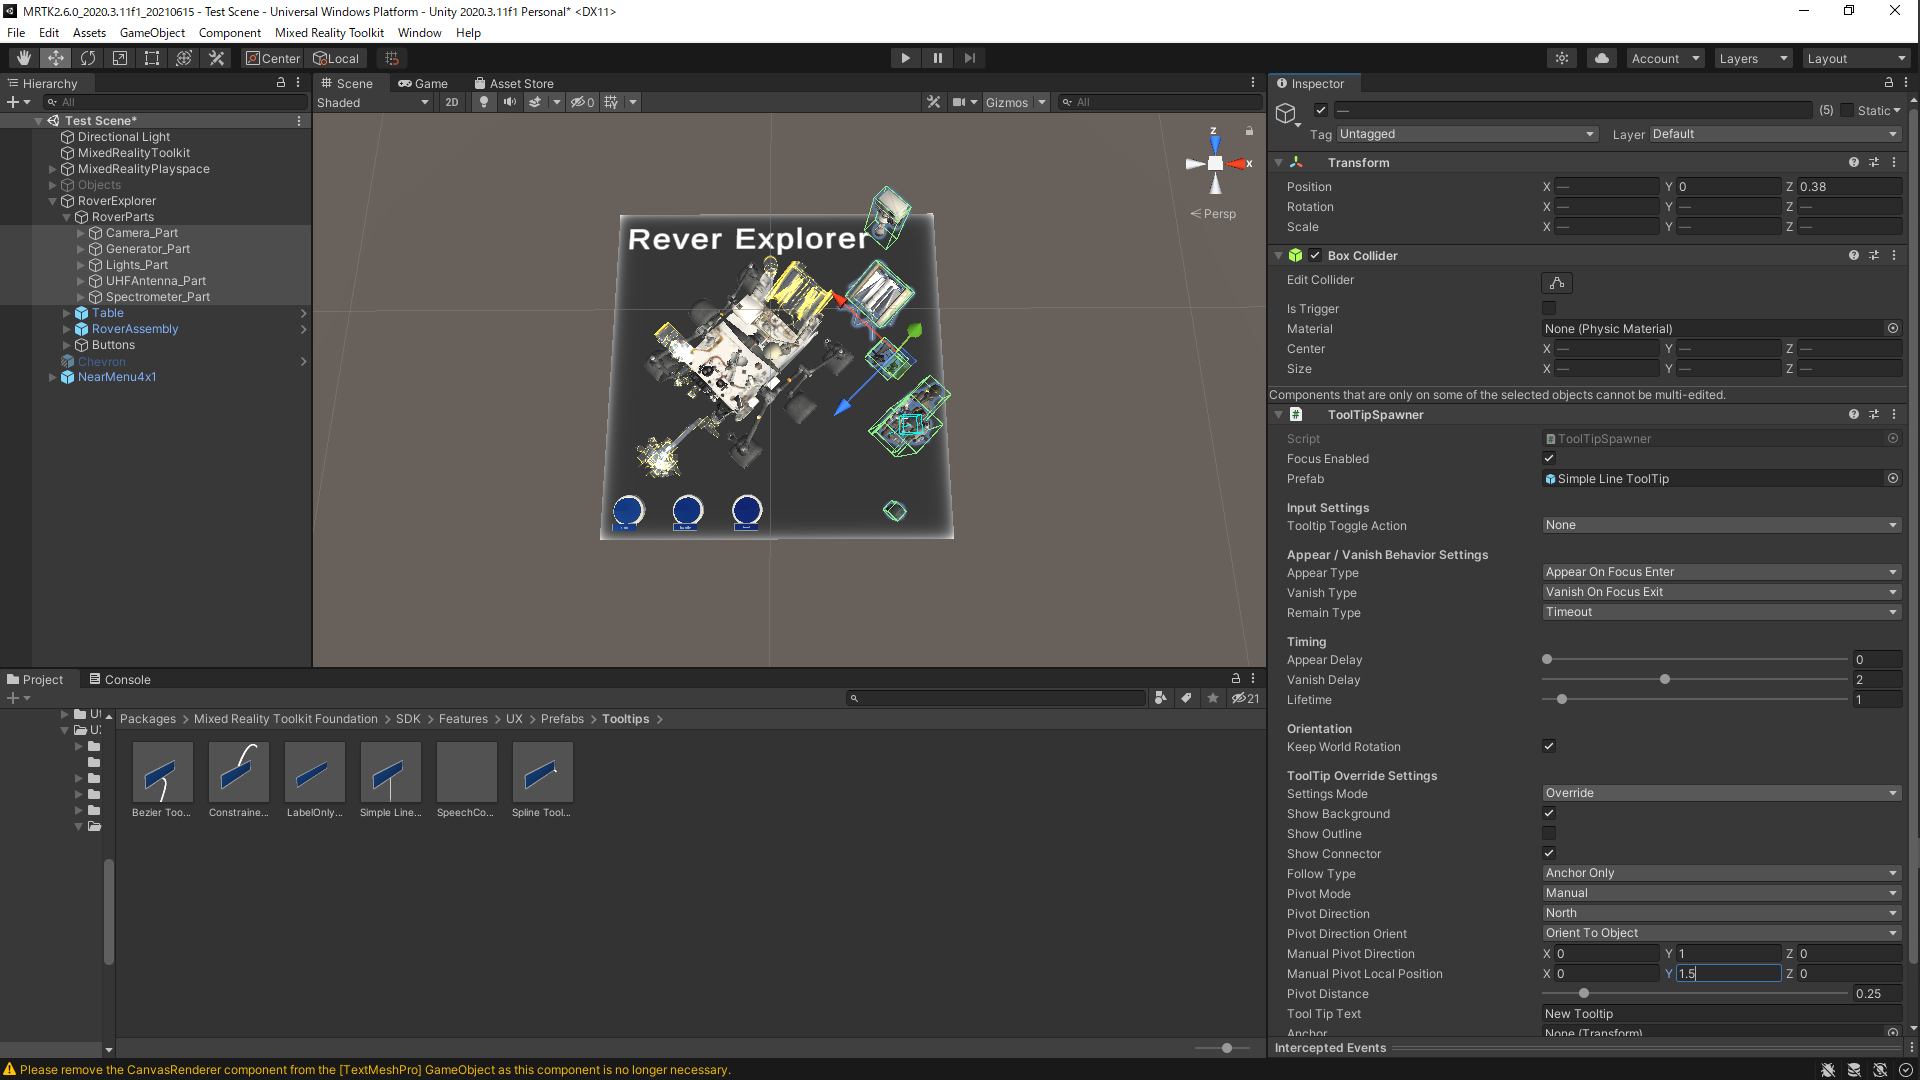
今度はそれぞれのToolTipSpawner の Tool Tip Textを一つずつ設定する
・Generator_Part:Generator
・Lights_Part:Lights
・UHFAntenna_Part:UHF Antenna field
・Spectrometer_Part:Spectrometer

実行してカーソルをパーツに合わせるとTipsが出現する
インタラクション(チュートリアル7)
3Dオブジェクトの操作
RoverExplorer/RoverPartsの中の子オブジェクトすべてとRoverAssemblyを選択する
選択した状態でAdd ComponentからObject ManipulatorとNear Interaction GrabbableとPart Assembly Controllerを追加
(Constraint ManagerはObject Manipulatorに付随して追加される)
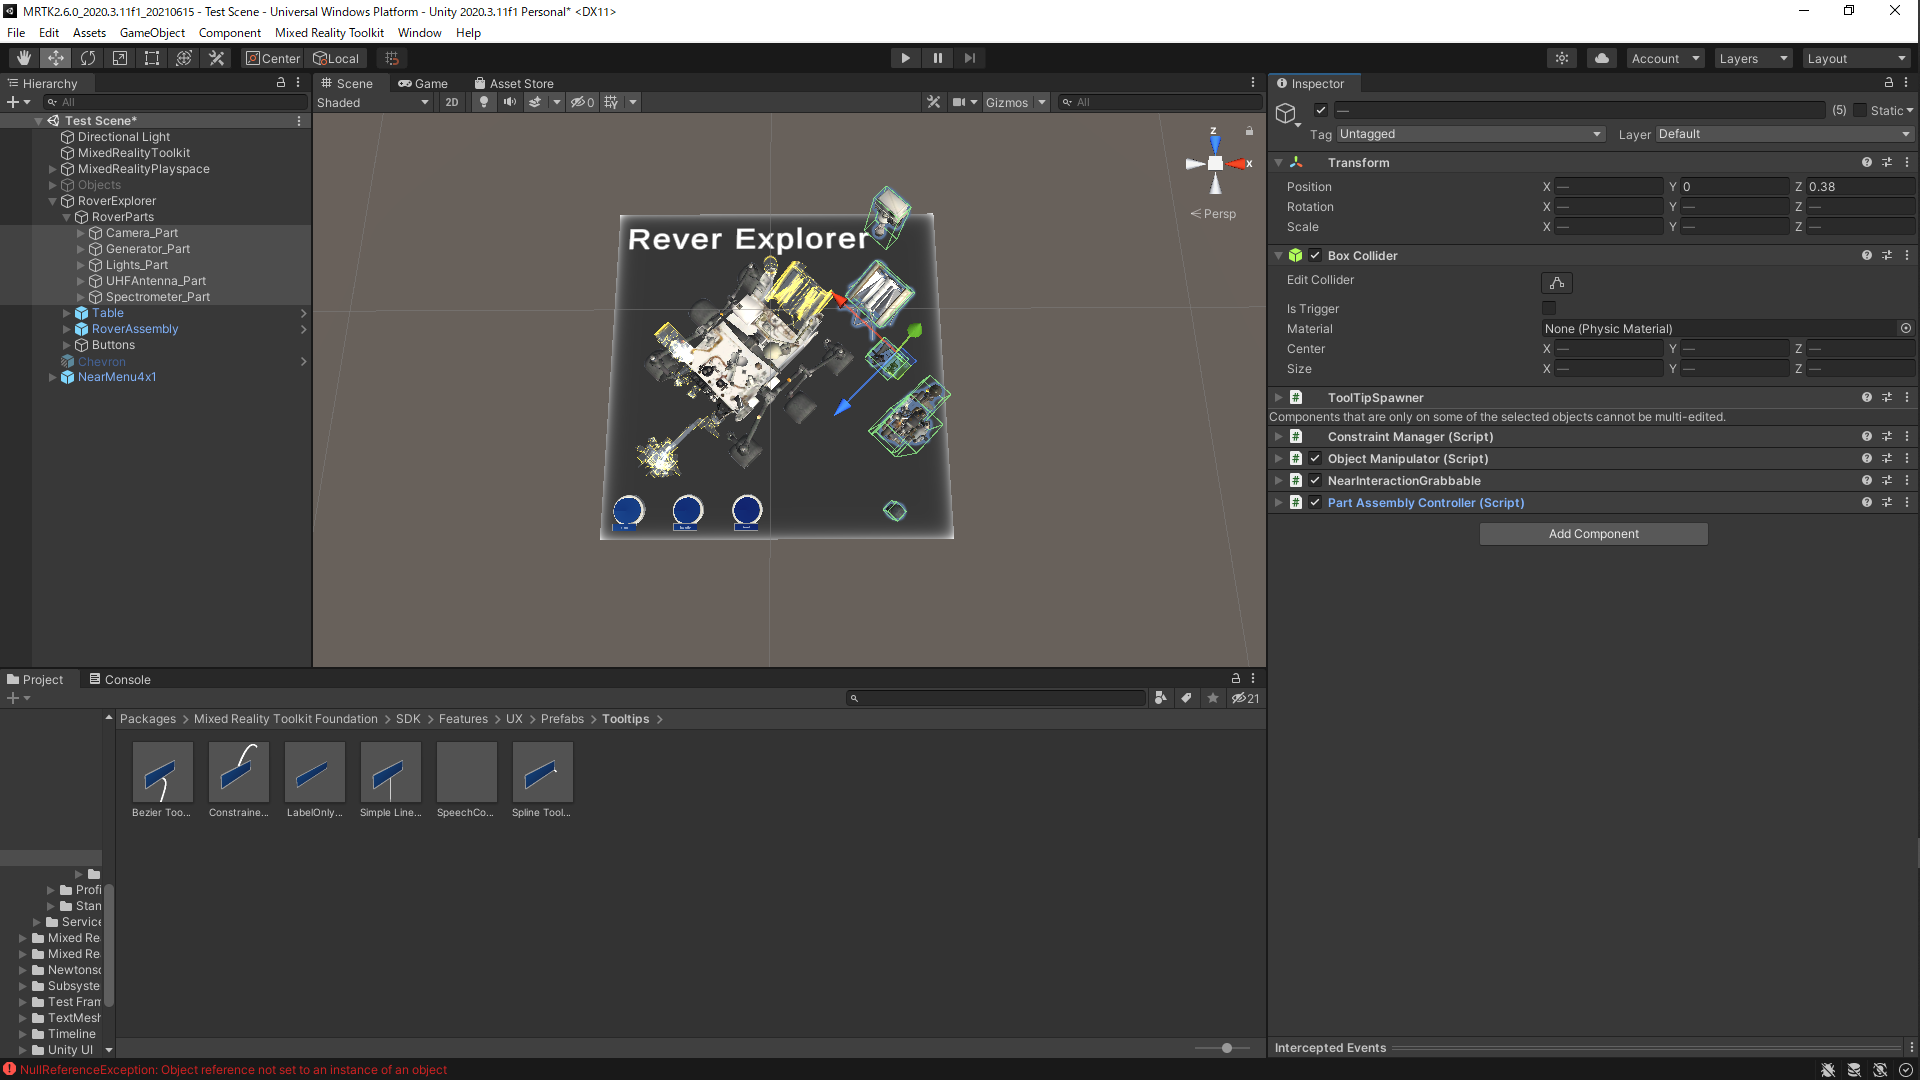
Object Manipulatorを以下のように設定する
Two Handed Manipulation Type:MoveとRotateをチェックする

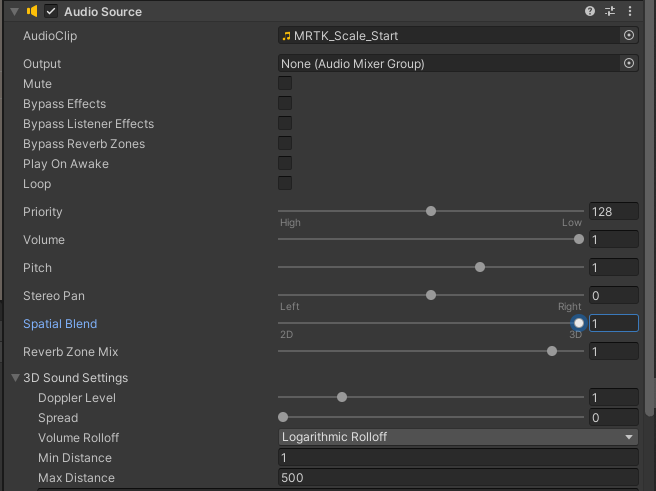
Packages > Mixed Reality Toolkit Standard Assets > Audioを開く
RoverExplorer/RoverPartsの中の子オブジェクトすべてを選択
選択した状態でAdd ComponentからAudio Sourcesを追加
以下のように変更する
AudioClip:開いたAudioからMRTK_Scale_Startを当てる
Play On Awake:チェックを外す
Spatial Blend:1
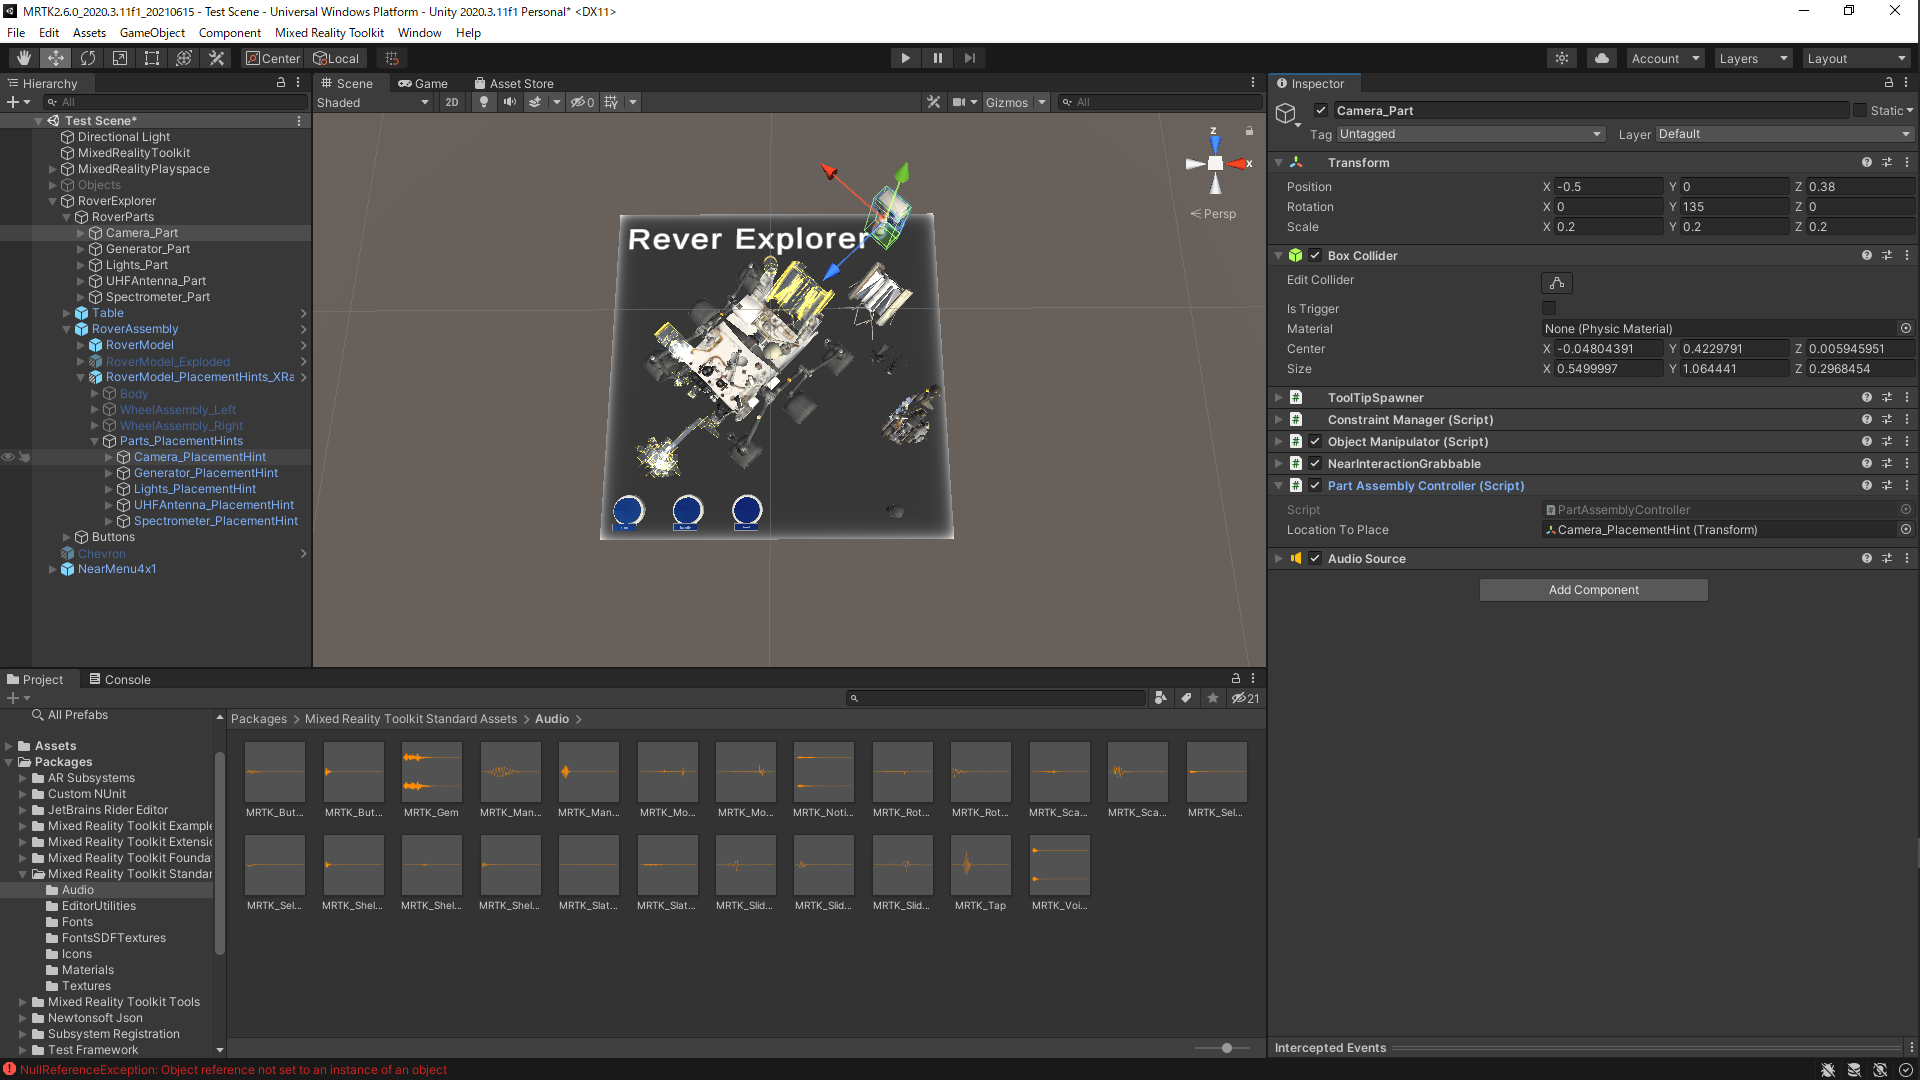
RoverAssembly/RoverModel_PlacementHints_XRay/Parts_PlacementHintsの子オブジェクトを表示させておく
RoverExplorer/RoverPartsの子オブジェクトとRoverAssemblyをそれぞれ変更する
・RoverExplorer/RoverParts/Camera_PartのPart Assembly Controller
Location To Place:Camera_PlacementHintを当てる
・RoverExplorer/RoverParts/Generator_PartのPart Assembly Controller
Location To Place:Generator_PlacementHintを当てる
・RoverExplorer/RoverParts/Lights_PartのPart Assembly Controller
Location To Place:Lights_PlacementHintを当てる
・RoverExplorer/RoverParts/UHFAntenna_PartのPart Assembly Controller
Location To Place:UHFAntenna_PlacementHintを当てる
・RoverExplorer/RoverParts/Spectrometer_PartのPart Assembly Controller
Location To Place:Spectrometer_PlacementHintを当てる
・RoverExplorer/RoverAssemblyのPart Assembly Controller
Location To Place:RoverAssembly(自身)を当てる

Buttons/Resetを選択
InteractiveのOnClick()を変更
OnClick()のNone(Object)にRoverAssemblyを当てる
PartAssemblyControllerのResetPlacement ()を選択
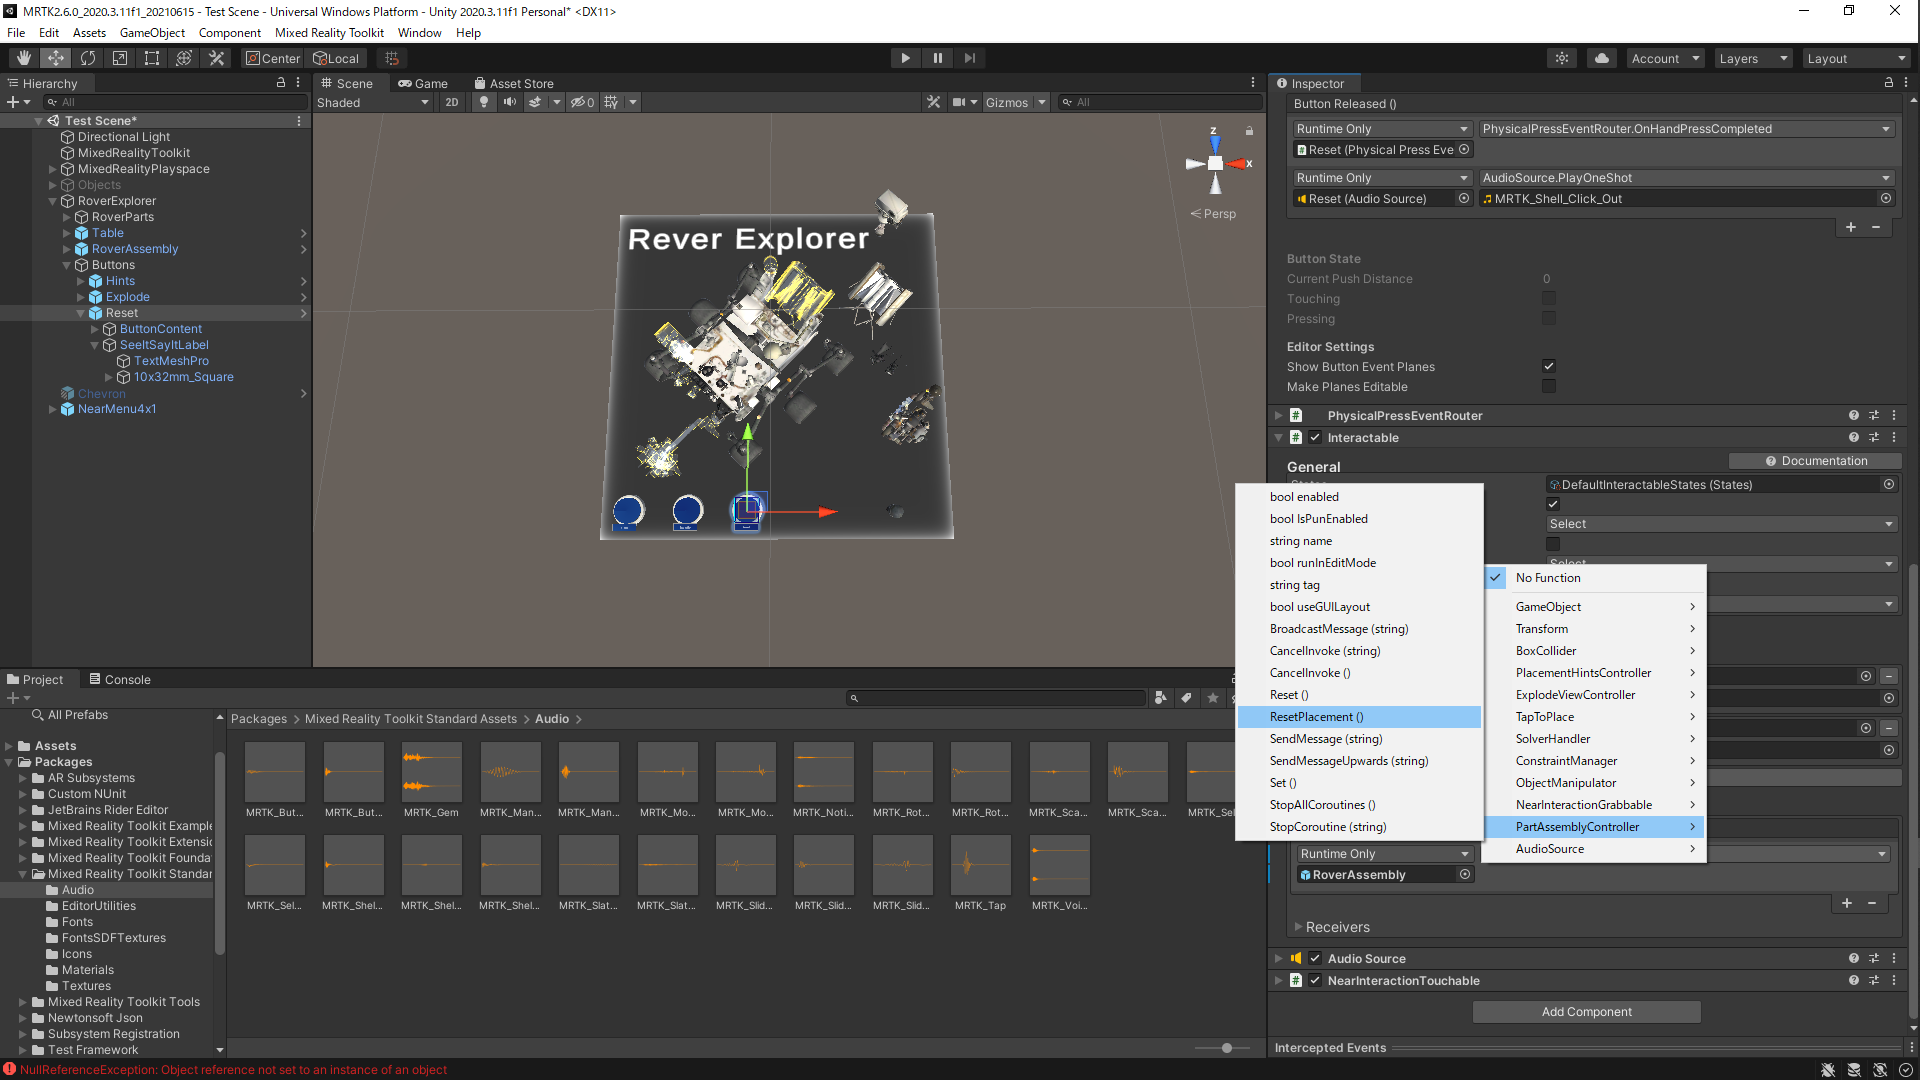
これでそれぞれのパーツを適切な位置まで運ぶととパーツがはまります
Resetのボタンを押すと元の位置にパーツが再配置されます
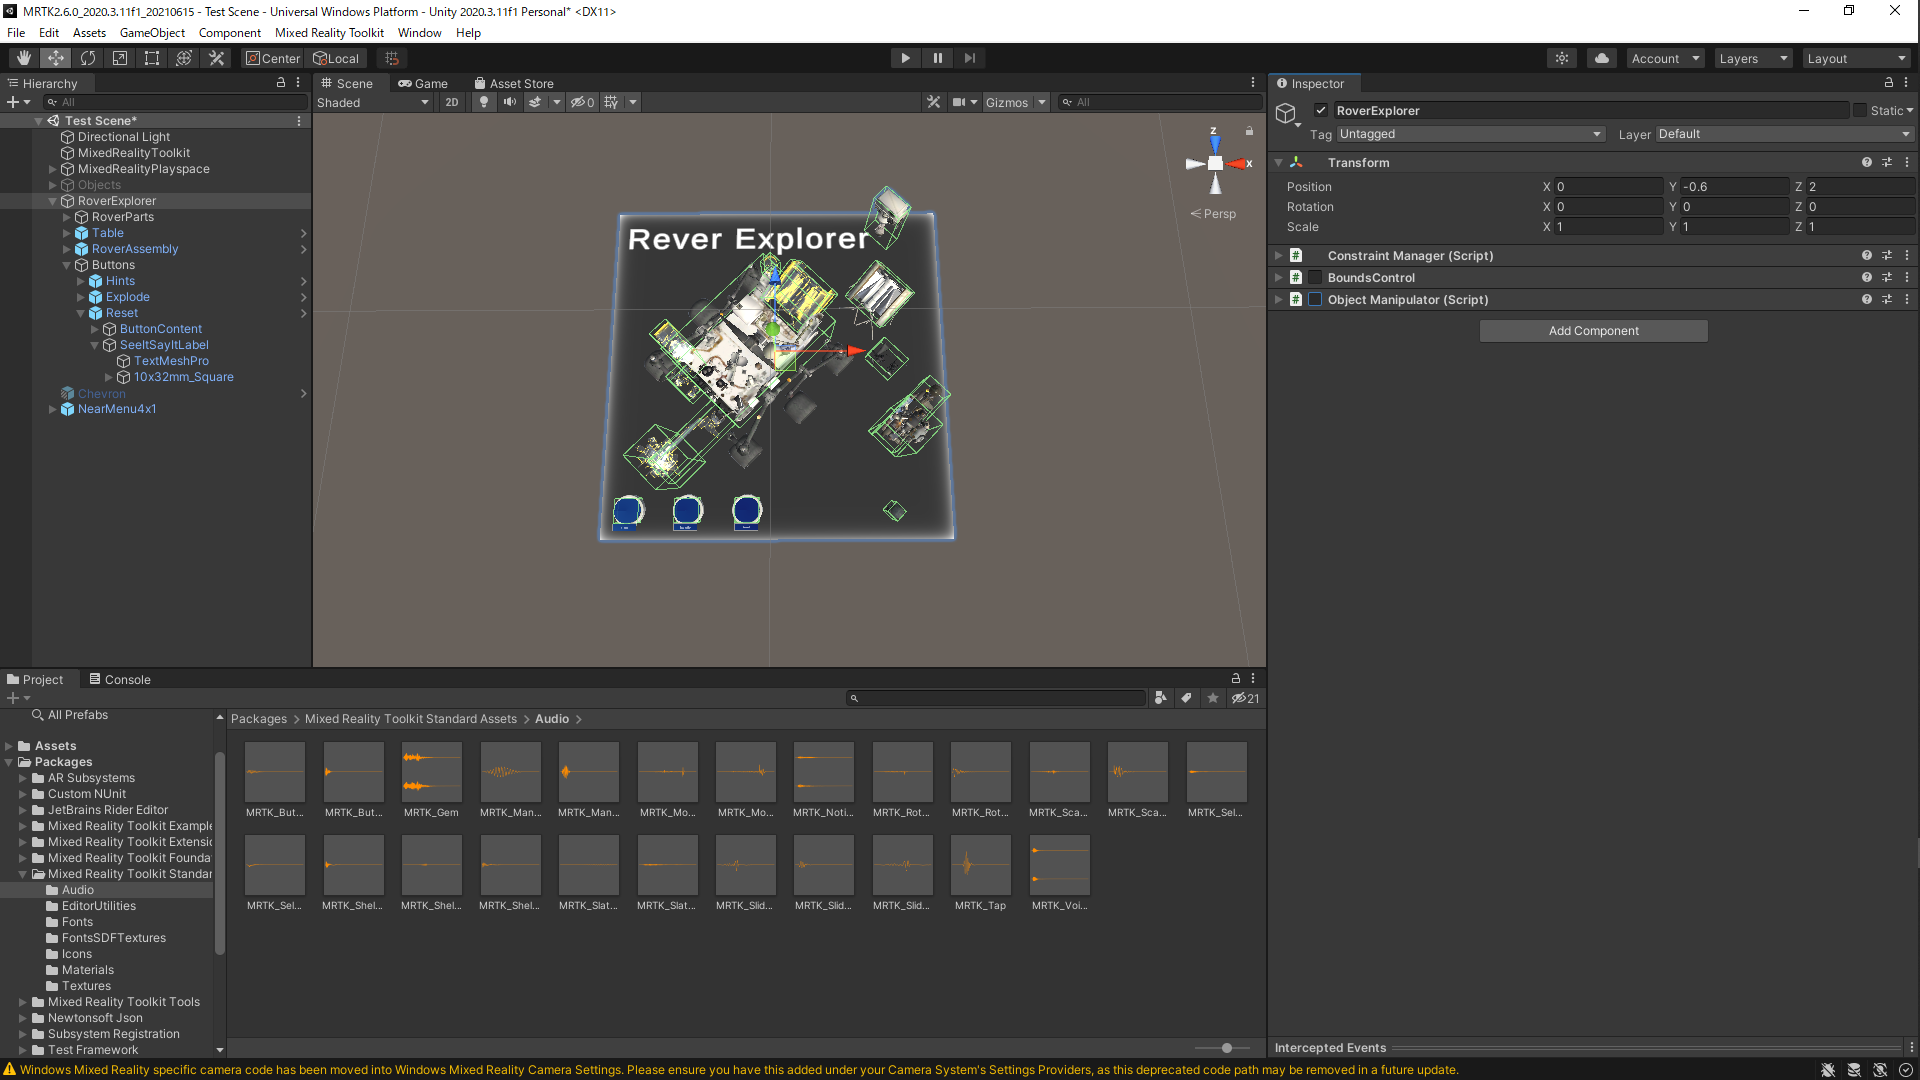
Bound Control
Bounds Controlは、拡大縮小や回転に使用できるハンドルを提供することで、近くでも遠くでも、片手で簡単かつ直感的にオブジェクトを操作することが可能となる
RoverExplorerを選択
Add ComponentからBoundsControlとObject Manipulatorを追加
標準ではOFFにしておくためそれぞれチェックを外す
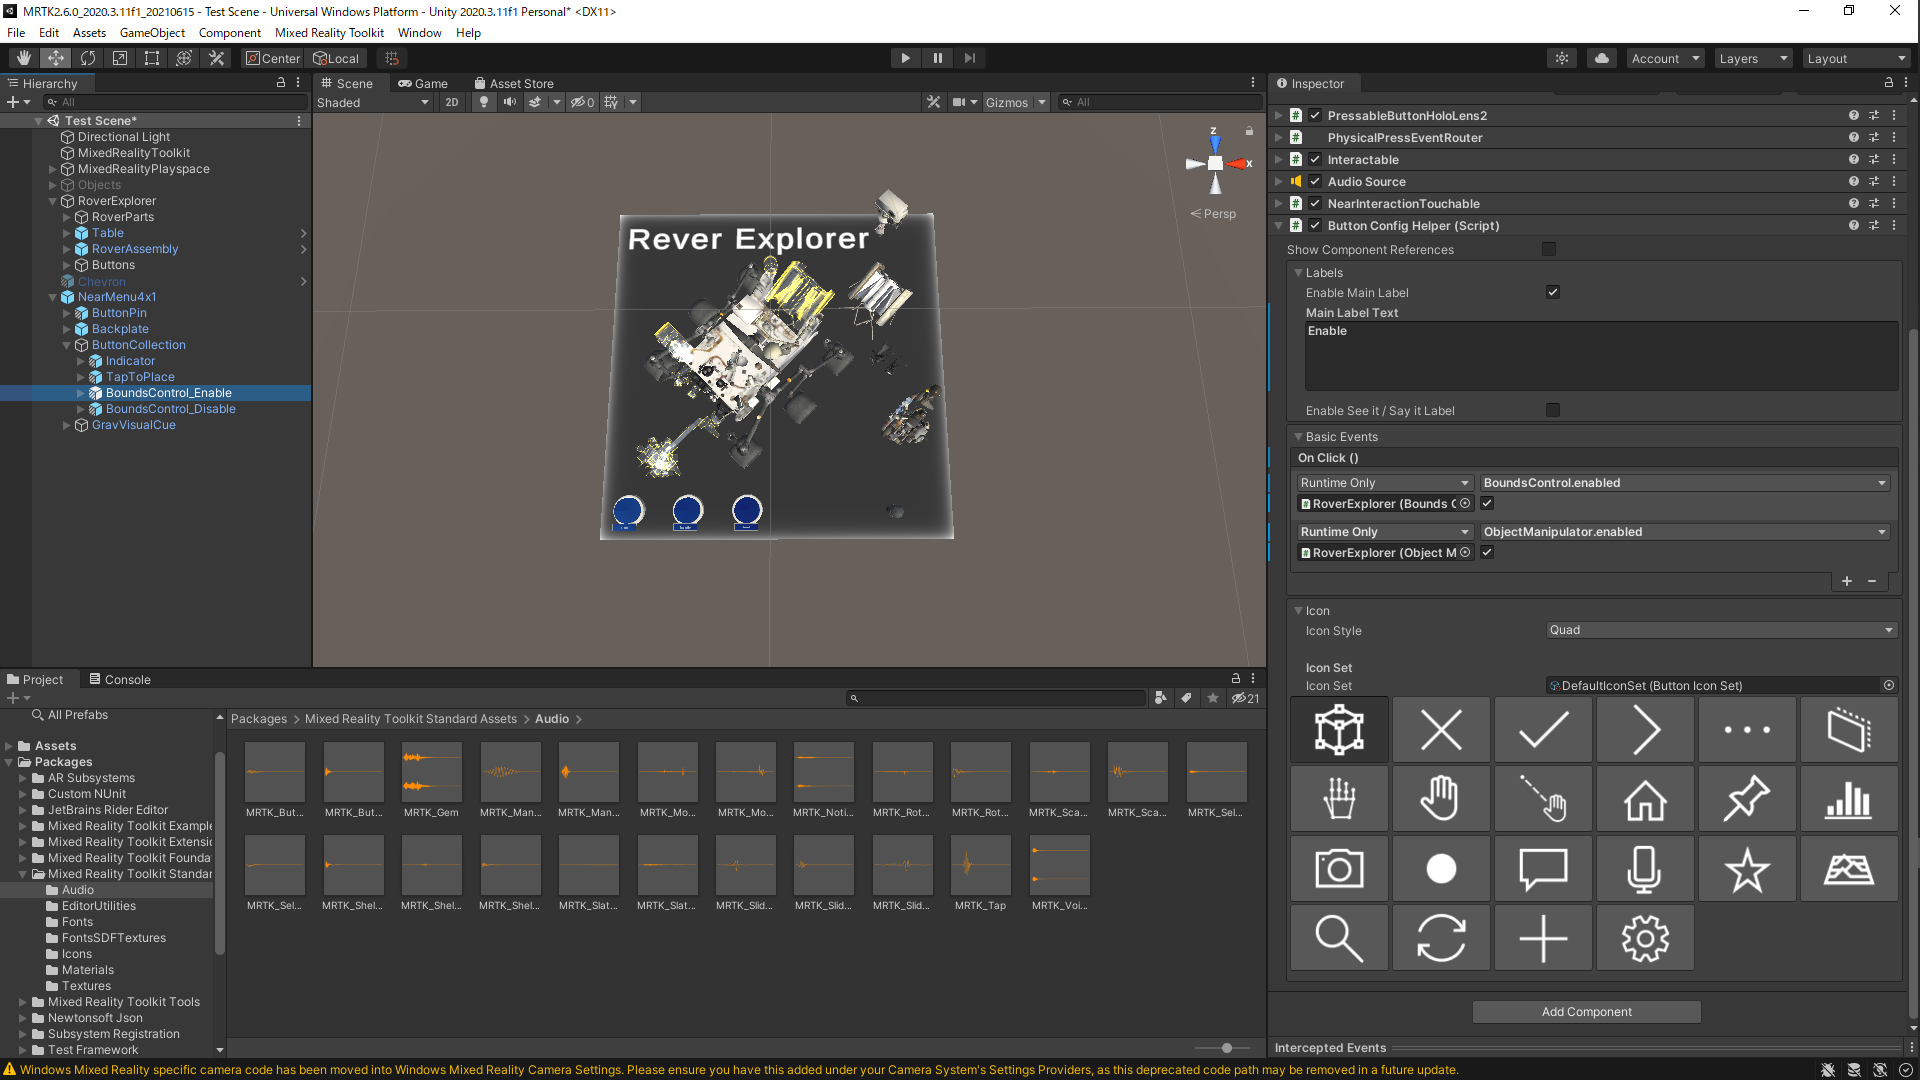
Menu/ButtonCollection/ButtonThreeを選択する
名前をBoundsControl_Enableに変更
Button Config Helperを以下のように変更
・Labels/Main Label TextにEnableを記入
・OnClick()のNone(Object)にRoverExplorerを当てる
・BoundsControlのbool Enabledを選択
・下のチェックボックスをチェックする
・さらに+を押して項目を追加する
・None(Object)にRoverExplorerを当てる
・ObjectManipulatorのbool Enabledを選択
・下のチェックボックスをチェックする
・アイコンをcube with bounds controlにしておく
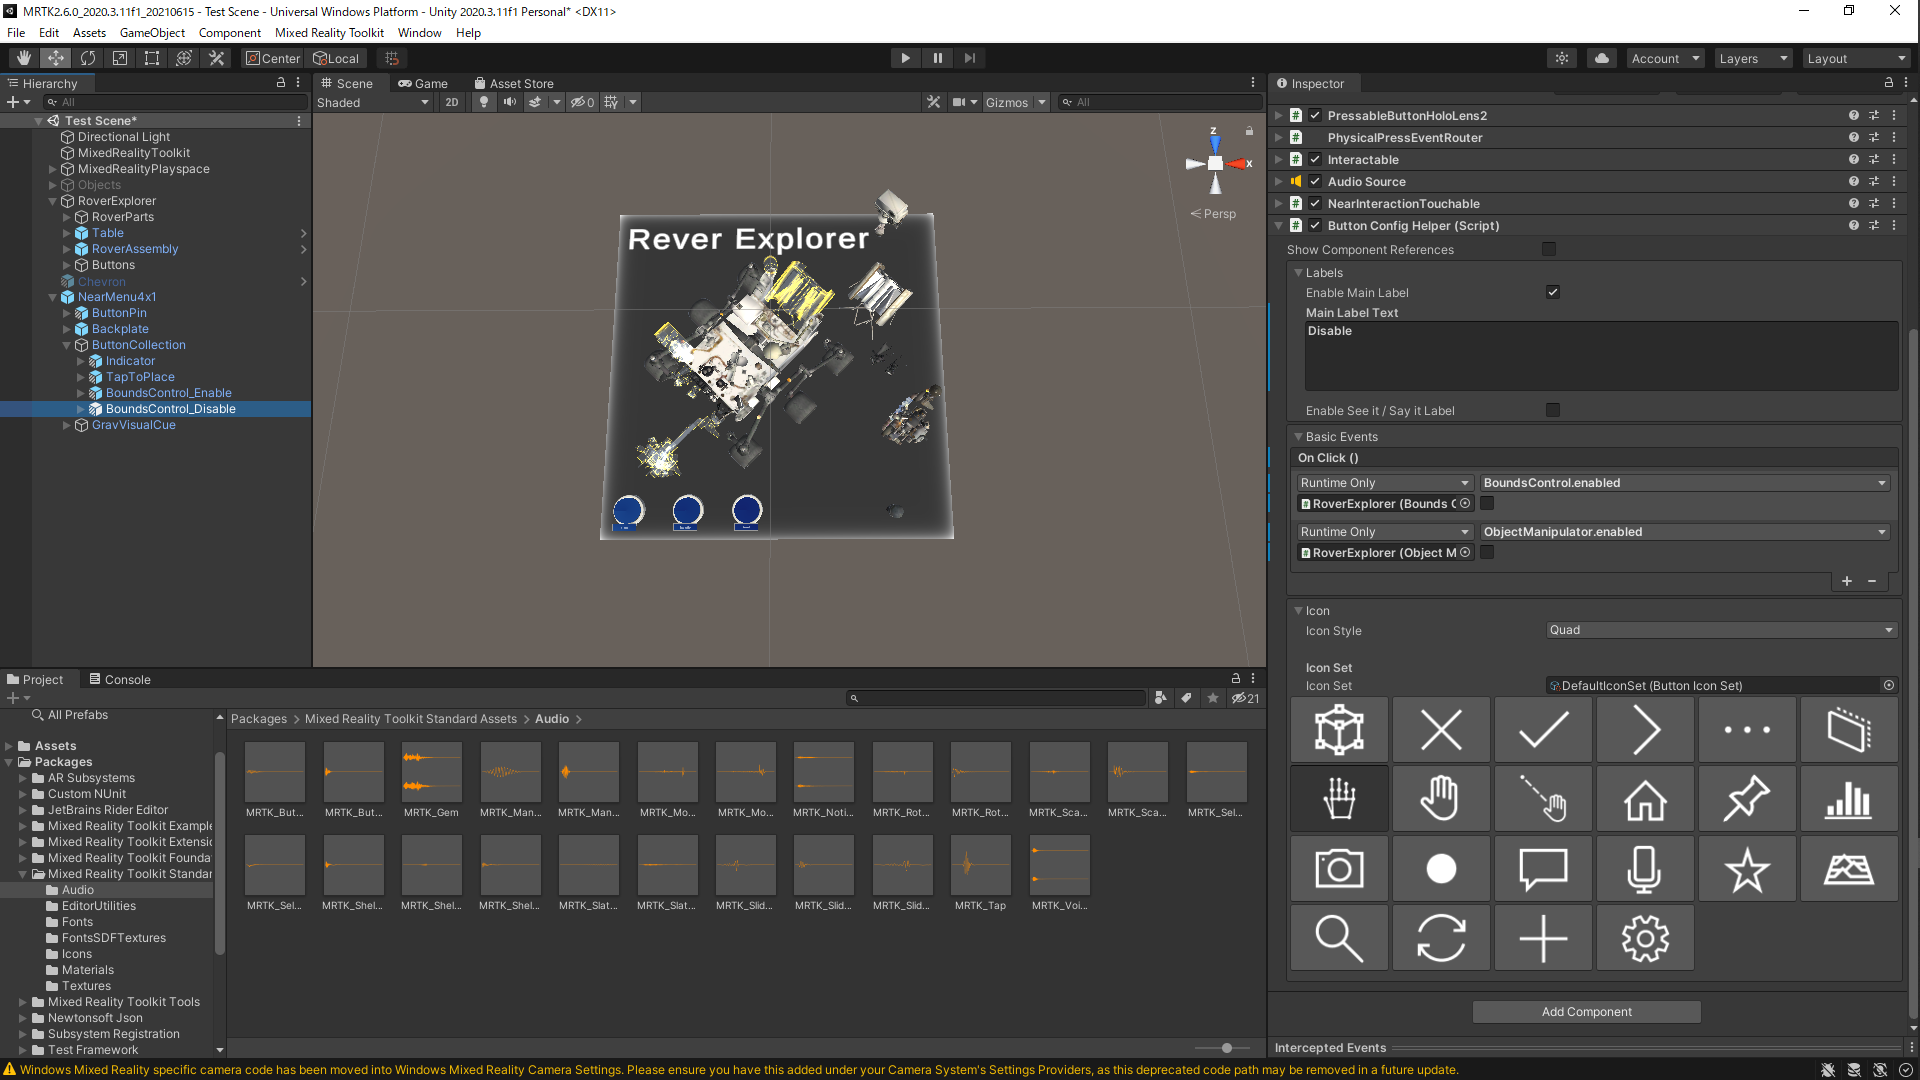
Menu/ButtonCollection/ButtonForthを選択する
名前をBoundsControl_Disableに変更
Button Config Helperを以下のように変更
・Labels/Main Label TextにDisableを記入
・OnClick()のNone(Object)にRoverExplorerを当てる
・BoundsControlのbool Enabledを選択
・下のチェックボックスはチェックしない
・さらに+を押して項目を追加する
・None(Object)にRoverExplorerを当てる
・ObjectManipulatorのbool Enabledを選択
・下のチェックボックスはチェックしない
・アイコンをcube with bounds controlにしておく
これでEnableボタンを押すとオブジェクトの拡縮,移動が可能となり,Disableボタンで変更を終了することができる
あとがき
以上で2~7のチュートリアルは終了する
以降8:アイトラッキング,9:ボイスコマンドは応用として次回にする
補助資料
作業映像
シーン分けできたらします...