概要
1対1のチャットを実装します。
フロントはSwiftでバックエンドはRuby on Railsを使います。
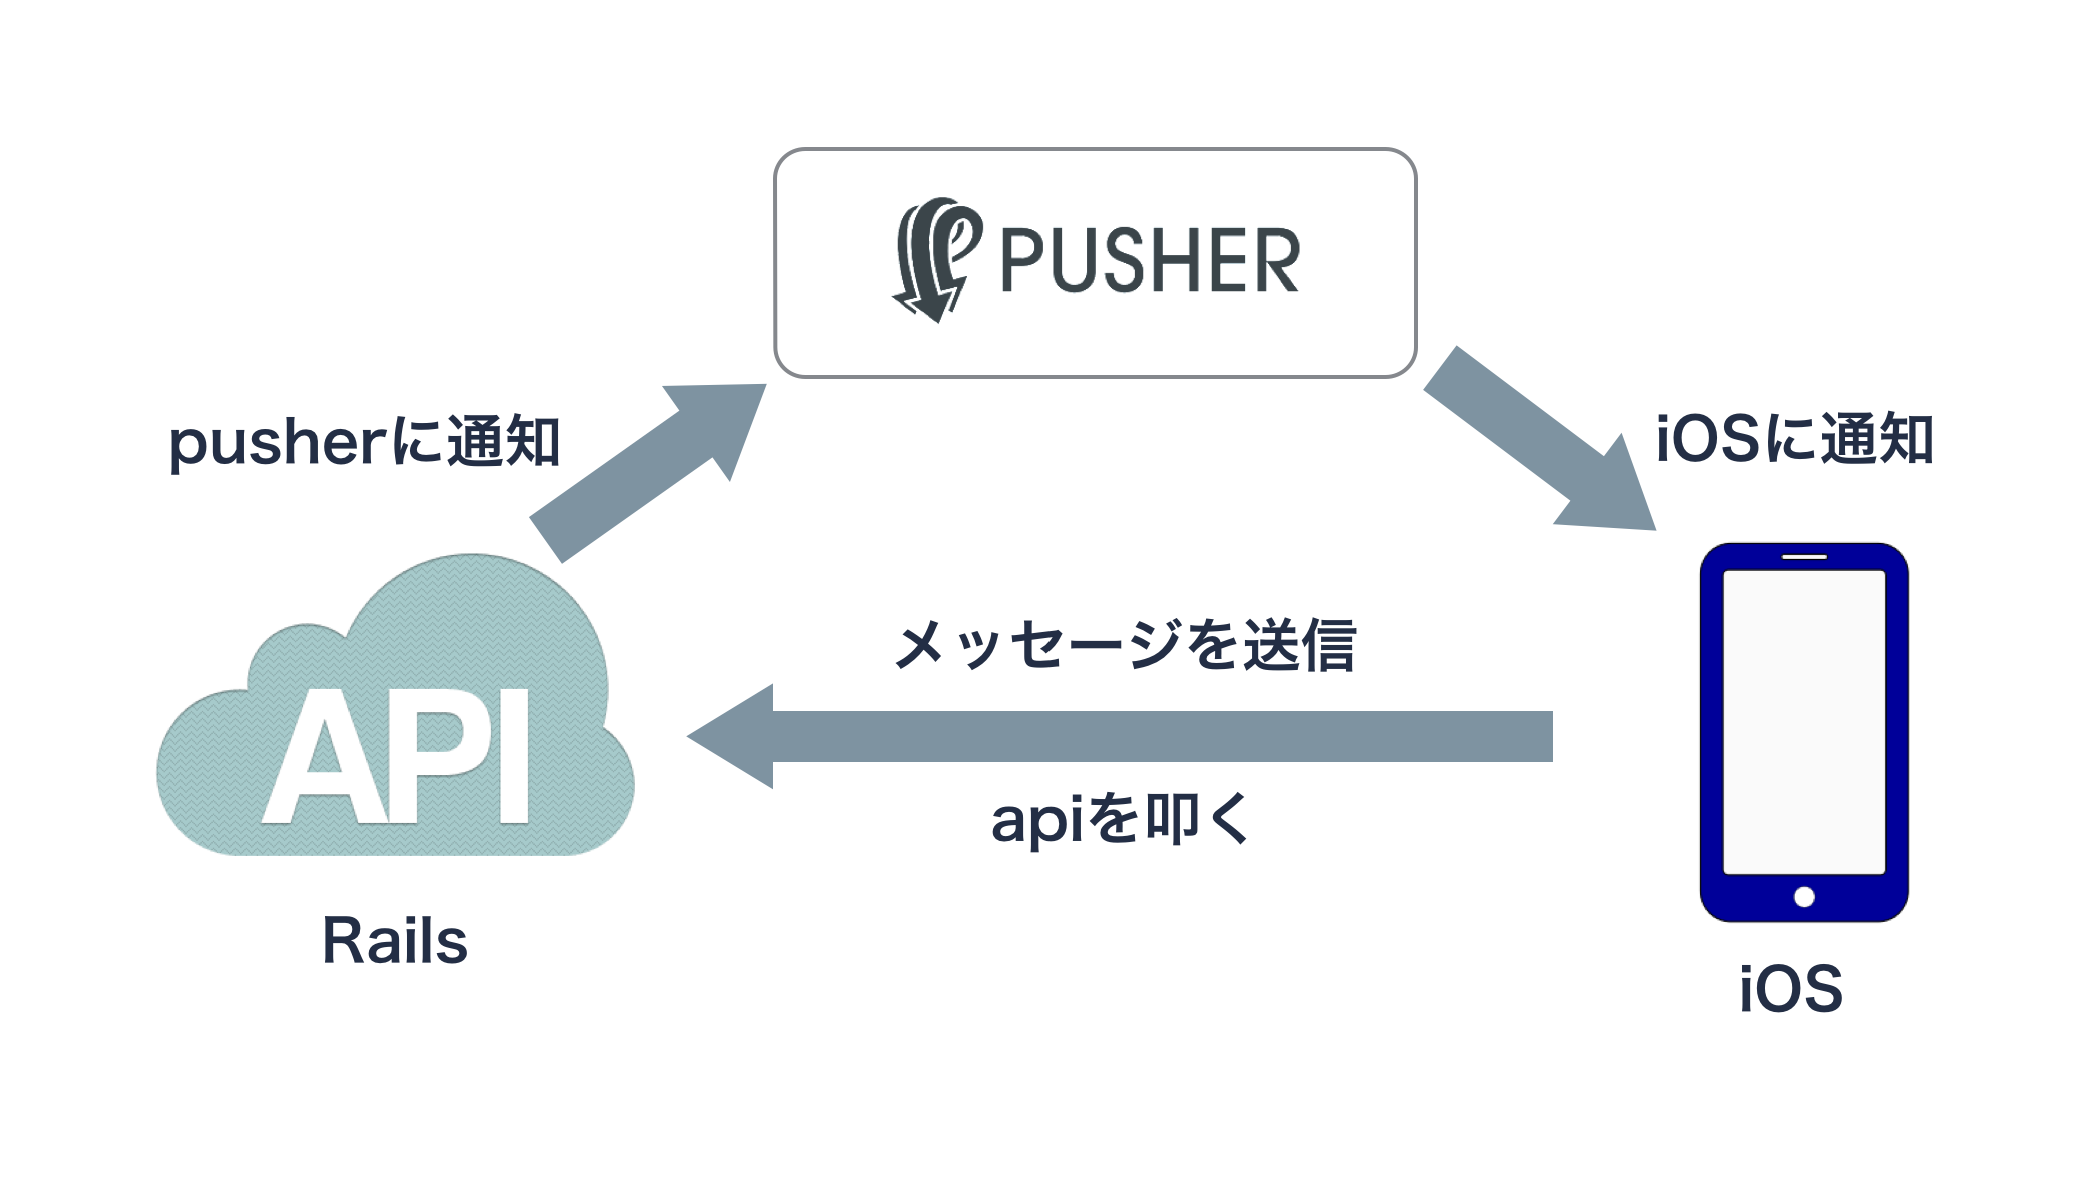
さらにPusherというWebSocketを利用したAPIを使用しますン。
pusherのイメージ
pusher.comに登録
pusher.comにユーザ登録します。登録後は流れにそってアプリを作ります。
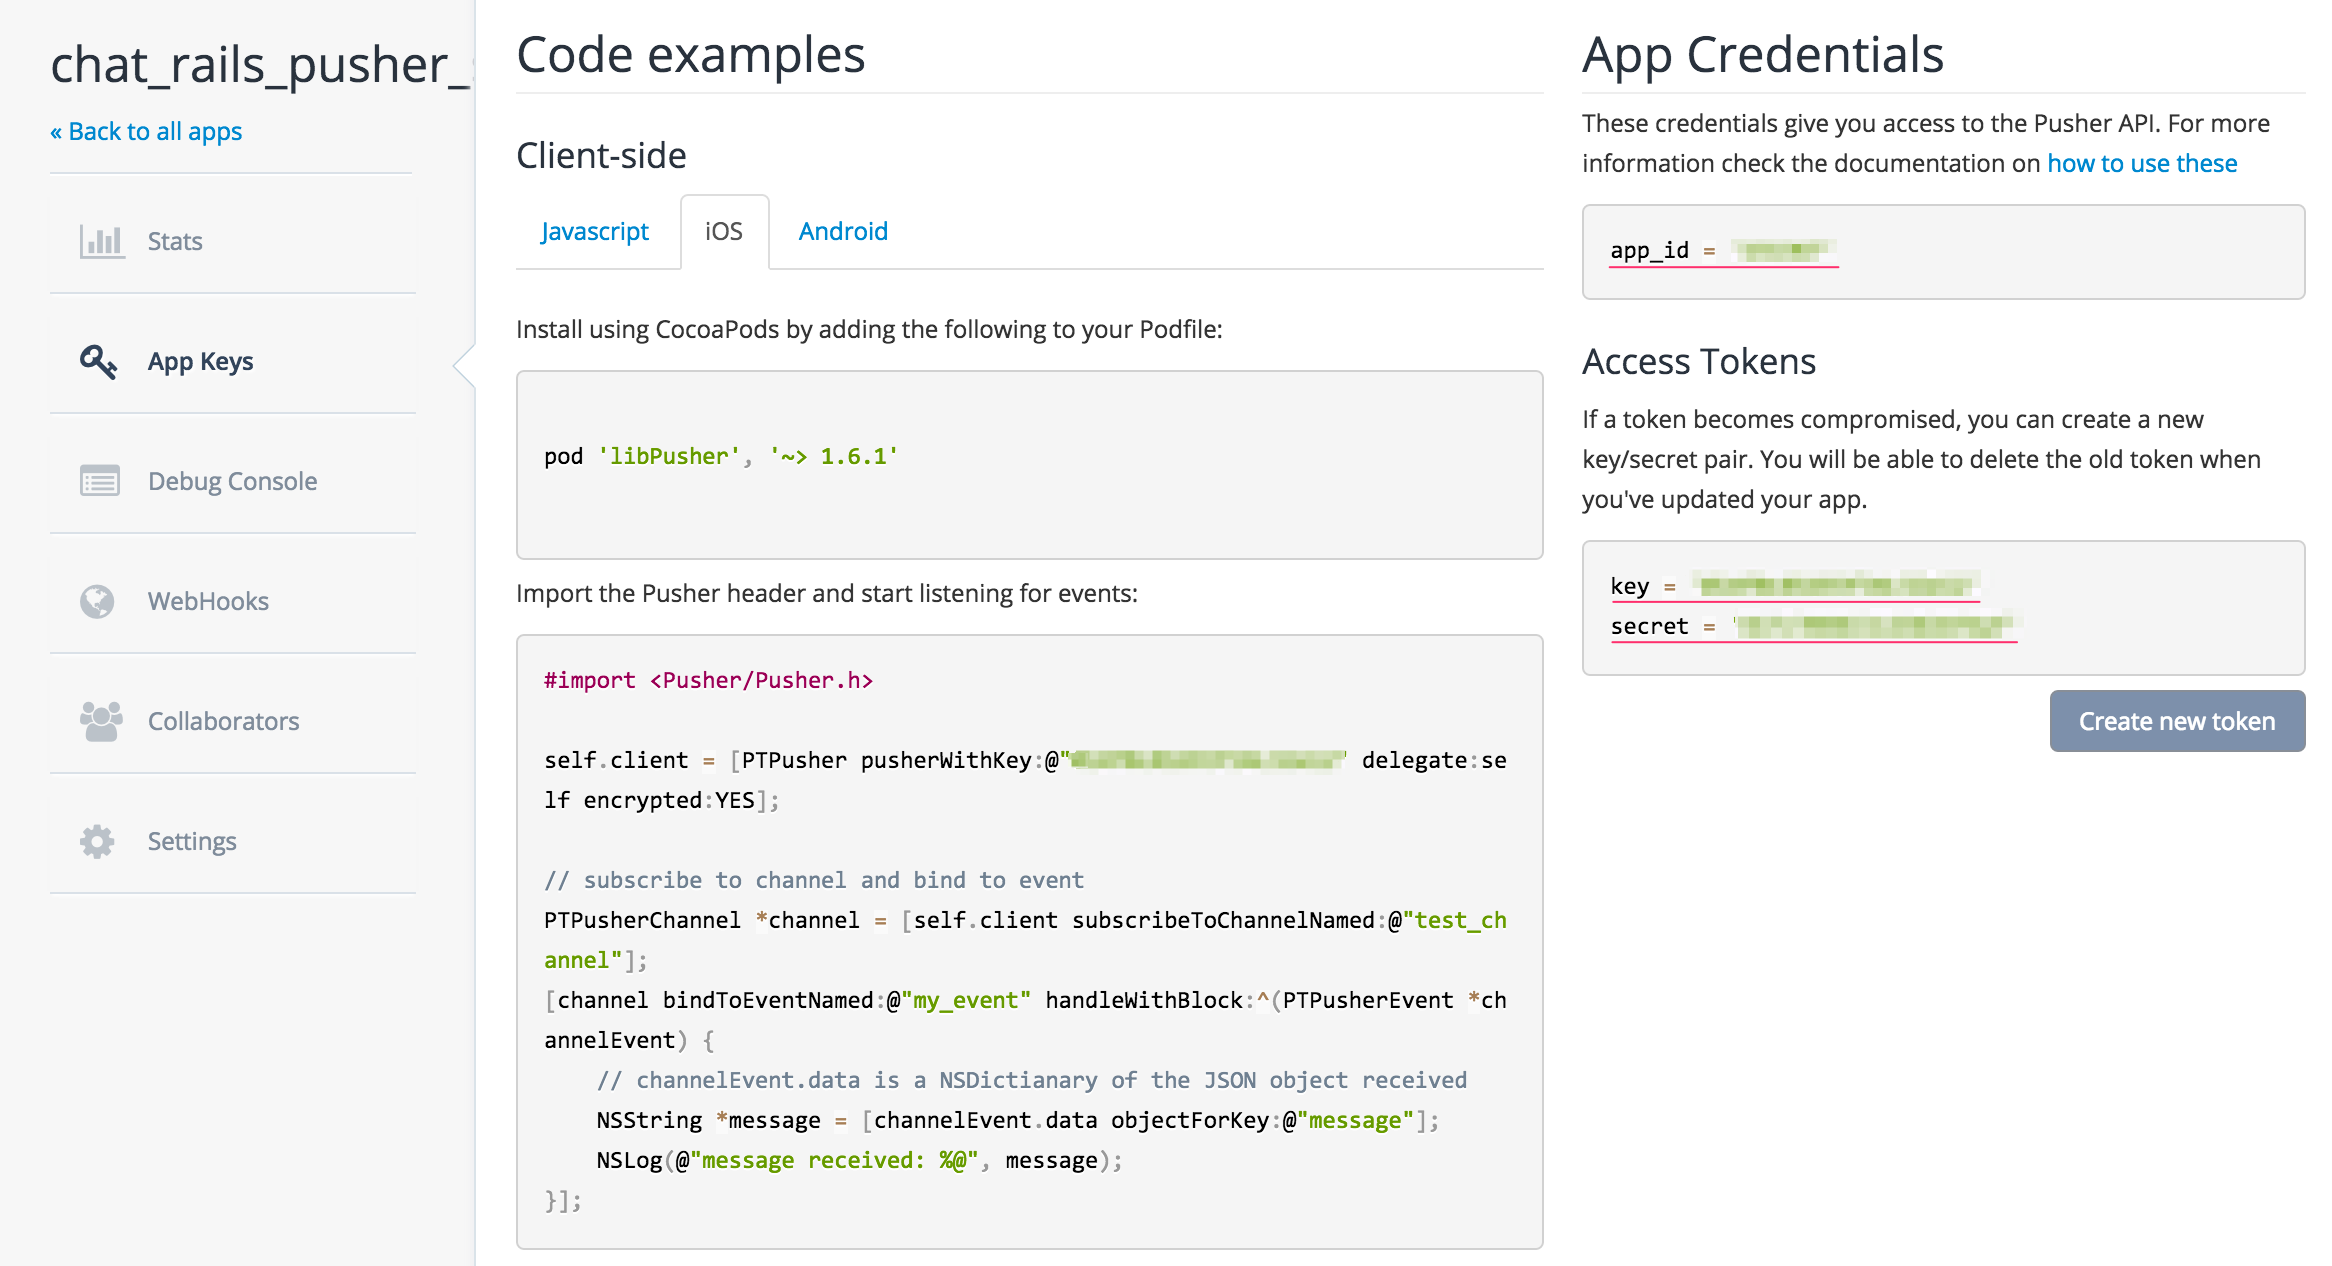
すると以下のようなページに遷移します。
ここのページではサーバサイド・クライアントサイドのサンプルコードが載せられているのでこのソースコードを参考に作っていきます。
また、画像右部の
- app_id
- key
- secret
の値をメモしておきます。後で使います。
RailsでAPIを作る
サーバーサイドの機能を作っていきます。
Pusherを導入する
gem 'pusher'
キー情報を管理
pusher.comにてアプリを作った際に発行されたキー情報を設定ファイルに保持させておきます。
config/pusher.yml を作成
development:
app_id: <あなたのapp_id>
access_key: <あなたのaccess_key>
access_key_secret: <あなたのaccess_key_secret>
Pusherの設定ファイルを作る
また、pusher.comのダッシュボードを参考にpusherの設定を行っていきます。
config/initializers/pusher.rb を作成
require 'pusher'

config_pusher = YAML.load_file('config/pusher.yml')[Rails.env]
Pusher.url = "http://#{config_pusher['access_key']}:#{config_pusher['access_key_secret']}@api.pusherapp.com/apps/{config_pusher['app_id']}"
Pusher.logger = Rails.logger
pusherの準備は以上です。ここからはapiを作成していきます。
コントローラを作る
rails g controller api/chats
ルーティングを設定する
Rails.application.routes.draw do
  namespace :api, default: {format: :json} do
    resources :chats, only: :create
  end
end
chatsコントローラを編集する
class Api::ChatsController < ApplicationController
  skip_before_filter :verify_authenticity_token #外部からのリクエストを許可する
  def create
    Pusher['general'].trigger('chat_event', {
      message: params[:message]
    })
  end
end
Pusher['general']の部分の[]に指定するのはチャットのルーム名です。この部分を可変にすることで幾つものチャットルームを作成することができ、ルーム別に通知を送ることができます。今回はgeneralとしておきます。
また、今回はjsonを返さなくても成立しますがテンプレートエラーが発生してしますのでcreate.json.juilderを作成しておきましょう。
以上でapiの作成は完了です。
iOS側で作成したAPIを叩く
サーバサイド側の実装が完了したのでiOS側で作成したapiを使ってリアルタイム通信を可能にします。
iOSプロジェクトにPusherを導入する
CocoaPodsを使用します。Pusherのクライアント専用のライブラリlibPusherを使用します。
その他HTTP通信とjsonを扱いやすくするためにAlamofire、SwiftyJSONをそれぞれ使用します。
target 'ChatiOS' do
 pod 'libPusher', '~> 1.6.1'
 pod 'Alamofire'
 pod 'SwiftyJSON'
end
またキー情報を設定します。
import UIKit
import Pusher
import Alamofire
import SwiftyJSON

class ViewController: UIViewController, PTPusherDelegate {

	var client: PTPusher!

	override func viewDidLoad() {
        super.viewDidLoad()

        //Pushernの設定
        self.client = PTPusher(key: "<あなたのaccess_key>", delegate: self, encrypted: true)
        self.client.connect()
    }
APIを叩きリクエストを送る
let paramas = [
	 "message": hoge,
]

Alamofire.request(.POST, "http://localhost:3000/api/chats", parameters: paramas)
	.responseString { response in
	print("Success: \(response.result.isSuccess)")
	print("Response String: \(response.result.error)")
}
このようにapiを叩くと先ほど作成したcreateアクションが呼ばれ、Pusherに通知が送られます。
Pusherに通知が送られるとクライアント側に再通知してくれます。
Pusherからの通知を受け取る
//Pusherから通知を受け取る
let channel = self.client.subscribeToChannelNamed("general")
channel.bindToEventNamed("chat_event") { (channelEvent) -> Void in
	//pusherから通知がくると呼ばれる
	let json = JSON(channelEvent.data)
	print(json["message"])
}
チャットのUIを作り、適した場所に以上の記述を追記すれば簡単なチャットアプリが作れますね。
チャットのUIの作成には以下を御覧ください。
Swiftで超簡単にチャットアプリのUIを作る
参考

