
はじめに
UnityのUIボタン(Buttonコンポーネント)には onClick というイベントがあって、
AddListener() を使って関数(メソッド)を使うと、クリックしたときにその関数が実行されるようになります。
目次
1.Buttonの作り方
2.スクリプトをかく
3.スクリプトをButtonオブジェクトにアタッチする
4.完成!
1.Buttonの作り方
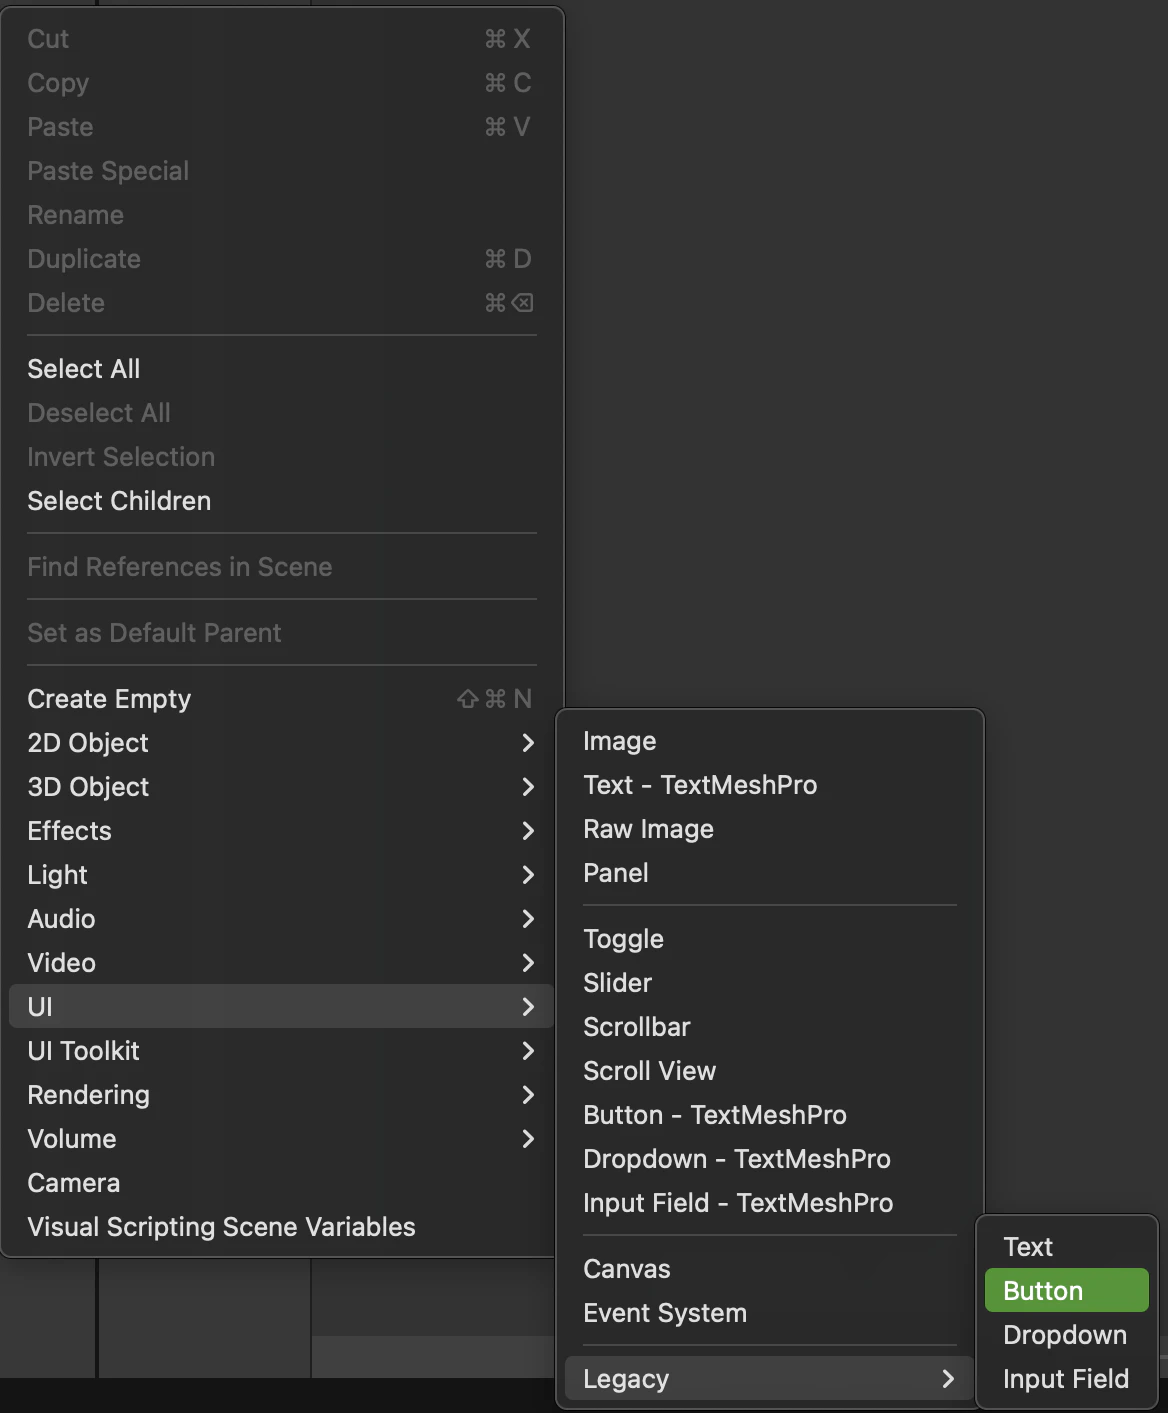
Hierarchy上で右クリック→UI→Legacy→Button
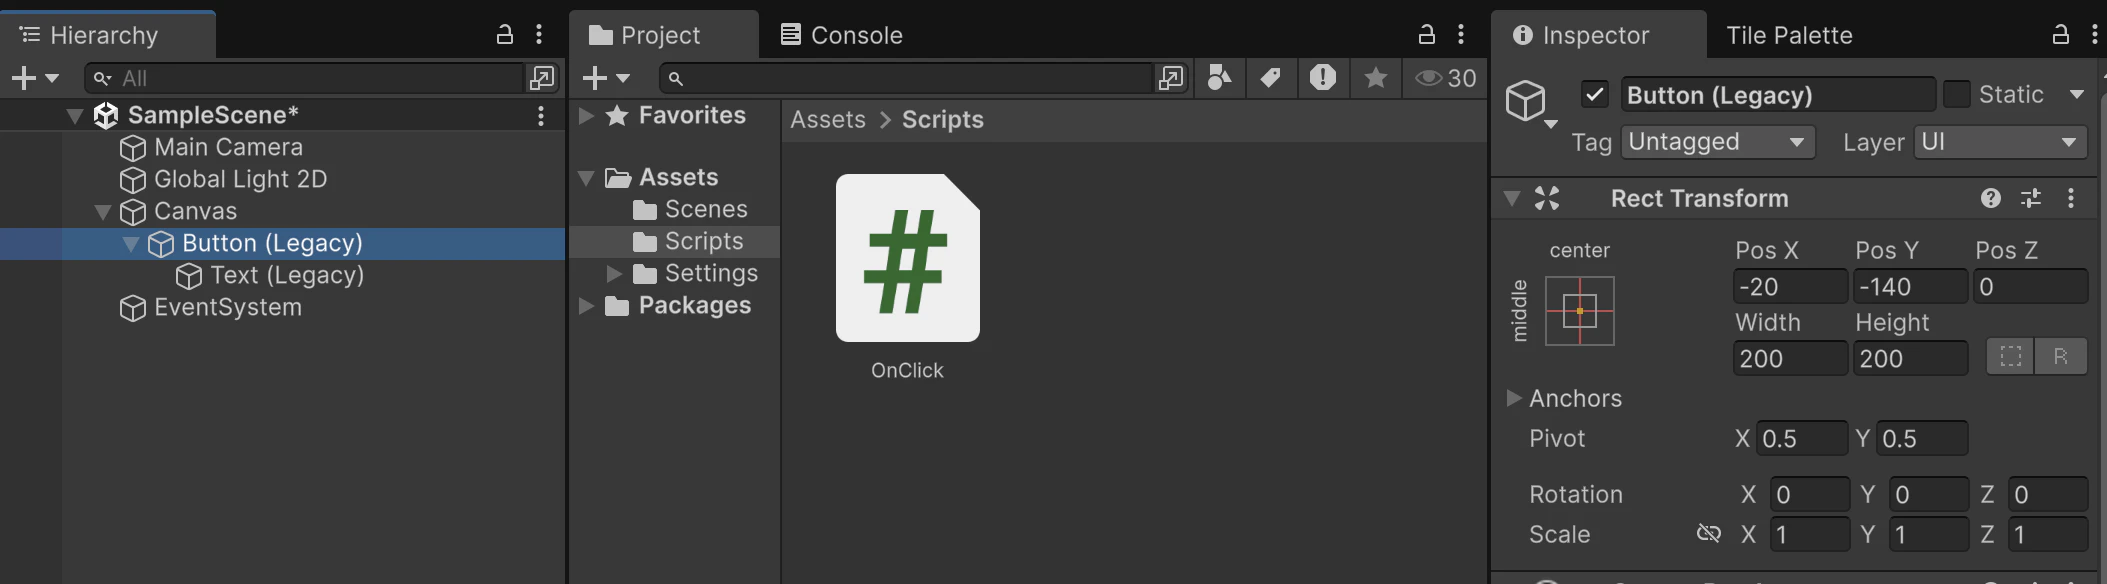
Buttonの位置がすごいことになっていると思うので画像のようにRect Transformを調整します
2.スクリプトをかこう
ボタンを押したらHello Worldと表示させるスクリプトを書いてみましょう。
using UnityEngine;
using UnityEngine.UI;  // UIを使う場合に必要

public class OnClick : MonoBehaviour
{
    public Button myButton;  // Inspectorからアタッチする

    void Start()
    {
        // ボタンがクリックされたら、PrintMessage を実行
        myButton.onClick.AddListener(PrintMessage);
    }

    void PrintMessage()
    {
        Debug.Log("Hello, World!");
    }
}
こんな感じでかきます。
3.スクリプトをButtonオブジェクトにアタッチする
1.Hierarchy上にあるButton(Legacy)をクリック
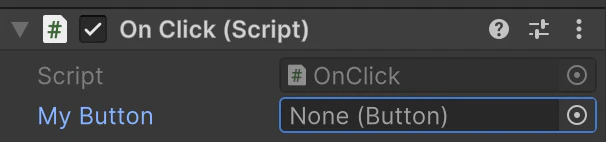
2.Inspectorに先ほど書いたスクリプト(OnClick)をドラッグ&ドロップするもしくはAdd ComponentからOnClickを検索して追加する
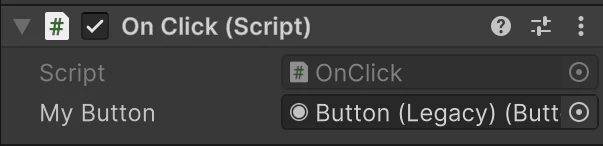
3.MyButtonにButton(Legacy)をドラッグ&ドロップするもしくはNone(Button)の右側にある◉をおしてButton(Legacy)を選択
4.完成
1.実行ボタンをクリックする
2.Buttonをクリックする
3.ConsoleにHello, World!と表示されたら成功!!
