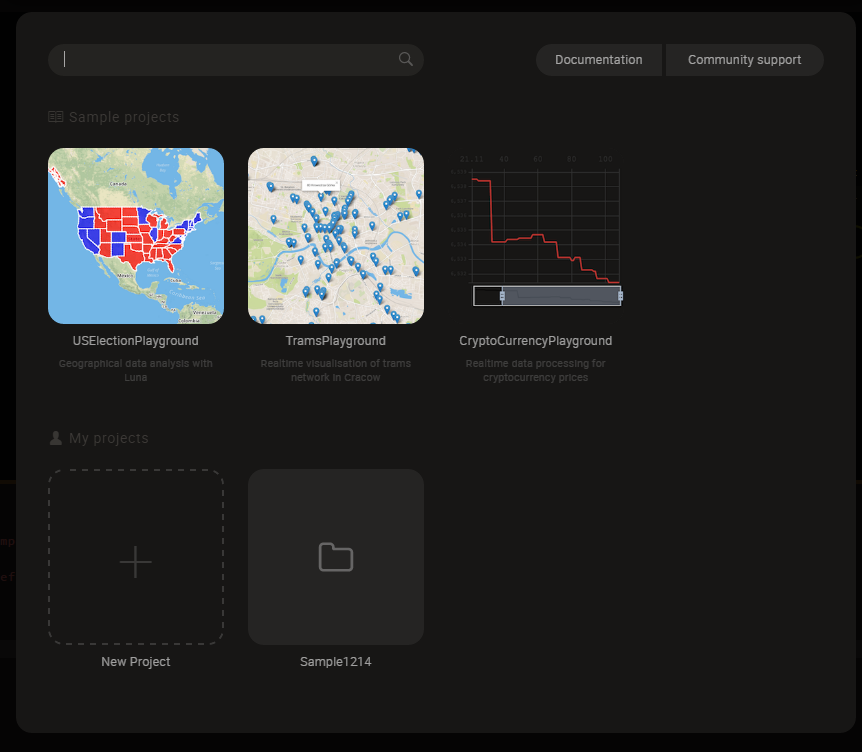
どこか遠くへ行きたい
今日は Luna という言語を使ってみました。
Luna
公式サイト : https://luna-lang.org/
公式マニュアル : https://luna-lang.gitbooks.io/docs/content/ (※ 内容は Ver 1.3 のもの )
Luna Core リポジトリ : https://github.com/luna/luna
Luna Studio リポジトリ : https://github.com/luna/luna-studio
Luna Manager リポジトリ : https://github.com/luna/luna-manager
型ドキュメント : http://docs.luna-lang.org/
Luna is a data processing and visualization environment built on a principle that people need an immediate connection to what they are building. It provides an ever-growing library of highly tailored, domain specific components and an extensible framework for building new ones.
Luna targets domains where data processing is the primary focus, such as data science, IoT, bioinformatics, graphic design and architecture.
| 用途 | 汎用 ( 今はデータ解析・可視化に特化 ) |
| 開始 | 2017/07 |
| 最新バージョン | Luna Core : 不明 Luna Studio : 1.6.1.1 ( 2018/12/13 ) Luna Manager : 1.2 ( 2018/11/9 ) |
| ライセンス | Luna Core : Apache License 2.0 Luna Studio : GNU Affero General Public License v3.0 Luna Manager : Apache License 2.0 |
| プラットフォーム | Luna Core : Haskell Haskell, GHCJS, React Luna Manager : Haskell |
| 型 | 静的型付け |
| パッケージ管理 | Luna Manager |
| Github スター | Luna Core : 2654 Luna Studio : 463 Luna Manager : 42 |
- オブジェクト指向言語
- しかし、関数型 ( 特に Haskell ) の影響は強い
- Visual and Textual Programming
- コードとグラフ両方で記述可能
- Luna AST の別々の表現
- Visual
- コーディングと同等の操作が可能
- データ処理の中間状態もステップ毎に可視化
- 高速なフィードバックによる探索的なプログラミング
- コンポーネントツリー
- コンポーネントは他のコンポーネントでできている
- ツリーの階層を潜ったり昇ったりして抽象レベルを調整できる
- コードとグラフ両方で記述可能
- Luna Studio
- 公式の IDE
- Atom ベース
- いずれは Web ブラウザ対応も
公式ページのアニメーションに圧倒される。
インストール
- Windows 10 Pro 1803
まず、Luna を始めるには Luna Studio が必要。
そのインストール方法としては、
- インストーラ でインストール
- Luna Manager でインストール
取り敢えず、2 で進めた。
Luna Manager の導入
残念ながら Luna Manager は scoop にはなかったので、公式よりダウンロードして PATH の通った場所に置いた。
$ luna-manager version
# 1.1.5
1.2 を落としたつもりだったが。細かいことは気にしない。
Luna Studio の導入
それでは、Luna Manager で Luna Studio をインストールする。
ターミナルを管理者権限で開き、luna-manager install すると、以降は対話的に進む。
$ luna-manager install
# Please enter your email address (it is optional but will help us greatly in the early beta stage):
#
# Available components:
#   - luna-studio
# Select component to be installed [luna-studio]:
#
# Available luna-studio versions:
#   - 1.0
#   - 1.1
#   - 1.2
#   - 1.3
#   - 1.4
#   - 1.5
#   - 1.6
# Select version to be installed [1.6]:
#
# Select installation path for luna-studio [C:\Program Files]: C:\Tools
# Download completed!
# Download completed!
# Unpacking archive: C:\Users\Username\AppData\Local\Temp\luna3433\luna-studio-windows-1.6.7z
#
# Copying files from C:\Users\Username\AppData\Local\Temp\luna3433\luna-studio-windows-1 to C:\Tools\LunaStudio\1.6
#
# Do you want to export C:\Tools\LunaStudio\current\bin\main\luna-studio.exe? [yes]/no
#
# Creating Menu Start shortcut.
#
# Copying user config to ~/.luna
#
# Do you want to run luna-studio? yes/no [yes]
# luna-manager.exe:
# Ran commands:
# 'C:\Program Files\LunaStudio\1.6\bin\public\luna-studio\luna-studio.exe'
# which C:\Program Files\LunaStudio\1.6\bin\public\luna-studio\luna-studio.exe
#
# Exception: C:\Program Files\LunaStudio\1.6\bin\public\luna-studio\luna-studio.exe: createProcess: does not exist (No such file or directory)
インストールパスを変更すると、最後の Luna Studio 起動に失敗するのはご愛嬌。
ひとまず、これでインストールは完了。
エディタ支援
エディタはそもそも公式に提供されている Luna Studio で十分なので、別途用意する必要はない。
言語仕様
まずは、言語についての仕様を見ていく。
馴染みやすい Text Programming としてまずは全体を見ていく。
◆ Text Programming
● Code layout
Python のようにインデントがそのままブロックになる。
スコープはブロックで作られる。
# create main block
def main:
    v = Vector 1 2 3
    print $ checkVector v

# inline expression
def sum a b: a + b
この def は、関数定義ではあるんだけど、Luna 上の概念でいうと コンポーネント でもある。
● Type
Luna では型を明記する必要はなく、全て型推論で処理される。
実際にどの型が推論されたのかは、Visual Editor で色を見ると分かる ( 後述 )。
基本的な方は以下。
| Std.Base |
|---|
| Scientific |
| Int |
| Real |
| Text |
| Binary |
| Complex |
| Bool |
| None |
| Tuple2 |
| Tuple3 |
| Tuple4 |
| Maybe |
| Either |
| List |
| Map |
| JSON |
| MVar |
| Stream |
| Functions |
それ以外は ここ に
● Syntex
# Text
text = "I'm string"
concated = text + ", not number"

# Number (Int, Real)
int = 2
real = 3.4

added = integer . toReal + real

# Bool
true = True
false = False

anded = true . and false

# List
list = [1,2,3]

# Touple
touple = ( "3", 3 )

# Maype
some = Just "Some"
none = Nothing

# Either
l = Left 1
r = Right "error"
● Function
https://luna-lang.gitbooks.io/docs/content/calling_functions.html
https://luna-lang.gitbooks.io/docs/content/defining_functions.html
# apply function
added = add 1 2

# Lambda
f = x: x + 2
f = _ + 2    # short representation

list = [1, 2, 3]
list.each f

# Currying
list.each (+ 2)
● Class
https://luna-lang.gitbooks.io/docs/content/classes.html
https://luna-lang.gitbooks.io/docs/content/constructors.html
https://luna-lang.gitbooks.io/docs/content/polymorphism.html
https://luna-lang.gitbooks.io/docs/content/advanced_types.html
class Shape:
    Circle:
        radius :: Real
    Rectangle:
        width  :: Real
        height :: Real

    def perimeter: case self of
        Circle r: 2.0 * pi * r
        Rectangle w h: 2.0 * w + 2.0 * h

    def area: case self of
        Circle r: pi * r * r
        Rectangle w h: w * h
上記は、Haskell でいうと多分こんな感じに認識されるのかな ↓
-- With NamedFieldPuns

data Shape = Circle { radius :: Real } | Rectangle { width :: Real , height :: Real }

perimeter :: Shape -> Real
perimeter Circle { radius } = 2.0 * pi * radius
perimeter Rectangle { width, height } =  2.0 * width + 2.0 * height

area :: Shape -> Real
area Circle { radius } = pi * radius * radius
area Rectangle { width, height } =  width + height
それ以外にも、
# Not record
class Shape:
    Circle     Real
    Rectangle  Real Real

# Same named constructor as class name
class Vector:
    x y z :: Real

# With type parameter
class Vector a:
    x y z :: a

# Constrained methods
class Vector a:
    x y z :: a
    def dotProduct that:
        self.x * that.x + self.y * that.y + self.z * that.z  # compile error when a is not number

# like Duck Typing
def twice a: a * 2
b = twice 4    # OK
c = twice "5"  # compile error
Luna の型チェッカーは、実際に使われるまで型を保留しておいて、利用側で不整合があればエラーを出す。
動的言語っぽさはあるが、ランタイムエラーではなくコンパイルエラーらしい。
◆ Visual Programming
● Interface
Luna Studio は Atom ベースで、基本的な操作はほとんど Atom と同じ。
Luna Studio 特有の機能部分だけ解説する。
Status Bar
デフォルトで再生状態で変更を即時評価するようになっている。
停止ボタンをクリックして停止状態にすると、リアルタイムに評価がなされない。
更新するにはリロードボタンをクリックする。
もう一度再生状態にするには、再生ボタンをクリックする。
Luna Toolbar
右上の 『Documentation』と『Community Support』は、それぞれのページへのリンク。
Luna Visual Editor
Luna Studio の要の部分で、Visual Programming のインターフェイスを提供している。
仰々しいが、ただのタブなので位置はいくらでも変更できる。
● Expression
それでは、先程の Text Programming での表現が、どう Visual Programming で表現されるのかを見ていく。
1. Luna Explorer
基本的には、すべて Node と Edge でできている。

その Node を作るには、Luna Explorer を利用する。
全てのコンポーネント、ライブラリ、メソッドからインクリメンタルに検索して、新たな Node を追加することができる。

呼び出しは Tab キーを入力するだけ。
2. Node
Node には、Value Node と Reference Node が存在している。
Value Node が一般的なノードで、Reference Node がパターンマッチで値を抜き出すだけのノードとなる。
Value Node には Name と Expression、その下に評価結果が表示される。
value = "node"

source = (1, "2", False)
(a, b, c) = source

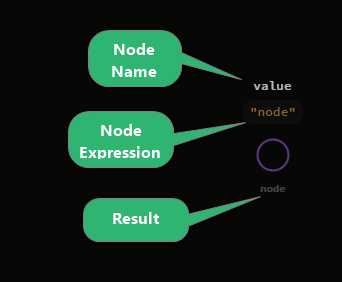
Name や Expression は、ダブルクリックすることで編集可能となる。

クリックして選択 ( Node がオレンジの円で囲まれた状態 ) が可能であり、Name の辺りをドラッグすれば移動もできる。
3. Port
Node には Input Ports (左側), Output Ports (右側), Self Port (中央) という接続部があり、それらを他の Node と繋ぐことで関係を表現する。
Input Ports は Node に渡された値を繋き、Output Ports Node が返す値を繋ぐ。
オブジェクトが Self port に接続される時、その Node は受け取ったオブエジェクトのメソッド呼び出しを表現する。
uri = "https://min-api.cryptocompare.com/data/price"
request = Http.get uri
withFsym = request . setParam "fsym" (Just crypto)
withTsyms = withFsym . setParam "tsyms" (Just fiat)


4. Edge
Node の各 Port 間をつないで Node 間の関係を宣言していく。
マウスで Port をクリックすると Edge が生えて、今度は接続先をクリックすることで繋げられる。

関数の中は、引数の Ports が左、返される値の Ports が右に配置される。
def getCurrencyPrice crypto fiat:
    ...

    price
5. Result
既に説明したように、完全な評価が可能な場合には Node の下方に 評価された結果が表示される。

よりリッチな Visualization を行うには、変数名の右横に出る『目のアイコン』をクリックする。

すると、下方に Visualization Panel が表示される。
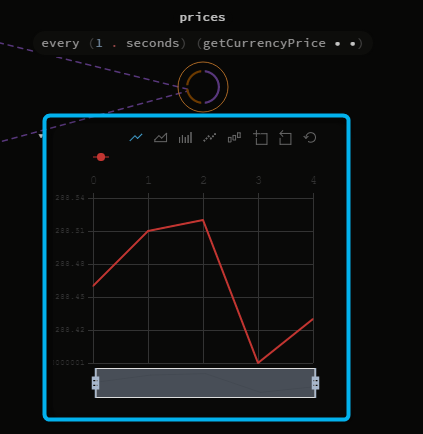
6. Detail View
ちょっとしたことだが、Node を選択して Enter を押すと 詳細表示 に変えられます。

● Type Color
Visual Editor 側では、色だけで型がある程度分かる。


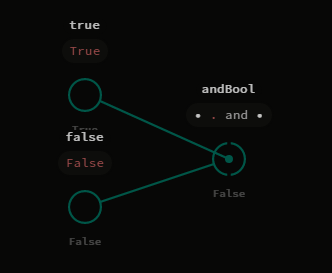

色だけでわからないときでも、Node にマウスオーバーして型情報を見ることもできる。

| Type | Color |
|---|---|
| Text | Purple |
| Bool | Green |
| Int | Yellow |
| Real | Orange |
| List, Map, Maype, Function | Blue |
| Either | Green ? |
| Touple | ??? |
| 未定の型パラメータ | Red |
Touple の色が結構不安定で法則がよく分からない。
● Navigation
グラフィカルなので、やはりマウスで操作したくなる。
Node や Edge に対しての操作は既に述べたので、それ以外をまとめる。
| Target | Action | |
|---|---|---|
| Wheel Button Drag | パン | |
| Component Node | Double Click | コンポーネントに階層を潜る |
| 背景 | Double Click | 上の階層に戻る |
| Select Range with Drag | 範囲内の Node 選択 |
● Keyboard Shortcut
細かい操作をするには、キーボードの操作が必要だが、マウス同様操作のまとまったドキュメントが見当たらなかった。
仕方なく ソースコードを見ながら調べることに。
イベント名はそのままなので、効果の程は想像してください。
| Modifier Key | Key | Event |
|---|---|---|
| Ctrl | ← | PanLeft |
| Ctrl | → | PanRight |
| Ctrl | ↑ | PanUp |
| Ctrl | ↓ | PanDown |
| Ctrl | + | ZoomIn |
| Ctrl + Shift | + | ZoomIn |
| Ctrl | - | ZoomOut |
| Ctrl + Shift | - | ZoomOut |
| Ctrl | 0 | ResetZoom |
| Ctrl + Shift | 0 | ResetPan |
| Ctrl + Alt + Shift | 0 | ResetCamera |
| Ctrl + Shift | 0 | CenterGraph |
| H | CenterGraph | |
| Ctrl | Esc | ExitGraph |
| Ctrl + Shift | ↓ | GoConeDown |
| Ctrl + Shift | ← | GoConeLeft |
| Ctrl + Shift | → | GoConeRight |
| Ctrl + Shift | ↑ | GoConeUp |
| ↓ | GoDown | |
| ← | GoLeft | |
| → | GoRight | |
| ↑ | GoUp | |
| Shift | ← | GoPrev |
| Shift | → | GoNext |
| Ctrl | A | SelectAll |
| Ctrl | E | UnfoldSelectedNodes |
| Ctrl | Enter | EditSelectedNodes |
| Ctrl | L | AutolayoutAllNodes |
| Ctrl | Space | ZoomVisualization |
| Backspace | RemoveSelectedNodes | |
| Del | RemoveSelectedNodes | |
| Enter | ExpandSelectedNodes | |
| F | CollapseToFunction | |
| L | AutolayoutSelectedNodes | |
| Tab | SearcherOpen | |
| Shift | Tab | SearcherEditExpression |
| Ctrl | Z | Undo |
| Ctrl | Y | Redo |
| Ctrl + Shift | Z | Redo |
| Ctrl | M | MockAddMonad |
| Ctrl + Shift | M | MockClearMonads |
サンプル体験
Stream
醍醐味である ( 勝手に推測 ) Stream をソースとしたこういう奴をやりたい。以下画像は公式サイトのトップにあるアニメーションの一部。
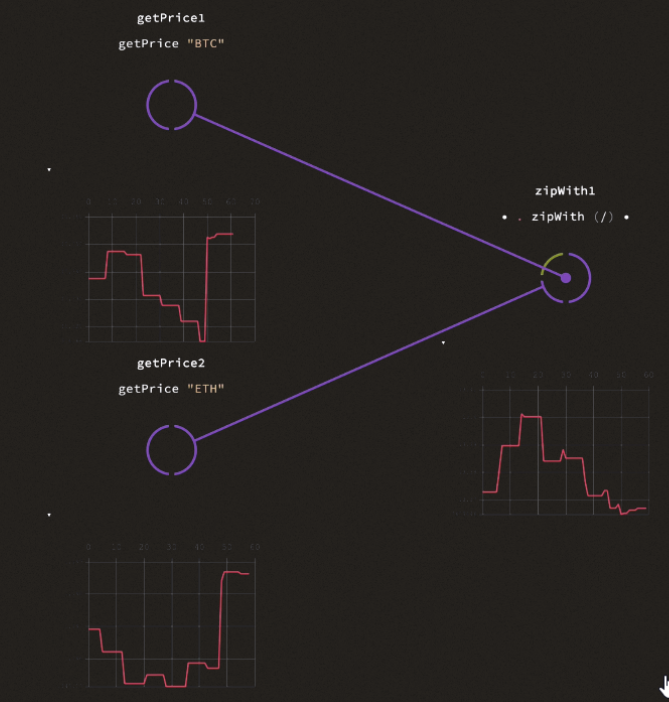
で、こんな感じのコードを書いてみた。
import Std.HTTP
import Std.Time

def getSin:
    uri = "http://localhost:5000/api/sin"
    request = Http.get uri
    response = request . perform . json
    value = response . getReal "sin"
    value

def getCos:
    uri = "http://localhost:5000/api/cos"
    request = Http.get uri
    response = request . perform . json
    value = response . getReal "cos"
    value

def getSinStream:
    every 1.seconds getSin

def getCosStream:
    every 1.seconds getCos

def main:
    sinValue = getSinStream
    cosValue = getCosStream
    compsite = sinValue . zipWith (/) cosValue
    None
しかし、動かしてみると、
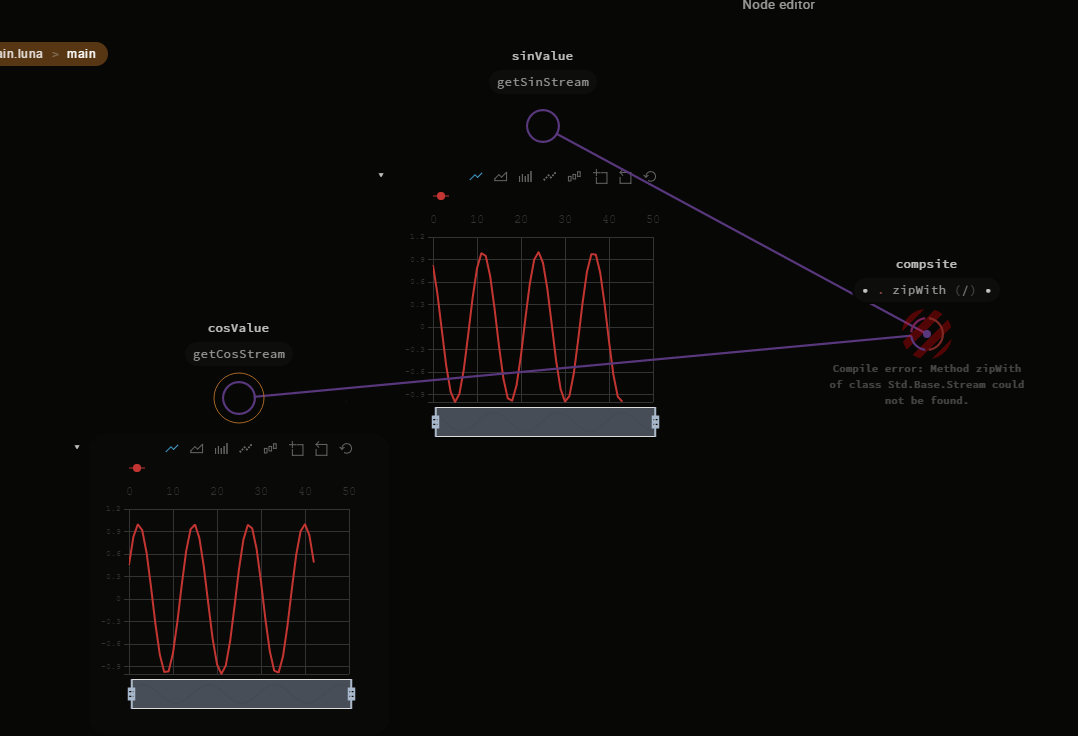
Stream に zipWith が無いと。
ソースを見ると、どうやら zip zipWith 的なのは無さそう。何か勘違いしてるかも。
感想
- Visual Programming は悪くない
- これだけだとちょっとつらい
- Text Programming も合わせれば大体問題ない
- 慣れれば意外と直感的に分かる
- これだけだとちょっとつらい
- StdLib 的なライブラリが充実していない
- 特に Stream がもうちょっと何とかならんもんか
- ドキュメント・情報が充実していない
- 公式リンクされていない Gitbook しか手がかりがない
- これも古いバージョンにしか対応してない
- 公式の情報発信も少ない
- 第三者情報は皆無に近い
- 公式リンクされていない Gitbook しか手がかりがない
- Windows 対応がまだまだ
- Luna Explorer がとにかく遅い
- クラッシュもそこそこ多い
-
未来を感じた
- 小さくまとまらないように願う
| Production Ready (独断) | ★★☆☆☆ |
| ドキュメント充実 | ★★☆☆☆ |
| 公式以外の情報 | ★☆☆☆☆ |
そういえば、数日前に書いた記事 で感じたことが、Luna の目指す所ととても近かった。
参考
あとがき
※ この記事は個人の見解であり、所属する組織を代表するものではありません。


