はじめに
前回,micro:bitから値を送ってProcessingで可視化する記事をあげました.
今回はProcessingから送った値をmicro:bitで可視化するということをやります.
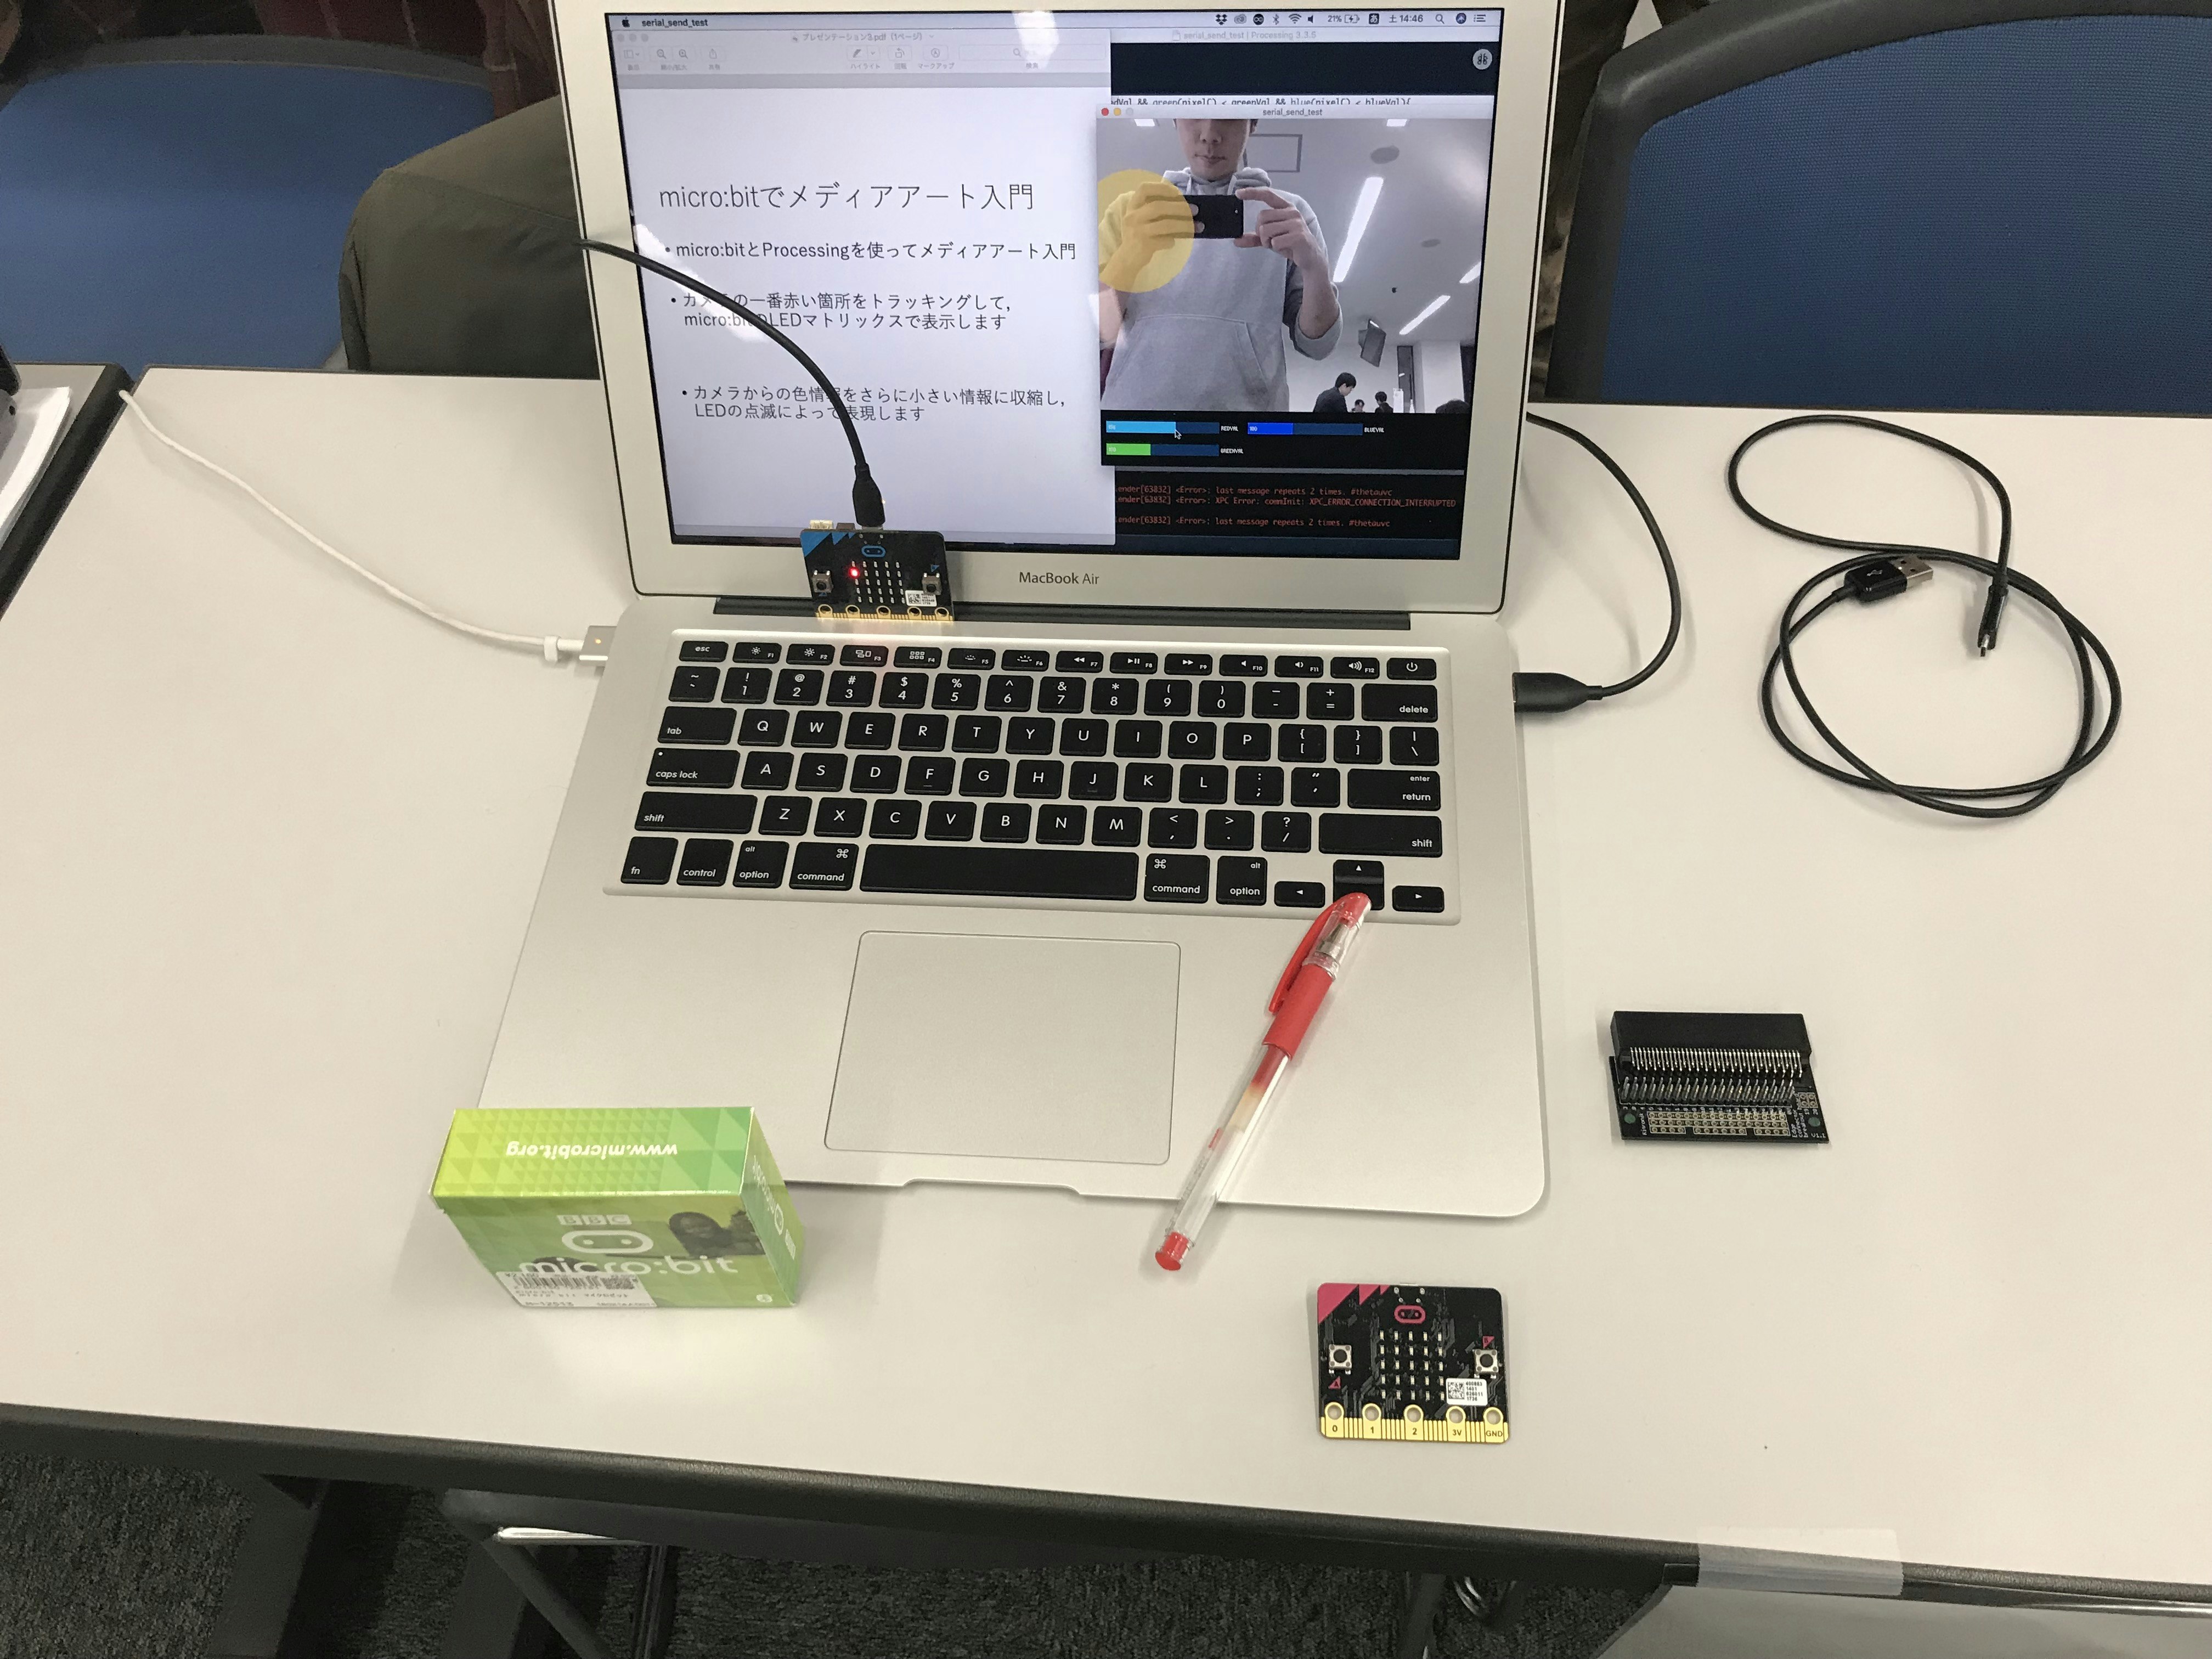
オープンソースカンファレンス(OSC)
毎年OSCにブースを出していて,今回この記事の内容の物を展示させていただきました.

内容
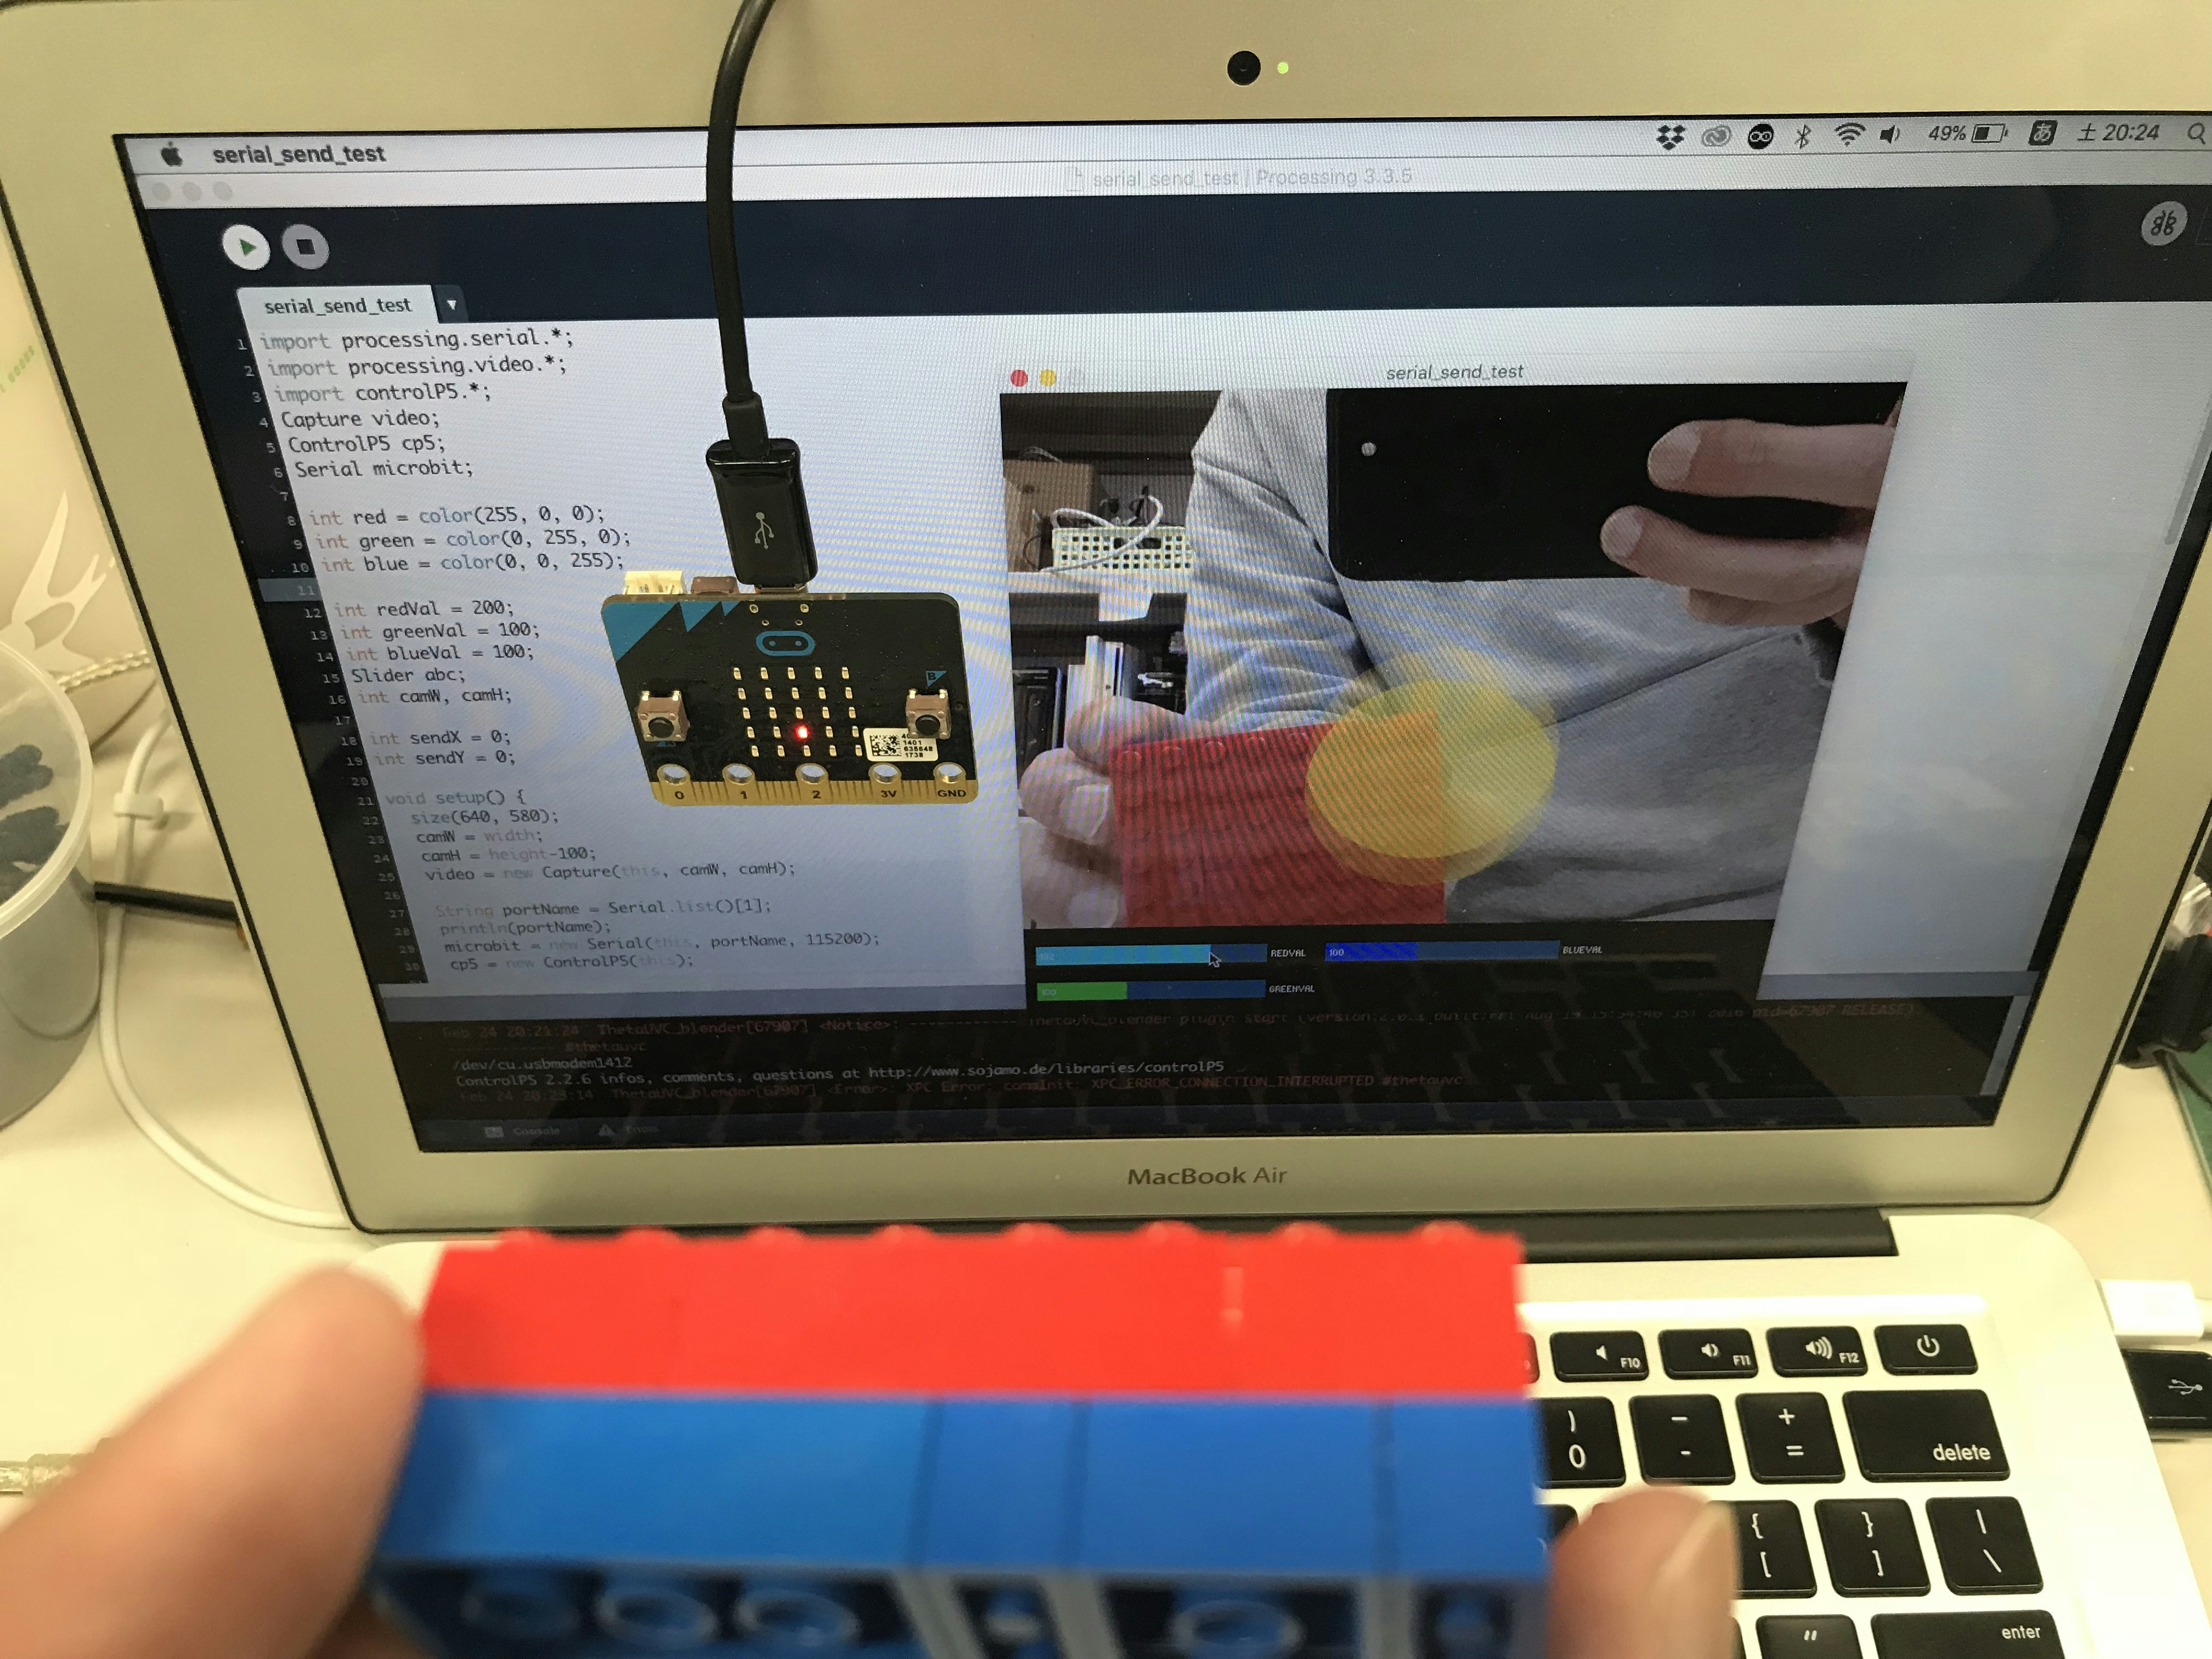
Processingのカメラで画面の赤い箇所をトラッキングして,micro:bitのLEDマトリックスでその位置を可視化します.
カメラの情報を収縮して最小限の情報をmicro:bitで表現します.
Processing
検出する赤色のしきい値をGUIで設定出来るようにControlP5ライブラリをインポートします.
scale()で左右を反転させて鏡のようにします.
map()でxyの座標を5×5に変換してSerialでmicro:bitに送ります.
\nを入れないとmicro:bitの方で文字列として受け取ってくれないみたいです.
import processing.serial.*;
import processing.video.*;
import controlP5.*;
Capture video;
ControlP5 cp5;
Serial microbit;

int red = color(255, 0, 0);
int green = color(0, 255, 0);
int blue = color(0, 0, 255);

int redVal = 200;
int greenVal = 100;
int blueVal = 100;
Slider abc;
int camW, camH;

int sendX = 0;
int sendY = 0;

void setup() {
  size(640, 580);
  camW = width;
  camH = height-100;
  video = new Capture(this, camW, camH);

  String portName = Serial.list()[1];
  println(portName);
  microbit = new Serial(this, portName, 115200);
  cp5 = new ControlP5(this);

  cp5.addSlider("redVal")//しきい値用GUIスライダー
    .setPosition(10, height-80)
    .setColorForeground(red)
    .setSize(200, 20)
    .setRange(0, 255)
    .setValue(redVal);

  cp5.addSlider("greenVal")
    .setPosition(10, height-40)
    .setColorForeground(green)
    .setSize(200, 20)
    .setRange(0, 255)
    .setValue(greenVal);

  cp5.addSlider("blueVal")
    .setPosition(260, height-80)
    .setColorForeground(blue)
    .setSize(200, 20)
    .setRange(0, 255)
    .setValue(blueVal);

  video.start();
  noStroke();
  smooth();
}

void draw() {

  if (video.available()) {
    video.read();
    pushMatrix();
    scale(-1,1);//画像の反転
    image(video,-camW,0);
    popMatrix();

    int brightestX = 0;
    int brightestY = 0;

    video.loadPixels();
    int index = 0;
    for (int y = 0; y < video.height; y++) {
      for (int x = video.width; x > 0; x--) {//右端から読み込む
        color pixelC = video.pixels[index];

        if (red(pixelC) > redVal && green(pixelC) < greenVal && blue(pixelC) < blueVal) {
          brightestX = x;
          brightestY = y;
        }
        index++;
      }
    }
    fill(255, 204, 0, 128);
    ellipse(brightestX, brightestY, 200, 200);
    sendX = int(map(brightestX, 0, 640, 0, 5));
    sendY = int(map(brightestY, 0, 480, 0, 5));
    microbit.clear();
    microbit.write(sendX+","+sendY+"\n");//micro:bitにmapした座標を送る
  }
  fill(0);
  rect(0, 480, width, 100);
}
micro:bit
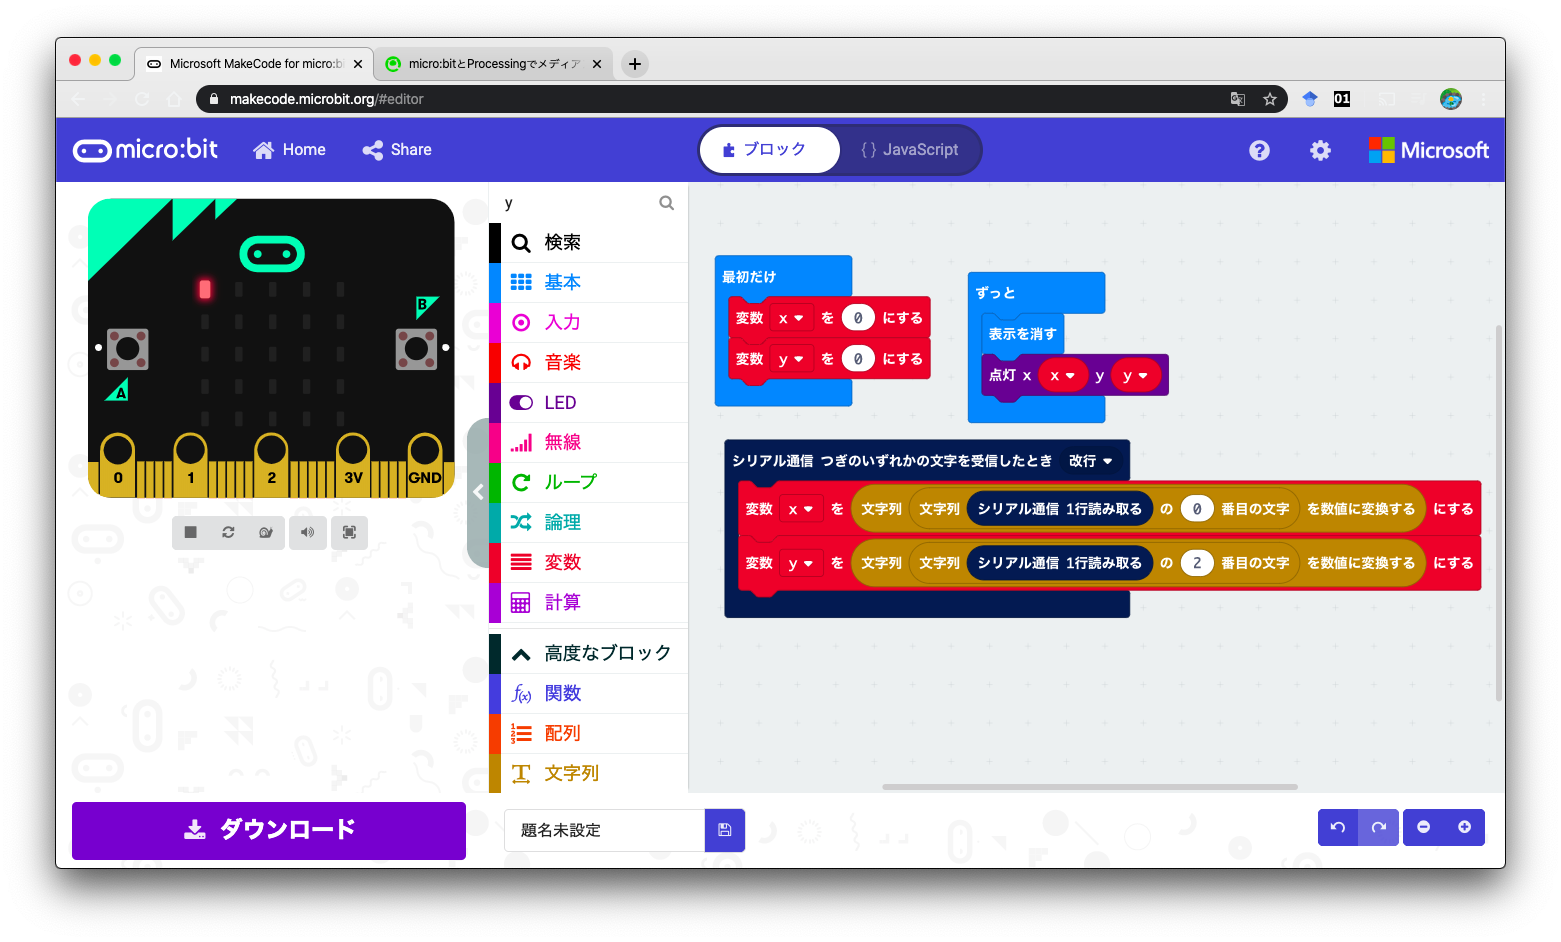
”X,Y”の文字列で送られてくるので,「文字列の何番目の文字を整数に変換する」というようにブロックをくむ.
実行結果
スライダーのしきい値をいじってやると安定してトラッキングできます.
最後に
メディアアートと言っていいものなのか正直微妙だが,micro:bitのような教育系ボードを使った作品の取っ掛かりとなれば良いなと思います.

