はじめに
本記事では、IBM webMethods Integration(SaaS)にオンプレミスDBを連携する手順を記載します。
IBM webMethods Integrationは様々なシステムやサービス、データをノーコード・ローコードで統合・連携させることができる製品で、SaaSアプリケーションの連携だけでなくオンプレミスとの連携にも強みを持っています。
今回は、オンプレミスDBを想定したCloud上VMのDBからデータを抽出するFlow Serviceを作成し、それをWorkflowに組み込んで呼び出してみます。
前提として、webMethods Edge Runtime をデプロイするためのコンテナ環境(docker, podmanなど)が必要です。
今回は以下のような方針で簡易的な構成をとっています。
- webMethods Edge Runtime をデプロイするコンテナ環境としてRHELサーバーを準備
- 上記サーバーに最小構成でPostgreSQLコンテナを立ててDBを作成(参考)
- IBM webMethods Integration(SaaS)は共有テナントのCSM環境を使用
webMethodsに関しての詳細は公式Documentをご確認ください。
https://www.ibm.com/docs/en/wm-integration
1. webMethods Edge runtimeの登録
webMethods Edge runtimeとは、Flow Service実行環境です。
ローカルのサーバーに導入することで、DBとの接続の中継として機能し、IBM webMethods Integration(SaaS)とセキュアに通信することが可能になります。
webMethods Edge runtimeの登録をするため、まずはIBM webMethods Integration(GUI)にログインします。
上部メニューの「Integration Runtimes」からEdge runtimeを新規登録します。
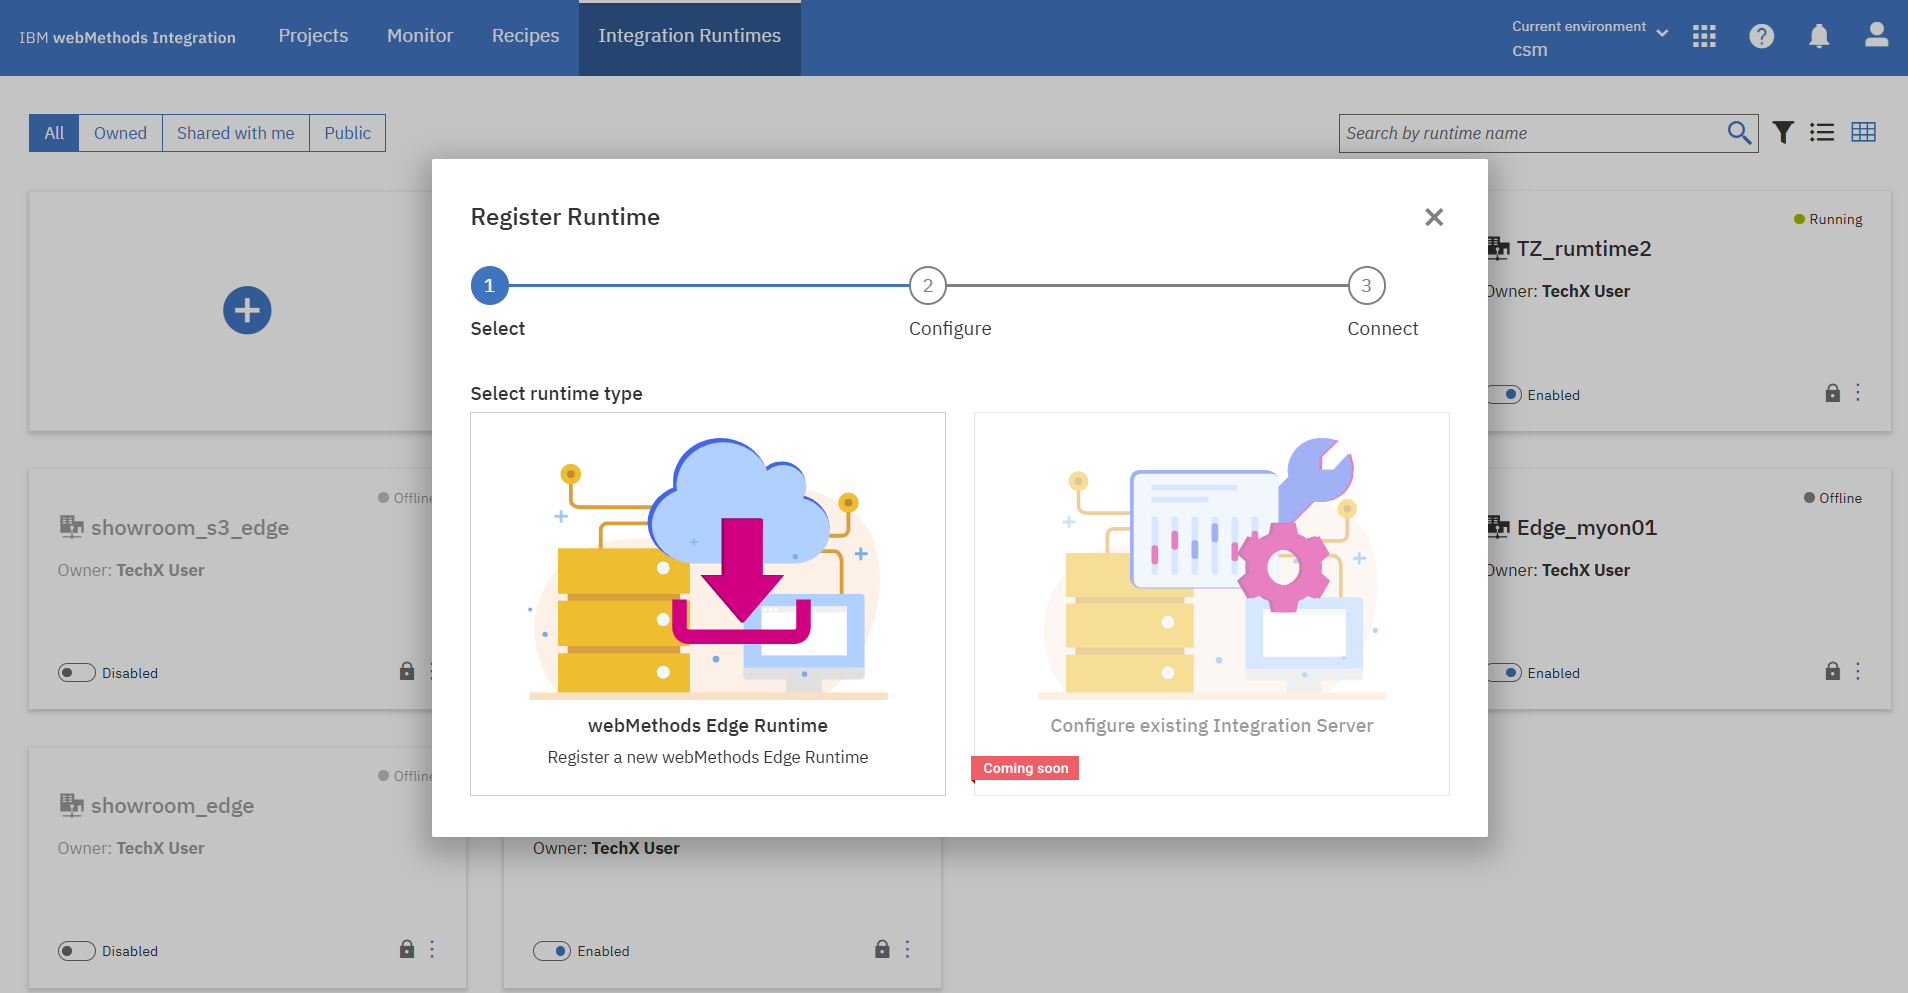
画面に従い、事前に準備しておいたRHELサーバーでEdge runtimeのimage registryへのloginとimage pullをしていきます。

$ docker login -u IBMid-xxxxxxxxxx -p xxxxxxxxxx ibmwebmethods.azurecr.io
Login Succeeded
$ docker pull ibmwebmethods.azurecr.io/webmethods-edge-runtime:11.0.11
11.0.11: Pulling from webmethods-edge-runtime
026bc477d162: Pull complete
ae97dc5dd071: Pull complete
71e1aa19fa91: Pull complete
ff47bf1bb83b: Pull complete
88d5a7a8f8f5: Pull complete
64f6d10345fd: Pull complete
c814fb232bae: Pull complete
c5bac6ebc07a: Pull complete
5d937c22bfc3: Pull complete
22479f28b5a0: Pull complete
Digest: sha256:1b03ec93ddcf8e0086b2dd89ef718203d6a85e0ee48415f2a4e033be7a060fe9
Status: Downloaded newer image for ibmwebmethods.azurecr.io/webmethods-edge-runtime:11.0.11
ibmwebmethods.azurecr.io/webmethods-edge-runtime:11.0.11
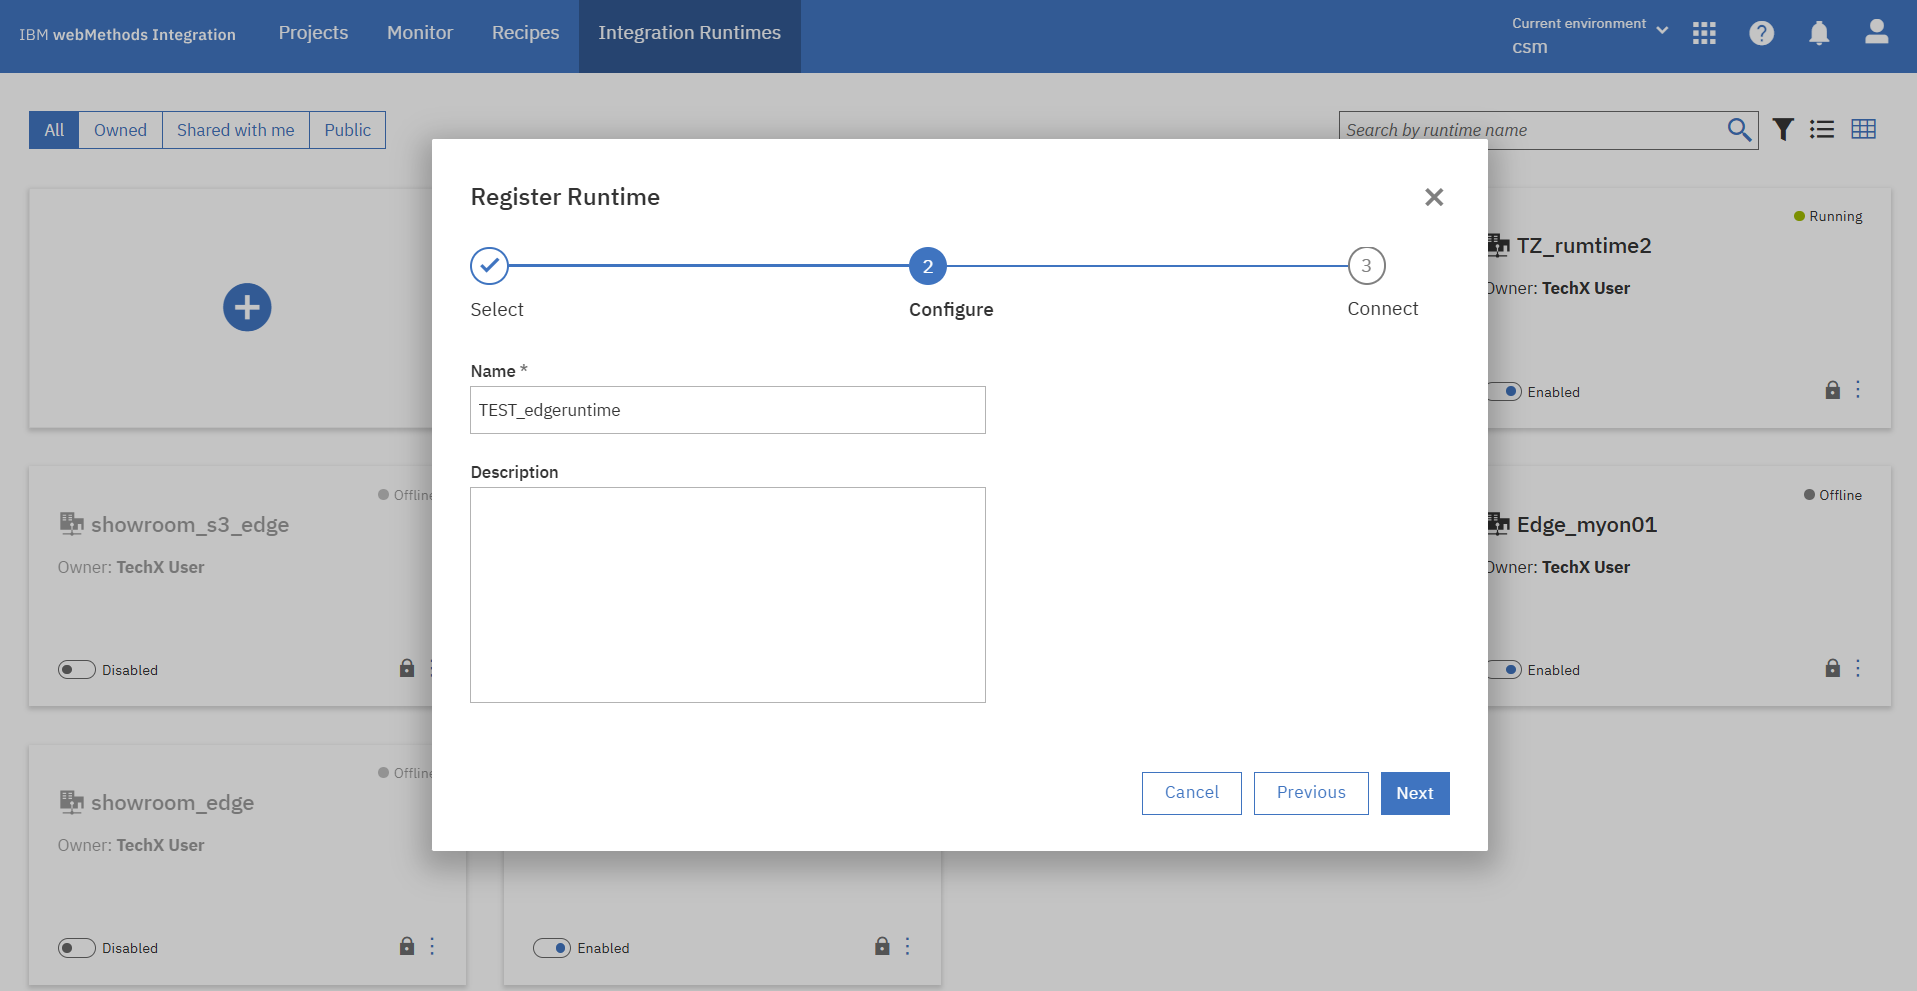
Runtimeの名前の設定後、GUIからペアリングをします。
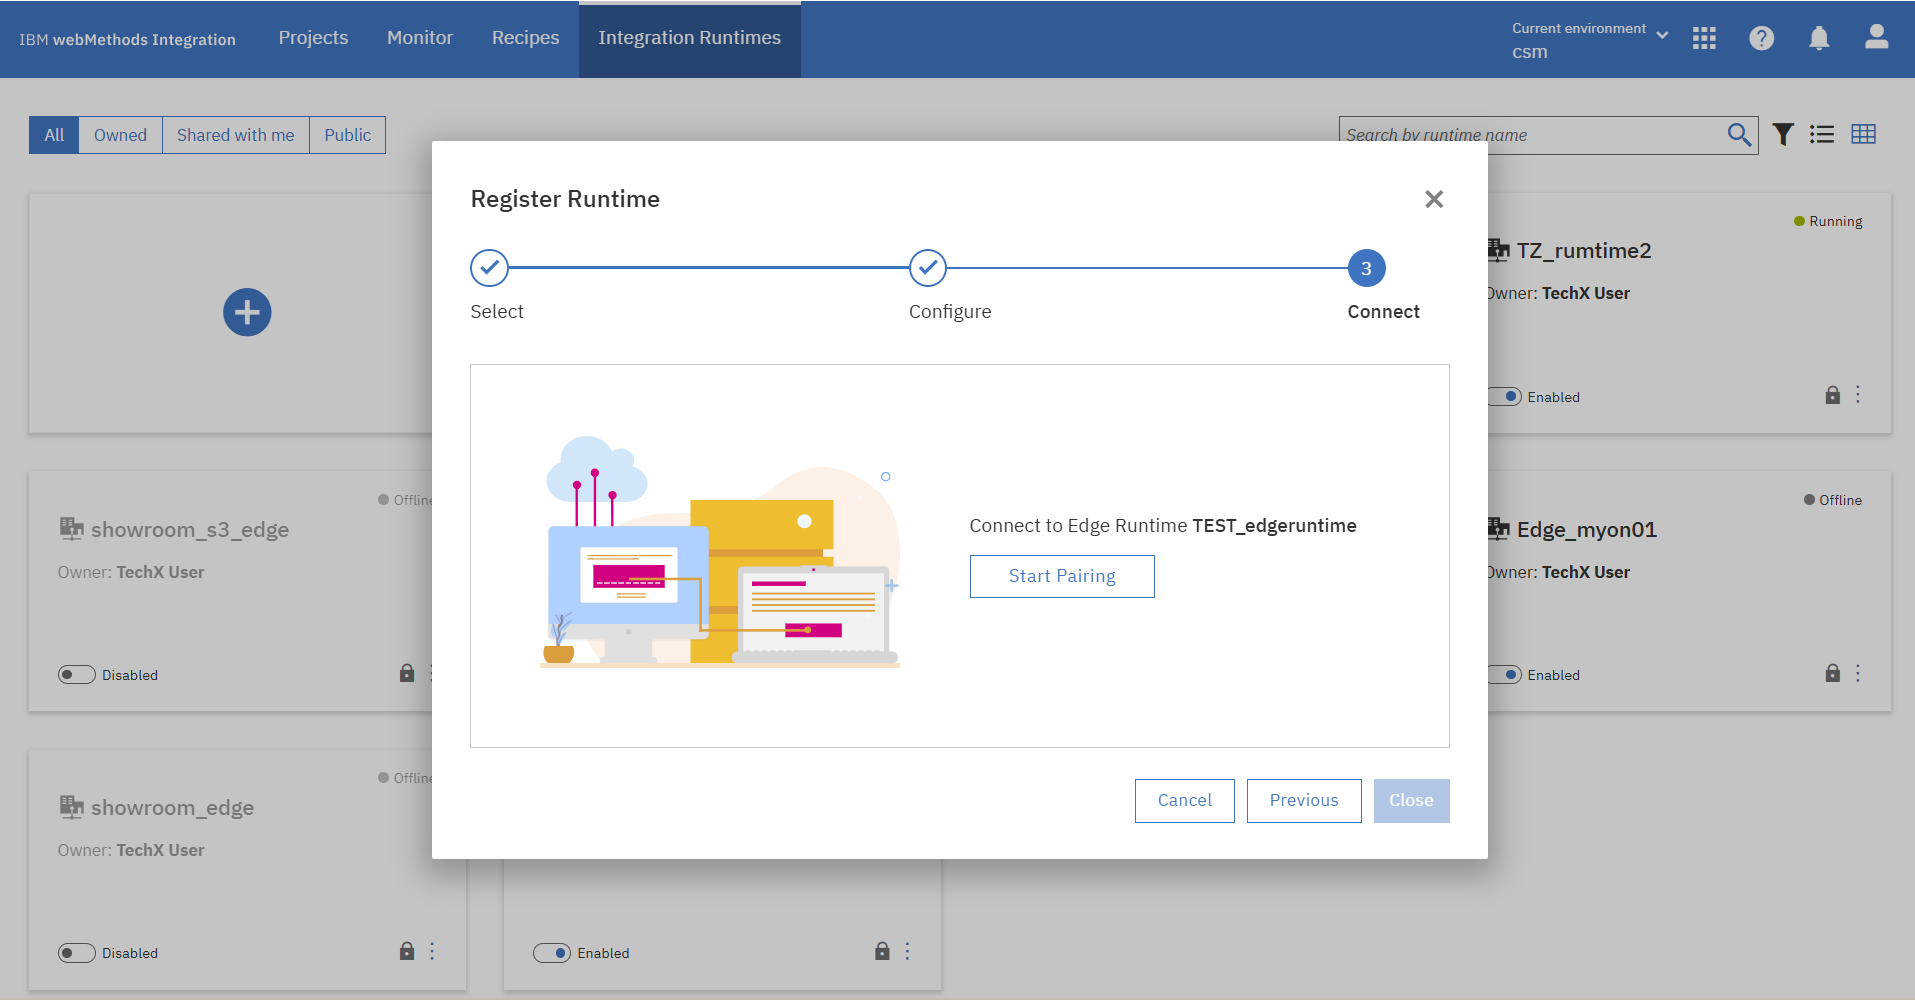
ペアリングに成功するとEdge Runtimeコンテナを起動するコマンドが表示されるので、ローカルサーバーで実行します。
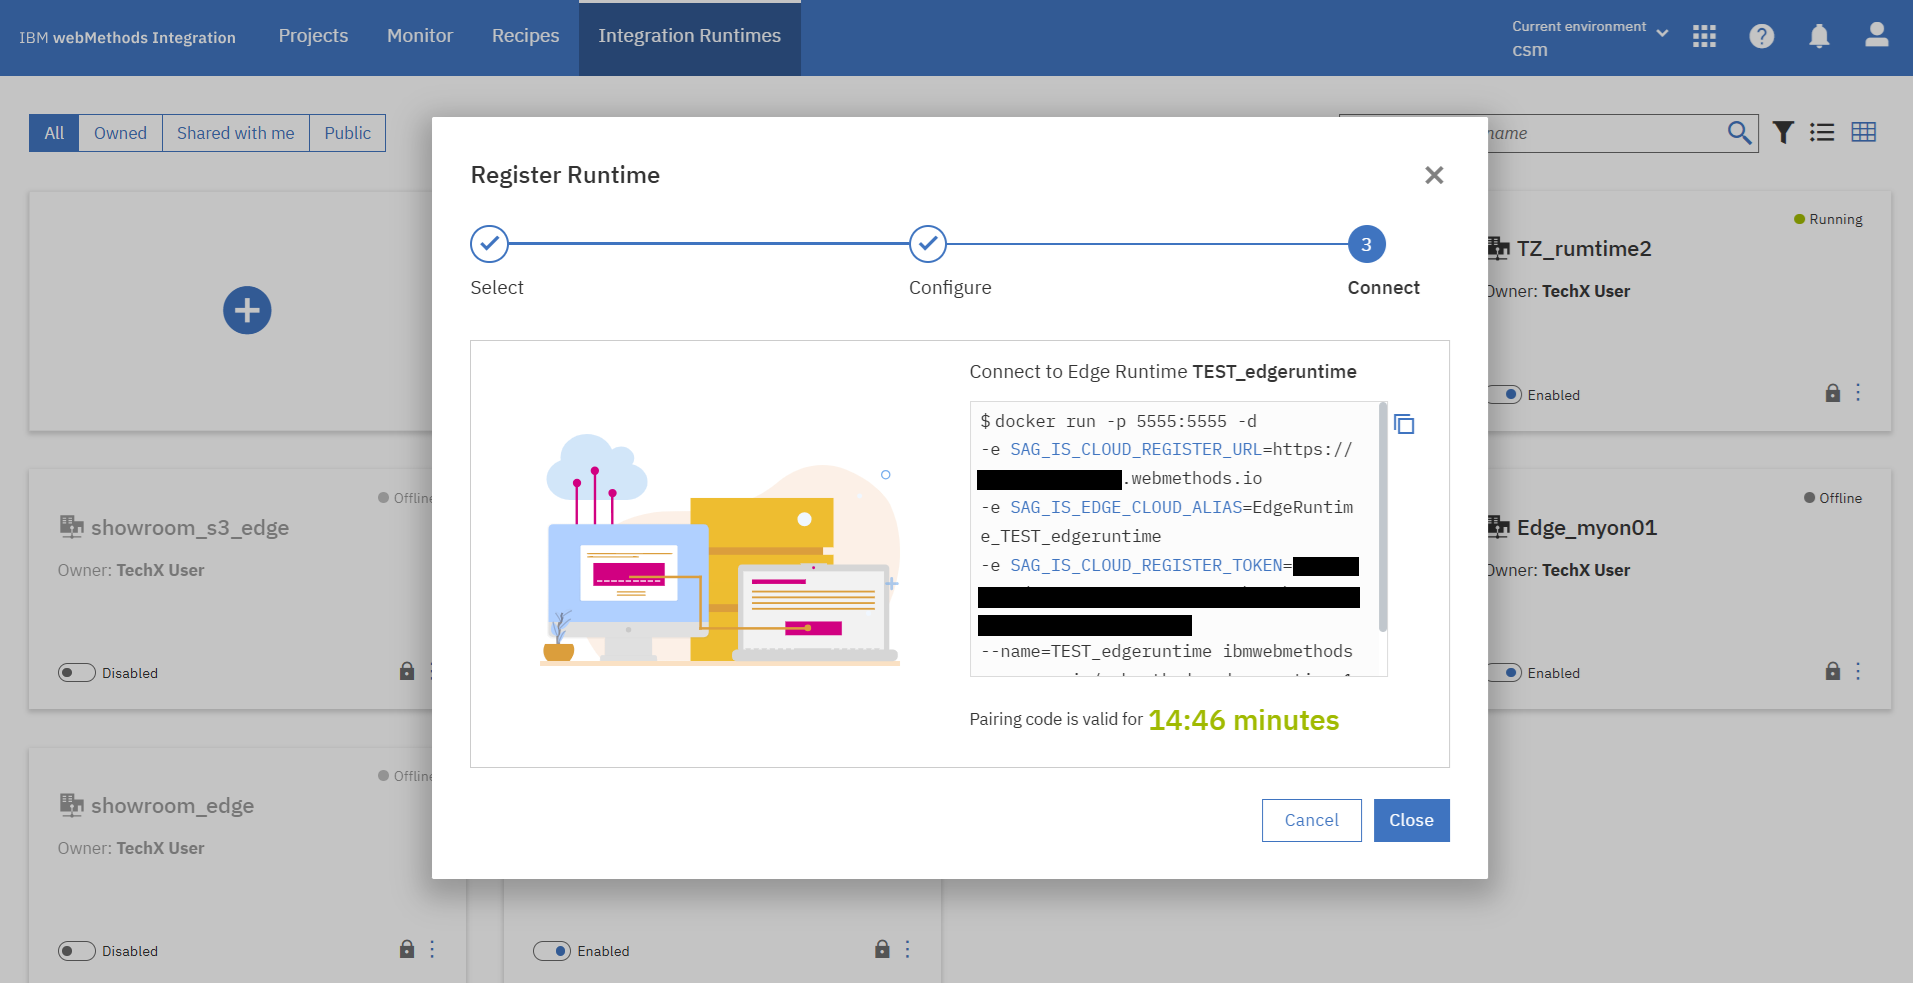
$ docker run -p 5555:5555 -d -e SAG_IS_CLOUD_REGISTER_URL=https://xxxx.webmethods.io -e SAG_IS_EDGE_CLOUD_ALIAS=EdgeRuntime_TEST_edgeruntime -e SAG_IS_CLOUD_REGISTER_TOKEN=xxxxxxxxxx --name=TEST_edgeruntime ibmwebmethods.azurecr.io/webmethods-edge-runtime:11.0.11
bff00161c0be3f6b897019a0628442317b5137cf6c106279625440077ce5e06b
コンテナが起動しました。(1行目「TEST_edgeruntime」)
※2行目「my-postgres」は事前準備したPostgreSQLコンテナ
$ docker ps
CONTAINER ID   IMAGE                                                      COMMAND                  CREATED          STATUS          PORTS                                                             NAMES
bff00161c0be   ibmwebmethods.azurecr.io/webmethods-edge-runtime:11.0.11   "/opt/softwareag/Int…"   14 seconds ago   Up 14 seconds   5543/tcp, 9999/tcp, 0.0.0.0:5555->5555/tcp, [::]:5555->5555/tcp   TEST_edgeruntime
9a11d64cc0ea   postgres:latest                                            "docker-entrypoint.s…"   3 days ago       Up 3 days       0.0.0.0:5432->5432/tcp, [::]:5432->5432/tcp                       my-postgres
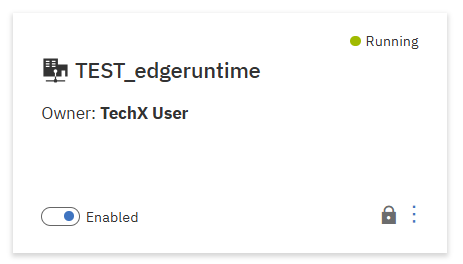
GUIでもEdge runtime作成の成功メッセージと作成したruntimeのステータス「Runnnig」を確認できました。

2. Flow Serviceの構成
2.1 Flow Service作成・DBコネクター作成
自身のProjectに入り、DB連携用のFlow Serviceを作成します。
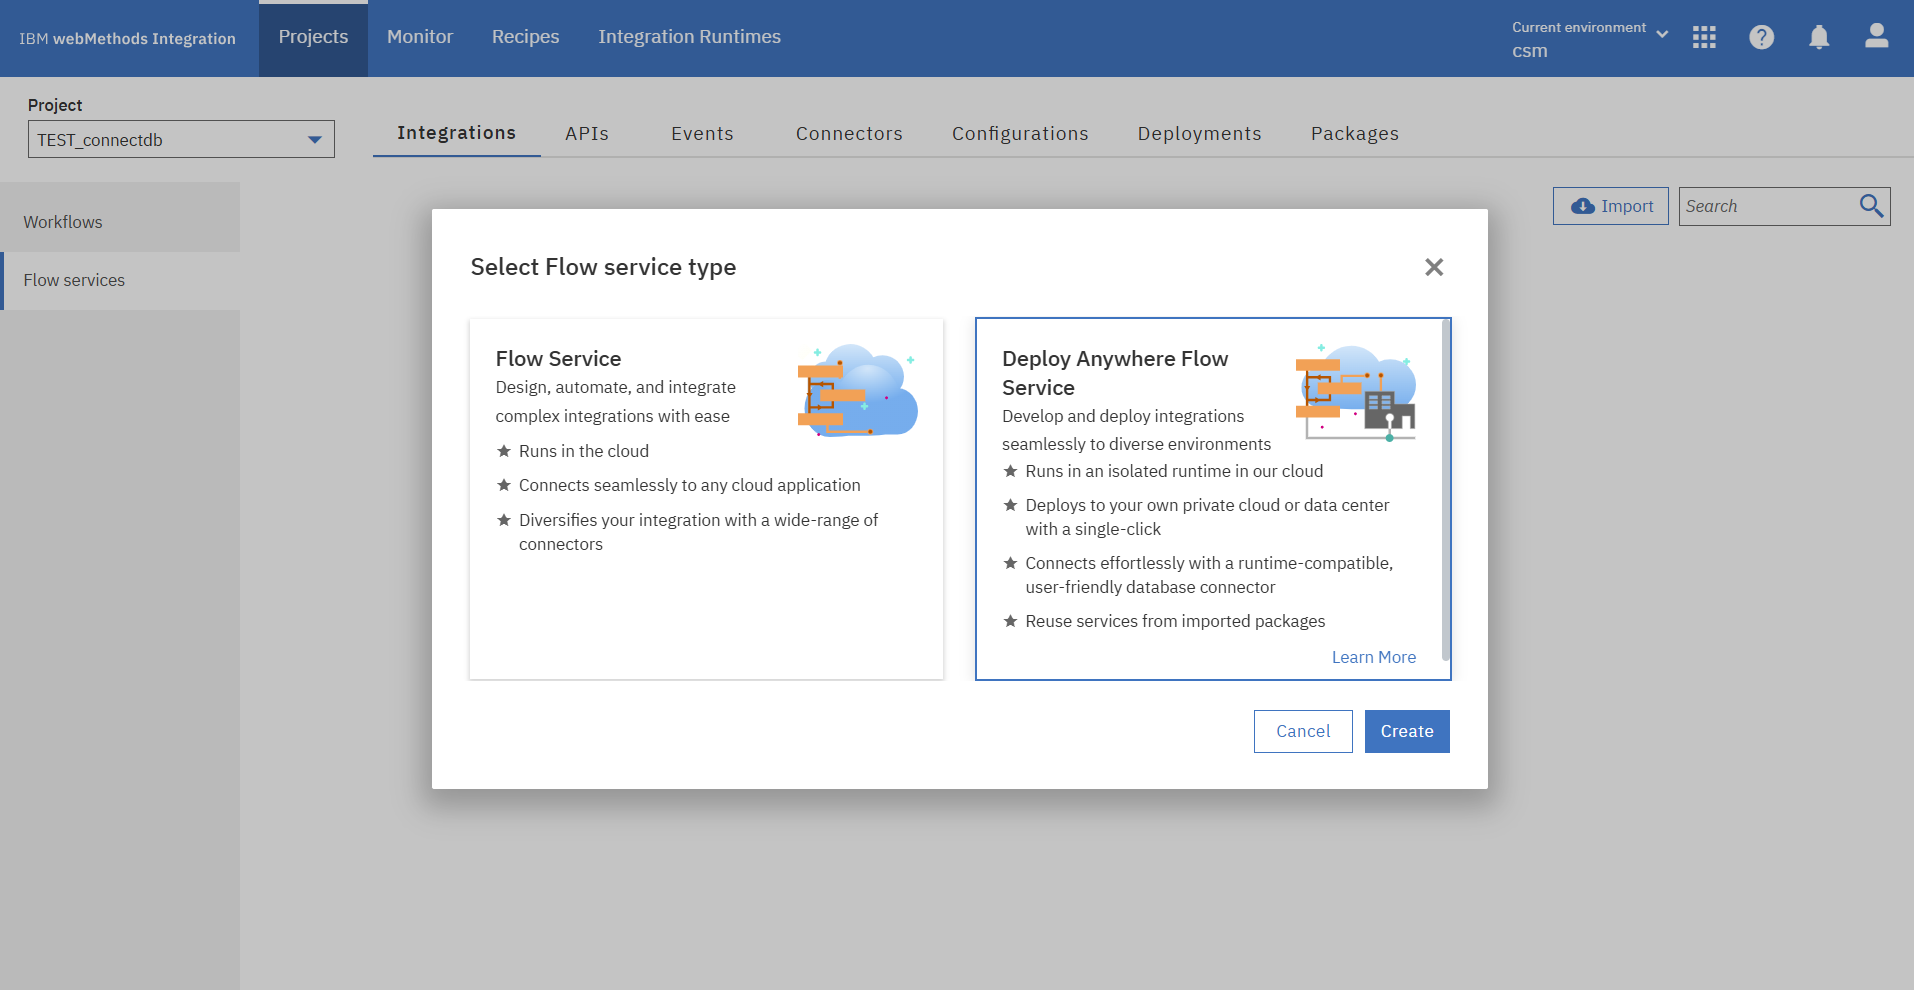
Flow Service名を入力し、Flow Serviceデプロイ先のRuntimeを選択します。

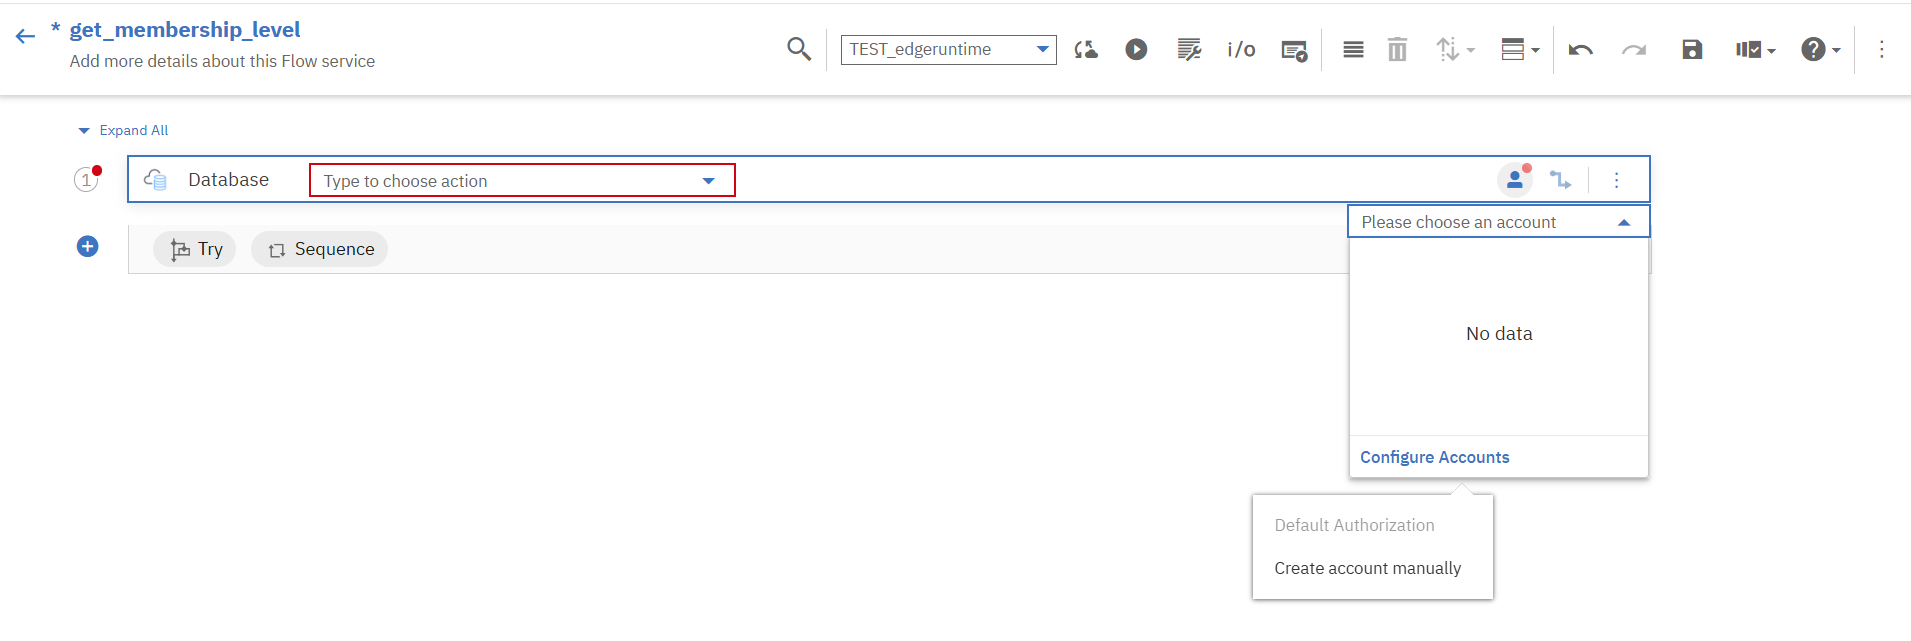
Databaseアプリケーションを選択します。

2.2 DBアカウントの作成・JDBC接続設定
DBアカウントのアイコンを押下し、「Configure Accounts」→「Create account manually」を選択します。
画面に従ってDBの情報を入力し、アカウントを追加していきます。
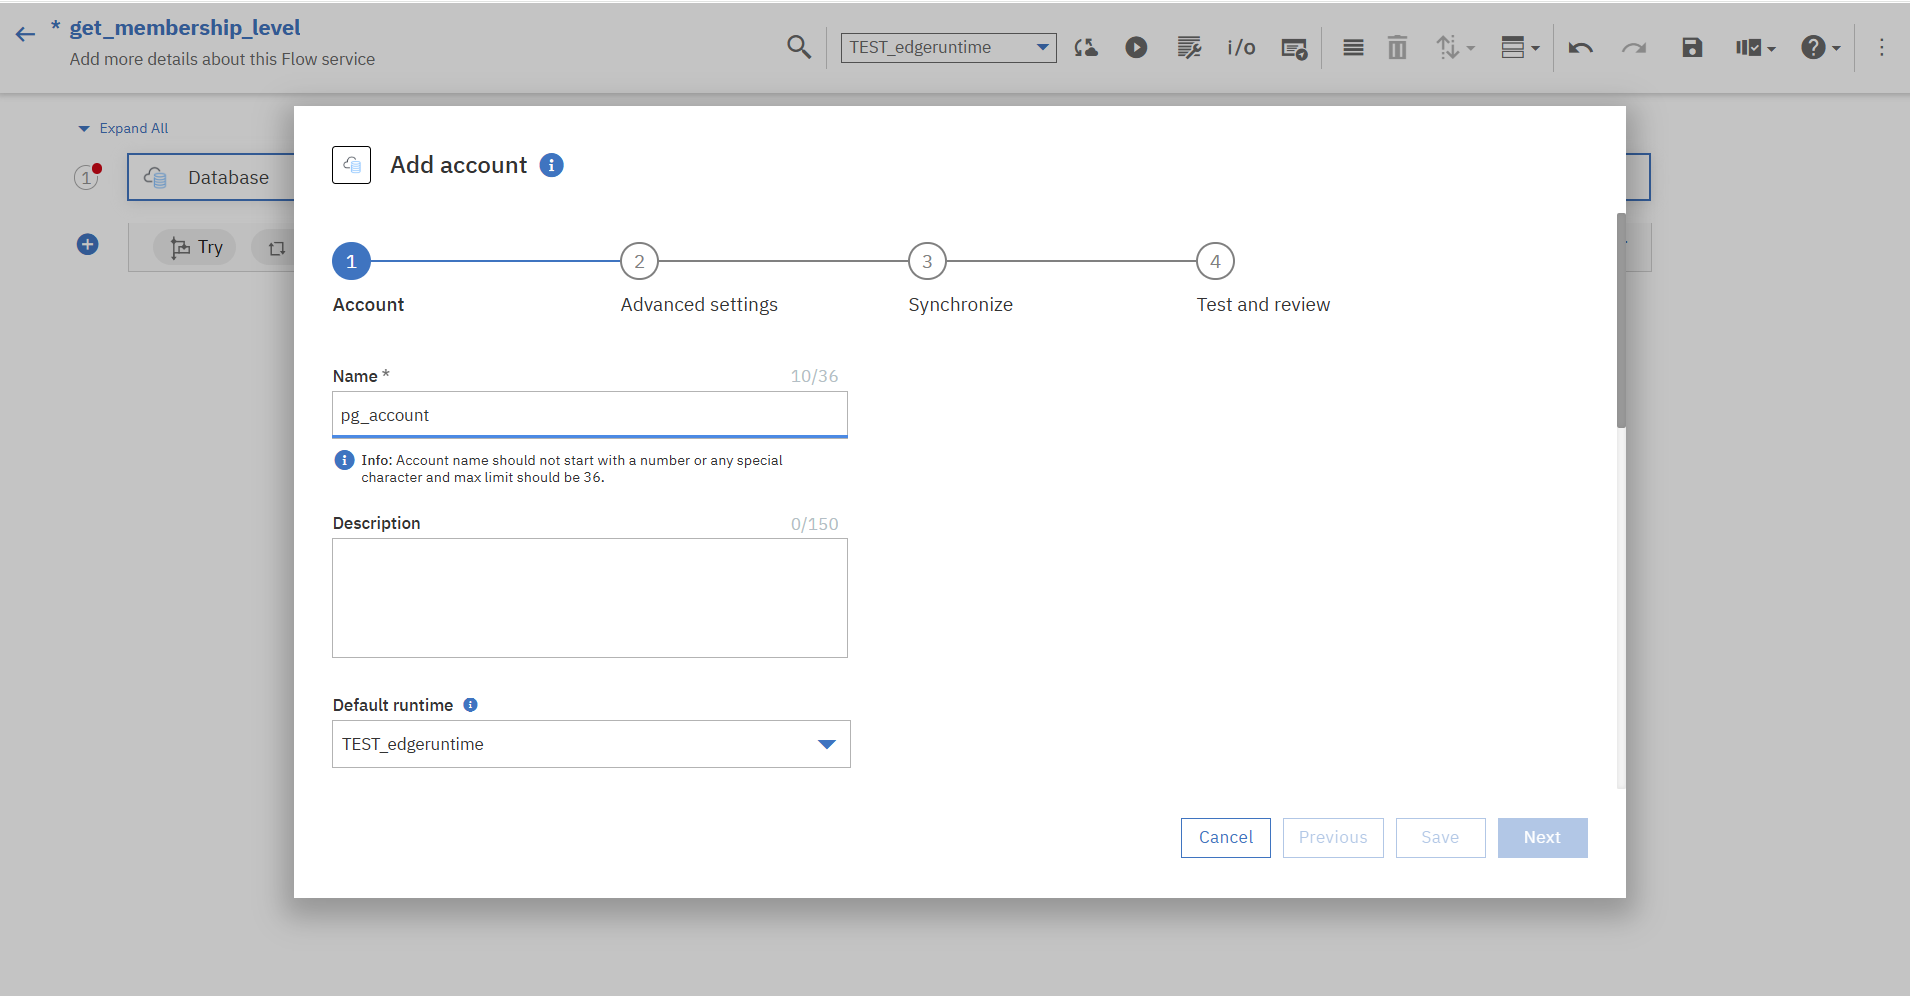
【入力例】
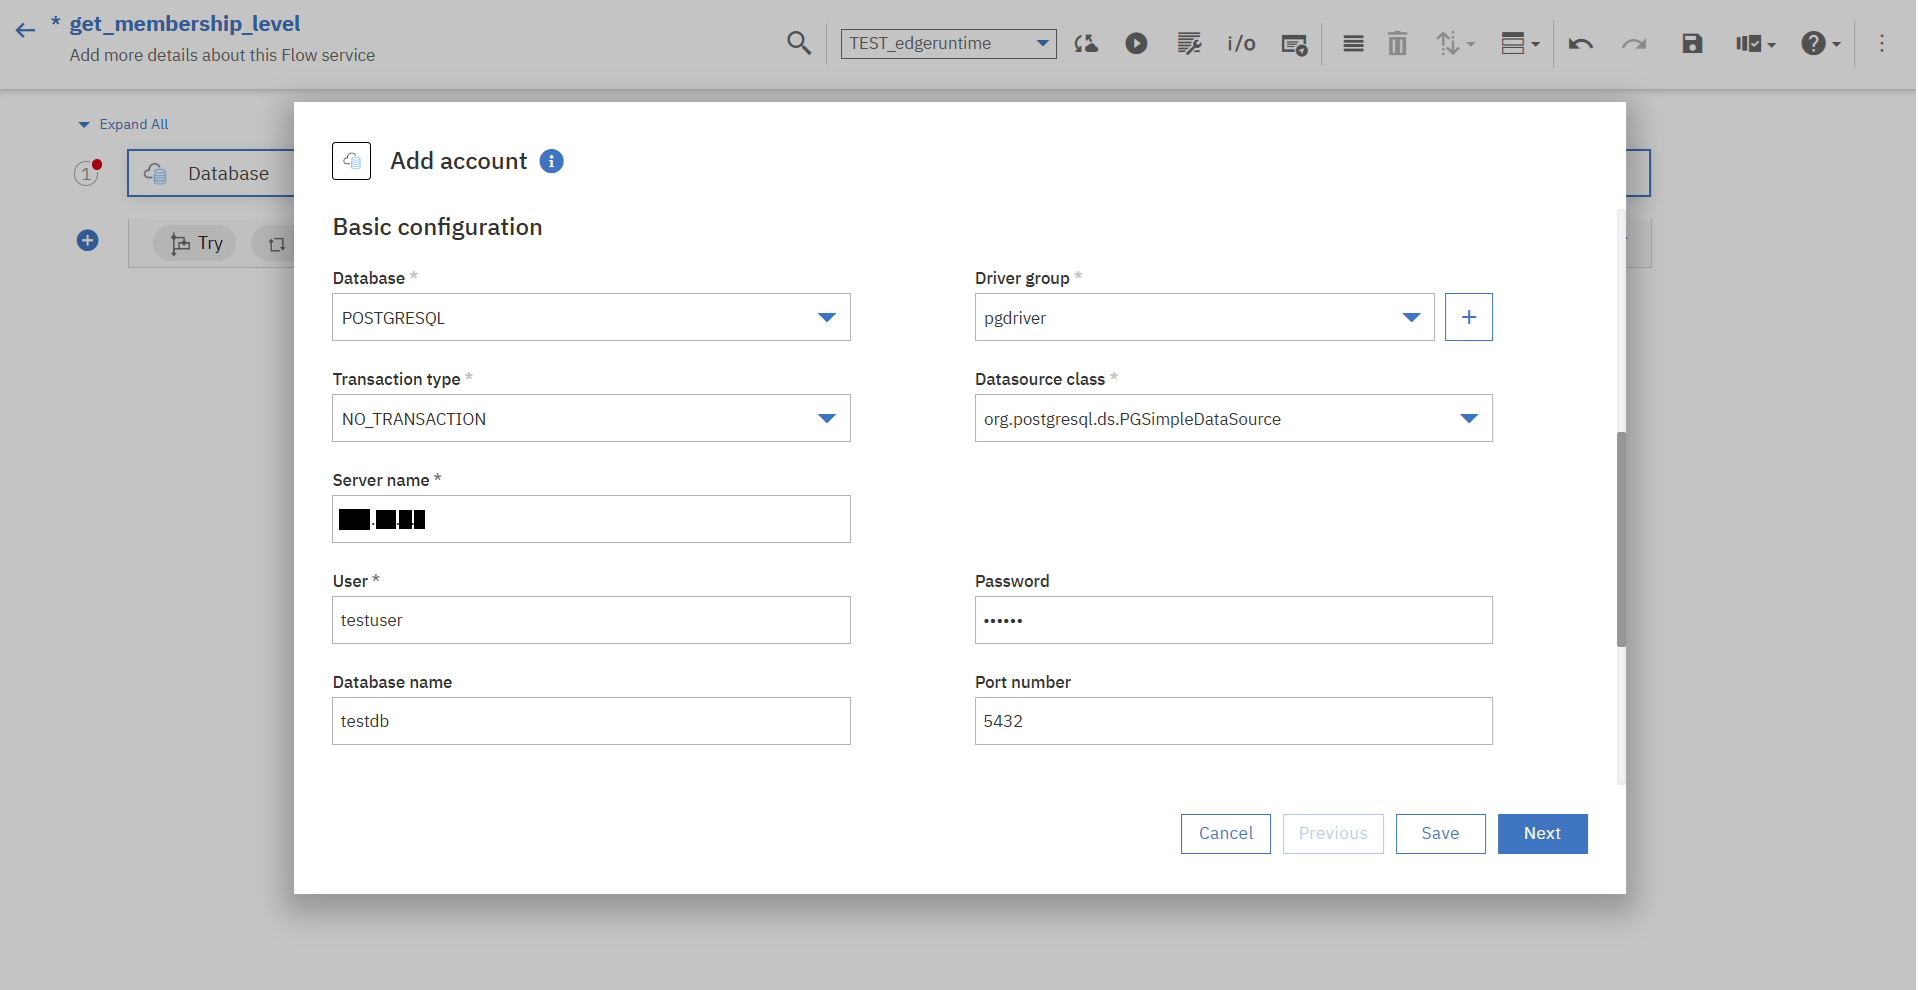
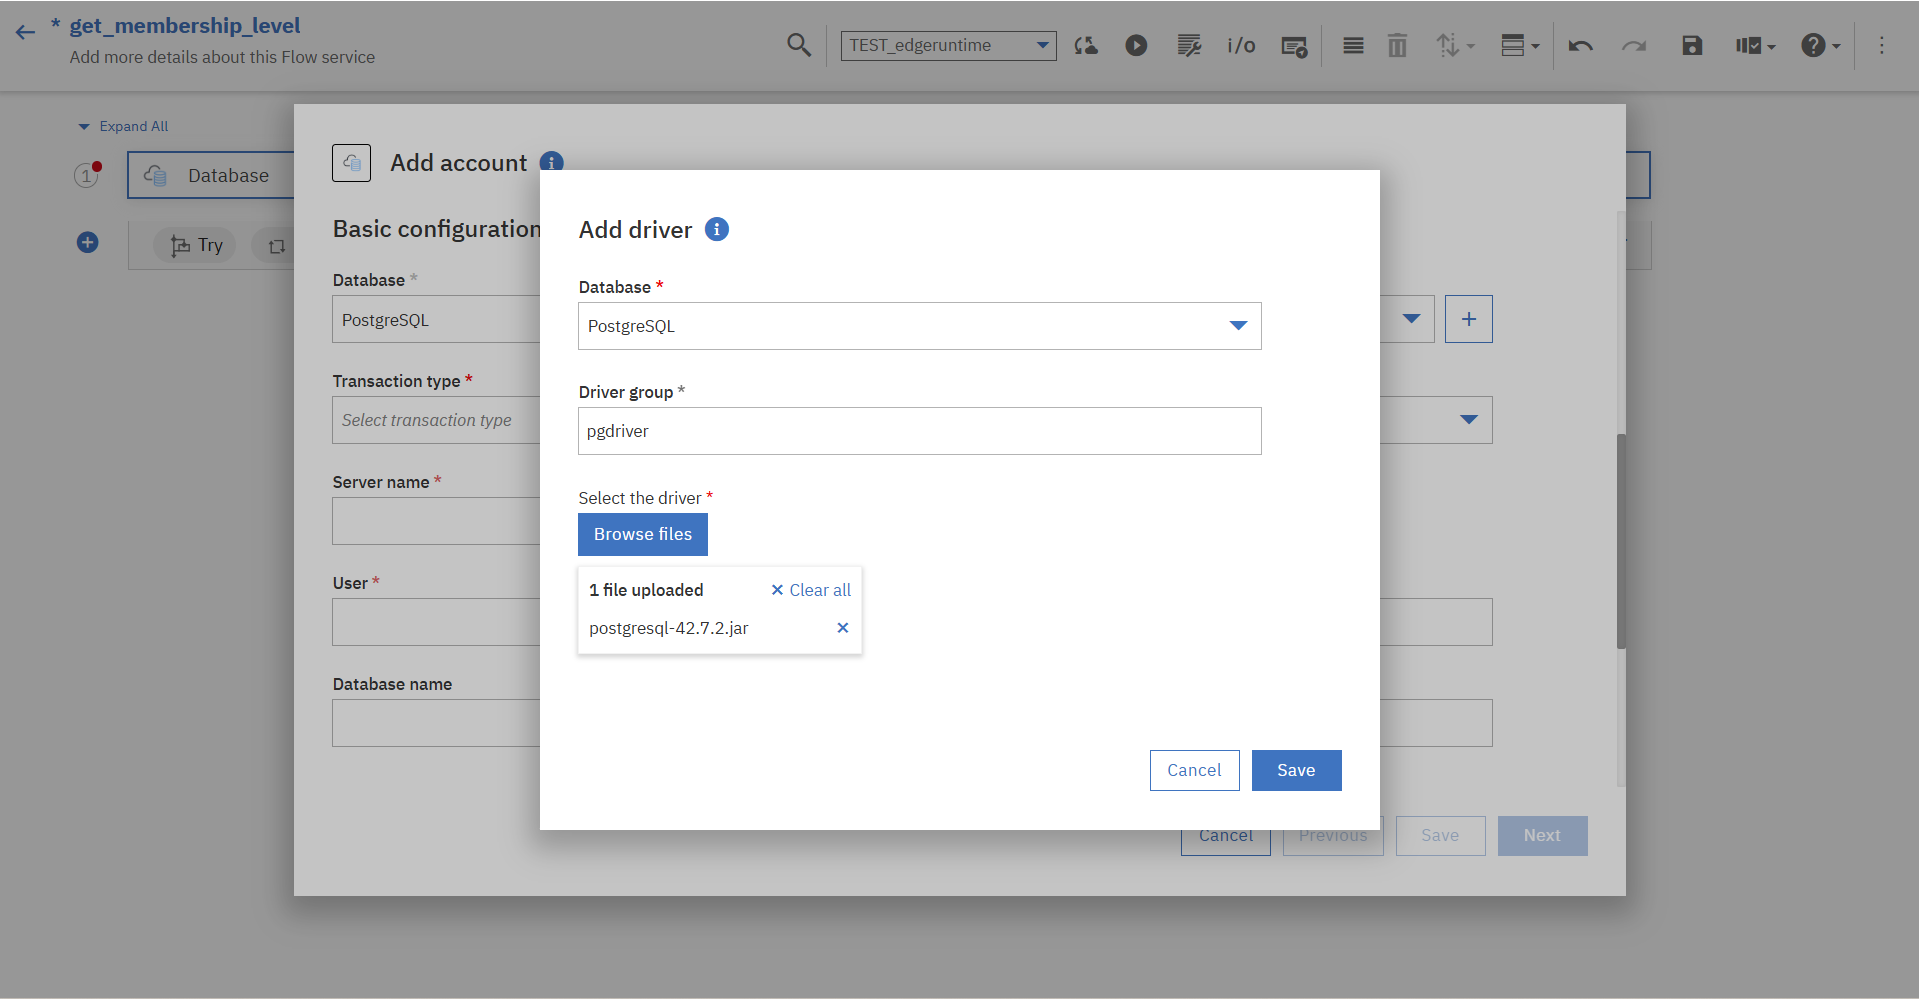
※「Driver group」欄では、PostgreSQLのJDBCドライバーのjarファイルをアップロードして「Driver group」を新規作成しています。
DBのアカウント情報の入力、その他設定を終えるとアカウントが作成され、自動的にEdge Runtimeに構成情報がデプロイされます。

DB接続テストボタンと確認画面が表示されるので、接続テストを行います。

接続テストに問題がなかったので、上記確認画面の「Enable」を押下します。

DBアカウントを正常に有効化できました。

2.3 DBへのアクション設定
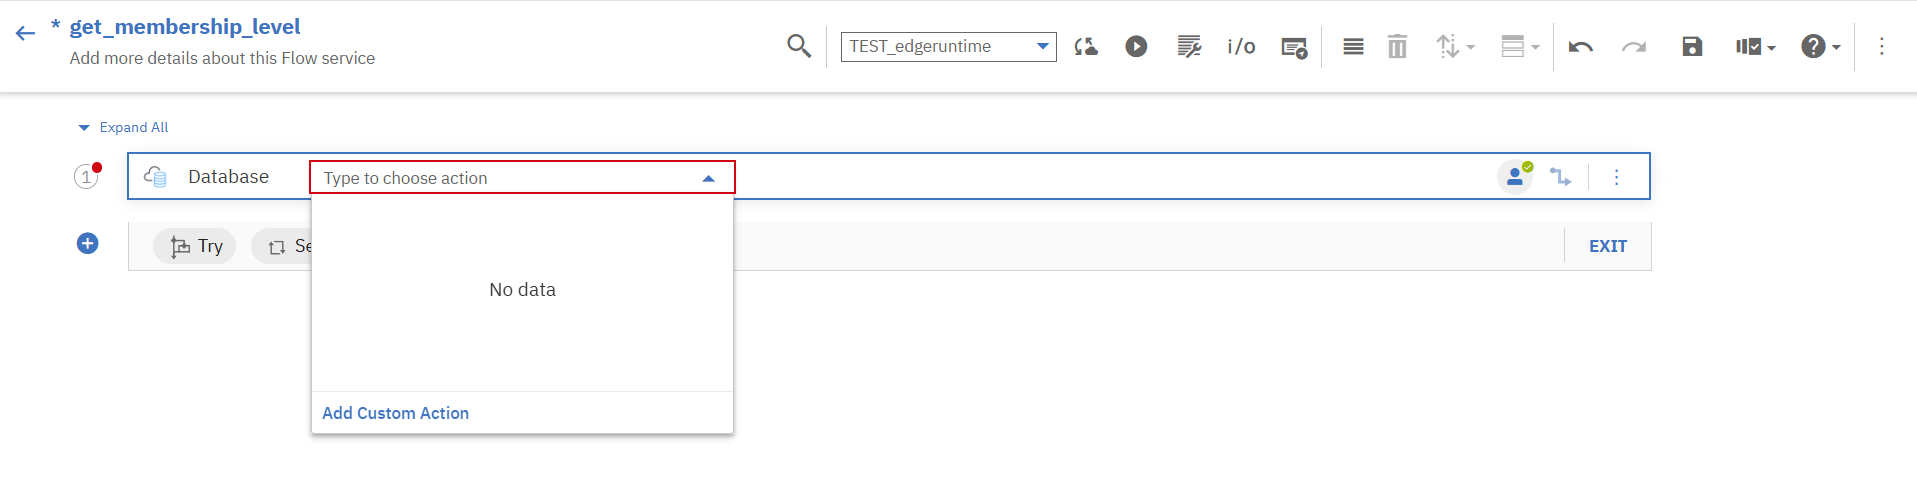
アカウント追加ができたので、DBへのアクションを作成・設定していきます。
「Add Custom Action」を押下します。
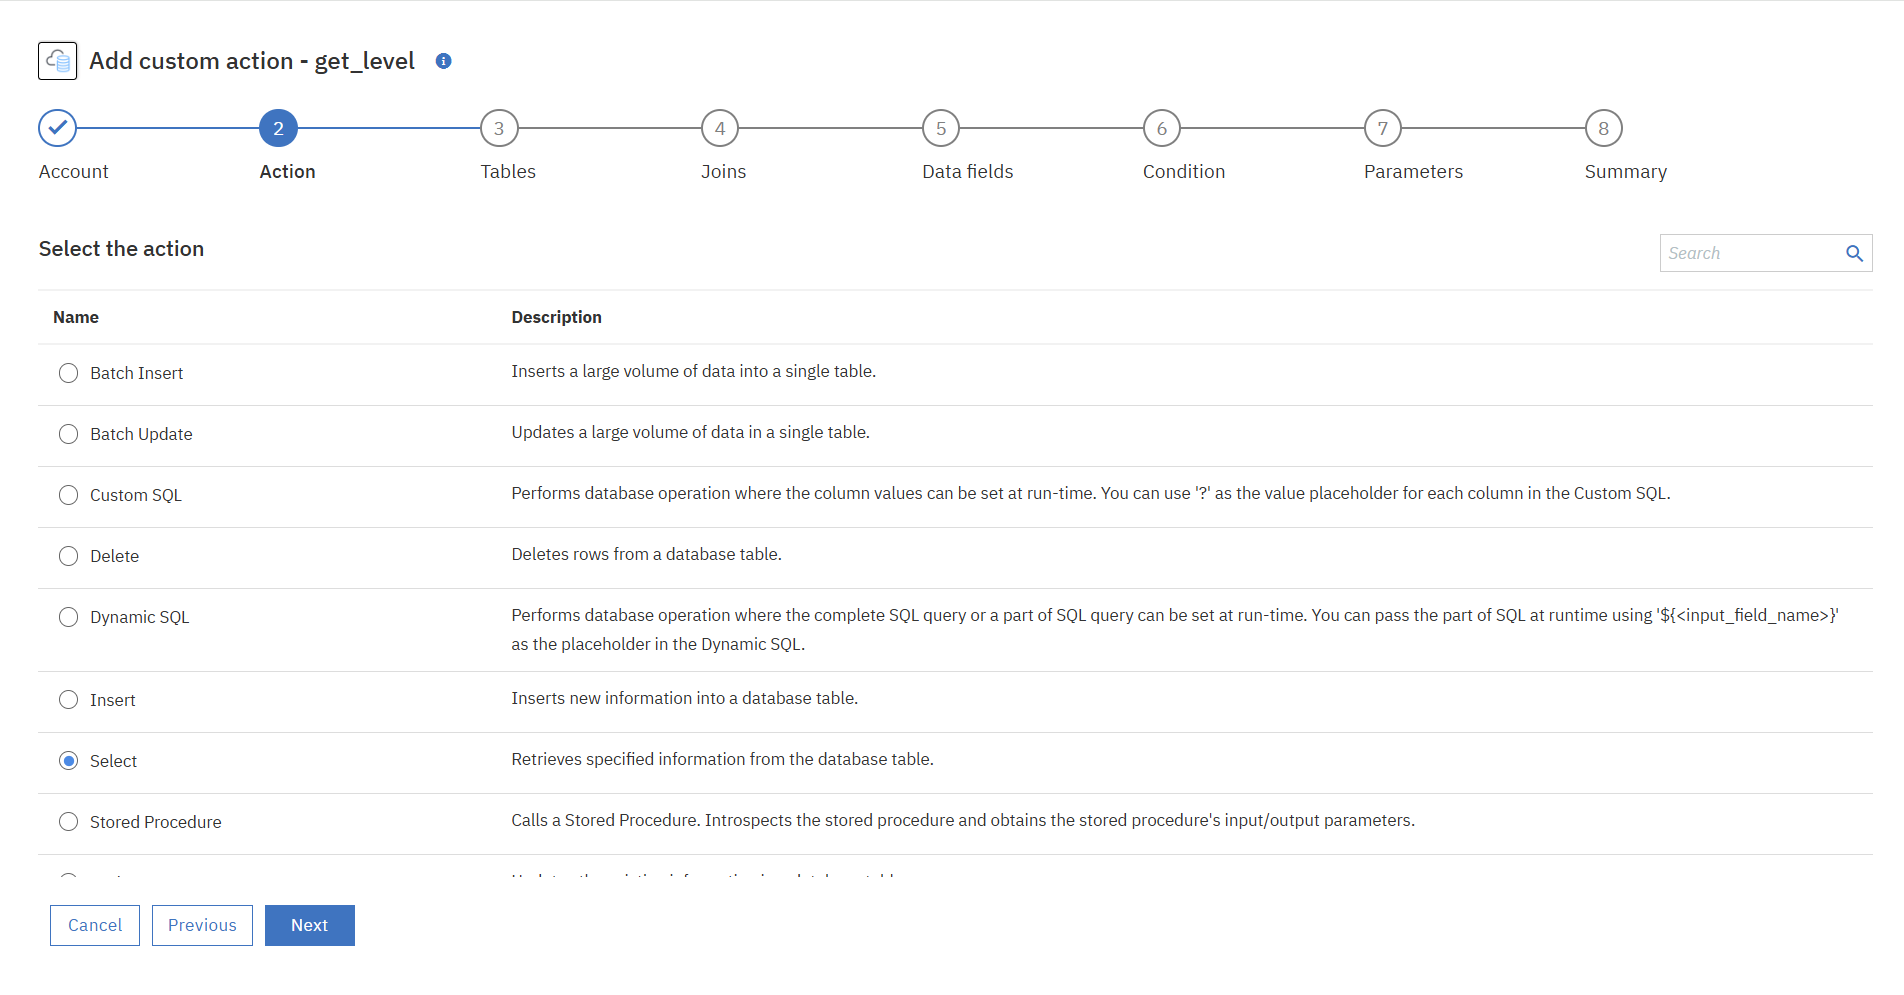
①作成するアクションに関する項目を入力します。

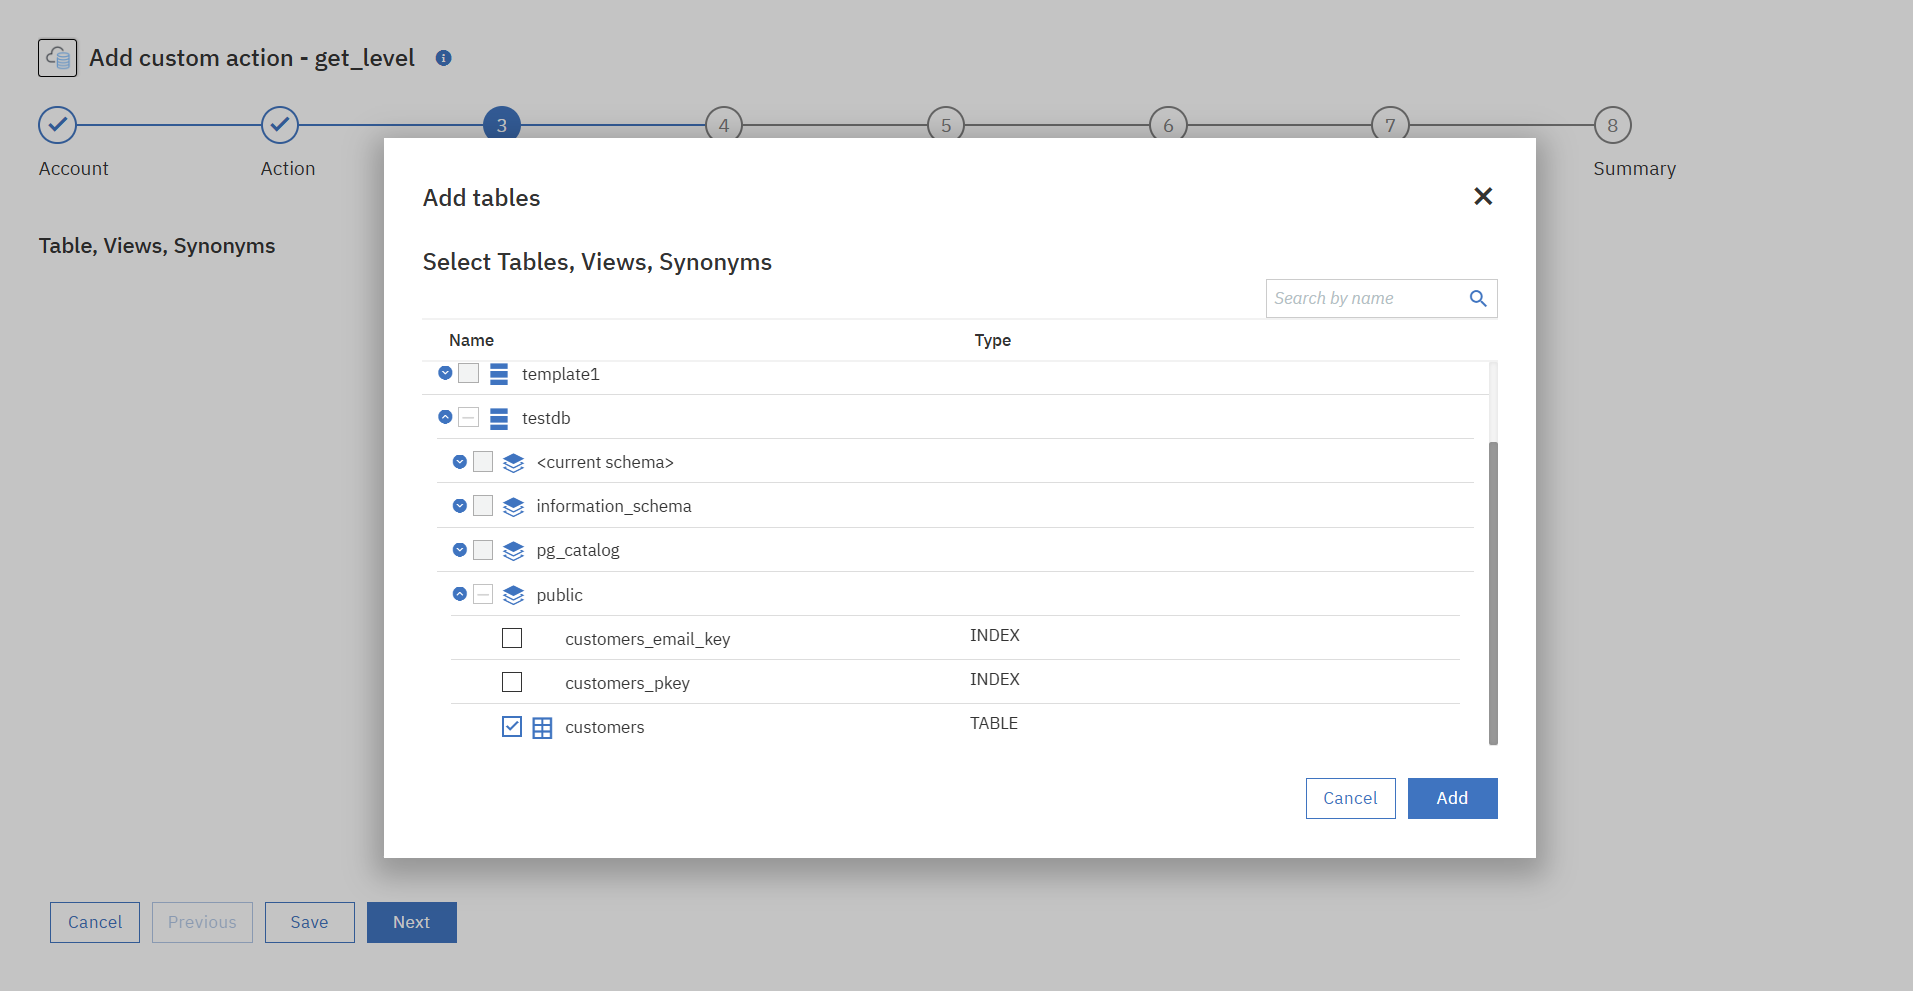
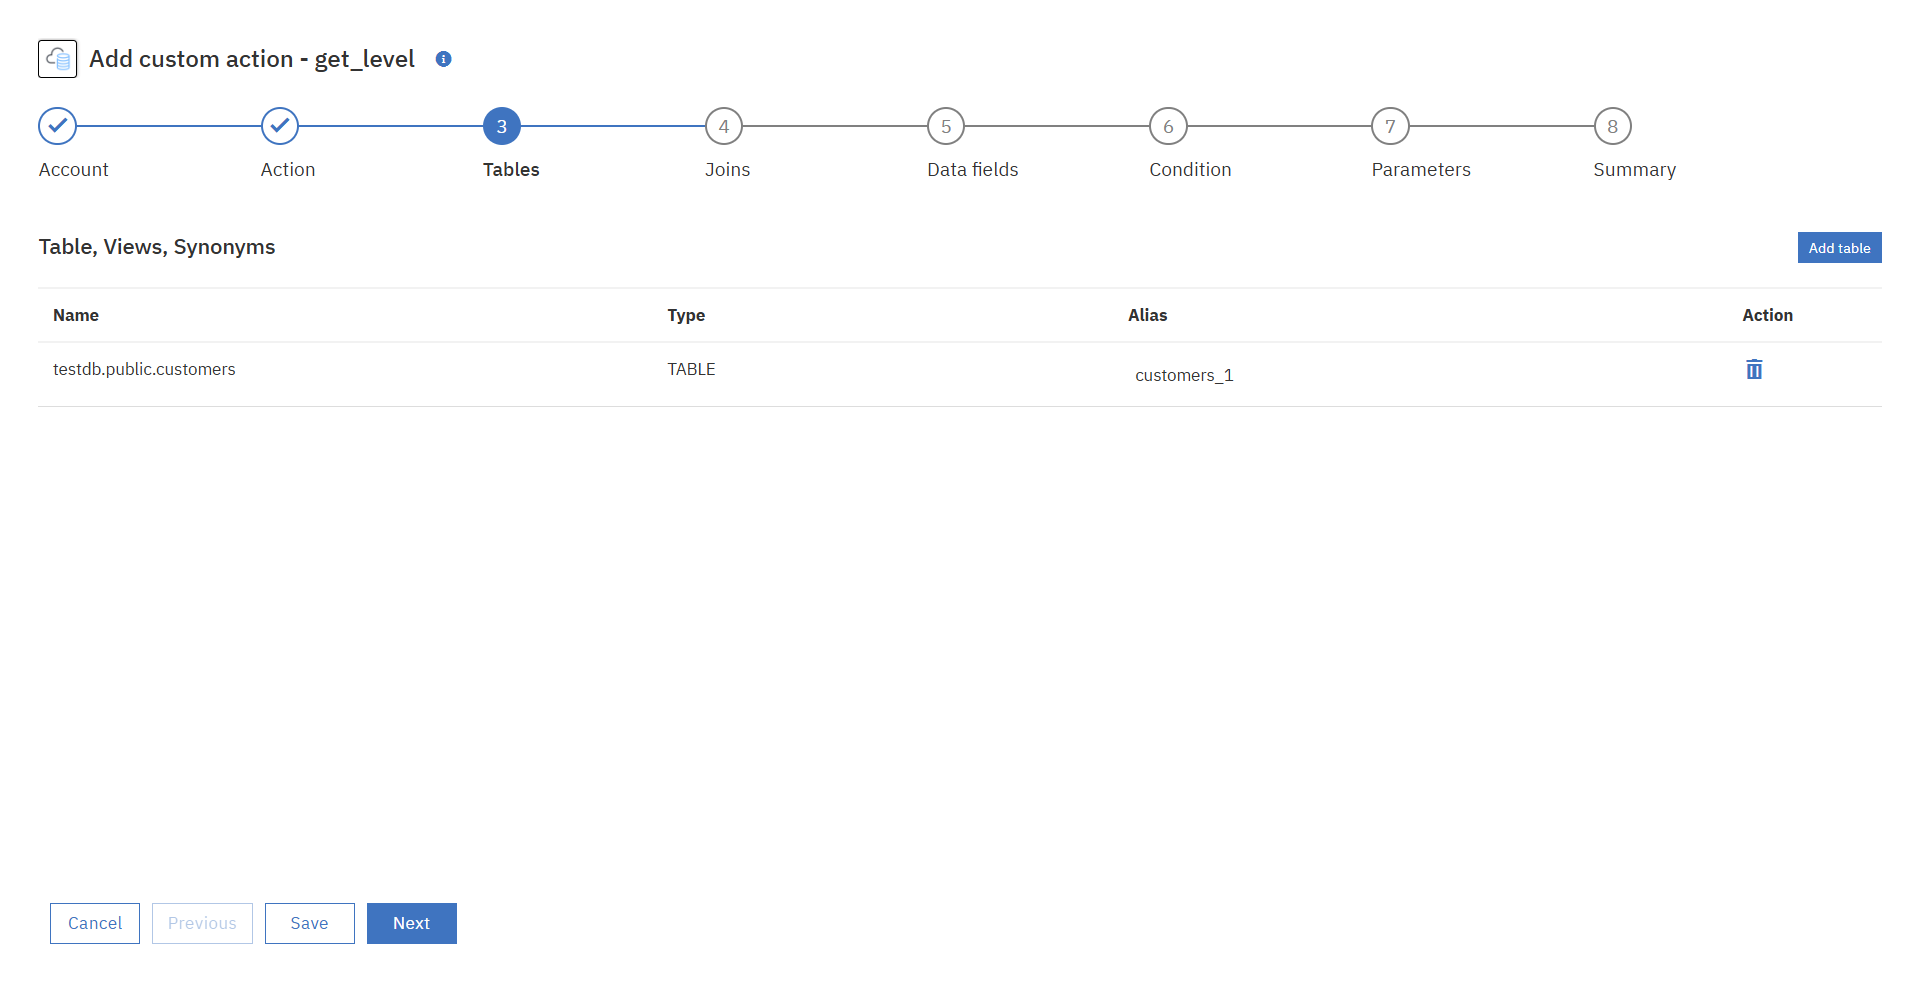
②行いたいアクションを選択します。今回は単にデータを抽出するのみなので、「Select」を選択してクエリを定義していきます。
③接続したDBのテーブル情報がFetchされているので、使用するテーブルを選択します。
④joinの追加は今回はスキップします。
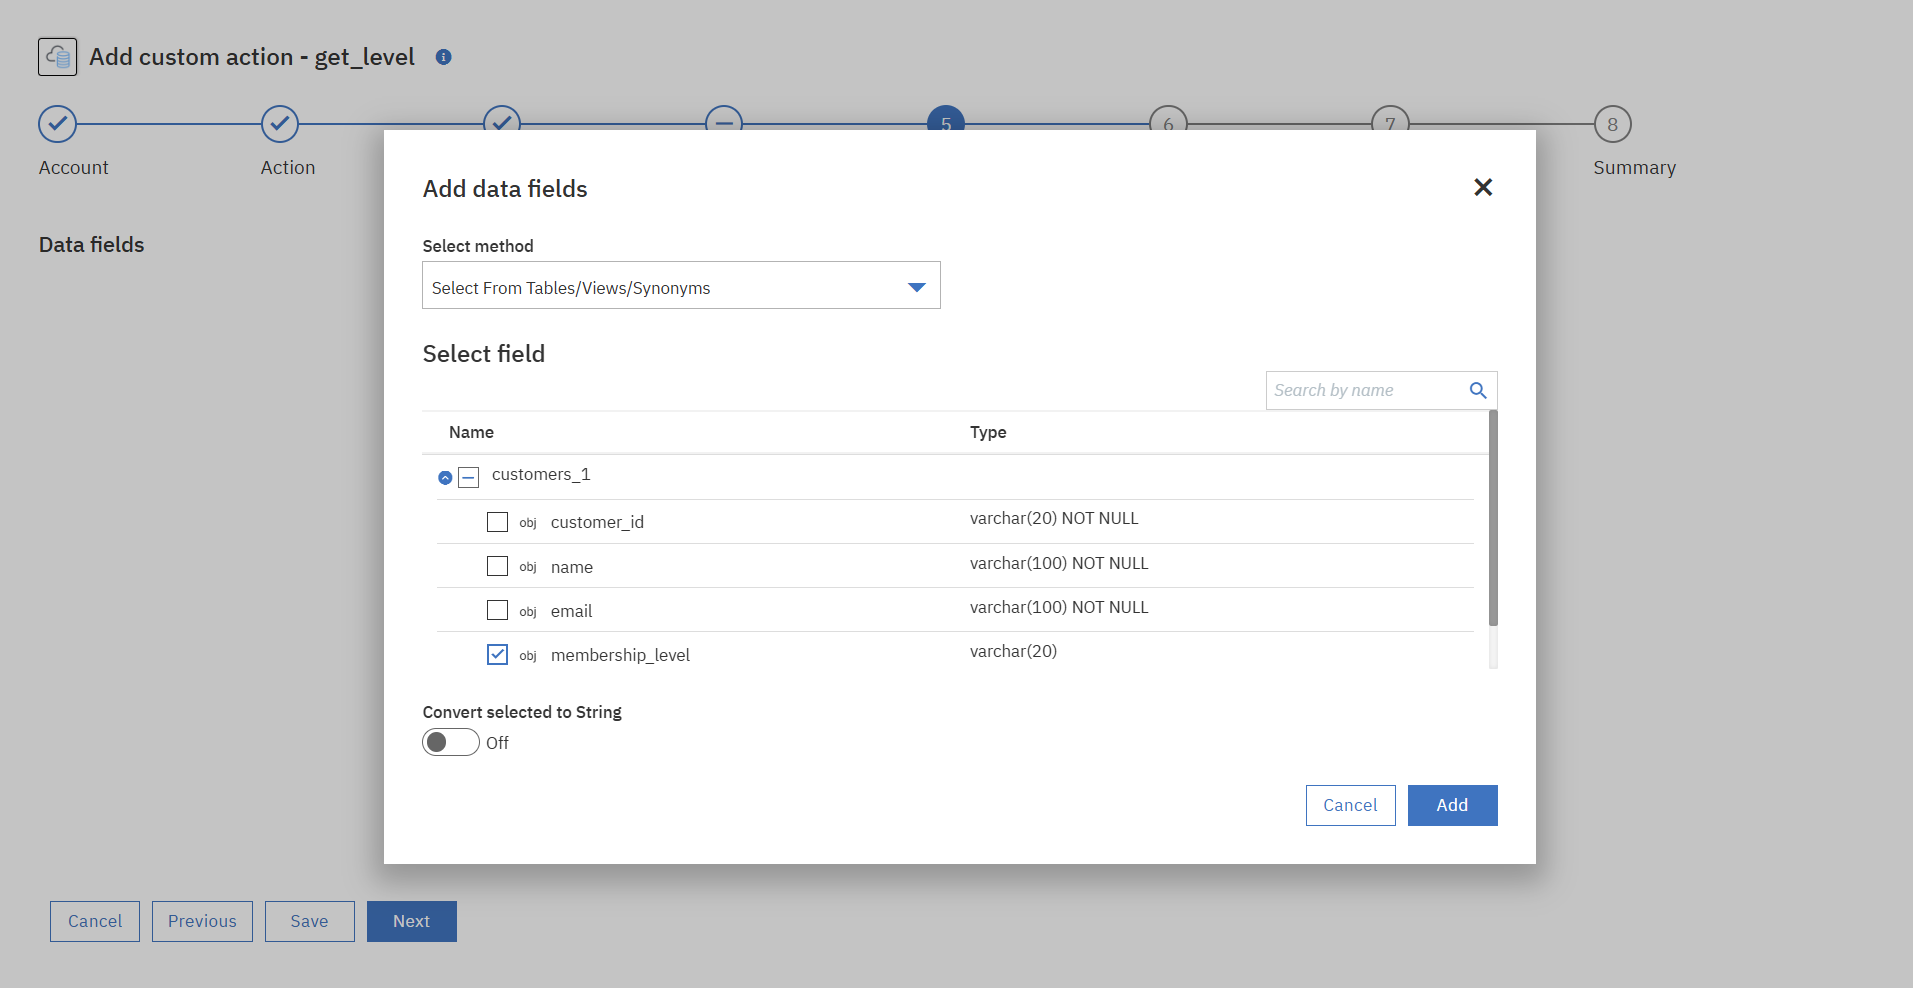
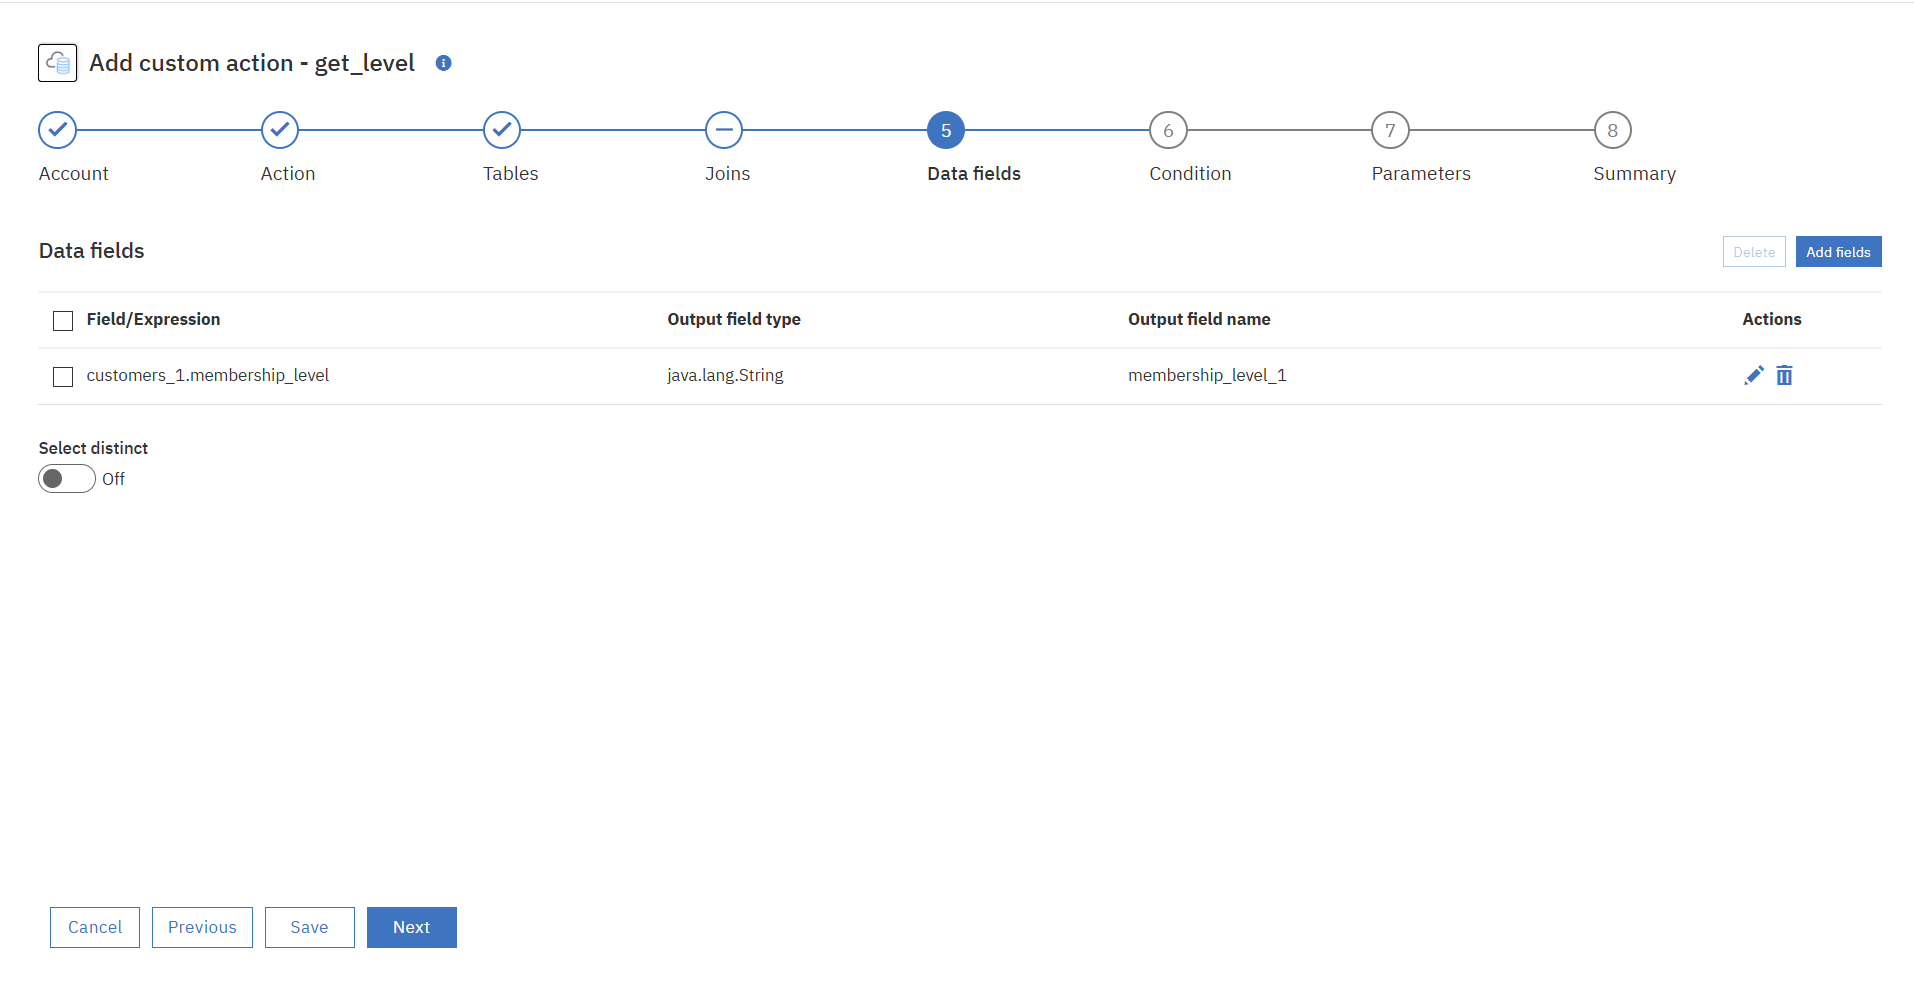
⑤Data fieldを追加します。今回は選択したテーブルから実際に応答させたいフィールドのみ選択します。
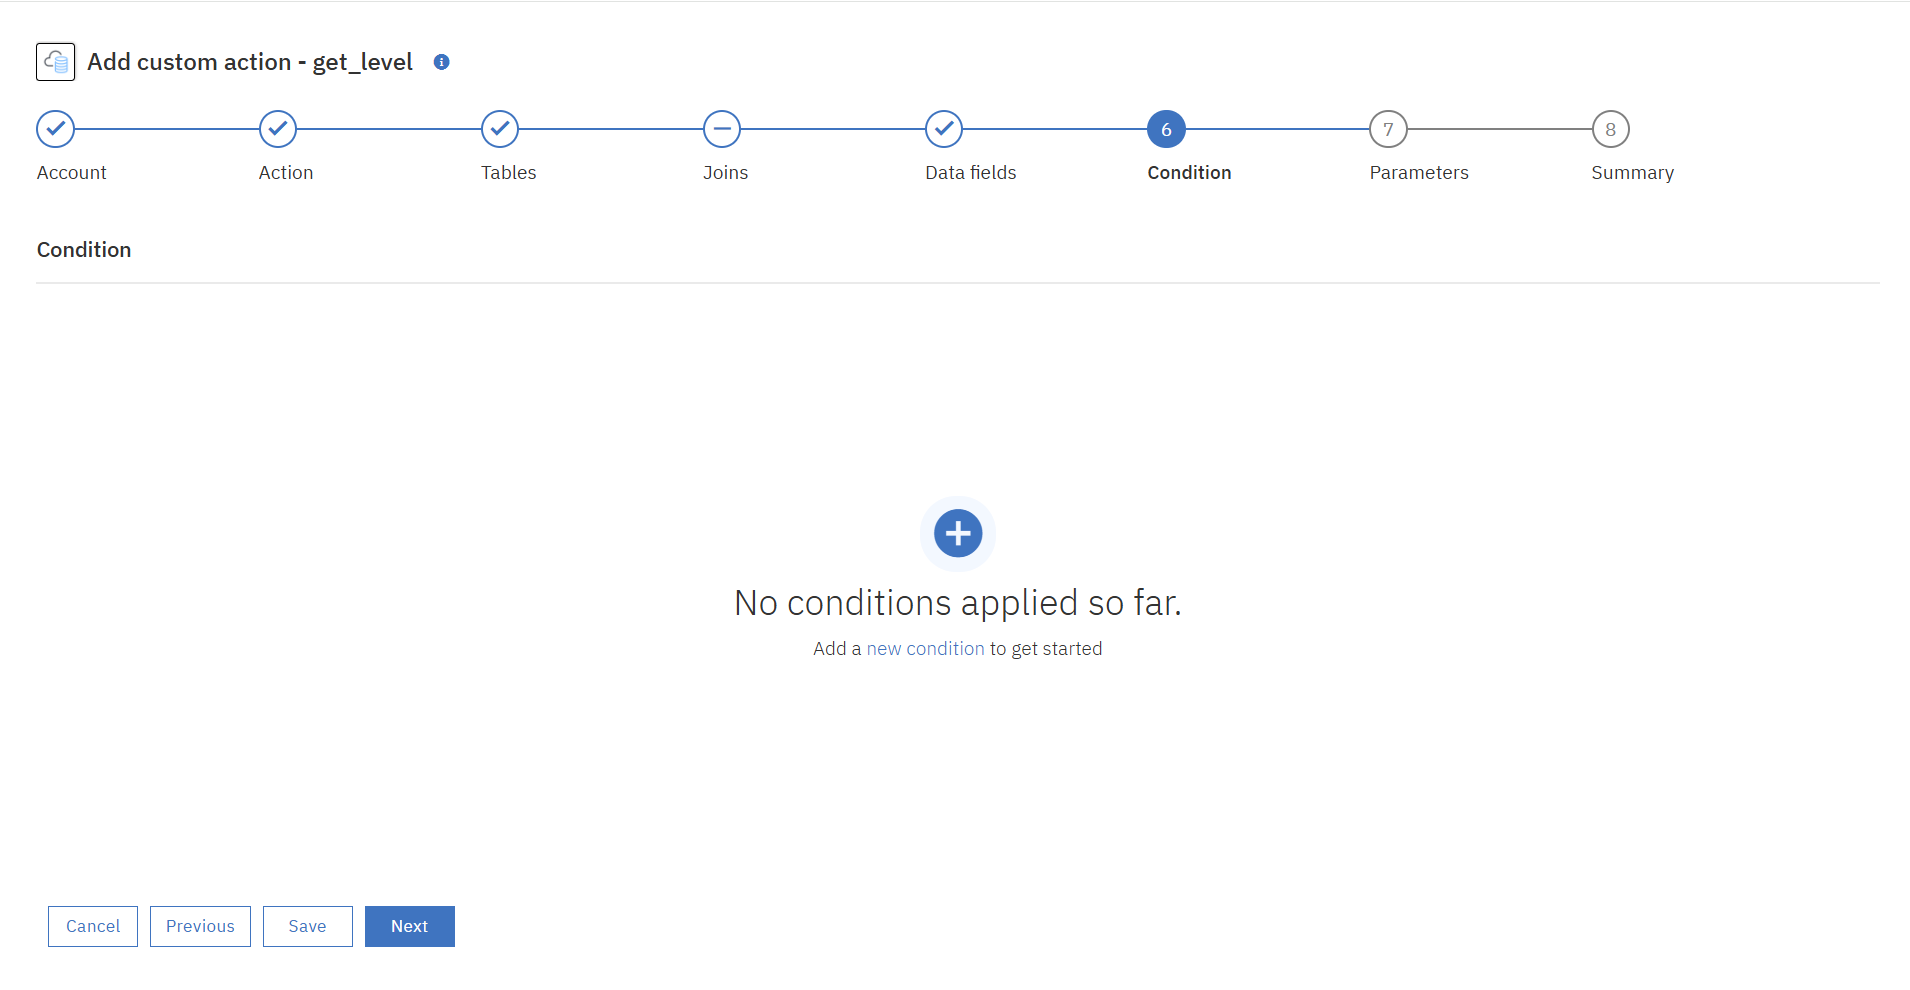
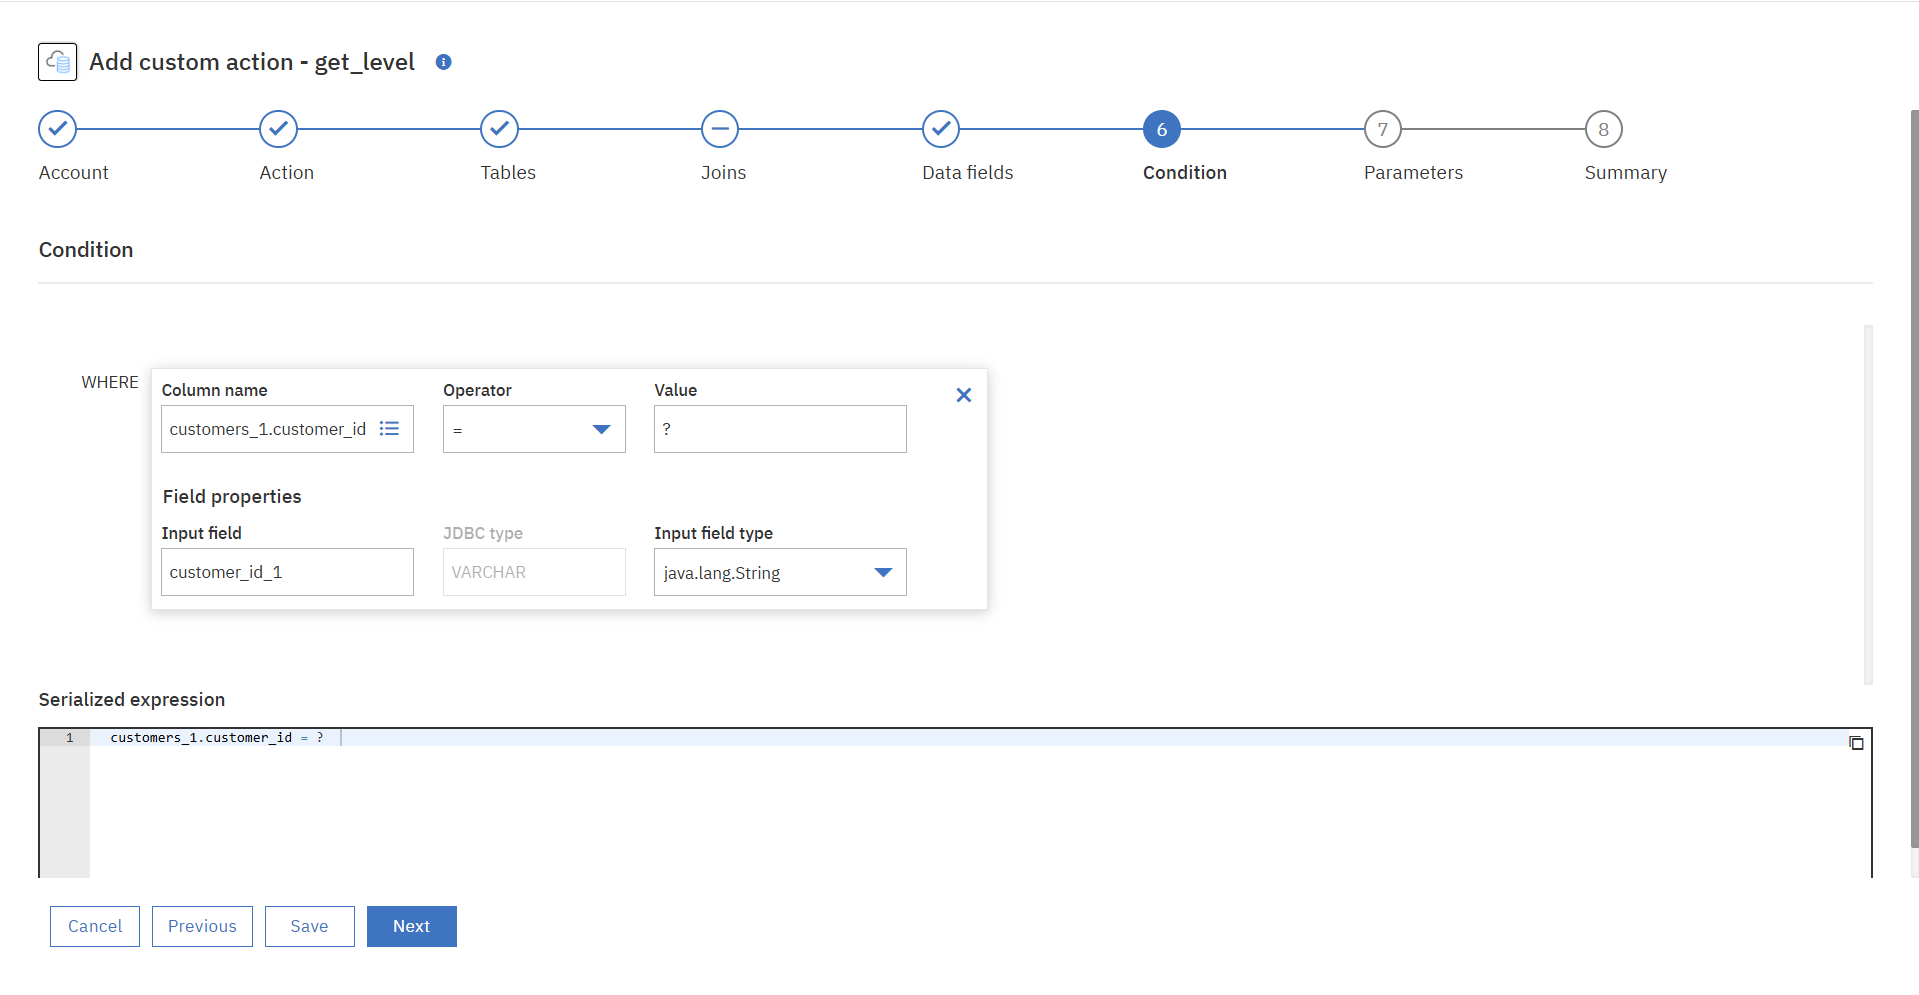
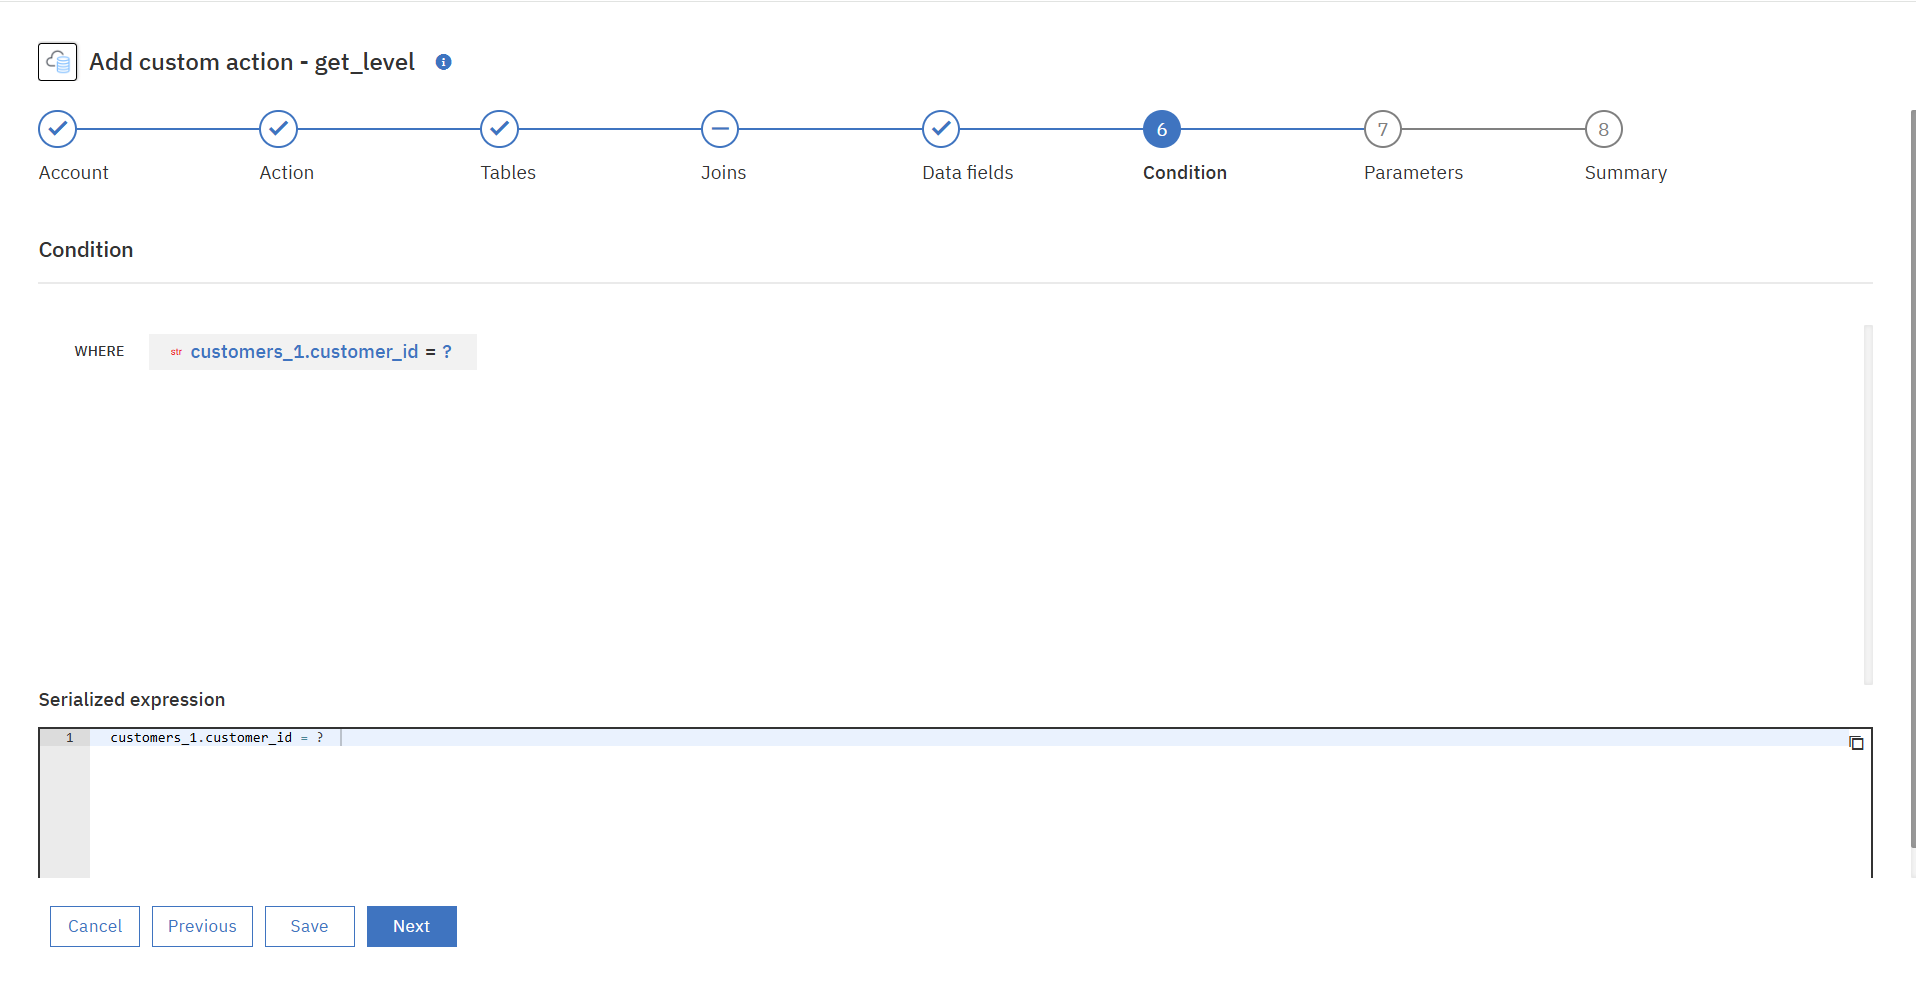
⑥条件文を追加します。
今回はインプットデータを検索条件にしてクエリを実行し、データを抽出するFlow Serviceを作成したいので「インプットデータ(customer_id)=?」という条件文を追加します。
⑦実行パラメーターの追加は今回はスキップします。
⑧Summaryが表示されます。DBアカウントや定義したクエリに問題なければ「Done」を押下します。

アカウント、アクションともに作成したものが選択されていることを確認します。

2.4 パラメーター設定
後ほど作成するWorkflowを通して連携されるリクエストデータをFlow Serviceに渡すため、Flow Serviceのインプットを定義します。
Flow Service画面上部メニューにある「i/o」を押下します。

「Input Field」タブからData Fieldの追加を行います。
今回は以下のような内容で定義しました。

更にデータマッピングを行います。
ドラッグアンドドロップで対応させたいデータ、今回の場合は「id_input」と「customer_id_1」をつないでいきます。
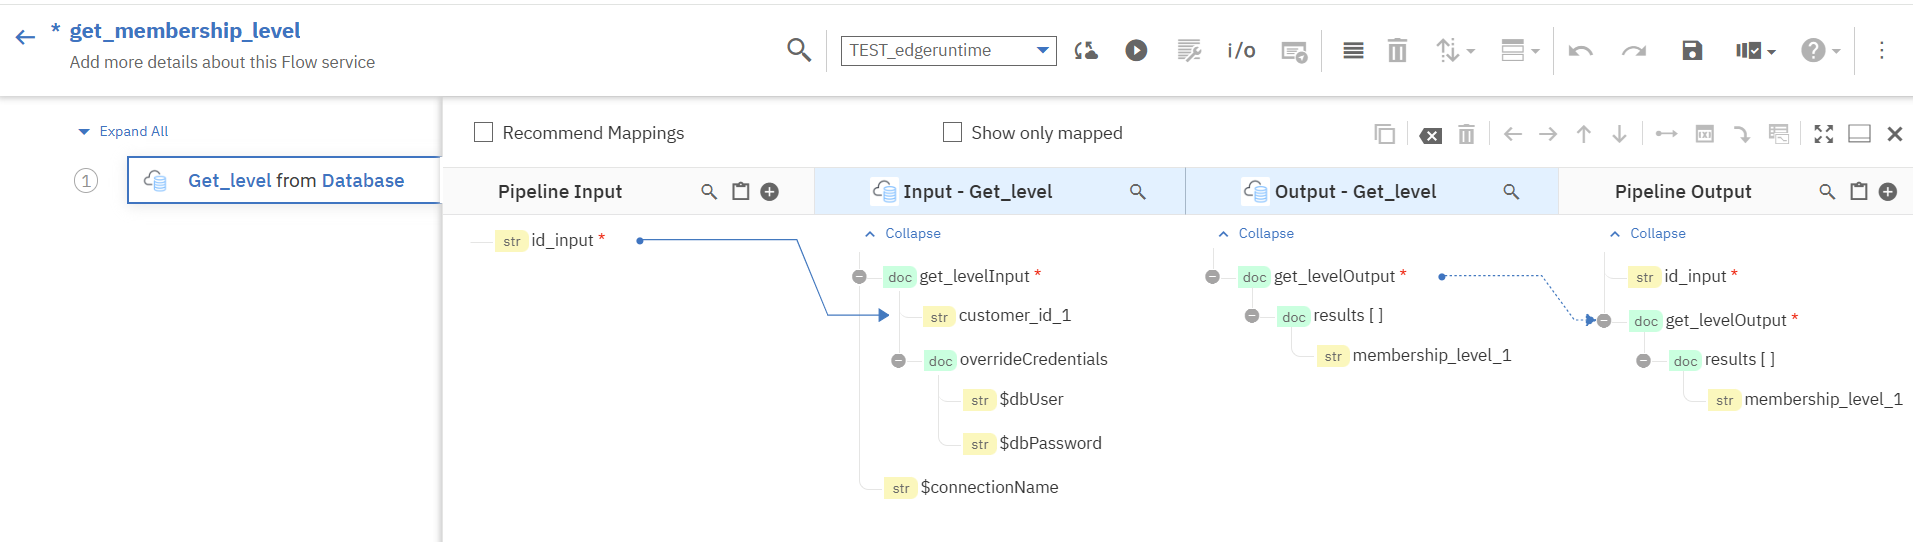
設定が完了したら、保存とEdge runtimeへの同期(「Syncronize latest changes to the selected runtime」)を行います。

2.5 Flow Serviceのテスト
Flow Service単体のテストを行います。
同期ボタンの右隣の「Run」を押下し、テスト用のインプットデータを入力します。
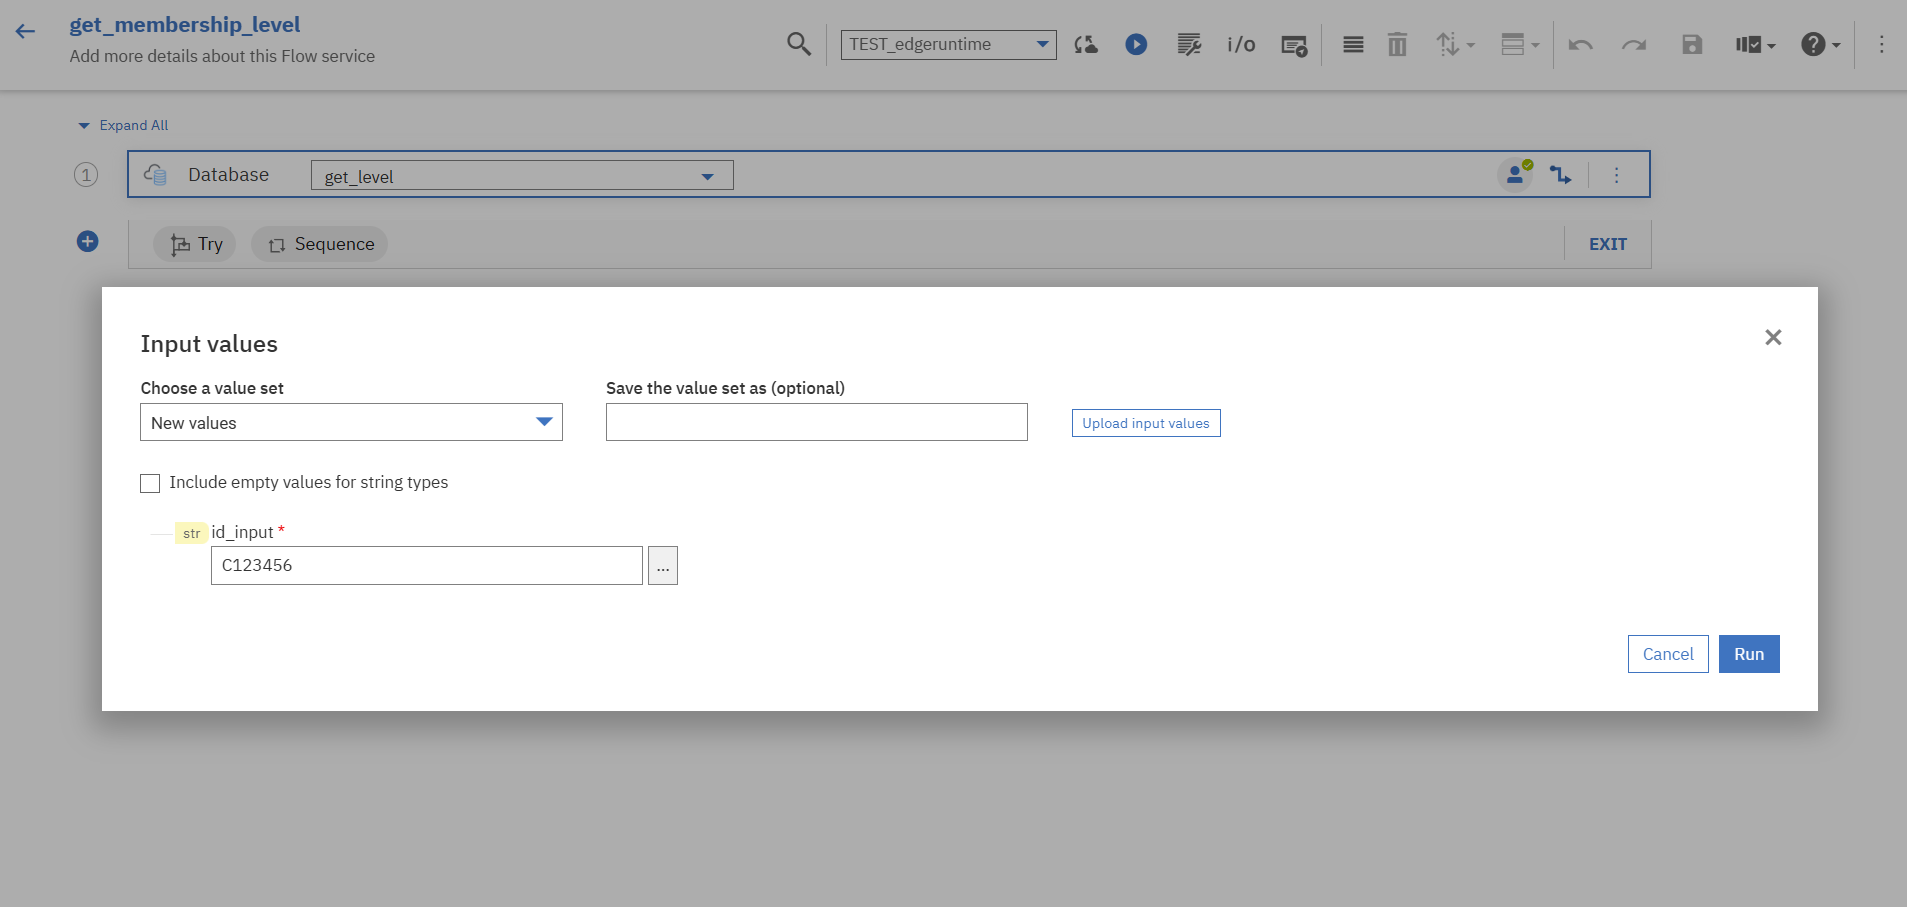
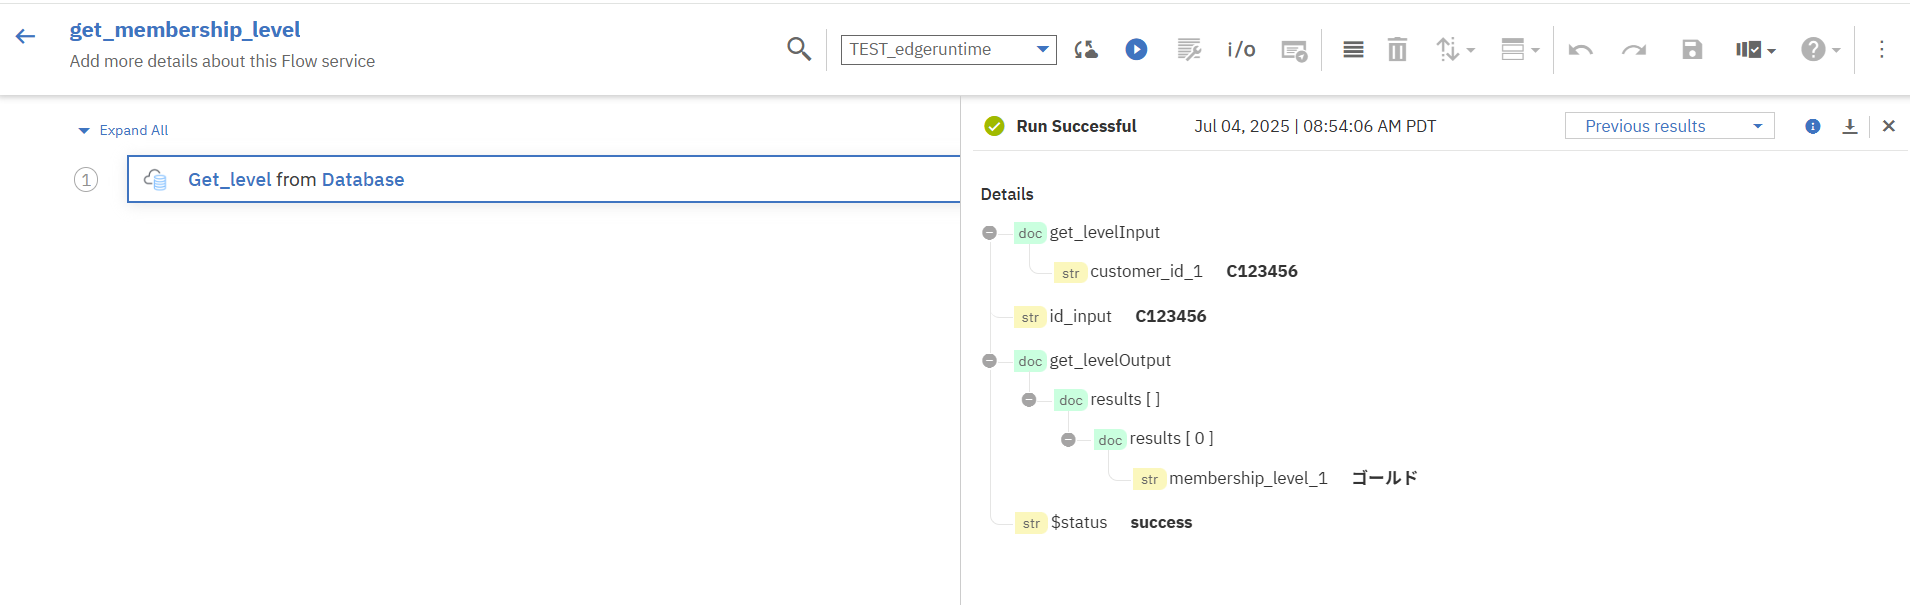
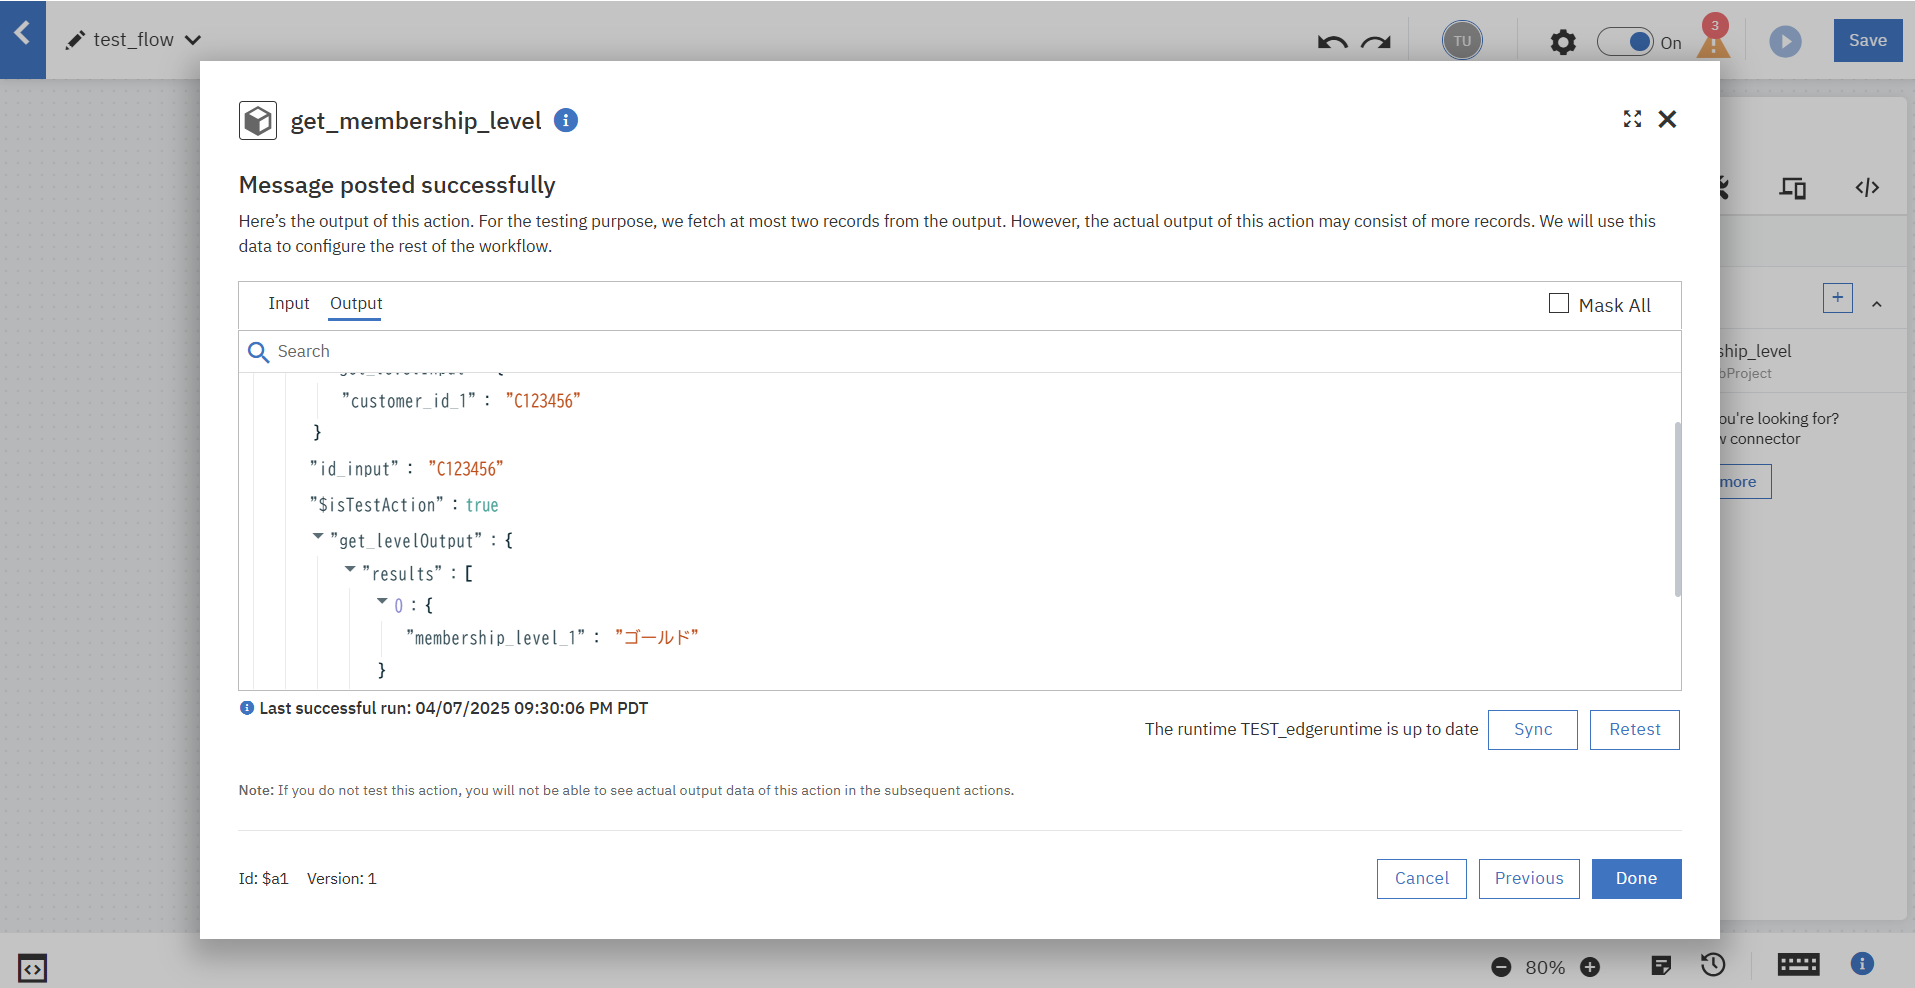
「Run」を押下するとテスト結果が返ってきます。
問題なく想定したデータ「membership_level_1」が応答されました。
3. Workflow作成
Flow ServiceでPostgreSQLにクエリを行い、その結果を応答するフローを作成します。

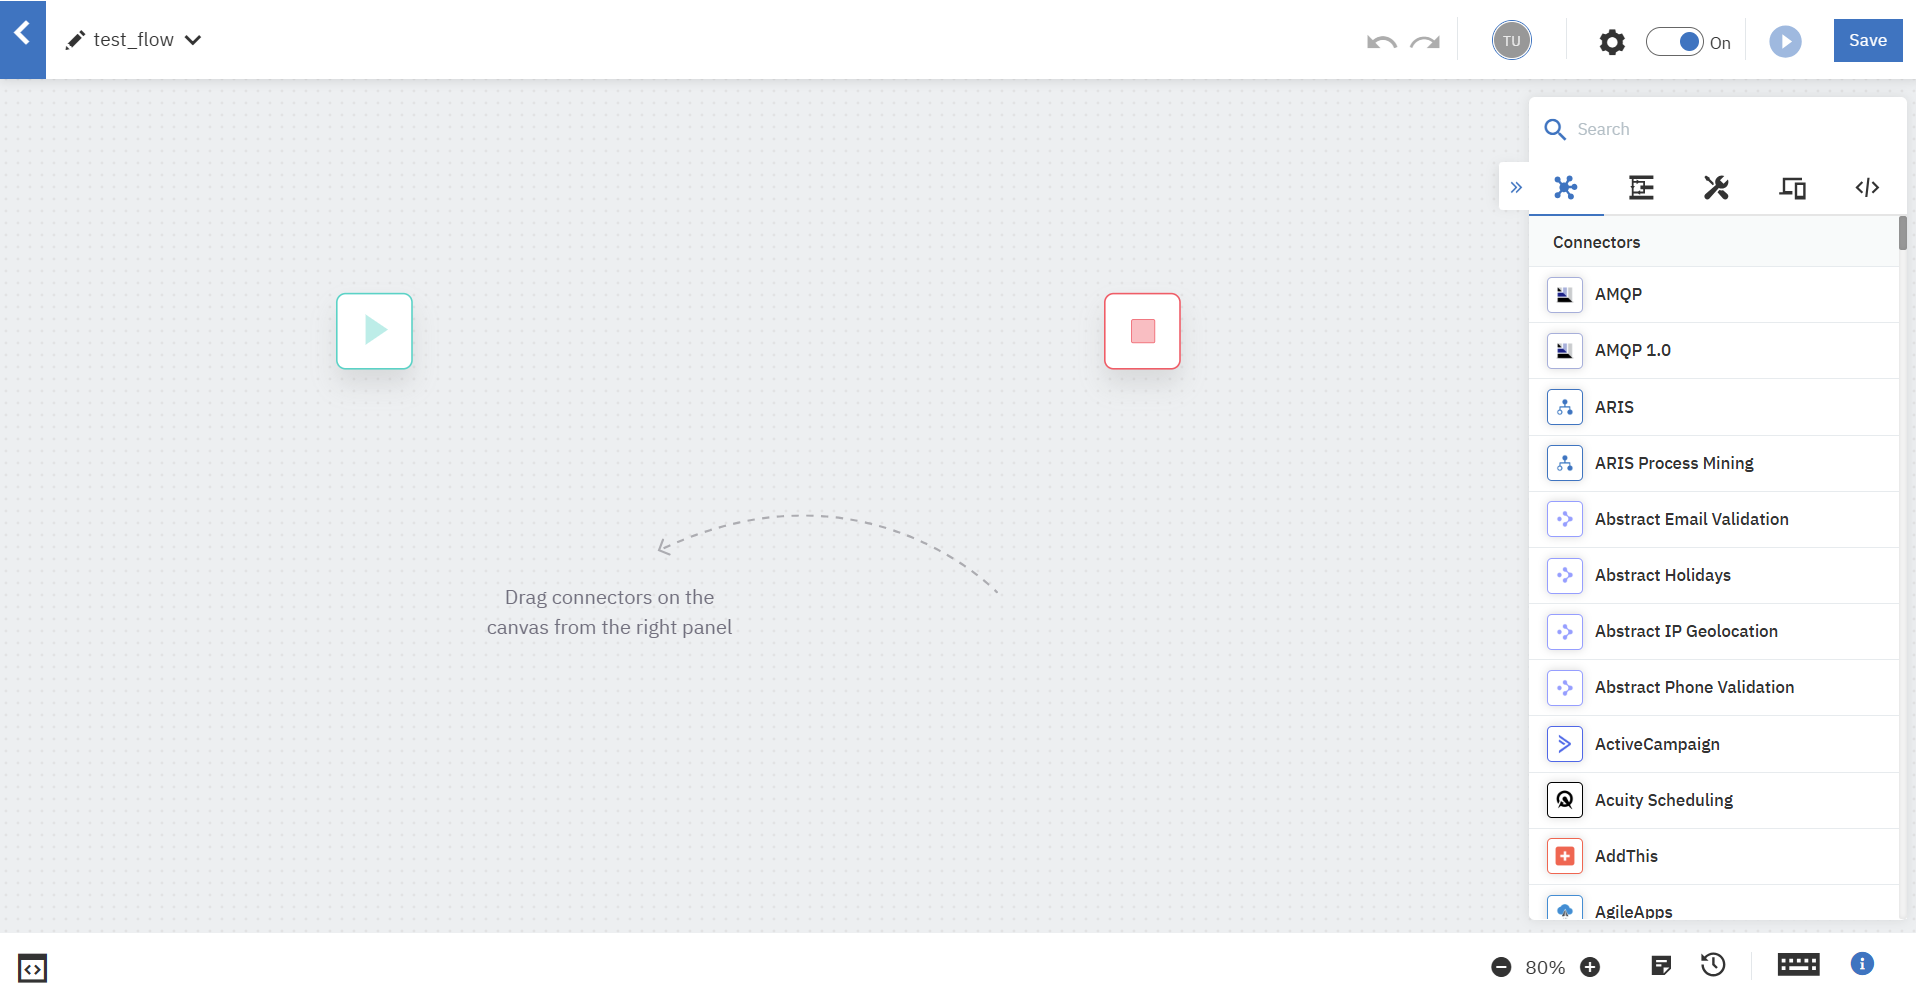
「Create New Workflow」を押下して、Workflow開発画面であるパレットを開きます。
3.1. Webhookの構成
今回はこのWorkflowをWebhookとして呼び出し、結果を受け取れるようにします。
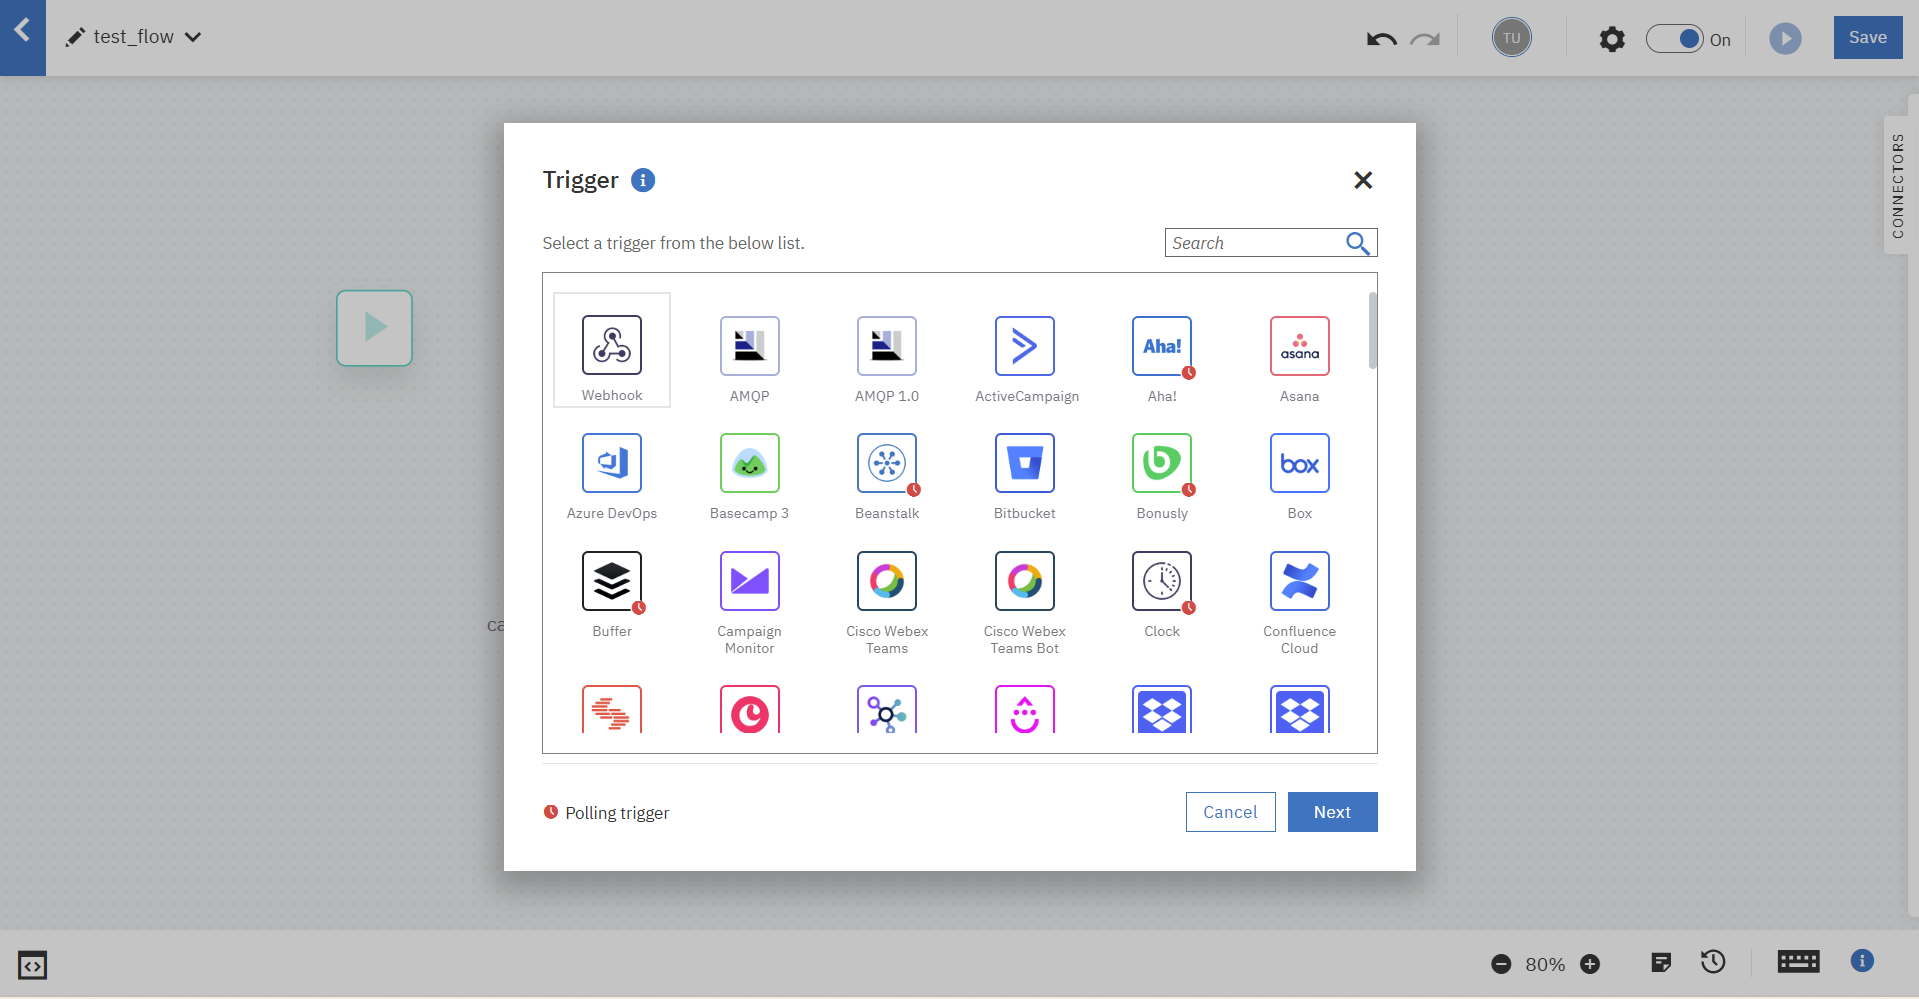
はじめにフローのスタートを「webhook」トリガーに設定します。
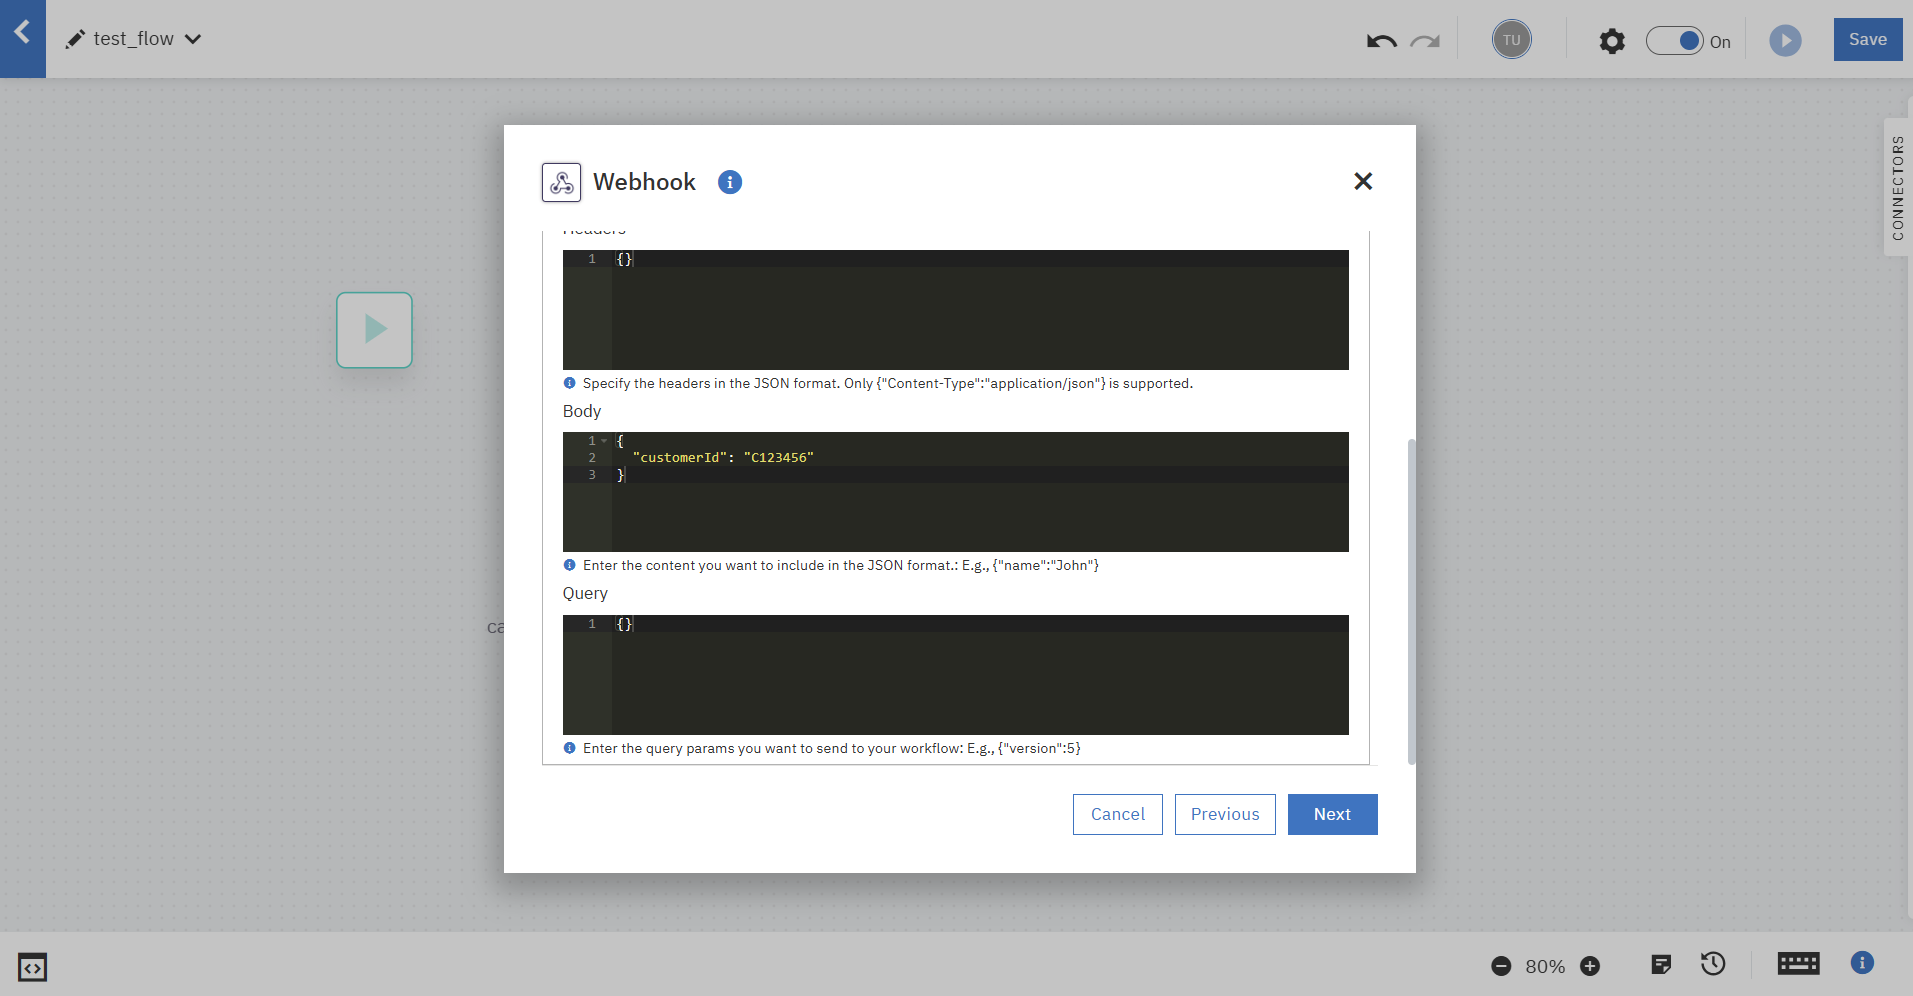
payloadデータの形式を指定します。
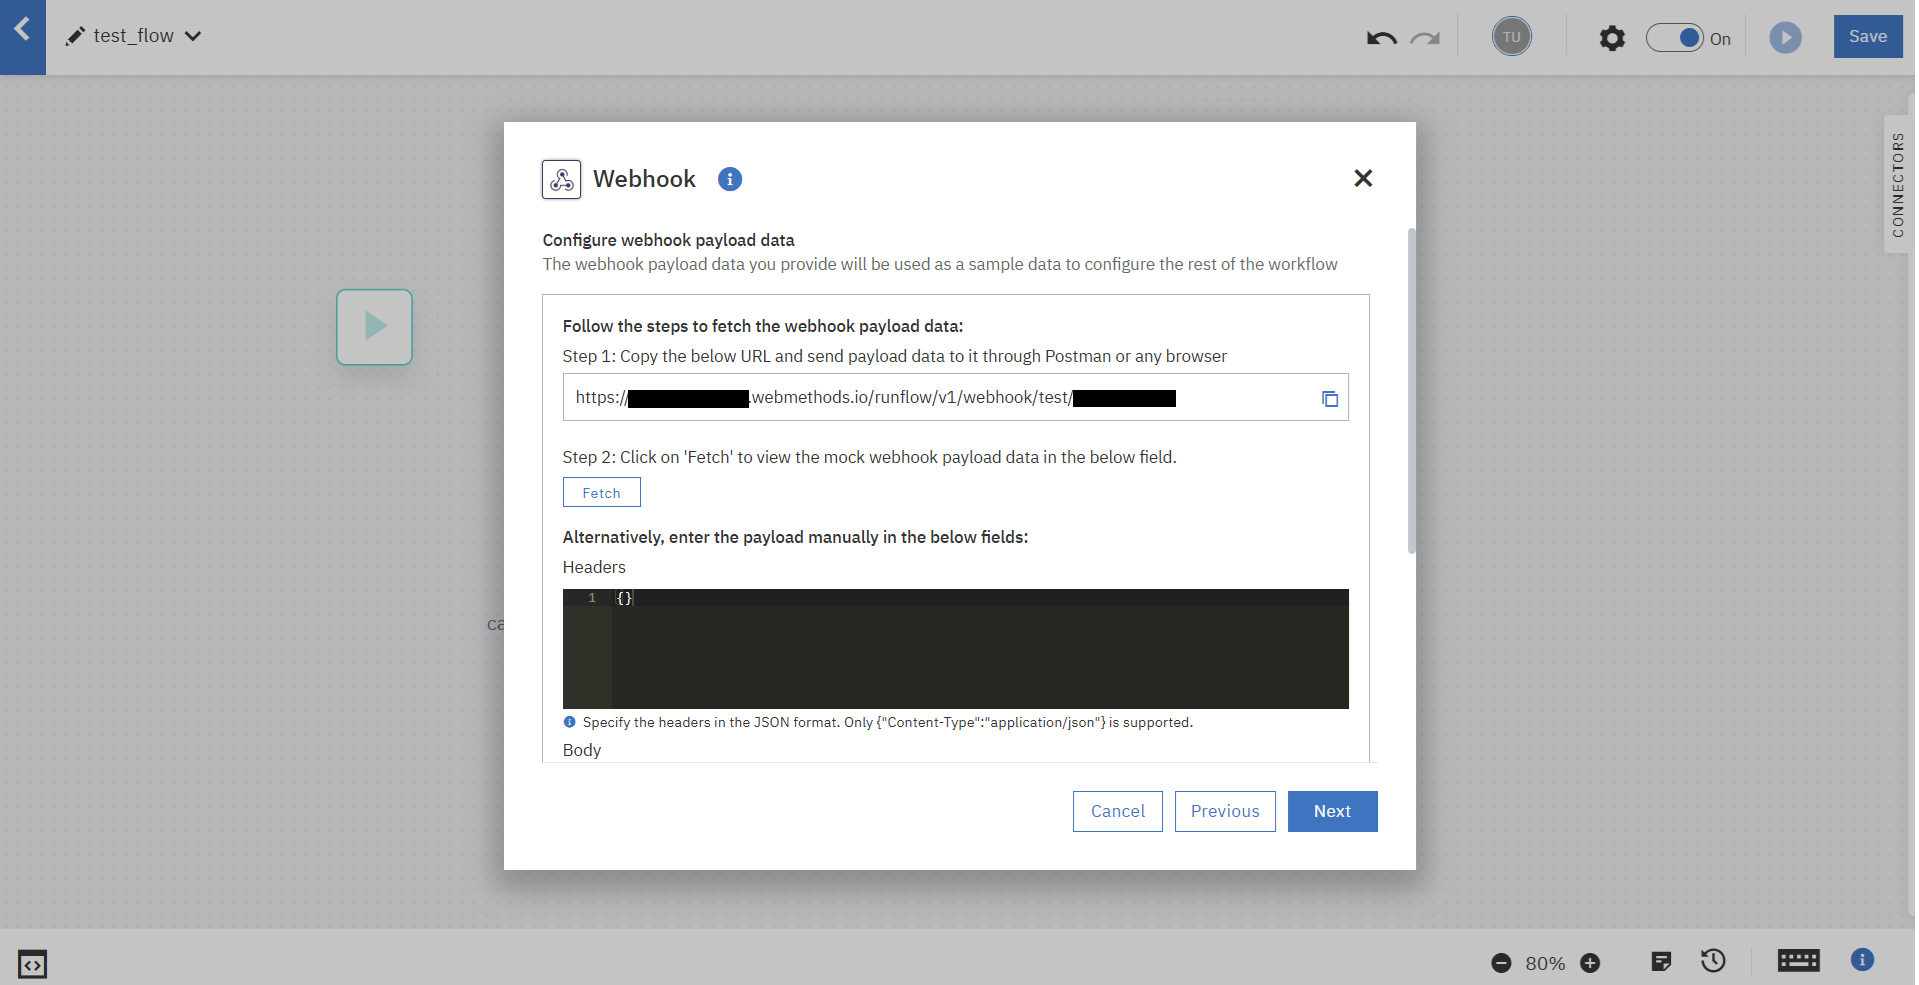
今回はBodyを直接打ち込んで指定しました。
※直接打ち込まずに実際にデータを試しに送ってfetchさせる場合、以下のような応答があり、HeaderやBodyが自動で入力されます。
$ curl -X POST https://xxxx.webmethods.io/runflow/v1/webhook/test/xxxx \
> -H "Content-Type: application/json" \
> -d '{"customerId": "C123456"}'
{"message":"Mock payload data set for your workflow. To execute the workflow, please use the live webhook URL https://xxxx.webmethods.io/runflow/run/xxx","code":153}
payloadデータが構成されました。
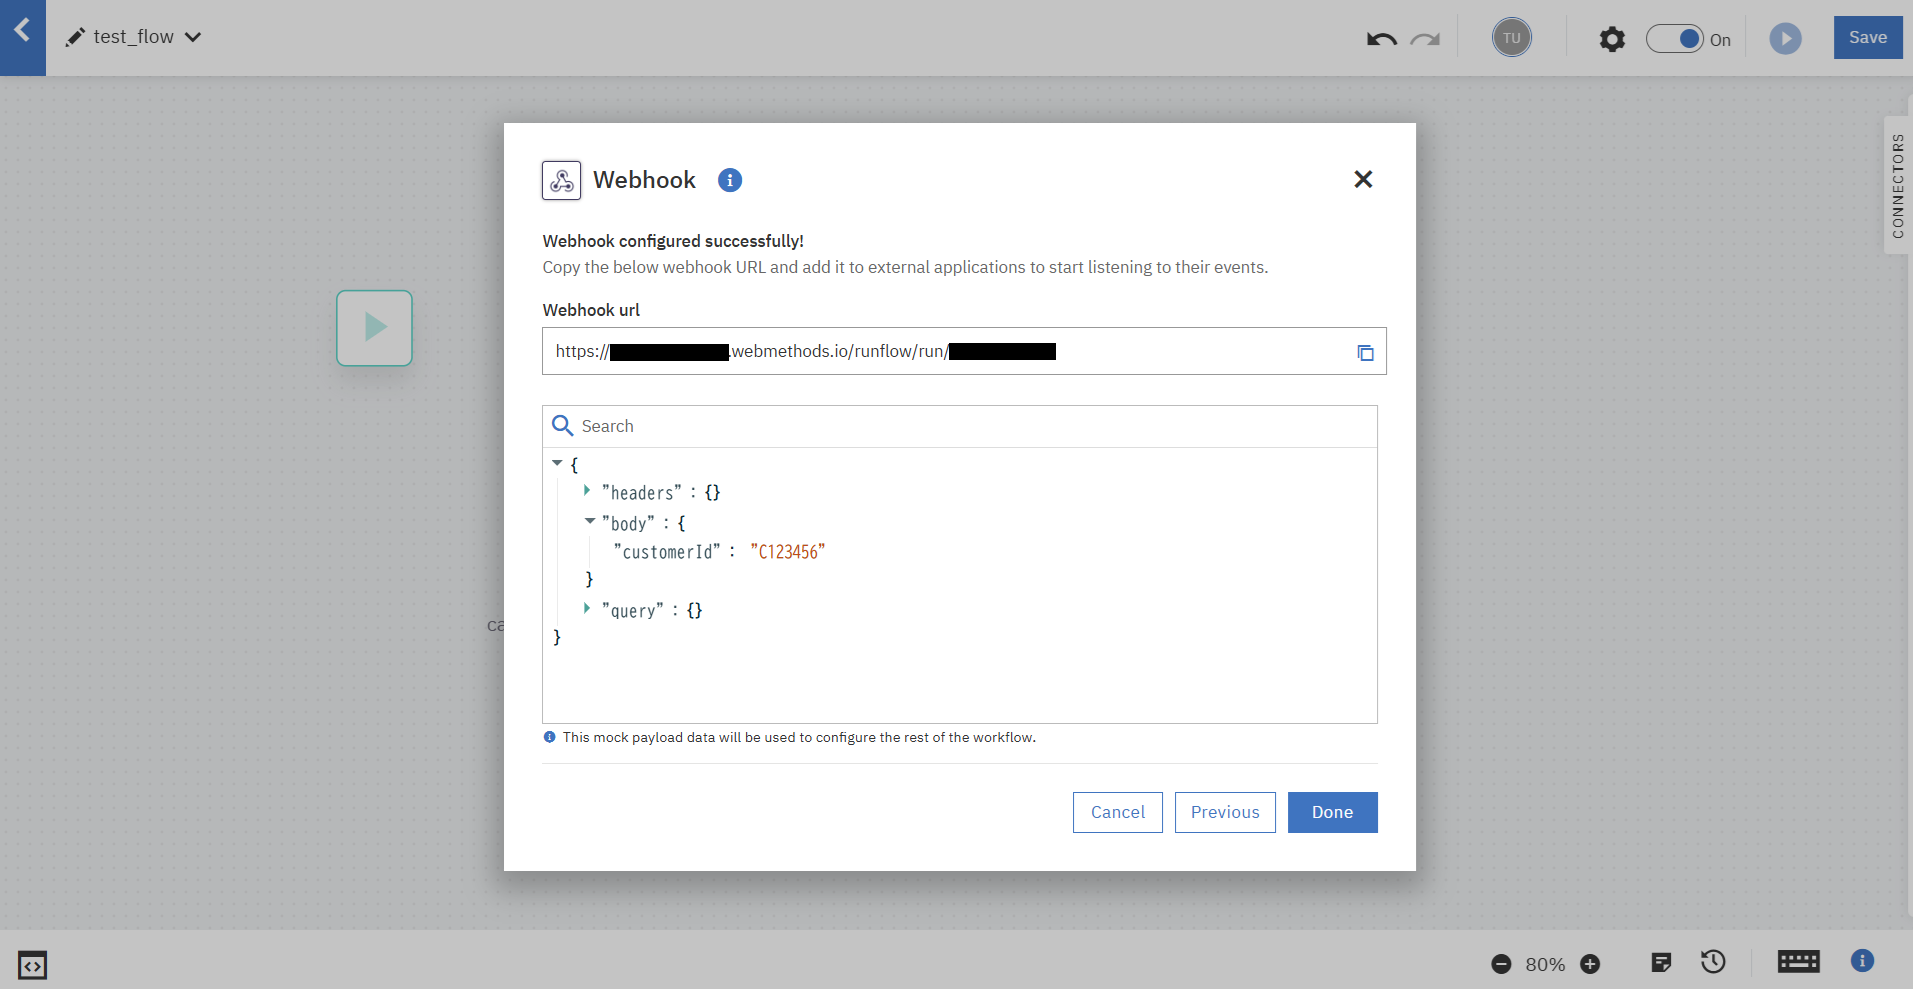
次の画面でその他の設定を行います。
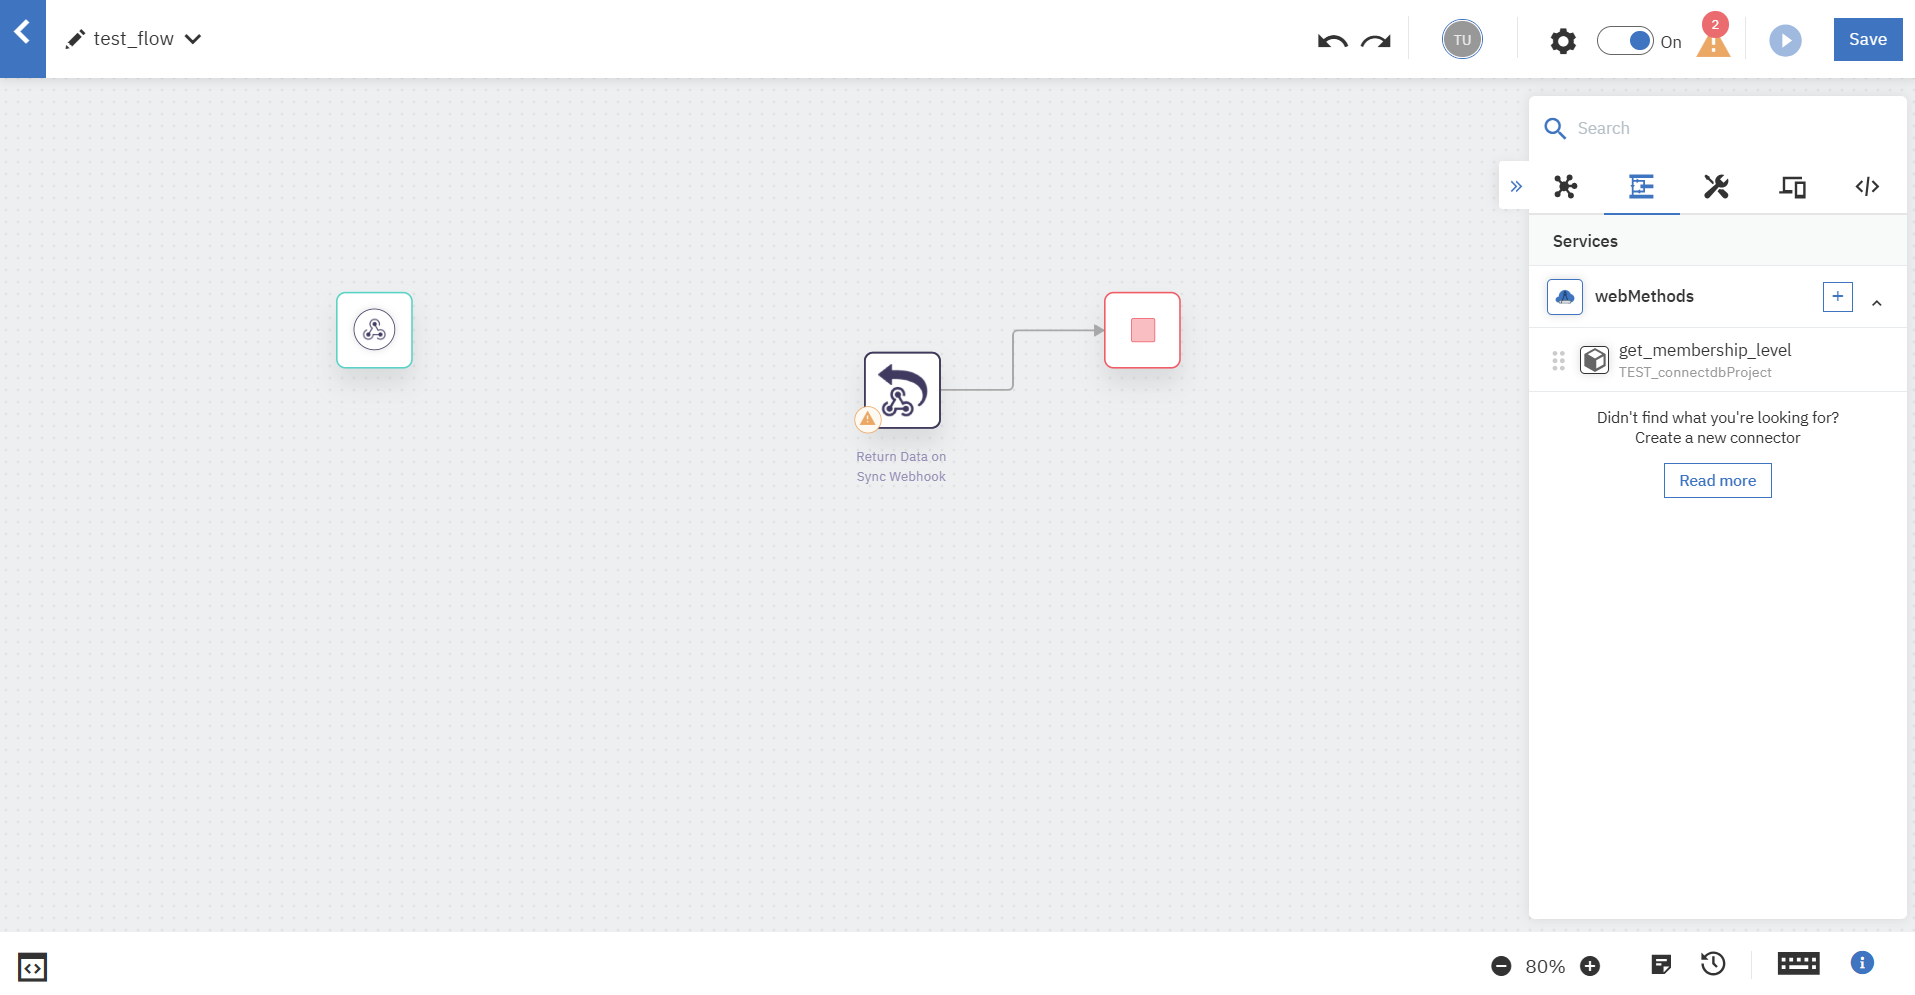
Webhook Keyによる認証を入れ、フロー呼び出し時に応答を受け取れるように「Autoconnect Return Sync on Webhook」をOnにします。

フローのスタートがWebhookトリガーのアイコンに変わり、自動的に「Return Data on Sync Webhook」というコネクターが作られました。
「Return Data on Sync Webhook」の設定は、データマッピングのためにFlow Serviceコネクターのテスト後に行います。

3.2. Flow Serviceコネクターの構成
2.で作成したFlow ServiceをWorkflowに組み込んでいきます。
コネクター群から作成したFlow Serviceを探します。
ドラッグアンドドロップでWebhookトリガーの後にFlow Serviceコネクターを持ってきて各項目を入力します。

トリガーとFlow Serviseコネクターのデータマッピングを行います。
トリガーのBodyを、Flow Serviceのインプットに渡します。

Webhookトリガーの設定時に使用したデータをもとにFlow Serviceコネクターの単体テストを実行できます。

テストが完了しました。
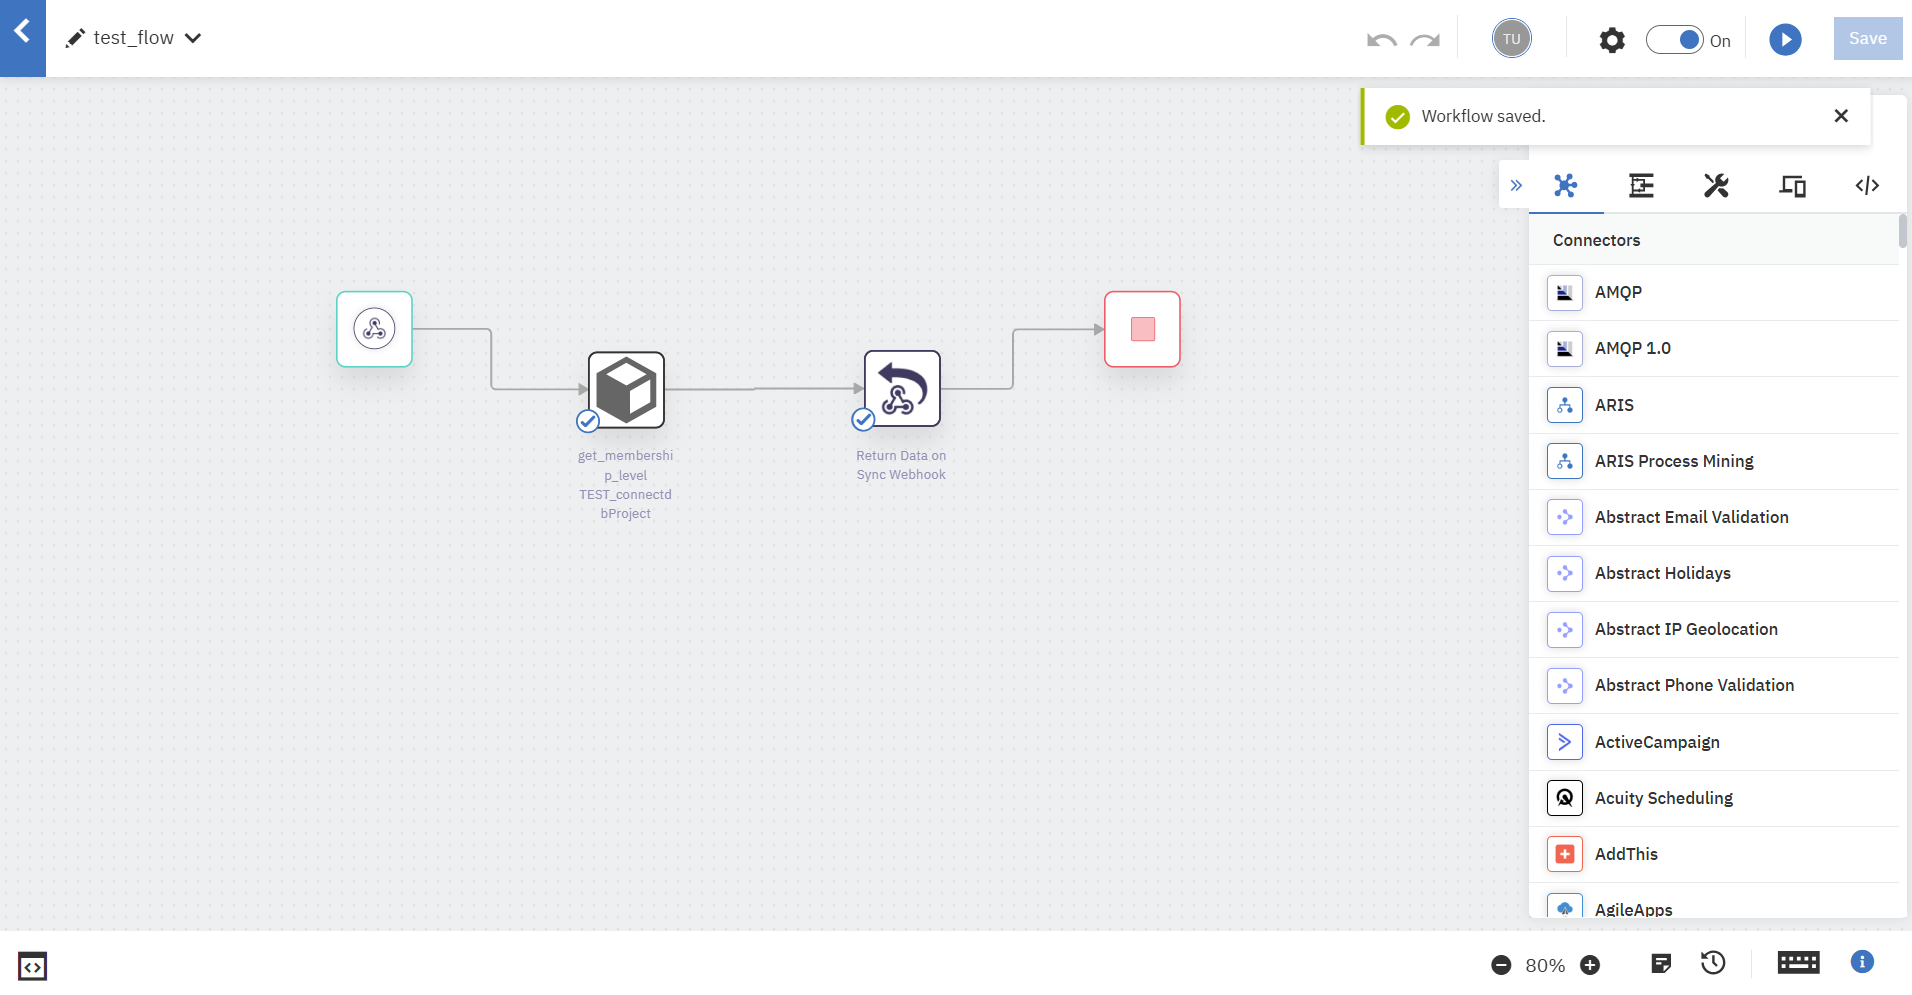
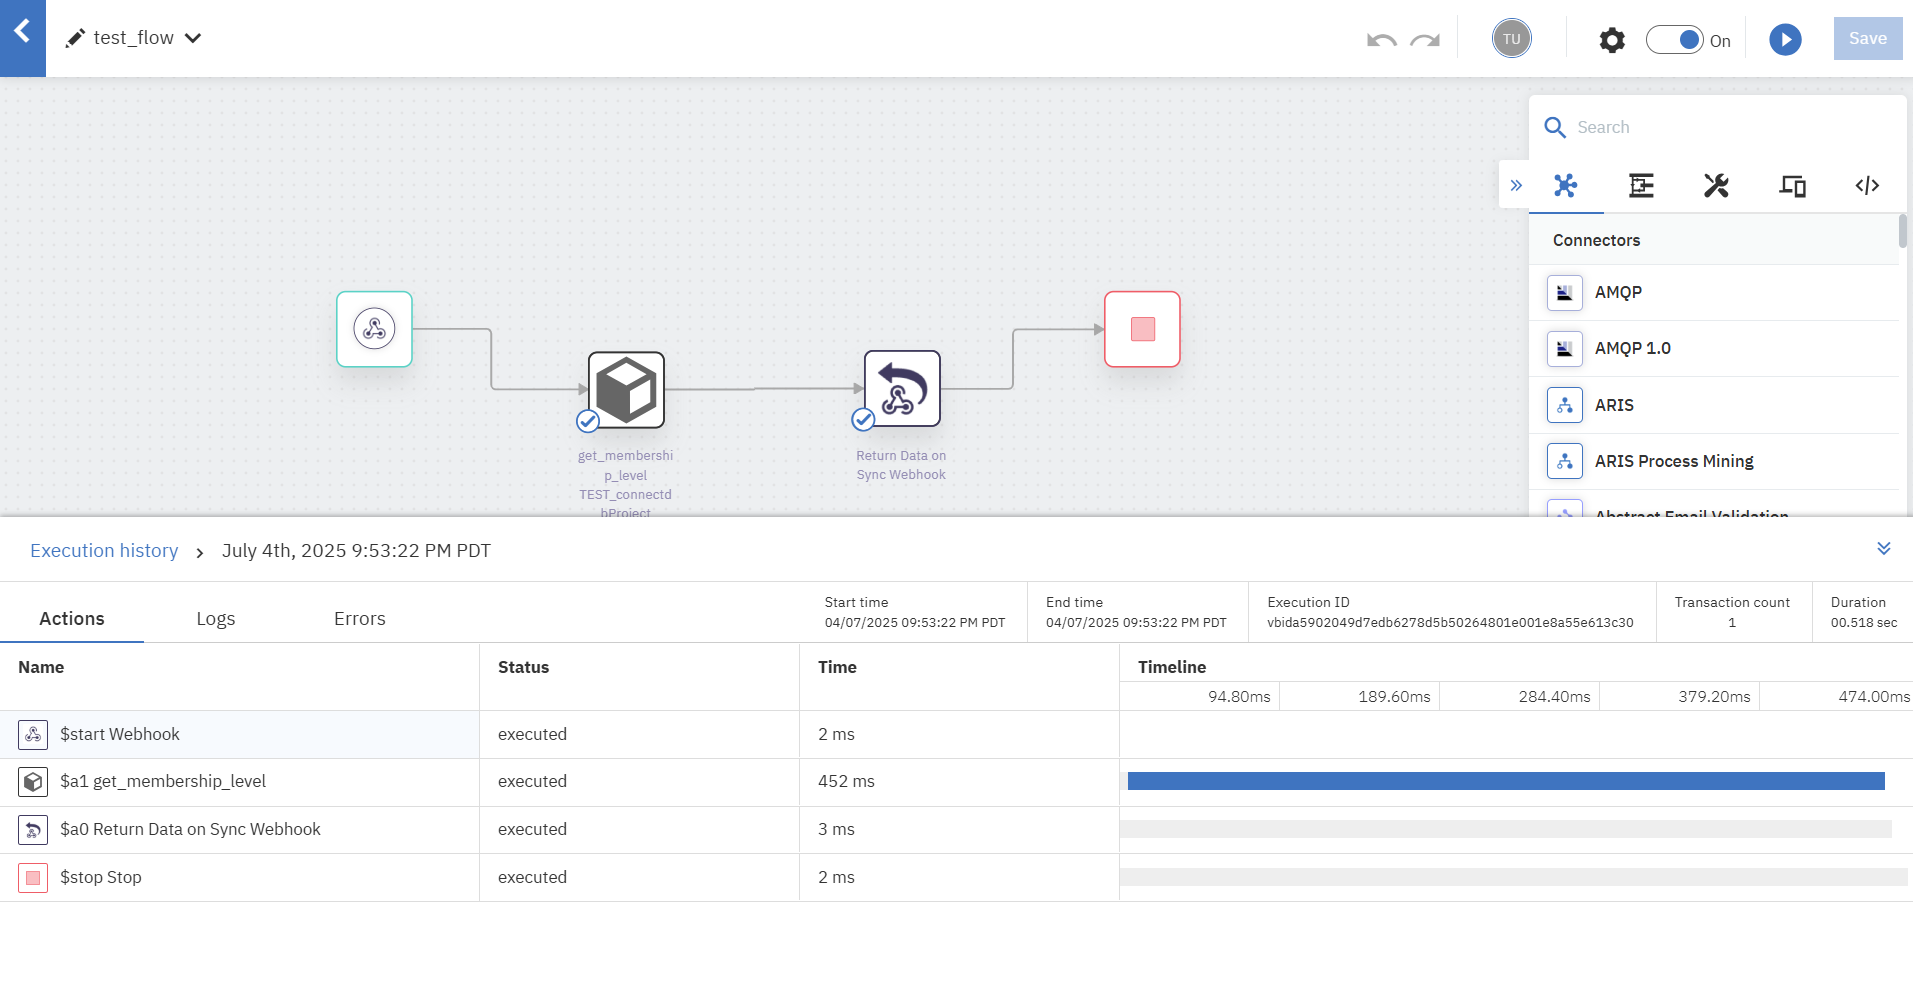
フロー全体はこのようになりました。

最後に、「Return Data on Sync Webhook」の設定を行います。
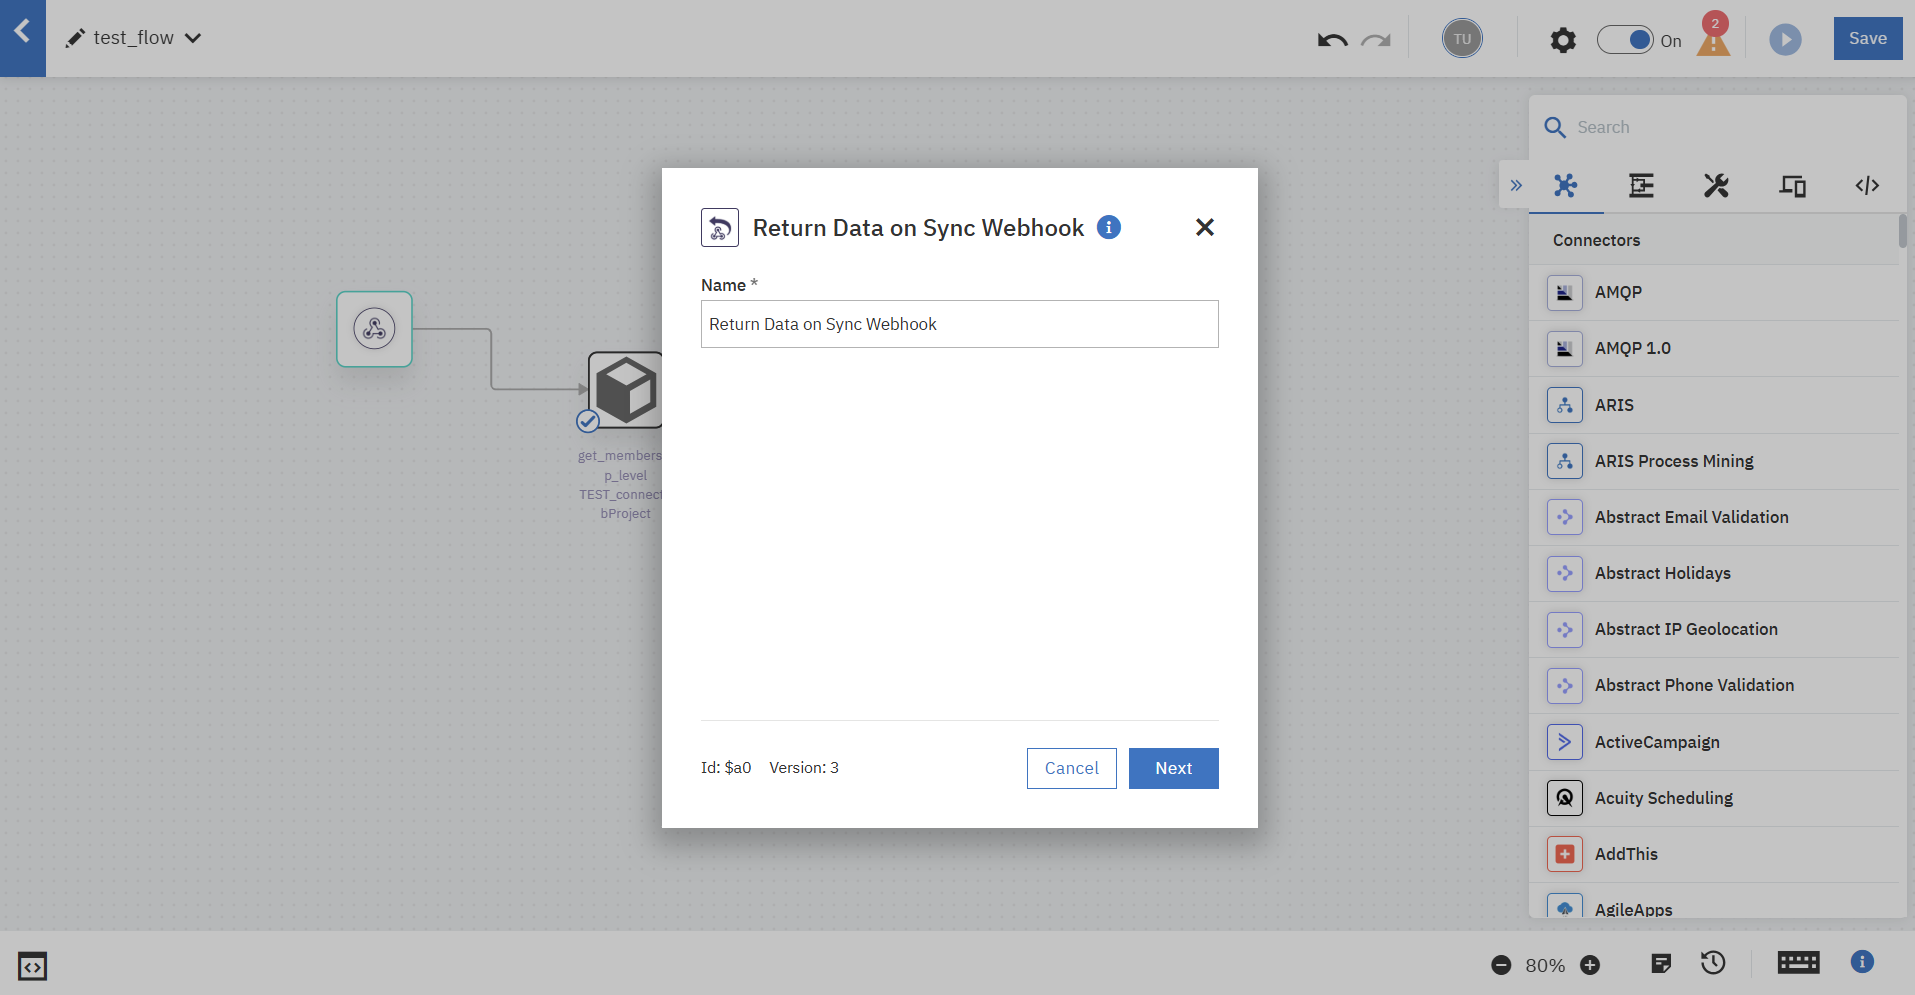
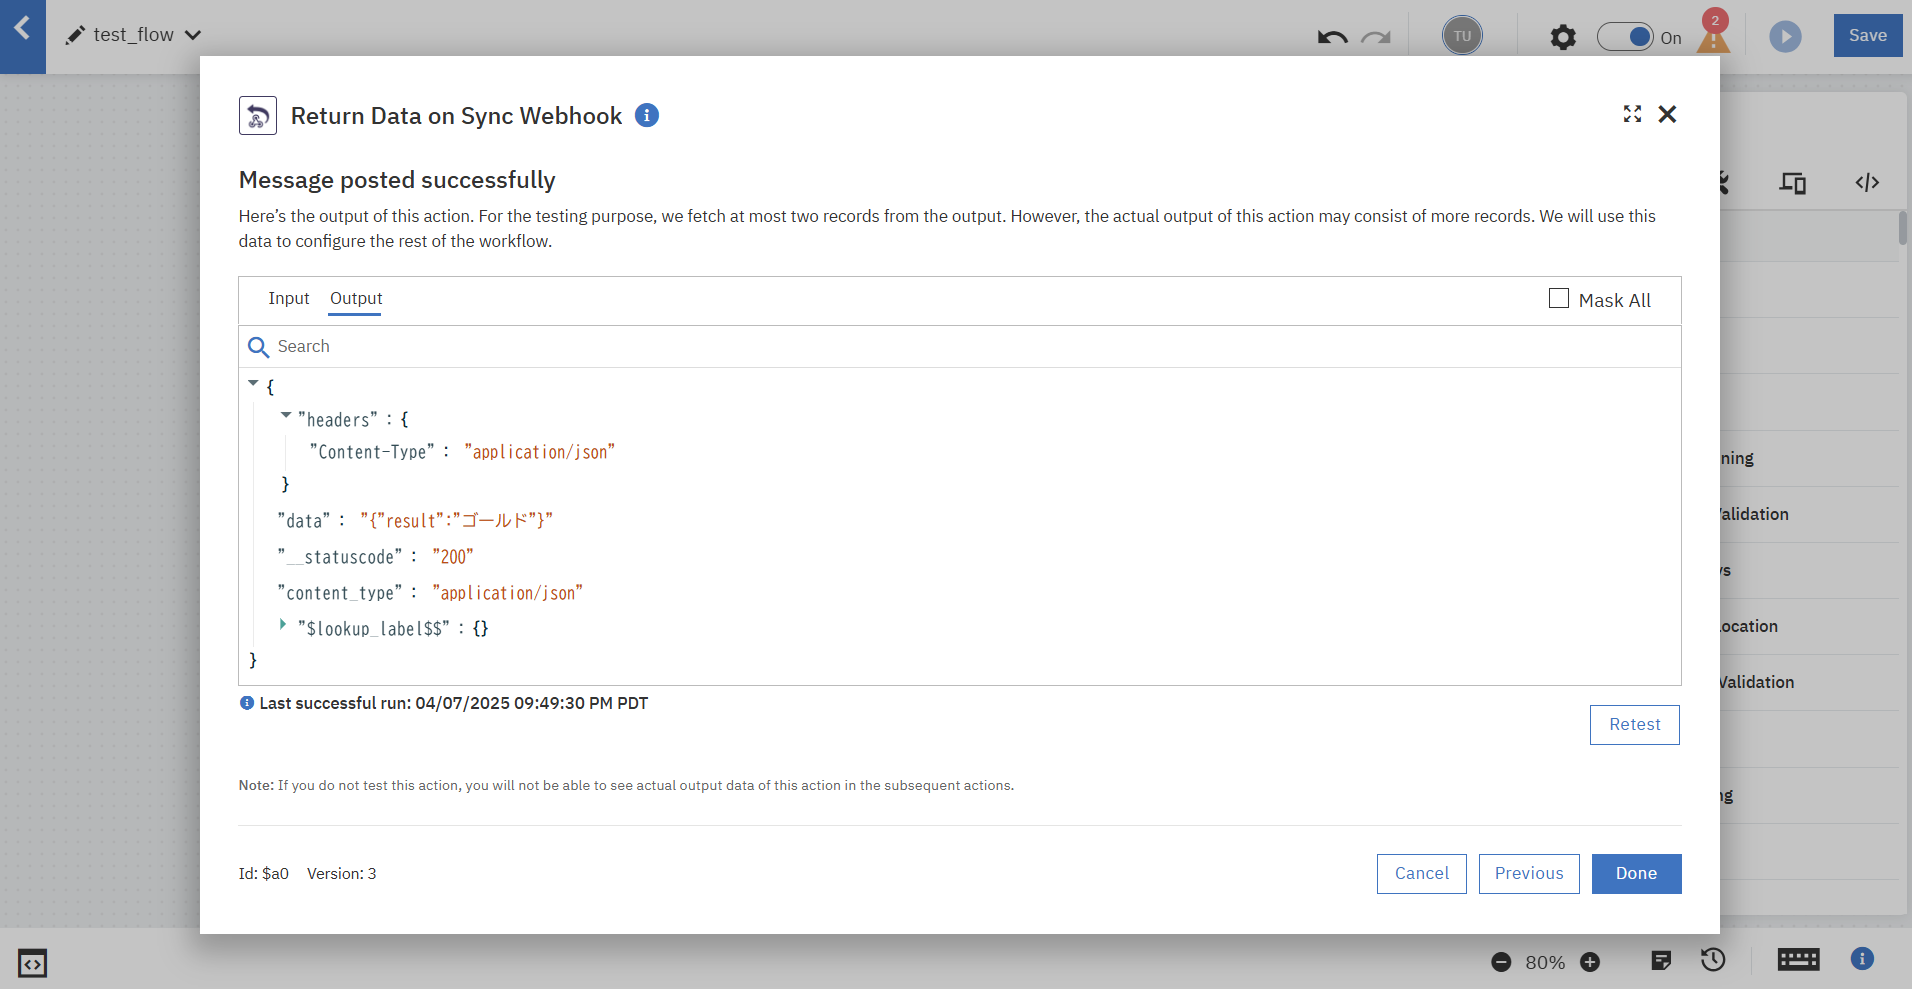
Flow ServiceでのPostgreSQLへのクエリ結果を、クライアントへの応答結果としてデータマッピングします。

同様に単体テストを行い、確認します。

Workflowの作成が完了しました。
4. テスト
作成したフローをAPIとして呼び出し、Webhookで受け取ったリクエストデータ「customer_id」がバインドされているか確認します。
なお、DB(PostgreSQL)は以下のような構成です。
testdb=# SELECT * FROM customers;
 customer_id |   name    |       email        | membership_level |         created_at
-------------+-----------+--------------------+------------------+----------------------------
 C123456     | 山田 太郎 | taro@example.com   | ゴールド         | 2025-07-01 03:39:35.462219
 C234567     | 鈴木 花子 | hanako@example.com | シルバー         | 2025-07-01 03:39:35.462219
 C345678     | 佐藤 次郎 | jiro@example.com   | ブロンズ         | 2025-07-01 03:39:35.462219
(3 rows)
今回はcurlコマンドでHTTP リクエストを送信してテストします。
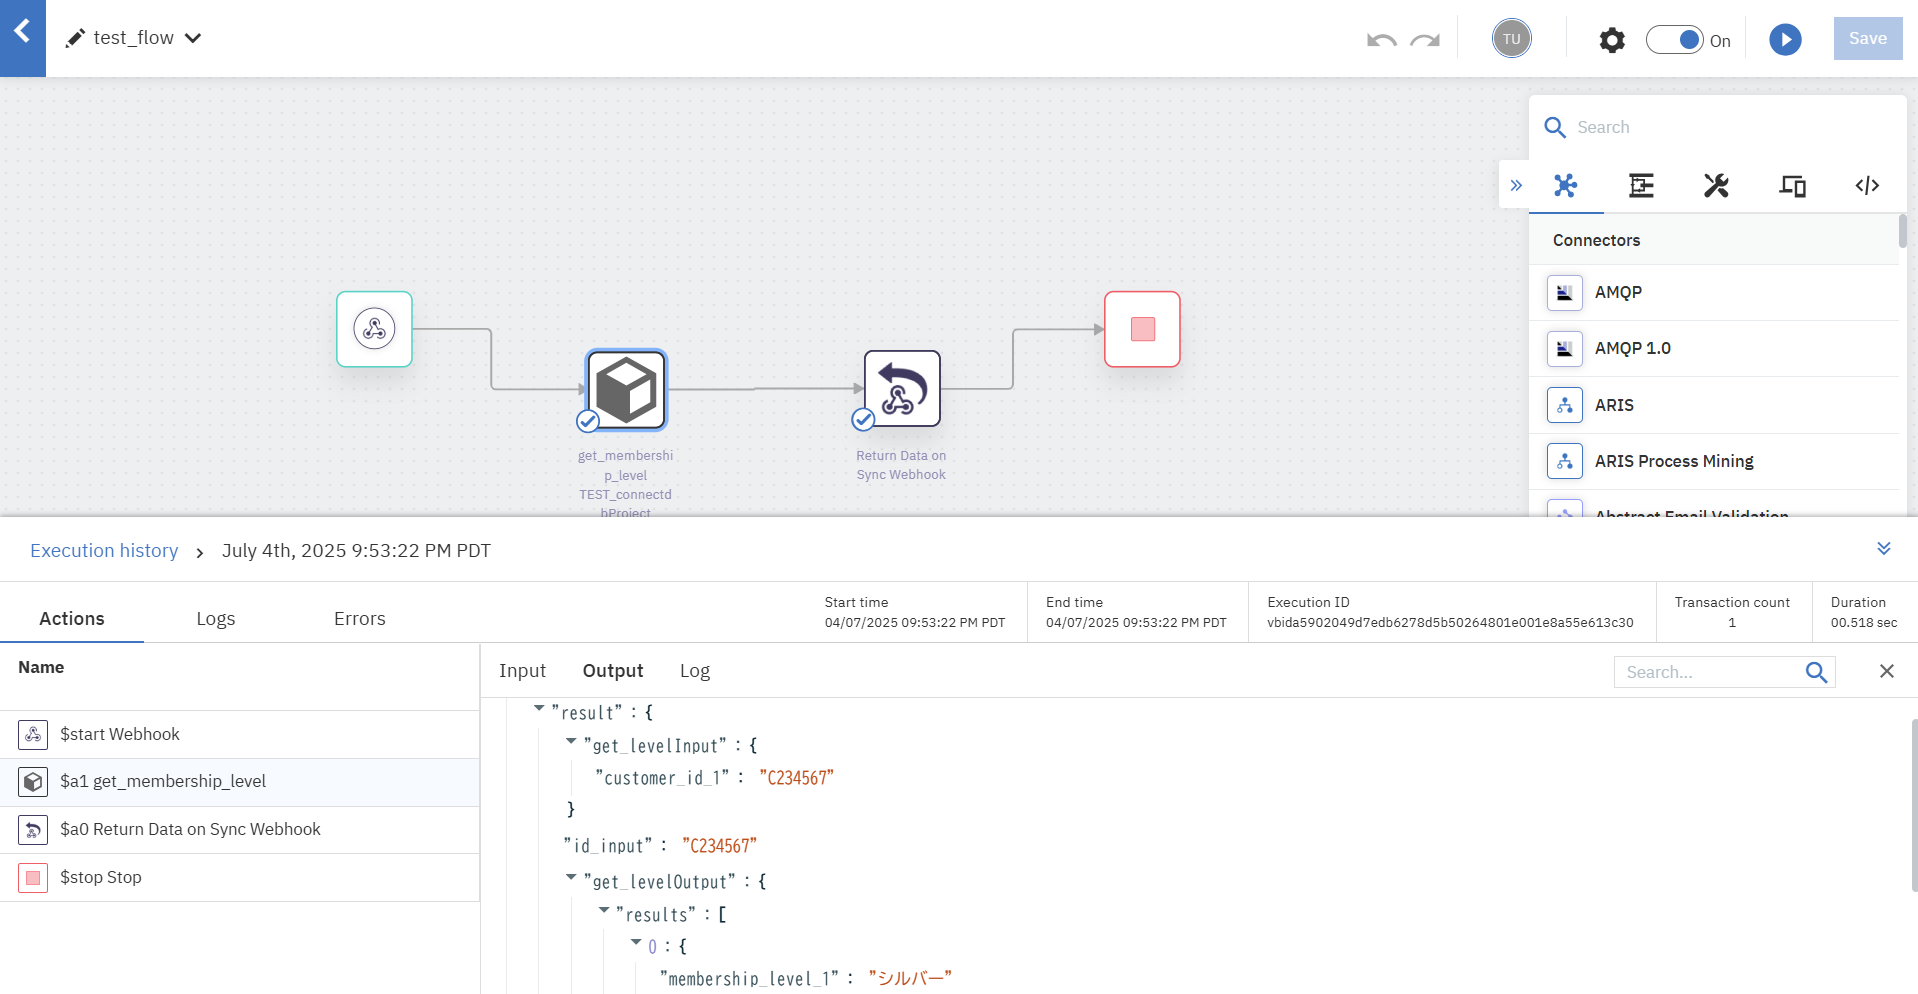
正常にDBへのクエリ結果を受け取ることができ、DBとの連携が行われていることを確認できました。
$ curl -i -X POST 'https://xxxx.webmethods.io/runflow/run/sync/xxxx?webhook_key=xxxxx' -H "Content-Type: application/json" -d '{"customerId": "C234567"}'
HTTP/2 200
server: nginx
date: Sat, 05 Jul 2025 04:53:22 GMT
content-type: application/json; charset=utf-8
content-length: 25
vary: Accept-Encoding
content-security-policy: default-src 'self';base-uri 'self';block-all-mixed-content;font-src 'self' https: data:;frame-ancestors 'self';img-src 'self' data:;object-src 'none';script-src 'self';script-src-attr 'none';style-src 'self' https: 'unsafe-inline';upgrade-insecure-requests
x-dns-prefetch-control: off
expect-ct: max-age=0
strict-transport-security: max-age=31536000; includeSubDomains
x-download-options: noopen
x-permitted-cross-domain-policies: none
vary: Accept-Encoding
x-ratelimit-remaining: 1499
x-ratelimit-limit: 1500
referrer-policy: strict-origin
public-key-pins: pin-sha256="Uakss5bqpEVcU/aACJDW5ZeqfCFOyUp+s2n+1W6Tc1I=";  max-age=5184000; includeSubDomains;
x-frame-options: SAMEORIGIN
x-content-type-options: nosniff
x-xss-protection: 0
strict-transport-security: max-age=31536000; includeSubDomains;preload;

{"result":"シルバー"}
Workflow settingsで「Maintain workflow execution logs when executed via webhook or trigger」にチェックを入れると、コネクターごとのlogを確認することができるようになります。

まとめ
今回は単にリクエストに合わせてDBからデータを抽出しただけですが、実際にはこれを応用して、コネクターを使用して外部サービスにクエリ実行結果を連携したり、DBに対してCRUD処理をしたりすることが想定されていそうです。
更にFlow Serviceでは複雑なロジックやエラーハンドリングも実装可能ですので、作り込み次第で様々なシーンでの活用が期待できそうです。