このメモに書いてあること
- CentOS8 インストールの流れ
- インストール画面が見切れる問題への対処方法
- VirtualBox Guest Additions のインストール方法
- IPv6 の無効化方法:sysctl の場合
- IPv6 の無効化方法:kernel boot option の場合
インストール条件
| 設定項目 | このメモでの設定値 | 備考 |
|---|---|---|
| ソフトウェアの選択 | サーバ(GUI使用) | 初期値 |
| hostname | cent8.example.co.jp | |
| rootパスワード | ||
| 一般ユーザID | user01 | |
| 一般ユーザパスワード | ||
| インストール先PC | VirtualBox 仮想マシン | VBoxGuestAdditions を導入 |
| 日本語入力環境 | 日本語入力環境を設定 | |
| IPv6 | 無効化 |
インストール
-
Install CentOS Linux 8.0.1905 を選択 (項1~3は失敗例です。項4から開始してください)

-
言語選択 (項1~3は失敗例です。項4から開始してください)

-
インストール概要 (項1~3は失敗例です。項4から開始してください)
普通にインストーラーを起動するとこういう風に画面が切れてしまいます。

-
インストール開始
Install CentOS Linux 8.0.1905 を選択した状態で Tab を押してメニューを表示
末尾に vga=773 を追記してインストーラを起動してください。
※この時点でシステムは英語キーボードモードです。日本語キーボードを使っている場合"="は "^"を押して入力してください。
参考:GRUB VGA Modes

-
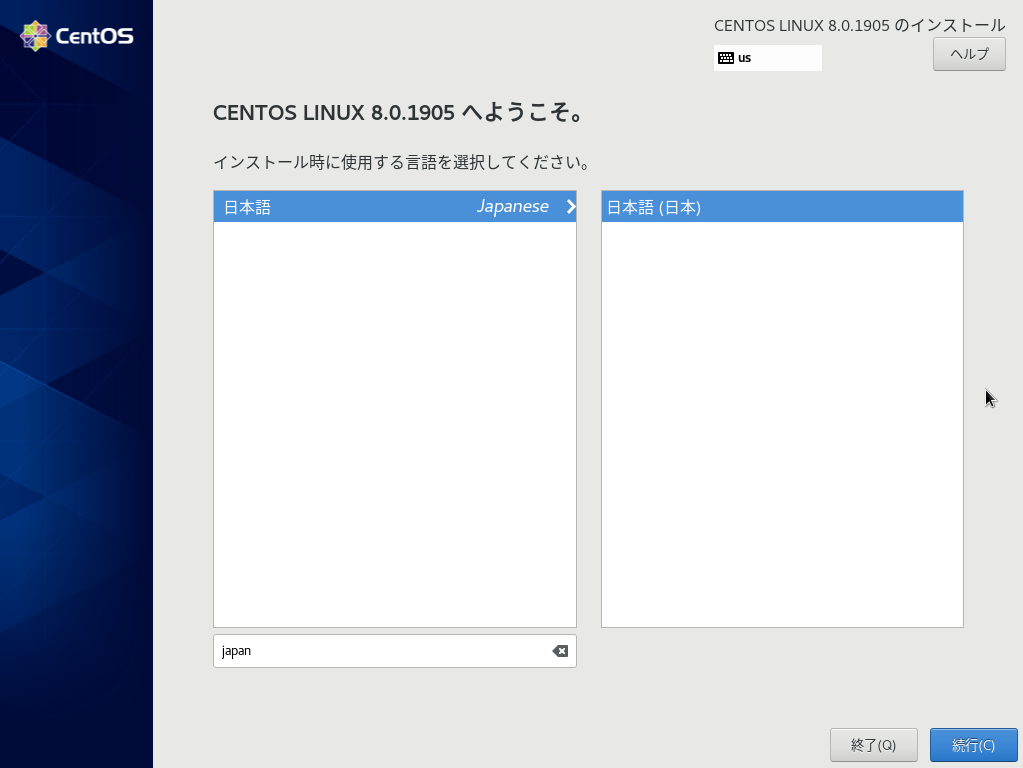
言語選択
利用する言語を選択します。私は日本語を選択しました。
-
インストール概要
時刻と日付
インストール先(ディスク および 必要であればパーティション設定)
KDUMP無効化(自宅サーバならKDUMPが取れても解析しないよね?)
ネットワークとホスト名(DHCPでもホスト名位設定しましょう)

-
時刻と日付を選択し地域を選択
アジア/東京 を選択しました

-
インストール先Diskを設定、必要であればパーティション設定
私は標準のディスク選択を受け入れました。

-
KDUMP 無効化
kdumpを有効にする のチェックを外す
必要な方はチェックを外さず、標準設定を受け入れてもいいと思います。


-
ネットワークとホスト名
ホスト名の設定
Ethernet を オン に変更

-
インストール概要の確認
インストールの開始 をクリック

-
ユーザの設定
root パスワードの設定と、一般ユーザアカウントの作成を行います。

-
root パスワードの設定

-
ユーザの作成
作成するユーザの情報を指定
私は "このユーザを管理者にする" をチェックしてここで作成したユーザで作業してます。

-
再起動
インストールが終わるのを待って 再起動 を行います。
インストールメディアを外すのを忘れないでください。

-
ライセンスへの同意

-
ライセンスを確認し同意できる場合 ライセンスに同意する にチェックを付けてください。

-
初期セットアップ完了

-
ログイン

-
初回ログイン時の設定1:言語選択

-
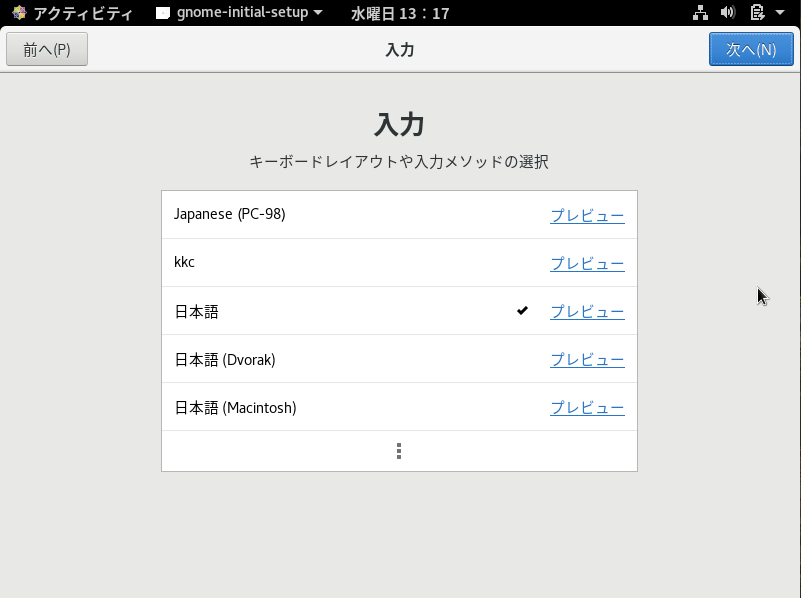
初回ログイン時の設定2:入力方法選択
-
初回ログイン時の設定3:プライバシー設定

-
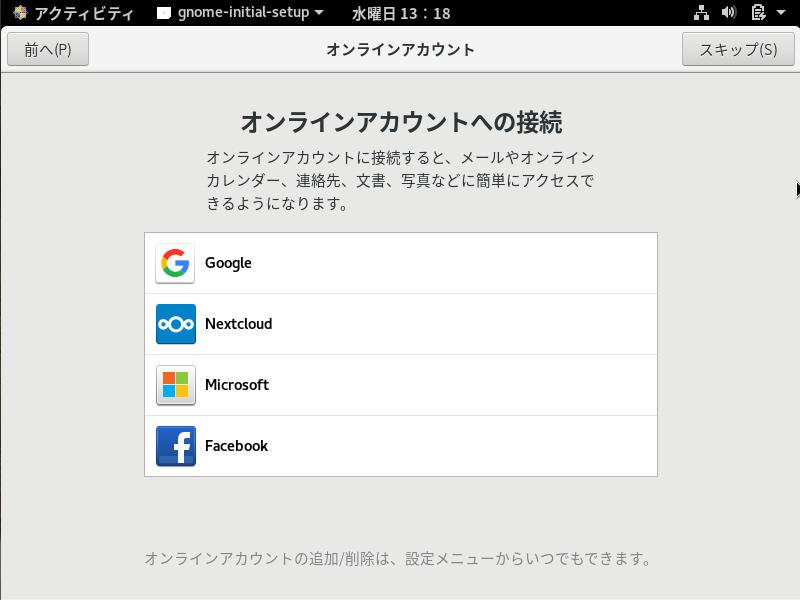
初回ログイン時の設定4:オンラインアカウントへの接続(任意、私はスキップしてます)
-
初回ログイン時の設定5:完了

VirtualBox Guest Additons インストール
-
必要なパッケージ追加
VirtualBox Guest Additions インストールの為に開発環境のインストールを行う
最初、VBoxGuestAdditions のインストールに失敗したのでsetup.logを見ると以下のモジュールを要求していたので、
開発環境と一緒にインストールしてます。
libelf-dev lebelf-devel or elfutils-libelf-devel[user01@centos8 ~] sudo dnf group install -y "Development Tools" [user01@centos8 ~] sudo dnf install -y elfutils-libelf-devel -
アップデートの実施
大抵の場合、追加インストールされた kernel-header と稼働中のkernelにずれが出来ます。
アップデートを実施してパッケージのバージョンを揃えましょう。[user01@centos8 ~] sudo dnf clean all [user01@centos8 ~] sudo dnf check-update [user01@centos8 ~] sudo dnf -y upgrade [user01@centos8 ~] sudo shutdown -r now -
VirtualBox Guest Additions のインストール1
Guest Additions CDイメージの挿入を選択

-
VirtualBox Guest Additions のインストール2
VBox_GAs_XXX の画面が出たら 実行する をクリックしてください。
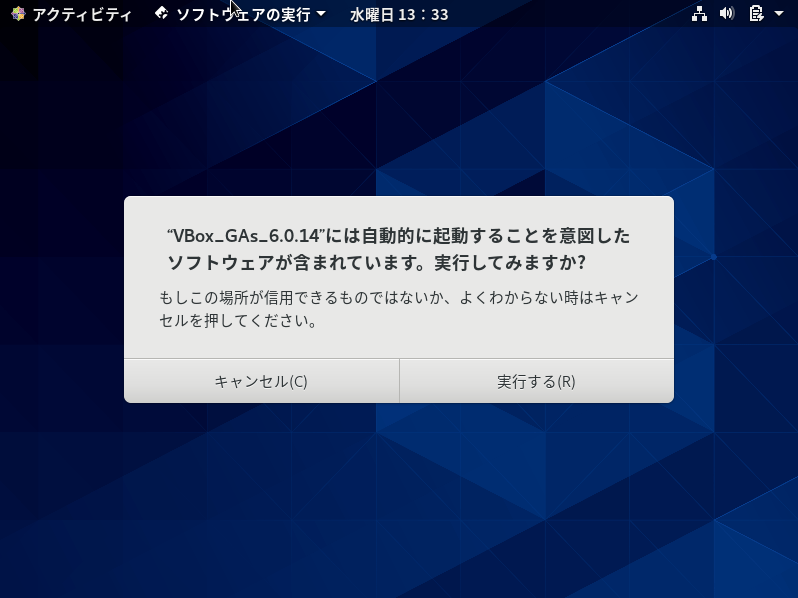
画面が表示されない場合以下のコマンドでインストールを実行してください。[user01@centos8 ~] sudo /run/media/user01/Vbox_GAs_6.0.14/VBoxLinuxAdditions.run [user01@centos8 ~] sudo shutdown -r now -
VirtualBox Guest Additions のインストール3
認証が要求された場合、認証情報を入力してください。

-
VirtualBox Guest Additions のインストール4
インストールが完了したらOSを再起動して完了です。
IPv6無効化
方法1:sysctl での無効化
-
sysctl.conf での IPv6無効化設定
[user01@cent8 ~]$ sudo vi /etc/sysctl.d/ipv6.conf net.ipv6.conf.all.disable_ipv6 = 1 net.ipv6.conf.default.disable_ipv6 = 1 [user01@cent8 ~]$ sudo sysctl --load /etc/sysctl.d/ipv6.conf -
NetworkManager でのIPv6無効化設定
NetworkManagerを利用している場合 OSを再起動したり コマンドでnicの再起動を行うと、IPv6が有効化されてしまいます。
この動作を回避するため、NetworkManagerでIPv6を無効に設定します。コマンド例では8.1以降用のdisabled を指定しています。
CentOS7から8.0までの場合、ignoreを指定してください。
また、enp0s3 の部分は自サーバのNIC名に置き換えてください。[user01@cent8 ~]$ nmcli connection show enp0s3 |grep ipv6.method ipv6.method: auto [user01@cent8 ~]$ sudo nmcli connection modify enp0s3 ipv6.method "disabled" [user01@cent8 ~]$ nmcli connection show enp0s3 |grep ipv6.method ipv6.method: disabled [user01@cent8 ~]$
方法2:Kernel Boot Option での無効化
-
GRUB_CMDLINE_LINUX 行の末尾に "ipv6.disable=1" を追記してください。
[user01@cent8 ~]$ sudo vi /etc/default/grub GRUB_TIMEOUT=5 GRUB_DISTRIBUTOR="$(sed 's, release .*$,,g' /etc/system-release)" GRUB_DEFAULT=saved GRUB_DISABLE_SUBMENU=true GRUB_TERMINAL_OUTPUT="console" GRUB_CMDLINE_LINUX="resume=/dev/mapper/cl-swap rd.lvm.lv=cl/root rd.lvm.lv=cl/swap rhgb quiet ipv6.disable=1" GRUB_DISABLE_RECOVERY="true" GRUB_ENABLE_BLSCFG=true [user01@cent8 ~]$ -
Grub設定を反映
ls で確認したリンク先を指定して grub2-mkconfig を実行してください。
リンク先が2カ所あった場合 grub2-mkconfig も二回実行してください。[user01@cent8 ~]$ ls -lh /etc/grub*.cfg lrwxrwxrwx. 1 root root 22 10月 3 02:01 /etc/grub2.cfg -> ../boot/grub2/grub.cfg [user01@cent8 ~]$ sudo grub2-mkconfig -o /boot/grub2/grub.cfg Generating grub configuration file ... done [user01@cent8 ~]$
共通設定
sysctl/kernel boot option のどちらでIPv6を停止した場合でも共通で行う設定です。
-
/etc/hosts から IPv6 エントリを削除
IPv6 のエントリを削除するかコメントアウトしましょう。[user01@cent8 ~]$ cat /etc/hosts 127.0.0.1 localhost localhost.localdomain localhost4 localhost4.localdomain4 ##::1 localhost localhost.localdomain localhost6 localhost6.localdomain6 [user01@cent8 ~]$ -
/etc/netconfig から IPv6 エントリを削除
エラーメッセージの抑止です。
udp6/tcp6 の行削除するかコメントアウトしましょう。[user01@cent8 ~]$ sudo vi /etc/netconfig # # The network configuration file. This file is currently only used in # conjunction with the TI-RPC code in the libtirpc library. # # Entries consist of: # # <network_id> <semantics> <flags> <protofamily> <protoname> \ # <device> <nametoaddr_libs> # # The <device> and <nametoaddr_libs> fields are always empty in this # implementation. # udp tpi_clts v inet udp - - tcp tpi_cots_ord v inet tcp - - ##udp6 tpi_clts v inet6 udp - - ##tcp6 tpi_cots_ord v inet6 tcp - - rawip tpi_raw - inet - - - local tpi_cots_ord - loopback - - - unix tpi_cots_ord - loopback - - - [user01@cent8 ~]$
参考
- CentOS 8.0.1905 documentation
- 画面の見切れを解消する方法は、他に仮想マシンのグラフィックコントローラを VBoxSVGA に設定する方法もあります。