Node.js とは何なのか
Node.js とは、簡単にいうと JavaScript をサーバーサイドで実行させてくれる存在です。フロントエンドも、バックエンドも1つの言語で実行でき、WEBサービス、スマートフォンアプリ、IoT関連の開発にも使用することができるみたいです。
インストール
まず Node.jsをインストールしていない人は、[Node.js公式サイト](https://nodejs.org/en/) から、LTS版をダウンロードしてインストール。
『node』 でJavaScriptを実行させる
コマンドラインでindex.jsが格納されているフォルダにpwdで移動し、そのフォルダ内のindex.jsを実行する。
node index.js
nodeだけでEnter押すと、JavaScriptコンソールで色々なコードを試せるようになるみたい。やめるときは .exit と入力するか、control + C を2回押すと終了します。
Node.js のいろんなAPI
Node.jsには様々な機能があり、その一覧が公式サイトのdocumentationで見れます。
https://nodejs.org/dist/latest-v12.x/docs/api/
APIの1つ。 『File System』
FileSystemは、ローカルファイルとかにアクセスすることができるAPI。
今回は、Node.js の File System を使用して、ローカルファイルのコピーを使用します。
FileSystemを読み込む
//jshint esversion:6

const fs = require("fs");
※ const とは、var のようなもの。しかし、var が後から変更できるのに対して、constは後から変更できることができず、一度データを格納(代入?)するとずっとそのまま。
※コメントがないと、"const" is available in ES6 というエラーメッセージが出てきますが、コメントで//jshint esversion:6と記載することでエラーメッセージを回避することができます。
ファイルのコピーを作成する
//jshint esversion:6

const fs = require("fs");

fs.copyFileSync("file.txt","copyfile.txt");

//fs.copyFileSync("コピーするファイル","コピーされたもののファイル名");
※ file.txtのコピーを作成して、copyfile.txtを作成します。って意味。 ちなみに、すでにcopyfile.txtという名前のファイルが存在していた場合、上書き保存されるので注意。
コマンドラインで、実行する
node qiita.js
※今回は、qiita.js というファイルにJavaScriptコードを記載していたので、そのファイルをコマンドライン上で実行する。
Expressフレームワーク
node.js をより使いやすくしたのがExpress フレームワークらしい。めっちゃざっくりだけど。
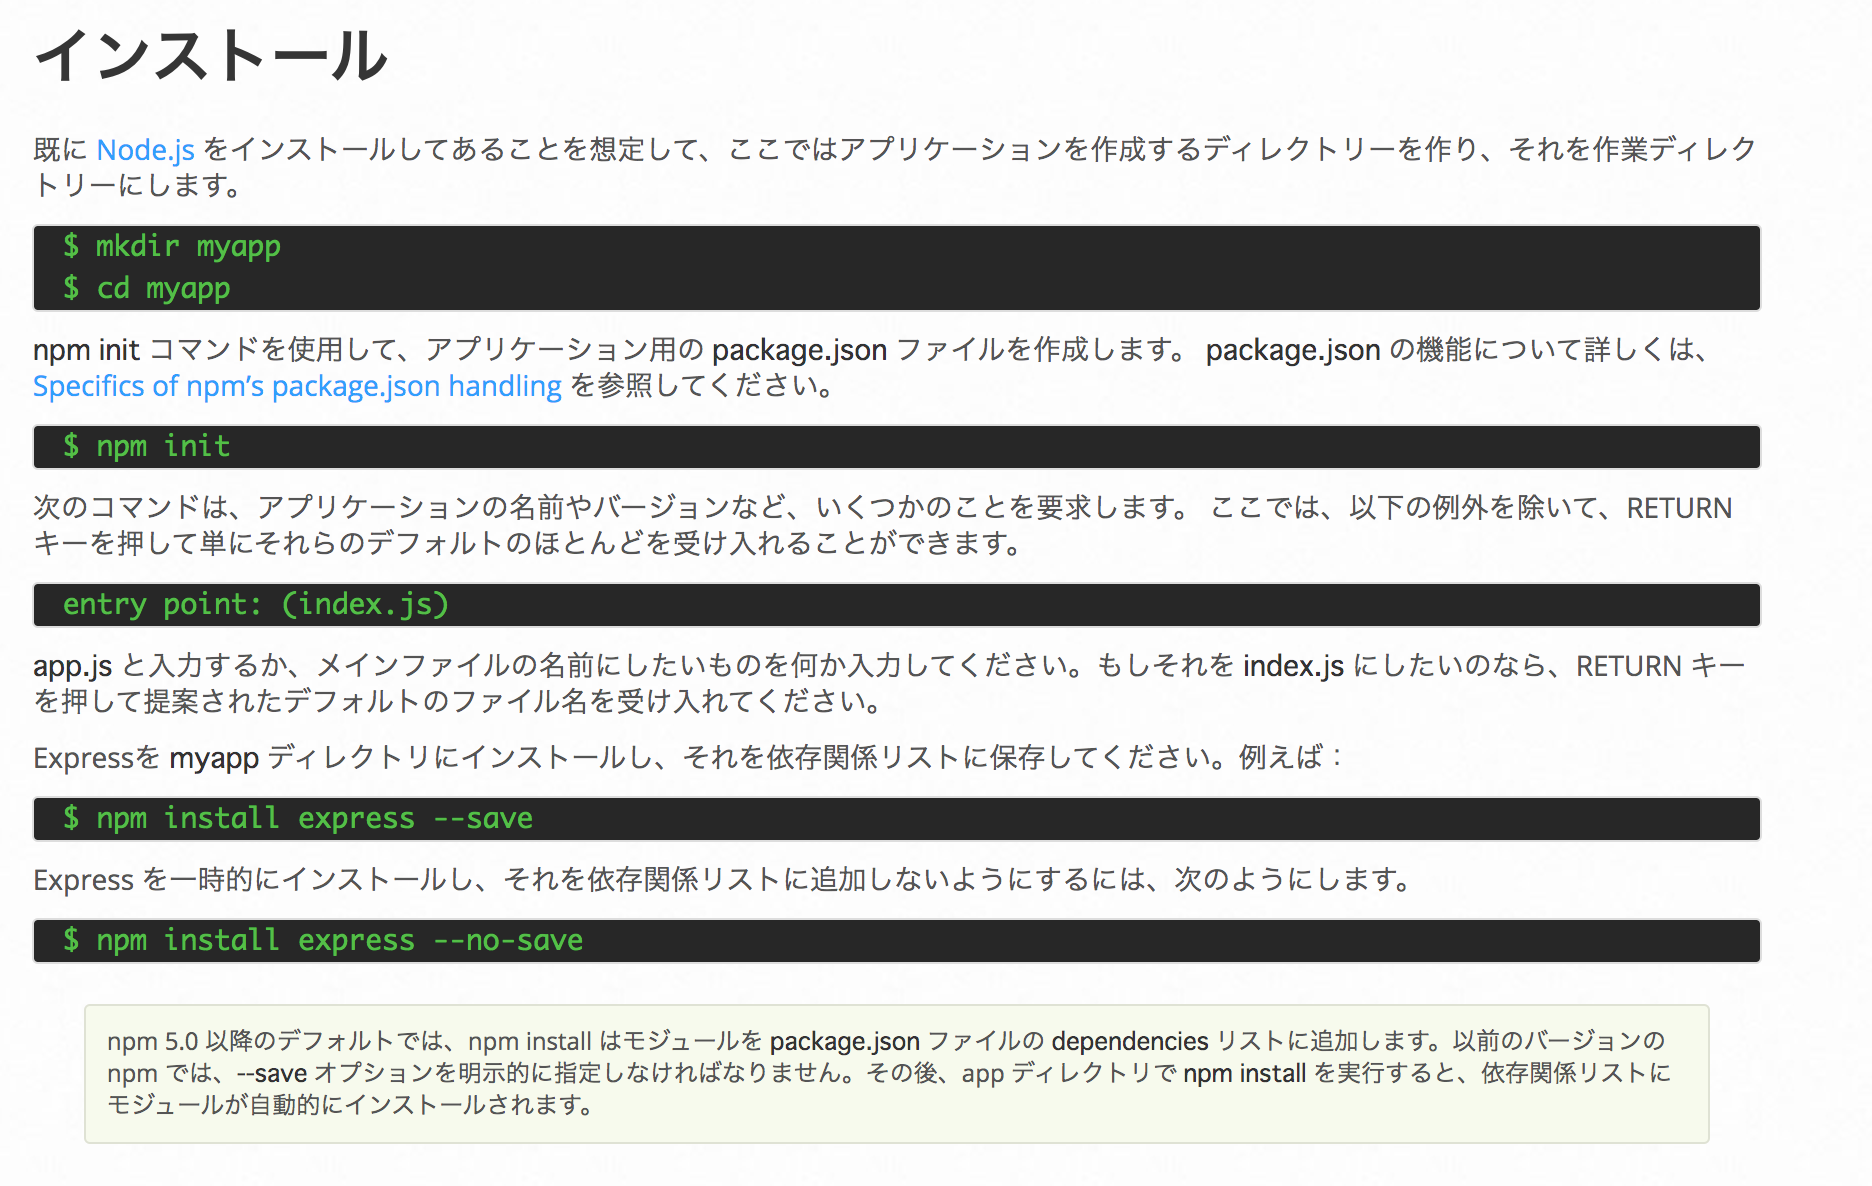
Expressのインストール

retrieved from Express.jp 公式サイト
https://expressjs.com/ja/starter/installing.html
最後のところは『 npm install express 』だけでOKみたい。
Express をjsファイルで使用できるようにする
requireでExpressをロードし使用できるようにします。ついでにexpress()もappに格納します。
const express = require("express");

const app = express();
Expressでサーバーを作成する
ここが割と理解に苦しんだところ。
そもそもサーバーとは、って感じの人はこちらが超絶わかりやすかったので引用。
手順
========================
(JavaScript上)
1.まずExpressをロード
2.アクセスされた時のRespondを考える(ページ別)
3.listenでサーバーを指定
(コマンドラインにて)
4.node server.js で実行
(ブラウザ上にて)
5.http://localhost:3000/と入力し、サーバーに接続
6.respondの処理が実行される
(コマンドラインにて)
7.control + C で終了する
========================
これが一応の流れで、下記が実際のコード。
// jshint esversion:6

// expressをロード
const express = require("express");
const app = express();

// localhost:3000 にアクセスされた時のRespond
app.get("/",function(request, respond){
  //ここでconsole.log(request);とするとrequestの内容みれる
  respond.send("Hello World");
});


// localhost:3000/profile にアクセスされた時のRespond
app.get("/profile", function(request, respond){
  respond.send("My name is Kibinag0. I'm from Japan.");
});

//listenで待ち受け状態にする
 app.listen(3000, function(){
   console.log("Server started on port 3000");
 });
・Request
ブラウザ?からサーバーにリクエストされる情報。
・Respond
サーバーにリクエストが来た時に、反応して実行する処理。
ちなみにサーバーにはスレッドモデル(Apache等)とイベントループ(Node.js等 シングルスレッドともいう)という種類があり、それぞれの違いはこちらが分かりやすかったため、参照。
https://dotinstall.com/lessons/basic_nodejs/26202
・listen()
listenで待ち受け状態にする。このlistenがあることによってrequestを受け取ることができるようになる。
『res.sendFile』を使用してHTMLファイルでRespondする
今までは、"Hello world"とかいう文字列でRespondしていましたが、今回はres.sendFileを使用してHTMLファイルでRespondします。
// リクエストがあったら、index.htmlファイルをrespondする
app.get("/", function(req, res){

  // responseとして、fileをsendしますよ
  res.sendFile(__dirname + "/index.html");

});
(__dirname + "/index.html")は、dirnameをちゃんと取得して、そのindex.htmlがどのディレクトリに格納されているのかを教えてあげる必要があるんですね。
body-parserを使用してformデータを取得する
HTMLファイルでFormを使用して、ユーザーにデータを入力してもらう。そして、そのデータを使用して何か処理を行う場合の方法です。
事前にbody-parserをインストール
npm install body-parser
HTMLでフォームを作成
  <h1>Calculator</h1>
  <form class="" action="/" method="post">
    <input type="text" name="num1" placeholder="First Number">
    <input type="text" name="num2" placeholder="Second Number">
    <button type="submit" name="submit">Calculate</button>
  </form>
このフォームは、
タグに、action="/", method="post" があり、タグにtype="submit"がある必要があります。またapp.post()のところで<input.タグのname=""を使用して、データを引っ張ってくるので、nameもお忘れなく。このフォームをサーバー側で
// jshint esversion:6

// ロードする
const express = require("express");
const bodyParser = require("body-parser");
const app = express();

// body-parserの使用
app.use(bodyParser.urlencoded({extended: true}));

// index.html でrespondする
app.get("/",function(req,res){
  res.sendFile(__dirname + "/index.html");
});


// index.htmlのフォームでpostされた部分
app.post("/",function(req, res){

 // bodyの中のnum1, num2を取得する
 // Number()で値を数値に
  var num1 = Number(req.body.num1);
  var num2 = Number(req.body.num2);

  var result = num1 + num2;

  res.send("The result of the calculation is " + result);
});

app.listen(3000);
app.getがサーバー自体へのリクエストに対するリスポンスの処理なのに対し、app.postはformのsubmitというリクエストに対するリスポンスの処理である。
Udemy AngelaさんのWEB DEVELOPMENT COURSE 『206. Processing Post requests with body-parser』より
サーバー更新自動化『nodemon』のすすめ
ちなみに、上記だとserver.jsファイルを更新するたびにコマンドラインでサーバー終了して、もう一回立ち上げることになります。それって結構めんどくさいですよね。
そんな人のために、Udemy講師のAngelaさんが役立つツールnodemonを教えてくれました。
Angelaさんの講義はこちら→ Udemy Bootcamp web development
nodemonを使うと、server.jsファイルを上書き保存するたびに検知してくれて、自動でサーバーを更新し、反映させてくれる優れものです。
インストール
インストールの仕方はコマンドラインで
npm install -g nodemon
と記載するだけ。
※permission error が出たら
sudo npm install nodemon -g
で対応。
使い方
nodemon server.js
とコマンドラインで記載すると、server.jsファイルの更新を自動反映してくれます。
quitする時は、ctrl+C 。
以上 Node.jsとExpress。
結構難しいかったので、追加、修正を随時していきます。。