はじめに
今回はjQueryを使ってアウトプットをしてみました!
(間違いや、こうした方がより良い!などありましたらご指摘いただけると嬉しいです!)
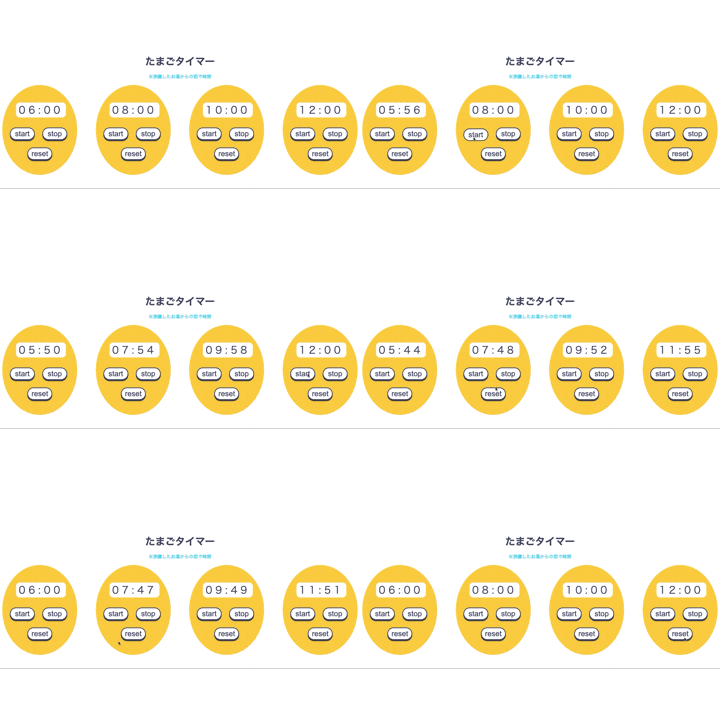
できあがったもの
卵のタイマーにした理由は、家族それぞれで茹で時間がバラバラだったので複数個タイマーあればいいな〜と思ったからです(笑)
機能
- startボタンでカウントスタート
- stopボタンでカウントストップ
- resetボタンでカウントリセット
- それぞれのタイマーで別の動きをする
HTMLとCSSを記述する
HTML
<!DOCTYPE html>
<html lang="ja">

<head>
  <meta charset="UTF-8">
  <meta name="viewport" content="width=device-width, initial-scale=1.0">
  <link rel="stylesheet" href="style.css">
  <title>Timer</title>
</head>

<body>
  <h1>たまごタイマー</h1>
  <p>※沸騰したお湯からの茹で時間</p>

  <div class="container">

    <div class="element">
      <div class="count" data-time="360"></div>
      <div class="display"></div>
      <button class="start-btn">start</button>
      <button class="stop-btn">stop</button>
      <button class="reset-btn">reset</button>
    </div>

    <div class="element">
      <div class="count" data-time="480"></div>
      <div class="display"></div>
      <button class="start-btn">start</button>
      <button class="stop-btn">stop</button>
      <button class="reset-btn">reset</button>
    </div>

    <div class="element">
      <div class="count" data-time="600"></div>
      <div class="display"></div>
      <button class="start-btn">start</button>
      <button class="stop-btn">stop</button>
      <button class="reset-btn">reset</button>
    </div>

    <div class="element">
      <div class="count" data-time="720"></div>
      <div class="display"></div>
      <button class="start-btn">start</button>
      <button class="stop-btn">stop</button>
      <button class="reset-btn">reset</button>
    </div>

  </div>
  <script src="libs/jquery-3.5.1.min.js"></script>
  <script src="main.js"></script>
</body>

</html>
タイマー1つだけつくる場合はid指定していましたが、今回は複数つくるためclass指定にしました。
また、data属性を使ってそれぞれのタイマーに時間を設定しています。
参考:data属性について
https://developer.mozilla.org/ja/docs/Learn/HTML/Howto/Use_data_attributes
CSS
body {
  color: #515151;
}

.count {
  display: none;
}

h1 {
  margin: 0;
  font-size: 40px;
  text-align: center;
}

p {
  text-align: center;
  font-size: 18px;
  color: #28CECE;
  margin-bottom: 20px;
}

.container {
  display: flex;
  justify-content: space-between;
}

.element {
  width: 300px;
  height: 360px;
  background-color: #F7d233;
  border-radius: 50%;
  position: relative;
}

.display {
  font-family: 'Dotum';
  color: #515151;
  position: absolute;
  top: 70px;
  right: 45px;
  font-size: 40px;
  text-align: center;
  letter-spacing: 0.8rem;
  width: 200px;
  height: 60px;
  background-color: white;
  border-radius: 15px;
}

button {
  font-size: 30px;
  color: #515151;
  background-color: white;
  border: solid #515151;
  border-radius: 50px;
  width: 100px;
  height: 50px;
  box-shadow: 0 5px 0 #515151;
  outline: none;
}

button:active {
  transform: translateY(4px);
  box-shadow: none;
}

.start-btn {
  position: absolute;
  top: 170px;
  left: 30px;
}

.stop-btn {
  position: absolute;
  top: 170px;
  right: 40px;
}

.reset-btn {
  position: absolute;
  top: 250px;
  right: 100px;
}
見た目は卵を意識してつくりました(笑)
あとボタンをクリックした時に沈むような動きをつけるのにtranslateYというやり方を使いました。(知らなかった)
jQueryを記述する
$(() => {

  $('.element').each(function () {
    const countBox = $(this).children('.count');
    const start = $(this).children('.start-btn');
    const stop = $(this).children('.stop-btn');
    const reset = $(this).children('.reset-btn');
    const display = $(this).children('.display');

    //タイマーの秒数
    let setTime = countBox.data('time');
    //残りの秒数
    let timeLeft = setTime;
    //setIntervalのための変数
    let testTimer;
    //分を表示する
    let minutes;
    //秒を表示する
    let seconds;

    //残りの秒数を表示する関数
    const displayText = () => {
      minutes = Math.floor(timeLeft / 60);
      seconds = timeLeft % 60;
      if (String(minutes).length == 1)
        minutes = "0" + String(minutes)
      if (String(seconds).length == 1)
        seconds = "0" + String(seconds)
      display.text(minutes + ":" + seconds);
    };
    //1ずつカウントダウンする関数
    const countDown = () => {
      timeLeft--;
      displayText();
    };
    //カウントをストップする関数
    const stopCount = () => {
      clearInterval(testTimer);
    };
    //1000ミリ秒ごとに処理を繰り返す関数
    const timerStart = () => {
      testTimer = setInterval(function () {
        if (timeLeft <= 0)
          clearInterval(testTimer);
        else
          countDown();
      }, 1000);
      return;
    };

    //ボタンを押したらカウントダウンスタート
    start.on('click', () => {
      stopCount();
      timerStart();
    });
    //ボタンを押したらカウントストップ
    stop.on('click', () => {
      stopCount();
    });
    //ボタンを押したらカウントリセット
    reset.on('click', () => {
      stopCount();
      timeLeft = setTime;
      displayText();
    });

      displayText();
  })
});
コードを説明
$(() => {

  $('.element').each(function () {
    const countBox = $(this).children('.count');
    const start = $(this).children('.start-btn');
    const stop = $(this).children('.stop-btn');
    const reset = $(this).children('.reset-btn');
    const display = $(this).children('.display');
まずDOM操作に必要なIDを取得します。
${'.element'} で複数の要素を取得し、eachメソッドを使ってループ処理してます。
ここの $(this) は $('.element') をさしていて、childrenを使うことで.elementの子要素を取得してます。
補足
一番上にある $(() => { は readyイベント関数というもので、見た目は似ていますがJavaScriptで使われる即時関数とは別物です。
即時関数については前回の記事参照 → https://qiita.com/ki01chi/items/abb986ebc59bc684b4d7
上記は一部分だけですが全体で見ると
   $(document).ready(function() {
       //実行したい内容
   });
このような形で使われます。
今回は省略して $(() => {}); としています。
readyイベント関数を使うことで、HTMLが全部読み込まれてからfunction( )以降の処理が行われるようになります。
参考:jQueryの基本 - $(document).ready
    //タイマーの秒数
    let setTime = countBox.data('time');
    //残りの秒数
    let timeLeft = setTime;
    //setIntervalのための変数
    let testTimer;
    //分を表示する
    let minutes;
    //秒を表示する
    let seconds;
タイマーの秒数はdata()メソッドを使って取得。
HTML内でデータ属性を使って指定したdata-timeをここで取得してます。
参考:data()メソッドについて
https://www.sejuku.net/blog/38263
    //残りの秒数を表示する関数
    const displayText = () => {
      minutes = Math.floor(timeLeft / 60);
      seconds = timeLeft % 60;
      if (String(minutes).length == 1)
        minutes = "0" + String(minutes)
      if (String(seconds).length == 1)
        seconds = "0" + String(seconds)
      display.text(minutes + ":" + seconds);
    };
countBoxに残り秒数を表示するよう指定。
秒で表示されているのを分で表示したいのでMath.floorを使って計算式をつくってます。
例) 360秒 を 6分と表示したい!
分 → 360 ÷ 60 = 6
そして6分という表示をタイマーっぽく 06:00 という表示にしたかったため、数字が1桁ならその数字の前に0を付け足すようにしました。
もしif文を書かなかったら 6:0 という表示になります。
    //1ずつカウントダウンする関数
    const countDown = () => {
      timeLeft--;
      displayText();
    };
1ずつカウントダウンする関数を作成します。
   //1000ミリ秒ごとに処理を繰り返す関数
    const timerStart = () => {
      testTimer = setInterval(function () {
        if (timeLeft <= 0)
          clearInterval(testTimer);
        else
          countDown();
      }, 1000);
      return;
    };
最初につくっておいた変数testTimerにsetIntervalの処理を入れます。
setIntervalは繰り返し処理をおこなってくれる関数です。
ですが、setIntervalだけでは半永久的に繰り返し処理が行われてしまうので、この繰り返し処理を停止させるためにclearIntervalを使っています。
上記コードの場合、timeLeft(残りの秒数)が0になったらclearIntervalが実行されて繰り返し処理が停止します。
0秒になるまでは1000ミリ秒(=1秒)ずつタイムが減っていきます。
    //カウントをストップする関数
    const stopCount = () => {
      clearInterval(testTimer);
    };
setInterval処理を停止させるための関数です。
    //ボタンを押したらカウントダウンスタート
    start.on('click', () => {
      stopCount();
      timerStart();
    });
関数が一通り作れたのであとはクリックイベントです。
まずスタートボタンを押したとき。
スタートを2回以上クリックしたときに起きる変な挙動(setIntervalの繰り返し処理が複数回起きて正常にカウントされない)を防ぐために、最初にstopCount();を書いています。
    //ボタンを押したらカウントストップ
    stop.on('click', () => {
      stopCount();
    });
そしてストップボタンを押した時の挙動。
    //ボタンを押したらカウントリセット
    reset.on('click', () => {
      stopCount();
      timeLeft = setTime;
      displayText();
    });

    displayText();
  })
});
最後にリセットボタンを押したとき。
stopCount(); を最初につけることでリセットを押したあと、勝手にカウント開始されないようにしています。
残り時間に初期値であるsetTimeを入れてあげることでリセット完了です。
さいごに
ようやくまとめれました、、よかった。
今見返すとスタートボタンを1回押したら連続でクリックできないようにするとか他のやり方があったなぁと思いつつ、今回は過去の私が知恵をしぼって書いたものをそのまま載っけました(笑)
最後まで読んでいただきありがとうございました!
