はじめに
今回は、検証用に無償かつローカルで稼働できる KMS を構築して、VM Encryption のテストをしたいと思います。
VM Encyription の機能を有効化するためには、「サードパーティのキー管理サーバー(Key Management Server (KMS))」が必要になります。
そのため、VMware 基盤とは別に用意しておく必要があります。
KMIP for VMware on IBM Cloud を使って VM Encryption を有効化する - Qiita : https://qiita.com/khayama/items/e47f83d6709c0564d970
OS バージョン確認
今回は以下の OS の Docker 上で KMS サーバーを起動させます。
cat /etc/system-release
CentOS Linux release 7.5.1804 (Core)
Docker インストール
検証用 KMS サーバーに必要な Docker をインストールします。
必要なパッケージのインストール
sudo yum install -y yum-utils \
  device-mapper-persistent-data \
  lvm2
レポジトリの追加
sudo yum-config-manager \
    --add-repo \
    https://download.docker.com/linux/centos/docker-ce.repo
最新版 Docker のインストール
sudo yum install docker-ce
Docker サービスの開始
sudo systemctl start docker
動作確認
こちらのコマンドで正しく表示されれば、 OK です。
sudo docker run hello-world

Hello from Docker!
This message shows that your installation appears to be working correctly.

To generate this message, Docker took the following steps:
 1. The Docker client contacted the Docker daemon.
 2. The Docker daemon pulled the "hello-world" image from the Docker Hub.
    (amd64)
 3. The Docker daemon created a new container from that image which runs the
    executable that produces the output you are currently reading.
 4. The Docker daemon streamed that output to the Docker client, which sent it
    to your terminal.

To try something more ambitious, you can run an Ubuntu container with:
 $ docker run -it ubuntu bash

Share images, automate workflows, and more with a free Docker ID:
 https://hub.docker.com/

For more examples and ideas, visit:
 https://docs.docker.com/get-started/
Option : OS 起動時に Docker を自動起動にする設定
オプションですが、設定しておきましょう。
sudo systemctl enable docker
KMS サーバーの起動・設定
公開されている Docker image を元に KMS サーバーをローカルに立ち上げて設定していきます。
コンテナイメージのダウンロード
ダウンロードはこれだけです。
docker pull lamw/vmwkmip
Using default tag: latest
latest: Pulling from lamw/vmwkmip
93b3dcee11d6: Pull complete
0f5812e39a48: Pull complete
e3ea6cd8b75c: Pull complete
6babfb2795ad: Pull complete
cc1693f97254: Pull complete
ef543cab6bd7: Pull complete
ab84cc116cf0: Pull complete
Digest: sha256:ceed15cde1176109d88b9f5dc3878f80a0c155c8778e41c49d5629b2a22b4162
Status: Downloaded newer image for lamw/vmwkmip:latest
コンテナをバックグラウンドで起動
すぐに起動させられます。
docker run -d --rm -it -p 5696:5696 lamw/vmwkmip
0fac953dafedb84875550108f543004b079bcc2f6bb24fd2c9f5cfb96d006ad8
「-d」なしで起動すると以下の注意喚起が表示されます。
本番用途は想定していない、暗号鍵は再起動ごとに消去されることに留意して使いましょう。
再起動後は、新規に別コンテナを立ち上げ、以下同様の作業を行えばよいようです。
******* DO NOT RUN THIS IN PRODUCTION *******
*** ENCRYPTION KEYS ARE LOST UPON RESTART ***
vCenter での設定
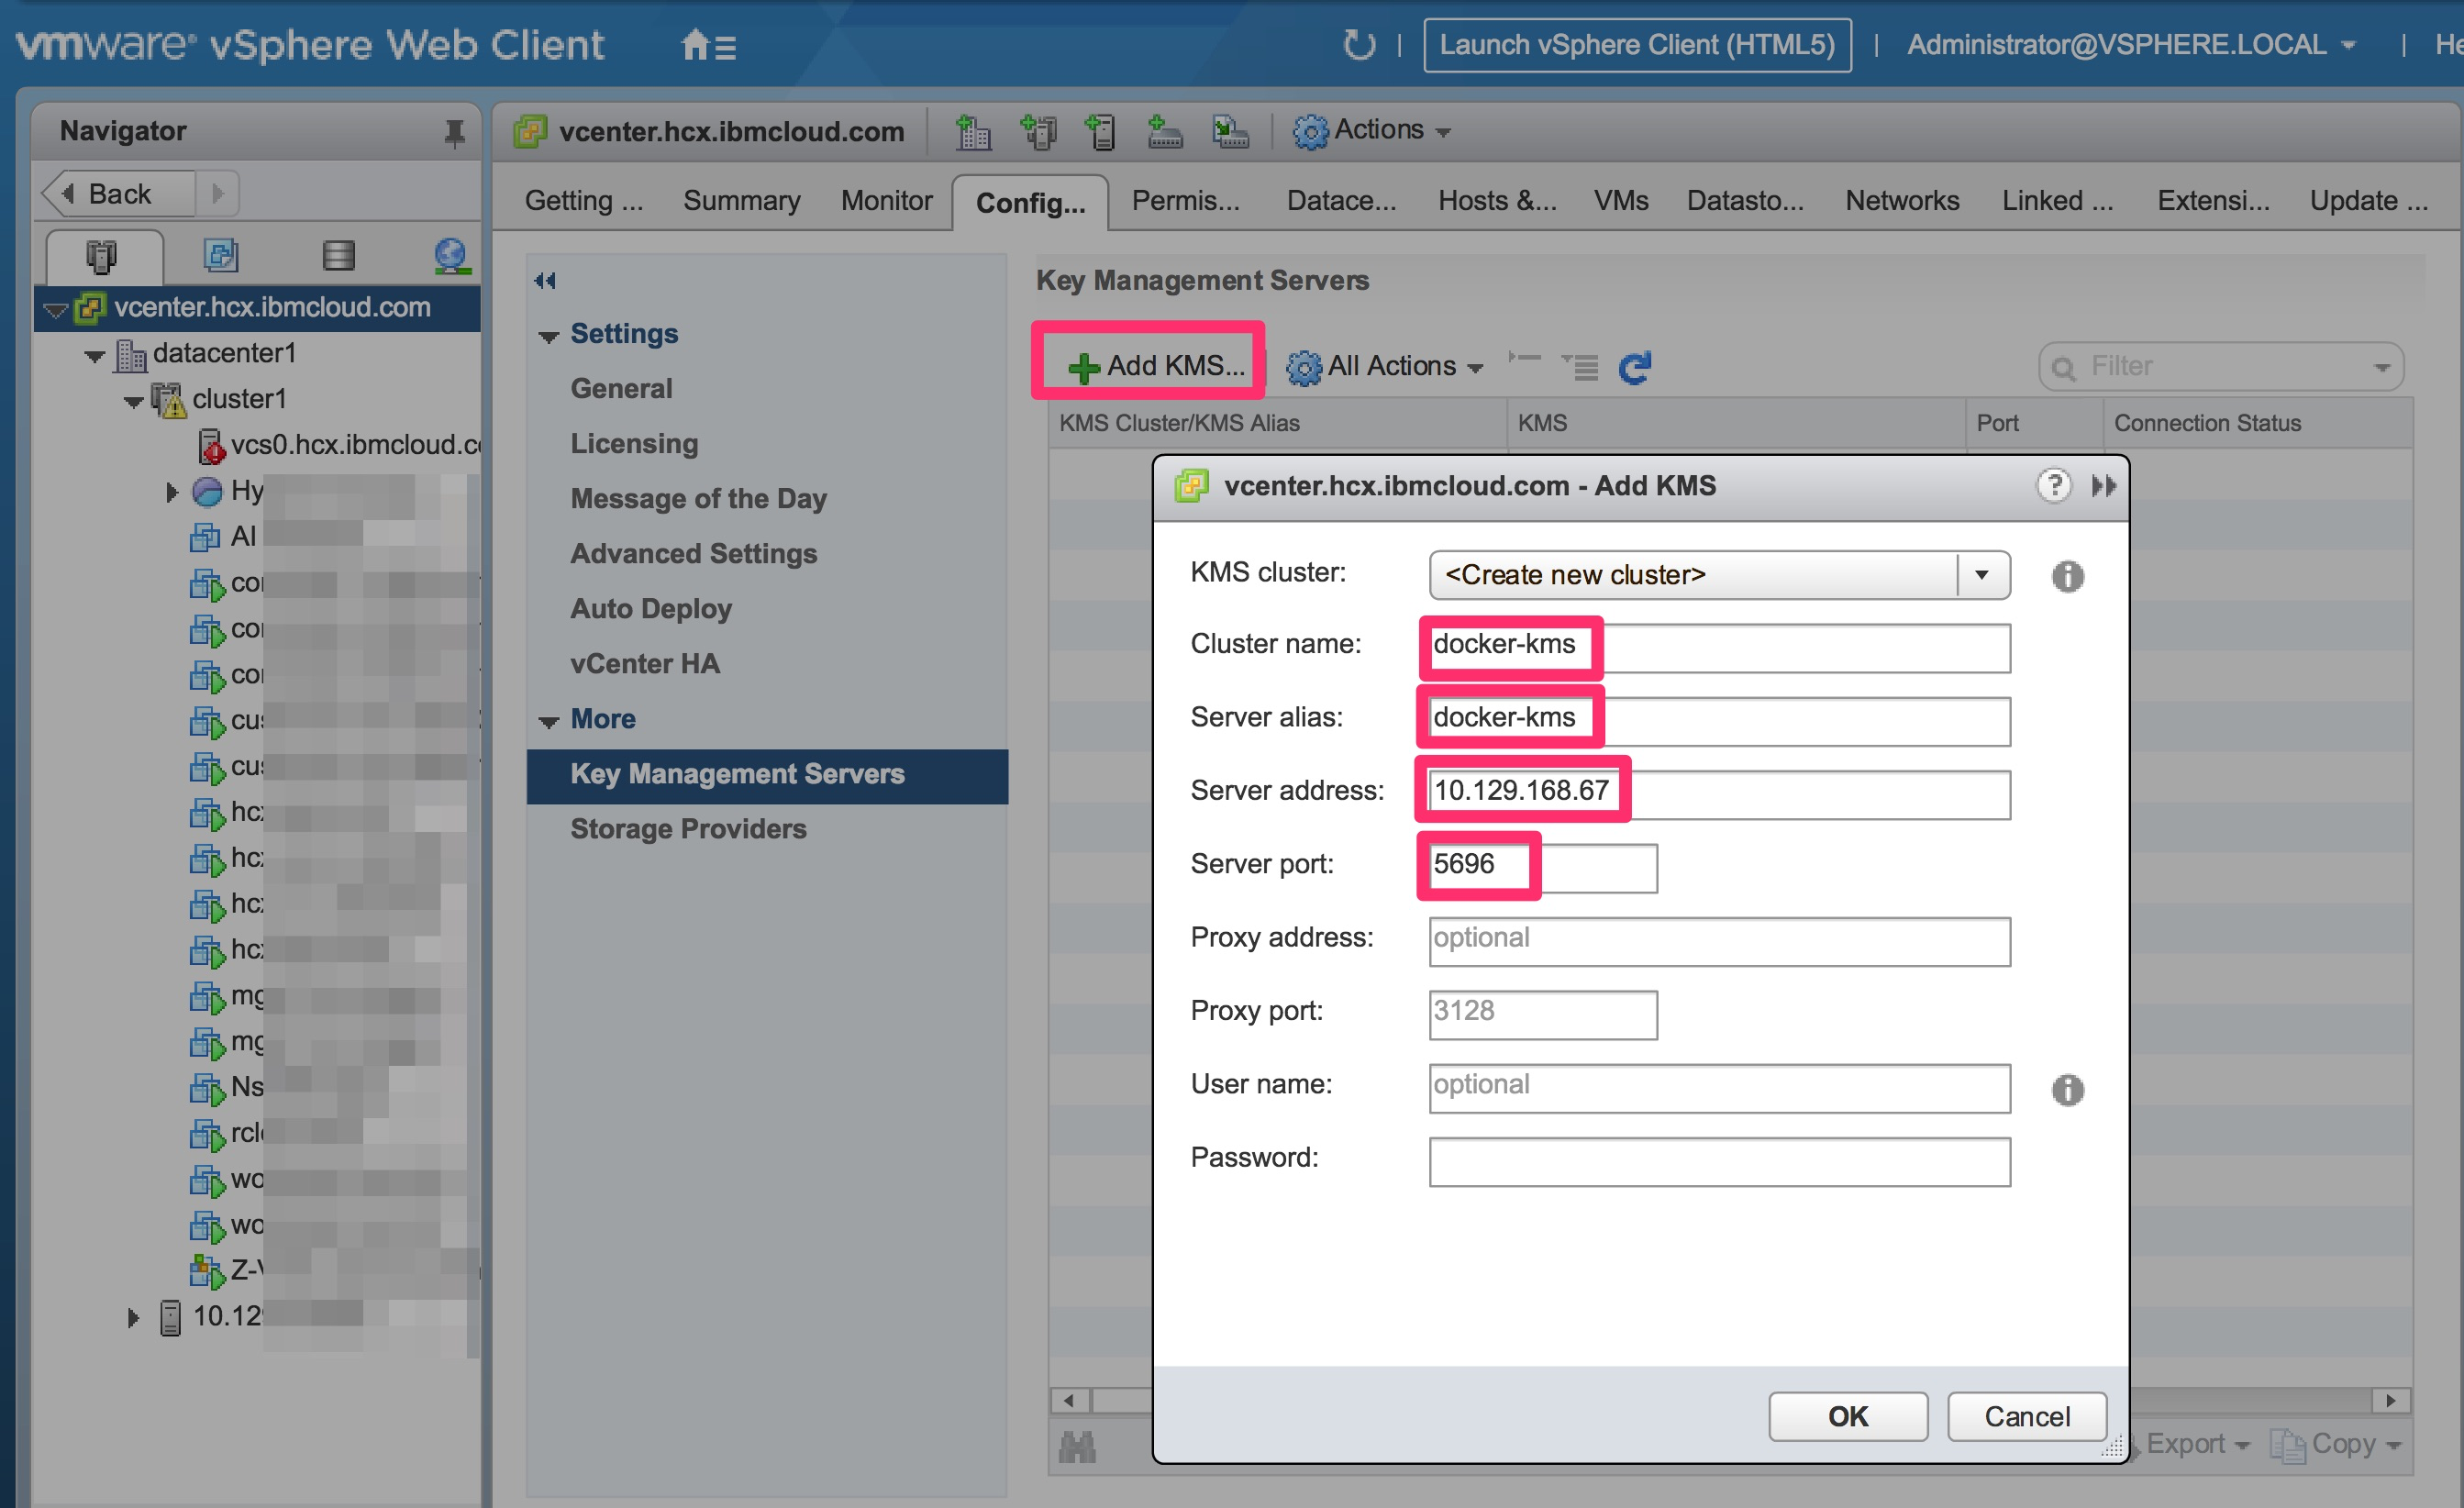
vCenter Server インスタンスの「構成」をクリックし、「キー管理サーバー」をクリックします。
KMS の追加をクリックし、ウィザードに KMS 情報を指定して、OK をクリックします。
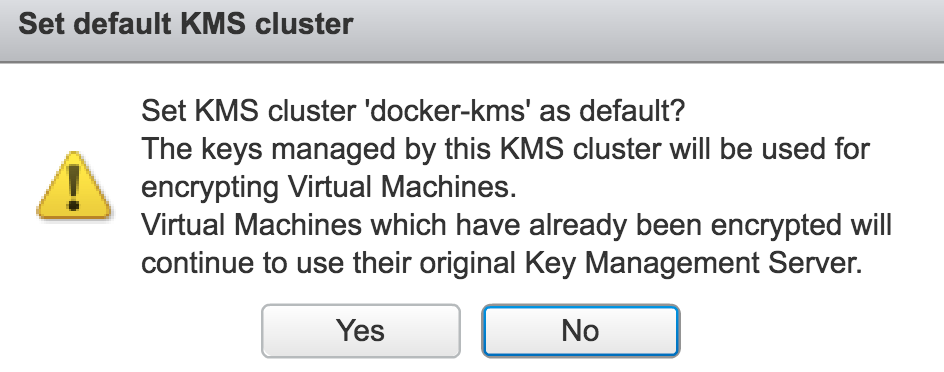
初回の場合、デフォルトの KMS サーバーに設定するか聞かれますが、どちらでも構いません。
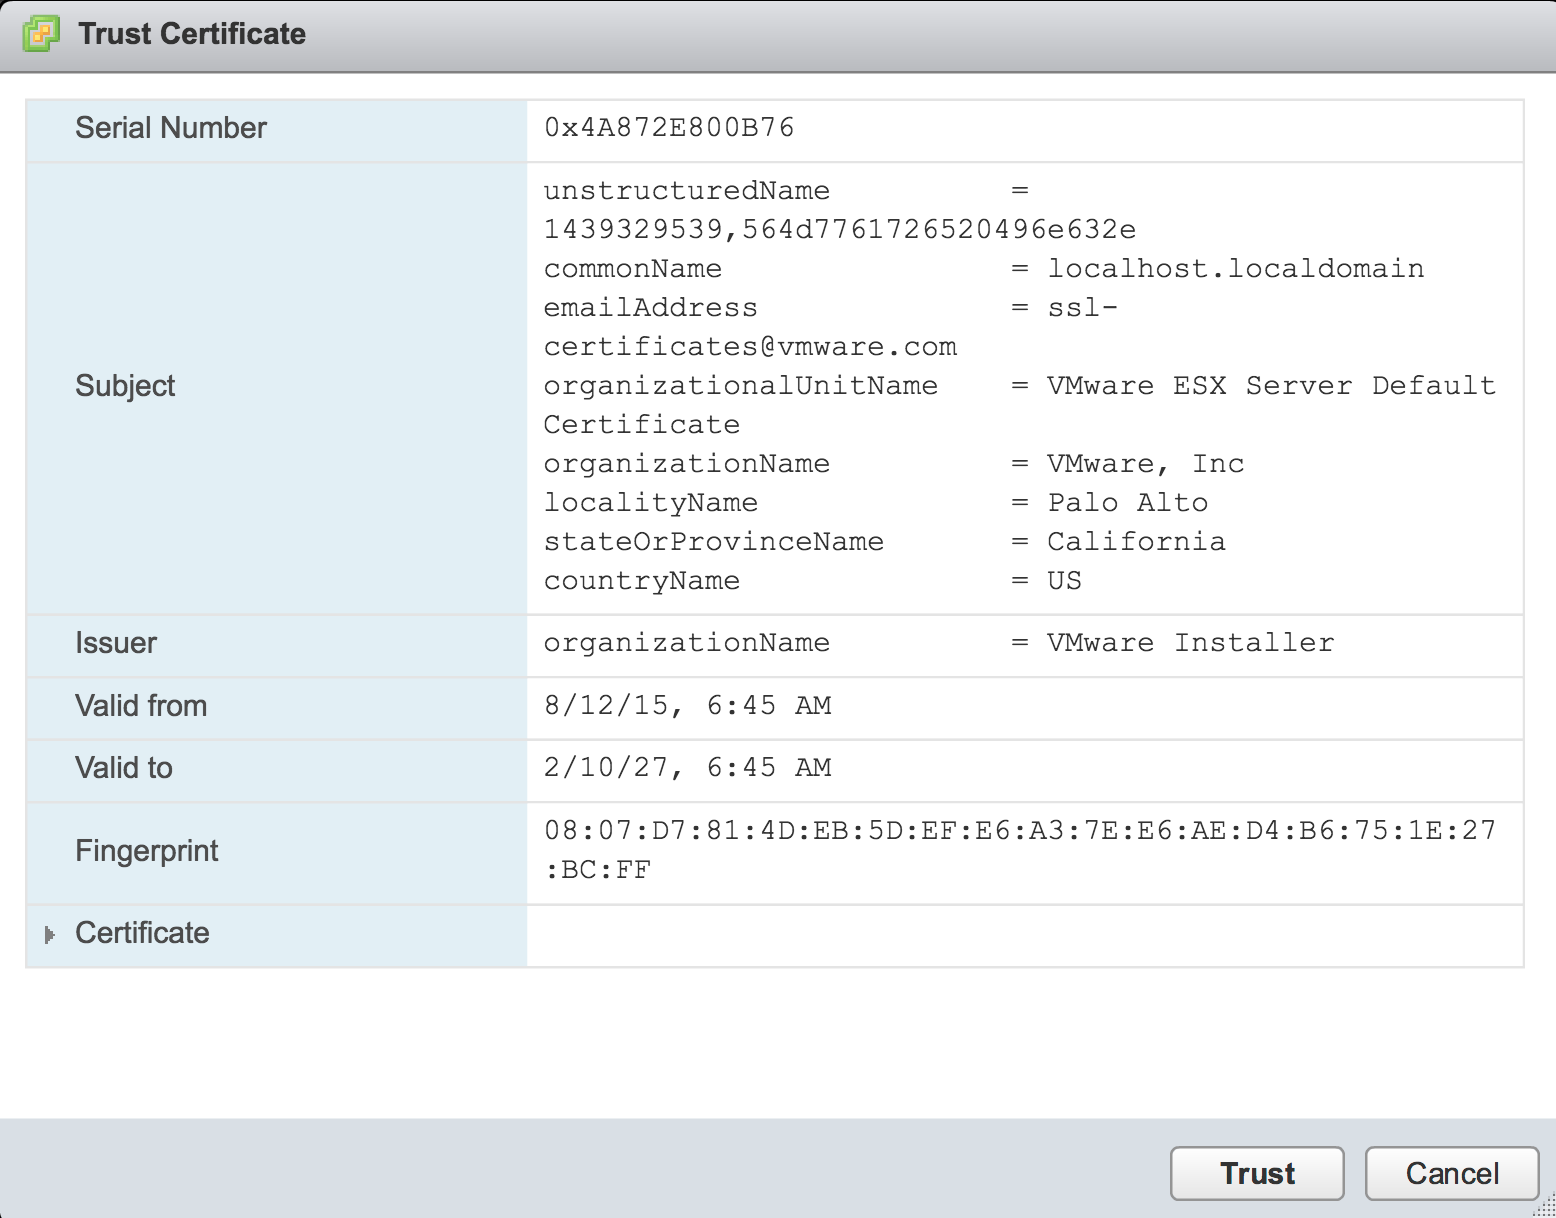
証明書を「信頼」します。
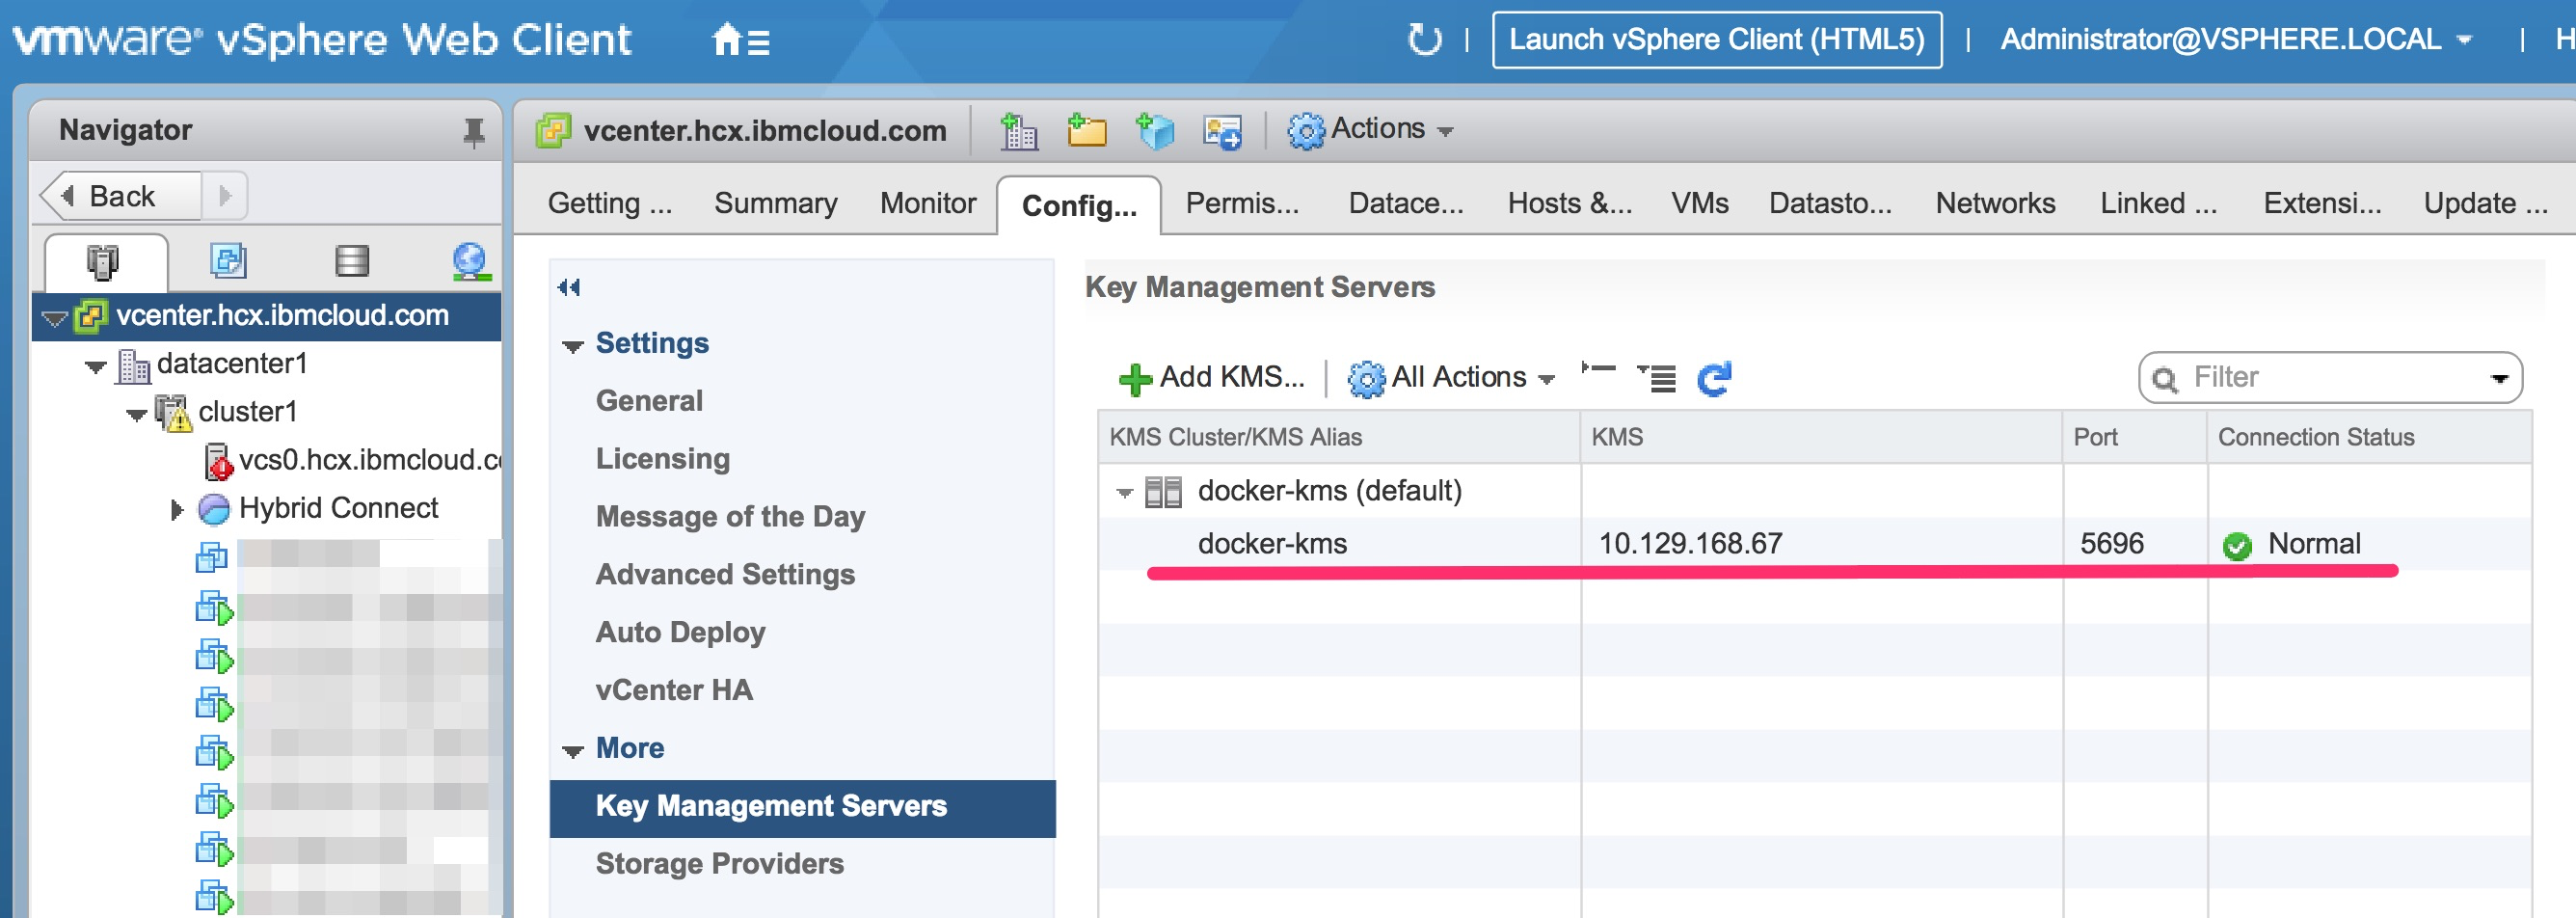
「キー管理サーバー」の欄で、正しく接続がされていれば、 OK です。
めちゃめちゃ簡単に構築できてしまいました...笑
VM Encryption のテスト
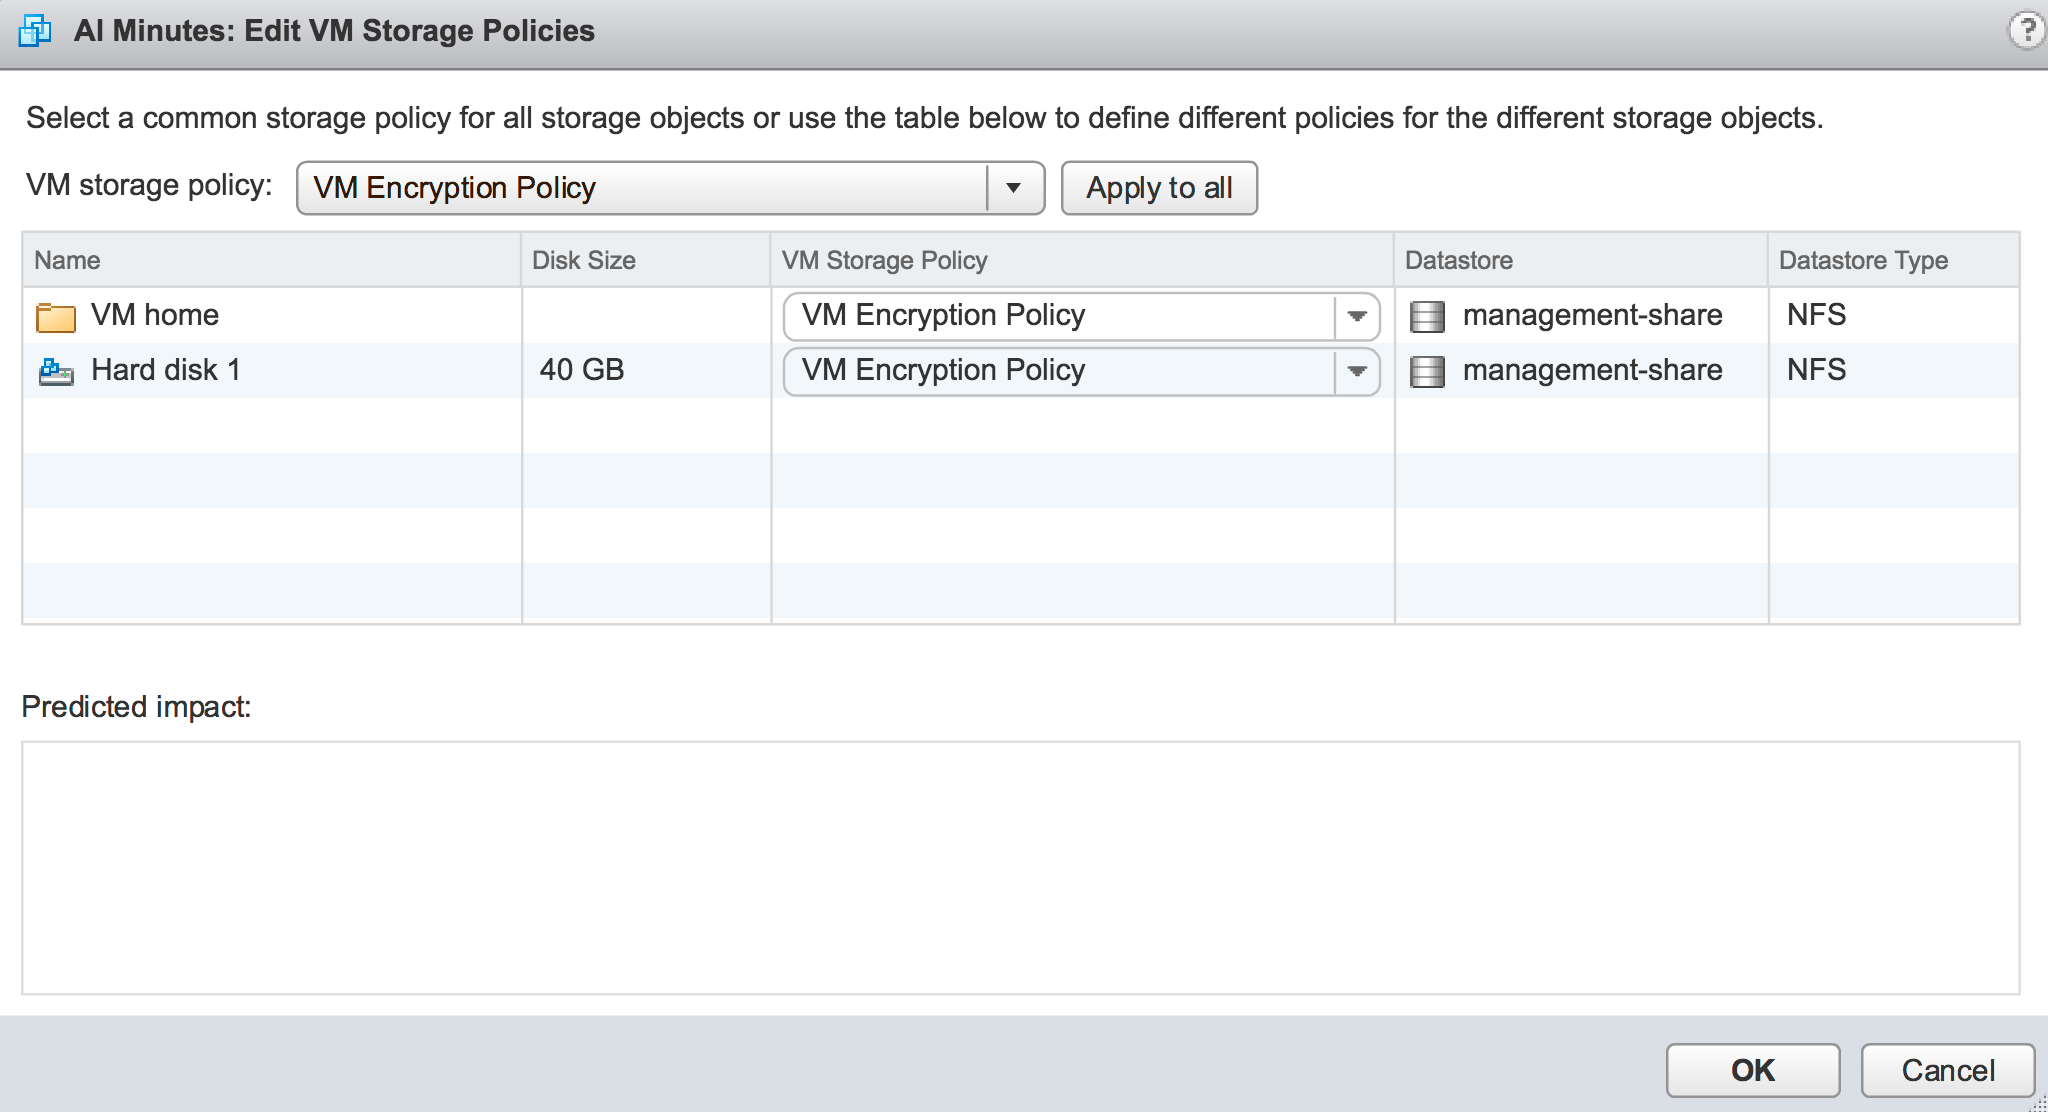
仮想マシンのストレージポリシーから「VM Encryption」を有効化してみます。

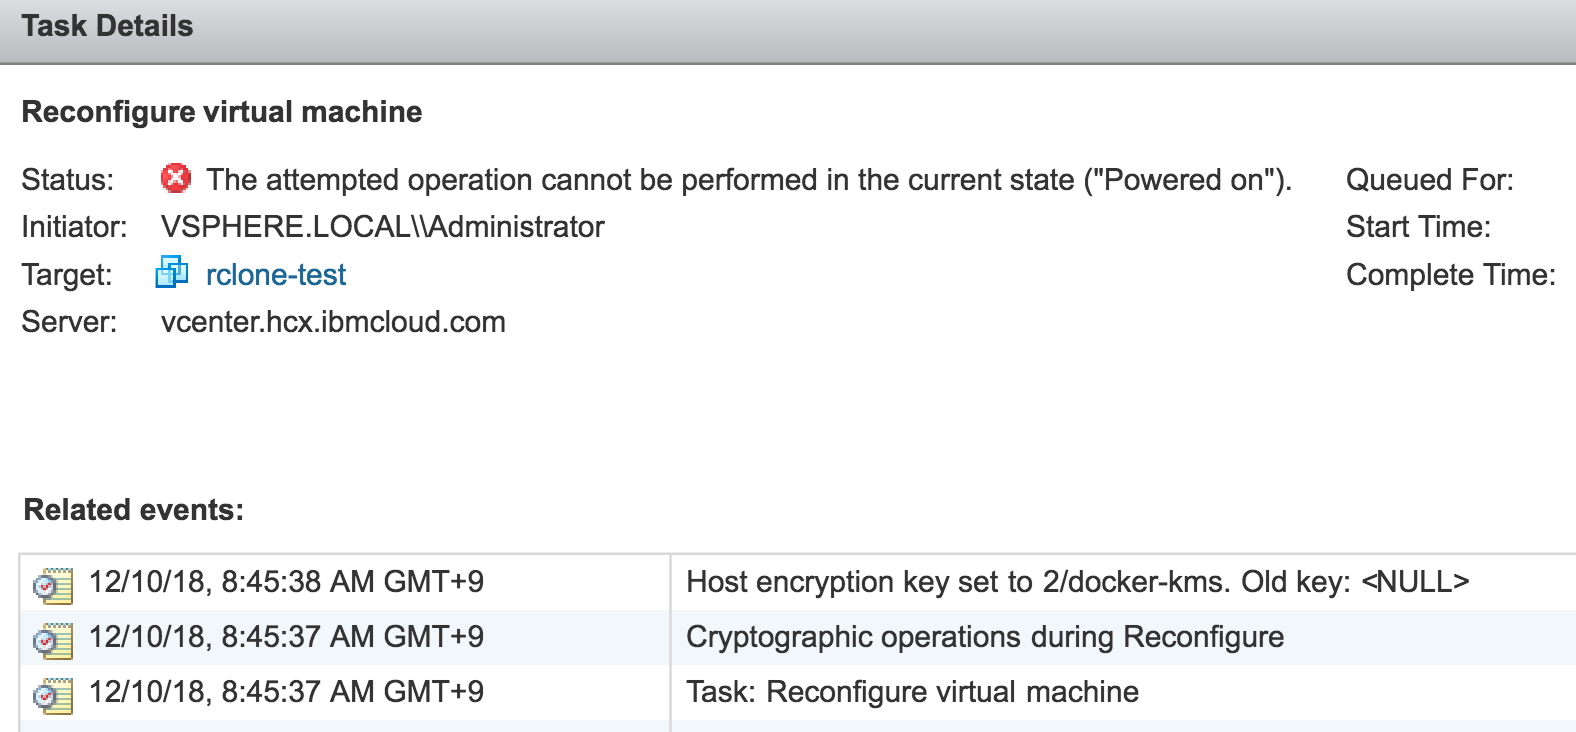
ちなみに「パワーオフ」の状態でないと怒られるので、シャットダウンしてから「VM Encryption」を有効化することになります。
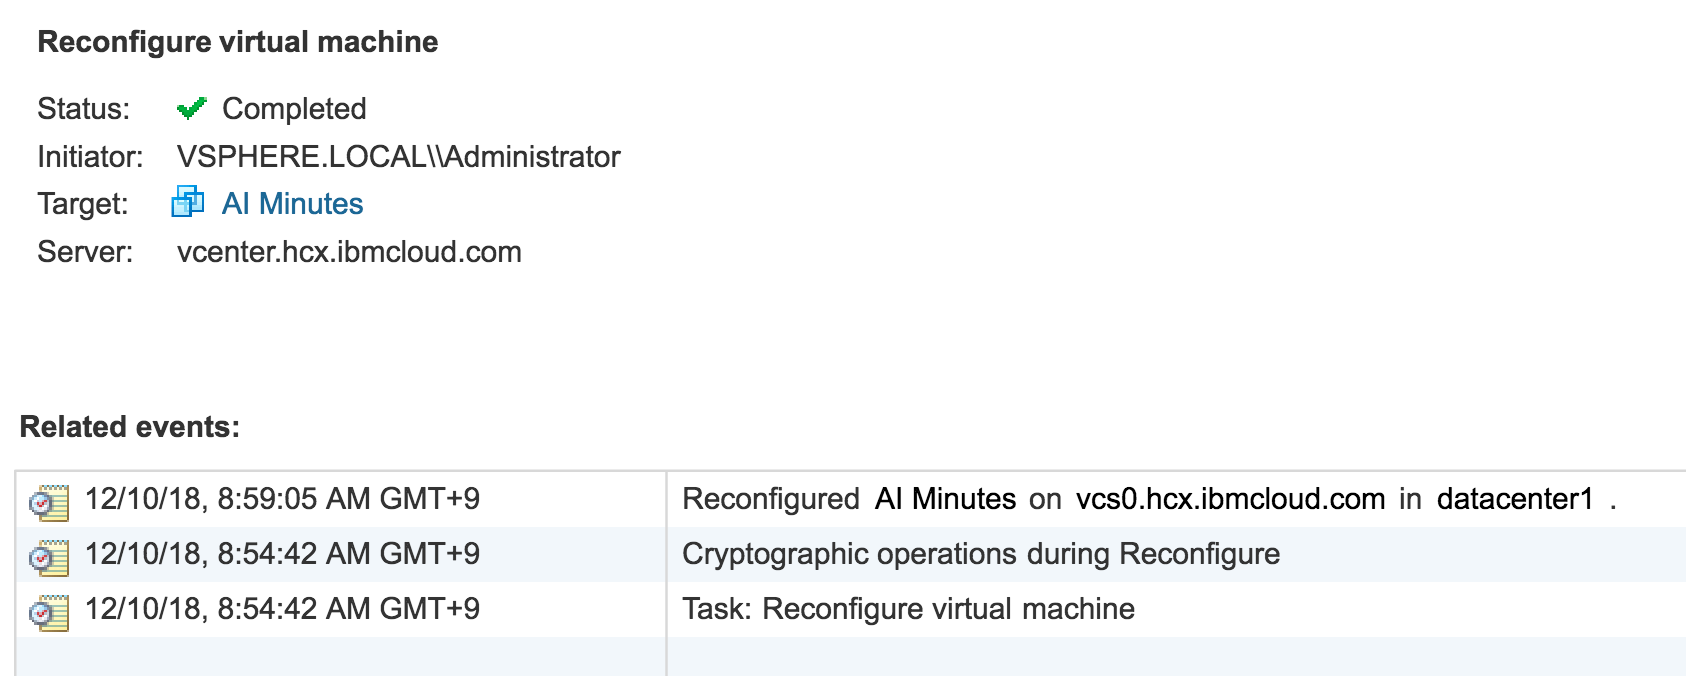
ディスク領域の定義が Thin Provision で 40 GB、 Storage Usage が 約 10 GB のボリュームに対して、約 5 分で完了しました。
まとめ
vSphere 6.5 を持っている方は「VM Encryption」の新機能を、これだけ簡単にテストできてしまいます!
他の既存機能との互換性など、チェックしてみてはいかがでしょうか。
コンテナって便利ですね!
Reference
- Get Docker CE for CentOS | Docker Documentation : https://docs.docker.com/install/linux/docker-ce/centos/#os-requirements
- lamw/vmwkmip - Docker Hub : https://hub.docker.com/r/lamw/vmwkmip/
- KMIP Server Docker Container for evaluating VM Encryption in vSphere 6.5 : https://www.virtuallyghetto.com/2016/12/kmip-server-docker-container-for-evaluating-vm-encryption-in-vsphere-6-5.html
