gem omniauth-google-oauth2を使いつつGoogleログインを実装し、Herokuでデプロイすることまでの道のりを書きます。
途中途中でエラーが出たので、その辺りも書いていきます。
ローカルでの実装編
ローカルで実装する手順をまずは書きます。
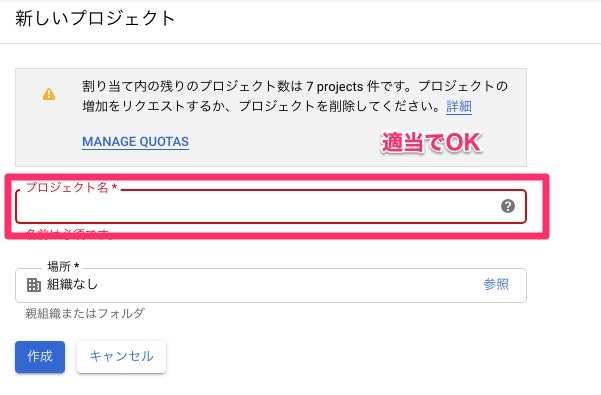
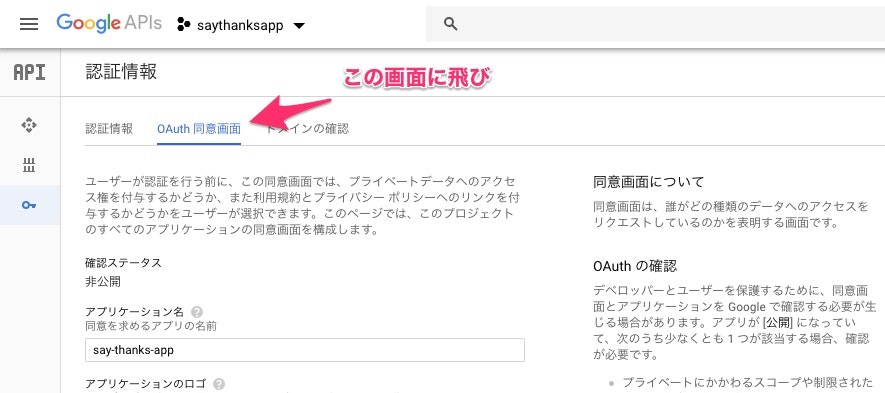
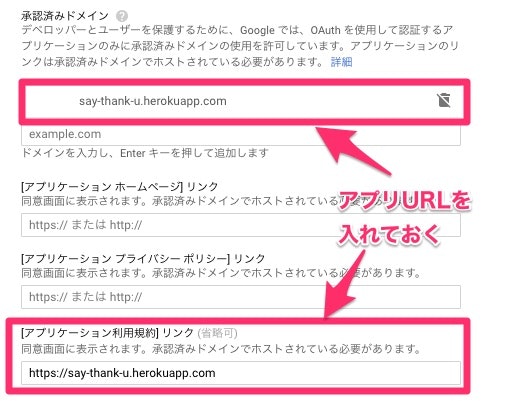
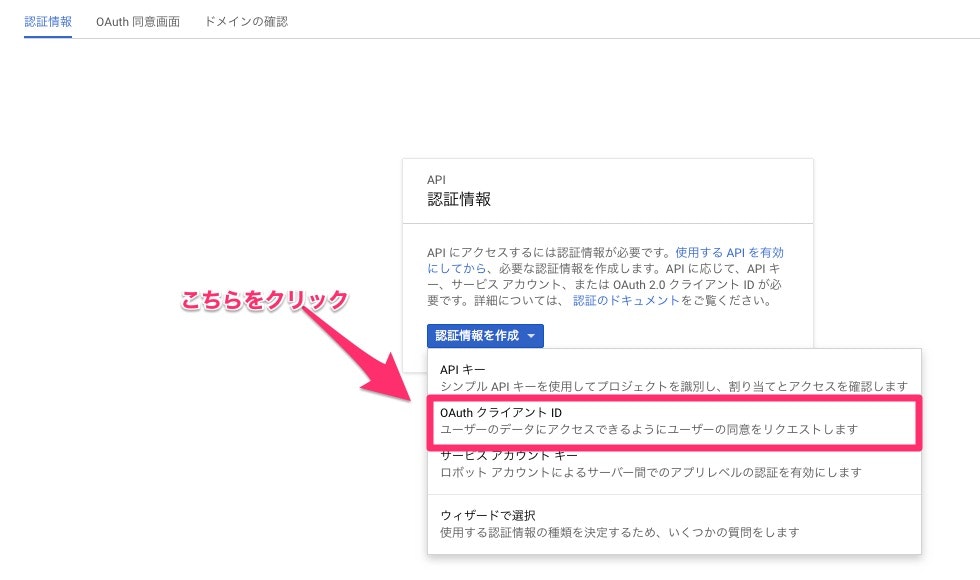
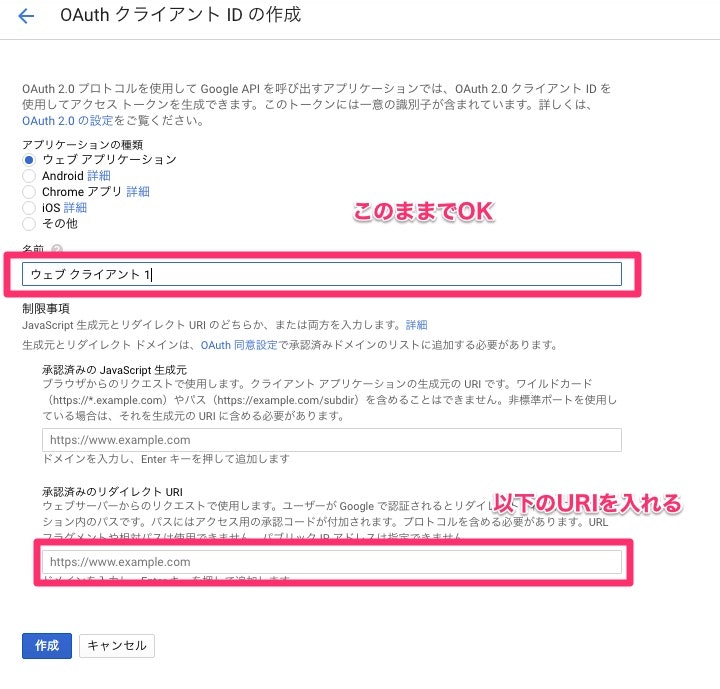
GoogleクライアントID、クライアントシークレットの取得
⬇︎
▼承認済みのリダイレクトURIに入れる値
http://localhost:3000/users/auth/google/callback-
アプリのURL/users/auth/google/callback(ex.https://say-thank-u.herokuapp.com/users/auth/google/callback)
上記の流れで発行される、クライアントIDとクライアントシークレットをメモ帳などに控えておきます。
Deviseの導入
Deviseを導入する手順です。順番を間違えると面倒なのでお気をつけください。
gem 'devise'
gem 'omniauth'
gem 'omniauth-google-oauth2'
$ bundle install
$ rails g devise:install
$ rails g devise user
      #add
      t.string :users, :name
      t.string :users, :password
      t.string :users, :provider
      t.string :users, :uid
      t.string :users, :meta
      t.string :users, :reset_password_token
      t.string :users, :reset_password_sent_at
      t.string :users, :remember_created_at
      #以下はコメントアウトされている場合は解除してください
      ## Trackable
      t.integer  :sign_in_count, default: 0, null: false
      t.datetime :current_sign_in_at
      t.datetime :last_sign_in_at
      t.string   :current_sign_in_ip
      t.string   :last_sign_in_ip
Userテーブルが存在している場合には、migrationファイルの中身について、上記のカラムが追加されるように書き換える必要があります。
$ rake db:migrate
modelを修正
class User < ActiveRecord::Base
  devise :trackable, :omniauthable, omniauth_providers: %i(google)

  protected
  def self.find_for_google(auth)
    user = User.find_by(email: auth.info.email)

    unless user
      user = User.create(name:     auth.info.name,
                         email: auth.info.email,
                         provider: auth.provider,
                         uid:      auth.uid,
                         token:    auth.credentials.token,
                         password: Devise.friendly_token[0, 20],
                         meta:     auth.to_yaml)
    end
    user
  end
end
config修正
今回は.envにGOOGLE_APP_IDなどを書き込むので、それらの準備をします。
gem 'dotenv-rails'
$ bundle install
.envを作成してください。
GOOGLE_APP_ID='クライアントIDをペースト'
GOOGLE_APP_SECRET='-クライアントシークレットをペースト'
/.env #追記
さてconfigを修正します。
Devise.setup do |config|
  require 'devise/orm/active_record'
  config.omniauth :google_oauth2,
                  ENV['GOOGLE_APP_ID'],
                  ENV['GOOGLE_APP_SECRET'],
                  name: :google
end
ログインリンク設置
<%= link_to 'Googleログイン', user_google_omniauth_authorize_path %>
routes.rbの修正
# devise_for :users
  devise_for :users, controllers: {
      omniauth_callbacks: "users/omniauth_callbacks"
  }
controllerの作成・修正
class Users::OmniauthCallbacksController < Devise::OmniauthCallbacksController
  def google
    @user = User.find_for_google(request.env['omniauth.auth'])

    if @user.persisted?
      flash[:notice] = I18n.t 'devise.omniauth_callbacks.success', kind: 'Google'
      sign_in_and_redirect @user, event: :authentication
      session[:user_id] = @user.id #add
    else
      session['devise.google_data'] = request.env['omniauth.auth']
      redirect_to new_user_registration_url
    end
  end
end
ここまでの実装が完了したら、rails sを叩くとローカルでは問題なく動くはずです。
Not found. Authentication passthru.などが表示された場合は、ログインリンクの実装のところが間違っている可能性があるので、見直してください。
HerokuへのデプロイでPrecompiling assets failedが出た場合
上記の手順でローカルでは問題なく動いても、git push heroku masterを実行した際に、Precompiling assets failedというエラーが出ることがあります。
この際の対処法を書いておきます。
まずは以下のコマンドで表示されるsecret_key_baseをコピーします。
$ EDITOR=vim rails credentials:edit
コピーした文字列を以下の箇所に貼り付けします。
SECRET_KEY_BASE = 'ここにペースト'
config.secret_key = ENV['SECRET_KEY_BASE'] #コメントアウトを外す
これで一旦Herokuへのデプロイgit push heroku masterコマンドは通ります。しかし、.gitignoreで.envファイルはGitにあげない設定にしてあるので、Heroku側で改めて変数を設定する必要があります。
git push heroku master後にやること
$ heroku config:set GOOGLE_APP_ID='appidを貼り付け'
$ heroku config:set GOOGLE_APP_ID='secretを貼り付け'
$ heroku config:set SECRET_KEY_BASE='secret_key_baseを貼り付け'
$ heroku run rails db:migrate
色々試してみた中でこれが結果的にうまくいったのですが、なぜうまくいったのか理解してません。フィードバックをコメント欄などで頂けますと幸いです🙇♂️
参考
爆速ッ!! gem omniauth-google-oauth2 で認証させる
rakeがDevise.secret_key was not setと出て失敗するときの対処法

