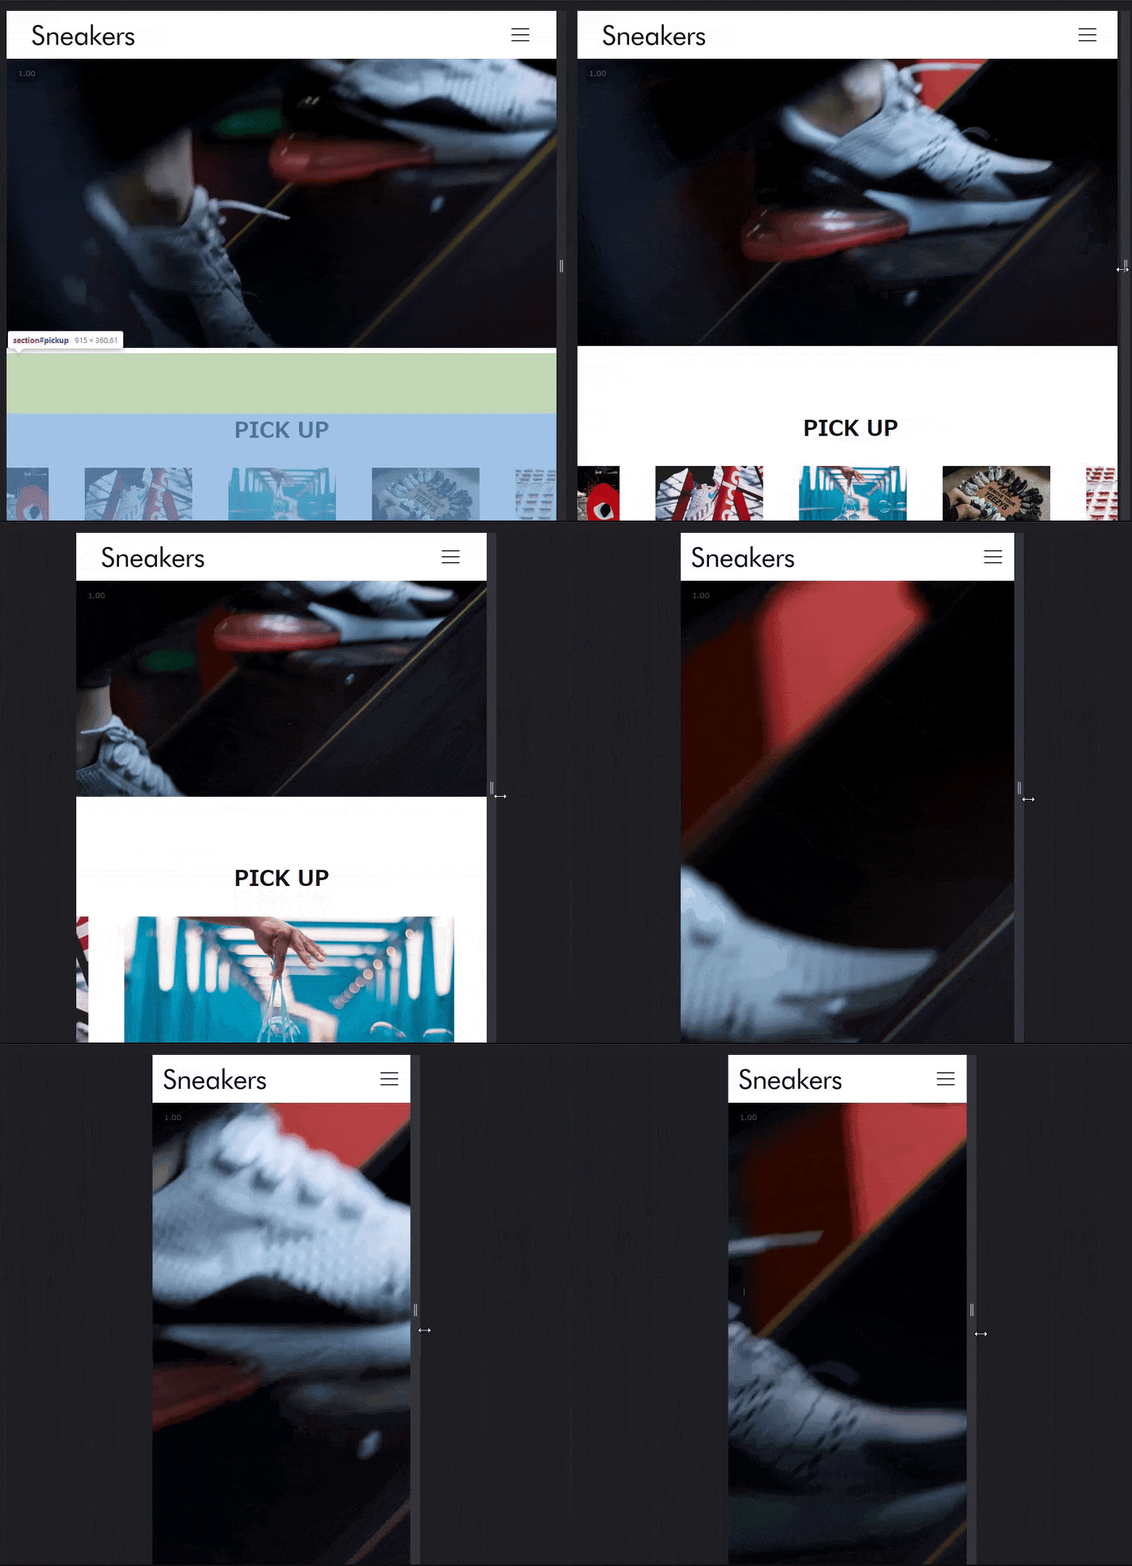
模写サイト
Codestepのデモサイト
参考サイト
その他
変更点
- jQuery を使わない
- スライダーをslick から swiperへ変更
- レスポンシブデザインはスマホファーストに変更
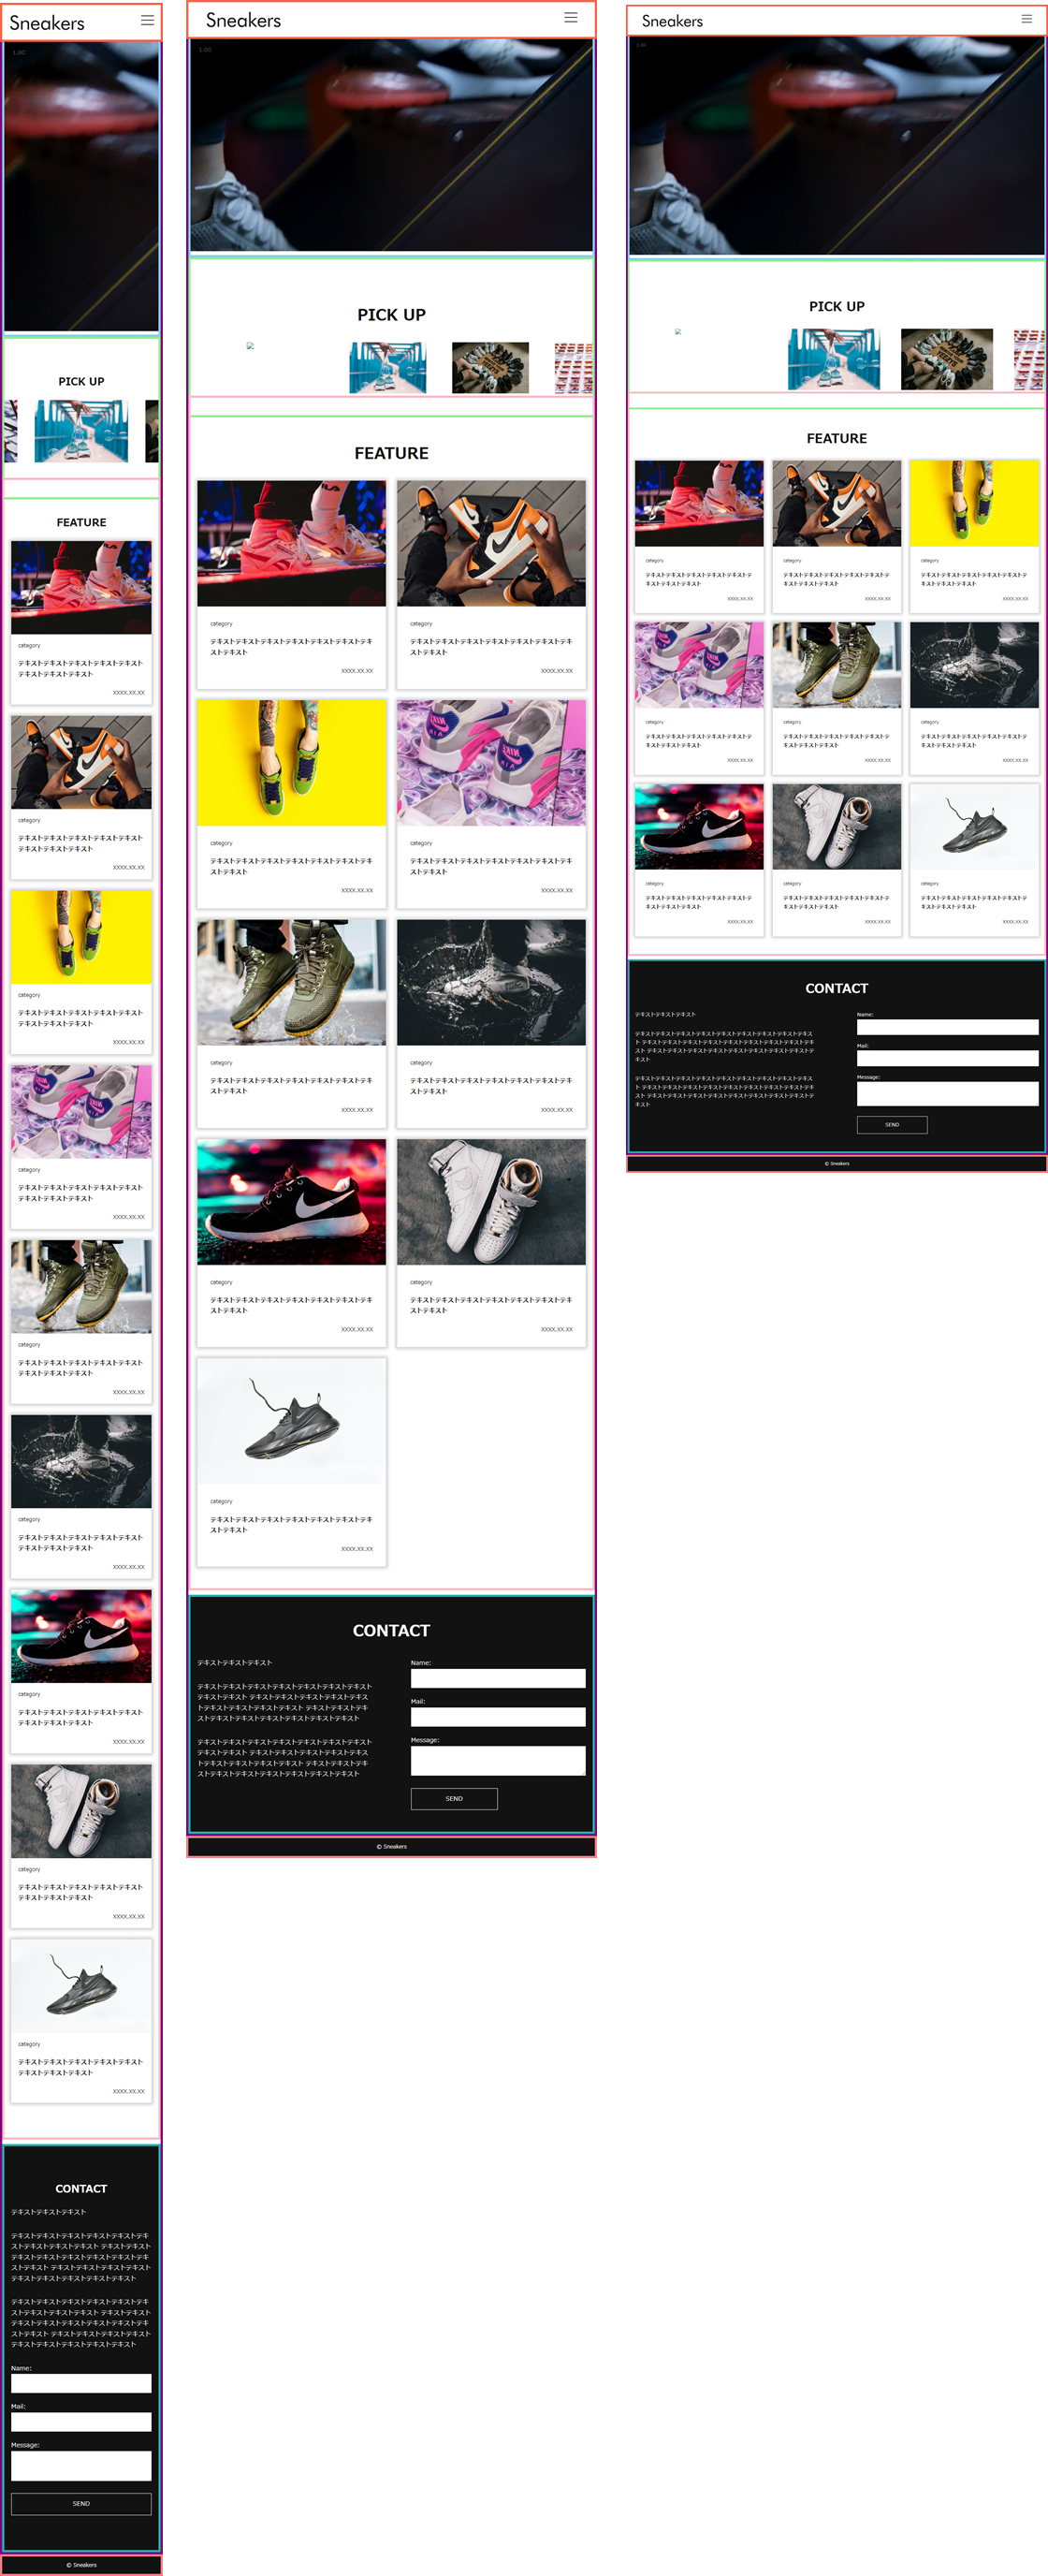
全体のレイアウト図
最終的なディレクトリ構成
media
 ├─img
 │  ├─favicon.ico
 │  ├─logo.svg
 │  ├─pickup1.jpg ~ pickup9.jpg
 │  └─feature1.jpg ~ feature9.jpg
 │
 ├─css
 │  └─style.css
 │
 ├─js
 │  └─app.js
 │
 ├─video
 │  └─video.mp4
 │
 └─index.html
全体のレイレイアウト
全体のhtml
index.html
<!DOCTYPE html>

<!-- ja に変更 -->
<html lang="ja">

<head>
    <meta charset="UTF-8">
    <meta http-equiv="X-UA-Compatible" content="IE=edge">
    <meta name="viewport" content="width=device-width, initial-scale=1.0">

<!-- + サイトの説明 -->
    <meta name="description" content="テキストテキストテキストテキストテキストテキストテキストテキス">

<!-- + title -->
    <title>Sneakers</title>

<!-- + favicon -->
    <link rel="shortcut icon" href="img/favicon.ico">

<!-- + リセットCSS -->
    <link rel="stylesheet" href="https://unpkg.com/ress/dist/ress.min.css">

<!-- + スタイルシート -->
    <link rel="stylesheet" href="css/style.css">
</head>

<body>

    <header id="header"></header>

    <main>
        <div id="video"></div>
        <section id="pickup"></section>
        <section id="feature"></section>
        <section id="contact"></section>
    </main>

    <footer id="footer"></footer>

<!-- + スクリプトファイル -->
    <script src="js/main.js"></script>
</body>
</html>
全体のstyle
- テーマ毎に補助線で区切ることで、記述場所を区切る。
- line-heightに単位がない + 継承される
- 行間は font-size * 1.7 になる。
- 下の場合bodyの子要素の行間は 16px0.91.7 になる。
css\style.css
html {
  font-size: 100%;
}
body {
  color: #121212;
  font-size: 0.9rem;
  line-height: 1.7;
}
a {
  color: #121212;
  text-decoration: none;
}
img {
  max-width: 100%;
}
li {
  list-style: none;
}

#header {
    border: 5px solid tomato;
}

#main{
    border: 5px solid purple;
}

#video{
    border: 5px solid skyblue;
}

#pickup{
    border: 5px solid lightgreen;
}

#feature{
    border: 5px solid lightpink;
}

#contact{
    border: 5px solid lightseagreen;
}

#footer{
    border: 5px solid pink;
}
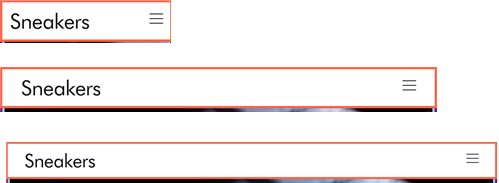
header の作成
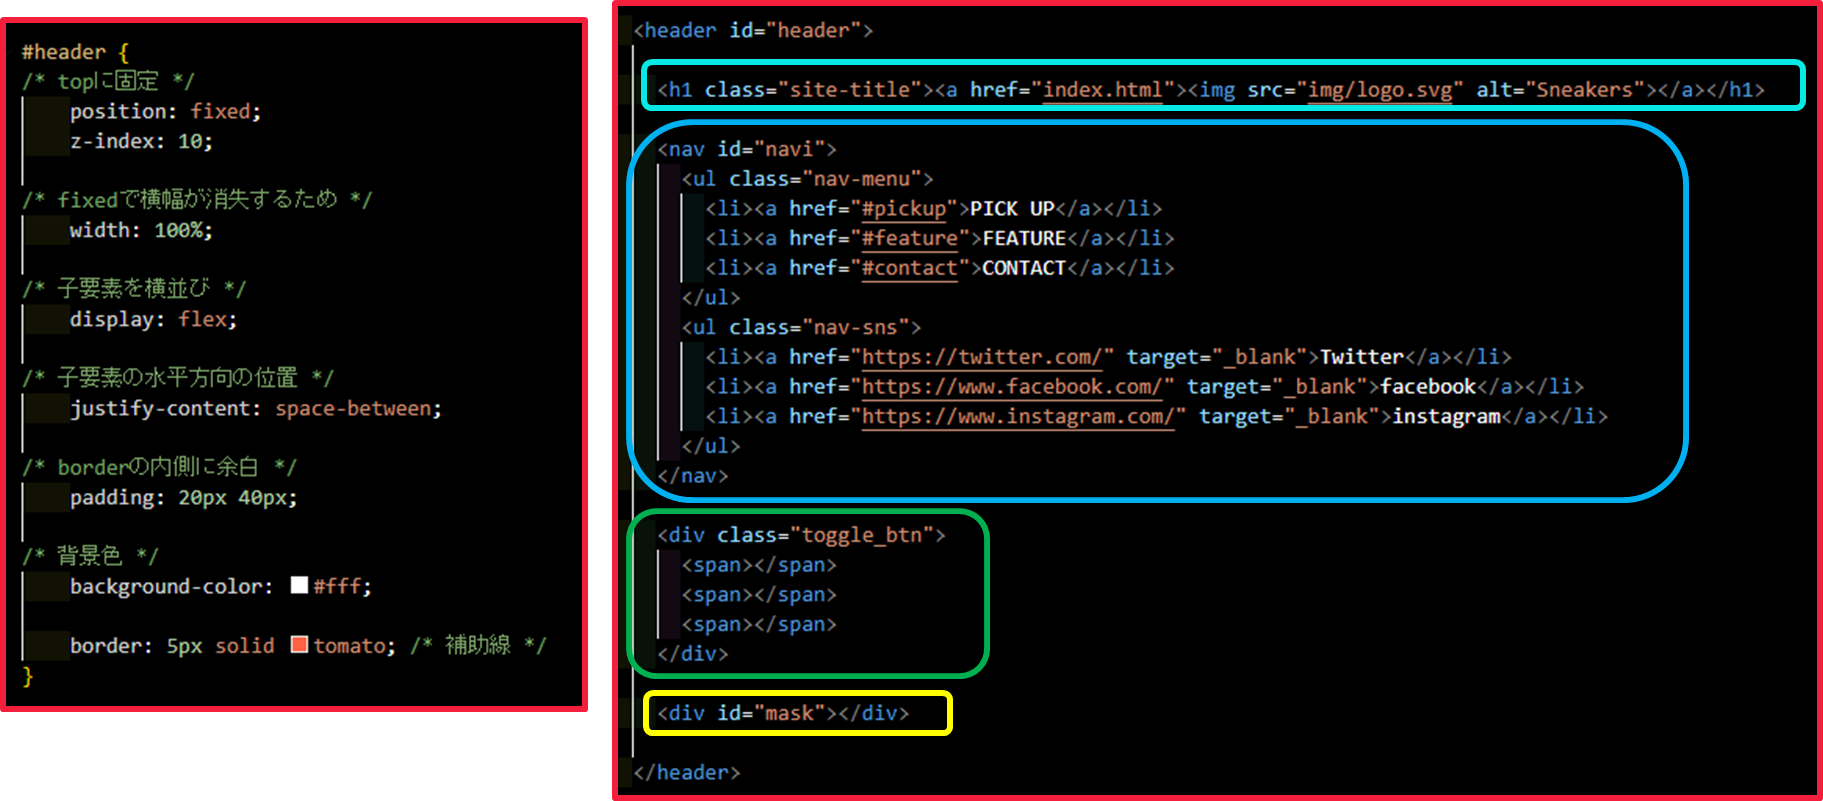
header の html と css
- header タグ
-
positon:fixedでその位置で固定 -
display:flexで 子要素を横並び -
padding:20px 40px;で ボーダーの内側に上下20px左右40pxの余白 -
background-color:#fffで 背景を白色
-
-
h1.site-titleタグ
- h1 タグの余計な余白を消去。
h1>a>imgの時は定番
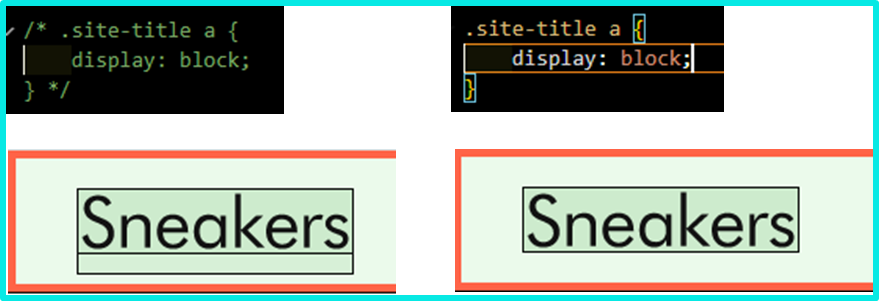
- a タグが親要素からずれているのを解消
block要素 > aの時は定番
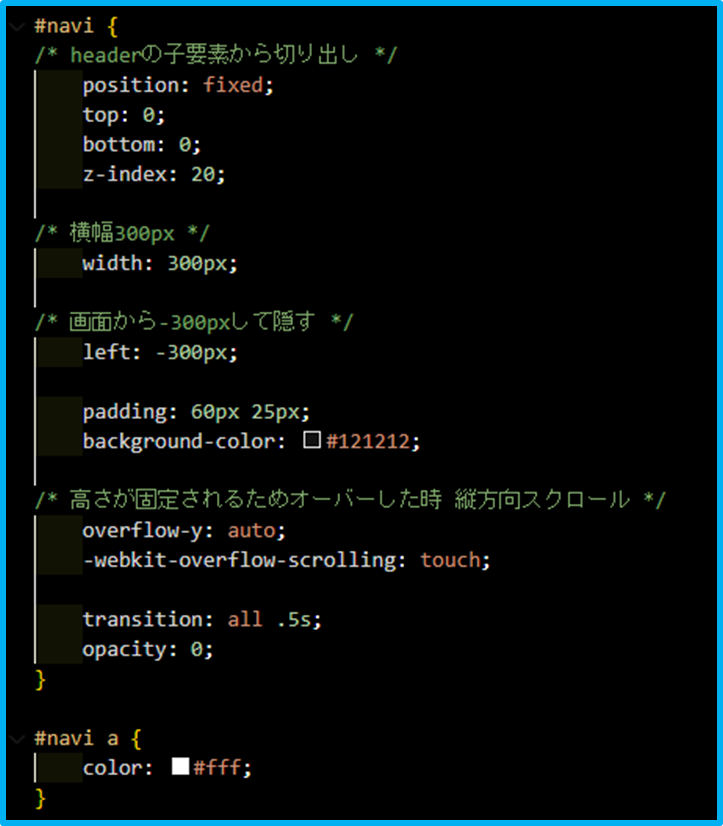
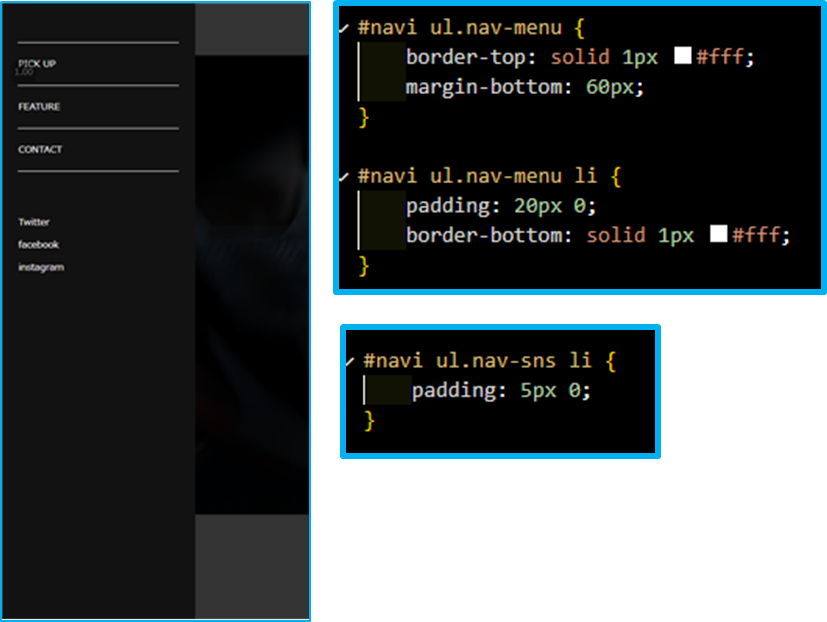
- navi タグ
-
position:fixedで 親要素から切り出し -
top:0;+bottom:0;で 高さは 画面一杯 -
width:300px;で 幅を 300px -
left:-300px;で 画面から消去
- liタグの内側に余白や下線を作っている
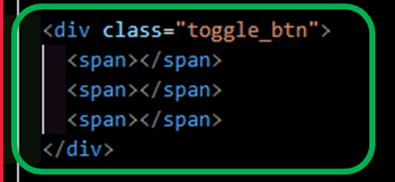
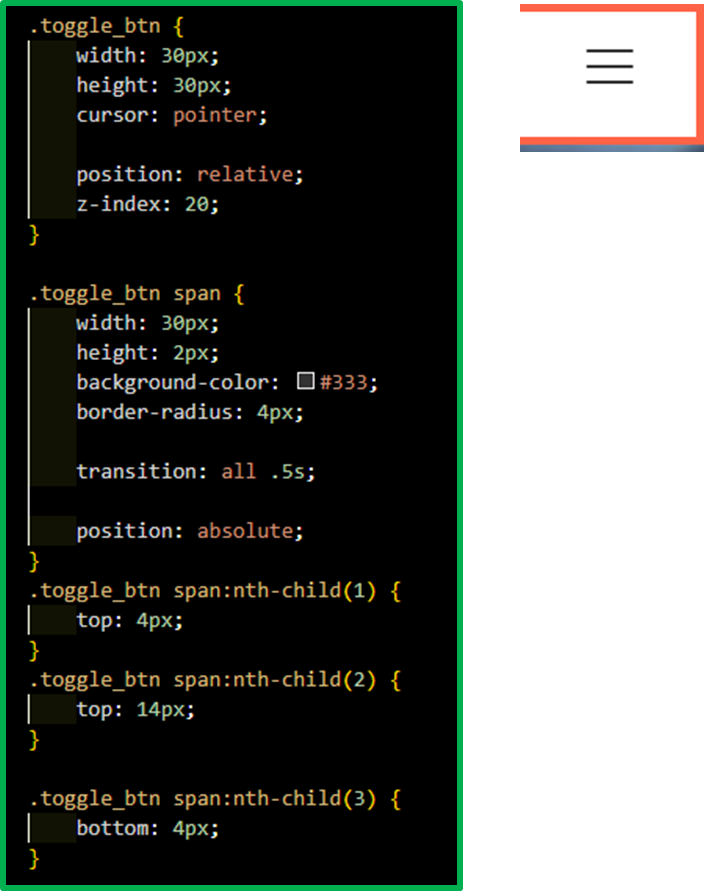
- div.toggle_btn タグ
- 位置は親要素の
display:flex;+justify-content: space-between;で決定
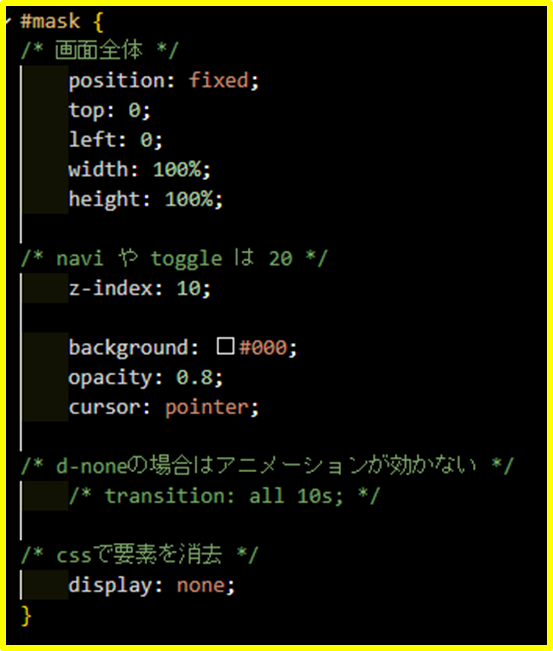
- div#maskタグ
-
position:fixed;で親要素から切り出し -
top:0;+left:0;+width:100%;+height:100%;で画面一杯 -
display:none;で cssで要素を削除している。 -
z-indexはpositionとセットで効果がある。
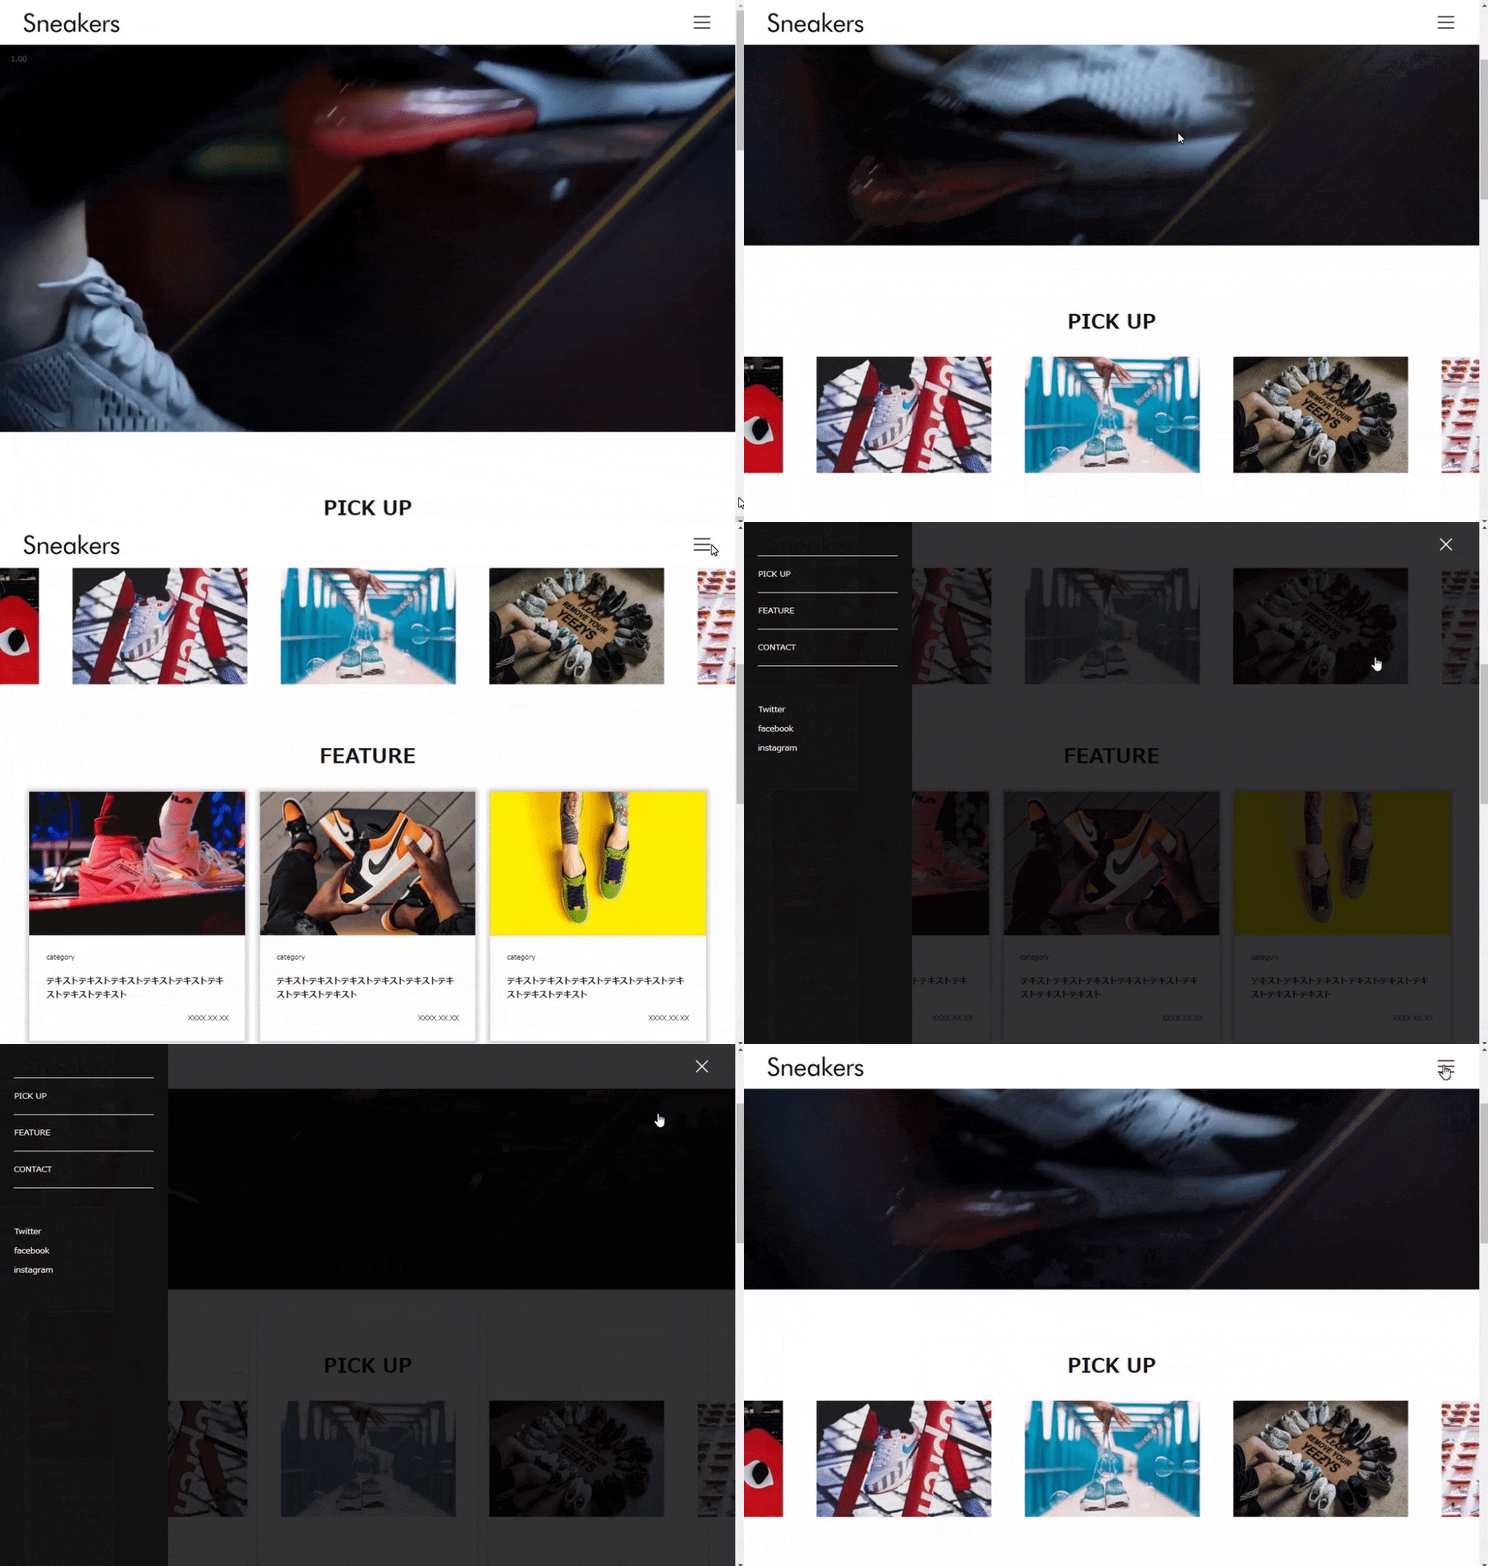
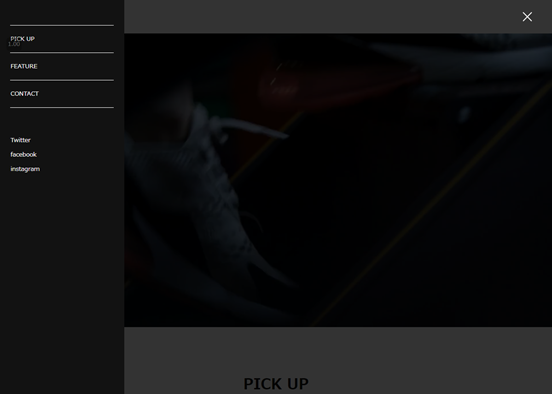
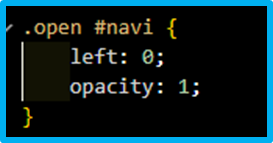
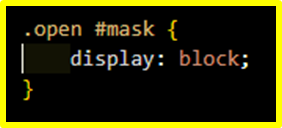
- header タグに open クラスをつけることで css で 見えなくした要素 削除した要素を戻す
-
left:-300px;+opacity:0;を上書き
-
display:none;を上書き
-
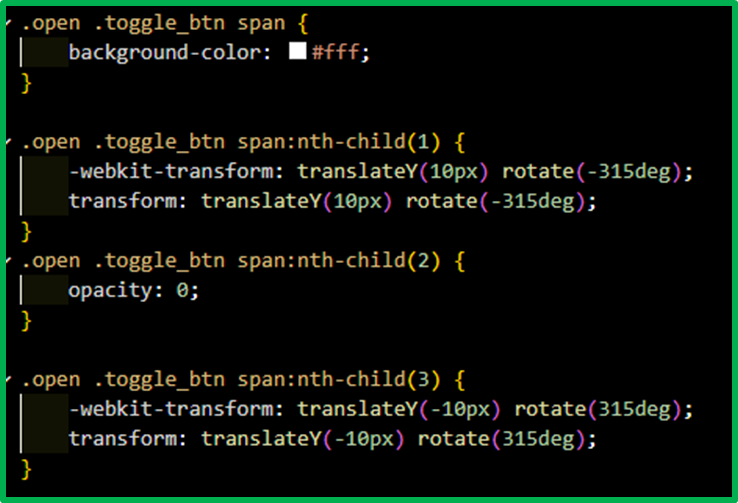
三=>Xに変更するとtransitionが勝手にアニメーションにしてくれる。 - 真ん中を
opacity:0;で消去 - 上は下にずらして-315度回転させると
\になる - 下は上にずらして315度回転させると
/になる
header のhtmlの作成
index.html
  <header id="header">

    <h1 class="site-title"><a href="index.html"><img src="img/logo.svg" alt="Sneakers"></a></h1>

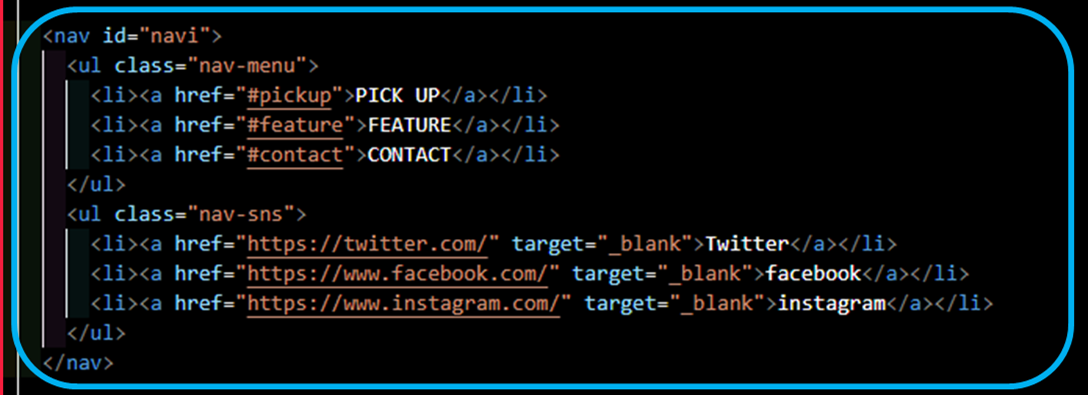
    <nav id="navi">
      <ul class="nav-menu">
        <li><a href="#pickup">PICK UP</a></li>
        <li><a href="#feature">FEATURE</a></li>
        <li><a href="#contact">CONTACT</a></li>
      </ul>
      <ul class="nav-sns">
        <li><a href="https://twitter.com/" target="_blank">Twitter</a></li>
        <li><a href="https://www.facebook.com/" target="_blank">facebook</a></li>
        <li><a href="https://www.instagram.com/" target="_blank">instagram</a></li>
      </ul>
    </nav>

    <div class="toggle_btn">
      <span></span>
      <span></span>
      <span></span>
    </div>
    <div id="mask"></div>

  </header>
header のstyleの作成
css\style.css
#header {
/* topに固定 */
    position: fixed;
    z-index: 10;

/* fixedで横幅が消失するため */
    width: 100%;

/* 子要素を横並び */
    display: flex;

/* 子要素の水平方向の位置 */
    justify-content: space-between;

/* borderの内側に余白 */
    padding: 20px 40px;

/* 背景色 */
    background-color: #fff;
}

.site-title {
    line-height: 1px;
}

.site-title a {
    display: block;
}

.toggle_btn {
    width: 30px;
    height: 30px;
    cursor: pointer;

    position: relative;
    z-index: 20;
}

.toggle_btn span {
    width: 30px;
    height: 2px;
    background-color: #333;
    border-radius: 4px;

    transition: all .5s;

    position: absolute;
}
.toggle_btn span:nth-child(1) {
    top: 4px;
}
.toggle_btn span:nth-child(2) {
    top: 14px;
}

.toggle_btn span:nth-child(3) {
    bottom: 4px;
}

#navi {
/* headerの子要素から切り出し */
    position: fixed;
    top: 0;
    bottom: 0;
    z-index: 20;

/* 横幅300px */
    width: 300px;

/* 画面から-300pxして隠す */
    left: -300px;

    padding: 60px 25px;
    background-color: #121212;

/* 高さが固定されるためオーバーした時 縦方向スクロール */
    overflow-y: auto;
    -webkit-overflow-scrolling: touch;

    transition: all .5s;
    opacity: 0;
}

#navi a {
    color: #fff;
}

#navi ul.nav-menu {
    border-top: solid 1px #fff;
    margin-bottom: 60px;
}

#navi ul.nav-menu li {
    padding: 20px 0;
    border-bottom: solid 1px #fff;
}

#navi ul.nav-sns li {
    padding: 5px 0;
}

#mask {
/* 画面全体 */
    position: fixed;
    top: 0;
    left: 0;
    width: 100%;
    height: 100%;

/* navi や toggle は 20 */
    z-index: 10;

    background: #000;
    opacity: 0.8;
    cursor: pointer;

/* d-noneの場合はアニメーションが効かない */
    /* transition: all 10s; */

/* cssで要素を消去 */
    display: none;
}

.open .toggle_btn span {
    background-color: #fff;
}

.open .toggle_btn span:nth-child(1) {
    -webkit-transform: translateY(10px) rotate(-315deg);
    transform: translateY(10px) rotate(-315deg);
}
.open .toggle_btn span:nth-child(2) {
    opacity: 0;
}

.open .toggle_btn span:nth-child(3) {
    -webkit-transform: translateY(-10px) rotate(315deg);
    transform: translateY(-10px) rotate(315deg);
}

.open #navi {
    left: 0;
    opacity: 1;
}

.open #mask {
    display: block;
}
headerのレスポンシブ設定
- なし
headerのjavascriptの作成
- headerタグにopenクラスをtoggleしてサイドメニューをだしたりけしたりする。
| プロパティ | 1.cursor変化 | 2.クリックイベント取得 | 3.:visible判定 |
|---|---|---|---|
| opacity: 0 | ○ | ○ | true |
| visibility :hidden | × | × | true |
| display: none | × | × | false |
main.js
// 要素の取得
  const toggle_btn = document.querySelector('.toggle_btn');
  const header = document.querySelector('header');

// 要素のクリックプロパティに関数を登録
  toggle_btn.onclick = ()=>{
    if(header.classList.contains('open')){
      header.classList.remove('open');
    }
    else{
      header.classList.add('open');
    }
  }
  // #maskのエリアをクリックした時にメニューを閉じる
  // display:none;で削除されている時はclickイベントは効かない
  const mask = document.querySelector('#mask');
  mask.onclick = ()=>{
    header.classList.remove('open');
  }

  // リンクをクリックした時にメニューを閉じる
  const naviLinks = document.querySelectorAll('#navi a');
  naviLinks.forEach(naviLink => {
    naviLink.onclick = ()=>{
      header.classList.remove('open');
    }
  });
div#videoの作成
- スマホ時画面一杯
- 600px 以上の時 は 高さは
autoに変更
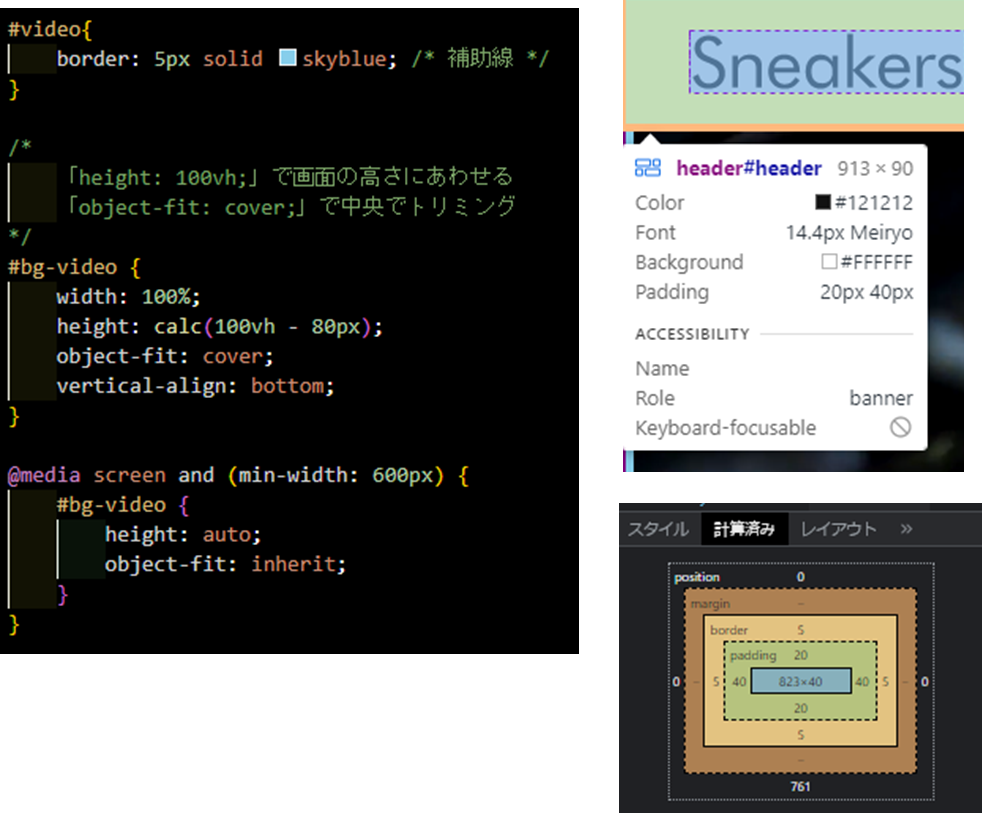
- video タグ
- 高さはheaderの高さ80px(10pxは補助線)を画面の高さ100vhから引いた高さに設定
-
width:100%+height:calc(100vh-80px)+object-fit:coverで画面一杯に動画を拡大できる。 -
vertical-align:bottom;はimg要素と同じborder-bottomの内側に余白が生じるのを消去している。定番の処理。 - widthが600px以上の時は
height:autoにしてトリミングも解除している。
div#video のhtmlの作成
  <main>

    <div id="video">

<!-- + -->
      <video id="bg-video" loop autoplay muted playsinline>
        <source src="./video/video.mp4"  type="video/mp4">
      </video>

    </div>

    <section id="pickup"></section>
    <section id="feature"></section>
    <section id="contact"></section>
  </main>
div#video のstyleの作成
css\style.css
#video{
    border: 5px solid skyblue; /* 補助線 */
}
/*+*/
/*
    「height: 100vh;」で画面の高さにあわせる
    「object-fit: cover;」で中央でトリミング
*/
#bg-video {
    width: 100%;
    height: calc(100vh - 80px);
    object-fit: cover;
    vertical-align: bottom;
}
/*+*/
@media screen and (min-width: 600px) {
    #bg-video {
        height: auto;
        object-fit: inherit;
    }
}
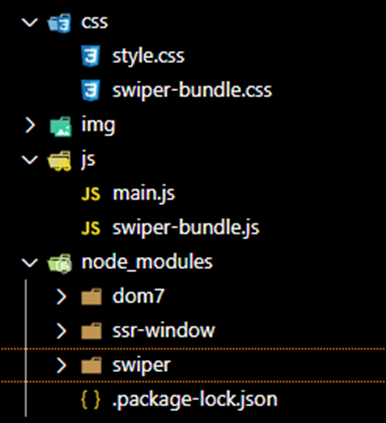
swiper の npm インストール
- package.json の作成
- なにか npm install
パッケージするには必ずpackage.jsonファイルがいる。 -
-yは全てのフィールドにデフォルトの値を設定して作成する。
- なにか npm install
$ package.jsonファイルが作成される。
npm init -y
- Swiper をインストール
$ node_moduleフォルダが作成され下にswiperがインストールされる。
npm install swiper
-
npm でインストールしたパッケージの利用方法
-
laravel-mix を使って 利用する
$ laravel-mixのインストール
npm install laravel-mix --save-dev
- webpack.mix.js ファイルを作成する
$
touch webpack.mix.js
webpack.mix.js
//+
let mix = require('laravel-mix');

//+
mix.js('src/app.js', 'js').setPublicPath('js');
- src/app.js ファイルの作成
- 編集は src/app.js 行う。
mkdir src && touch src/app.js
こうしたかったけど、swiperが上手くいかなかったディレクトリ構成
- src/app.js
src/app.js
//全てのモジュールをまとめてインポート
import Swiper from 'swiper/bundle';
// 全てのスタイルをまとめて
import 'swiper/css/bundle';
- undefined Swiper になる。
index.html
<!-- +</body>の上に追加 -->
<!-- app.jsにはswiper.jsのフレームワークが入っている -->
    <script src="js/app.js"></script>
    <script>
/* swiperをインスタンスしカスタマイズできるが・・・underfinedになる */
        window.onload = function () {
            let mySwiper = new Swiper('.swiper', {
                navigation: {  //ナビゲーションのオプション(矢印ボタンの要素を指定)
                    nextEl: '.swiper-button-next',
                    prevEl: '.swiper-button-prev',
                }
            });
        };
    </script>
</body>
こうすると 上手くいった
src/app.js
//全てのモジュールをまとめてインポート
import Swiper from 'swiper/bundle';

// 全てのスタイルをまとめて
import 'swiper/css/bundle';

let mySwiper = new Swiper('.swiper', {
    navigation: {  //ナビゲーションのオプション(矢印ボタンの要素を指定)
        nextEl: '.swiper-button-next',
        prevEl: '.swiper-button-prev',
    }
});
index.html
<!-- +</body>の上に追加 -->

    <script src="js/app.js"></script>
</body>
結局こういう形で作ることにした。
-
main.jsをjs/main.jsからsrc/main.jsへ移動させる。
src\app.js
require('./main');
require('./swiper');
- swiper.js ファイルを作成
src\swiper.js
//全てのモジュールをまとめてインポート
import Swiper from 'swiper/bundle';
// 全てのスタイルをまとめて
import 'swiper/css/bundle';


let mySwiper = new Swiper('.swiper', {
    navigation: {  //ナビゲーションのオプション(矢印ボタンの要素を指定)
        nextEl: '.swiper-button-next',
        prevEl: '.swiper-button-prev',
    }
});
index.html
    <title>Document</title>
<!-- + defer をつけて titleタグの直下に配置 -->
    <script src="js/app.js" defer></script>


<!-- + コメントアウト js/main.js は src/main.jsへ移動させる -->
<!--  <script src="js/main.js"></script> -->
  </body>
- ただ、これだと変更するたびに
npx mixする必要があるので -
npx mix watchを導入する- 監視ファイルが変更されるたびに自動でコンパイルしてくれる。
- 終了する時は
ctr + c
$
npx mix watch
- package.jsonをlarabel仕様に変更する
- 変更前
package.json
{
  "name": "codestepadvancedlevel",
  "version": "1.0.0",
  "description": "",
  "main": "index.js",
  "scripts": {
    "test": "echo \"Error: no test specified\" && exit 1"
  },
  "keywords": [],
  "author": "",
  "license": "ISC",
  "dependencies": {
    "swiper": "^8.1.4"
  },
  "devDependencies": {
    "laravel-mix": "^6.0.43"
  }
}
- 変更後
package.json
{
  "private": true,
  "scripts": {
      "dev": "npm run development",
      "development": "mix",
      "watch": "mix watch",
      "watch-poll": "mix watch -- --watch-options-poll=1000",
      "hot": "mix watch --hot",
      "prod": "npm run production",
      "production": "mix --production"
  },
  "keywords": [],
  "author": "",
  "license": "ISC",
  "dependencies": {
    "swiper": "^8.1.4"
  },
  "devDependencies": {
    "laravel-mix": "^6.0.43"
  }
}
$
npx mix
- こうすることで laravel でのお馴染みのコマンドで操作できるようになった。
$ コマンド例
npm run dev   //npx mix
npm run watch //mpx mix watch
npm run prod  //圧縮してくれる。
section#pickupの作成
section#pickupのhtml
index.html
    <section id="pickup">
      <h2 class="sec-title">PICK UP</h2>
      <!-- スライダーのメインコンテナの div 要素(必須) -->
      <div class="swiper">
        <!-- スライドを囲む div 要素(必須) -->
        <div class="swiper-wrapper">
          <!-- それぞれのスライドの div 要素(必須) -->
          <div class="swiper-slide"><img src="img/pickup1.jpg" alt=""></div>
          <div class="swiper-slide"><img src="img/pickup2.jpg" alt=""></div>
          <div class="swiper-slide"><img src="img/pickup3.jpg" alt=""></div>
          <div class="swiper-slide"><img src="img/pickup4.jpg" alt=""></div>
          <div class="swiper-slide"><img src="img/pickup5.jpg" alt=""></div>
          <div class="swiper-slide"><img src="img/pickup6.jpg" alt=""></div>
          <div class="swiper-slide"><img src="img/pickup7.jpg" alt=""></div>
          <div class="swiper-slide"><img src="img/pickup8.jpg" alt=""></div>
          <div class="swiper-slide"><img src="img/pickup9.jpg" alt=""></div>
        </div>
        <!-- ページネーションの div 要素(省略可能) -->
        <div class="swiper-pagination"></div>

        <!-- ナビゲーションボタンの div 要素(省略可能) -->
        <div class="swiper-button-prev"></div>
        <div class="swiper-button-next"></div>
      </div>
    </section>
section#pickupのstyle
- style は swiperで作成するため特別なものは必要ないが img要素に
max-width:100%は必要。
img {
    max-width: 100%;
/* + */
    vertical-align: bottom;
}


#pickup{
/* + */
    padding: 100px 0 50px 0;

    border: 5px solid lightgreen; /* 補助線 */
}

/* + */
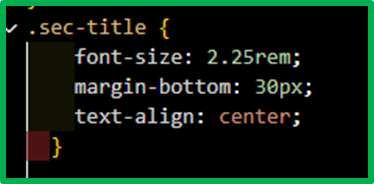
.sec-title {
    font-size: 2.25rem;
    margin-bottom: 30px;
    text-align: center;
}
section#pickupのjavascript
src/app.js
require('./main');
require('./swiper');
src/swiper.js
//全てのモジュールをまとめてインポート
import Swiper from 'swiper/bundle';
// 全てのスタイルをまとめて
import 'swiper/css/bundle';
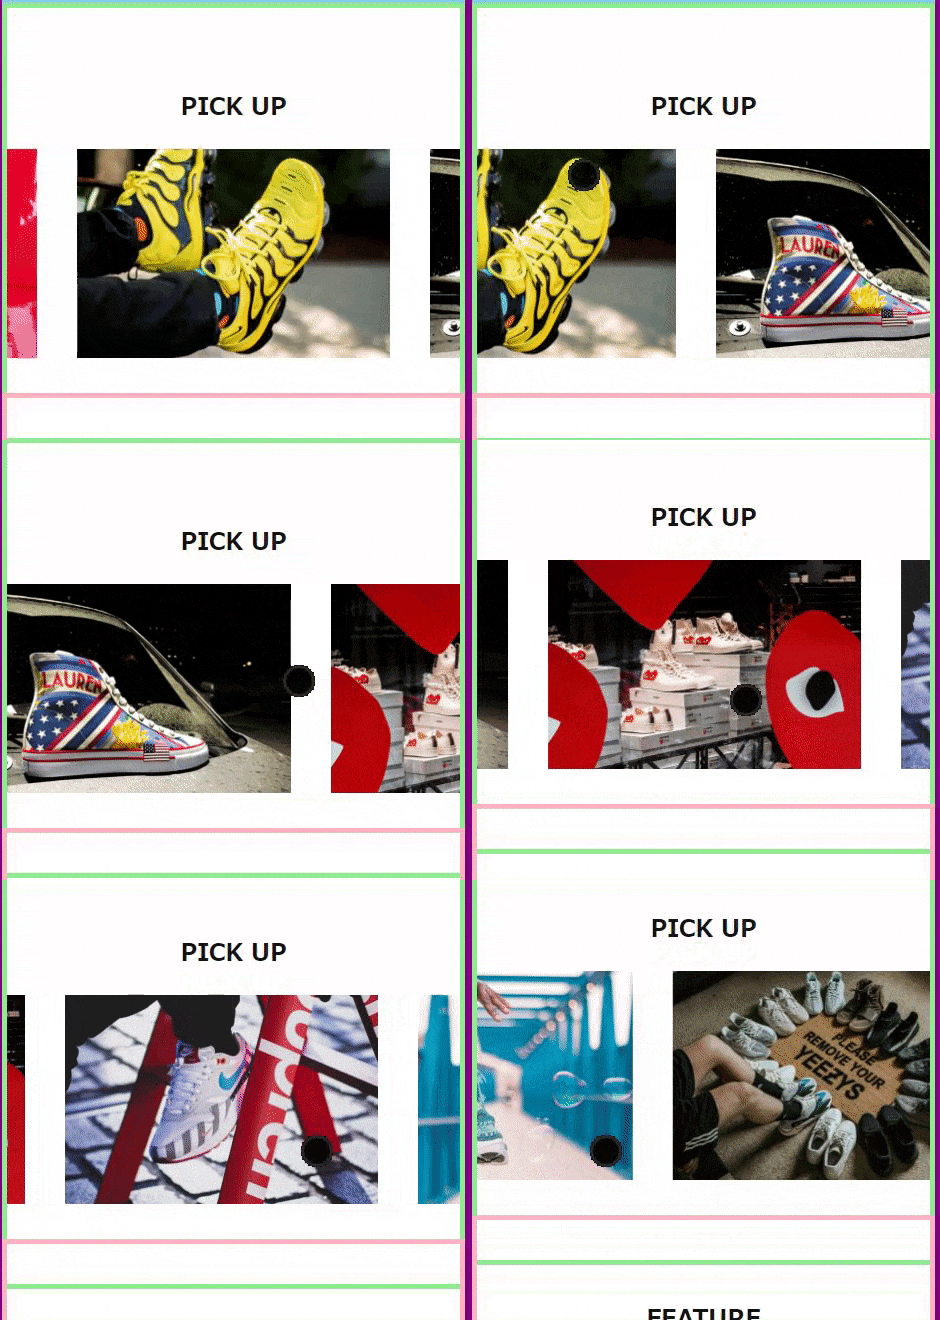
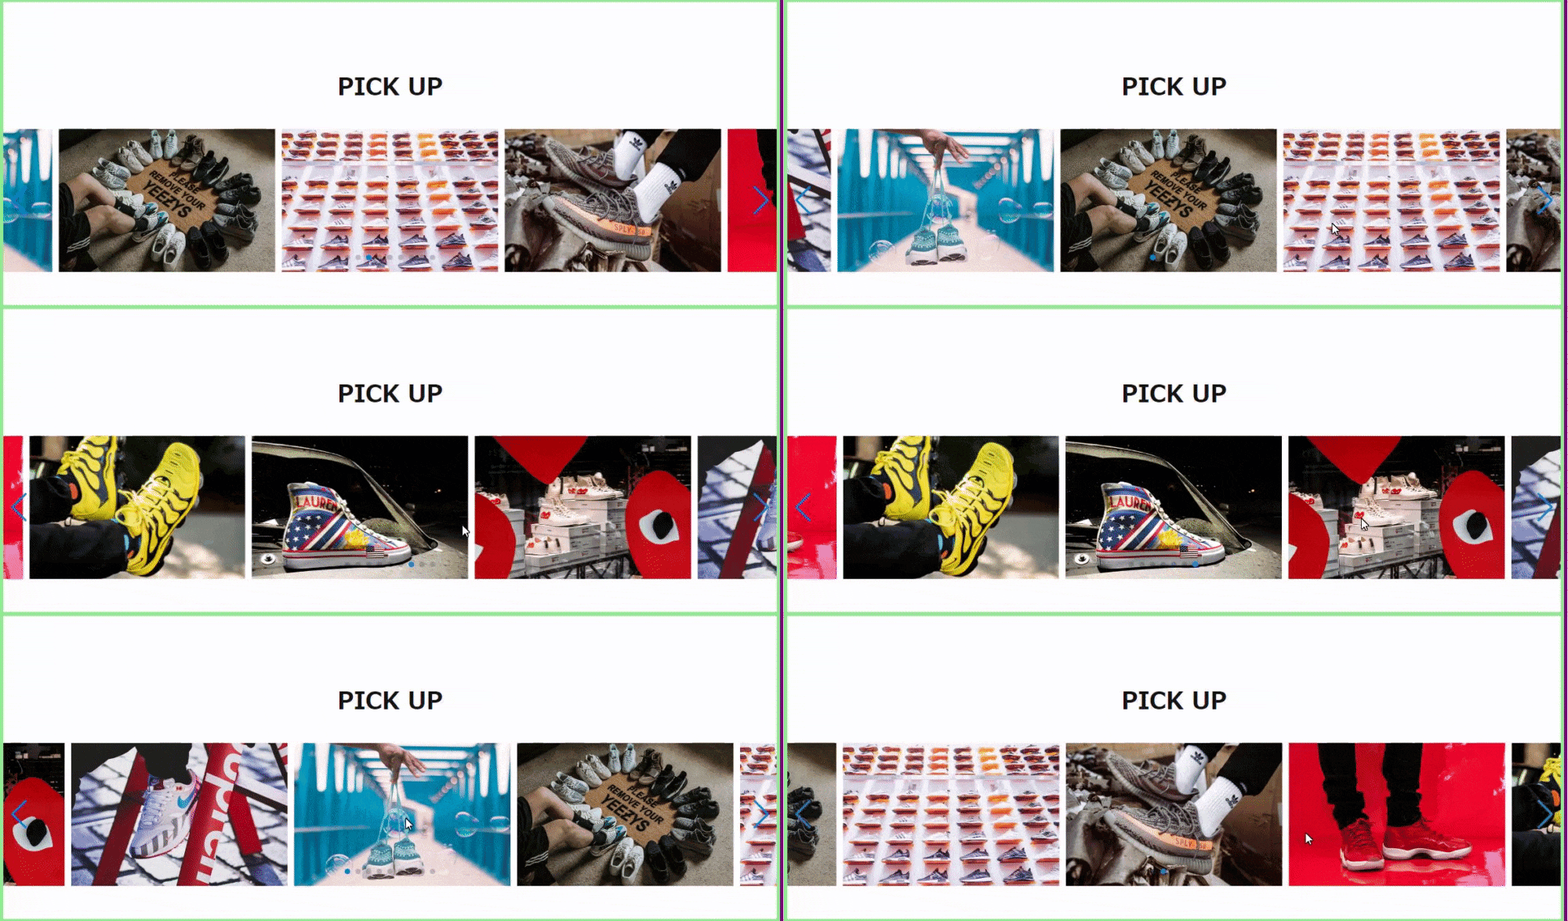
//変更
let mySwiper = new Swiper('.swiper', {
    loop: true,  //ループ可能(ループモードを有効に)
    slidesPerView: 1.3,  //スライドを1.3(分)表示
    spaceBetween: 3,
    centeredSlides: true,  //アクティブなスライドを中央に表示

    effect: 'slide',  //スライドのエフェクトを coverflow に

    breakpoints: {
        // 画面幅が 640px 以上の場合(window width >= 640px)
        640: {
            slidesPerView: 2,
            spaceBetween: 5
        },
        // 画面幅が 980px 以上の場合(window width >= 980px)
        980: {
            slidesPerView: 3.5,
            spaceBetween: 10
        }
    },

    pagination: {  //ページネーションを表示
        el: '.swiper-pagination',
        clickable: true,  //アイコンをクリックすると対応するスライドに移動
    },

    navigation: {  //ナビゲーションボタンを表示
        nextEl: '.swiper-button-next',
        prevEl: '.swiper-button-prev',
    },
});
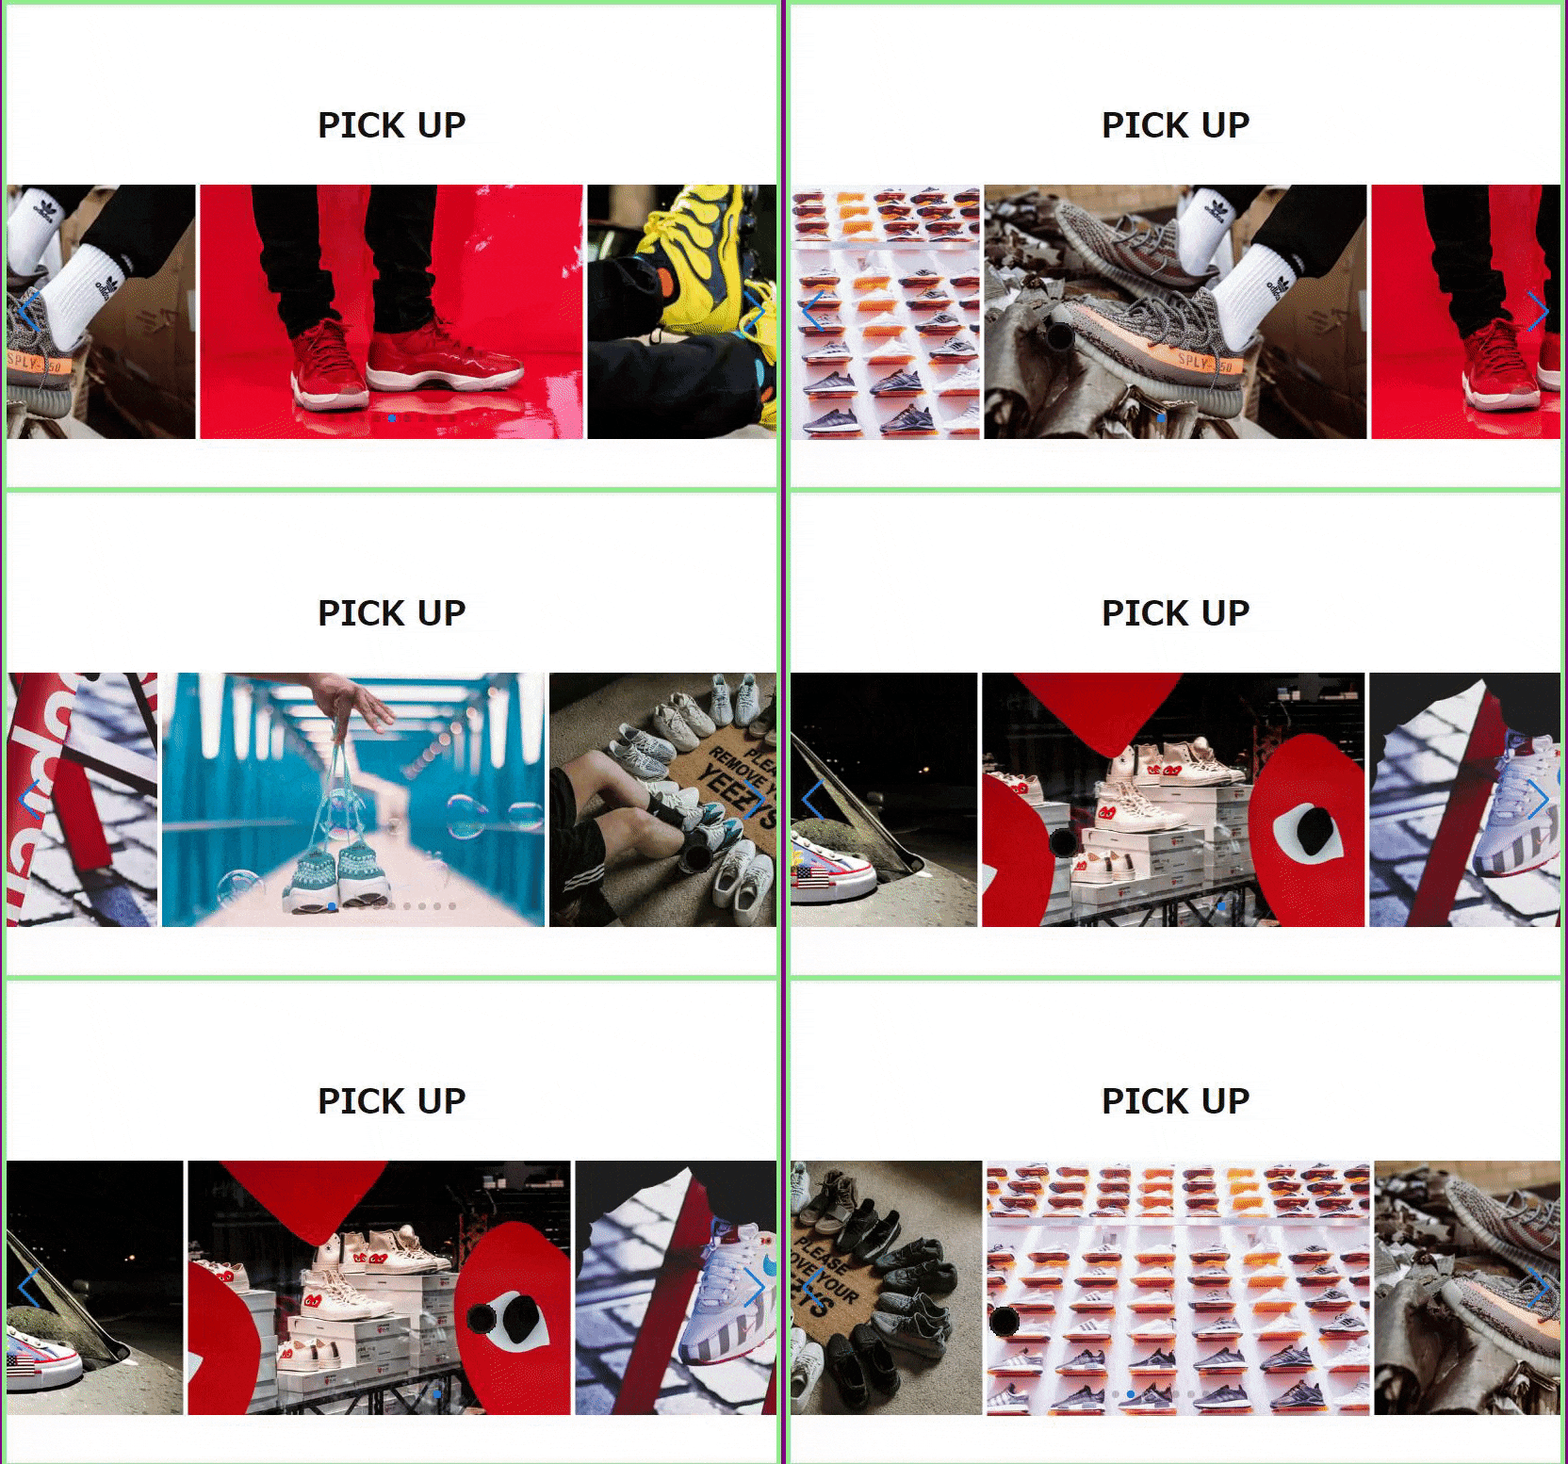
最終的にこうなった。
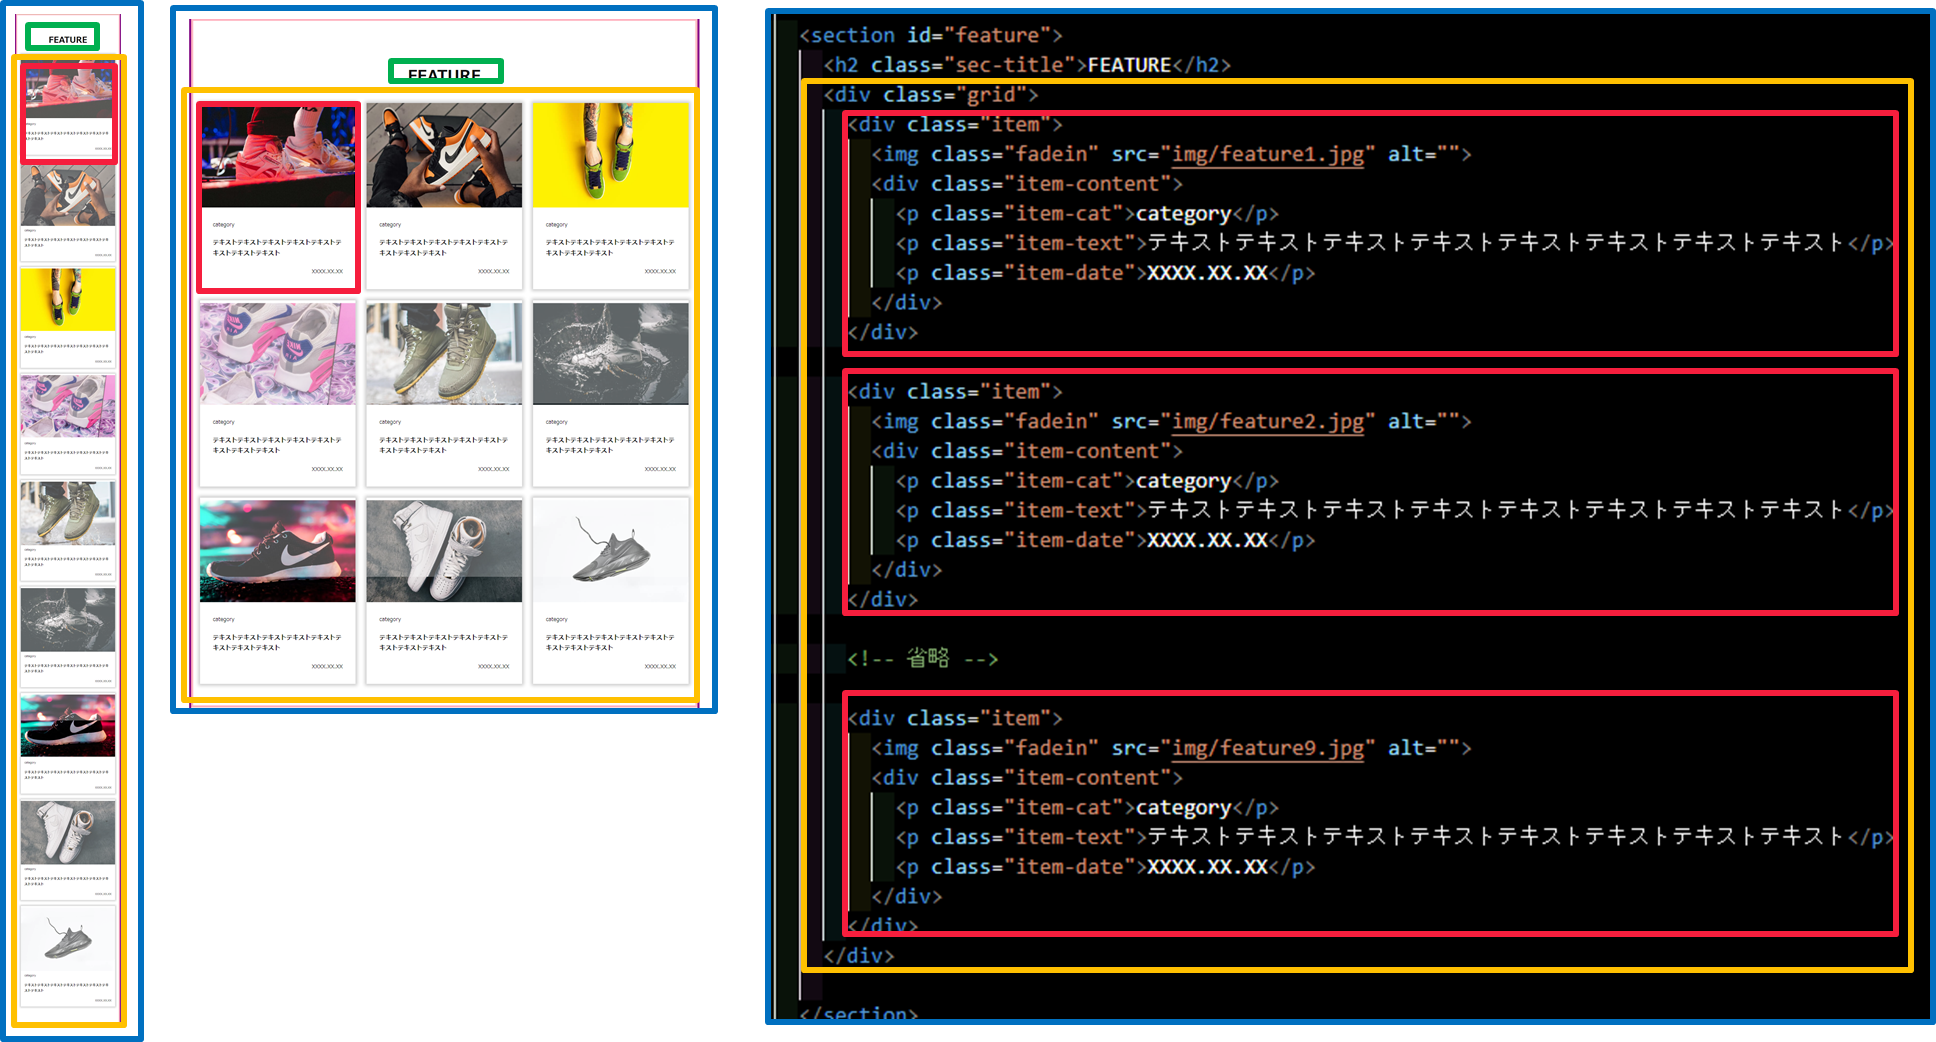
section#FEATUREの作成
-
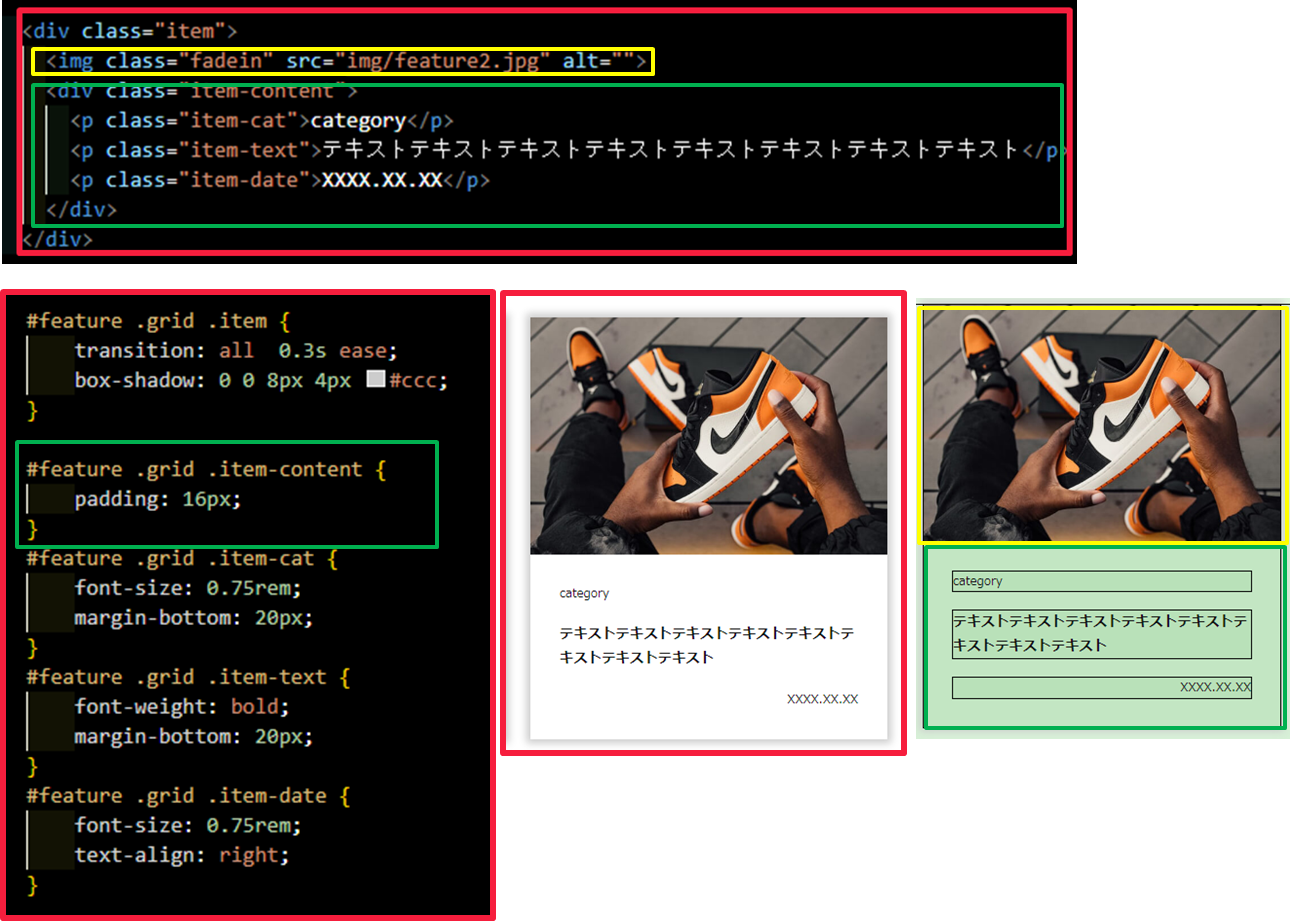
div#feature タグ
-
緑のタグ
-
オレンジのタグ
-
grid-template-columns: repeat(auto-fit, minmax(300px, 1fr));これで自動的にレスポンシブ対応してくれる
- div.item タグ
- box-shadow
-
img要素はmax-width:100%;で最大幅は自要素の幅になるwidth:100%;だと親要素の幅まで拡大されるので注意
index.html
    <section id="feature">
      <h2 class="sec-title">FEATURE</h2>
      <div class="grid">
        <div class="item">
          <img class="fadein" src="img/feature1.jpg" alt="">
          <div class="item-content">
            <p class="item-cat">category</p>
            <p class="item-text">テキストテキストテキストテキストテキストテキストテキストテキスト</p>
            <p class="item-date">XXXX.XX.XX</p>
          </div>
        </div>

        <div class="item">
          <img class="fadein" src="img/feature2.jpg" alt="">
          <div class="item-content">
            <p class="item-cat">category</p>
            <p class="item-text">テキストテキストテキストテキストテキストテキストテキストテキスト</p>
            <p class="item-date">XXXX.XX.XX</p>
          </div>
        </div>

        <div class="item">
          <img class="fadein" src="img/feature3.jpg" alt="">
          <div class="item-content">
            <p class="item-cat">category</p>
            <p class="item-text">テキストテキストテキストテキストテキストテキストテキストテキスト</p>
            <p class="item-date">XXXX.XX.XX</p>
          </div>
        </div>

        <div class="item">
          <img class="fadein" src="img/feature4.jpg" alt="">
          <div class="item-content">
            <p class="item-cat">category</p>
            <p class="item-text">テキストテキストテキストテキストテキストテキストテキストテキスト</p>
            <p class="item-date">XXXX.XX.XX</p>
          </div>
        </div>

        <div class="item">
          <img class="fadein" src="img/feature5.jpg" alt="">
          <div class="item-content">
            <p class="item-cat">category</p>
            <p class="item-text">テキストテキストテキストテキストテキストテキストテキストテキスト</p>
            <p class="item-date">XXXX.XX.XX</p>
          </div>
        </div>

        <div class="item">
          <img class="fadein" src="img/feature6.jpg" alt="">
          <div class="item-content">
            <p class="item-cat">category</p>
            <p class="item-text">テキストテキストテキストテキストテキストテキストテキストテキスト</p>
            <p class="item-date">XXXX.XX.XX</p>
          </div>
        </div>

        <div class="item">
          <img class="fadein" src="img/feature7.jpg" alt="">
          <div class="item-content">
            <p class="item-cat">category</p>
            <p class="item-text">テキストテキストテキストテキストテキストテキストテキストテキスト</p>
            <p class="item-date">XXXX.XX.XX</p>
          </div>
        </div>

        <div class="item">
          <img class="fadein" src="img/feature8.jpg" alt="">
          <div class="item-content">
            <p class="item-cat">category</p>
            <p class="item-text">テキストテキストテキストテキストテキストテキストテキストテキスト</p>
            <p class="item-date">XXXX.XX.XX</p>
          </div>
        </div>

        <div class="item">
          <img class="fadein" src="img/feature9.jpg" alt="">
          <div class="item-content">
            <p class="item-cat">category</p>
            <p class="item-text">テキストテキストテキストテキストテキストテキストテキストテキスト</p>
            <p class="item-date">XXXX.XX.XX</p>
          </div>
        </div>
      </div>
    </section>
style.css
#feature{
    padding: 80px 16px;
    margin: 0px auto 10px auto;

    border: 5px solid lightpink; /* 補助線 */
}
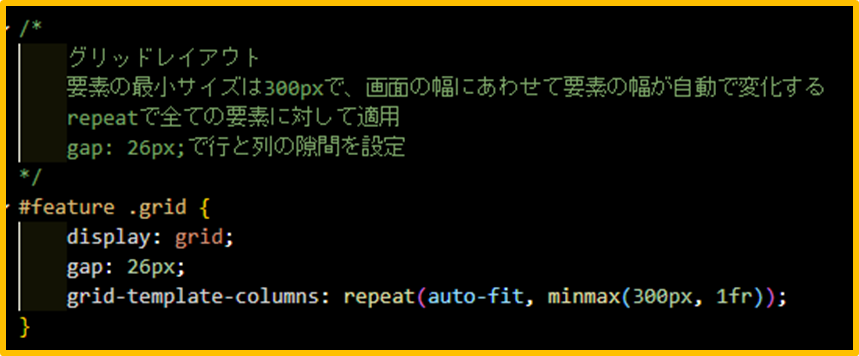
    /*
        グリッドレイアウト
        要素の最小サイズは300pxで、画面の幅にあわせて要素の幅が自動で変化する
        repeatで全ての要素に対して適用
        「gap: 26px;」で行と列の隙間を設定
    */
#feature .grid {
    display: grid;
    gap: 26px;
    grid-template-columns: repeat(auto-fit, minmax(300px, 1fr));
}
#feature .grid .item {
    transition: all  0.3s ease;
    box-shadow: 0 0 8px 4px #ccc;
}
#feature .grid .item-content {
    padding: 16px;
}
#feature .grid .item-cat {
    font-size: 0.75rem;
    margin-bottom: 20px;
}
#feature .grid .item-text {
    font-weight: bold;
    margin-bottom: 20px;
}
#feature .grid .item-date {
    font-size: 0.75rem;
    text-align: right;
}
@media screen and (min-width: 600px) {
    #feature {
        max-width: 1240px;
        padding: 100px 16px 50px 16px;
    }

    #feature .grid .item-content {
        padding: 30px;
    }
}
div#feature の javascript
- アニメーションのためのcssを追加
style.css
/*
  + フェード表示させる要素に使用するためのクラス
*/
.fadein {
  opacity : 0;
  transform: translateY(20px);
  transition: all 1s;
}
- src/observer.js を作成する
- item要素を監視することで、監視領域にimg要素が30%入ったタイミングでjsを発火させる。
src/app.js
require('./main');
require('./swiper');
//+
require('./observer');
src/observer.js
//1.インスタンスの生成 コールバック関数の登録
let options = {
    root: null,// viewport デフォルト値
    rootMargin: '0px', // デフォルト値
// img要素が監視領域と交差し かつ 交差領域がimg要素の30%を占めた時発火させる。
    threshold: 0.3
}
//instance時、第2引数に登録する
let observer = new IntersectionObserver(inview, options);

const items = document.querySelectorAll('.item');

//2.監視要素を登録
//observer.observe(document.querySelector('.mainvisual'));
items.forEach(item => {

    //1つ1つ登録する必要がある。
    observer.observe(item);
});

//3.関数funcの第一引数にIntersectionObserverEntryオブジェクトの配列が入る
function inview(entries) {
    //entries.forEach(e=>{});
    for (e of entries) {
        if (e.isIntersecting) {
            e.target.querySelector('img').style.opacity = 1;
            e.target.querySelector('img').style.transform = 'translateY(0)';
        } else {
            e.target.querySelector('img').style.opacity = 0;
            e.target.querySelector('img').style.transform = 'translateY(20px)';
        }
    }
}
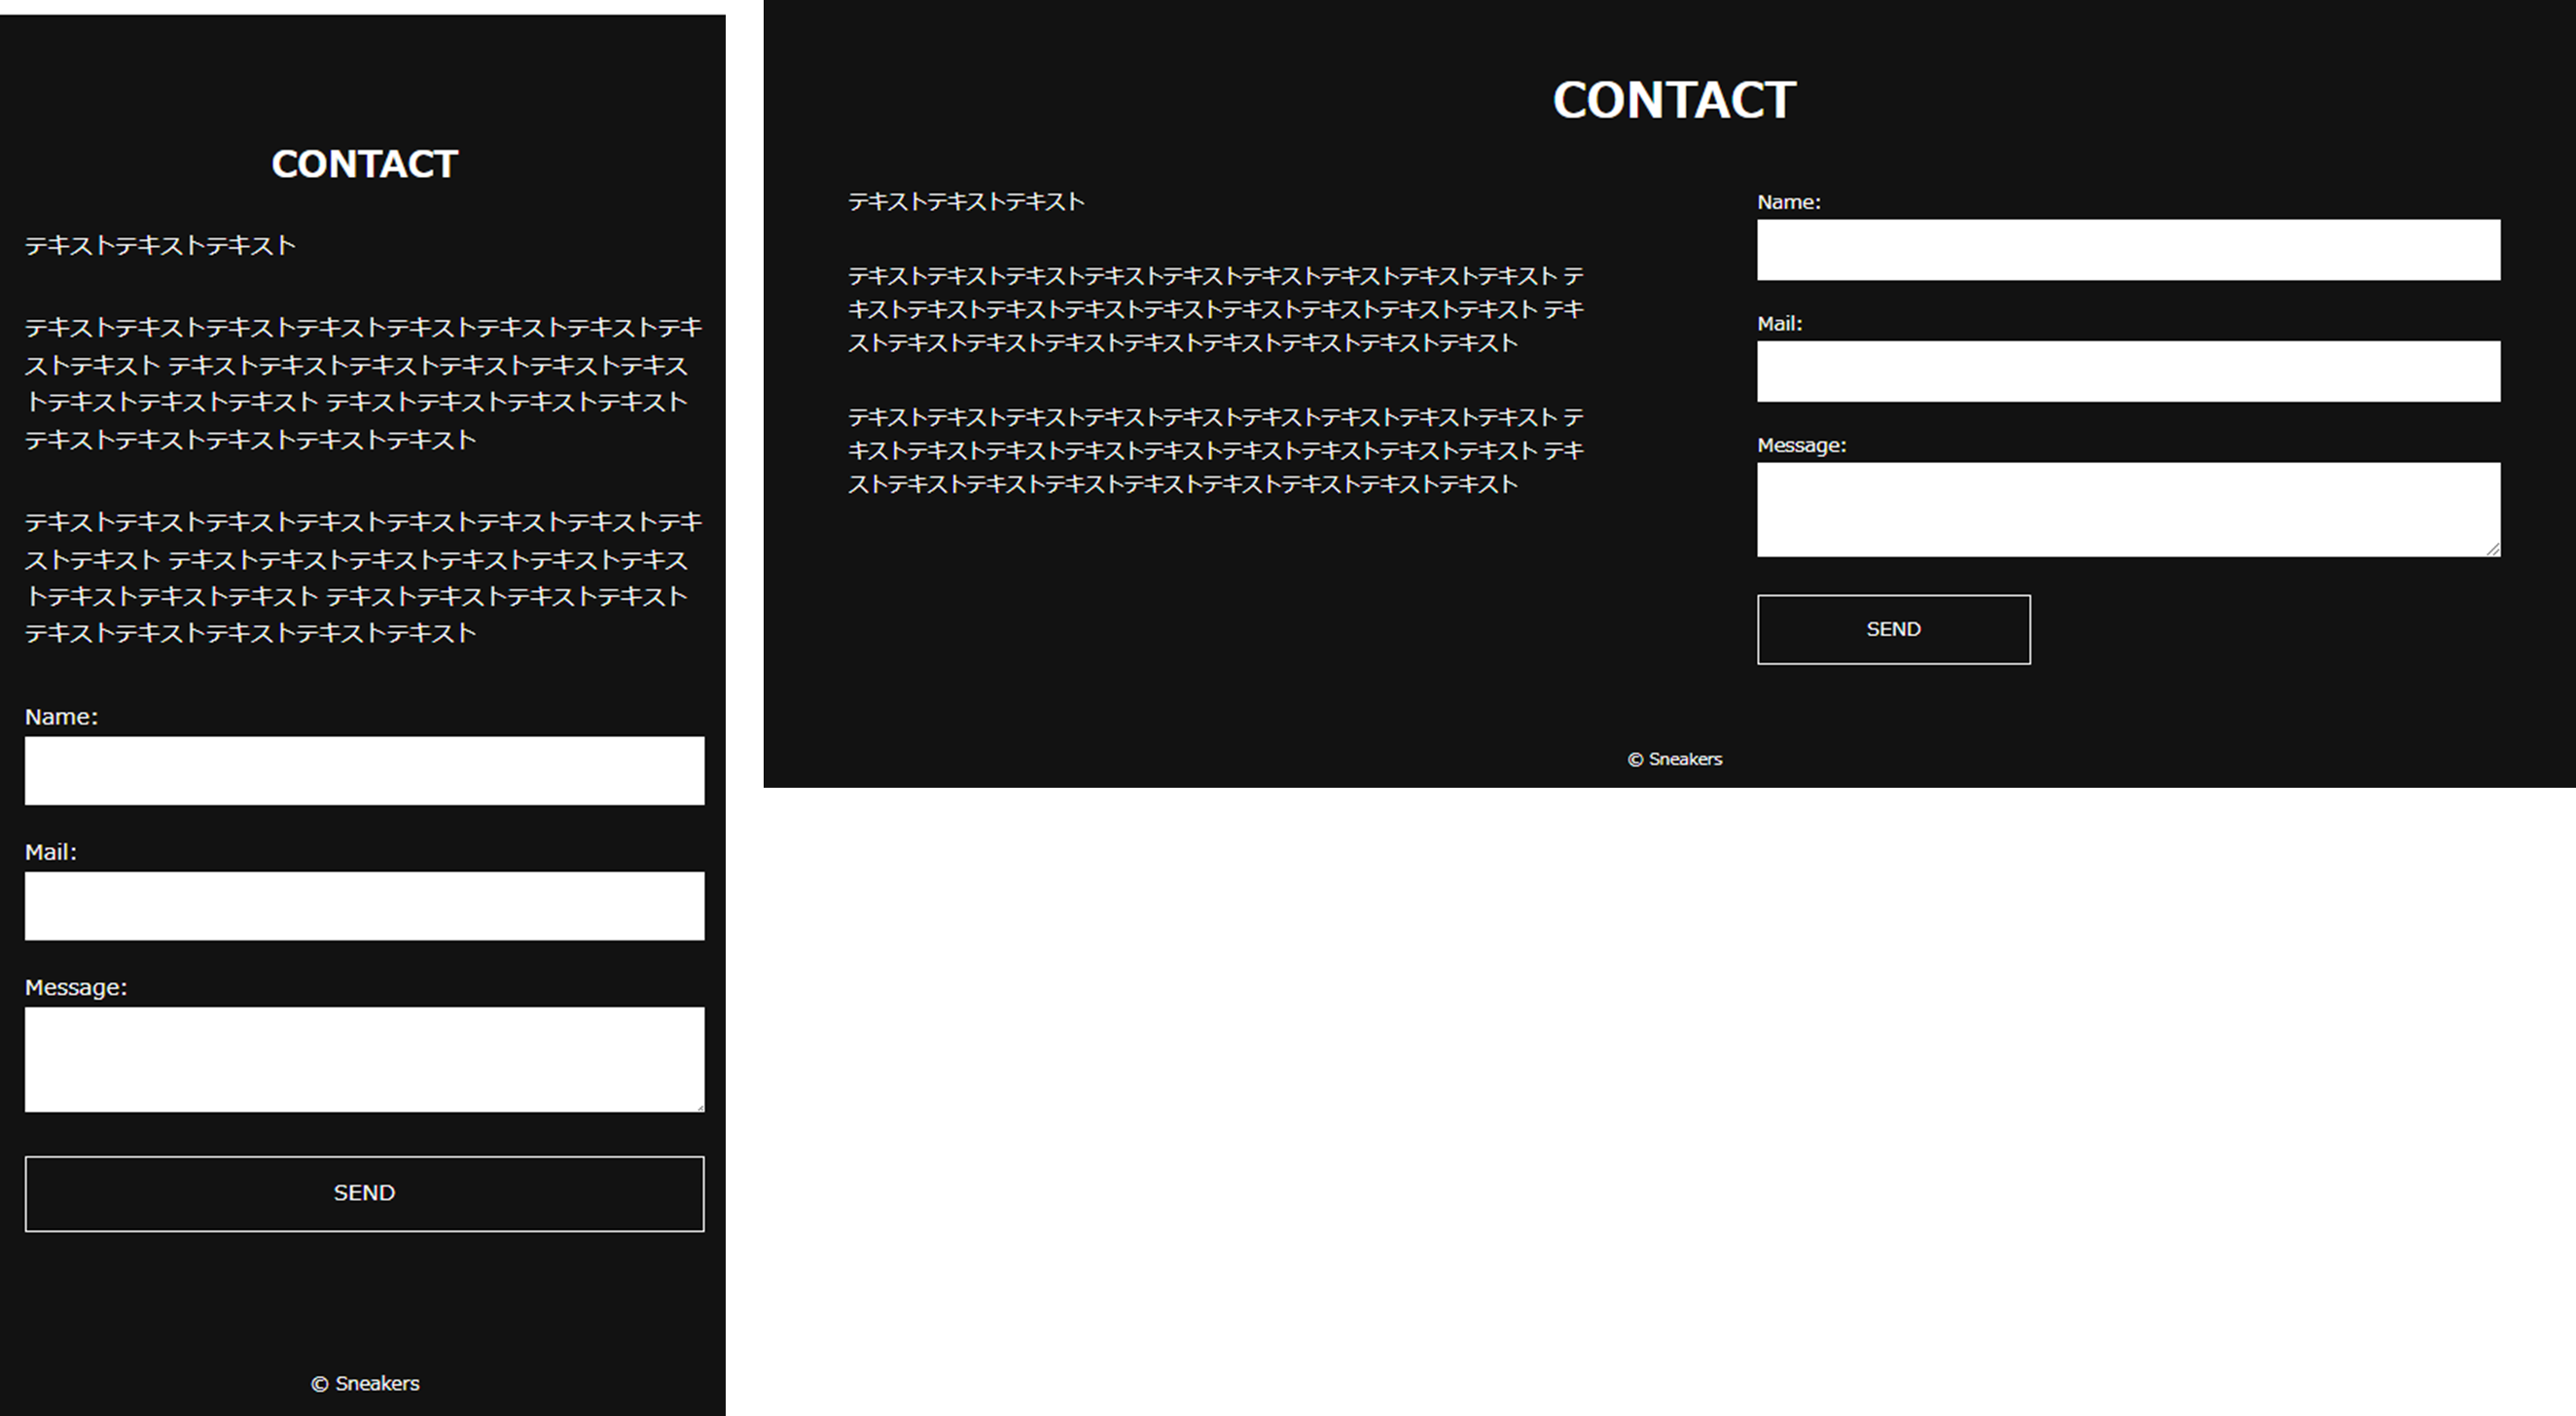
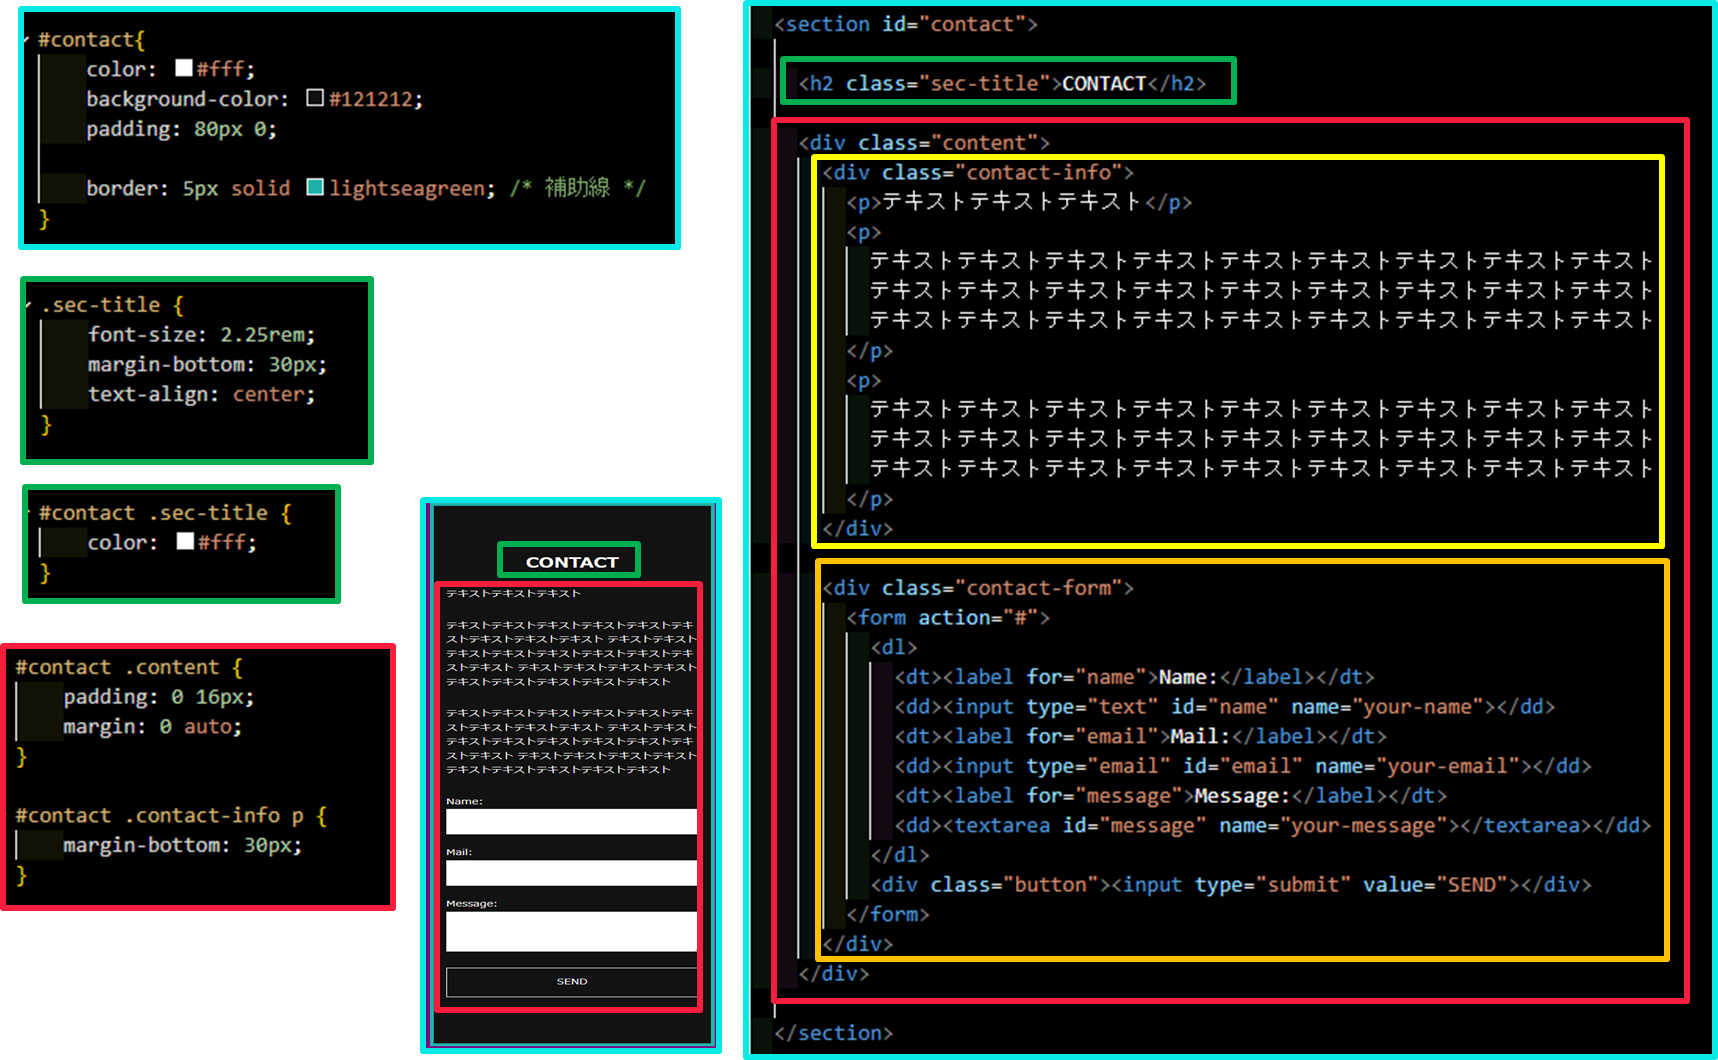
section#contactの作成
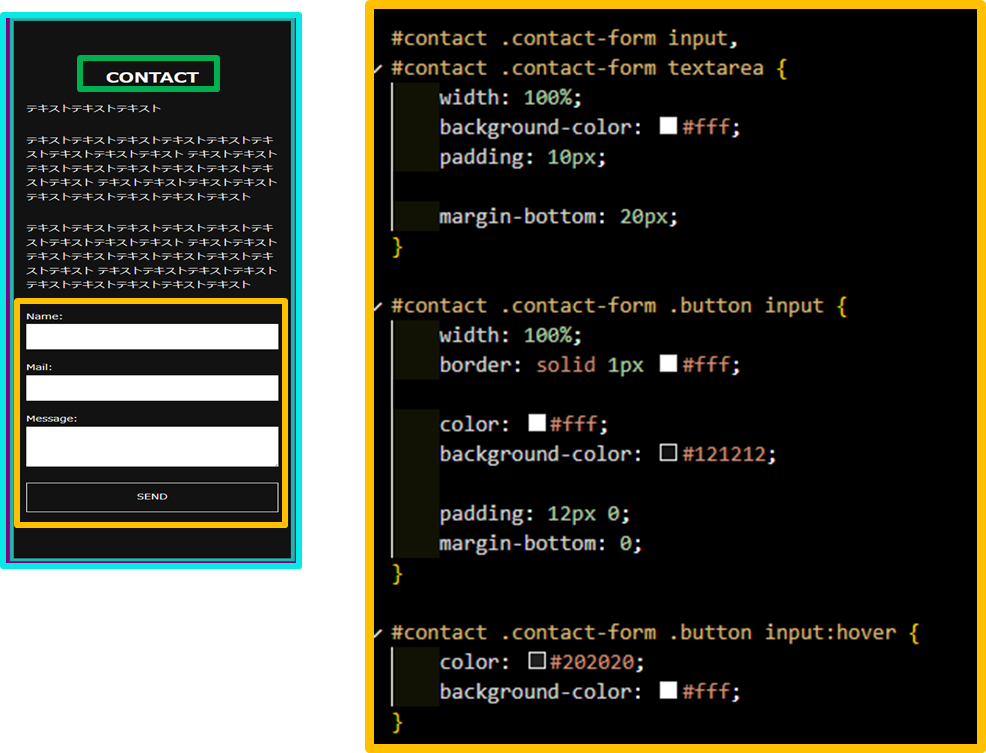
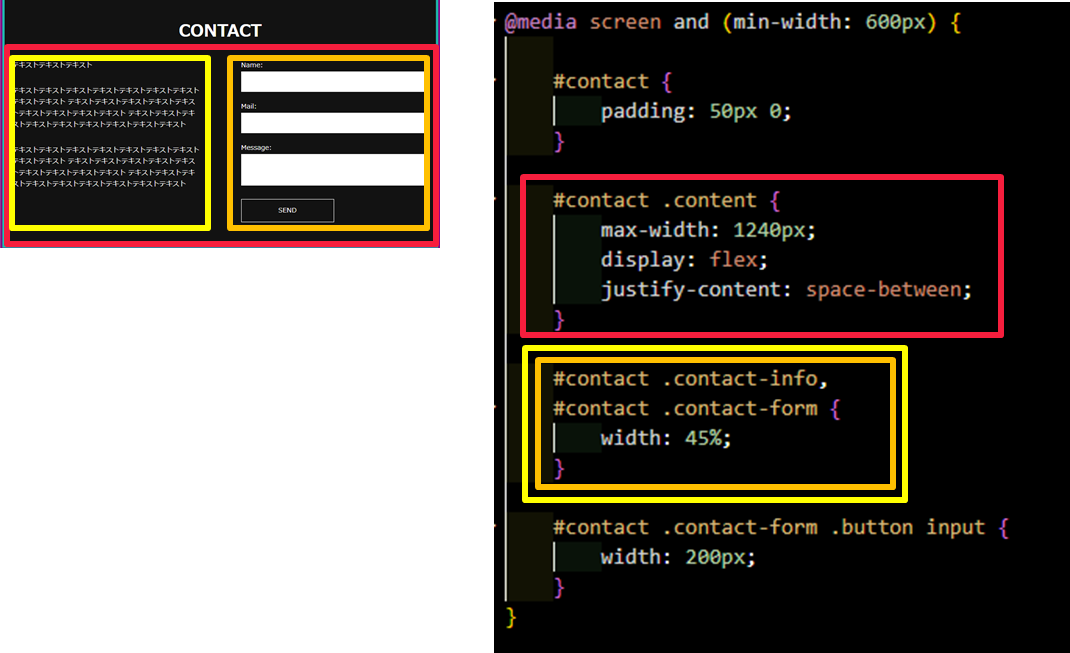
- input要素はリセットCSSでdefaultのスタイルが削除されている
-
width:100%;やborder,background-color,paddingを使って見た目を整える必要がある
- 親要素に
display:flex;子要素を横並びになる - 子要素の幅は
width:45%;+ 親要素のjustify-content:space-between;で間に10%の余白を作れる。
    <section id="contact">
      <h2 class="sec-title">CONTACT</h2>
      <div class="content">
        <div class="contact-info">
          <p>テキストテキストテキスト</p>
          <p>
            テキストテキストテキストテキストテキストテキストテキストテキストテキスト
            テキストテキストテキストテキストテキストテキストテキストテキストテキスト
            テキストテキストテキストテキストテキストテキストテキストテキストテキスト
          </p>
          <p>
            テキストテキストテキストテキストテキストテキストテキストテキストテキスト
            テキストテキストテキストテキストテキストテキストテキストテキストテキスト
            テキストテキストテキストテキストテキストテキストテキストテキストテキスト
          </p>
        </div>

        <div class="contact-form">
          <form action="#">
            <dl>
              <dt><label for="name">Name:</label></dt>
              <dd><input type="text" id="name" name="your-name"></dd>
              <dt><label for="email">Mail:</label></dt>
              <dd><input type="email" id="email" name="your-email"></dd>
              <dt><label for="message">Message:</label></dt>
              <dd><textarea id="message" name="your-message"></textarea></dd>
            </dl>
            <div class="button"><input type="submit" value="SEND"></div>
          </form>
        </div>
      </div>
    </section>
#contact{
    color: #fff;
    background-color: #121212;
    padding: 80px 0;

    border: 5px solid lightseagreen; /* 補助線 */
}
#contact .sec-title {
    color: #fff;
}

#contact .content {
    padding: 0 16px;
    margin: 0 auto;

}
#contact .contact-info p {
    margin-bottom: 30px;
}
#contact .contact-info,
#contact .contact-form {
    width: 100%;
}
#contact .contact-form input,
#contact .contact-form textarea {
    width: 100%;
    background-color: #fff;
    padding: 10px;
    margin-bottom: 20px;
}

#contact .contact-form .button input {
    width: 100%;

    color: #fff;
    background-color: #121212;
    border: solid 1px #fff;
    padding: 12px 0;
    margin-bottom: 0;
}
#contact .contact-form .button input:hover {
    color: #202020;
    background-color: #fff;
}
@media screen and (min-width: 600px) {
    #contact {
        padding: 50px 0;
    }
    #contact .content {
        max-width: 1240px;
        display: flex;
        justify-content: space-between;
    }

    #contact .contact-info,
    #contact .contact-form {
        width: 45%;
    }

    #contact .contact-form .button input {
        width: 200px;
    }
}
footerの作成
index.htm.
<footer id="footer">
<p>© Sneakers</p>
</footer>
style.css
#footer{
    color: #fff;
    background-color: #121212;
    text-align: center;
    padding: 10px;
    font-size: 0.75rem;

    border: 5px solid pink; /* 補助線 */
}
補助線の削除
スムーススクロール
- href から data-href に変更
index.html
    <nav id="navi">
      <ul class="nav-menu">
<!-- href から data-href に変更 -->
        <li><a data-href="#pickup">PICK UP</a></li>
        <li><a data-href="#feature">FEATURE</a></li>
        <li><a data-href="#contact">CONTACT</a></li>
      </ul>
-
scrollIntoViewの追加
src/main.js
// リンクをクリックした時にメニューを閉じる
const naviLinks = document.querySelectorAll('#navi a');
naviLinks.forEach(naviLink => {
    naviLink.onclick = (e) => {

//+
        const elmSelector = e.target.dataset.href;
        var element = document.querySelector(elmSelector);
        let scrollOption = {
            behavior: 'smooth',//推移のアニメーション
        }
        element.scrollIntoView(scrollOption);


        header.classList.remove('open');
    }
});
