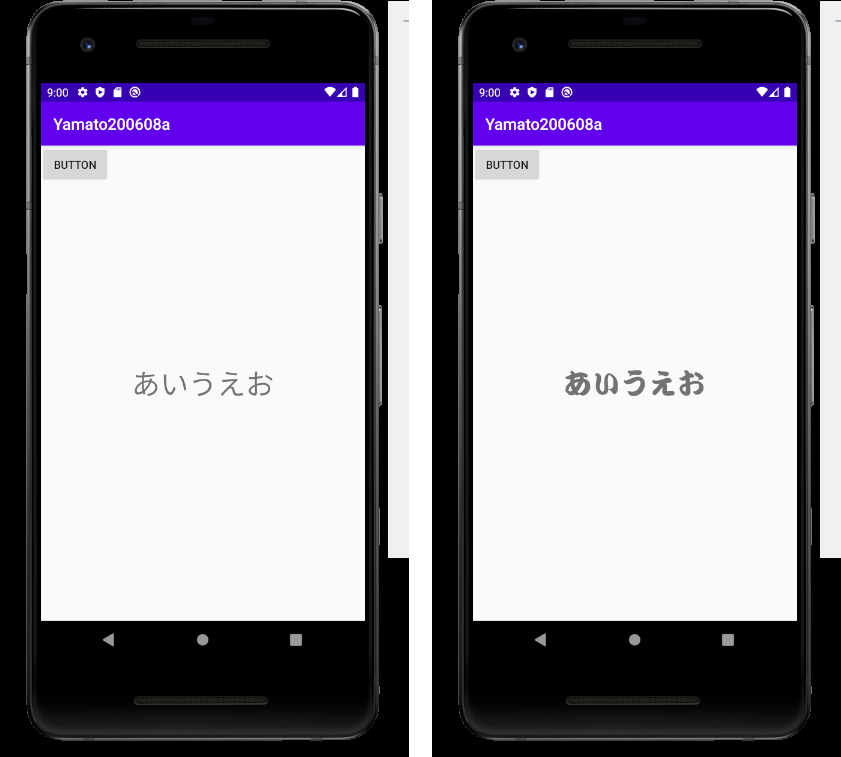
やりたいこと
- フォントファイルをアプリのアセットに取り込む。
- ボタンを押下すると、テキストビューの書体が変わる。
フォントファイルの取り込み
フォントファイルの入手方法(自分のPCから)
Windows10の場合、
コントロールパネル > デスクトップのカスタマイズ > フォント

でフォントファイルが表示されるので、
任意のファイルをコピペしてアプリのアセットに保存する。
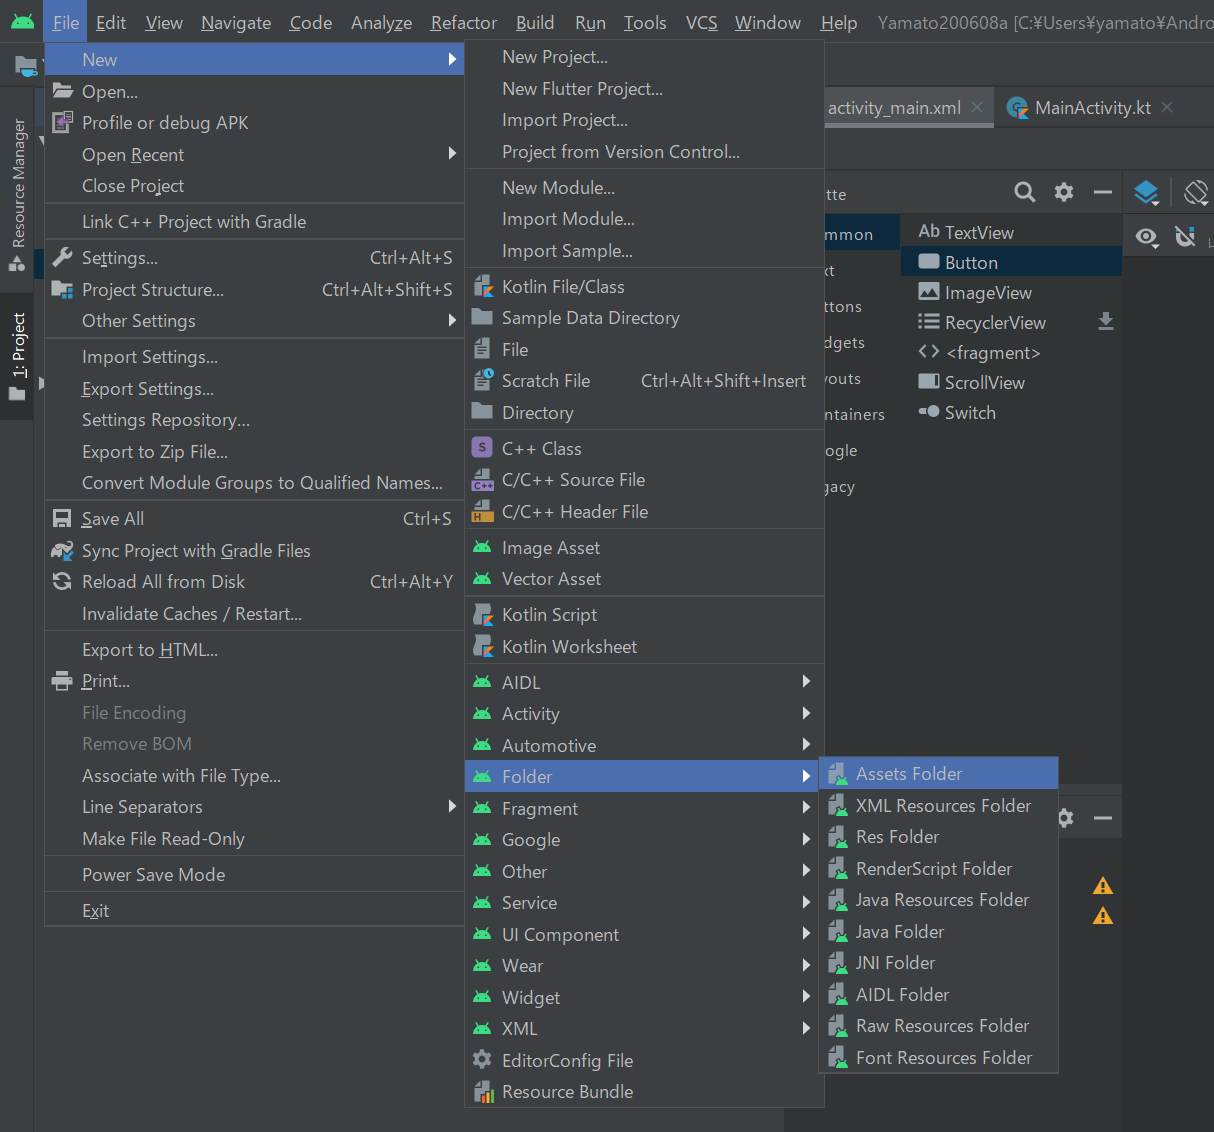
アセットフォルダの作成方法
AndroidStudioにて
File > New > Folder > Asset Folder
を実行する。
すると、app配下に assets フォルダが作成される。
このフォルダにフォントファイルをコピペする。
実装
画面側
<?xml version="1.0" encoding="utf-8"?>
<androidx.constraintlayout.widget.ConstraintLayout xmlns:android="http://schemas.android.com/apk/res/android"
    xmlns:app="http://schemas.android.com/apk/res-auto"
    xmlns:tools="http://schemas.android.com/tools"
    android:layout_width="match_parent"
    android:layout_height="match_parent"
    tools:context=".MainActivity">

    <TextView
        android:id="@+id/textView"
        android:layout_width="wrap_content"
        android:layout_height="wrap_content"
        android:text="あいうえお"
        android:textSize="36sp"
        app:layout_constraintBottom_toBottomOf="parent"
        app:layout_constraintLeft_toLeftOf="parent"
        app:layout_constraintRight_toRightOf="parent"
        app:layout_constraintTop_toTopOf="parent" />

    <Button
        android:id="@+id/btn"
        android:layout_width="wrap_content"
        android:layout_height="wrap_content"
        android:text="Button"
        app:layout_constraintStart_toStartOf="parent"
        app:layout_constraintTop_toTopOf="parent" />

</androidx.constraintlayout.widget.ConstraintLayout>
メイン処理
assetsフォルダ内に hoge.ttc がある場合、下記のように指定できる。
package com.example.yamato200608a

import android.graphics.Typeface
import android.os.Bundle
import androidx.appcompat.app.AppCompatActivity
import kotlinx.android.synthetic.main.activity_main.*

class MainActivity : AppCompatActivity() {
    override fun onCreate(savedInstanceState: Bundle?) {
        super.onCreate(savedInstanceState)
        setContentView(R.layout.activity_main)
        btn.setOnClickListener {
            val typeface = Typeface.createFromAsset(assets, "hoge.ttc")
            textView.typeface = typeface
        }
    }
}