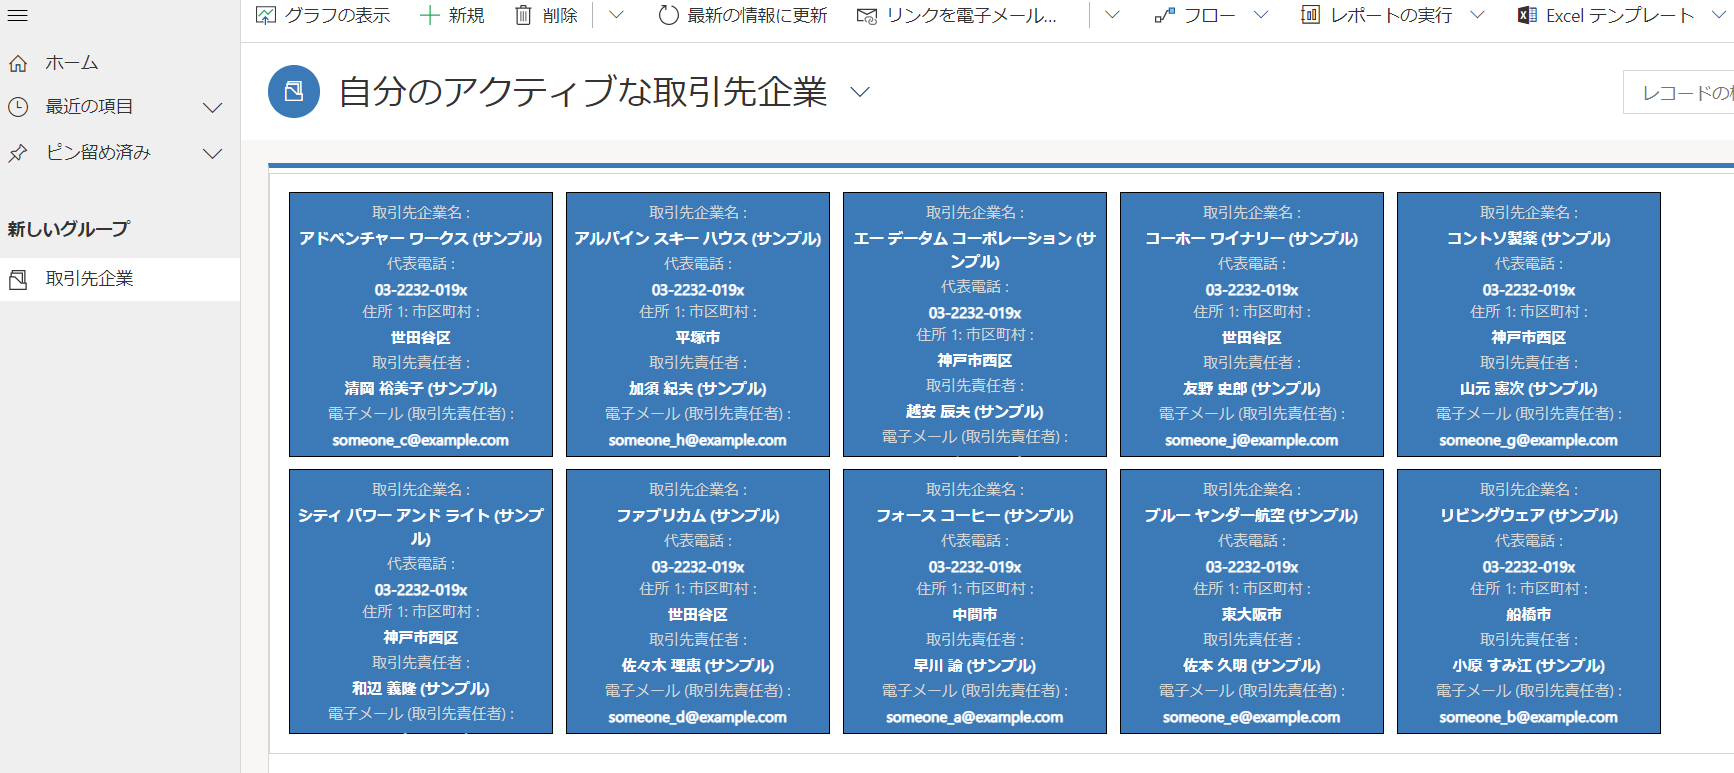
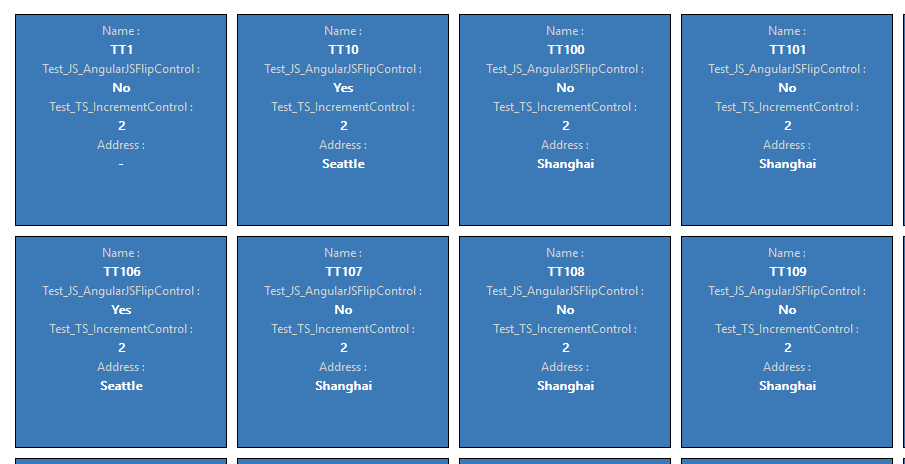
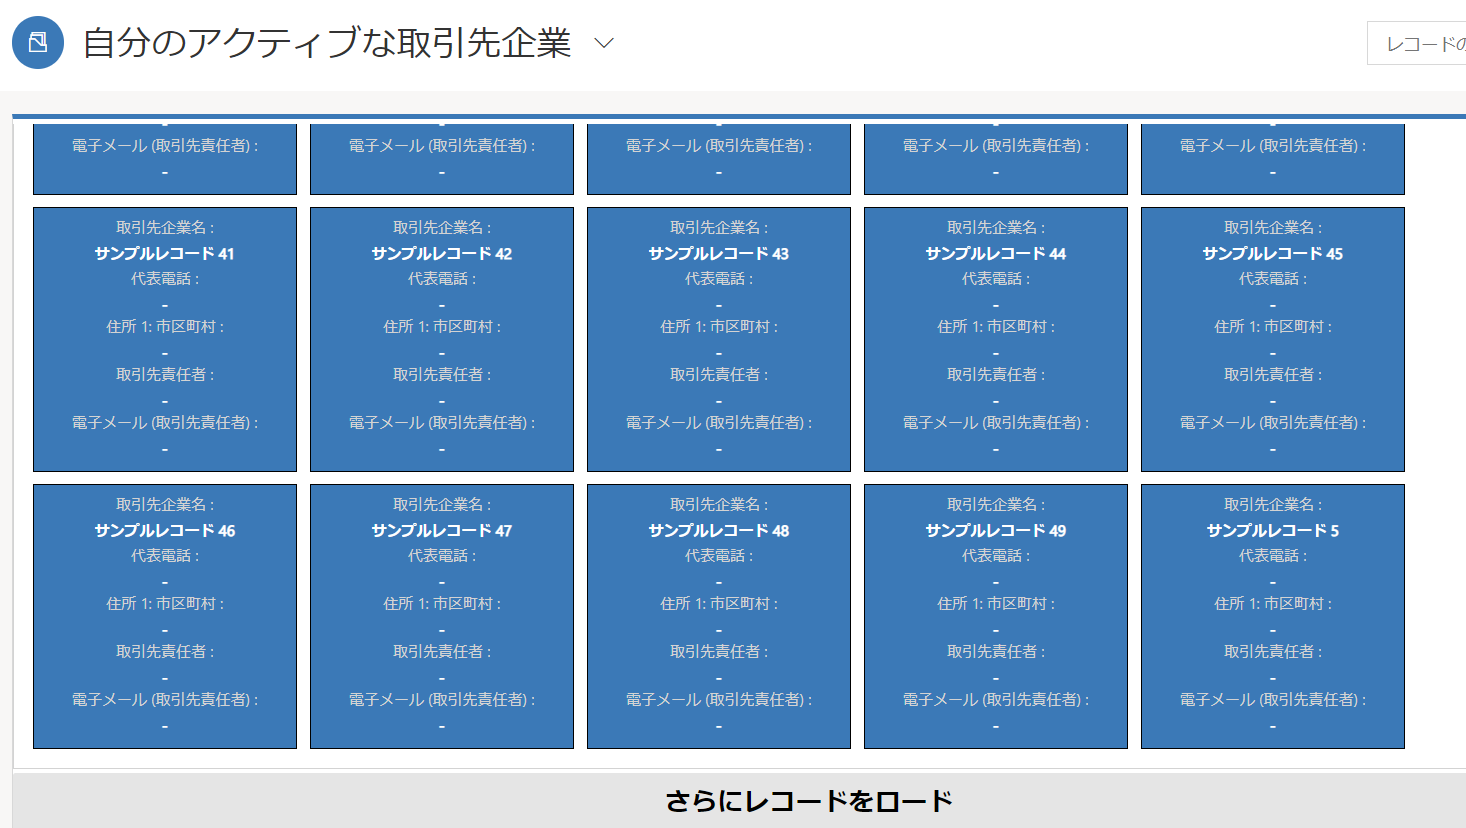
前回 まではスライダーコントロールを開発してきましたが、今回はタイル形式のグリッドを開発してみます。完成イメージはこちらです。
利用する API
PCF の API の中でも、データセットに関わる API をよく使います。
DataSet
グリッドに関して、現在選択されているレコードの情報やビューの ID の取得を行ったり、データのリフレッシュや任意のレコードを選択した状態にするなど、便利なメソッドを提供する他、列やソート、ロード状況やページング情報などグリッドで必要な情報をプロパティとして提供します。
Column
グリッドの特定の列に関して、データの型や表示名、表示のステータスや順序などが取得できます。
Paging
データグリッドのページングについて、レコードの数や次のページがあるかなどの情報が取得できます。
そのほかにも画面で出来るようなことは API が適用されているため、ドキュメントを参照してください。
プロジェクトの作成
まず PAC を使ってフィールド用の PCF プロジェクトを作成します。
1. 前回まで作ってきた PCFControls フォルダに移動して、グリッド用のコントロールを作成。
mkdir TileGridControl
cd TileGridControl
2. 以下のコマンドを実行してプロジェクトを作成。
- 名前空間とプロジェクト名の指定
- template 引数は dataset を指定
pac pcf init --namespace SampleNamespace --name TSDataSetGrid --template dataset
3. npm パッケージをリストアして任意の IDE でフォルダを開く。ここでは Visual Studio Code を利用。
npm install
code .
タイルグリッドの開発
コントロールマニフェストの編集
開発する UI コントロールのメタデータは ControlManifest.Input.xml に記述します。
参照: マニフェストスキーマ
1. まずはコントロールのメタデータを変更。ControlManifest.Input.xml の control 要素を以下の様に変更。
- namespace: 名前空間の指定
- constructor: UI コントロール読み込み時の初期化処理を行う関数名
- display-name, description: リソースファイルのキーまたは文字列をハードコード
<control
  namespace="SampleNamespace"
  constructor="TSDataSetGrid"
  version="0.0.1"
  display-name-key="Sample Tile Grid Control"
  description-key="This is sample tile grid control"
  control-type="standard">
2. 次に control ノード内に dataset を定義。
<data-set
  name="dataSetGrid"
  display-name-key="dataset for the grid">
</data-set>
3. 最後にプロジェクトで利用されるファイルの指定を resources に設定。css ファイルは後ほど追加。
<resources>
  <code path="index.ts" order="1" />
  <css path="css/TS_DataSetGrid.css" order="1" />
</resources>
最終的に ControlManifest.Input.xml は以下の様になります。
<?xml version="1.0" encoding="utf-8" ?>
<manifest>
  <control
    namespace="SampleNamespace"
    constructor="TSDataSetGrid"
    version="0.0.1"
    display-name-key="Sample Tile Grid Control"
    description-key="This is sample tile grid control"
    control-type="standard">
    <data-set
      name="dataSetGrid"
      display-name-key="dataset for the grid">
    </data-set>
    <resources>
      <code path="index.ts" order="1" />
      <css path="css/TS_DataSetGrid.css" order="1" />
    </resources>
  </control>
</manifest>
リソースファイルの追加
プロジェクトに必要なリソースを追加します。
1. ControlManifest.Input.xml と同じところに css フォルダを追加。
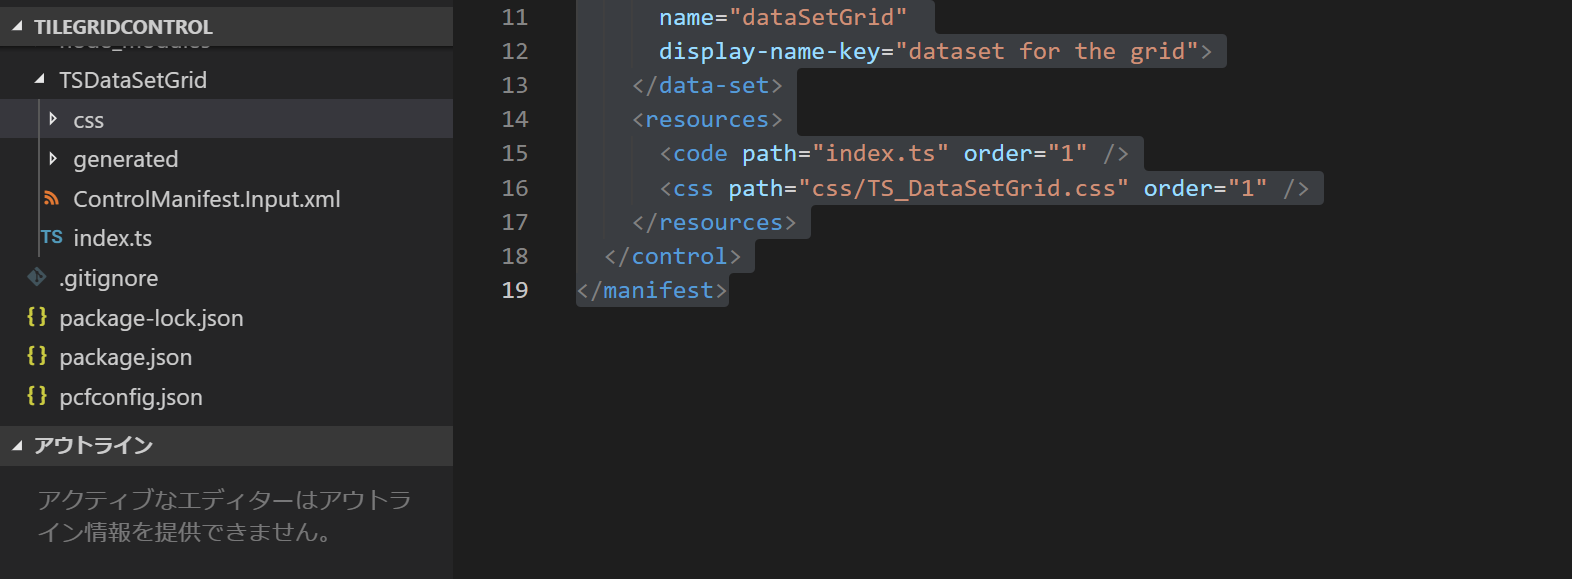
2. TS_DataSetGrid.css ファイルを追加。
.SampleNamespace\.TSDataSetGrid .DataSetControl_main-container {
    overflow-y: auto;
}

.SampleNamespace\.TSDataSetGrid .DataSetControl_grid-container {
    background-color: transparent;
    border: solid thin lightgray;
    padding: 10px;
    display: inline-block;
    overflow: auto;
}

.SampleNamespace\.TSDataSetGrid .DataSetControl_grid-item {
    margin: 5px;
    width: 200px;
    height: 200px;
    background-color: rgb(59, 121, 183);
    color: white;
    border: solid thin black;
    padding: 5px;
    text-align: center;
    float: left;
}

.SampleNamespace\.TSDataSetGrid .DataSetControl_grid-text-label {
    font-size: 12px;
    white-space: normal;
    margin: 2px;
    display: block;
    color: lightgray;
}

.SampleNamespace\.TSDataSetGrid .DataSetControl_grid-text-value {
    font-size: 12px;
    white-space: normal;
    margin: 1px;
    display: block;
    color: white;
    font-weight: bold;
}

.SampleNamespace\.TSDataSetGrid button.DataSetControl_LoadMoreButton_Style {
    background-color:#e5e5e5;
    font-size:1.5rem;
    font-weight:bold;
    height:3.5rem;
    text-align:center;
    width:100%;
    border:none
}

.SampleNamespace\.TSDataSetGrid button.DataSetControl_LoadMoreButton_Hidden_Style {
    display: none;
}

.SampleNamespace\.TSDataSetGrid .DataSetControl_grid-norecords {
    display: flex;
    align-items: center;
    justify-content: center;
}
ManifestTypes.d.ts
マニュフェストの定義でインプットやアウトプットの設定が完了したら、一旦プロジェクトをビルドして型定義を作成します。
1. 既存の generated\ManifestTypes.d.ts を開いて中身を確認。
- 元々マニュフェストにあった sampleDataSet のみ存在。
/*
 * This is auto generated from the ControlManifest.Input.xml file
 */

// Define IInputs and IOutputs Type. They should match with ControlManifest.
export interface IInputs {
    sampleDataSet: ComponentFramework.PropertyTypes.DataSet;
}

export interface IOutputs {
}
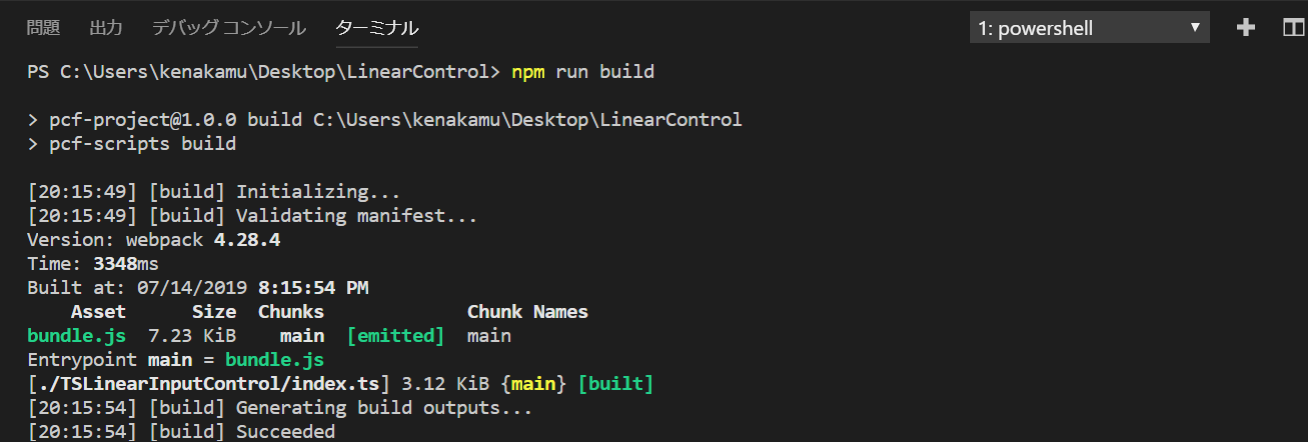
2. Visual Studio Code のターミナルより npm run build を実行。
3. ManifestTypes.d.ts が更新されたことを確認。
/*
*This is auto generated from the ControlManifest.Input.xml file
*/

// Define IInputs and IOutputs Type. They should match with ControlManifest.
export interface IInputs {
    dataSetGrid: ComponentFramework.PropertyTypes.DataSet;
}
export interface IOutputs {
}
index.ts コードの編集
ではタイル形式のグリッドコントロールを実装していきます。
1. 既存のコードがある場合は一旦削除。その後 import、type と const を追加。ManifestTypes は先ほど npm run build で作成されたインプット、アウトプットの型情報を提供。
import {IInputs, IOutputs} from "./generated/ManifestTypes";
import DataSetInterfaces = ComponentFramework.PropertyHelper.DataSetApi;
type DataSet = ComponentFramework.PropertyTypes.DataSet;
// 選択されたレコードの ID
const RowRecordId:string = "rowRecId";
// ボタン非表示用のクラス名
const DataSetControl_LoadMoreButton_Hidden_Style = "DataSetControl_LoadMoreButton_Hidden_Style";
2. ComponentFramework.StandardControl 継承するように、TSDataSetGrid クラスを追加。
export class TSDataSetGrid implements
ComponentFramework.StandardControl<IInputs, IOutputs> {
}
3. クラスで使うプロパティの追加。
// コンテキスト
private contextObj: ComponentFramework.Context<IInputs>;
// カスタムコントロール用のメインコンテナ
private mainContainer: HTMLDivElement;
// カスタムグリッド用のコンテナ
private gridContainer: HTMLDivElement;
// ロードページ用のボタン
private loadPageButton: HTMLButtonElement;
4. init メソッドの追加。ここではスライダーやラベルの初期化をしてコンテナに設定。
- context.parameters からインプット値を取得
/**
 * カスタムコントロールの初期化。データセットの初期化は updateView メソッド内で行う
 * @param context コンテキスト
 * @param notifyOutputChanged コントロール側でも出力変更を通知するコールバック
 * @param state セッションレベルで保持されるステート
 * @param container カスタムコントロールを描写する親コンテナ
 */
public init(context: ComponentFramework.Context<IInputs>, notifyOutputChanged: () => void, state: ComponentFramework.Dictionary, container:HTMLDivElement)
{
	// 画面サイズの変更を追跡する
	context.mode.trackContainerResize(true);
	// メインとグリッド用コンテナの作成とクラスの追加
	this.mainContainer = document.createElement("div");
	this.gridContainer = document.createElement("div");
	this.gridContainer.classList.add("DataSetControl_grid-container");
	// ボタンの作成と各種イベントや属性の追加
	this.loadPageButton = document.createElement("button");
	this.loadPageButton.setAttribute("type", "button");
	this.loadPageButton.innerText = "さらにレコードをロード";
	this.loadPageButton.classList.add(DataSetControl_LoadMoreButton_Hidden_Style);
	this.loadPageButton.classList.add("DataSetControl_LoadMoreButton_Style");
	this.loadPageButton.addEventListener("click", this.onLoadMoreButtonClick.bind(this));
	// メインコンテナにグリッドとボタンを追加。
	this.mainContainer.appendChild(this.gridContainer);
	this.mainContainer.appendChild(this.loadPageButton);
	this.mainContainer.classList.add("DataSetControl_main-container");
	container.appendChild(this.mainContainer);
}
5. データの描写を行う処理として updateView メソッドを追加。
/**
 * データセットや画面サイズなど、各種変更時に呼び出される
 * @param context コンテキスト
 */
public updateView(context: ComponentFramework.Context<IInputs>): void
{
	// コンテキストをローカル変数に保存
	this.contextObj = context;
	// ロードページボタンの表示操作
	this.toggleLoadMoreButtonWhenNeeded(context.parameters.dataSetGrid);

	// データのロードが完了した場合
	if(!context.parameters.dataSetGrid.loading){
		// グリッドの列情報を並べ替え順に取得
		let columnsOnView = this.getSortedColumnsOnView(context);
		if (!columnsOnView || columnsOnView.length === 0) {
			return;
		}
		// 既存のデータを全て削除
		while(this.gridContainer.firstChild)
		{
			this.gridContainer.removeChild(this.gridContainer.firstChild);
		}
		// グリッドのデータを追加
		this.gridContainer.appendChild(this.createGridBody(columnsOnView, context.parameters.dataSetGrid));
	}
	// コンテナのサイズを調整
	this.mainContainer.style.maxHeight = window.innerHeight - this.gridContainer.offsetTop - 75 + "px";
}
6. ビューの並び替え順で列を取得する getSortedColumnsOnView メソッドを追加。
- context.parameters.dataSetGrid: グリッドのメタデータ情報
/**
 * ビューの並べ替え順序をもとに列を取得
 * @param context
 * @return 並べ替え列
 */
private getSortedColumnsOnView(context: ComponentFramework.Context<IInputs>): DataSetInterfaces.Column[]
{
	if (!context.parameters.dataSetGrid.columns) {
		return [];
	}
	// コンテキストからデータグリッドの列を並び順に取得
	let columns = context.parameters.dataSetGrid.columns
		.filter(function (columnItem:DataSetInterfaces.Column) {
			// いくつかのシステム列は負の順序を持つため、正の並び替え値をもつ列のみ取得
			return columnItem.order >= 0 }
		);
	// 並び替えの順番通りにソート
	columns.sort(function (a:DataSetInterfaces.Column, b: DataSetInterfaces.Column) {
		return a.order - b.order;
	});
	return columns;
}
7. タイル形式のデータを作成する createGridBody メソッドを追加。
- gridParam.sortedRecordIds: グリッドに表示さえれる各レコードの Guid
- getFormattedValue(): フォーマットされた値の取得
/**
 * タイル形式のデータを作成
 * @param columnsOnView タイル上に表示する列
 * @param gridParam グリッドのデータ
 */
private createGridBody(columnsOnView: DataSetInterfaces.Column[], gridParam: DataSet):HTMLDivElement{
	let gridBody:HTMLDivElement = document.createElement("div");
	if(gridParam.sortedRecordIds.length > 0)
	{
		// グリッドのレコードを順次処理
		for(let currentRecordId of gridParam.sortedRecordIds){
			// タイル用 div の作成とクリックイベント追加
			let gridRecord: HTMLDivElement = document.createElement("div");
			gridRecord.classList.add("DataSetControl_grid-item");
			gridRecord.addEventListener("click", this.onRowClick.bind(this));
			// レコードの ID を列番号として設定
			gridRecord.setAttribute(RowRecordId, gridParam.records[currentRecordId].getRecordId());
			// 表示する列ごとにデータを追加
			columnsOnView.forEach(function(columnItem, index){
				// ラベルとデータ用の p 要素作成
				let labelPara = document.createElement("p");
				labelPara.classList.add("DataSetControl_grid-text-label");
				let valuePara = document.createElement("p");
				valuePara.classList.add("DataSetControl_grid-text-value");
				// ラベル値の設定
				labelPara.textContent = columnItem.displayName+" : ";
				gridRecord.appendChild(labelPara);
				// 列の値がある場合はフォーマットされた値を、ない場合は - を設定
				if(gridParam.records[currentRecordId].getFormattedValue(columnItem.name) != null && gridParam.records[currentRecordId].getFormattedValue(columnItem.name) != "")
				{
					valuePara.textContent = gridParam.records[currentRecordId].getFormattedValue(columnItem.name);
					gridRecord.appendChild(valuePara);
				}
				else
				{
					valuePara.textContent = "-";
					gridRecord.appendChild(valuePara);
				}
			});
			gridBody.appendChild(gridRecord);
		}
	}
	else
	{
		let noRecordLabel: HTMLDivElement = document.createElement("div");
		noRecordLabel.classList.add("DataSetControl_grid-norecords");
		noRecordLabel.style.width = this.contextObj.mode.allocatedWidth - 25 + "px";
		noRecordLabel.innerHTML = this.contextObj.resources.getString("PCF_DataSetControl_No_Record_Found");
		gridBody.appendChild(noRecordLabel);
	}
	return gridBody;
}
8. レコードをクリックした際の処理が記述された onRowClick メソッドを追加。
- getNamedReference(): レコードの EntityReference 情報を取得
- navigation.openForm(): レコードを開く処理
/**
 * 列をクリックした際の処理 (レコードを開く)
 * @param event
 */
private onRowClick(event: Event): void {
	let rowRecordId = (event.currentTarget as HTMLTableRowElement).getAttribute(RowRecordId);
	if(rowRecordId)
	{
		// 開くレコードの情報
		let entityReference = this.contextObj.parameters.dataSetGrid.records[rowRecordId].getNamedReference();
		// エンティティのタイプとレコードの ID
		let entityFormOptions = {
			entityName: entityReference.entityType!,
			entityId: entityReference.id,
		}
		// navigation を使ってレコードを開く
		this.contextObj.navigation.openForm(entityFormOptions);
	}
}
9. ロードページボタンの表示判定として toggleLoadMoreButtonWhenNeeded メソッドを追加。
/**
 * 'LoadMore' ボタンの表示判定
 */
private toggleLoadMoreButtonWhenNeeded(gridParam: DataSet): void{
	if(gridParam.paging.hasNextPage && this.loadPageButton.classList.contains(DataSetControl_LoadMoreButton_Hidden_Style))
	{
		this.loadPageButton.classList.remove(DataSetControl_LoadMoreButton_Hidden_Style);
	}
	else if(!gridParam.paging.hasNextPage && !this.loadPageButton.classList.contains(DataSetControl_LoadMoreButton_Hidden_Style))
	{
		this.loadPageButton.classList.add(DataSetControl_LoadMoreButton_Hidden_Style);
	}
}
10. ボタンクリック時の処理として onLoadMoreButtonClick メソッドを追加。
- paging.loadNextPage(): 次のページ情報をロード
/**
 * 'LoadMore' ボタンがクリックされた際の処理
 * @param event
 */
private onLoadMoreButtonClick(event: Event): void {
	this.contextObj.parameters.dataSetGrid.paging.loadNextPage();
	this.toggleLoadMoreButtonWhenNeeded(this.contextObj.parameters.dataSetGrid);
}
11. getOutputs と destroy を追加。今回は特に処理はなし。
/**
     * It is called by the framework prior to a control receiving new data.
     * @returns an object based on nomenclature defined in manifest, expecting object[s] for property marked as “bound” or “output”
     */
    public getOutputs(): IOutputs
    {
        return {};
	}

    /**
     * Called when the control is to be removed from the DOM tree. Controls should use this call for cleanup.
     * i.e. cancelling any pending remote calls, removing listeners, etc.
     */
    public destroy(): void
    {
	}
テストとデバッグ
スライダーコントロールと同じようにテストとデバッグが出来ます。
1. ターミナルより以下のコマンドを実行。
npm start
2. ブラウザが起動してアプリが実行されます。画面に出ているように、3 件のサンプルレコードが提供されます。

コンポーネントのパッケージ化と展開
既に作成済のソリューションに今回のコントロールを追加します。
1. SampleSolution フォルダに移動し、以下のコマンドを実行。
pac solution add-reference --path ../TileGridControl
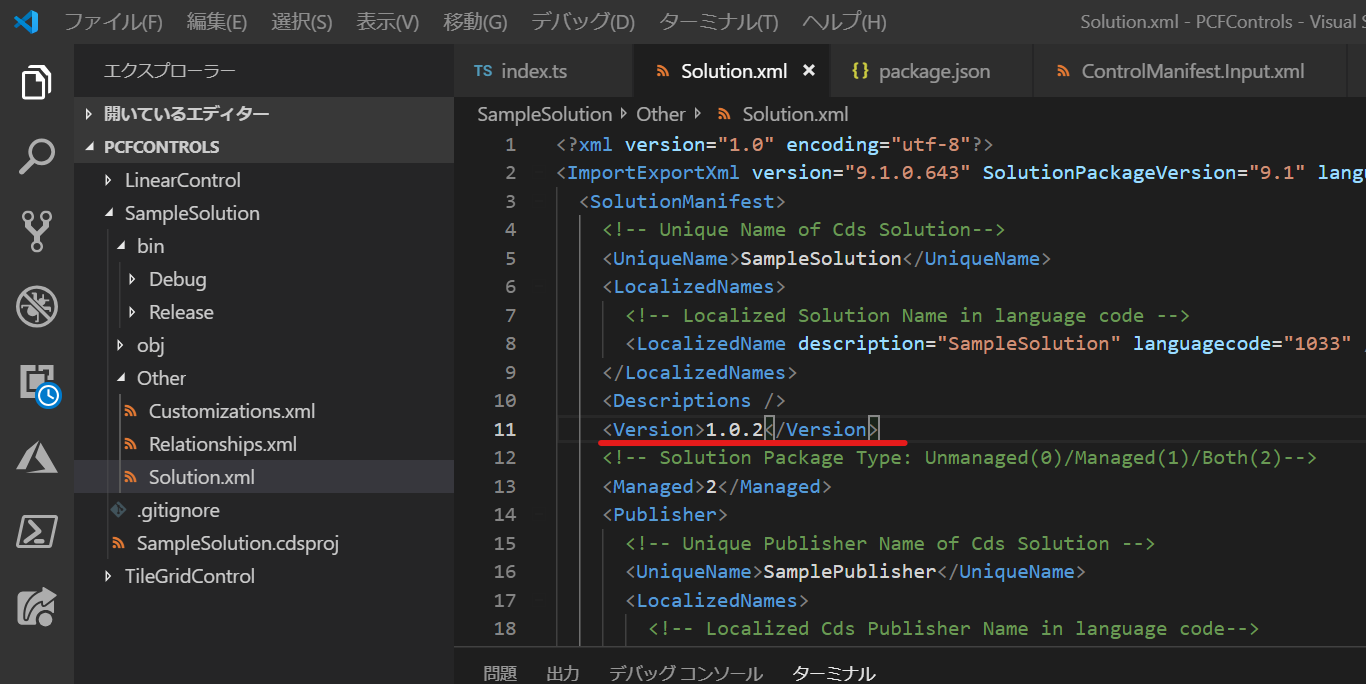
2. SampleSolution\Other\Solution.xml でバージョン情報を更新。
3. 以下コマンドでパッケージをビルド。
msbuild /restore
msbuild /p:configuration=Release
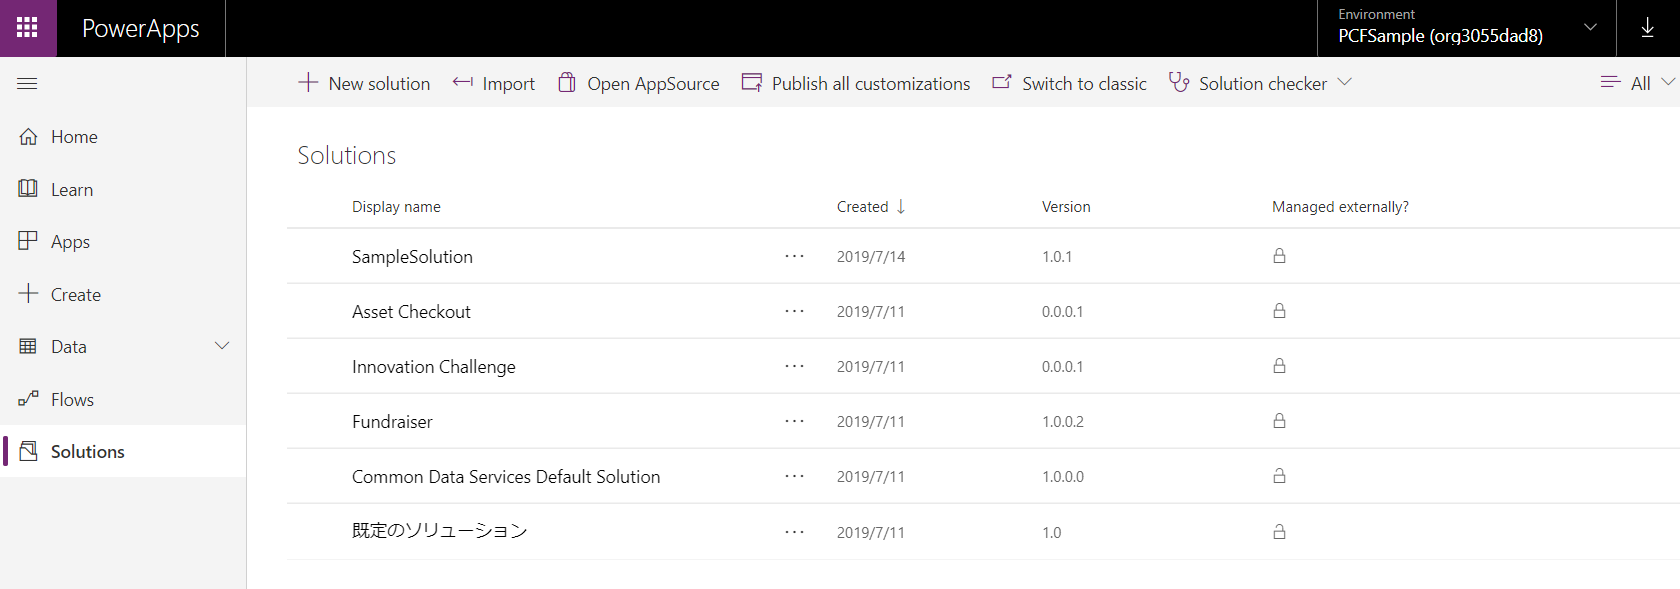
4. https://make.powerapps.com に接続。管理者権限でログイン。すでに SampleSolution を入れた環境で Solutions を選択し、Import をクリック。
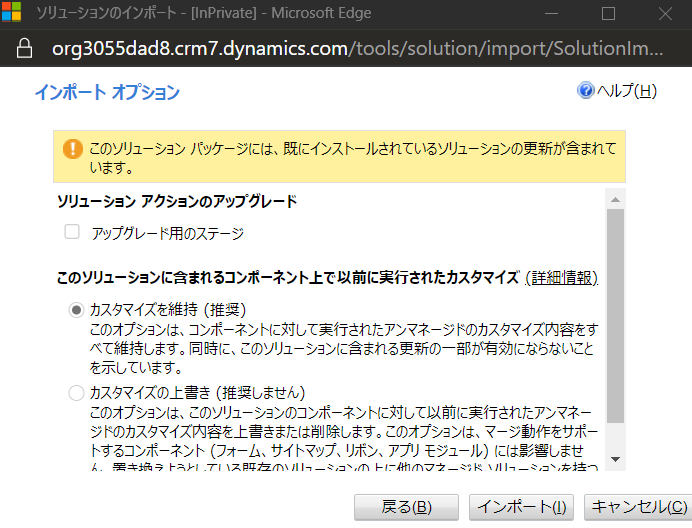
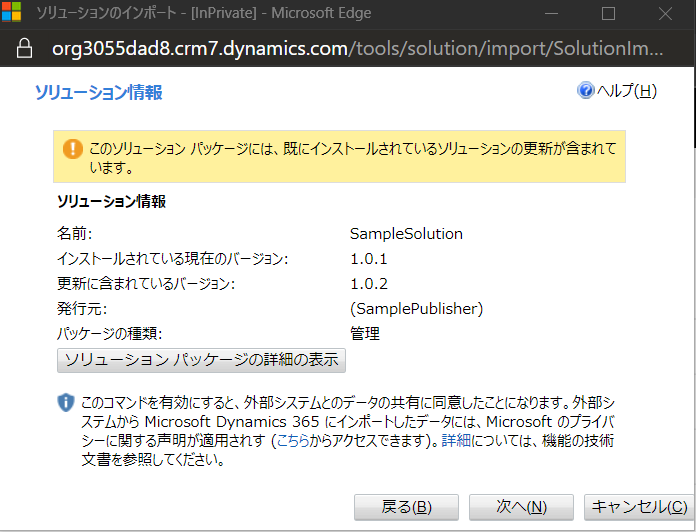
5. インポート時にパッケージが更新される旨が表示されるので、そのまま次へ。
7. インポートが終わったら「Switch to classic」をクリック。

8. Common Data Service Defaut Solution を開く。

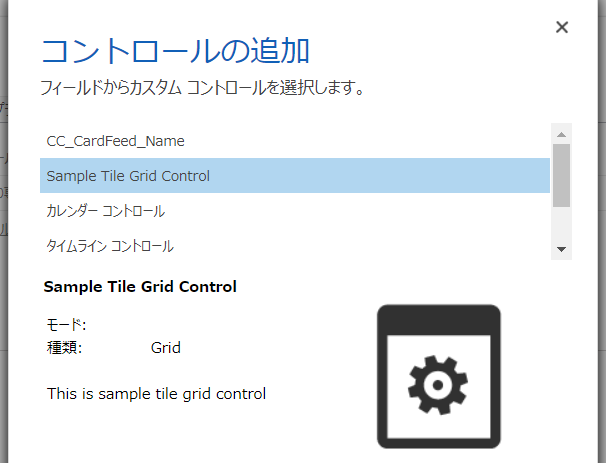
9. エンティティ | 取引先企業 | コントロールより「コントロールの追加」をクリック。

11.「Web」の選択肢をカスタムコントロールに変更して「保存」後、「公開」をクリック。

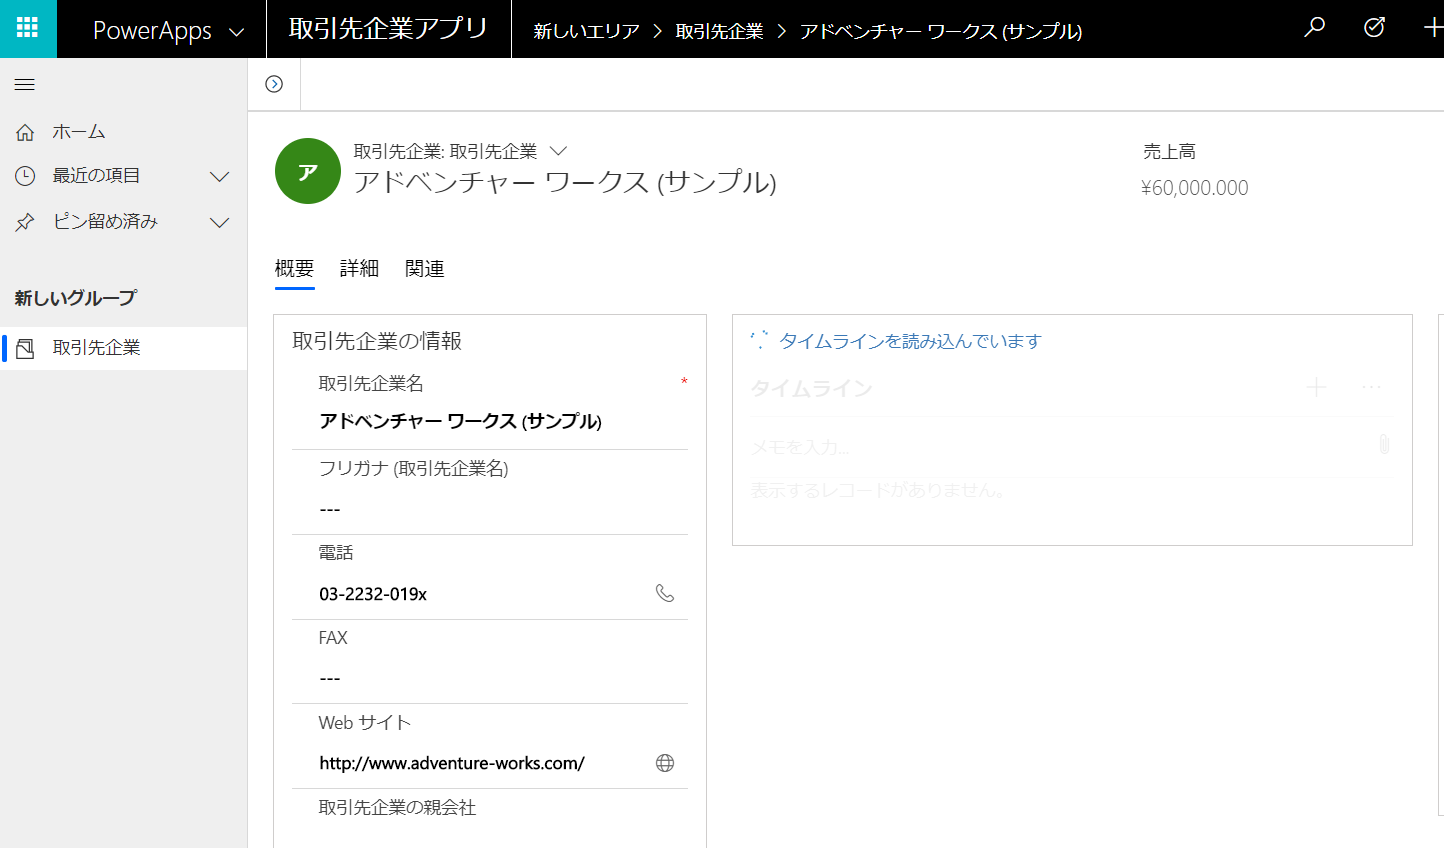
動作確認
最後に動作を確認します。
3. 画面に表示しきれないレコードすがある場合のボタンの挙動も確認。
まとめ
グリッドのカスタムコントロールも、フィールドのカスタムコントロールを同じように作成が出来ました。
次回からは他のサンプルを通して他の機能も使ってみます。
