前回 は簡単な CRUD ができるアプリを作りましたが、今回はそこから色々手を加えていきます。やりながら書いているのでどうなるかは分かりません。
メニューから複数の機能を利用する
現在はユーザーの一覧から色々操作するだけですが、他の機能も加えることを考えます。
ナビゲーションドロワーを利用する
Ignite UI の NavDrawer という、左右から飛び出るメニューを作れる機能を使って、実装します。
1. まずはモジュールの追加からします。モジュール名が NavigationDrawerModule であり、Igx から始まりませんが、GitHub の Issue に上がっているのでそのうち IgxNavigationDrawerModule になるでしょう。
import { BrowserModule } from '@angular/platform-browser';
import { BrowserAnimationsModule } from '@angular/platform-browser/animations';
import { NgModule } from '@angular/core';
import { FormsModule } from '@angular/forms';
import { AppRoutingModule } from './app-routing.module';
import { AppComponent } from './app.component';

// Ignite UI モジュールの参照
import {
  IgxNavbarModule, IgxIconModule, IgxScrollModule, IgxAvatarModule,
  IgxLabelModule, IgxInput, IgxDatePickerModule, IgxButtonModule, IgxRippleModule,
  IgxToastModule, IgxDialogModule, IgxCheckboxModule, IgxSwitchModule, IgxSliderModule,
  IgxRadioModule, NavigationDrawerModule } from 'igniteui-angular/main';

// Hammer
import "hammerjs";
import { ListComponent } from './list/list.component';
import { DetailComponent } from './detail/detail.component';
import { UserService } from './user/user.service';
import { NewComponent } from './new/new.component';

@NgModule({
  declarations: [
    AppComponent,
    ListComponent,
    DetailComponent,
    NewComponent
  ],
  imports: [
    BrowserModule,
    BrowserAnimationsModule,
    AppRoutingModule,
    FormsModule,
    IgxNavbarModule, // Ignite UI Navbar モジュールの追加
    IgxIconModule, // Ignite UI Icon モジュールの追加
    IgxScrollModule, // Ignite UI Scroll モジュールの追加
    IgxAvatarModule, // Ignite UI Avatar モジュールの追加
    IgxLabelModule, // Ignite UI Label モジュールの追加
    IgxInput, // Ignite UI Input の追加
    IgxDatePickerModule, // Ignite UI DatePicker モジュールの追加
    IgxButtonModule, // Ignite UI Button モジュールの追加
    IgxRippleModule, // Ignite UI Ripple モジュールの追加
    IgxToastModule, // Ignite UI Toast モジュールの追加
    IgxDialogModule, // Ignite UI Dialog モジュールの追加
    IgxCheckboxModule, // Ignite UI Checkbox モジュールの追加
    IgxSwitchModule, // Ignite UI Switch モジュールの追加
    IgxSliderModule, // Ignite UI Slider モジュールの追加
    IgxRadioModule, // Ignite UI Slider モジュールの追加
    NavigationDrawerModule // Ignite UI Drawer モジュールの追加
  ],
  providers: [UserService], // サービスをプロバイダに追加
  bootstrap: [AppComponent]
})
export class AppModule { }
2. メニューの追加先は app モジュールにしてみます。ドロワーの追加とメニューボタンクリック時にドロワーをトグルするようにします。尚、pinThreashold を false にしているのは、画面サイズが 1024 以上の場合に、メニュー以外がグレーになる効果が得られないためです。また app-list は削除しています。
<igx-navbar [title]="title" actionButtonIcon="menu" (onAction)="drawer.toggle()">
  <igx-icon name="add" (click)="onClickAdd()"></igx-icon>
</igx-navbar>
<!-- ドロワーの追加 -->
<igx-nav-drawer #drawer [pinThreshold]="false" width="280px">
  <div class="ig-drawer-content">
    <nav class="nav">
      <!-- ヘッダー -->
      <span class="nav-item header">menus</span>
      <!-- メニューの追加 -->
      <span class="nav-item" [routerLinkActive]="'active'" routerLink="/">
        <igx-icon fontSet="material" name="list"></igx-icon>
        <span>List</span>
      </span>
      <span class="nav-item" [routerLinkActive]="'active'" routerLink="grid">
        <igx-icon fontSet="material" name="grid_on"></igx-icon>
        <span>Grid</span>
      </span>
    </nav>
  </div>
</igx-nav-drawer>

<router-outlet></router-outlet>
3. 既定ではあまり奇麗に表示されないため、CSS を追加します。GitHub の CSSをそのまま使っています。NavDrawer のアイテムや CSS は NavDrawer フォルダではなく、app.component レベルにあります。
.ig-drawer-content {
    background: #fff;
}

.ig-drawer-content ::-webkit-scrollbar {
    width: 3px;
    background: #e4e4e4;
}

.ig-drawer-content ::-webkit-scrollbar-thumb {
    background: #ec6f74;
    border-radius: 0;
}

.nav {
    position: absolute;
    width: 100%;
    height: 100%;
    border-right: 1px solid #e4e4e4;
    overflow-y: scroll;
    overflow-x: hidden;
}

.nav-item {
    display: flex;
    flex: 1 0 100%;
    flex-flow: row nowrap;
    color: #383838;
    max-height: 48px;
    padding: 12px 16px;
    cursor: pointer;
    font-size: 14px;
    align-items: center;
    font-weight: 600;
    user-select: none;
    outline: transparent;
    white-space: nowrap;
}

.nav-item.active {
    background-color: #fcc5de;
}

.nav-item:hover {
    background-color: #f0f0f0;
}

.nav-item > * + * {
    margin-left: 32px;
}

.nav-item.header {
    font-size: 16px;
    color: #9c9c9c;
    font-weight: 400;
    cursor: initial;
}

.nav-item.header:hover {
    background-color: transparent;
}
4. 保存して動作を確認します。

5. メニューは出ていますが、画面の一番上からでていてメニューを隠してしますので、もう少し CSS を追加して挙動を変えます。
/*上記のものに以下を追加 */
igx-nav-drawer >>> .ig-nav-drawer-overlay,
igx-nav-drawer >>> .ig-nav-drawer {
 margin-top: 56px;
}
6. これでメニューを隠さなくなりました。

Angular の機能でリストのモジュール化
現在は app.module.html にリストの機能があり、ルーティングで詳細や新規画面を出しています。しかし他の機能を使う際にはリストが不要であるため、リスト自体をモジュール化しましょう。
1. まず見やすくするため、new と detail フォルダを list フォルダに移します。

2. 次に src/app/list 配下に list.module.ts を作成し、コンポーネントやモジュールの情報を追加します。
import { NgModule } from '@angular/core';
import { CommonModule } from '@angular/common';
import { FormsModule } from '@angular/forms';
import { Routes, RouterModule } from '@angular/router';

import { ListComponent } from './list.component';
import { DetailComponent } from './detail/detail.component';
import { NewComponent } from './new/new.component';

// Ignite UI モジュールの参照
import {
    IgxIconModule, IgxScrollModule, IgxAvatarModule,
    IgxLabelModule, IgxInput, IgxDatePickerModule, IgxButtonModule, IgxRippleModule,
    IgxToastModule, IgxDialogModule, IgxCheckboxModule, IgxSwitchModule, IgxSliderModule,
    IgxRadioModule
} from 'igniteui-angular/main';

const listRoutes: Routes = [
    {
        // 親パスと子パスを設定
        path: 'list', component: ListComponent, children: [
            // detail をパスとして指定したら Detail コンポーネントを表示。idがパラメーター
            { path: 'detail/:id', component: DetailComponent },
            // new をパスとして指定したら New コンポーネントを表示
            { path: 'new', component: NewComponent }
        ]
    }
];

@NgModule({
    declarations: [
        ListComponent,
        DetailComponent,
        NewComponent
    ],
    imports: [
        // ルートモジュールを子パスを含めて登録
        RouterModule.forChild(listRoutes),
        CommonModule,
        FormsModule,
        IgxScrollModule, // Ignite UI Scroll モジュールの追加
        IgxAvatarModule, // Ignite UI Avatar モジュールの追加
        IgxLabelModule, // Ignite UI Label モジュールの追加
        IgxInput, // Ignite UI Input の追加
        IgxDatePickerModule, // Ignite UI DatePicker モジュールの追加
        IgxButtonModule, // Ignite UI Button モジュールの追加
        IgxRippleModule, // Ignite UI Ripple モジュールの追加
        IgxToastModule, // Ignite UI Toast モジュールの追加
        IgxDialogModule, // Ignite UI Dialog モジュールの追加
        IgxCheckboxModule, // Ignite UI Checkbox モジュールの追加
        IgxSwitchModule, // Ignite UI Switch モジュールの追加
        IgxSliderModule, // Ignite UI Slider モジュールの追加
        IgxRadioModule, // Ignite UI Slider モジュールの追加
    ],
    exports: [RouterModule]
})
export class ListModule { }
3. アプリで リストモジュールが使えるように app.module.ts に追加するとともに、リストモジュールでしか使わない Ignite UI のモジュールは、一旦削除します。※また後から必要になって追加しますが、それはまたその時に。
import { BrowserModule } from '@angular/platform-browser';
import { BrowserAnimationsModule } from '@angular/platform-browser/animations';
import { NgModule } from '@angular/core';
import { FormsModule } from '@angular/forms';
import { AppRoutingModule } from './app-routing.module';
import { ListModule } from './list/list.module';
import { AppComponent } from './app.component';

// Ignite UI モジュールの参照
import {
  IgxNavbarModule, IgxIconModule, NavigationDrawerModule } from 'igniteui-angular/main';

// Hammer
import "hammerjs";
import { UserService } from './user/user.service';

@NgModule({
  declarations: [
    AppComponent
  ],
  imports: [
    BrowserModule,
    BrowserAnimationsModule,
    AppRoutingModule,
    FormsModule,
    ListModule,
    IgxNavbarModule, // Ignite UI Navbar モジュールの追加
    IgxIconModule, // Ignite UI Icon モジュールの追加
    NavigationDrawerModule // Ignite UI Drawer モジュールの追加
  ],
  providers: [UserService], // サービスをプロバイダに追加
  bootstrap: [AppComponent]
})
export class AppModule { }
4. new と detail のパスを変更したことで影響を受ける import のパスを修正します。
import { Component, OnInit, ViewChild } from '@angular/core';
import { FormsModule } from '@angular/forms';
import { User, Gender } from '../../models/user';
import { UserService } from '../../user/user.service';
import { IgxLabel, IgxInput, IgxAvatar, IgxToast, IgxDialog, IgxCheckbox, IgxSwitch, IgxSlider, IgxRadio } from 'igniteui-angular/main';
import { Router } from '@angular/router';
import { ActivatedRoute } from '@angular/router';

@Component({
  selector: 'app-new',
  templateUrl: './new.component.html',
  styleUrls: ['./new.component.css']
})
export class NewComponent implements OnInit {

  constructor(private userService: UserService, private router: Router) {
  }

  @ViewChild('toast') toast: IgxToast;
  public user: User;
  public gender: string[];

  ngOnInit() {
    this.user = new User("", "", 0, null, Gender.Other, 0, true);
    // Gender を配列から取得
    let genderValues = Object.keys(Gender);
    this.gender = genderValues.slice(genderValues.length / 2);
  }

  public loadImage(input: HTMLInputElement): void {
    if (!input.value) {
      return;
    }

    let reader = new FileReader();
    // Callback when file read.
    reader.onload = () => {
      input.value = "";
      this.user.image = reader.result;
    }

    reader.readAsDataURL(input.files[0]);
  }

  public create() {
    this.userService.add(this.user).subscribe(() => {
      // 作成したらトーストを出してルートに遷移
      this.toast.show();
      this.router.navigate([`/`]);
    });
  }
}
import { Component, OnInit, ViewChild } from '@angular/core';
import { FormsModule } from '@angular/forms';
import { ActivatedRoute } from '@angular/router';
import { IgxLabel, IgxInput, IgxAvatar, IgxToast, IgxDialog } from 'igniteui-angular/main';
import { UserService } from '../../user/user.service';
import { User } from '../../models/user';
import { Router } from '@angular/router';

@Component({
  selector: 'app-detail',
  templateUrl: './detail.component.html',
  styleUrls: ['./detail.component.css']
})

export class DetailComponent implements OnInit {

  @ViewChild('toast') toast: IgxToast;
  public user: User;
  constructor( private route: ActivatedRoute, private router: Router,private userService: UserService ) {
  }

  ngOnInit() {
    // パラメーターの変更をモニタ
    this.route.params.subscribe(params => {
      this.userService.getUser(params.id).subscribe(
        (user) => {this.user = user;}
      );
    });
  }

  public save(){
    this.userService.save(this.user).subscribe(()=>{
      this.toast.show();
    });
  }

  public delete(){
    this.userService.delete(this.user).subscribe(()=>{
      this.toast.message = "deleted";
      this.toast.show();
      this.router.navigate([`/`]);
    })
  }
}
5. ルーティングが変わって new は /list/new に、detail は /list/detail/:id になっているので、それぞれ影響箇所を変えます。
import { Component, OnInit, EventEmitter } from '@angular/core';
import { IgxScroll, IgxScrollEvent, IgxAvatar } from "igniteui-angular/main";
import { User } from '../models/user';
import { UserService } from '../user/user.service';
import { Router } from '@angular/router';

@Component({
  selector: 'app-list',
  templateUrl: './list.component.html',
  styleUrls: ['./list.component.css']
})
export class ListComponent implements OnInit {

  constructor(private userService: UserService, private router: Router) {
    this.load();
  }

  public users: User[] = new Array<User>();
  public visibleUsers: User[];
  public visibleUsersCount: number = 8;

  ngOnInit() {
    // 変更通知を受け取ったら再度データをロード
    this.userService.userUpdateSource$.subscribe(
      (user)=>{this.load();}
    )
  }

  public load():void{
     // ユーザーをサービスから取得。非同期のため subscribe でデータ受け取り。
    this.userService.getUsers().subscribe(
      (users) => {
        this.users = users;
        this.visibleUsers = this.users.slice(0, this.visibleUsersCount);
      }
    );
  }

  private onItemSelect(user: User): void {
    // list/detail にナビゲート
    this.router.navigate([`/list/detail/${user.id}`]);
  }

  private updateList($event: IgxScrollEvent): void {
    this.visibleUsers = this.users.slice($event.currentTop, $event.currentTop + this.visibleUsersCount);
  }
}
import { Component, ViewChild, ElementRef } from '@angular/core';
import { User } from './models/user';
import { Router } from '@angular/router';
import { IgxNavbar, IgxIcon, NavigationDrawer } from 'igniteui-angular/main';

@Component({
  selector: 'app-root',
  templateUrl: './app.component.html',
  styleUrls: ['./app.component.css']
})

export class AppComponent {

  selectedUser: User;

  title = 'Ignite Ui App';

  constructor(private router: Router) {
  }

  onClickAdd(){
    // list/new を呼び出し
    this.router.navigate(['/list/new']);
  }
}
6. list.component.html で router-outlet を入れます。それに伴い、CSS も更新します。
<igx-scroll #scroll (onScroll)="updateList($event)"
    [visibleItemsCount]="visibleUsersCount"
    [itemHeight]="70"
    [totalItemsCount]="users.length">
    <ul class="list">
        <li class="list-item" *ngFor="let user of visibleUsers" (click)="onItemSelect(user)">
            <igx-avatar class="list-item-image" roundShape="true" src="{{user.image}}"></igx-avatar>
            <h5 class="list-item-value">{{user.name}}</h5>
        </li>
    </ul>
</igx-scroll>

<router-outlet></router-outlet>
.list {
    width: 250px;
}

.list-item {
    list-style: none;
    height: 64px;
    display: flex;
    flex-direction: row;
    justify-content: flex-start;
    align-items: center;
}

.list-item-image, .list-item-value {
    flex-grow: 1;
    flex-shrink: 1;
    flex-basis: auto;
}

igx-scroll, router-outlet {
    float: left;
}
7. 最後に app レベルのルーティングを修正します。
import { NgModule } from '@angular/core';
import { Routes, RouterModule } from '@angular/router';
import { ListComponent } from './list/list.component';

const routes: Routes = [
  // 既定はリストコンポーネントを表示
  { path: '', component: ListComponent }
];

@NgModule({
  imports: [RouterModule.forRoot(routes)],
  exports: [RouterModule]
})
export class AppRoutingModule { }
8. すべて保存して動作が変わっていないことを確認します。結構広範囲にわたって変更しましたが、これでリストモジュールにすべてを一旦移動できました。
データグリッドの利用
リストではレコードの操作を中心に作ったので、グリッドはユーザーの一覧を柔軟に表示します。Ignite UI には柔軟で高機能なデータグリッド機能があるので、そちらを使います。
1. グリッドはモジュールではなくはコンポーネントとして追加するので、以下のコマンドを実行します。
ng generate component grid
2. 次にモジュールの追加をします。データグリッドはこれまでと異なり、.forRoot() が必要になります。
import { BrowserModule } from '@angular/platform-browser';
import { BrowserAnimationsModule } from '@angular/platform-browser/animations';
import { NgModule } from '@angular/core';
import { FormsModule } from '@angular/forms';
import { AppRoutingModule } from './app-routing.module';
import { ListModule } from './list/list.module';
import { AppComponent } from './app.component';
import { GridComponent } from './grid/grid.component';
import { UserService } from './user/user.service';

// Ignite UI モジュールの参照
import {
  IgxNavbarModule, IgxIconModule, NavigationDrawerModule,
  IgxGridModule, } from 'igniteui-angular/main';

// Hammer
import "hammerjs";

@NgModule({
  declarations: [
    AppComponent,
    GridComponent
  ],
  imports: [
    BrowserModule,
    BrowserAnimationsModule,
    AppRoutingModule,
    FormsModule,
    ListModule,
    IgxNavbarModule, // Ignite UI Navbar モジュールの追加
    IgxIconModule, // Ignite UI Icon モジュールの追加
    NavigationDrawerModule, // Ignite UI Drawer モジュールの追加
    IgxGridModule.forRoot(), // Ignite UI Grid モジュールの追加
  ],
  providers: [UserService], // サービスをプロバイダに追加
  bootstrap: [AppComponent]
})
export class AppModule { }
3. Grid コンポーネントにデータグリッドを追加します。まずはデータグリッドが備える自動列生成 [autoGenerate] でグリッドを作ってみます。
<igx-grid [data]="users" [autoGenerate]="true" [paging]="true" [perPage]="8">
</igx-grid>
import { Component, OnInit } from '@angular/core';
import { User } from '../models/user';
import { UserService } from '../user/user.service';

@Component({
  selector: 'app-grid',
  templateUrl: './grid.component.html',
  styleUrls: ['./grid.component.css']
})

export class GridComponent implements OnInit {

  private users: User[] = new Array<User>();
  constructor(private userService: UserService) { }

  ngOnInit() {
    this.userService.getUsers().subscribe((users) => this.users = users);
  }
}
4. Grid コンポーネントにアクセスできるように、ルーティングを更新します。
import { NgModule } from '@angular/core';
import { Routes, RouterModule } from '@angular/router';
import { ListComponent } from './list/list.component';
import { GridComponent } from './grid/grid.component';

const routes: Routes = [
  // 既定はリストコンポーネントを表示
  { path: '', component: ListComponent },
  { path: 'grid', component: GridComponent }
];

@NgModule({
  imports: [RouterModule.forRoot(routes)],
  exports: [RouterModule]
})
export class AppRoutingModule { }
5. すべて保存したら、http://localhost:4200/grid にアクセスします。列が自動で生成されていたら成功です。

6. 次に列を個別に追加していきます。またアバターなどで見た目も変えましょう。まずモジュールの読み込みから
import { BrowserModule } from '@angular/platform-browser';
import { BrowserAnimationsModule } from '@angular/platform-browser/animations';
import { NgModule } from '@angular/core';
import { FormsModule } from '@angular/forms';
import { AppRoutingModule } from './app-routing.module';
import { ListModule } from './list/list.module';
import { AppComponent } from './app.component';
import { GridComponent } from './grid/grid.component';
import { UserService } from './user/user.service';

// Ignite UI モジュールの参照
import {
  IgxNavbarModule, IgxIconModule, NavigationDrawerModule,
  IgxGridModule, IgxAvatarModule } from 'igniteui-angular/main';

// Hammer
import "hammerjs";

@NgModule({
  declarations: [
    AppComponent,
    GridComponent
  ],
  imports: [
    BrowserModule,
    BrowserAnimationsModule,
    AppRoutingModule,
    FormsModule,
    ListModule,
    IgxNavbarModule, // Ignite UI Navbar モジュールの追加
    IgxIconModule, // Ignite UI Icon モジュールの追加
    NavigationDrawerModule, // Ignite UI Drawer モジュールの追加
    IgxGridModule.forRoot(), // Ignite UI Grid モジュールの追加
    IgxAvatarModule, // Ignite UI Avatar モジュールの追加
  ],
  providers: [UserService], // サービスをプロバイダに追加
  bootstrap: [AppComponent]
})
export class AppModule { }
7. Grid コンポーネントを変更します。列の指定には igx-column を使い、また詳細を変更したい場合は Angular の機能である ng-template で中身を調整可能です。
import { Component, OnInit } from '@angular/core';
import { User } from '../models/user';
import { UserService } from '../user/user.service';
import { IgxIcon, IgxAvatar } from 'igniteui-angular/main';

@Component({
  selector: 'app-grid',
  templateUrl: './grid.component.html',
  styleUrls: ['./grid.component.css']
})

export class GridComponent implements OnInit {

  private users: User[] = new Array<User>();
  constructor(private userService: UserService) { }

  ngOnInit() {
    this.userService.getUsers().subscribe((users) => this.users = users);
  }
}
<igx-grid #grid [data]="users" [autoGenerate]="false" [paging]="true" [perPage]="6">
  <igx-column width="80px" field="userRank" header="Rank" dataType="number" sortable="true"></igx-column>
  <igx-column width="120px" field="image">
    <ng-template igxCell let-col>
      <igx-avatar size="medium" roundShape="true" src="{{col}}"></igx-avatar>
    </ng-template>
  </igx-column>
  <igx-column field="name" header="User Name" dataType="string" editable="true"></igx-column>
  <igx-column field="birthdate" header="BirthDate" dataType="Date">
    <ng-template igxCell let-col>
      {{col.toDateString()}}
    </ng-template>
  </igx-column>
  <igx-column width="120px" field="gender" header="Gender" dataType="Gender"></igx-column>
  <igx-column width="120px" field="isAdmin" header="Is Admin" dataType="boolean">
    <ng-template igxCell let-col>
      <igx-icon *ngIf="col" fontSet="material" name="star" color="red"></igx-icon>
      <igx-icon *ngIf="!col" fontSet="material" name="star_border"></igx-icon>
    </ng-template>
  </igx-column>
</igx-grid>
8. すべてを保存すると以下のようにグリッドが表示されます。

9. ソートを有効にした Rank ヘッダーをクリックすると並べ替えが行えます。また編集可能にしたユーザー名をダブルクリックすると名前を変えることが出来ます。ただしここでは保存機能はつけていないので実際は機能しません。
その他グリッドでは検索もできます。
カードの利用
データグリッドやリストはあくまでテーブル形式ですが、Ignite UI のカードを使うとタイル的な UI を簡単に実現できます。
1. まずカード用のコンポーネントを追加します。
ng generate component card
2. 次にモジュールを追加します。
import { BrowserModule } from '@angular/platform-browser';
import { BrowserAnimationsModule } from '@angular/platform-browser/animations';
import { NgModule } from '@angular/core';
import { FormsModule } from '@angular/forms';
import { AppRoutingModule } from './app-routing.module';
import { ListModule } from './list/list.module';
import { AppComponent } from './app.component';
import { GridComponent } from './grid/grid.component';
import { CardComponent } from './card/card.component';
import { UserService } from './user/user.service';

// Ignite UI モジュールの参照
import {
  IgxNavbarModule, IgxIconModule, NavigationDrawerModule,
  IgxGridModule, IgxAvatarModule, IgxCardModule
} from 'igniteui-angular/main';

// Hammer
import "hammerjs";

@NgModule({
  declarations: [
    AppComponent,
    GridComponent,
    CardComponent
  ],
  imports: [
    BrowserModule,
    BrowserAnimationsModule,
    AppRoutingModule,
    FormsModule,
    ListModule,
    IgxNavbarModule, // Ignite UI Navbar モジュールの追加
    IgxIconModule, // Ignite UI Icon モジュールの追加
    NavigationDrawerModule, // Ignite UI Drawer モジュールの追加
    IgxGridModule.forRoot(), // Ignite UI Grid モジュールの追加
    IgxAvatarModule, // Ignite UI Avatar モジュールの追加
    IgxCardModule, // Ignite UI Card モジュールの追加
  ],
  providers: [UserService], // サービスをプロバイダに追加
  bootstrap: [AppComponent]
})
export class AppModule { }
3. ルーティングにカードコンポーネントを追加します。また既定はリストですが、明示的にリストを指定できるようにもしておきます。
import { NgModule } from '@angular/core';
import { Routes, RouterModule } from '@angular/router';
import { ListComponent } from './list/list.component';
import { GridComponent } from './grid/grid.component';
import { CardComponent } from './card/card.component';

const routes: Routes = [
  // 既定はリストコンポーネントを表示
  { path: '', component: ListComponent },
  { path: 'list', component: ListComponent },
  { path: 'grid', component: GridComponent },
  { path: 'card', component: CardComponent }
];

@NgModule({
  imports: [RouterModule.forRoot(routes)],
  exports: [RouterModule]
})
export class AppRoutingModule { }
4. 各ユーザーのカード用の画像を指定したいので、ユーザーモデルを拡張します。またユーザーサービスで画像を返すように設定します。
export class User {
    public image: string
    public name: string
    public id: number
    public birthdate: Date
    public gender: Gender
    public userRank: number
    public isAdmin: boolean
    public backgroundImage: string

    constructor(image: string, name: string, id: number, birthdate: Date,
    gender: Gender, userRank: number, isAdmin: boolean, backgroundImage: string ) {
        this.image = image;
        this.name = name;
        this.id = id;
        this.birthdate = birthdate;
        this.gender = gender;
        this.userRank = userRank;
        this.isAdmin = isAdmin;
        this.backgroundImage = backgroundImage;
    }
}

export enum Gender {
    Male = 1,
    Female,
    Other,
}
import { Injectable } from '@angular/core';
import { Observable } from 'rxjs/Observable';
import { of } from 'rxjs/observable/of';
import { User, Gender } from '../models/user'
import { Subject } from 'rxjs/Subject';

@Injectable()
export class UserService {

  private users: Array<User>;
  // 通知用に一つ Subject を用意
  private userUpdate = new Subject<string>()
  public userUpdateSource$ = this.userUpdate.asObservable();

  constructor() {
    this.users = new Array<User>();
    for (let i = 1; i <= 22; i++) {
      let birthdate = new Date(2018, 0, i);
      let backgrounImage = "http://www.infragistics.com/angular-demos/assets/images/card/media/ny.jpg";
      if( i % 4 == 1){
        backgrounImage = "http://www.infragistics.com/angular-demos/assets/images/card/media/yosemite.jpg";
      }
      else if (i%4 == 2){
        backgrounImage = "http://www.infragistics.com/angular-demos/assets/images/card/media/monuments.jpg";
      }
      else if (i%4 == 3){
        backgrounImage = "http://www.infragistics.com/angular-demos/assets/images/card/media/the_red_ice_forest.jpg";
      }
      this.users.push(new User(
        `http://www.infragistics.com/angular-demos/assets/images/avatar/${i}.jpg`,
        "User: " + i,
        i,
        birthdate,
        Gender.Other,
        i,
        true,
        backgrounImage
      ));
    }
  }

  getUsers(): Observable<User[]> {
    return of(this.users)
  }

  getUser(id: number): Observable<User> {
    return of(this.users.find(x => x.id === +id));
  }

  add(user: User): Observable<boolean> {
    this.users.push(user);
    // 追加したことを通知
    this.userUpdate.next("updated");
    return of(true);
  }

  save(user: User): Observable<boolean> {
    let index = this.users.indexOf(user);
    if (index !== -1) {
      this.users[index] = user;
      return of(true);
    }
    else {
      return of(false);
    }
  }

  delete(user: User): Observable<boolean> {
    let index = this.users.indexOf(user);
    if (index !== -1) {
      this.users.splice(index, 1);
      // 削除したことを通知
      this.userUpdate.next("updated");
      return of(true);
    }
    else {
      return of(false);
    }
  }
}
5. カードコンポーネントを更新してカードを表示します。今回も Ignite UI のコントロールに対して直接 CSS を指定してカスタマイズしています。
import { Component, OnInit } from '@angular/core';
import { User } from '../models/user';
import { UserService } from '../user/user.service';
import { IgxAvatar } from 'igniteui-angular/main';
@Component({
  selector: 'app-card',
  templateUrl: './card.component.html',
  styleUrls: ['./card.component.css']
})
export class CardComponent implements OnInit {

  private users: User[] = new Array<User>();
  constructor(private userService: UserService) { }

  ngOnInit() {
    this.userService.getUsers().subscribe((users) => this.users = users);
  }
  private openUrl(url: string): void {
    window.location.href = url;
  }
}
<div class="card">
  <div class="card-item" *ngFor="let user of users">
    <igx-card>
      <div style="overflow: hidden">
        <img width="100%" height="100%" src="{{user.backgroundImage}}">
      </div>
      <igx-card-header>
        <igx-avatar class="list-item-image" roundShape="true" src="{{user.image}}"></igx-avatar>
        <h2 class="list-item-value">{{user.name}}</h2>
      </igx-card-header>
      <igx-card-content>
        Rank:{{user.userRank}}
        <br/> Birthday: {{user.birthdate.toDateString()}}

      </igx-card-content>
      <igx-card-actions>
        <button igxButton igxRipple>Like</button>
        <button igxButton igxRipple>Share</button>
      </igx-card-actions>
    </igx-card>
  </div>
</div>
.card {
    display: flex;
    flex-flow: row wrap;
}

.card-item{
    max-width:400px;
    padding:10px;
}

igx-card-header {
    background: #f8f8ff;
}

igx-card-content {
    background: gray;
    color:white;
}
6. 最後にナビゲーションドロワーを更新してカードに対するリンクを作成します。また今回はメニューを選ぶとドロワーを閉じるようにしてみました。
<igx-navbar [title]="title" actionButtonIcon="menu" (onAction)="drawer.toggle()">
  <igx-icon name="add" (click)="onClickAdd()"></igx-icon>
</igx-navbar>
<!-- ドロワーの追加 -->
<igx-nav-drawer #drawer [pinThreshold]="false" width="280px">
  <div class="ig-drawer-content">
    <nav class="nav">
      <!-- ヘッダー -->
      <span class="nav-item header">menus</span>
      <!-- メニューの追加 -->
      <span class="nav-item" [routerLinkActive]="'active'" routerLink="list" (click)="drawer.close();">
        <igx-icon fontSet="material" name="list"></igx-icon>
        <span>List</span>
      </span>
      <span class="nav-item" [routerLinkActive]="'active'" routerLink="grid" (click)="drawer.close();">
        <igx-icon fontSet="material" name="grid_on"></igx-icon>
        <span>Grid</span>
      </span>
      <span class="nav-item" [routerLinkActive]="'active'" routerLink="card" (click)="drawer.close();">
        <igx-icon fontSet="material" name="view_module"></igx-icon>
        <span>Card</span>
      </span>
    </nav>
  </div>
</igx-nav-drawer>

<router-outlet></router-outlet>
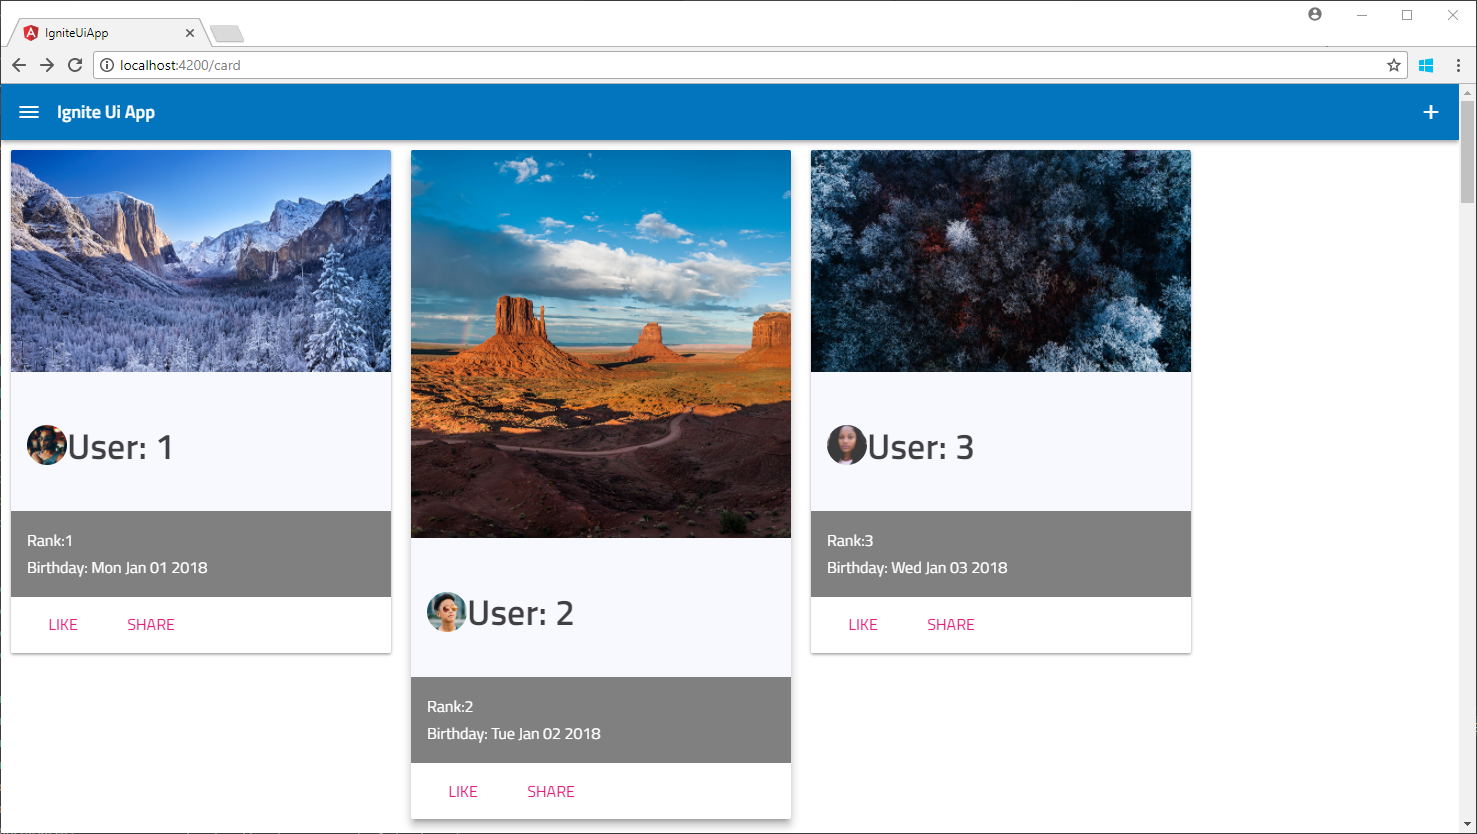
7. 全て保存して、http://localhost:4200/card にアクセスすると、画面が以下のように更新されます。メニューの挙動も確認してください。
モバイルの検討
モバイルになると画面サイズが変わりますが、Ignite UI はレスポンシブ対応しているため、結構リサイズには柔軟に対応が可能です。モバイルで面白そうなコントロールとしてはタブバーコントロールがあります。Tab Bar
ネイティブ開発する際は、Ionic 等と組み合わた開発になると思いますが、また別の機会に見てみます。
まとめ
Ignite UI を見てきましたが個人的には気に入っています。Ignite UI は Angular 以外にも JavaScript 版があります。また Xamarin、MVC、WPF、iOS、Android 用のコントロールなどもあるようですので、試したらまた記事にします。