レガシーエンジニア がサーバレス+SPAやってみた
普段はLAMP+cakePHP+bootstrapのレガシーエンジニアがサーバレスを試してみました。はたしてJSだけでどこまでできるのか?
- サーバレス気になる→Firebaseがイケてるらしい。mBaaSだがwebでもいけるみたい。
- React、Angular、Vueはなじめなかった→マイナーだがriotというのが簡単らしい。
- bootstrap、jquery止めたい→フロントよくわからないのでひとまずMaterialDesignLite。
- LambdaとかCognitoは面倒だった→正直認証とか自動でやって欲しい。
認証、文章と画像の投稿と一覧表示まで適当にサンプル
https://newagent-db971.firebaseapp.com/
ゲストユーザー test@test.com/testtest
※デザインとかほぼテンプレのまま&バリデーションとかしてないです
Firebase設定
以下4つを使用するプロジェクトを作成します。
- Authentication
- Database
- Storage
- Hosting
https://firebase.google.com/docs/cli/?hl=ja
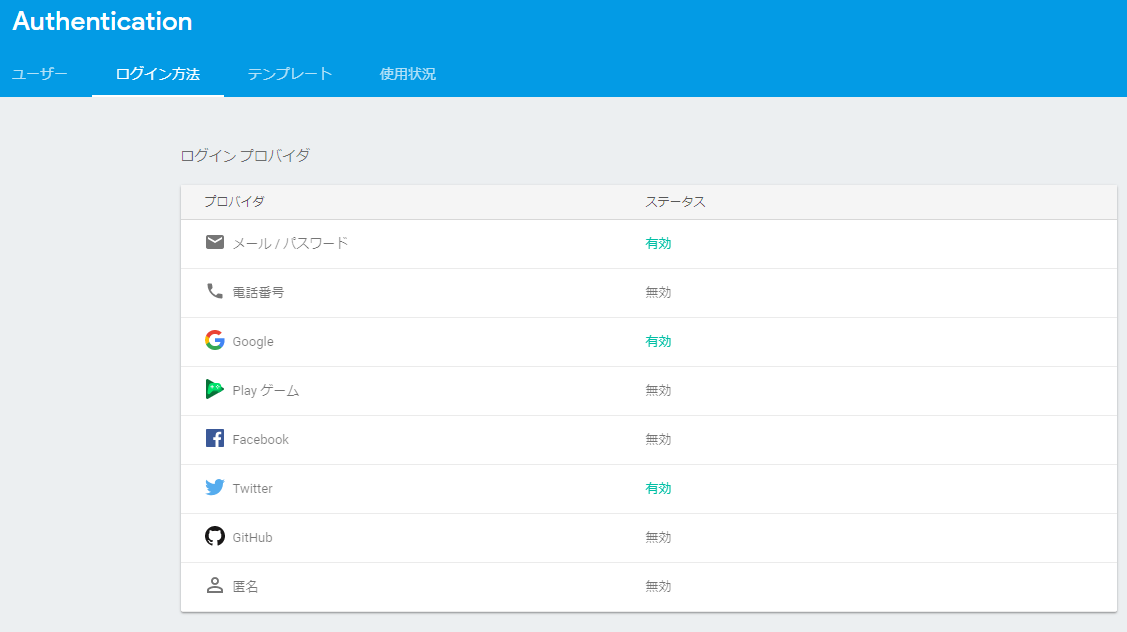
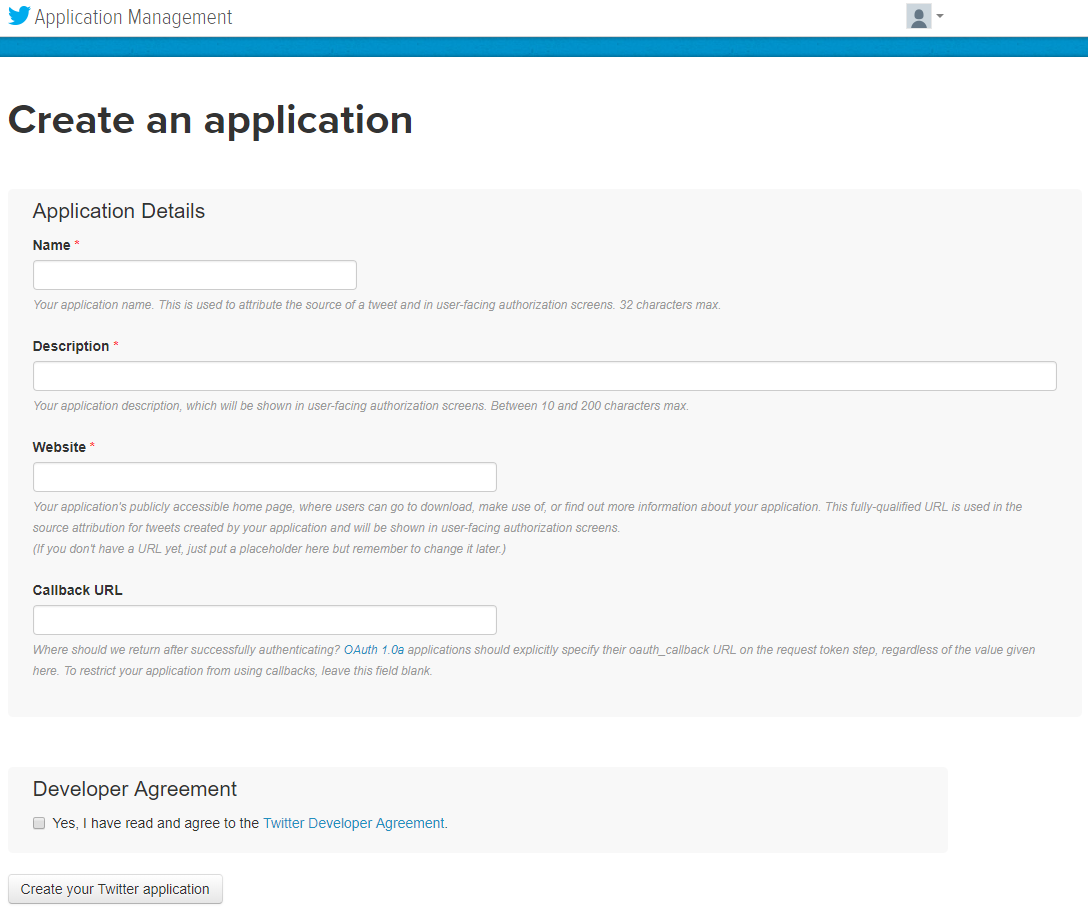
AuthenticationはメールとGoogle、Twitterを有効に。Twitterの認証アプリも作成し設定する。
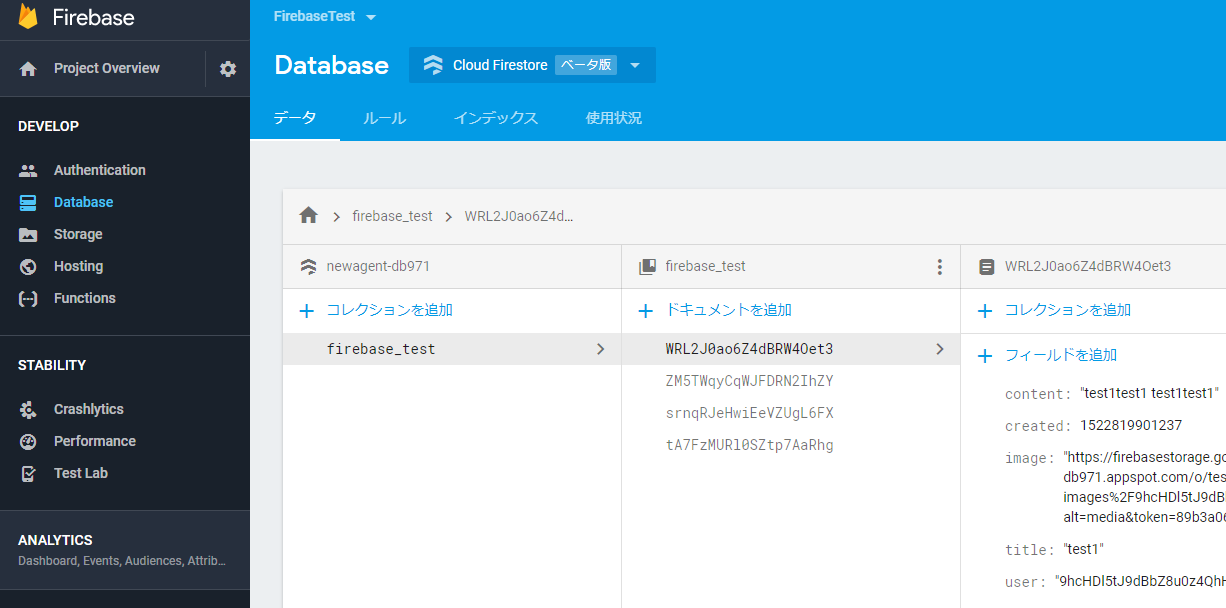
databaseはfirebase_testを作っておく。カラムはcontent、created(timestamp)、image、title、user。created以外はすべてstring。
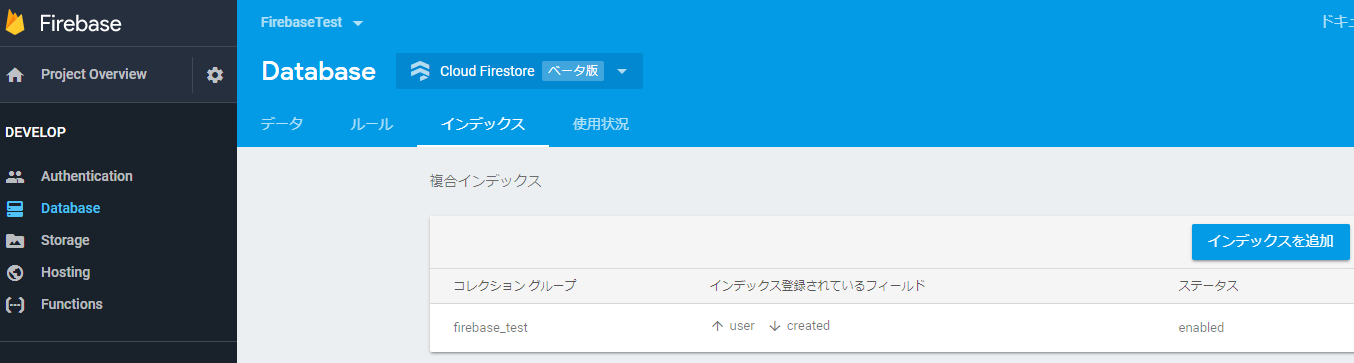
userとcreatedにindexを作成する。重要。
ルールを設定する。重要。読み書き共に要認証。
service cloud.firestore {
  match /databases/{database}/documents {
    match /firebase_test/{document=**} {
      allow read: if request.auth.uid == resource.data.user;
      allow create: if request.auth.uid == request.resource.data.user &&
                       request.resource.data.keys().hasAll(['created','user','title','content']) &&
                       request.resource.data.created is int;
    }
  }
}
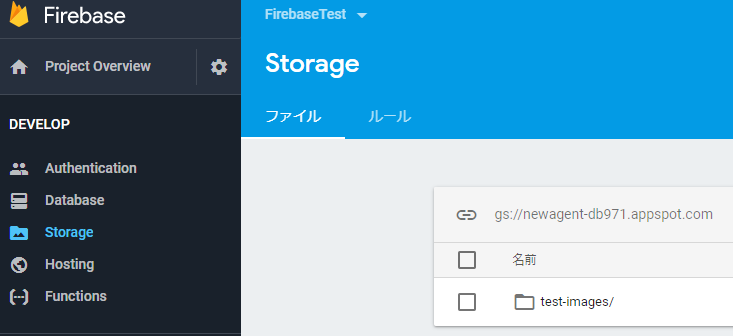
CloudStrageにtest-imagesバケットを作成する。
ルールを設定する。重要。読み書き共に要認証。
service firebase.storage {
  match /b/{bucket}/o {
    match /test-images/{userId}/{fileName} {
      allow read: if request.auth.uid == userId;
      allow write: if request.auth.uid == userId
                   && request.resource.size < 5 * 1024 * 1024
                   && request.resource.contentType.matches('image/.*');
    }
  }
}
ソース
サンプルファイル構成
- 404.html
- index.html
- main.js
- post.tag (投稿画面のriotカスタムタグ)
- style.css
- images/
> firebase serveで開発サーバ起動。localhost:5000。
JS、CSS読み込みと初期設定
    <link rel="stylesheet" href="https://fonts.googleapis.com/icon?family=Material+Icons">
    <link rel="stylesheet" href="https://code.getmdl.io/1.3.0/material.blue-light_blue.min.css" />
    <link rel="stylesheet" href="https://cdn.firebase.com/libs/firebaseui/2.5.1/firebaseui.css" />
    <link rel="stylesheet" href="styles.css">
・・・
    <script src="https://code.getmdl.io/1.3.0/material.min.js"></script>
    <script src="https://www.gstatic.com/firebasejs/4.9.0/firebase.js"></script>
    <script src="https://cdn.firebase.com/libs/firebaseui/2.5.1/firebaseui.js"></script>
    <script src="https://www.gstatic.com/firebasejs/4.9.1/firebase-firestore.js"></script>
    <script src="https://rawgit.com/riot/riot/master/riot%2Bcompiler.min.js"></script>
    <script src="https://rawgit.com/riot/route/master/dist/route.min.js"></script>
    <script src="post.tag" type="riot/tag"></script>
    <script src="/__/firebase/init.js"></script>
    <script src="main.js"></script>
  let uid
  let storageRef = firebase.storage().ref();

  const db = firebase.firestore();
  const table = db.collection('firebase_test')
  const ui = new firebaseui.auth.AuthUI(firebase.auth());

  // FirebaseUI auth
  ui.start('#firebaseui-auth-container', {
    signInOptions: [
      firebase.auth.EmailAuthProvider.PROVIDER_ID,
      firebase.auth.GoogleAuthProvider.PROVIDER_ID,
      firebase.auth.TwitterAuthProvider.PROVIDER_ID,
    ],
  });
認証
・・・
      <dialog id="auth" class="mdl-dialog" style="width:360px;">
        <h4>Welcome to Test App</h4>
        <h5>Firebase, Riotjs, MaterialDesignLite</h5>
        <div id="firebaseui-auth-container"></div>
      </dialog>
・・・
CSSとJSを読んで認証画面はで定義。認証画面はfirebaseuiが<div id="firebaseui-auth-container"></div>に自動で吐く。FirebaseのコンソールのAuthenticationで設定を忘れずに。
<script src="/__/firebase/init.js"></script>はFirebaseの各種設定の自動読み込み。
・・・
  //認証状態の確認
  firebase.auth().onAuthStateChanged(function(user) {

    let authWindow = document.getElementById('auth') // ログインウィンドウ

    if(user) {
      authWindow.close()

      uid = user.uid
      const providerId = user.providerData[0].providerId
・・・
    } else {
      authWindow.showModal()
    }
  })
・・・
認証状態に変化があると firebase.auth().onAuthStateChanged(function(user) {が走る。ログイン状態の場合はユーザーIDをごにょごにょしたりする。
※参考
https://qiita.com/ryoyakawai/items/5a7097fcd4928f3af8ff
一覧表示
・・・
      <main class="mdl-layout__content mdl-color--grey-100">
        <home class="mdl-grid demo-content hidden"></home>
・・・
    <script type="riot/tag">
      <home>
        <div class="demo-updates mdl-card mdl-shadow--2dp mdl-cell mdl-cell--2-col mdl-cell--4-col-tablet mdl-cell--6-col-desktop" each={contents}>
          <div class="mdl-card__title mdl-card--expand mdl-color--teal-300" style="background-image: url('{image}');">
            <h2 class="mdl-card__title-text">{title}</h2>
          </div>
          <div class="mdl-card__supporting-text mdl-color-text--grey-600">{content}</div>
          <div class="mdl-card__actions mdl-card--border">
            <a href="#" class="mdl-button mdl-js-button mdl-js-ripple-effect">Read More</a>
          </div>
        </div>
        <button onclick="document.getElementById('posts').showModal()" class="mdl-button mdl-js-button mdl-button--fab mdl-js-ripple-effect show-modal">
          <i class="material-icons">add</i>
        </button>

        let _this = this
        this.contents = []

        // データ取得を実行
        opts.table.where("user", "==", opts.uid).orderBy('created', 'desc')
        .get().then(function(querySnapshot) {
          querySnapshot.forEach(function(doc) {
            let v = doc.data()
            _this.contents.push({title: v.title, content: v.content, image: v.image})
          })
          _this.update();
        }).catch(function(error) {
            console.log("Error getting documents: ", error)
        })
      </home>
・・・
    </script>
・・・
  // NAVI router
  route(function(collection, id, action) {
    collection = (collection && collection !== 'index.html') ? collection : 'home'
    riot.mount(collection, {uid:uid, table:table, f:storageRef})
・・・
riotで<home>をユーザーID(uid)、DB collection(table)、ストレージ(storageRef)の情報を引数にマウント。
取得したデータをriot/tag内でthis.contentsにバインド。
条件やソートするのにindexを作成する必要があるので注意。Firebaseのコンソールで設定。
※参考
https://qiita.com/miyae/items/6988c1b61b76b4938ae6
投稿
      <dialog id="posts" class="mdl-dialog">
        <h4 class="mdl-dialog__title">Post</h4>
        <post></post>
      </dialog>
<post>
  <div class="mdl-dialog__content">
    <div class="mdl-textfield mdl-js-textfield">
      <input id="title" name="title" placeholder="title" class="mdl-textfield__input psot is-valid" type="text" />
    </div>
    <div class="mdl-textfield mdl-js-textfield">
      <textarea id="content" name="content" placeholder="content" class="mdl-textfield__input post is-valid" type="text" rows= "3" id="sample5" ></textarea>
    </div>
    <div class="mdl-textfield mdl-js-textfield">
      <div class="upload-box">
        <button class="mdl-button mdl-js-button mdl-button--fab mdl-button--mini-fab" onclick="document.getElementById('postImage').click()">
          <i class="material-icons">file_upload</i>
        </button>
        <input id="postImage" name="image" type="file" class="is-valid" onchange={fileChange} style="height: 0px;visibility: hidden;position: absolute;">
      </div>
      <img id="preview"></div>
    </div>
  </div>
  <div class="mdl-dialog__actions">
    <button type="button" class="mdl-button" onclick={send}>Send</button>
    <button type="button" class="mdl-button close" onclick="document.getElementById('posts').close()">Cancel</button>
  </div>

  let uniq = ''
  let image_url = ''

  // ファイルアップロード
  fileChange(e) {
    // 上げ直しの場合前のファイルを削除
    if (uniq) {
      let desertRef = f.child(`test-images/${opts.uid}/${uniq}`)
      desertRef.delete().catch(function(error) {
        alert('Could not delete fefore uploaded image file.')
        return
      })
    }

    // ユニークID再発行
    uniq = `${Math.floor(Math.random() * 101)}${Date.now()}`

    var fr = new FileReader();
    fr.onload = function() {
      document.getElementById('preview').setAttribute('src', fr.result)
    }
    fr.readAsDataURL(e.target.files[0])

    var uploadRef = opts.f.child(`test-images/${opts.uid}/${uniq}`)
    const f = e.target.files[0]
    uploadRef.put(f).then(function(snapshot) {
      image_url = snapshot.metadata.downloadURLs[0]
      console.log('Uploaded a blob or file!')
    }).catch(function(error) {
      alert('Could not upload image file.')
      return
    })
  }

  send(e) {
    opts.table.add({
      user: opts.uid,
      title: document.getElementById('title').value,
      content: document.getElementById('content').value,
      image: (uniq) ? image_url : '',
      created: Date.now()
    }).then(()=>{
        console.log('success')
        uniq = ''
    }).catch(error => {
        alert(error)
    })
    document.getElementById('posts').close()
    riot.mount('home', opts)
  }
</post>
投稿ダイアログ内のカスタムタグ<post>にマウント。CloudStrageにユニークなファイル名でアップロードし、タイトルと文章と画像URLをFirestoreに登録。<home>にマウントして戻る。
所感
firebase
超便利!Authenticationとか特に。
BigTableとかの分散KVS使いこなせれば、大体の事は出来てしまうのでは?CloudFunstions使えば従来のサーバっぽい事もサーバレスでできるし。
サービスによってはホントにフロントだけでいけるかも。
CloudStrageは名前の変更ができないので一時ファイルみたいな事ができなくて困った。(良い方法募集中)
LambdaもやってみたけどFirebaseの方が全然簡単だと思った。
riot
React、Angular、Vueと全てさわりだけやってみて一番しっくりきた。複雑な環境構築しないでいいのがGood。
関係ないけど、データバインドはわからんでもないが、SPAはそれにこだわる必要はある?別にHTML単体でページ遷移しても良いと思った。軽くするためにbootstrap止めたのにSPAは初動が重いのが問題とはこれ如何に。デザイナーさんも大変そうだし。
MaterialDesignLite
軽くていいかも。見た目のリッチさと、テンプレートの豊富さは当然bootstrapの方が多いので、特にテンプレートは豊富になってくれるとうれしいなぁ。