Ansible で Cisco機器の操作を試してみたいけど、自宅に検証用の機器がなかったり
する逸般のご家庭じゃない方がいらっしゃると思います。
おなじみGNS3をつかってAnsibleの操作を行ってみたいと思います。
今回はAWS EC2でUbuntuを作った後、GUI,GNS3,Docker,ansibleをインストールして
体験環境を構築します。
もちろんお手元の環境でもよいと思います。
環境構築
ubuntu
まずEC2でUbuntuを用意します。
terraform で実行しました。
provider "aws" {
  access_key = "${var.aws_access_key}"
  secret_key = "${var.aws_secret_key}"
  region     = "${var.region}"
}

resource "aws_instance" "ubuntu" {

  ami           = "ami-4e79ed36"
  instance_type = "t2.large"
  key_name = "${var.key_name}"
  monitoring    = true
  tags {
        Name = "${var.name}"
  }

  security_groups = ["ubuntu-gns3"]
  iam_instance_profile = "EC2S3Backup"
  root_block_device = {
                volume_type = "gp2"
                volume_size = "20"
  }
}
↑なtfファイルを作成して実行します。
※作業用のCentOSから実行してます。
[centos@ip-172-31-36-8 terra]$ terraform apply

An execution plan has been generated and is shown below.
Resource actions are indicated with the following symbols:
  + create

Terraform will perform the following actions:

  + aws_instance.ubuntu

省略

aws_instance.ubuntu: Still creating... (10s elapsed)
aws_instance.ubuntu: Creation complete after 16s (ID: i-05e7f05b94fa2b5a8)

Apply complete! Resources: 1 added, 0 changed, 0 destroyed.
[centos@ip-172-31-36-8 terra]$
EC2できましたー

GUI,GNS3インストール
EC2できたら,GUIとGNS3,ansibleをインストールするPlaybookを実行します。
https://dev.classmethod.jp/etc/lxde-remote-desktop-for-ubuntu-on-aws/
https://docs.gns3.com/1QXVIihk7dsOL7Xr7Bmz4zRzTsJ02wklfImGuHwTlaA4/index.html
---
- hosts: ubuntu
  connection: ssh
  become: true
  gather_facts: False

  tasks:
    - name: install lxde-core and xrdp
      apt:
        name: "{{ packages }}"
        state: present
        update_cache: yes
      vars:
        packages:
          - lxde-core
          - xrdp

    - name: change ubuntu passwd
      user:
        name: ubuntu
        password: "{{ password }}"
        update_password: always

    - name: add repository gns3
      apt_repository:
        repo: ppa:gns3/ppa

    - name: install gns3
      apt:
        name: gns3-gui
        state: present
        update_cache: yes

    - name: get-pip.py
      command: wget https://bootstrap.pypa.io/get-pip.py

    - name: pip install
      command: python3 get-pip.py

    - name: pip install ansible
      command: python3 -m pip install ansible
いざ実行っすわー
[centos@ip-172-31-36-8 an]$ ansible-playbook -i hosts install_gns3.yml

PLAY [ubuntu] *********************************************************************************

TASK [install lxde-core and xrdp] *************************************************************
changed: [34.221.156.139]

TASK [change ubuntu passwd] *******************************************************************
changed: [34.221.156.139]

TASK [add repository gns3] ********************************************************************
changed: [34.221.156.139]

TASK [install gns3] ***************************************************************************
changed: [34.221.156.139]

TASK [get-pip.py] *****************************************************************************
 [WARNING]: Consider using the get_url or uri module rather than running wget.  If you need to
use command because get_url or uri is insufficient you can add warn=False to this command task
or set command_warnings=False in ansible.cfg to get rid of this message.

changed: [34.221.156.139]

TASK [pip install] ****************************************************************************
changed: [34.221.156.139]

TASK [pip install ansible] ********************************************************************
changed: [34.221.156.139]

PLAY RECAP ************************************************************************************
34.221.156.139             : ok=7    changed=7    unreachable=0    failed=0

[centos@ip-172-31-36-8 an]$
Playbookが通ったら、いったんSSHでつないで、起動オプションを設定して再起動しました。
RDPのパスワードもセットしておきました。
→ Ansibleでの設定の仕方がわかりませんでしたので。。。orz
ubuntu@ip-172-31-34-243:~$ sudo passwd ubuntu
Enter new UNIX password:
Retype new UNIX password:
passwd: password updated successfully
ubuntu@ip-172-31-34-243:~$ sudo update-alternatives --config x-session-manager
There are 3 choices for the alternative x-session-manager (providing /usr/bin/x-session-manager).

  Selection    Path                      Priority   Status
------------------------------------------------------------
* 0            /usr/bin/startlxde         50        auto mode
  1            /usr/bin/lxsession         49        manual mode
  2            /usr/bin/openbox-session   40        manual mode
  3            /usr/bin/startlxde         50        manual mode

Press <enter> to keep the current choice[*], or type selection number: 3
ubuntu@ip-172-31-34-243:~$ sudo reboot
RDPでつないでGNS3が開けました。初期設定を行います。
dockerインストール
GNS3のシュミレーションで使うマシンにコンテナを使用するので、AnsibleでDockerを
インストールします。こちらのをそのまま使わせてもらいました。
Example usageに書いてあるsite.ymlを作成して実行します。
[centos@ip-172-31-36-8 an]$ ansible-playbook -i hosts site.yml

PLAY [ubuntu] *********************************************************************************

TASK [Gathering Facts] ************************************************************************
ok: [34.221.156.139]

TASK [nickjj.docker : Fail if Docker version is < 17.03] **************************************
[DEPRECATION WARNING]: Using tests as filters is deprecated. Instead of using
`result|version_compare` use `result is version_compare`. This feature will be removed in
version 2.9. Deprecation warnings can be disabled by setting deprecation_warnings=False in
ansible.cfg.
skipping: [34.221.156.139]

TASK [nickjj.docker : Install Docker and role dependencies] ***********************************
ok: [34.221.156.139] => (item=['apt-transport-https', 'ca-certificates', 'software-properties-common', 'cron'])

TASK [nickjj.docker : Get upstream APT GPG key] ***********************************************
changed: [34.221.156.139]

TASK [nickjj.docker : Configure upstream APT repository] **************************************
changed: [34.221.156.139]

TASK [nickjj.docker : Install Docker] *********************************************************
changed: [34.221.156.139]

TASK [nickjj.docker : Remove Upstart config file] *********************************************
changed: [34.221.156.139]

TASK [nickjj.docker : Ensure systemd directory exists] ****************************************
ok: [34.221.156.139]

TASK [nickjj.docker : Generate systemd unit file] *********************************************
changed: [34.221.156.139]

TASK [nickjj.docker : Reload systemd daemon] **************************************************
[DEPRECATION WARNING]: Using tests as filters is deprecated. Instead of using `result|changed`
 use `result is changed`. This feature will be removed in version 2.9. Deprecation warnings
can be disabled by setting deprecation_warnings=False in ansible.cfg.
changed: [34.221.156.139]

TASK [nickjj.docker : Add specific users to "docker" group] ***********************************

TASK [nickjj.docker : Install Docker Compose] *************************************************
changed: [34.221.156.139]

TASK [nickjj.docker : Create cron tasks for Docker commands] **********************************
changed: [34.221.156.139] => (item={'job': 'docker system prune -f', 'name': 'Docker clean up', 'schedule': ['0', '0', '*', '*', '0']})

RUNNING HANDLER [nickjj.docker : Restart Docker] **********************************************
changed: [34.221.156.139]

PLAY RECAP ************************************************************************************
34.221.156.139             : ok=12   changed=9    unreachable=0    failed=0

[centos@ip-172-31-36-8 an]$
dockerが正常に動いてます
ubuntu@ip-172-31-34-243:~$ sudo systemctl status docker
● docker.service - Docker Application Container Engine
   Loaded: loaded (/etc/systemd/system/docker.service; enabled; vendor preset: enabled)
   Active: active (running) since Thu 2018-08-09 13:46:14 UTC; 46s ago
     Docs: https://docs.docker.com
 Main PID: 4186 (dockerd)
    Tasks: 17
   Memory: 36.1M
      CPU: 330ms
   CGroup: /system.slice/docker.service
           tq4186 /usr/bin/dockerd
           mq4193 docker-containerd --config /var/run/docker/containerd/containerd.toml
GNS3のほうでコンテナの設定を追加しますと思ったらあれ、、、
dockerグループに追加してRDPを再接続しました。
ubuntu@ip-172-31-34-243:~$ sudo gpasswd -a $USER docker
Adding user ubuntu to group docker
ubuntu@ip-172-31-34-243:~$
Preferenceからコンテナを追加します。
New imageでubuntu-debootstrapを入力してデフォルト値のままNextをクリックしていき、
Finishを押します。
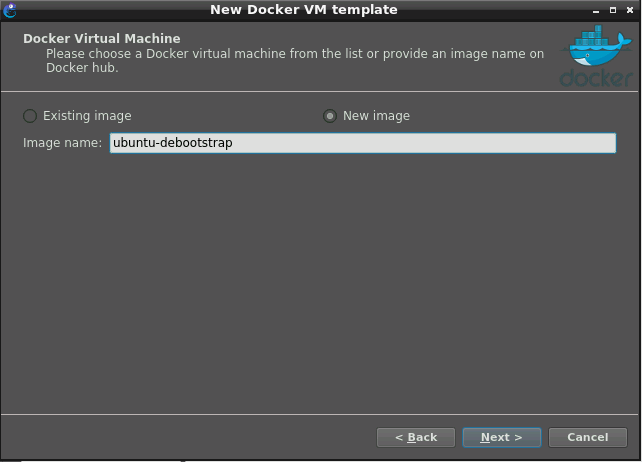
Preference画面になったらOKを押して終了します。
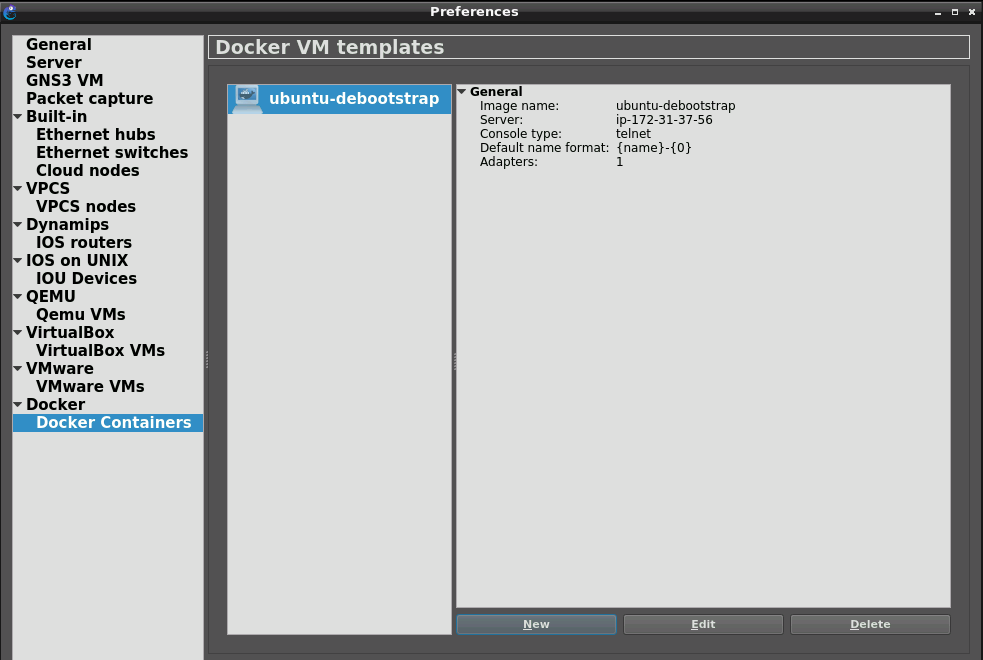
※コンテナはプロジェクトを作ってドラッグしたときに docker pull が動くみたいです。
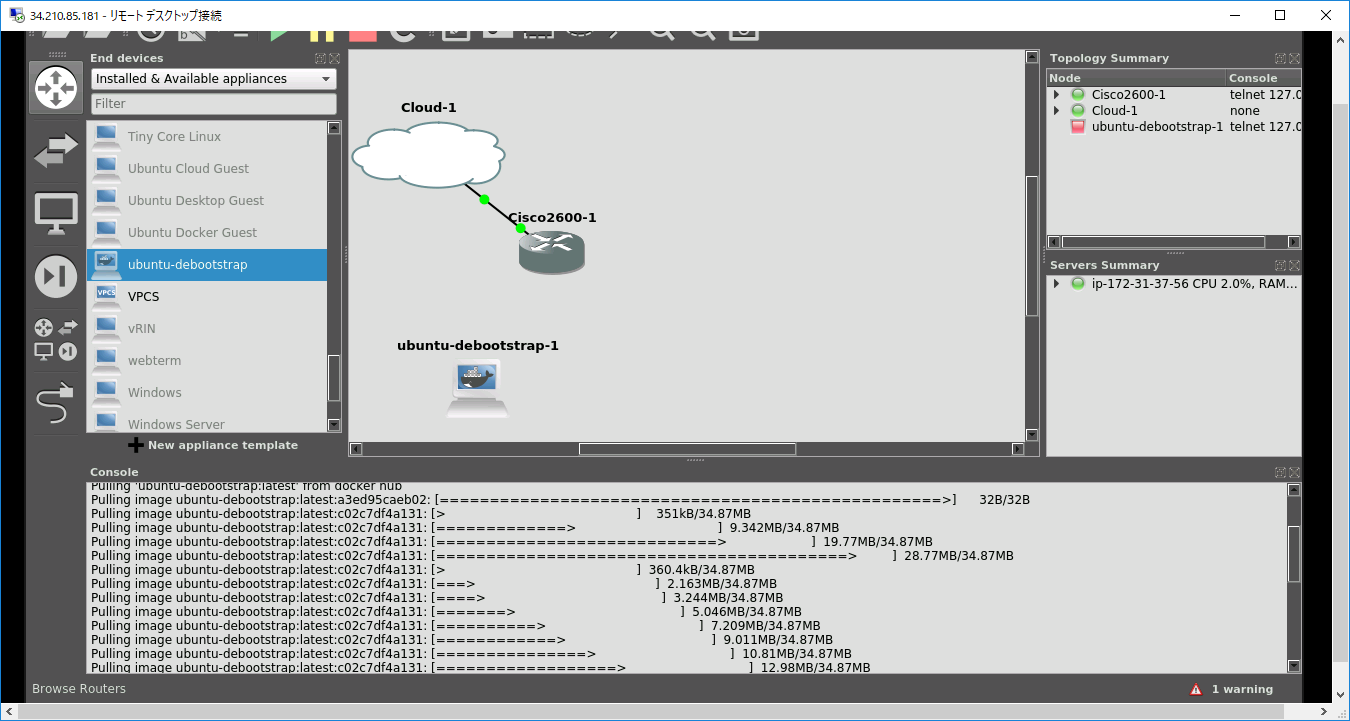
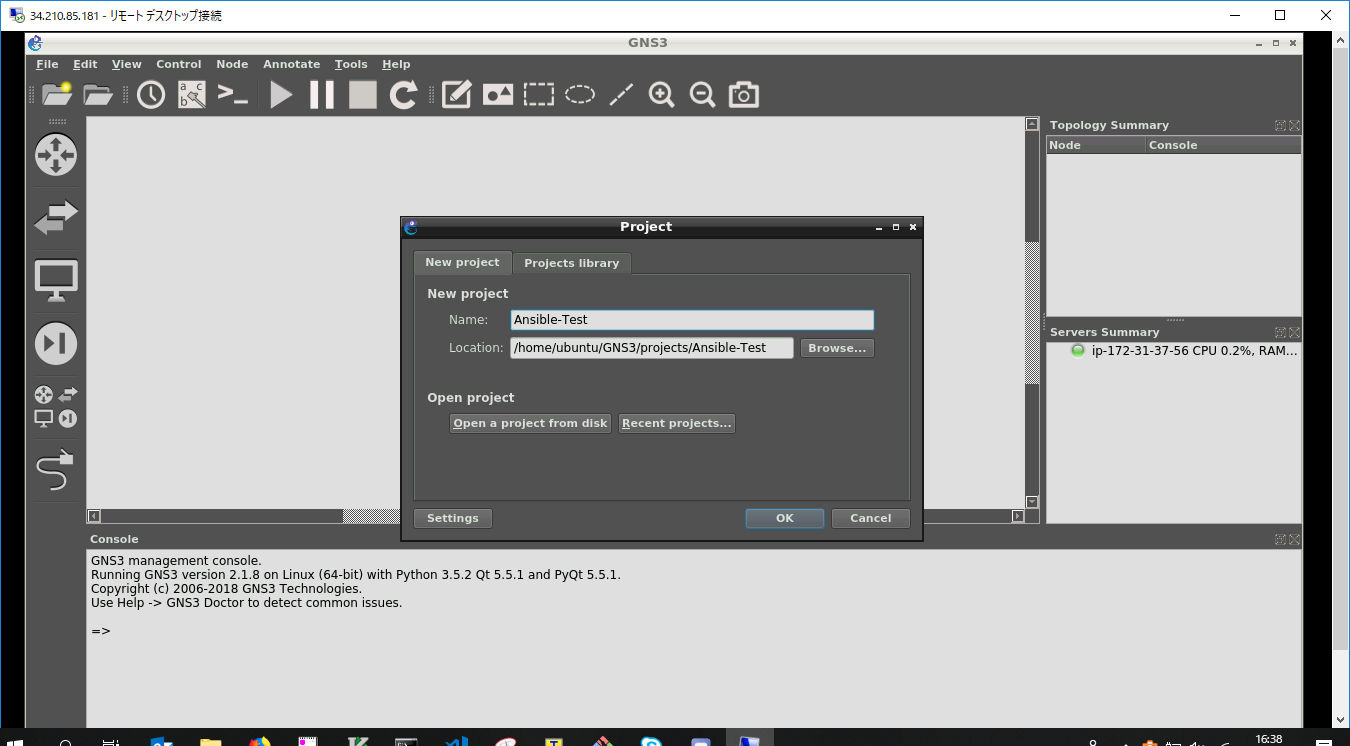
Project作成
設定したら適当なProjectを作成して、
ルータの設定をしていきます。
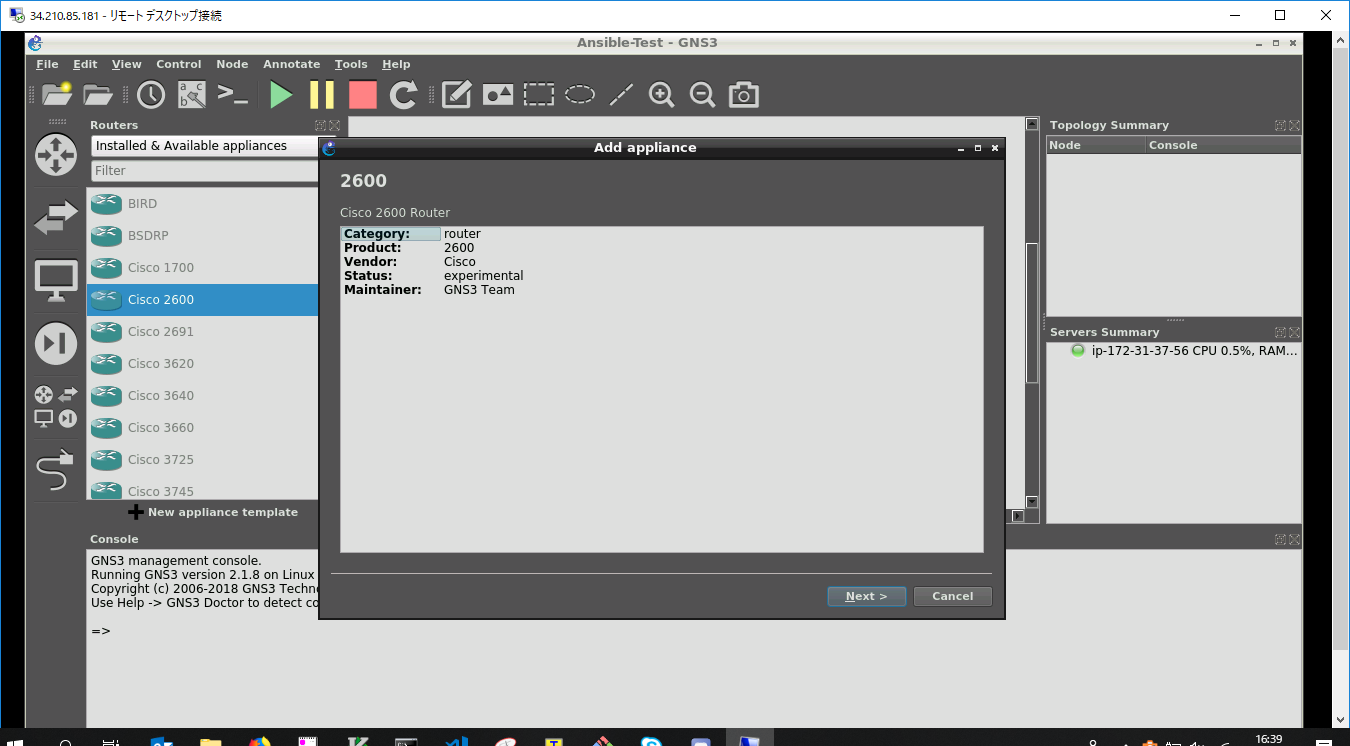
会社のファイルサーバにあったのを突っ込みました。
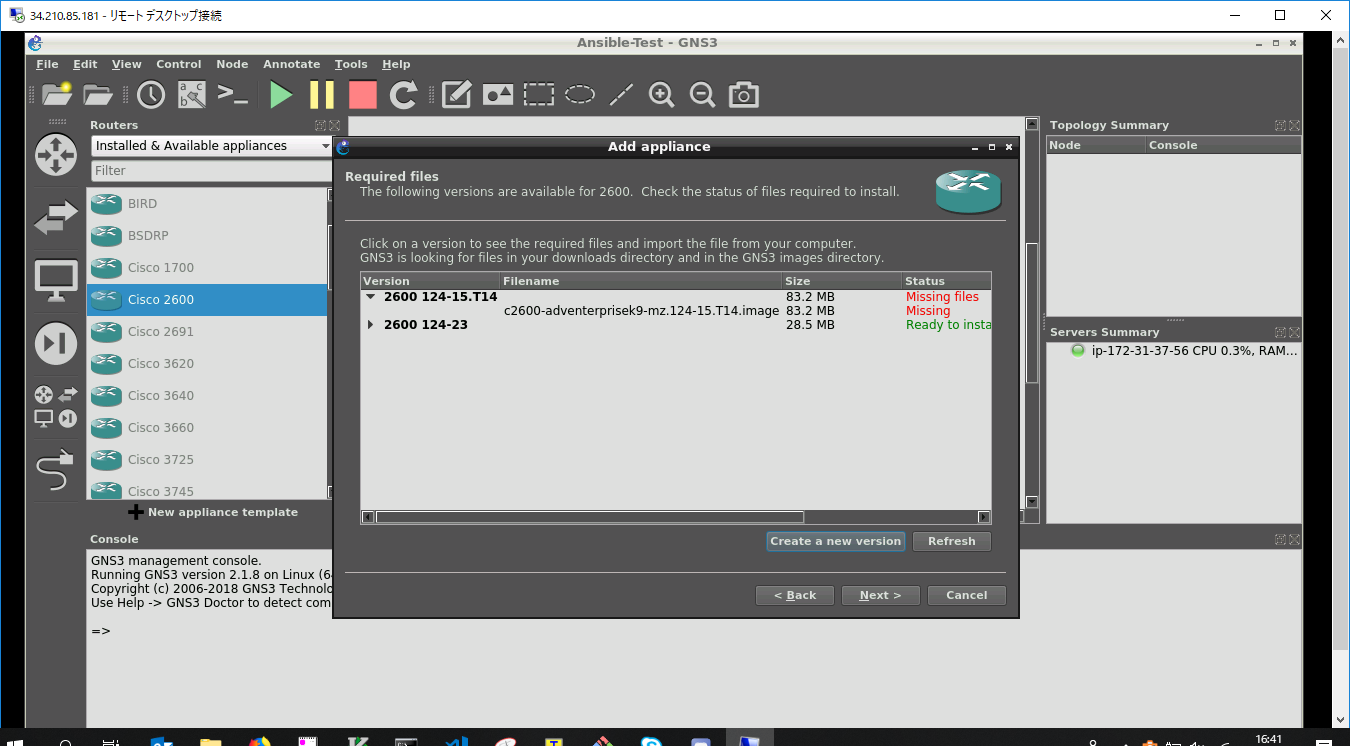
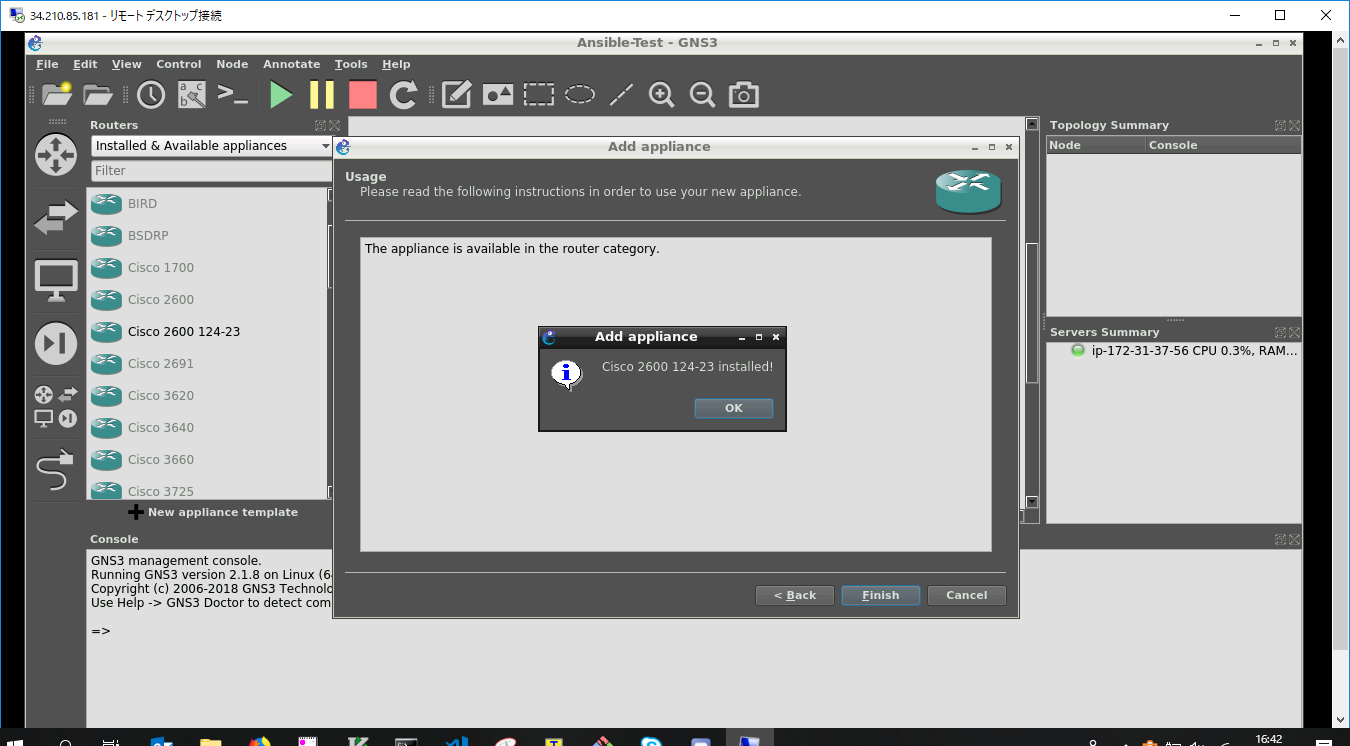
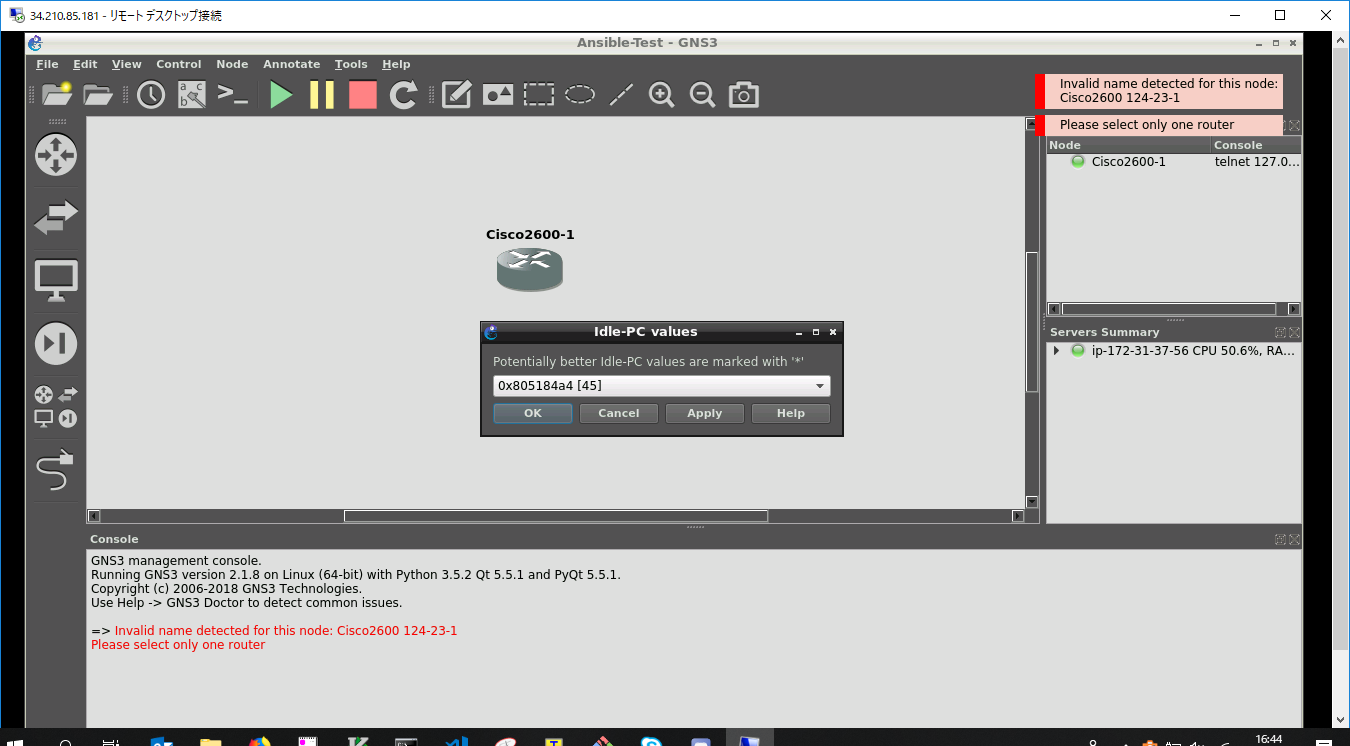
ルータを起動するとCPU使用率が上がるんで、ルータを右クリックしてIdel PCをセットします。
ルータが起動したらSSHとIPアドレスの設定をします。
Cisco2600-1#conf t
Enter configuration commands, one per line.  End with CNTL/Z.
Cisco2600-1(config)#line vty 0 4
Cisco2600-1(config-line)#login local
Cisco2600-1(config-line)#ip domain-name cisco.com
Cisco2600-1(config)#crypto key generate rsa
The name for the keys will be: Cisco2600-1.cisco.com
Choose the size of the key modulus in the range of 360 to 2048 for your
  General Purpose Keys. Choosing a key modulus greater than 512 may take
  a few minutes.

How many bits in the modulus [512]: 1024
% Generating 1024 bit RSA keys, keys will be non-exportable...[OK]

Cisco2600-1(config)#
*Mar  1 00:02:53.039: %SSH-5-ENABLED: SSH 1.99 has been enabled
Cisco2600-1(config)#ip ssh version 2
Cisco2600-1(config)#line vty 0 4
Cisco2600-1(config-line)#transport input ssh
Cisco2600-1(config-line)#exit
Cisco2600-1(config)#
Cisco2600-1(config)#username admin1 password cisco1
Cisco2600-1(config)#^Z
Cisco2600-1#w
*Mar  1 00:04:13.195: %SYS-5-CONFIG_I: Configured from console by console
Cisco2600-1#wr
Warning: Attempting to overwrite an NVRAM configuration previously written
by a different version of the system image.
Overwrite the previous NVRAM configuration?[confirm]
Building configuration...
[OK]
Cisco2600-1#
ubuntuでこちらのやり方を参考にルータと接続するtapデバイスを作成します。
https://websistent.com/how-to-connect-gns3-to-the-internet/
Connecting GNS3 to the Internet – Scenario 2
ubuntu@ip-172-31-34-243:~$ sudo apt-get install uml-utilities
ubuntu@ip-172-31-34-243:~$ sudo tunctl -t tap0
ubuntu@ip-172-31-34-243:~$ sudo ifconfig tap0 10.200.200.1 netmask 255.255.255.252 up
crontab に以下を追加しておきます。
@reboot sudo tunctl -t tap0 && sudo ifconfig tap0 10.200.200.1 netmask 255.255.255.252 up
ルータに戻って管理用のポートにIPアドレスを設定します。
Cisco2600-1#conf t
Enter configuration commands, one per line.  End with CNTL/Z.
Cisco2600-1(config)#int E0/0
Cisco2600-1(config-if)#ip addr 10.200.200.2 255.255.255.252
Cisco2600-1(config-if)#no sh
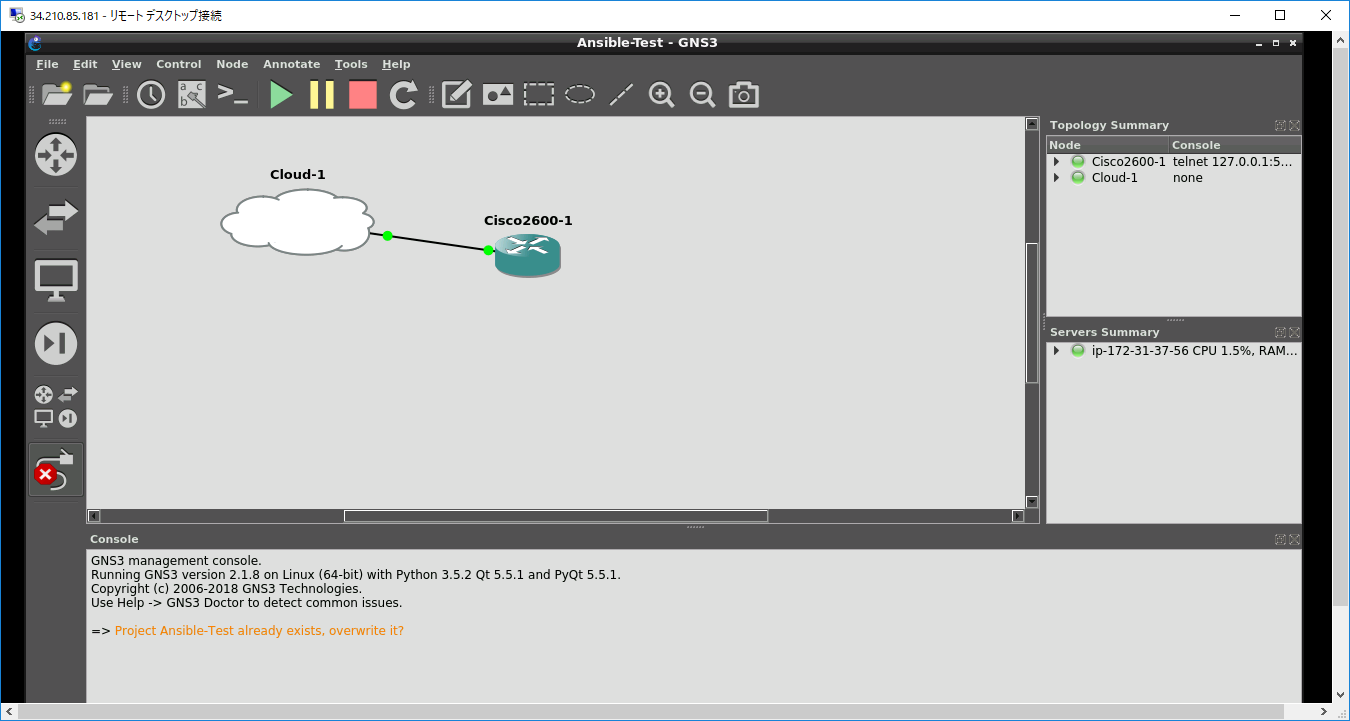
IPアドレスを設定したら、GNS3の画面でCloudの雲を追加して、tap0とルータのE0/0を
つなぎます。
そうするとPingが飛びます。
Cisco2600-1#ping 10.200.200.1

Type escape sequence to abort.
Sending 5, 100-byte ICMP Echos to 10.200.200.1, timeout is 2 seconds:
!!!!!
Success rate is 100 percent (5/5), round-trip min/avg/max = 1/8/16 ms
Cisco2600-1#
で、ansible --versionをやったら怒られたので、cryptographyをupdateしました。
ubuntu@ip-172-31-34-243:~$ ansible --version
ERROR! Unexpected Exception, this is probably a bug: (cryptography 1.2.3 (/usr/lib/python3/dist-packages), Requirement.parse('cryptography>=1.5'), {'paramiko'})

省略

    raise VersionConflict(dist, req).with_context(dependent_req)
pkg_resources.ContextualVersionConflict: (cryptography 1.2.3 (/usr/lib/python3/dist-packages), Requirement.parse('cryptography>=1.5'), {'paramiko'})
ubuntu@ip-172-31-34-243:~$
ubuntu@ip-172-31-34-243:~$ sudo python3 -m pip install --upgrade cryptography
2.6.2が入りました。
ubuntu@ip-172-31-34-243:~$ ansible --version
ansible 2.6.2
  config file = None
  configured module search path = ['/home/ubuntu/.ansible/plugins/modules', '/usr/share/ansible/plugins/modules']
  ansible python module location = /usr/local/lib/python3.5/dist-packages/ansible
  executable location = /usr/local/bin/ansible
  python version = 3.5.2 (default, Nov 23 2017, 16:37:01) [GCC 5.4.0 20160609]
ubuntu@ip-172-31-34-243:~$
いざPlaybook
まずルータに疎通を確認してみます。
ubuntu@ip-172-31-34-243:~/an$ ansible -i hosts Cisco2600-1 -m ping
10.200.200.2 | SUCCESS => {
    "changed": false,
    "ping": "pong"
}
ubuntu@ip-172-31-34-243:~/an$
いけそうです。
ios_factsを通してみました。
---
- hosts: Cisco2600-1
  gather_facts: no

  tasks:
    - ios_facts:
        gather_subset:
          - all
      register: facts

    - debug:
        var: facts
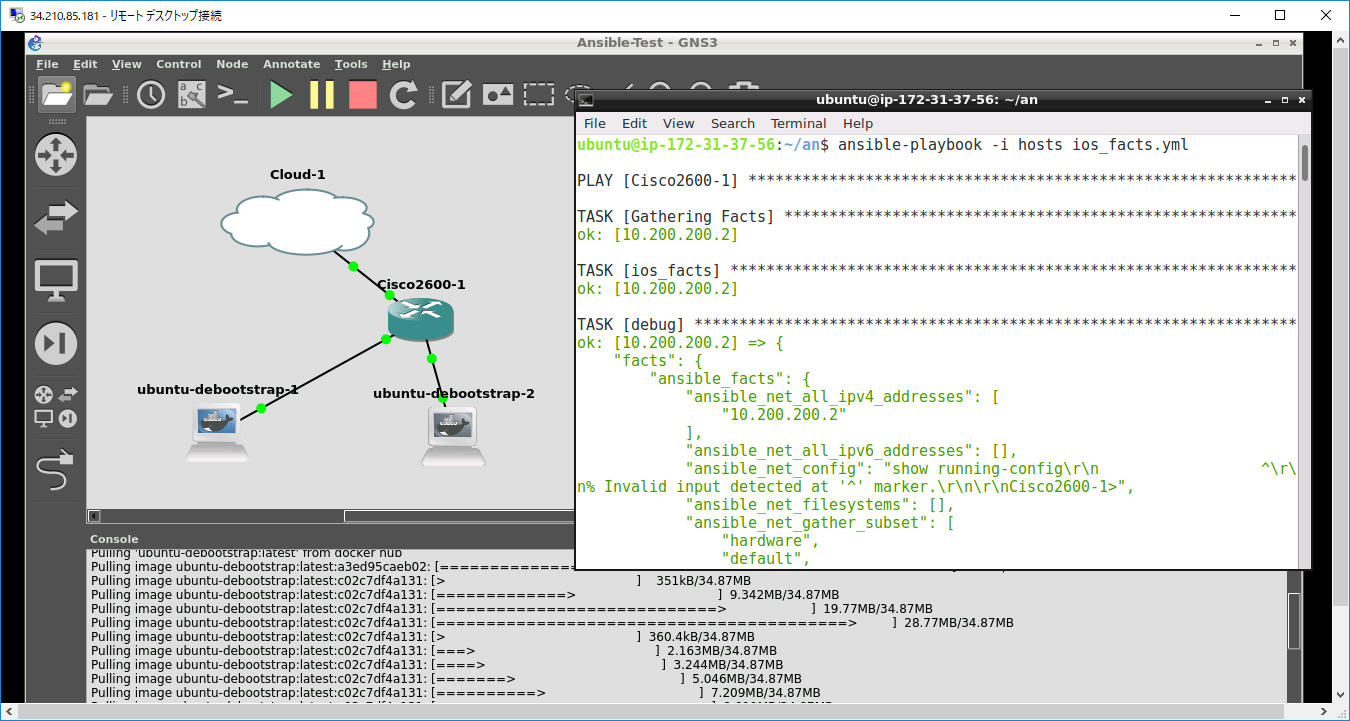
ansible_net_configの出力が気になりますが通りました。
ubuntu@ip-172-31-34-243:~/an$ ansible-playbook -i hosts ios_facts.yml

PLAY [Cisco2600-1] ****************************************************************************

TASK [ios_facts] ******************************************************************************
ok: [10.200.200.2]

TASK [debug] **********************************************************************************
ok: [10.200.200.2] => {
    "facts": {
        "ansible_facts": {
            "ansible_net_all_ipv4_addresses": [
                "10.200.200.2"
            ],
            "ansible_net_all_ipv6_addresses": [],
            "ansible_net_config": "show running-config\r\n                  ^\r\n% Invalid input detected at '^' marker.\r\n\r\nCisco2600-1>",
            "ansible_net_filesystems": [],
            "ansible_net_gather_subset": [
                "hardware",
                "default",
                "interfaces",
                "config"
            ],
            "ansible_net_hostname": "Cisco2600-1",
            "ansible_net_image": "tftp://255.255.255.255/unknown",
            "ansible_net_interfaces": {
                "Ethernet0/0": {
                    "bandwidth": 10000,
                    "description": null,
                    "duplex": null,
                    "ipv4": [
                        {
                            "address": "10.200.200.2",
                            "subnet": "30"
                        }
                    ],
                    "lineprotocol": "up ",
                    "macaddress": "c801.0ea2.0000",
                    "mediatype": null,
                    "mtu": 1500,
                    "operstatus": "up",
                    "type": "AmdP2"
                },
                "FastEthernet1/0": {
                    "bandwidth": 100000,
                    "description": null,
                    "duplex": null,
                    "ipv4": [],
                    "lineprotocol": "down ",
                    "macaddress": "c801.0ea2.f100",
                    "mediatype": null,
                    "mtu": 1500,
                    "operstatus": "up",
                    "type": "Fast Ethernet"
                },
省略
こんな感じで環境ができたので夏休み、これで遊んでみたいと思いまーす ( `・ω・´)ノ
遊び終わったら terraform destroy で削除しちゃえばおkっす
[centos@ip-172-31-36-8 terra]$ terraform destroy
aws_instance.ubuntu: Refreshing state... (ID: i-05e7f05b94fa2b5a8)

An execution plan has been generated and is shown below.
Resource actions are indicated with the following symbols:
  - destroy

Terraform will perform the following actions:

  - aws_instance.ubuntu


Plan: 0 to add, 0 to change, 1 to destroy.

Do you really want to destroy?
  Terraform will destroy all your managed infrastructure, as shown above.
  There is no undo. Only 'yes' will be accepted to confirm.

  Enter a value: yes

aws_instance.ubuntu: Destroying... (ID: i-05e7f05b94fa2b5a8)
aws_instance.ubuntu: Still destroying... (ID: i-05e7f05b94fa2b5a8, 10s elapsed)
aws_instance.ubuntu: Still destroying... (ID: i-05e7f05b94fa2b5a8, 20s elapsed)
aws_instance.ubuntu: Destruction complete after 30s

Destroy complete! Resources: 1 destroyed.
[centos@ip-172-31-36-8 terra]$
Special Thanks
コンテナとGNS3に組み合わせは技術書典で購入したcloretsblackさんのを参考にさせて
もらってます。
ダウンロード販売もされてますのでご興味のあるかたはぜひ。
http://cloretsblack.hatenablog.com/entry/2018/04/25/201739
http://develup-japan.co.jp/wp/works/netsimubook001_introduction/