今回は、Visual Studio Code の Remote Development 機能を使って、Azure Virtual Machine の Ubuntu で Linux System Programing (C言語)をやってみたいと思います。
とりあえず動かしてみるために helloworld を用意しました。また、実際の開発に近い形として nginx を題材にリモートデバッグしてみようと思います。
- helloworld の開発とリモートデバッグ
- nginx の開発とリモートデバッグ
1. Microsoft Azure に Ubuntu の Virtual Machine を準備する
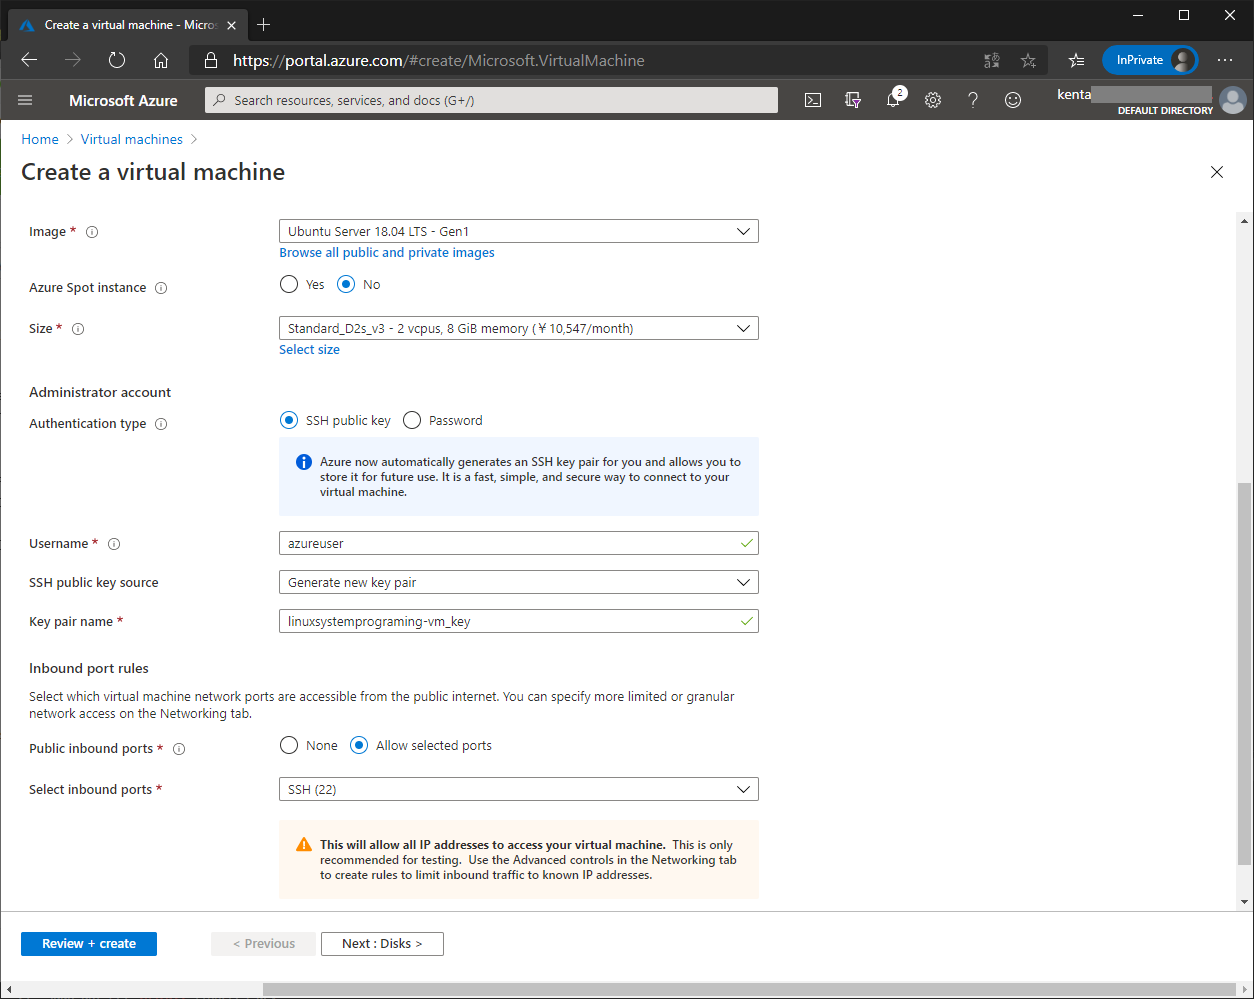
Ubuntu の Virtual Machine を作成します。ポイントとしては以下になります。
- Linux の Virtual Machine として今回は、 Ubuntu Server 18.04 LTS -Gen1 を使用
- Authentication Type は SSH Public Key を使用
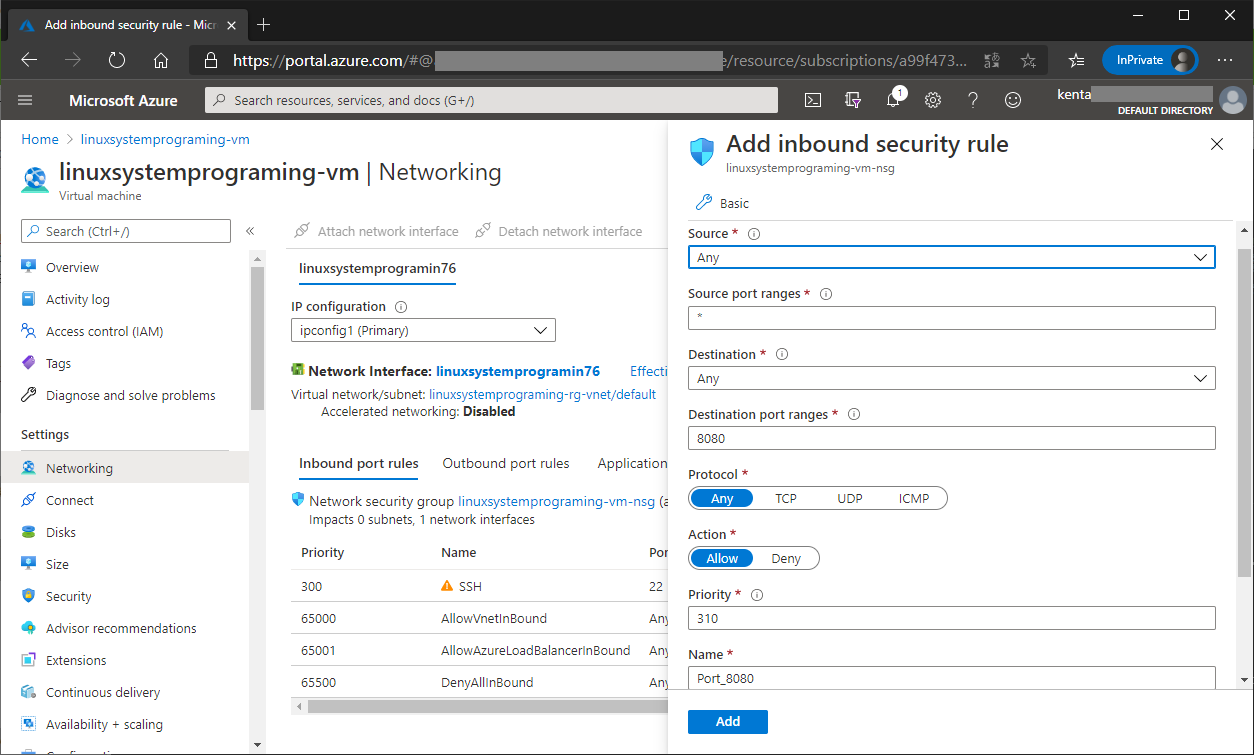
- Inbound ports は、22(SSH)と、8080(後半のnginxで使用)を設定
Virtual Machine の作成に関しては、みなさんご存じだと思いますので読み飛ばしても構いませんが、上記にあわせて作成してください。
1.1. Ubuntu の Virtual Machineを作成する
Microsoft Azure のポータル画面から、Create a resource を選び、Virtual Machineを作成します。以下のように Ubuntu Server 18.04 LTS -Gen1 を選択します。選択したら、Review + Createを押します。
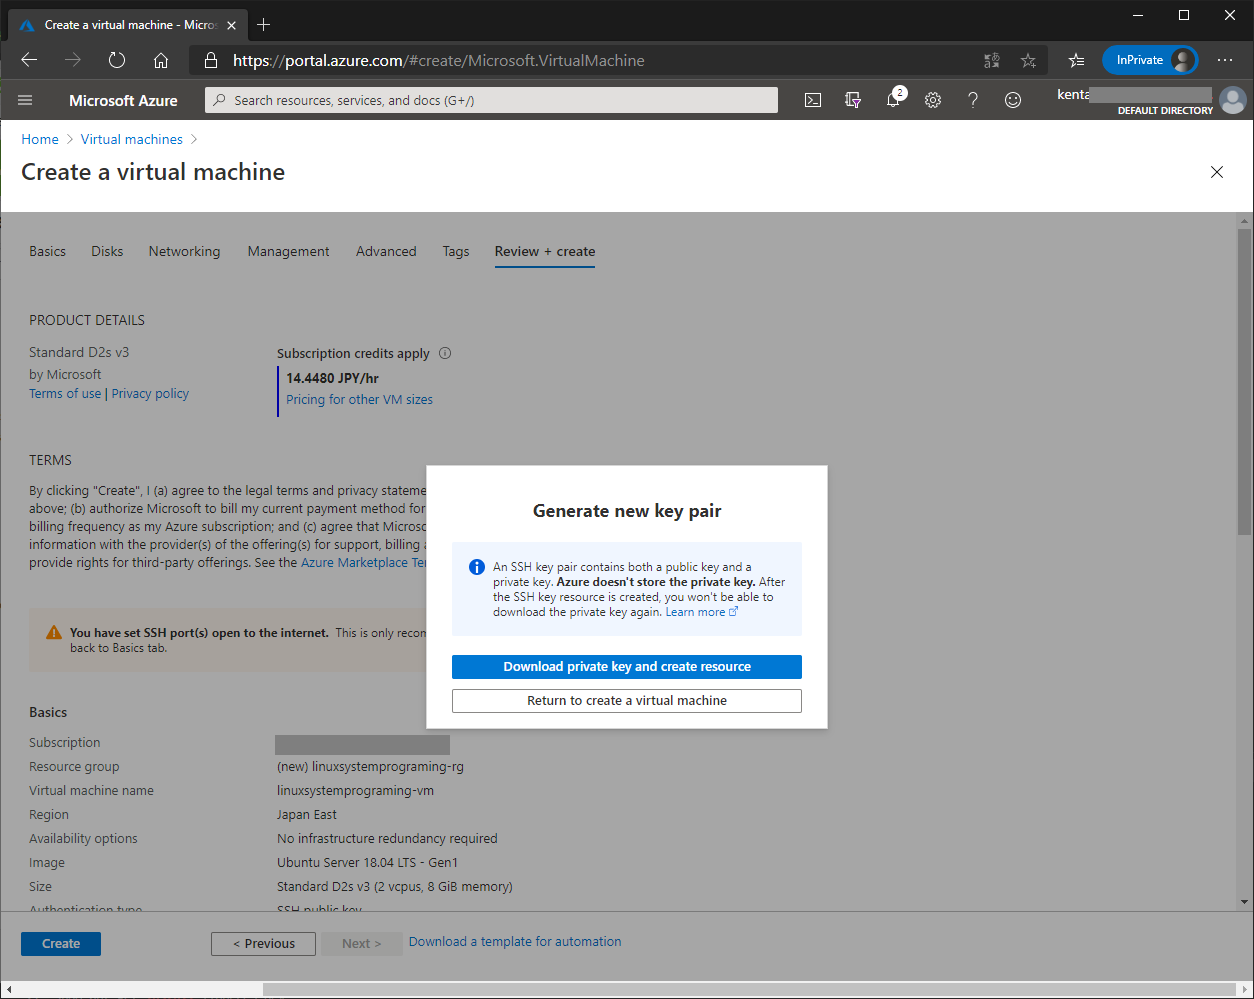
確認画面で Create を押すと、Private Key のダウンロードとVirtual Machineの作成ボタンが表示されますので続けて押します。Private Key は、作成された Ubuntu に SSHで使用する際に必要となりますので、無くさないように保存しておいてください。
Virtual Machine が作成されたら、Virtual Machine の画面から接続先のIPアドレスを確認しておいてください。
2. Visual Studio Code を準備する
Windows 10 に Visual Studio Code をインストールした後に、リモート開発の設定をします。(macOS も一緒ですが、今回は、あの Windows で 実機の Linux System Programing できることが凄いので、Windows 10 で進めます)
2.1. Visual Studio Code をインストールする
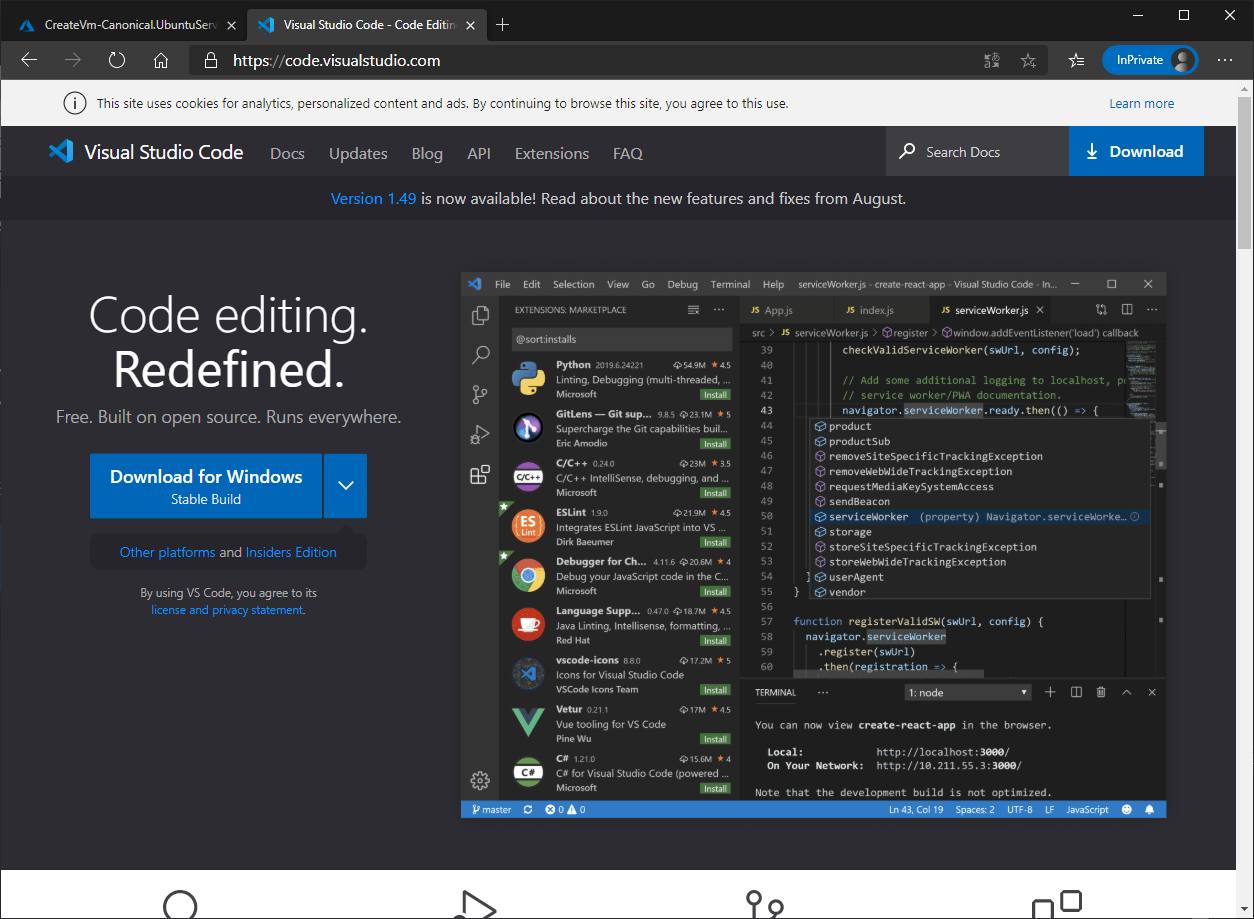
まずは、Visual Studio Code は以下のサイトからダウンロードしてください。
https://code.visualstudio.com/
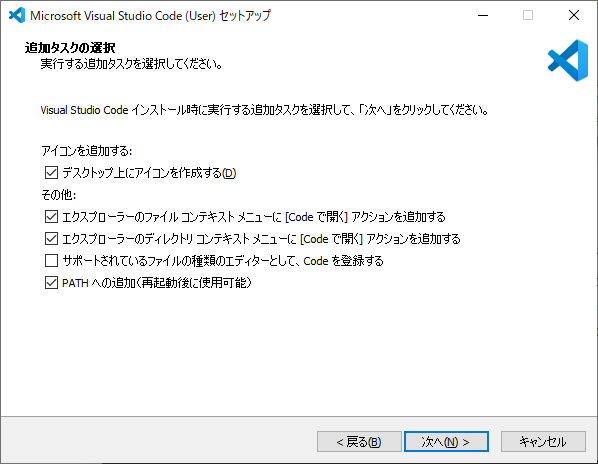
ダウンロードしたインストーラーを実行してインストールします。インストール中に追加するタスクの選択が出てきますが、今回は以下のように設定しました。デスクトップに Visual Studio Code のショートカットが作成されますので、本記事で実行する際はこちらをご利用ください。
2.2. リモート開発に必要なエクステンションを Visual Studio Code にインストールする
Visual Studio Code を起動した後に、左のExtentionsアイコン(下図の①)からエクステンションをインストールします。検索ボックス(下図の②)に、以下のエクステンション名を入力して検索します。エクステンションが表示されたらインストール(下図の③)を押してインストールを完了します。
エクステンション名:Remote Development
ms-vscode-remote.vscode-remote-extensionpack
https://marketplace.visualstudio.com/items?itemName=ms-vscode-remote.vscode-remote-extensionpack
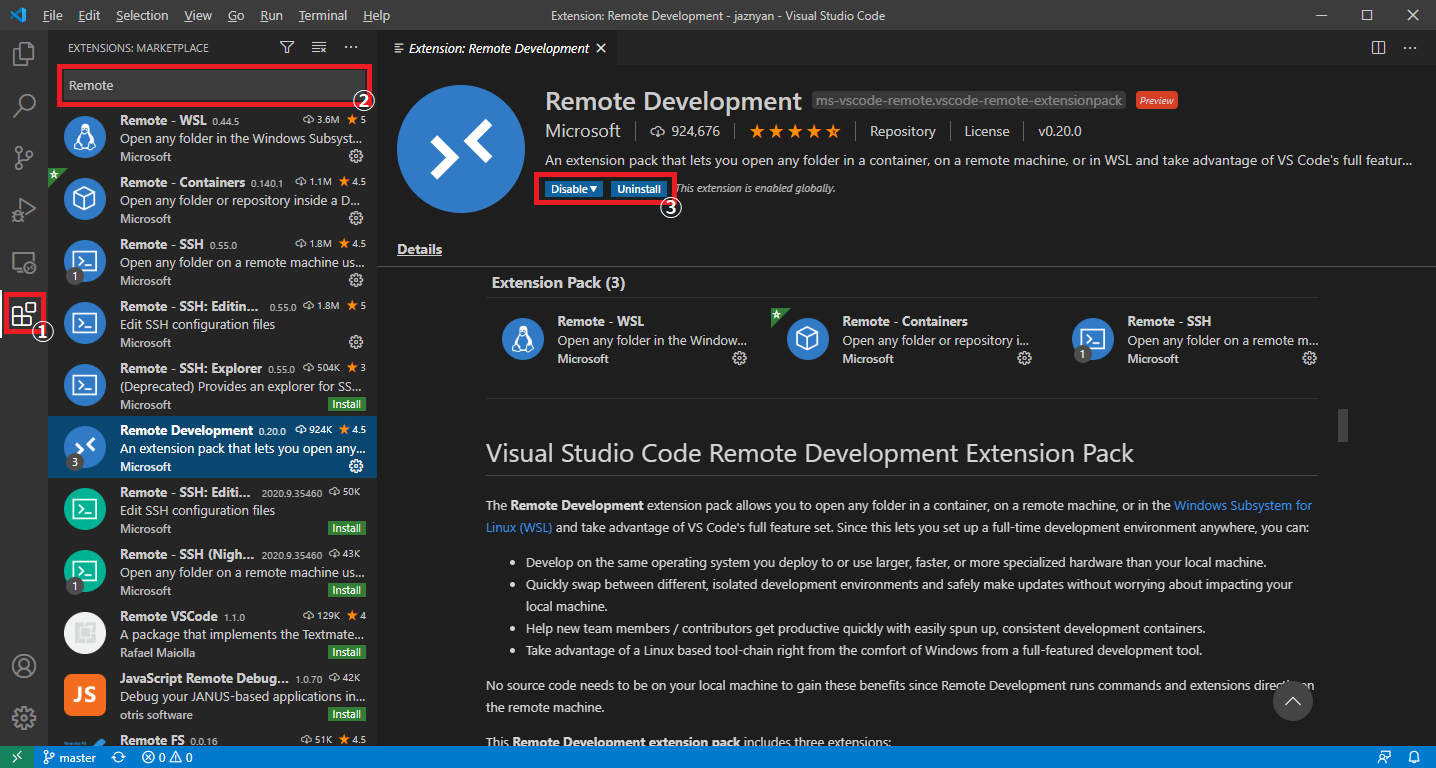
Remote Development がインストールされると、左下に緑色のボタンが表示されるので、そこをクリックします。
2.3. Azure の Virtual Machine に SSH で接続する
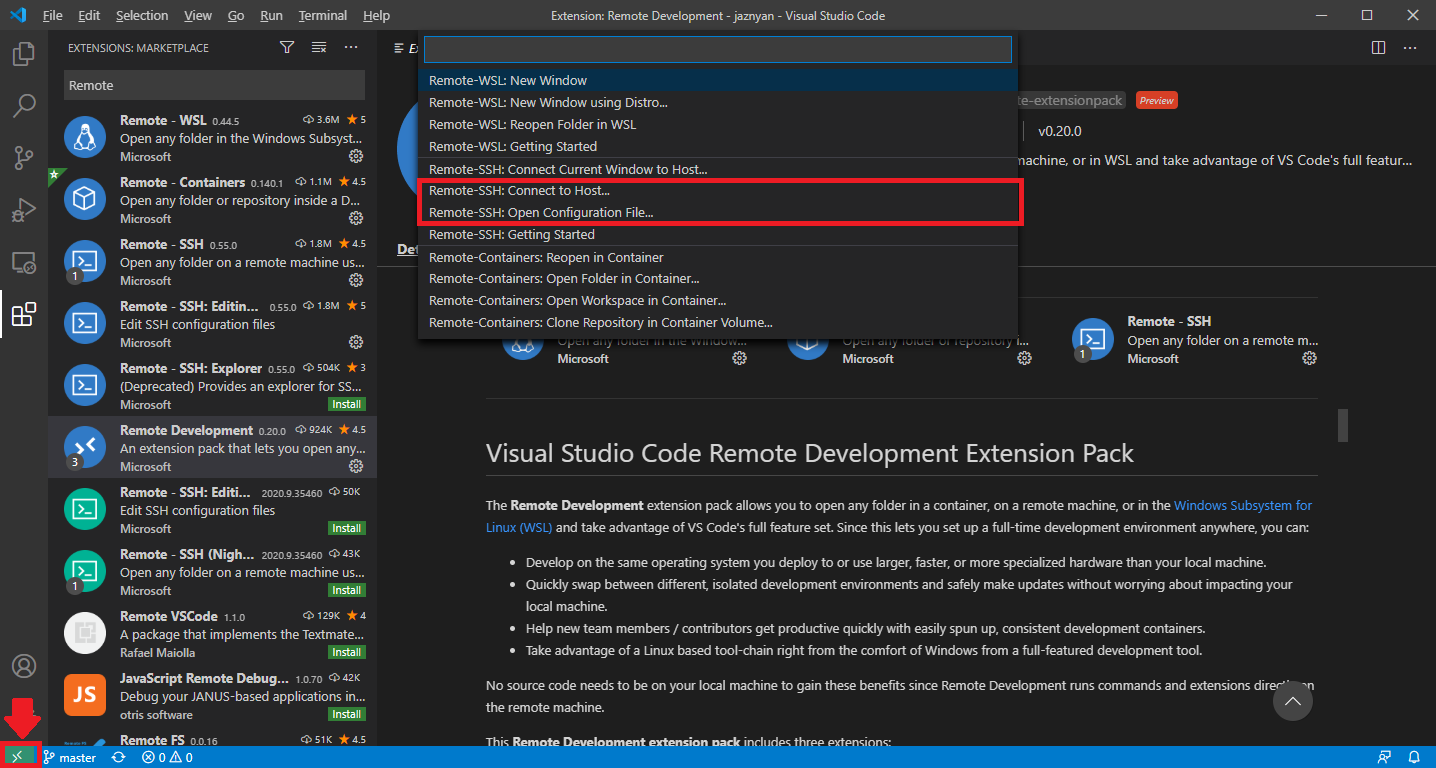
左下の緑色のボタンから、「Remote-SSH:Open Configuration File...」を選択して、sshの接続先を登録します。HostName には Virtual Machine のパブリックIPアドレス、IdentityFile には、Virtual Machine 作成時にダウンロードした Private Key を設定します。
Host linuxsystemprograming-vm
  HostName xxx.xxx.xxx.xxx
  IdentityFile C:\Users\kentaro\Downloads\linuxsystemprograming-vm_key.pem
  User azureuser
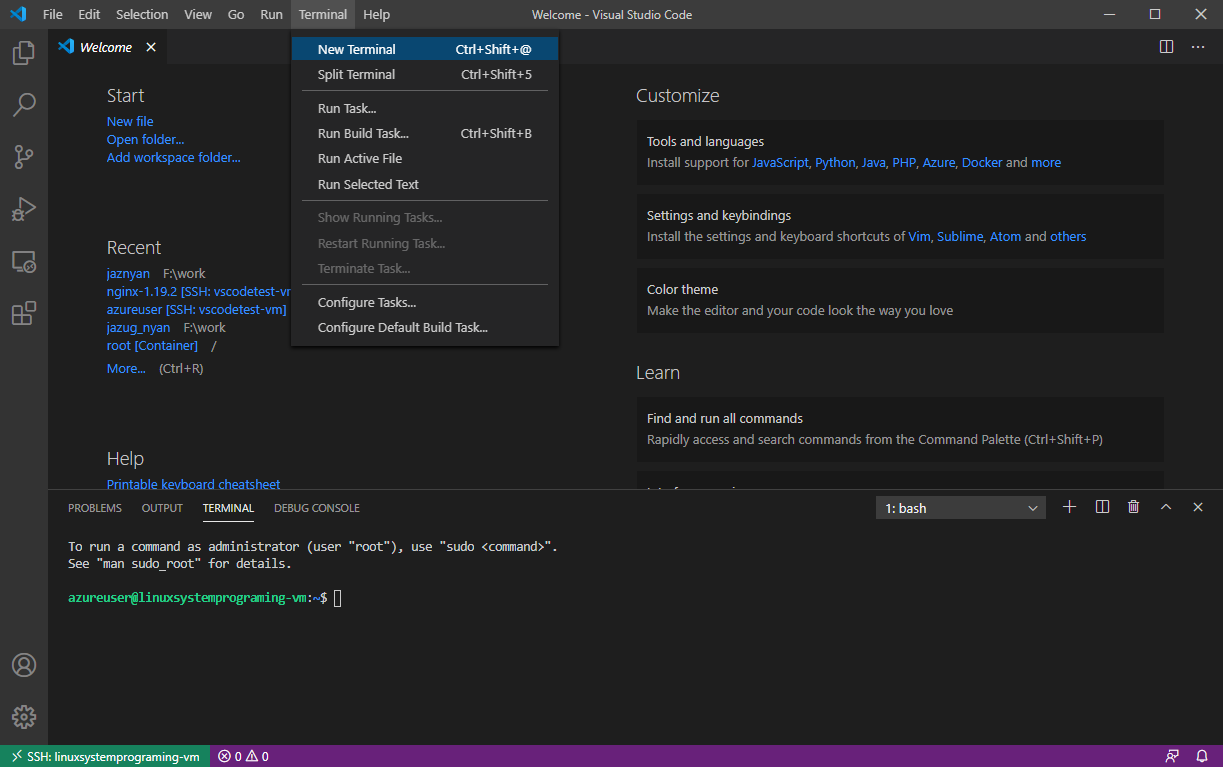
続いて、左下の緑色のボタンから、「Remote-SSH:Connect to Host...」を選択して、先ほど登録した接続先を選択して、プラットフォームとしてLinuxを選択して接続します。これで、Azure の Virtual Machine にログインされましたので、Ubuntu側に、開発に必要なパッケージをインストールします。Terminal メニューから New Terminal を選択することで、Azure Virtual Machine の Ubuntu のTerminal が表示されます。
3. Azure Virtual Machine の Ubuntu 開発環境を整える
Terminalで、以下のコマンドを入力して、Azure Virtual Machine の Ubuntu に gcc と gdb をインストールします。
sudo apt update
sudo apt install -y build-essential gdb
4. Hello World を作ってみる
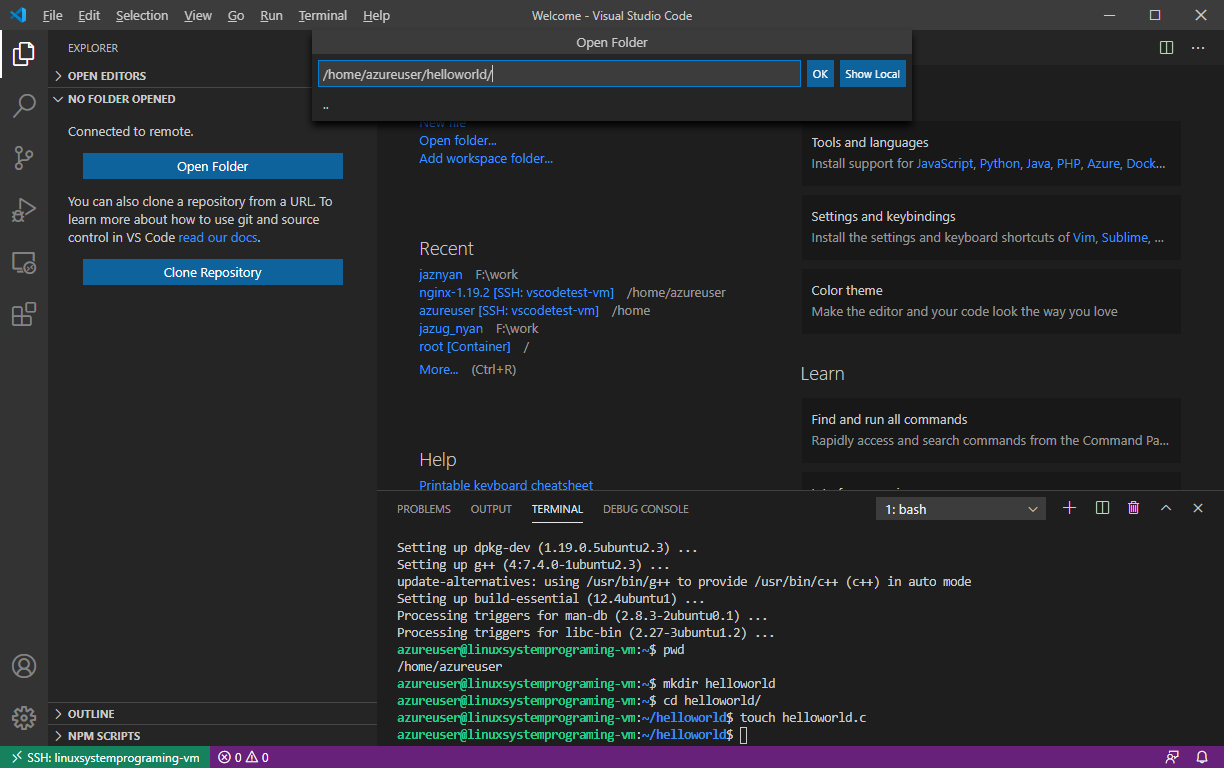
Terminal から、Azure Virtual Machine の Ubuntu にディレクトリを作成して Hello World のC言語ファイルを作成します。
cd /home/azureuser/
mkdir helloworld
cd helloworld
touch helloworld.c
右上のExploreアイコンから、先ほど作成したディレクトリ /home/azureuser/helloworld を開きます。
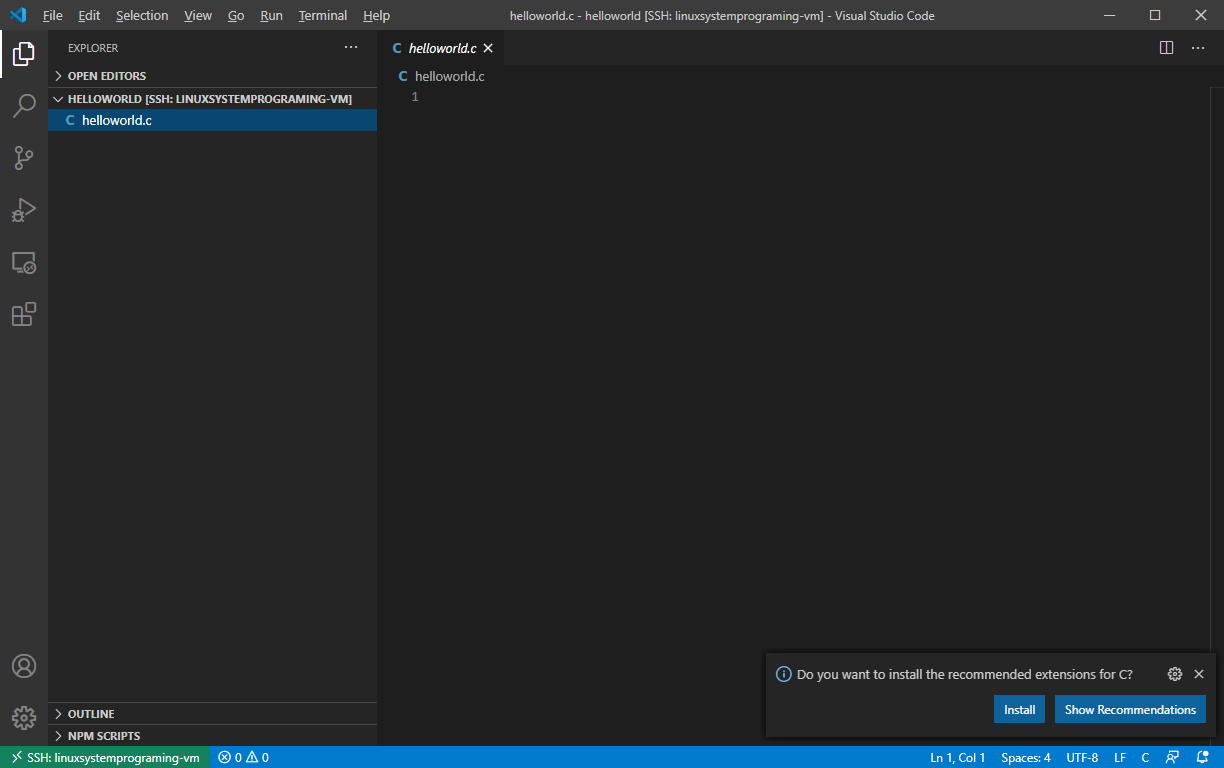
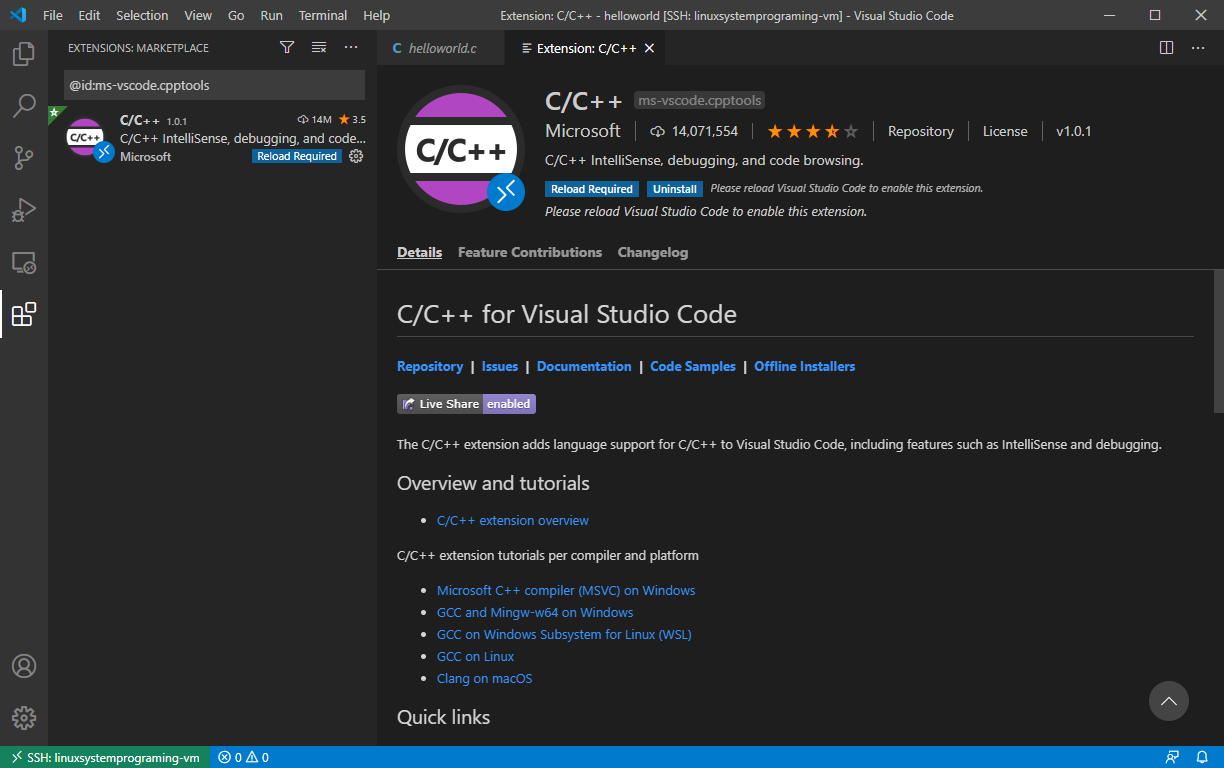
Explore に表示されている helloworld.c を選択すると、右下にC/C++のエクステンションをインストールするメッセージが表示されるので、インストールを選択します。(表示されない場合は、左側の Extentions から C/C++ のエクステンションをインストールしてください)
リロードが必要になりますので、画面中央上のリロードボタンからリロードを行って下しさい。
4.1. IntelliSense で helloworld.c を書く
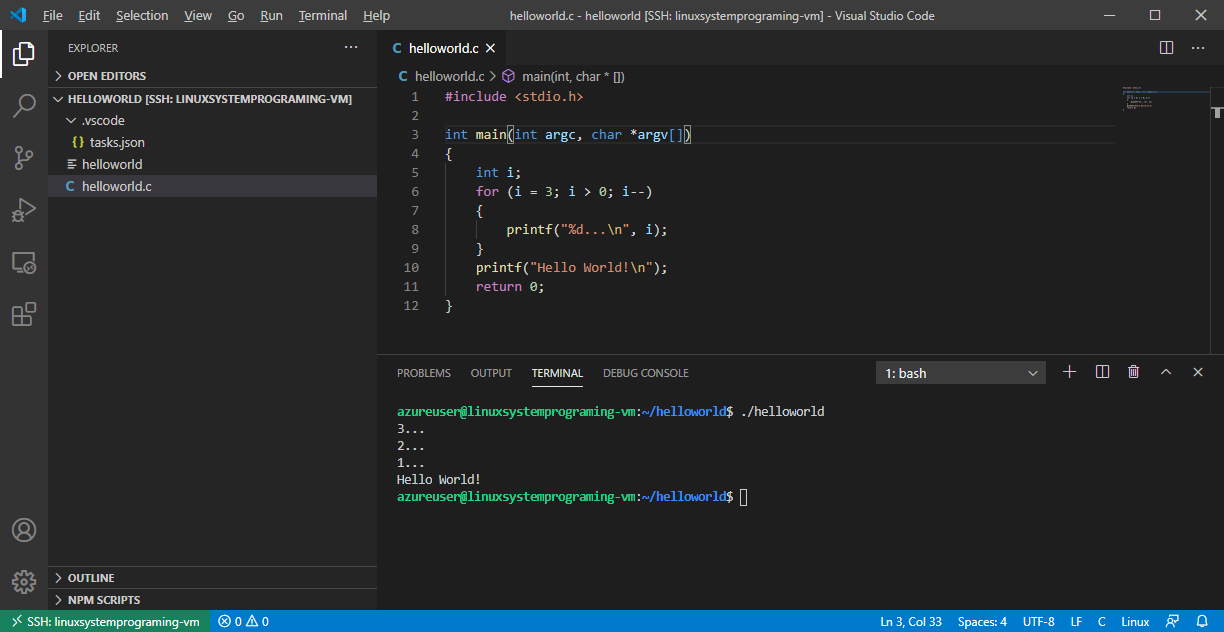
helloworld.c の ソースコードは以下になります。
# include <stdio.h>

int main(int argc, char *argv[])
{
    int i;
    for (i = 3; i > 0; i--)
    {
        printf("%d...\n", i);
    }
    printf("Hello World!\n");
    return 0;
}
Visual Studio Code では、IntelliSenseが使えるようになっていることを確認してください。
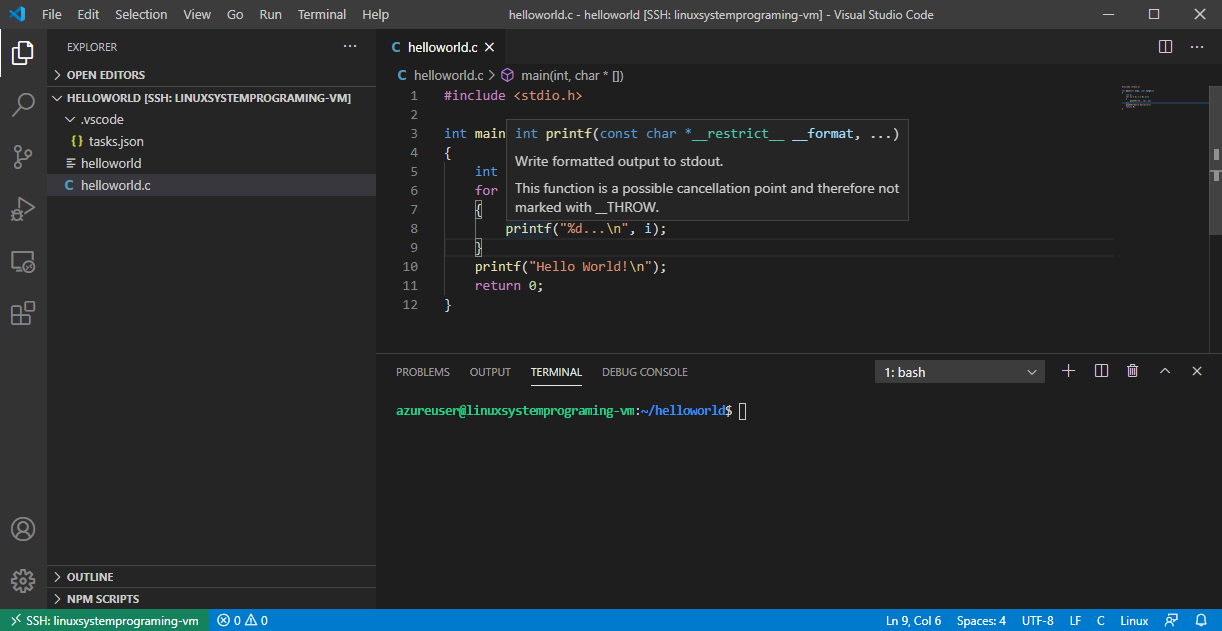
入力したら、Ctl-sで保存しておいてください。
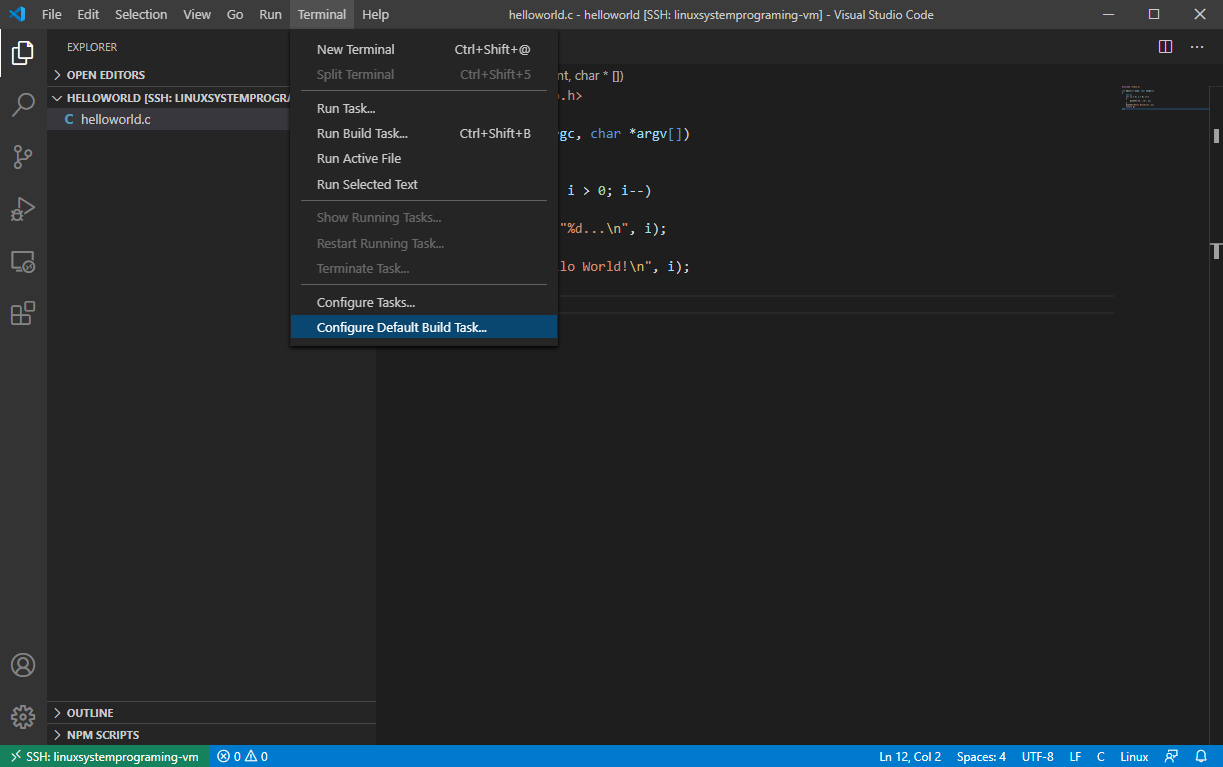
4.2. helloworld.c のビルド方法を設定する
Terminalメニューの「Configure Default Build Task...」を選択した後に、「C/C++:gcc build active file」を選択します。
taks.json の編集になりますので、以下のように設定します。(自動的に作られたものを変更していません)
{
	"version": "2.0.0",
	"tasks": [
		{
			"type": "shell",
			"label": "C/C++: gcc build active file",
			"command": "/usr/bin/gcc",
			"args": [
				"-g",
				"${file}",
				"-o",
				"${fileDirname}/${fileBasenameNoExtension}"
			],
			"options": {
				"cwd": "${workspaceFolder}"
			},
			"problemMatcher": [
				"$gcc"
			],
			"group": {
				"kind": "build",
				"isDefault": true
			}
		}
	]
}
Terminalメニューの「Run Build Task...」からビルドできることを確認してください。helloworld実行ファイルが作成されますので、実行することができます。
4.3. helloworld.c のデバッグ方法を設定する
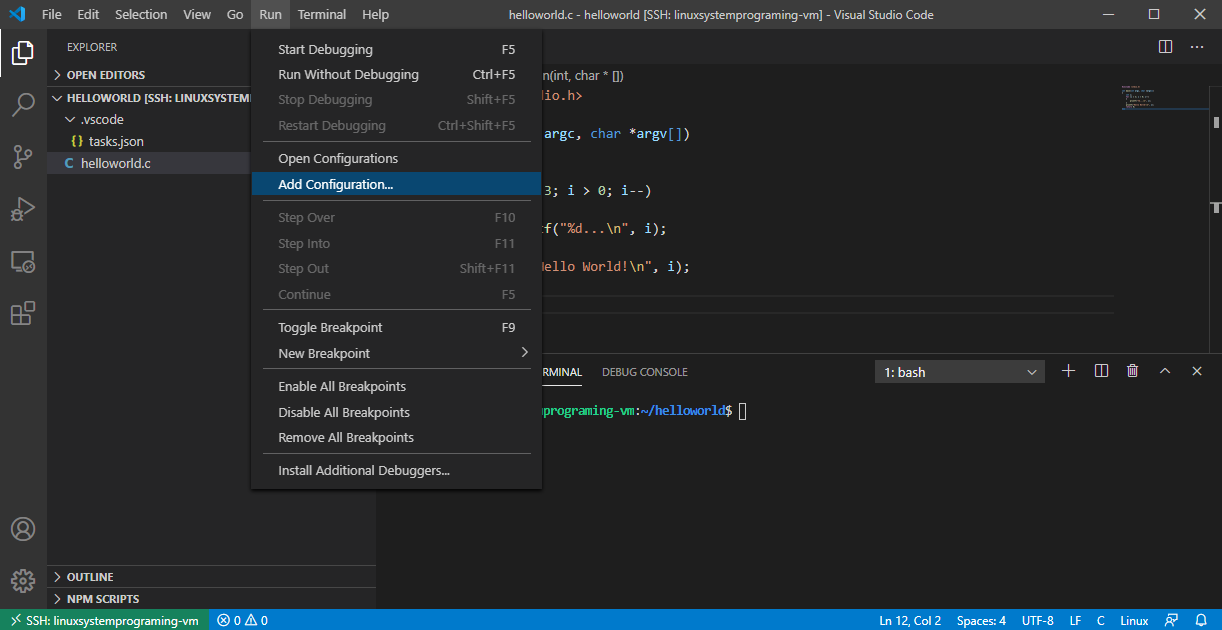
Terminalメニューから「Add Configuration...」を選択し、「C++(GDB/LLDB)」を選択し、「gcc - Build and debug active file」を選択してデバッグ方法を設定します。
{
    // Use IntelliSense to learn about possible attributes.
    // Hover to view descriptions of existing attributes.
    // For more information, visit: https://go.microsoft.com/fwlink/?linkid=830387
    "version": "0.2.0",
    "configurations": [
        {
            "name": "gcc - Build and debug active file",
            "type": "cppdbg",
            "request": "launch",
            "program": "${fileDirname}/${fileBasenameNoExtension}",
            "args": [],
            "stopAtEntry": false,
            "cwd": "${workspaceFolder}",
            "environment": [],
            "externalConsole": false,
            "MIMode": "gdb",
            "setupCommands": [
                {
                    "description": "Enable pretty-printing for gdb",
                    "text": "-enable-pretty-printing",
                    "ignoreFailures": true
                }
            ],
            "preLaunchTask": "C/C++: gcc build active file",
            "miDebuggerPath": "/usr/bin/gdb"
        }
    ]
}
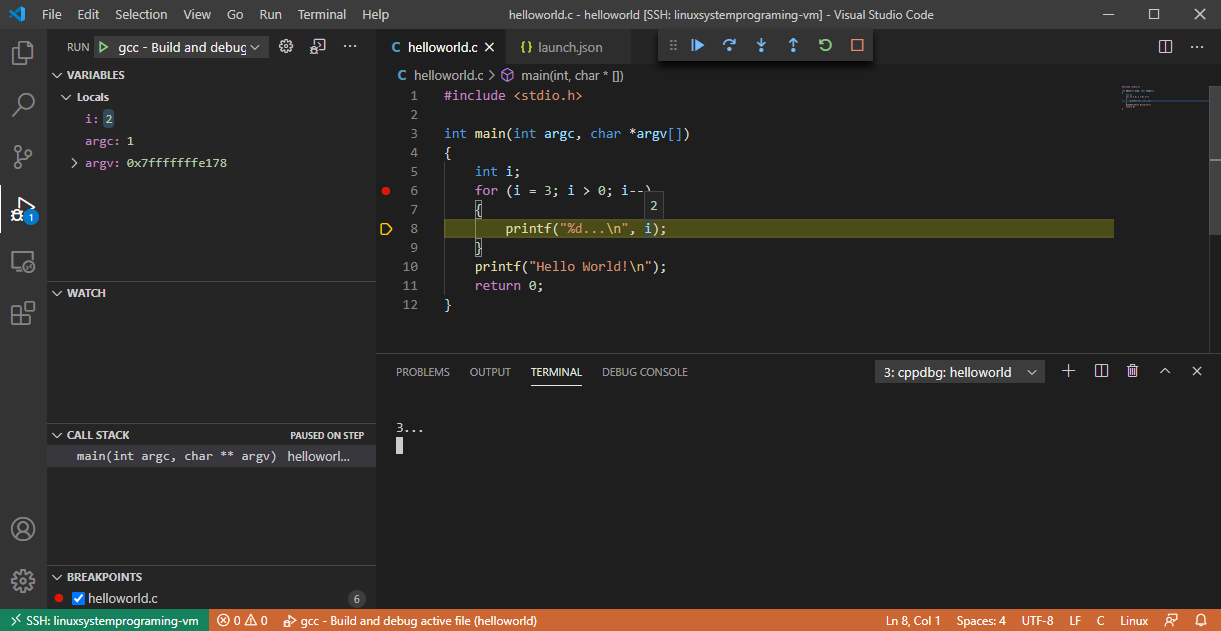
4.4. helloworld.c をリモートデバッグする
設定が完了したら、Helloworld.cを選択した状態で、F5を押すか、Runメニューから「Start Start Debugging」を選択して、helloworldをデバッグ実行します。行数が表示されている左側をクリックすることにより、ブレイクポイントを設定することもできますし、ステップ実行や、変数の値を確認することができるようになります。
次は、Azure Virtual Machine の Ubuntu 上で動いている nginxを題材にデバッグ実行してみます。
5. nginx を Visual Studio Code で ビルド、デバッグしてみる
Hello World だと実践的ではないので、nginx を題材に Visual Studio Code で開発とデバッグを行ってみたいと思います。
5.1. nginx のダウンロードと必要なパッケージのインストール
nginx のソースコードをダウンロードして nginx の開発環境を整えます。あと、nginx のビルドに必要なパッケージもインストールしておきます。
sudo apt install -y libpcre3-dev libz-dev
cd ~/
wget https://nginx.org/download/nginx-1.19.2.tar.gz
tar xvfz nginx-1.19.2.tar.gz
cd nginx-1.19.2/
試しに nginx をデバッグ用にビルドしてみます。エラー無くビルドできることを確認します。
cd ~/nginx-1.19.2/
./configure --with-cc-opt="-O0" --prefix=`pwd`/nginx
make
5.2. Visual Studio Code で nginx のコードを確認する
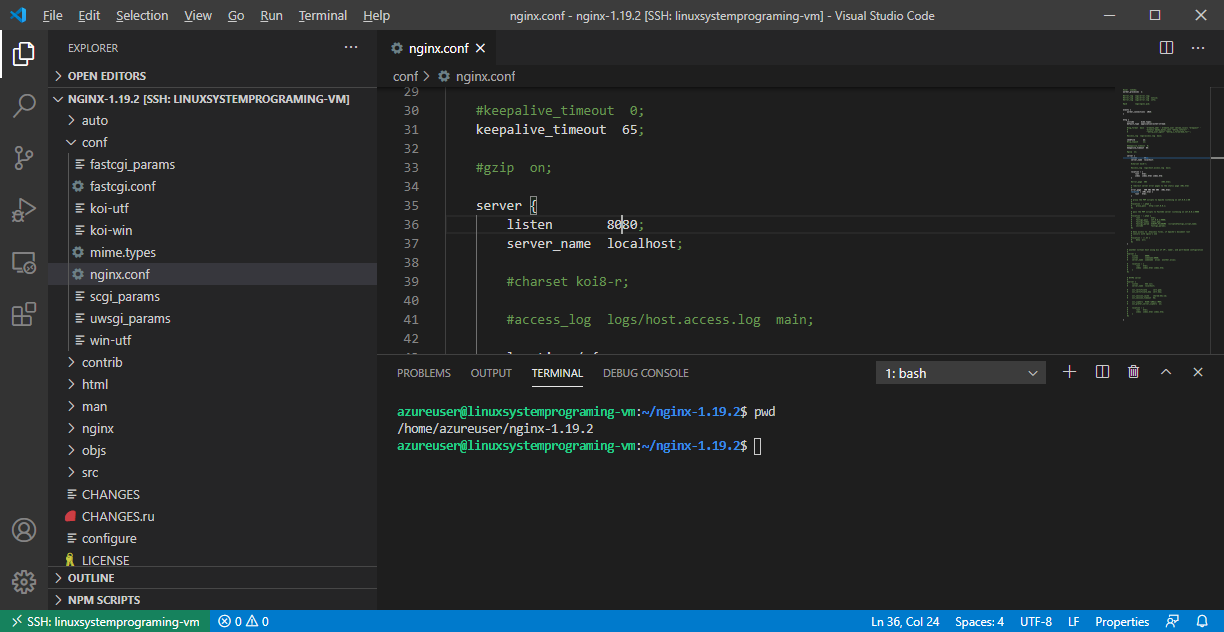
Visual Studio Code の Fileメニューから「Open Folder...」を選択して、nginxのディレクトリ(/home/azureuser/nginx-1.19.2)を開きます。IntelliSense が使えるようになっていると思います。
あと、今回の開発は azureuser で実施するため、nginxのリッスンポートを8080などに変更しておきます。conf/nginx.conf の 36行目あたりのポート設定を 8080 に変更します。(もし、make installしている場合は、nginx/conf/nginx.conf も変更しておいてください)
5.3. nginx のビルド方法を設定する
Terminalメニューの「Configure Default Build Task...」を選択した後に、「C/C++:gcc build active file」を選択します。
{
	"version": "2.0.0",
	"tasks": [
		{
			"type": "shell",
			"label": "C/C++: gcc build active file",
			"command": "/usr/bin/make",
			"args": [
				"install"
			],
			"options": {
				"cwd": "${workspaceFolder}"
			},
			"problemMatcher": [
				"$gcc"
			],
			"group": {
				"kind": "build",
				"isDefault": true
			}
		}
	]
}
Terminalメニューの「Run Build Task...」からビルドできることを確認してください。ビルド後、nginx が /home/azureuser/nginx-1.19.2/nginx にインストールされます。
5.4. nginx のデバッグ方法を設定する
/home/azureuser/nginx-1.19.2/src/core/nginx.c を選択した後に、Terminalメニューから「Add Configuration...」を選択し、「C++(GDB/LLDB)」を選択し、「gcc - Build and debug active file」を選択してデバッグ方法を設定します。nginx はデーモンで動かさないようにオプションを設定しています。あと、stopAtEntry を true にして、実行時にステップ実行できるように設定しています。
{
    // Use IntelliSense to learn about possible attributes.
    // Hover to view descriptions of existing attributes.
    // For more information, visit: https://go.microsoft.com/fwlink/?linkid=830387
    "version": "0.2.0",
    "configurations": [
        {
            "name": "gcc - Build and debug active file",
            "type": "cppdbg",
            "request": "launch",
            "program": "${workspaceFolder}/nginx/sbin/nginx",
            "args": ["-g", "daemon off;"],
            "stopAtEntry": true,
            "cwd": "${workspaceFolder}",
            "environment": [],
            "externalConsole": false,
            "MIMode": "gdb",
            "setupCommands": [
                {
                    "description": "Enable pretty-printing for gdb",
                    "text": "-enable-pretty-printing",
                    "ignoreFailures": true
                }
            ],
            "preLaunchTask": "C/C++: gcc build active file",
            "miDebuggerPath": "/usr/bin/gdb"
        }
    ]
}
5.5. nginx の動作を確認する
デバッグ実行する前に、Azure Virtual Machine の Inbound security rule で 8080ポートが許可されていることを確認してください。
Terminalから、nginx をインストールして実行してみます。
cd ~/nginx-1.19.2/
make install
./nginx/sbin/nginx -g "daemon off;"
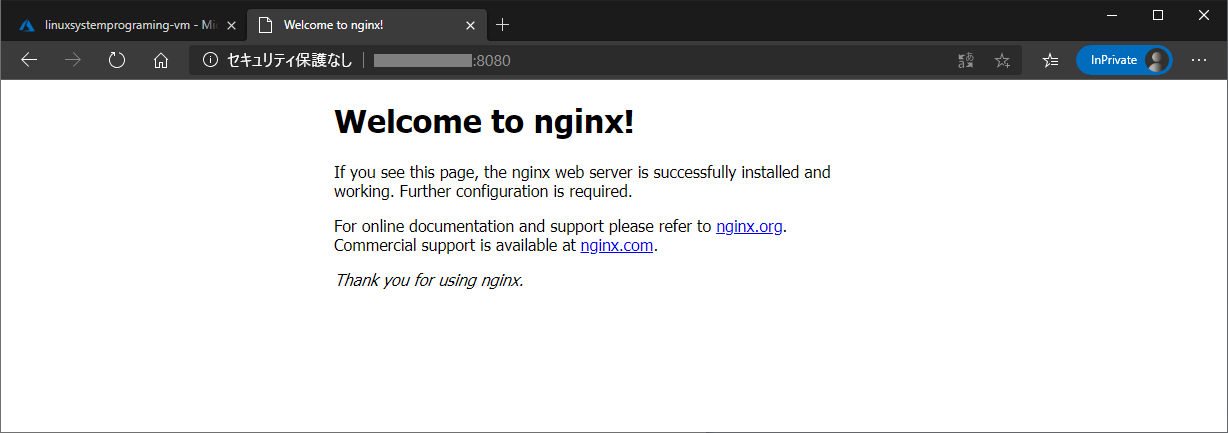
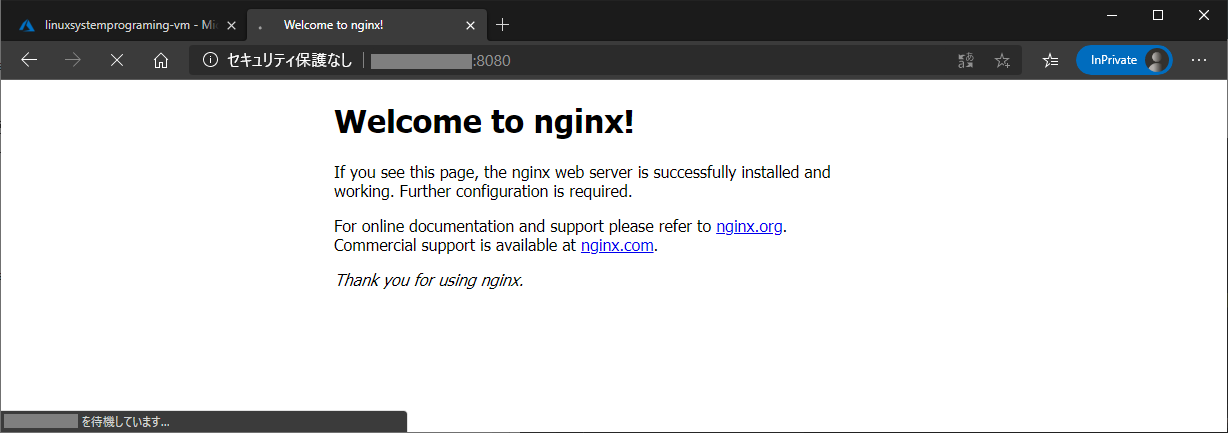
Webブラウザで、Azure Virtual Machine の パブリックIPアドレス 8080ポートにアクセスして nginx が動いていることを確認します。確認したら Ctl-c で終了してください。
5.6. nginx をリモートデバッグする
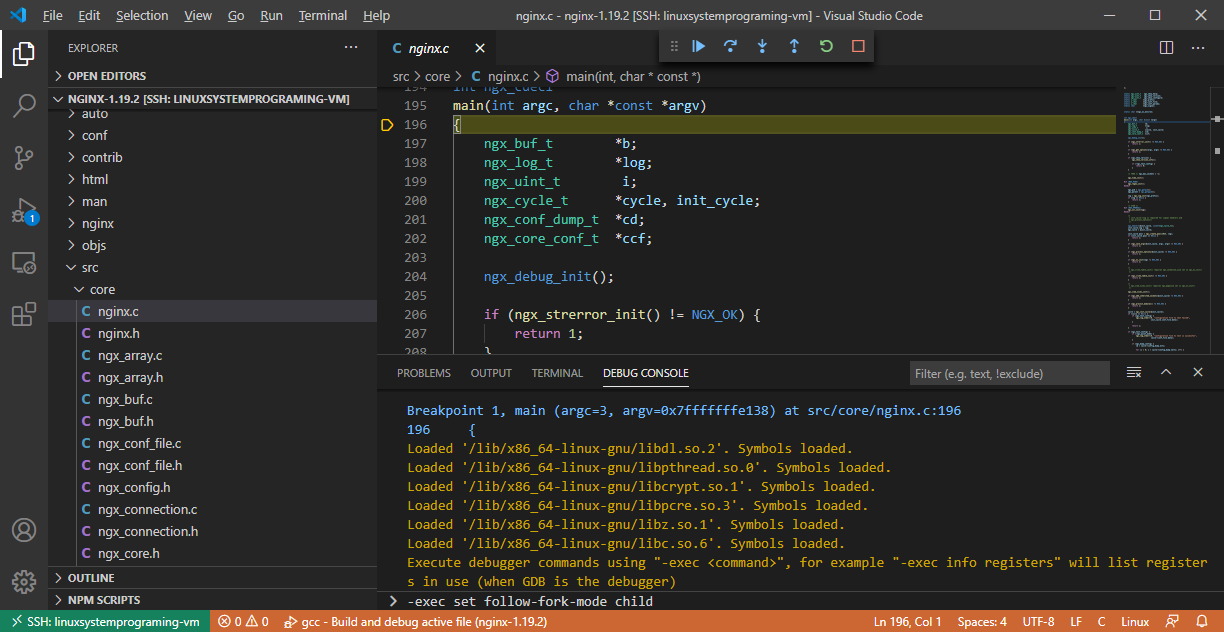
/home/azureuser/nginx-1.19.2/src/core/nginx.c を選択した状態で、F5を押すか、Runメニューから「Start Debugging」を選択して、nginx をデバッグ実行します。
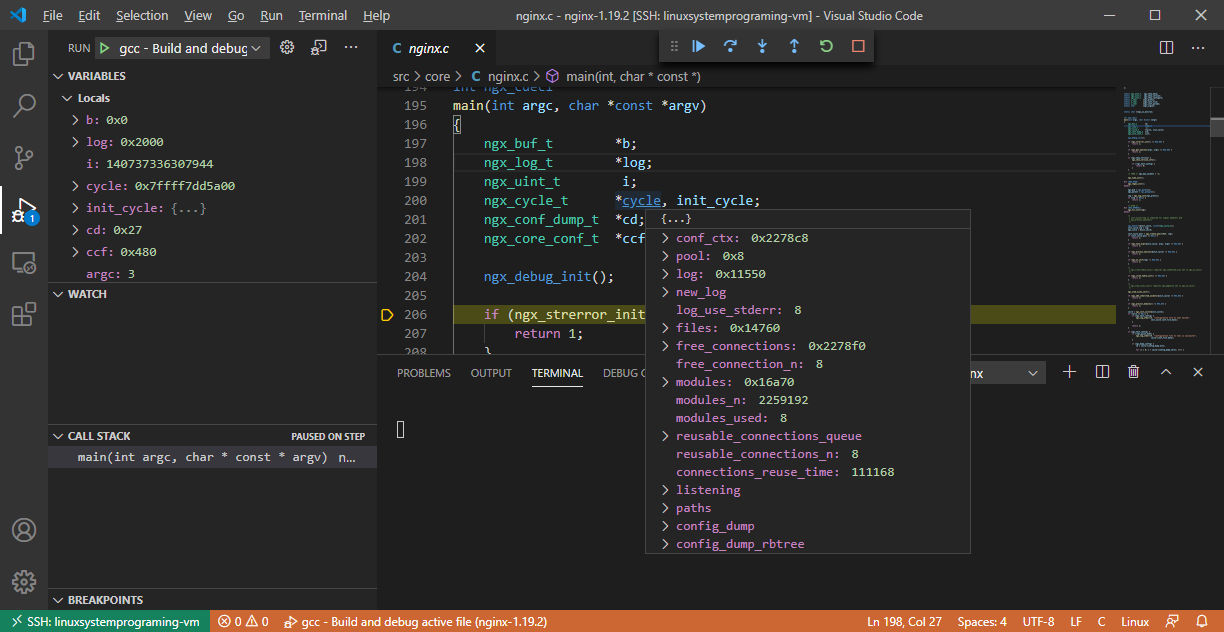
デバッグできますね!
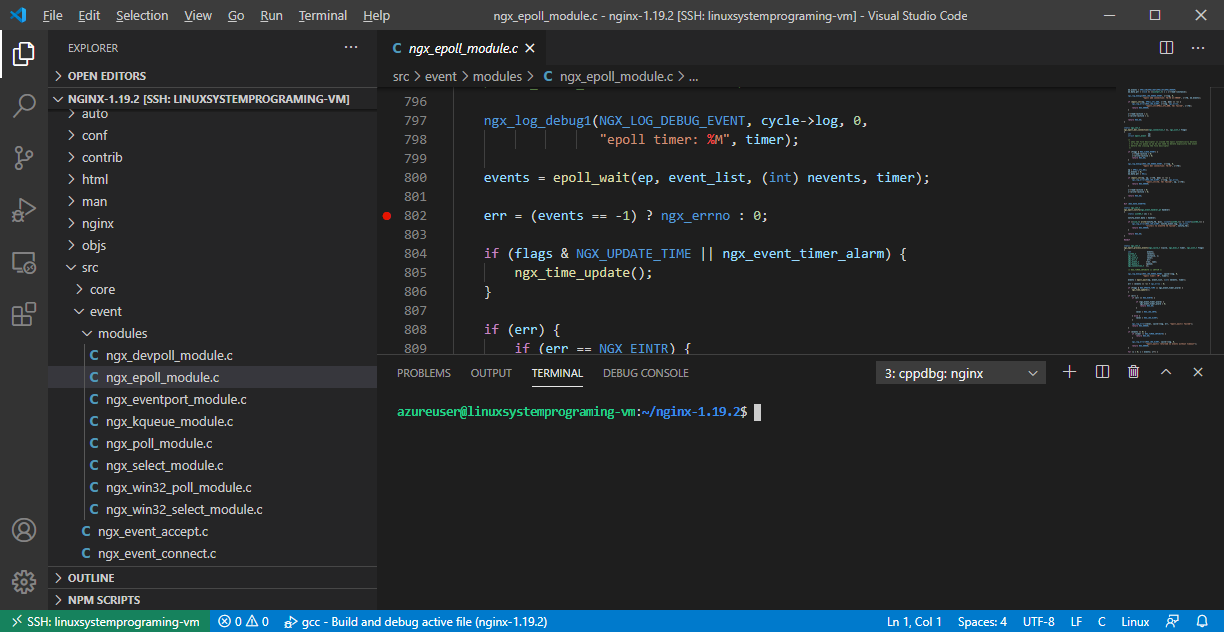
試しに、Webブラウザからリクエストを待っている直後の箇所にブレイクポイントを設定してみます。/home/azureuser/nginx-1.19.2/src/event/modules/ngx_epoll_module.c の 802行目あたりです。
800:    events = epoll_wait(ep, event_list, (int) nevents, timer);
801:
802:    err = (events == -1) ? ngx_errno : 0;
ここは nginx 起動後にworkerプロセス(子プロセス)として動く箇所なので、forkされる前にgdbで子プロセスにアタッチするように設定します。Visual Studio Code デバッグ実行中の DEBUG CONSOLEの一番下に gdb のコマンドを入力します。
-exec set follow-fork-mode child
あと、現在の状態を確認する場合は以下のようになります。
-exec show follow-fork-mode
gdbに設定したら、「Continue」(再生のような三角形のアイコン)で実行を続けます。
再度、Azure Virtual Machine の パブリックIPアドレス 8080ポートにアクセスすると、Webブラウザは待機状態になります。これは、Visual Studio Code(gdb) で設定したブレイクポイントで止まっているからです。
Visual Studio Codeで、epoll_wait から戻ってきた値を確認すると、1が入ってますね。ステップ実行もできます。素晴らしい!
(man epoll_wait : https://linuxjm.osdn.jp/html/LDP_man-pages/man2/epoll_wait.2.html)

あと、デバック開始時から follow-fork-mode を child にしたい場合は、以下のように setupCommands を設定しておいてください。
{
    // Use IntelliSense to learn about possible attributes.
    // Hover to view descriptions of existing attributes.
    // For more information, visit: https://go.microsoft.com/fwlink/?linkid=830387
    "version": "0.2.0",
    "configurations": [
        {
            "name": "gcc - Build and debug active file",
            "type": "cppdbg",
            "request": "launch",
            "program": "${workspaceFolder}/nginx/sbin/nginx",
            "args": ["-g", "daemon off;"],
            "stopAtEntry": true,
            "cwd": "${workspaceFolder}",
            "environment": [],
            "externalConsole": false,
            "MIMode": "gdb",
            "setupCommands": [
                {
                    "description": "Enable pretty-printing for gdb",
                    "text": "-enable-pretty-printing",
                    "ignoreFailures": true
                },
                {
                    "description": "Set follow-fork-mode to child",
                    "text": "set follow-fork-mode child",
                    "ignoreFailures": true
                }
            ],
            "preLaunchTask": "C/C++: gcc build active file",
            "miDebuggerPath": "/usr/bin/gdb"
        }
    ]
}
6. さいごに
Visual Studio Code と Azure Virtual Machine で Linux System Programing がより身近になりましたね。クラウドで動いている Linux をリモートデバッグできるなんて夢のようです。
サーバを書いてみたい人は是非チャレンジしてみてください。
ところで、TCP/UDP のサーバプログラム開発に関する書籍はたくさん出ておりますがエラー処理が足りなかったりする書籍が多いので、今から勉強する方のために、お勧めの書籍を紹介しておきます。
- UNIXネットワークプログラミング〈Vol.1〉 W.Richard Stevens (UNIXの教科書的な本ですが、中古しかないですね…。)
https://amzn.to/335xUel
UNIXの基本的なコードを知った上で、Linuxでサーバで大量のクライアントを相手にする場合は、以下の書籍がお勧めです。
- Linuxプログラミングインタフェース Michael Kerrisk https://amzn.to/3j6ITKp
- Linuxシステムプログラミング Robert Love https://amzn.to/2GilXsM
今回の記事のために nginx のコードを少し読みましたが、奇麗なのですごく勉強になりますね。
ではー。