日本語
こんばんわ!
Advent Calendar 2024に参加してまして、10日目の記事を書いていこうと思います。
題材は「オンライン決済サービスPAY.JPを使ってみた情報をシェアしよう! by PAY Advent Calendar 2024」ということで、PHP言語でPay.JPを使用して決済を試してみようと思います!
PAY.JPとは
PAY.JPは、シンプルなAPI設計と日本市場に特化した機能で、開発者から高く評価されるオンライン決済サービスです。ECサイト、サブスクリプション、イベント管理など、幅広い用途で利用可能となっています!
PAY.JPを使ってみる
ログインすると下記のような画面が表示されます。
ダッシュボードでいくら売り上げがあったか等見ることができます!
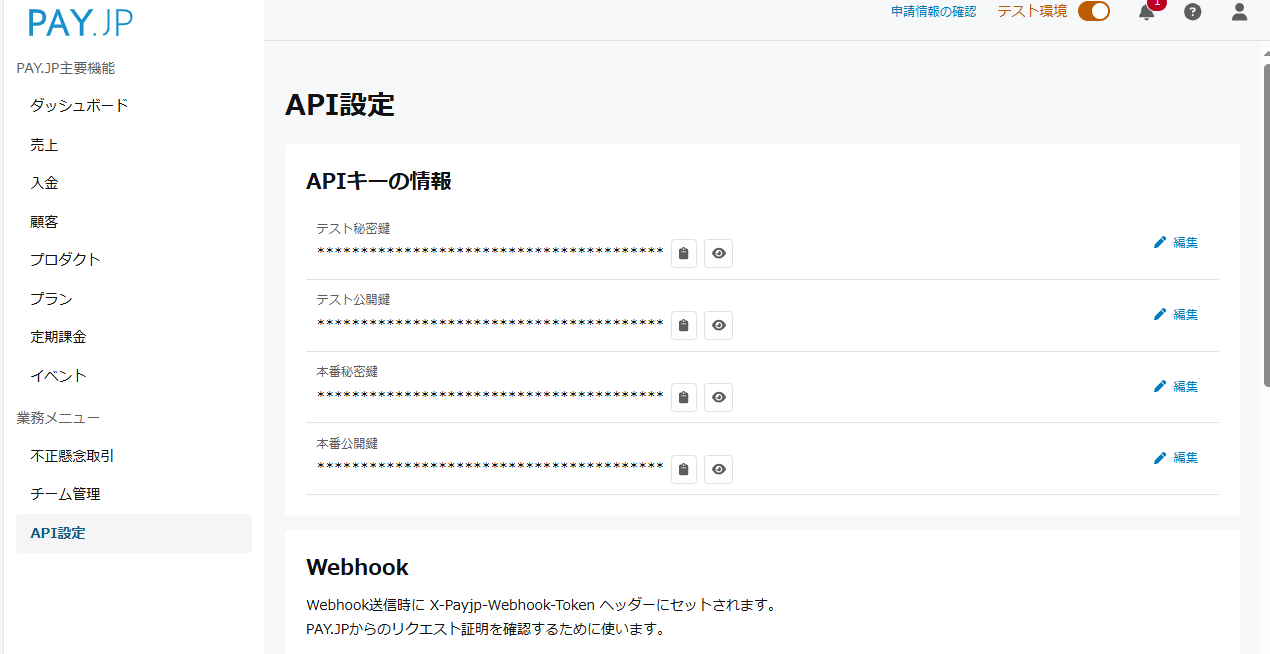
APIを使用するときは下記の情報を使用するみたいです!
これを基にPHPで組み込んでいきましょう!
使うためのPHP環境
今回はDockerで、「payjp/payjp-php」をモジュールが入っているPHP環境を構築して試してみます!ここまでは題材から外れるのでスキップします!興味ある方はコメントください♪
決済をする処理を書いていく
カードの情報を入力する画面(input.php)と登録した後にどんな結果を出すかを表示する画面(complete.php)の2画面を作成していこうと思います。
カードの情報を入力する画面(input.php)は下記のように書きました!
<!DOCTYPE html>
<html lang="ja">
<head>
    <meta charset="UTF-8">
    <meta name="viewport" content="width=device-width, initial-scale=1.0">
    <title>Pay.JP - 入力画面</title>
    <script src="https://js.pay.jp/v2/pay.js"></script>
    <style>
        #card-element {
            border: 1px solid #ccc;
            padding: 10px;
            margin-bottom: 10px;
            border-radius: 4px;
        }
    </style>
</head>
<body>
    <h1>カード情報入力</h1>
    <form id="payment-form" method="post" action="complete.php">
        <div id="card-element">
        </div>
        <input type="hidden" name="card_token" id="card-token">
        <button type="submit">支払う</button>
    </form>

    <script>
        document.addEventListener('DOMContentLoaded', function () {
            const payjp = Payjp(''); // 公開鍵を使用
            const elements = payjp.elements();
            const card = elements.create('card');
            card.mount('#card-element');

            // フォーム送信時の処理
            const form = document.getElementById('payment-form');
            form.addEventListener('submit', async function (e) {
                e.preventDefault();

                // カード情報をトークン化
                const result = await payjp.createToken(card);

                if (result.error) {
                    // トークン化失敗時の処理
                    console.error(result.error.message);
                    alert('カード情報のトークン化に失敗しました: ' + result.error.message);
                } else {
                    // トークン化成功時の処理
                    const token = result.id;
                    document.getElementById('card-token').value = token; // トークンを隠しフィールドに設定
                    form.submit(); // サーバーに送信
                }
            });
        });
    </script>
</body>
</html>
登録した後にどんな結果を出すかを表示する画面(complete.php)は下記のように書きました。
<?php
require 'vendor/autoload.php';

use Payjp\Payjp;

if ($_SERVER['REQUEST_METHOD'] === 'POST' && isset($_POST['card_token'])) {
    $apiKey = ''; // Pay.JPの秘密鍵
    $amount = 1000; // 課金金額
    $currency = 'jpy'; // 通貨
    $cardToken = $_POST['card_token']; // フロントエンドから送信されたカードトークン

    function chargeCreditCard($apiKey, $amount, $currency, $cardToken) {
        Payjp::setApiKey($apiKey);

        try {
            $charge = \Payjp\Charge::create([
                "amount" => $amount,
                "currency" => $currency,
                "card" => $cardToken,
                "description" => "Sample Charge"
            ]);
            return $charge; // 成功時はオブジェクトを返却
        } catch (\Payjp\Error\Base $e) {
            $error_body = $e->getJsonBody();
            $error_message = $error_body['error']['message'];
            return "Error: " . $error_message; // 失敗時はエラーメッセージを返却
        }
    }

    $result = chargeCreditCard($apiKey, $amount, $currency, $cardToken);

    if (is_object($result) && $result->paid) {
        // 課金成功時の処理
        echo "<p>課金成功!詳細:</p>";
        echo "<pre>";
        print_r($result);
        echo "</pre>";
    } else {
        // 課金失敗時の処理
        echo "<p>課金失敗: " . htmlspecialchars($result, ENT_QUOTES, 'UTF-8') . "</p>";
    }
} else {
    echo "<p>不正なリクエストです。</p>";
}
?>
動作確認
では実際動作を見てみましょう
input.php画面は下記のようになってます!
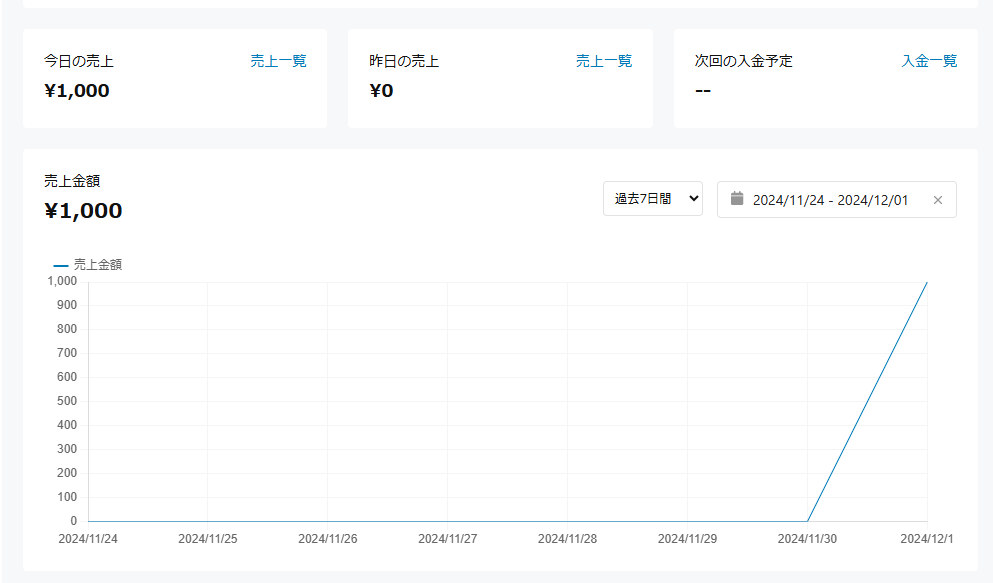
しっかり売上が反映されてますね!
このような形で決済を試してみました♪
とても面白く、事業ではもちろん、ポートフォリオの作成を考えている人にとっても大きな助けとなるサービスだと思います!
興味ある方は触ってみてください~
ここまで読んでいただきありがとうございました!
ENGLISH
Good evening! I am participating in Advent Calendar 2024, and I would like to write the fourth article of this series. The theme is "Share your experience of implementing payment systems or information about payment services (credit card, QR code, anything goes!) by PAY Advent Calendar 2024." So, I decided to try out payment processing using Pay.JP with PHP!
What is PAY.JP?
PAY.JP is an online payment service highly praised by developers for its simple API design and features tailored to the Japanese market. It can be used for various purposes, including e-commerce sites, subscriptions, and event management!
Trying PAY.JP
When you log in, you'll see a screen like this. You can check the sales amount on the dashboard!

When using the API, you will use the following information!

Let's incorporate this into PHP!
PHP Environment for Usage
This time, we will build a PHP environment with the "payjp/payjp-php" module using Docker! We'll skip this part as it strays from the main topic. If you're interested, feel free to leave a comment♪
Writing the Payment Processing
We will create two screens: one for entering card information (input.php) and another for displaying the results after registration (complete.php).
The screen for entering card information (input.php) is written as follows:
<!DOCTYPE html>
<html lang="ja">
<head>
    <meta charset="UTF-8">
    <meta name="viewport" content="width=device-width, initial-scale=1.0">
    <title>Pay.JP - 入力画面</title>
    <script src="https://js.pay.jp/v2/pay.js"></script>
    <style>
        #card-element {
            border: 1px solid #ccc;
            padding: 10px;
            margin-bottom: 10px;
            border-radius: 4px;
        }
    </style>
</head>
<body>
    <h1>カード情報入力</h1>
    <form id="payment-form" method="post" action="complete.php">
        <div id="card-element">
        </div>
        <input type="hidden" name="card_token" id="card-token">
        <button type="submit">支払う</button>
    </form>

    <script>
        document.addEventListener('DOMContentLoaded', function () {
            const payjp = Payjp(''); // 公開鍵を使用
            const elements = payjp.elements();
            const card = elements.create('card');
            card.mount('#card-element');

            // フォーム送信時の処理
            const form = document.getElementById('payment-form');
            form.addEventListener('submit', async function (e) {
                e.preventDefault();

                // カード情報をトークン化
                const result = await payjp.createToken(card);

                if (result.error) {
                    // トークン化失敗時の処理
                    console.error(result.error.message);
                    alert('カード情報のトークン化に失敗しました: ' + result.error.message);
                } else {
                    // トークン化成功時の処理
                    const token = result.id;
                    document.getElementById('card-token').value = token; // トークンを隠しフィールドに設定
                    form.submit(); // サーバーに送信
                }
            });
        });
    </script>
</body>
</html>
The screen for displaying the result after registration (complete.php) is written as follows:
<?php
require 'vendor/autoload.php';

use Payjp\Payjp;

if ($_SERVER['REQUEST_METHOD'] === 'POST' && isset($_POST['card_token'])) {
    $apiKey = ''; // Pay.JPの秘密鍵
    $amount = 1000; // 課金金額
    $currency = 'jpy'; // 通貨
    $cardToken = $_POST['card_token']; // フロントエンドから送信されたカードトークン

    function chargeCreditCard($apiKey, $amount, $currency, $cardToken) {
        Payjp::setApiKey($apiKey);

        try {
            $charge = \Payjp\Charge::create([
                "amount" => $amount,
                "currency" => $currency,
                "card" => $cardToken,
                "description" => "Sample Charge"
            ]);
            return $charge; // 成功時はオブジェクトを返却
        } catch (\Payjp\Error\Base $e) {
            $error_body = $e->getJsonBody();
            $error_message = $error_body['error']['message'];
            return "Error: " . $error_message; // 失敗時はエラーメッセージを返却
        }
    }

    $result = chargeCreditCard($apiKey, $amount, $currency, $cardToken);

    if (is_object($result) && $result->paid) {
        // 課金成功時の処理
        echo "<p>課金成功!詳細:</p>";
        echo "<pre>";
        print_r($result);
        echo "</pre>";
    } else {
        // 課金失敗時の処理
        echo "<p>課金失敗: " . htmlspecialchars($result, ENT_QUOTES, 'UTF-8') . "</p>";
    }
} else {
    echo "<p>不正なリクエストです。</p>";
}
?>
Checking the Operation
Let's see it in action. The input.phpscreen looks like this!

Enter the information here and press "Pay."

Success! Let's take a look at the PAY.JP screen.

The sales are properly reflected!
I tried payment processing like this. It was very interesting, and I believe this service will be a great help for those who are considering creating portfolios, in addition to business use! If you're interested, give it a try!
Thank you for reading this far!


