今日の目標
爆速でtag機能を搭載したミニアプリを制作してみる
まずは基本機能のみのアプリを作り 追加実装を意識した作りをする
環境
Ruby 2.5.1
Rails 5.2.4
docker 19.03.8
今回はdockerで環境構築します。
dockerなんて 訳わからんと言う人はdockerの構築部分は読み飛ばしてください
githubでリポジトリも作成します
githubなんて知らんわ って人も読み飛ばしてください
実装内容
タスク作成時・更新時に、事前に作成したラベルを複数付けられるようにする。
タスクに関連付けられているラベルを表示できるようにする。
タスクをラベルで絞り込みできるようにする。
dcocker構築
まずディレクトリを作成
$ mkdir todo-tag-app
$ cd todo-tag-app
githubで新しいレポジトリを作成
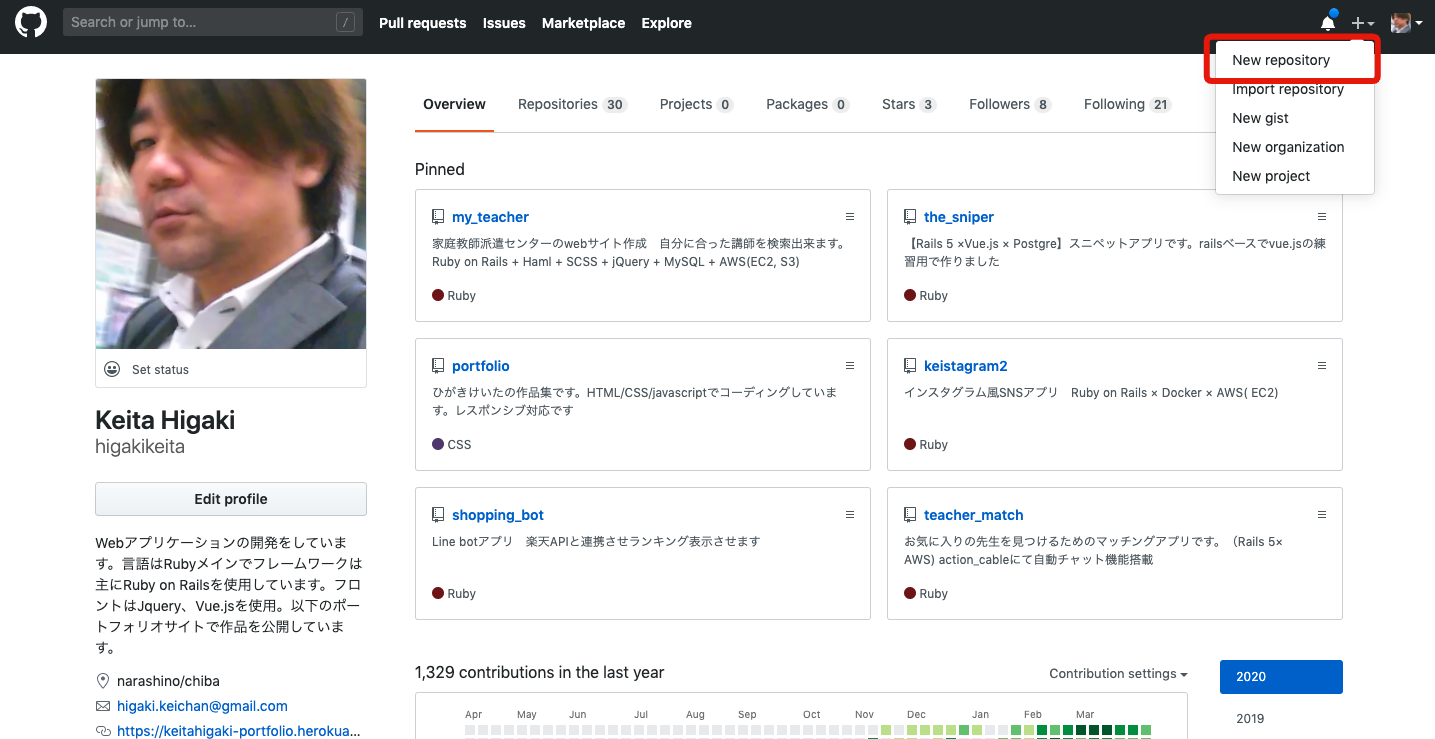
名前は適当で良いが今回はtodo-tag-appとする
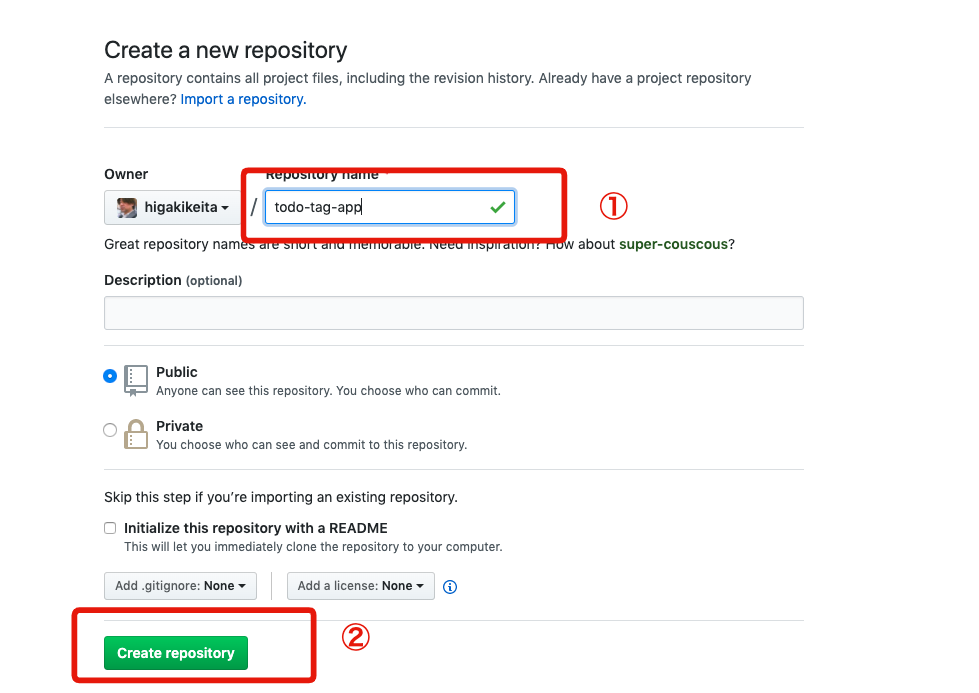
Create repositoryすると
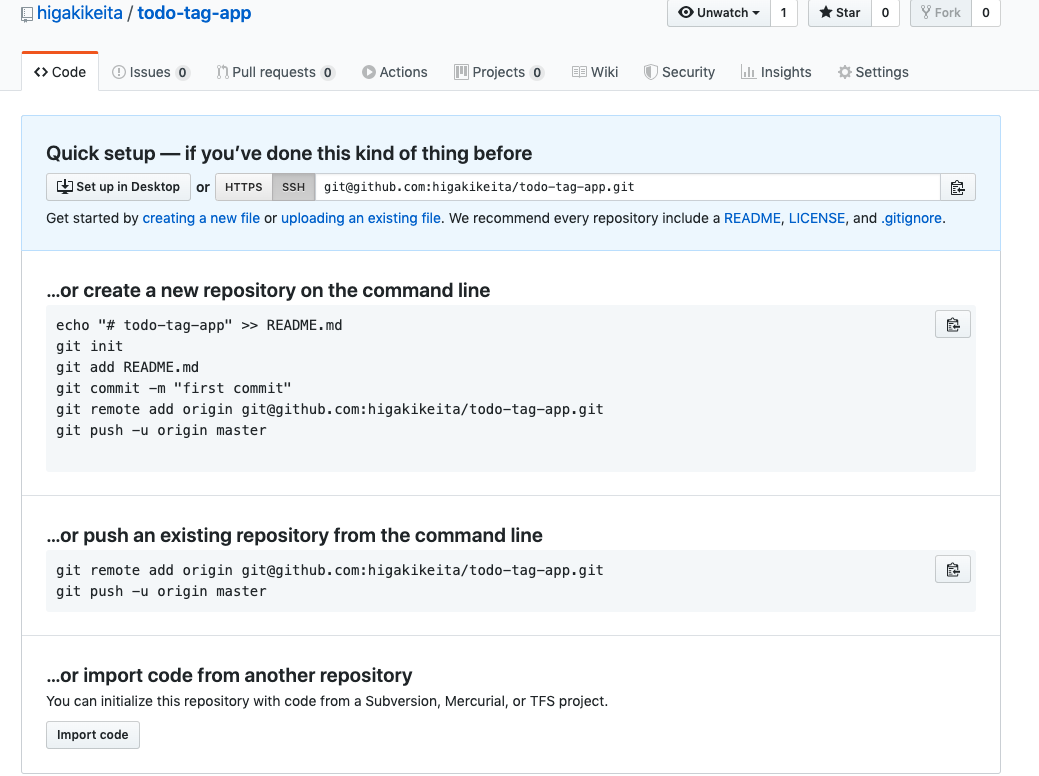
ガイダンスが出てくるので この通りにコマンド打てばgit連携できます
$ git init
今回は機能拡張するかもしれないので ReadMeも作っておきましょう
$ echo "# todo-tag-app" >> README.md

$ git add README.md
結果にcommit
$ git commit -m "first commit"
ファイルをリポジトリに
$ git remote add origin git@github.com:higakikeita/todo-tag-app.git
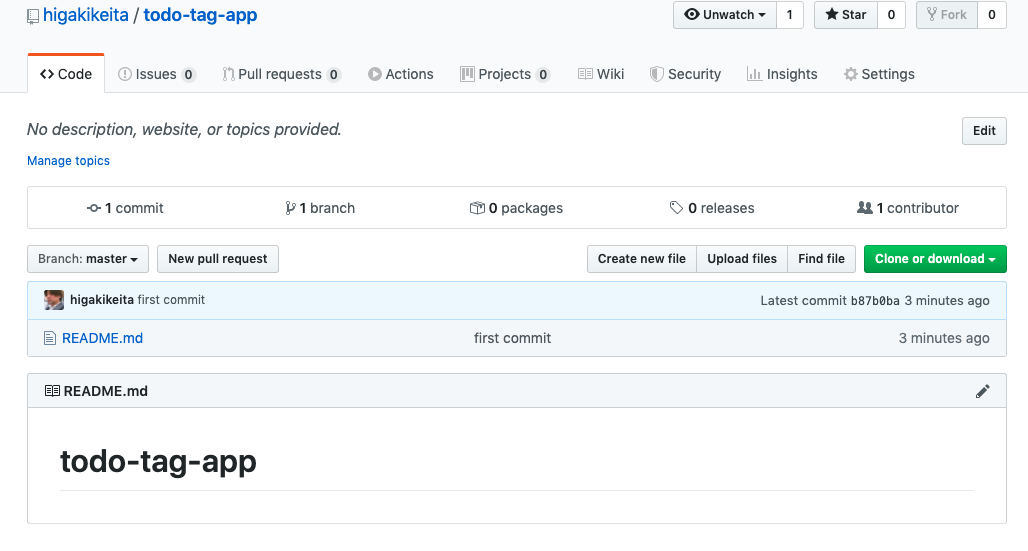
$ git push -u origin master
無事 Githubと連携できました
dockerの構築
docker-file作成
$ touch Dockerfile
VscodeでDockerfileが作られていることを確認

dockerfileを以下のように編集
FROM ruby:2.5.1

# 必要なパッケージのインストール(基本的に必要になってくるものだと思うので削らないこと)
RUN apt-get update -qq && \
    apt-get install -y build-essential \
                       libpq-dev \
                       nodejs

# 作業ディレクトリの作成、設定
RUN mkdir /app_name

# 作業ディレクトリ名をAPP_ROOTに割り当てて、以下$APP_ROOTで参照

ENV APP_ROOT /app_name
WORKDIR $APP_ROOT

# ホスト側(ローカル)のGemfileを追加する(ローカルのGemfileは【3】で作成)
ADD ./Gemfile $APP_ROOT/Gemfile
ADD ./Gemfile.lock $APP_ROOT/Gemfile.lock

# Gemfileのbundle install
RUN bundle install
ADD . $APP_ROOT
結果にcommit
$ git add .
$ git commit -m "Dockerfileの作成"
Gemfileの作成
$ touch Gemfile
source 'https://rubygems.org'
gem 'rails', '5.2.4'
Gemfile.lockの作成
$ touch Gemfile.lock
結果にcommit
$ git add .
$ git commit -m "Gemfileの作成"
docker-compose.ymlの作成
$ touch docker-compose.yml
version: '3'
services:
  db:
    image: mysql:5.7
    environment:
      MYSQL_ROOT_PASSWORD: password
      MYSQL_DATABASE: root
    ports:
      - "3306:3306"

  web:
    build: .
    command: rails s -p 3000 -b '0.0.0.0'
    volumes:
      - .:/app_name
    ports:
      - "3000:3000"
    links:
      - db
結果にcommit
$ git add .
$ git commit -m "docker-compose.yml"
ここまでで アプリケーション作成のためのgithubとdockerの構築はひとまず完了
$ git push
Rails new
$ docker-compose run web rails new . --force --database=mysql --skip-bundle
結果にcommit
$ git add .
$ git commit -m "Rails作成"
database.ymlの編集
default: &default
  adapter: mysql2
  encoding: utf8
  pool: <%= ENV.fetch("RAILS_MAX_THREADS") { 5 } %>
  username: root
  password: password # docker-compose.ymlのMYSQL_ROOT_PASSWORD
  host: db # docker-compose.ymlのservice名
ここまでで一旦 結果にcommit & pushする
$ git add .
$ git commit -m "database.ymlの編集”
$ git push
dockerを起動する
$ docker-compose build # コンテナをビルド

# -dオプションをつけてバックグラウンド実行するとこの後新しいシェルを立ち上げる必要がなくなる
$ docker-compose up # コンテナの一斉起動
dockerのコマンドの基本はこちらでどうぞ
docker-composeコマンドの備忘録
https://qiita.com/tegnike/items/bcdcee0320e11a928d46
DB作成
新しいターミナルを開いて /todo-tag-app で実行
$ docker-compose run web rails db:create
localhost:3000でサーバの起動を確認する
Railsが皆さんを歓迎してくれていますね。
ここまでで環境構築は完了です。いよいよアプリケーションを作っていきます。
爆速でtodoアプリを作成する
それでは 爆速でtodoアプリを作成していきます
まずTaskモデル・コントローラー・ビューをscaffoldで一括生成します。
$ rails generate scaffold task title:string
次にLabelもscaffoldで一括生成してしまいましょう。
$ rails generate scaffold label name:string
結果にcommit
$ git add .
$ git commit -m "タスク、ラベルモデルの作成"
今回は多対多の関連付けを行うので、結合モデル・中間テーブル(交差テーブル)を作りましょう。
$ rails generate model labelling task:references label:references
ここで 一旦 マイグレーションを実行します
$ docker-compose run web rails db:migrate
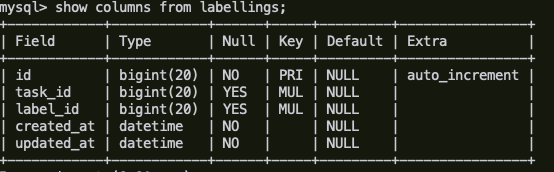
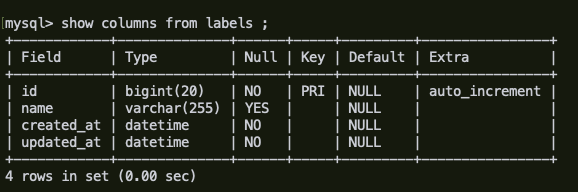
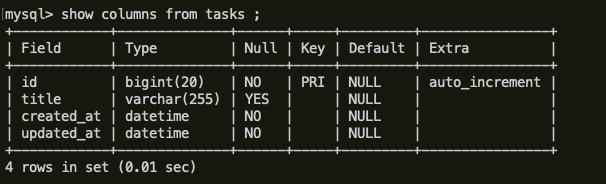
schema.rbが以下のようになっているか確認してください
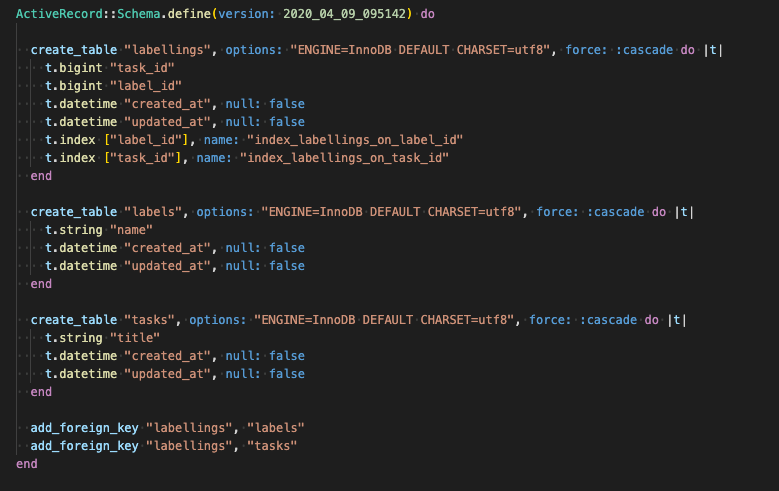
ここまで確認したら 結果にcommit
$ git add .
$ git commit -m "テーブルの作成"
アソシエーション
中間テーブルの作り方はこちらのドキュメント
Active Recordの関連付
TaskモデルとLabelモデルにhas_many :throughを使って、多対多の関連付けを指定します。
class Task < ApplicationRecord
  has_many :labellings, dependent: :destroy
  has_many :labels, through: :labellings
end
class Label < ApplicationRecord
  has_many :labellings, dependent: :destroy
  has_many :tasks, through: :labellings
end
中間テーブルのlabellingモデル
class Labelling < ApplicationRecord
  belongs_to :task
  belongs_to :label
end
ここでまた 結果にcommit
$ git add .
$ git commit -m "アソシエーションの設定"
$ git push
ルーティングの設定
Rails.application.routes.draw do
  root 'tasks#index'
  resources :labels
  resources :tasks

end
ここで一度サーバを再起動し、ビューを確認します。
$ docker-compose up --build

タスク作成・更新時にラベルを関連付けられるようにする
app/views/tasks/_form.html.erbのform_withヘルパーの中に、ラベルを選択できるチェックボックスを作ります。
<%= form.collection_check_boxes(:label_ids, Label.all, :id, :name) %>
<%= form_with(model: task, local: true) do |form| %>
  <% if task.errors.any? %>
    <div id="error_explanation">
      <h2><%= pluralize(task.errors.count, "error") %> prohibited this task from being saved:</h2>

      <ul>
      <% task.errors.full_messages.each do |message| %>
        <li><%= message %></li>
      <% end %>
      </ul>
    </div>
  <% end %>

  <div class="field">
    <%= form.label :title %>
    <%= form.text_field :title %>
  </div>
 ここに追加
  <div class="field">
      <%= form.collection_check_boxes(:label_ids, Label.all, :id, :name) %>
    </div>
  <div class="actions">
    <%= form.submit %>
  </div>
<% end %>
次にチェックボックスで選択したラベルをtasks_controller.rbのStrong Parametersで受け取れるようにしましょう。
ラベルを配列で送っているので、書き方が少し複雑になります。
private

def task_params
  params.require(:task).permit(:title, { label_ids: [] })
end
タスクに関連づけられているラベルを表示できるようにする
<% @tasks.each do |task| %>
      <tr>
        <td><%= task.title %></td>
        <td><%= link_to 'Show', task %></td>
        <td><%= link_to 'Edit', edit_task_path(task) %></td>
        <td><%= link_to 'Destroy', task, method: :delete, data: { confirm: 'Are you sure?' } %></td>
        <%# ここから追加 %>
         <td>
            <% task.labels.each do |label| %>
              <%= label.name %>
            <% end %>
          </td>
        <%# ここまで編集 %>
      </tr>
    <% end %>
まめに結果にcommitしておきましょう
$ git add .
$ git commit -m "ラベル表示の実装"
ラベルでタスクを絞り込めるようにする
まずはタスク一覧画面にセレクトボックスを作成して、絞り込みたいラベルのidをtasks_controllerのindexアクションに渡せるようにしましょう。
<%= form_with url: tasks_path, method: :get, local: true do |form| %>
  <%= form.select("label_id", Label.pluck(:name, :id), { include_blank: true }) %>
  <%= form.submit 'Search', name: nil %>
<% end %>
controller側
def index
 @tasks =Task.all
 @tasks =@tasks.joins(:labels).where(labels:{id:params[:label_id]})if params[:label_id].present?
end
@tasks.joins(:labels)でlabelsテーブルを結合します。
そして、where(labels: { id: params[:label_id] })で、先ほど設定したセレクトボックスから送られてきたparams[:label_id]と、idが一致するラベルを持つタスクを取得できます。
結果にcommit
$ git add .
$ git commit -m "ラベル絞り込みの実装"
$ git push
ページ遷移の確認
ラベル登録ページとタスク登録ページが今のままだと遷移できないので link_to で遷移できるようにします。
pathを確認
$ rails routes
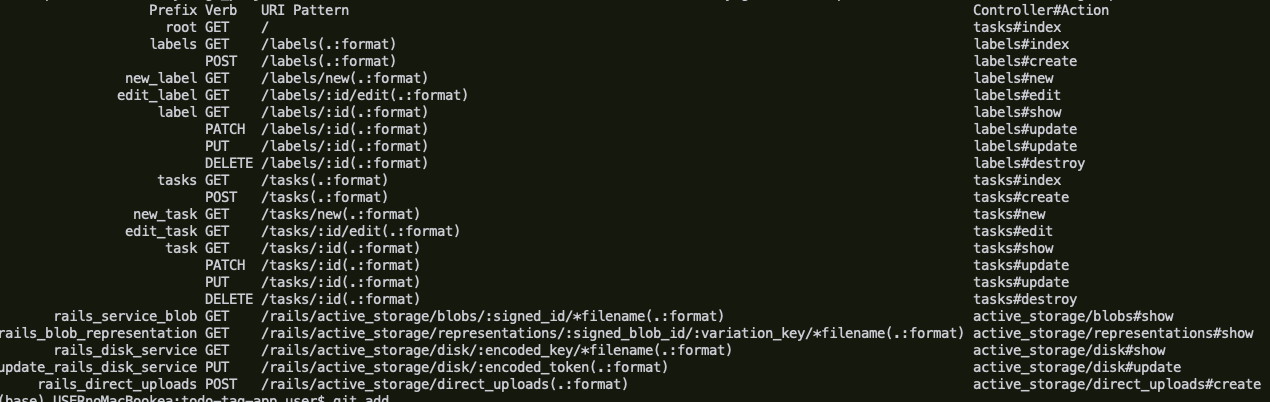
タスク一覧ページは tasks_path ラベル一覧ページは labels_path
<p id="notice"><%= notice %></p>

<h1>Tasks</h1>

<table>
  <thead>
    <tr>
      <th>Title</th>
      <th colspan="3"></th>
    </tr>
  </thead>
      <%= form_with url: tasks_path, method: :get, local: true do |form| %>
      <%= form.select("label_id", Label.pluck(:name, :id), { include_blank: true }) %>
      <%= form.submit 'Search', name: nil %>
    <% end %>

  <tbody>
    <% @tasks.each do |task| %>
      <tr>
        <td><%= task.title %></td>
        <td><%= link_to 'Show', task %></td>
        <td><%= link_to 'Edit', edit_task_path(task) %></td>
        <td><%= link_to 'Destroy', task, method: :delete, data: { confirm: 'Are you sure?' } %></td>
        <%# ここから追加 %>
         <td>
            <% task.labels.each do |label| %>
              <%= label.name %>
            <% end %>
          </td>
        <%# ここまで編集 %>
      </tr>
    <% end %>
  </tbody>
</table>

<br>

<%= link_to 'New Task', new_task_path %>
<%# この行を追記 %>
<%= link_to "ラベルを登録する",labels_path%>
<%= link_to "ラベルを登録する",labels_path%>を追記します
<p id="notice"><%= notice %></p>

<h1>Labels</h1>

<table>
  <thead>
    <tr>
      <th>Name</th>
      <th colspan="3"></th>
    </tr>
  </thead>

  <tbody>
    <% @labels.each do |label| %>
      <tr>
        <td><%= label.name %></td>
        <td><%= link_to 'Show', label %></td>
        <td><%= link_to 'Edit', edit_label_path(label) %></td>
        <td><%= link_to 'Destroy', label, method: :delete, data: { confirm: 'Are you sure?' } %></td>
      </tr>
    <% end %>
  </tbody>
</table>

<br>

<%= link_to 'New Label', new_label_path %>
<%# ここから追記 %>
<%= link_to "タスクを登録する",tasks_path%>
最後に結果にcommit しておきましょう
$ git add .
$ git commit -m "画面遷移の調整"
$ git push
完成品
基本機能は以下です
タスク作成時・更新時に、事前に作成したラベルを複数付けられる
タスクに関連付けられているラベルを表示できる
タスクをラベルで絞り込みできる
ここからログイン機能を付けたり、カレンダー機能と連携させたり、マークダウン を導入したり いろいろ出来るかと思います。
ビューもいじると結構見栄えのするアプリになるんじゃないかと思います。