0.始めに
この記事では、mmを指定して移動するプログラムと、角度を指定して回転するプログラムを紹介します。
コードについてはこちらをご覧下さい。
また、この記事ではライントレースについて解説していませんので、ライントレースについては以下をご覧下さい。
1.タイヤについて
SPIKEPRIMEの基本セットと、拡張セットには、4種類のタイヤが含まれています。この記事では、タイヤとタイヤの間の幅と、タイヤの円周を使用するので、以下に円周の表を貼り付けておきます。
| パーツ番号 | 画像 リンク | 平均直径(mm) | 平均円周(mm) |
|---|---|---|---|
| 61254 | https://rebrickable.com/parts/61254/tyre-offset-tread-with-center-band-23-x-7/ | 23 | 72.26 |
| 2815 | https://rebrickable.com/parts/2815/technic-wedge-belt-wheel-tire/ | 28.5 | 89.54 |
| 39367pat0001 | https://rebrickable.com/parts/39367pat0001/wheel-57-x-14-with-4-black-spokes-with-2-holes-and-medium-azure-integral-tire/ | 56.5 | 177.46 |
| 49295pat0001 | https://rebrickable.com/parts/49295pat0001/wheel-88-x-14-with-4-black-spokes-with-4-holes-4-inserts-and-medium-azure-integral-tire/ | 87.5 | 274.89 |
画像(上から順に表とおなじ)
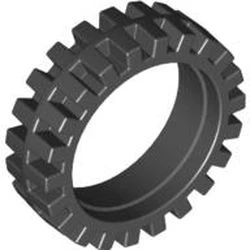


画像は全てrebrickableより
2.指定した回転数モーターを回転させる定義
void 関数名(char ポート, int 回転数);
void motorport_run(pup_motor_t *motor, int angle);
void motorport_run(pup_motor_t *motor, int angle){
    int start = pup_motor_get_count(motor);
    int target = start + angle;

    if(angle > 0){
        pup_motor_set_speed(motor, 500);
        while(pup_motor_get_count(motor) < target) dly_tsk(10);
    }else{
        pup_motor_set_speed(motor, -500);
        while(pup_motor_get_count(motor) > target) dly_tsk(10);
    }

    pup_motor_stop(motor);
}
使用例
motorport_run(motorA, 360);   // 正回転
motorport_run(motorA, -360);  // 逆回転
定義は、void Mainの前に置きます!
3.円周から、指定した距離進む定義
次に、円周から指定した距離すすむ定義を作りました。
motor_millimeter_run(ポート,円周,距離)
このように使用します。
次に実際の文です。
void motor_millimeter_run(pup_motor_t *motor, int circumference, float distance){
    motorport_run(motor, (distance * 360) / circumference);
}
例文
motor_millimeter_run(motorA, 177.46, 100);
Aポートのモーターに3番目のタイヤをつけると、100mm(10cm)進みます。
直進は、Aと、Bを同時に動かすため、直進用のプログラムも書きます。
4.距離を指定して直進
motor_millimeter_runを分ける
まず、同時にモーターを動かす直進では既存の
motor_millimeter_run(char port, int circumference, float distance)では、同時に動かし初めて、同時に止めることが、dry_tskのブロッキングにより、不可能なので、二つのコードに分けます。
void motorport_start(pup_motor_t *motor, float angle){
    pup_motor_set_speed(motor, angle > 0 ? 500 : -500);
}

void motorport_wait(pup_motor_t *motor, float angle){
    int start = pup_motor_get_count(motor);
    int target = start + angle;

    if(angle > 0){
        while(pup_motor_get_count(motor) < target) dly_tsk(10);
    }else{
        while(pup_motor_get_count(motor) > target) dly_tsk(10);
    }

    pup_motor_stop(motor);
}
実際に使わないので省略します。
距離を指定して直進する
まず、構文です。
go_forward(右モーター,左モーター,距離,円周)
指定した距離進むプログラムです。右モーターと左モーターを指定してください。
次に、実際の文です。
void go_forward(pup_motor_t *right_motor, pup_motor_t *left_motor,
                float distance, int circumference){
    int angle = (distance * 360) / circumference;

    motorport_start(right_motor, angle);
    motorport_start(left_motor, angle);

    motorport_wait(right_motor, angle);
    motorport_wait(left_motor, angle);
}
先ほどの二つの文を使用しています。
使用例です。
go_forward(motorA, motorB, 100, 177.46);
両サイドのモーターに3番目のタイヤをつけると10cm直進します。
5.指定した角度旋回
回転の基本
回転には、二つの方法が存在します。

このように、ピポットターンと、スピンターンが存在しています。ピポットターンのほうが動きが小さいので、私はよくピポットターンを使います。
ロボットの動きと、モーターの動かし方は、
で、次は、ピポットターンとスピンターンどちらも作っていきます。
ピポットターン
旋回方法

ピボットターンは、その場で旋回するため、動きが小さくなります。
レゴのスタッド数は、8mmなため、スタッドとスタッドの中心同士の間隔は、
(width - 1) * 8) / 2
となります。(半径)
よって、円周は、(3.14159 * (width - 1) * 8) * (turn_angle / 360.0)です。
コード
まず、構文です。
pivot_turn_right('右モーター','左モーター',曲がる角度,円周,タイヤの付いている場所同士の間隔(ポッチ数))
pivot_turn_left('右モーター','左モーター',曲がる角度,円周,タイヤの付いている場所同士の間隔(ポッチ数))
次に、実際の文です。
void pivot_turn_right(pup_motor_t *right_motor, pup_motor_t *left_motor,
                      float turn_angle, int circumference, int width){
    float width_mm = (width - 1) * 8;
    float turn_circumference = (3.14159 * width_mm) * (turn_angle / 360.0);
    float angle = (turn_circumference * 360) / circumference;

    motorport_start(right_motor, -angle);
    motorport_start(left_motor, angle);

    motorport_wait(right_motor, -angle);
    motorport_wait(left_motor, angle);
}

void pivot_turn_left(pup_motor_t *right_motor, pup_motor_t *left_motor,
                     float turn_angle, int circumference, int width){
    float width_mm = (width - 1) * 8;
    float turn_circumference = (3.14159 * width_mm) * (turn_angle / 360.0);
    float angle = (turn_circumference * 360) / circumference;

    motorport_start(right_motor, angle);
    motorport_start(left_motor, -angle);

    motorport_wait(right_motor, angle);
    motorport_wait(left_motor, -angle);
}
例文は省略します。
スピンターン
旋回方法

スピンターンは、片方のモーターを軸にするため、動きが大きくなります。
レゴのスタッド数は、8mmなため、スタッドとスタッドの中心同士の間隔は、
(width - 1) * 8
となります。(半径)
よって、円周は、(3.14159 * (width - 1) * 8 * 2) * (turn_angle / 360.0)です。
コード
スピンターンは、曲がりたい方向と逆のモーターだけを動かす旋回方法なので、一つのモーターを動かす「motor_millimeter_run」を使います。
まず、関数です。
// スピンターン(右回転)
spin_turn_right('右モーター', '左モーター', 角度°, タイヤ円周mm, 車幅stud);

// スピンターン(左回転)
spin_turn_left('右モーター', '左モーター', 角度°, タイヤ円周mm, 車幅stud);
次に、定義を書きます。
void spin_turn_right(pup_motor_t *right_motor, pup_motor_t *left_motor,
                     float turn_angle, int circumference, int width){
    float width_mm = (width - 1) * 8;
    float turn_circumference = (3.14159 * width_mm * 2) * (turn_angle / 360.0);

    motor_millimeter_run(left_motor, circumference, turn_circumference);
}

void spin_turn_left(pup_motor_t *right_motor, pup_motor_t *left_motor,
                    float turn_angle, int circumference, int width){
    float width_mm = (width - 1) * 8;
    float turn_circumference = (3.14159 * width_mm * 2) * (turn_angle / 360.0);

    motor_millimeter_run(right_motor, circumference, turn_circumference);
}
車幅を二倍にして、円周率をかけるのがポイントです。
実際に使うとこのようになります。
// スピンターン(右回転)
spin_turn_right('A', 'B', 90, 56, 10);    // 90°右スピン

// スピンターン(左回転)
spin_turn_left('A', 'B', 90, 56, 10);     // 90°左スピン
6.今までの定義まとめ
実際に使う際の構文です。ポートには必ず、「''」をつけてください。
例)motorport_start('A', 回転数);
// モーターを回転方向に応じてスタートさせる
motorport_start('ポート', 回転数);

// モーターが指定した回転数に達するまで待つ
motorport_wait('ポート', 回転数);

// モーターを指定した回転数だけ回す(ブロッキング)
motorport_run('ポート', 回転数);

// モーターを距離(mm)で動かす(ブロッキング)
motor_millimeter_run('ポート', タイヤ円周mm, 距離mm);

// 直進(左右モーターを同時に動かす)
go_forward('右モーター', '左モーター', 距離mm, タイヤ円周mm);

// ピボットターン(右回転)
pivot_turn_right('右モーター', '左モーター', 角度°, タイヤ円周mm, 車幅stud);

// ピボットターン(左回転)
pivot_turn_left('右モーター', '左モーター', 角度°, タイヤ円周mm, 車幅stud);

// スピンターン(右回転)
spin_turn_right('右モーター', '左モーター', 角度°, タイヤ円周mm, 車幅stud);

// スピンターン(左回転)
spin_turn_left('右モーター', '左モーター', 角度°, タイヤ円周mm, 車幅stud);
次に、実際に、void Mainの前に書くvoid定義です。
void motorport_start(pup_motor_t *motor, float angle){
    pup_motor_set_speed(motor, angle > 0 ? 500 : -500);
}

void motorport_wait(pup_motor_t *motor, float angle){
    int start = pup_motor_get_count(motor);
    int target = start + angle;

    if(angle > 0){
        while(pup_motor_get_count(motor) < target) dly_tsk(10);
    }else{
        while(pup_motor_get_count(motor) > target) dly_tsk(10);
    }

    pup_motor_stop(motor);
}

void motorport_run(pup_motor_t *motor, int angle){
    int start = pup_motor_get_count(motor);
    int target = start + angle;

    if(angle > 0){
        pup_motor_set_speed(motor, 500);
        while(pup_motor_get_count(motor) < target) dly_tsk(10);
    }else{
        pup_motor_set_speed(motor, -500);
        while(pup_motor_get_count(motor) > target) dly_tsk(10);
    }

    pup_motor_stop(motor);
}

void motor_millimeter_run(pup_motor_t *motor, int circumference, float distance){
    motorport_run(motor, (distance * 360) / circumference);
}

void go_forward(pup_motor_t *right_motor, pup_motor_t *left_motor,
                float distance, int circumference){
    int angle = (distance * 360) / circumference;

    motorport_start(right_motor, angle);
    motorport_start(left_motor, angle);

    motorport_wait(right_motor, angle);
    motorport_wait(left_motor, angle);
}

void pivot_turn_right(pup_motor_t *right_motor, pup_motor_t *left_motor,
                      float turn_angle, int circumference, int width){
    float width_mm = (width - 1) * 8;
    float turn_circumference = (3.14159 * width_mm) * (turn_angle / 360.0);
    float angle = (turn_circumference * 360) / circumference;

    motorport_start(right_motor, -angle);
    motorport_start(left_motor, angle);

    motorport_wait(right_motor, -angle);
    motorport_wait(left_motor, angle);
}

void pivot_turn_left(pup_motor_t *right_motor, pup_motor_t *left_motor,
                     float turn_angle, int circumference, int width){
    float width_mm = (width - 1) * 8;
    float turn_circumference = (3.14159 * width_mm) * (turn_angle / 360.0);
    float angle = (turn_circumference * 360) / circumference;

    motorport_start(right_motor, angle);
    motorport_start(left_motor, -angle);

    motorport_wait(right_motor, angle);
    motorport_wait(left_motor, -angle);
}

void spin_turn_right(pup_motor_t *right_motor, pup_motor_t *left_motor,
                     float turn_angle, int circumference, int width){
    float width_mm = (width - 1) * 8;
    float turn_circumference = (3.14159 * width_mm * 2) * (turn_angle / 360.0);

    motor_millimeter_run(left_motor, circumference, turn_circumference);
}

void spin_turn_left(pup_motor_t *right_motor, pup_motor_t *left_motor,
                    float turn_angle, int circumference, int width){
    float width_mm = (width - 1) * 8;
    float turn_circumference = (3.14159 * width_mm * 2) * (turn_angle / 360.0);

    motor_millimeter_run(right_motor, circumference, turn_circumference);
}
次に、例文を書きます。
// モーターを回し始める(正回転)
motorport_start(motorA, 360);

// モーターが指定回転数に達するまで待つ
motorport_wait(motorA, 360);

// モーターを指定回転数だけ回す(ブロッキング)
motorport_run(motorA, 720);

// モーターを距離(mm)で動かす(100mm前進)
motor_millimeter_run(motorA, 177.46, 100);

// 直進(左右モーターで200mm前進)
go_forward(motorA, motorB, 200, 177.46);

// ピボットターン(右回転 90°)
pivot_turn_right(motorA, motorB, 90, 177.46, 10);

// ピボットターン(左回転 90°)
pivot_turn_left(motorA, motorB, 90, 177.46, 10);

// スピンターン(右回転 90°)
spin_turn_right(motorA, motorB, 90, 177.46, 10);

// スピンターン(左回転 90°)
spin_turn_left(motorA, motorB, 90, 177.46, 10);
7.終わりに(タイヤの円周を求める方法)
今回は、正確な車のコードの作り方を紹介しました。
WROなどで、使ってみるといかかでしょうか。
今回紹介したタイヤは一部のものですが、
から、レゴの様々なタイヤがのっているので、ぜひ参考にしてみてください。
レゴのパーツ名(タイヤ)は、必ず「直径x幅」がのっていて、それをもとに、円周を計算することができます。

この場合だと、
68.7 * 3.14になるので、円周は約215.718mmだとわかります。
ぜひ、自分の持っているタイヤで、SPIKE-RTロボットをうごかしてみてはいかがでしょうか。