こんにちは。Keiです。
今回は、Omise Webhookのつかいかたについてざっくりと説明したいと思います。
Omise Webhookとは、あなたが加盟店であると定義したときに、あなたのAPIの操作の結果を、あなたのサイトにとばしてくれるサービスです。
HTTPS サーバを立てる
OmiseのWebhookはHTTPをサポートしていないため、TLS証明書を取得して、HTTPSのサーバーを立てる必要があります。(立て方の詳細はこの記事では割愛します)
エンドポイントを作る
OmiseのサーバーはあなたのWebサーバーにHash形式のデータを、POSTリクエストとして投げるので、これを受けるためのエンドポイントを作ります。この際にやらなくてはならないことは、
- エンドポイントのページファイルの作成及び配置
- ルーティングの設定
です。例えばRailsでやる場合、
endpointコントローラにget_requestという、webhookを受け取るアクションを定義するとして、
$ bin/rails generate controller endpoint get_request
そうすると、 config/routes.rb は、
Rails.application.routes.draw do
  get 'endpoint/index'

  scope "/endpoint" do
    post :get_request,  to: "endpoint#get_request"
    get  :index, to: "endpoint#index"
  end
end
こんな感じになります。
で、実際のコントローラはどうなっているかというと、
class EndpointController < ApplicationController
  skip_before_action :verify_authenticity_token

  require 'io/console'
  require 'mail'
  require 'slack-notifier'

  def index
  end

  #
  # take the incoming POST request from Omise webhook server
  # and parse|filter is, then send to Email|Slack notification
  #
  def get_request
    send_email
    send_slack
  end
ここまでがpublicメソッドです。 get_requestには、今回の例では send_mail(メール送信)と send_slack(スラック送信)を実装しています。
ちなみに、Omiseから送られてきたWebhookの中身は、上記configのルーティングのようにすれば、paramsというやつで取得することができます。なので、以下のようにしたりしてパラメータからメッセージを作ることが可能です。
  def build_notification_content
    data    = params["data"]  || {}
    refunds = data["refunds"] || {}
    card    = data["card"]    || {}
    params_filtered = {
      key:                   params['key'], # such as: charge.update etc..
      id:                    params['id'],
      mode:                  params['livemode'] ? 'live' : 'test',
      created:               params['created'],
      charge_id:             data['id'],
      charge_amount:         data['amount'],
      currency:              data['currency'],
      description:           data['description'],
      status:                data['status'],
      capture:               data['capture'],
      authorized:            data['authorized'],
      reversed:              data['reversed'],
      paid:                  data['paid'],
      transaction:           data['transaction'],
      source_of_fund:        data['source_of_fund'],
      refunded:              data['refunded'],
      refunds_total:         refunds['total'],
      refunds_location:      refunds['location'],
      from:                  data['from'],
      to:                    data['to'],
      return_uri:            params['return_uri'],
      offsite:               params['offsite'],
      offline:               params['offline'],
      reference:             params['reference'],
      authorize_uri:         params['authorize_uri'],
      failure_code:          params['failure_code'],
      failure_message:       params['failure_message'],
      card_id:               card['id'],
      card_last_digits:      card['last_digits'],
      card_brand:            card['brand'],
      card_expiration_month: card['expiration_month'],
      card_expiration_year:  card['expiration_year'],
      card_finger_print:     card['finger_print'],
      card_name:             card['name'],
      card_cvv:              card['security_code_check'],
      customer:              params['cust_test_5ar6mkaz88ltyem88ve'],
      event_id:              params['event_id'],
      transaction:           params['transaction'],
    }
    params_filtered
      .select{ |k, v| v }
      .inject(""){|k, (c, v)| "#{k}\n[#{c}] #{v}" }
  end
エンドポイントをOmiseに登録する。
さて、受け取り口ができたところで、そのページをOmiseに登録しましょう!
OmiseのダッシュボードのWebhookに行き、上の方のパネルのエンドポイントの編集をクリックします。
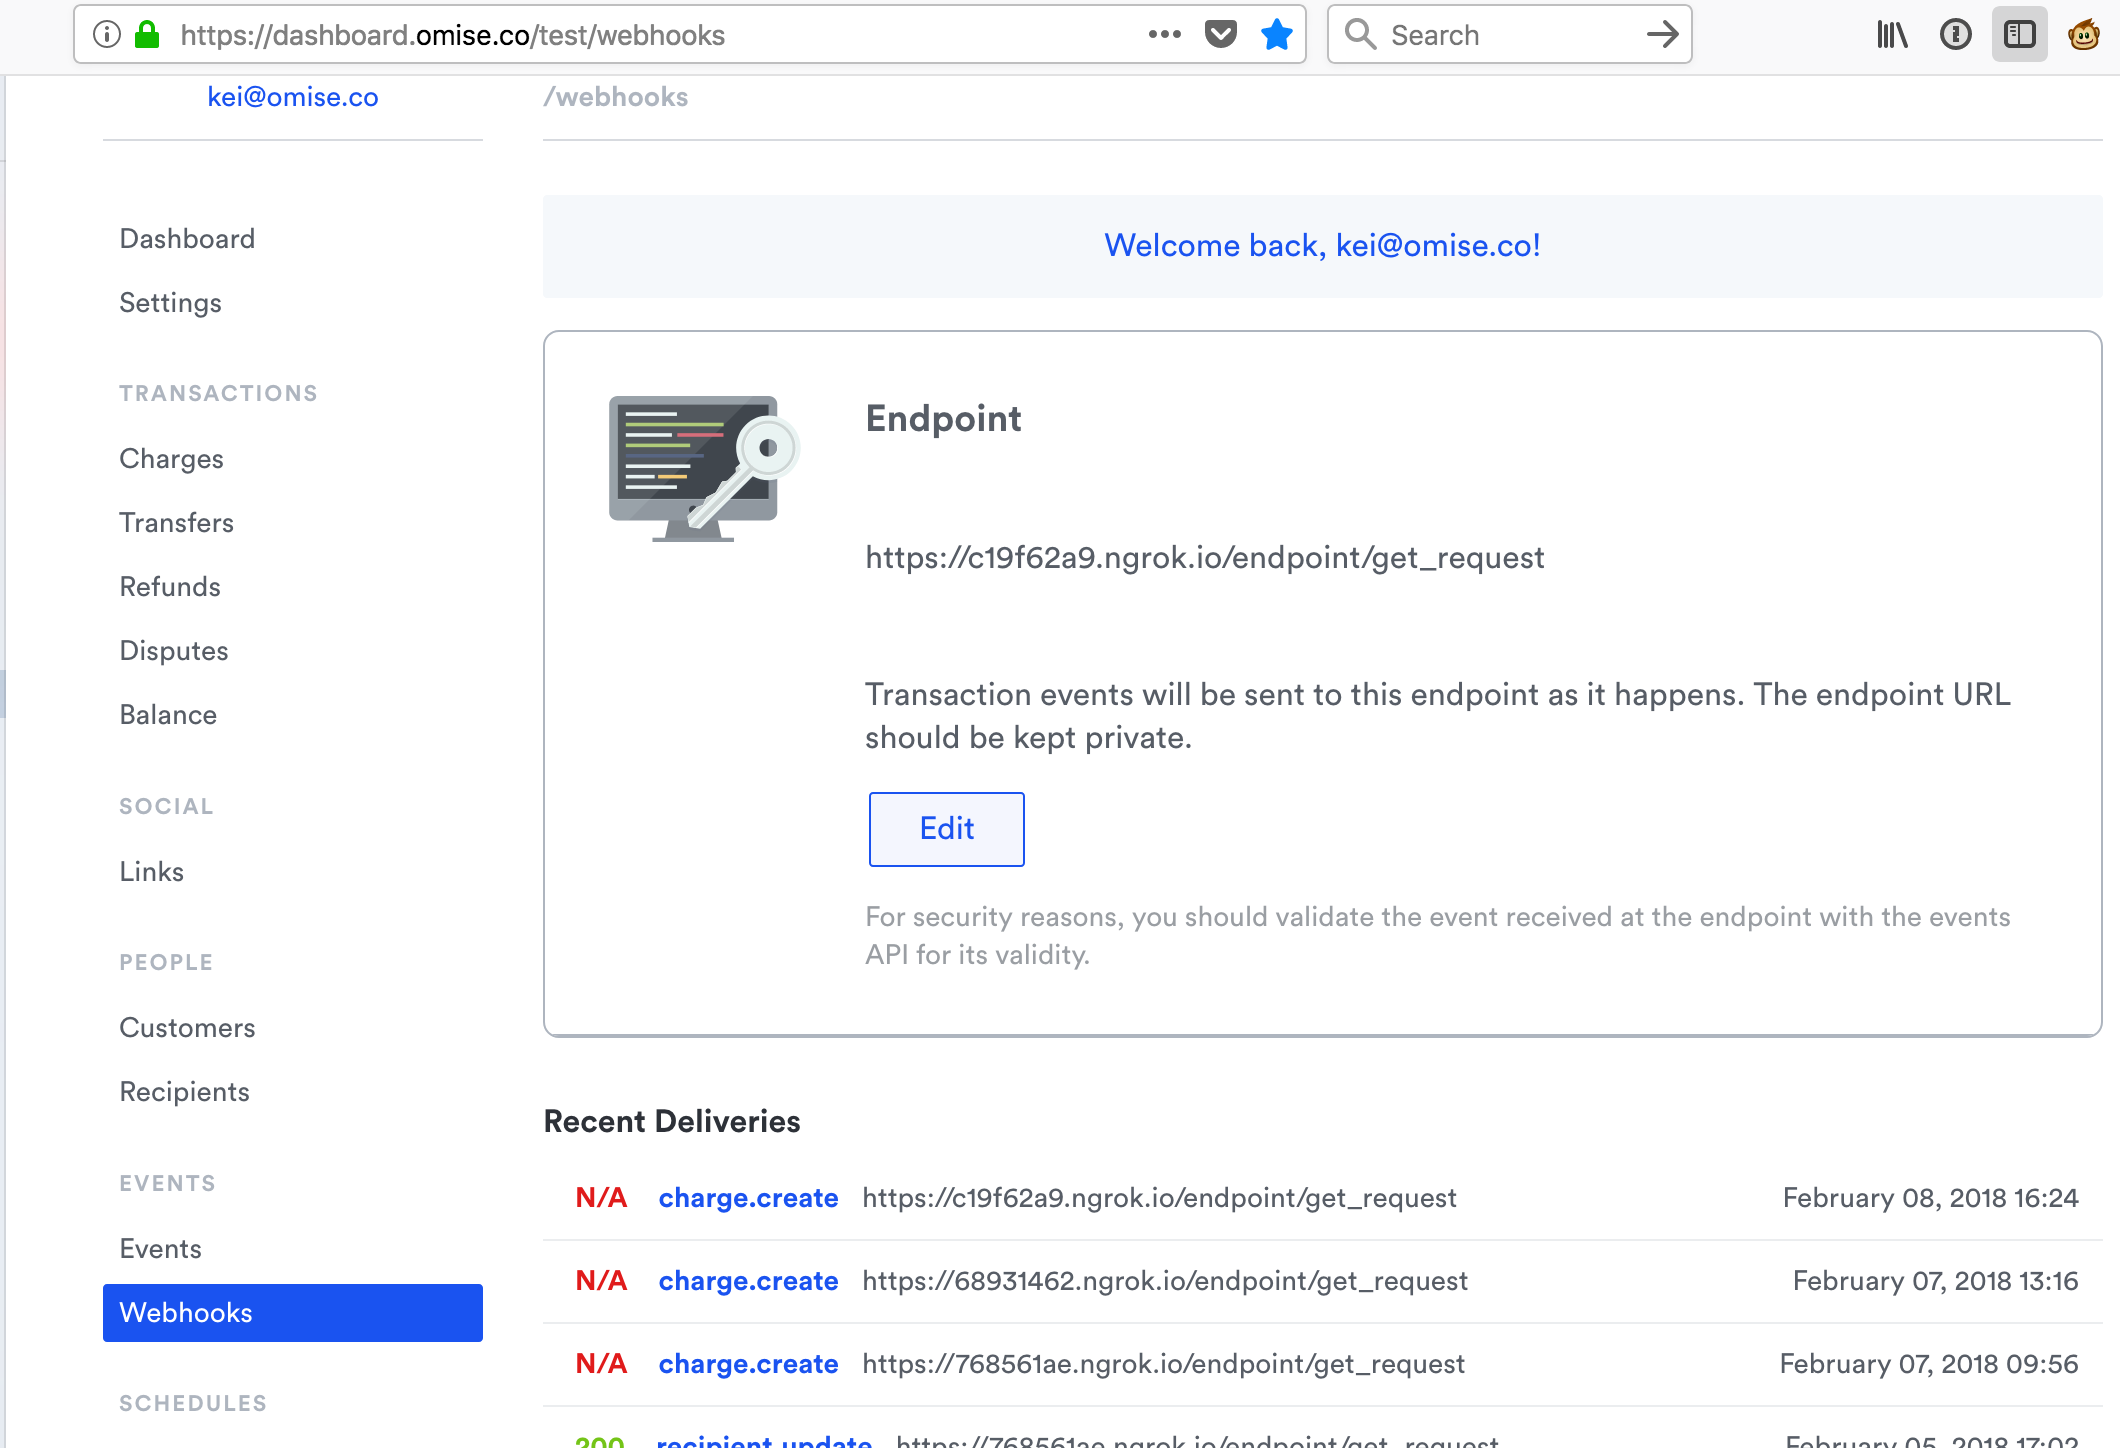
そして、ここに必要なエンドポイントを登録します。

これでオーケーです。
メール送信
さて、これを使って、メール送信をする場合 rubyにはmailというgemがあります。これを使えばほぼほぼ1ファイルでメールを実装することが可能です。
  #
  #     Email Generation/Sending Section
  #
  # XXX might have to be located in another backend class
  #
  def send_email
    sender_email_address = Rails.application.secrets.sender_email_address
    target_addresses     = Rails.application.secrets.default_target_addresses.split(",")
    pass                 = Rails.application.secrets.email_pass
    user_name            = /^[^@]+/.match(sender_email_address).to_s

    Mail.defaults do
      delivery_method :smtp, {
        address:              "smtp.gmail.com",
        port:                 587,
        domain:               "example.com", # this does not need to be changed
        user_name:            user_name,
        password:             pass,
        authentication:       'plain',
        enable_starttls_auto: true
      }
    end

    content = build_notification_content
    title   = "#{params['key']}: "
    #
    # If dispatching of destination, email header, or email content
    # needed you can use incoming parameters and define condition clause
    # with these.
    # The following example sets the specific email title if
    # the status is success.
    #
    if params["data"]["status"] == "successful"
      title += "success on #{params['data']['id']}"
    end

    target_addresses.each do |recipient_email_address|
      mail = build_mail(sender_email_address, recipient_email_address, title, content)
      mail.charset = "UTF-8"
      mail.content_transfer_encoding = "8bit"
      mail.deliver!
    end

  rescue Net::SMTPAuthenticationError
    raise("\nEmailAddress/Password is incorrect: #{sender_email_address}\n\n")
  end

  def build_mail(sender_email_address, recipient_email_address, _subject, _body)
    Mail.new do
      from    sender_email_address
      to      recipient_email_address
      subject _subject
      body    _body
    end
  end
end
Slack送信
Slackにはslack-notifierというのがあるので、これを使用します。(まず、SlackのwebhookのURLを取得する必要がありますが、これはSlackのサイトから簡単にできます)
  require "slack-notifier"

  def send_slack
    url         = Rails.application.secrets.webhook_url
    notifier    = Slack::Notifier.new(url)
    message     = build_notification_content
    notifier.ping "==========================\n#{message}\n"
  end
などなど、です。
なお、上記のソースコードはこちらから参照可能なので、興味があったらみてください。
また、わからないことなどあったら kei@omise.co までどうぞ。