はじめに
本記事には Auth0 の RBAC について検証した結果をまとめています。
流れとしてはこんな感じです。
- サンプルコードをダウンロード
- この中に、path ごとの scope チェックロジックが入っている
- それに合わせて Auth0 のユーザに付与する Permission をいじってみつつ、
- API からのレスポンスをチェックしていく
サンプルコードのダウンロードと、それを利用した API の起動
Docs > Quickstarts > Regular Web App を開く。

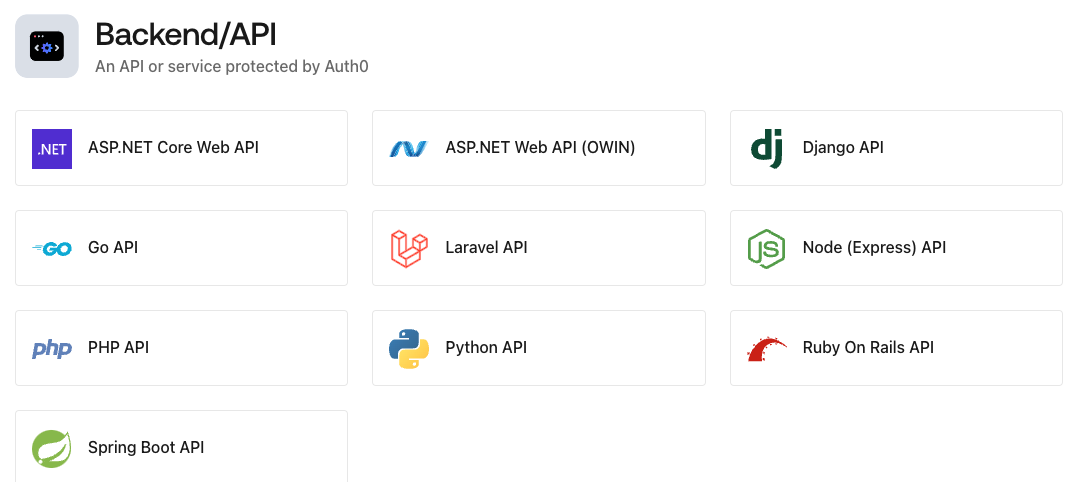
スクロールしていくと「Backend/API」があり、その中に「Node (Express) API」があるのでクリック。
ここに色々書かれているのだが、要はこのページは以下の内容となっている。
- まず、Node (Express) API のサンプルとして RBAC 実装したものをここからダウンロードできる
- そのために必要な Auth0 側の設定が書かれている
- サンプルを起動するために必要な設定が書かれている
まずは何も考えず、画面右上の「Download Sample」をクリック。
(画面を少しスクロールすると、ページのヘッダにボタンが表示される)

表示された画面には「API」という選択肢があるが、これは何かというと「これからダウンロードするサンプルを、Auth0 上に定義したどの API にマップするか?」が聞かれている。
今回は「Auth0 Practice API」を選択する。
つまり、 Auth0 で認証する SPA を作ってみる で作成した API として動作させることになる。
ダウンロードしたものを展開すると、以下のファイルが作られていることがわかる。
AUDIENCE=[Auth0 Practive API の Audience」
ISSUER_BASE_URL=[Auth0 Tenant ID]
当該 API を起動する。
( sh exec.sh は Docker で起動しようとするので起動方法だけ変更)
cd /path/to/01-authorization-rs256
npm install
npm audit fix
npm start
サンプルコードの解説
API 自体のコードは以下のようになっている。
const express = require('express');
const app = express();
const { auth, requiredScopes } = require('express-oauth2-jwt-bearer');
const cors = require('cors');
require('dotenv').config();

if (!process.env.ISSUER_BASE_URL || !process.env.AUDIENCE) {
  throw 'Make sure you have ISSUER_BASE_URL, and AUDIENCE in your .env file';
}

const corsOptions =  {
  origin: 'http://localhost:3000'
};

app.use(cors(corsOptions));

const checkJwt = auth();

app.get('/api/public', function(req, res) {
  res.json({
    message: 'Hello from a public endpoint! You don\'t need to be authenticated to see this.'
  });
});

app.get('/api/private', checkJwt, function(req, res) {
  res.json({
    message: 'Hello from a private endpoint! You need to be authenticated to see this.'
  });
});

app.get('/api/private-scoped', checkJwt, requiredScopes('read:messages'), function(req, res) {
  res.json({
    message: 'Hello from a private endpoint! You need to be authenticated and have a scope of read:messages to see this.'
  });
});

app.use(function(err, req, res, next){
  console.error(err.stack);
  return res.set(err.headers).status(err.status).json({ message: err.message });
});

app.listen(3010);
console.log('Listening on http://localhost:3010');
コードの中ではこういうことをしている。
-
checkJwtが JWT の有効性を確認 -
requiredScopesがscopeを確認 - API の Path ごとの期待挙動は以下
-
/api/publicは正当な JWT なしでレスポンスが得られる -
/api/privateは正当な JWT なしだとレスポンスが得られない- ただし scope については不問
-
/api/private-scopedは正当な JWT なしだとレスポンスが得られない- かつ scope に
read:messagesが存在しないとレスポンスが得られない
- かつ scope に
-
ということでこの検証をしていく。
アプリケーション (Auth0 上の API) へのパーミッション作成
Auth0 ダッシュボードで「Applications > API」と遷移し、今回の「Auth0 Practice API」を選択。
「Permissions」タブに read:messages を作成する。
以下のようになる。
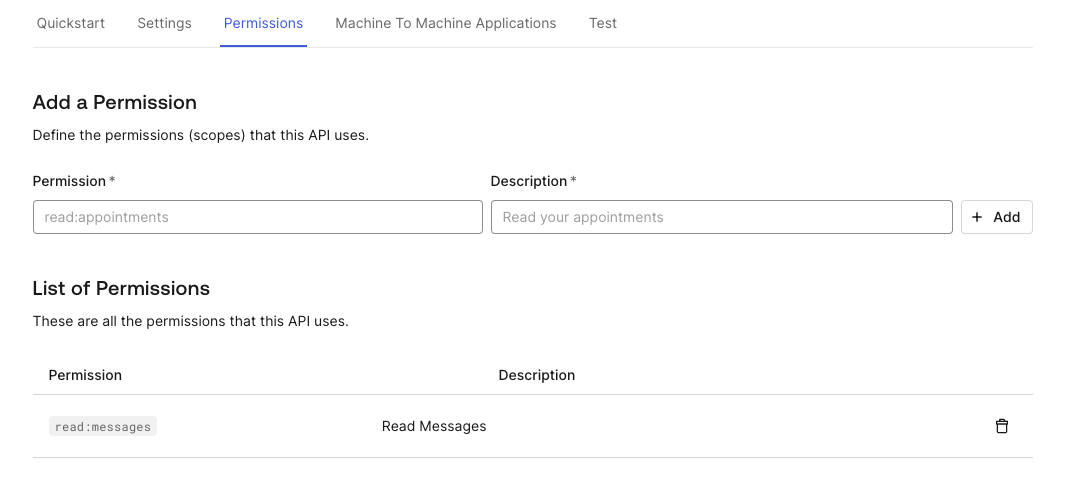
これはあくまで「このアプリケーションにはこういう Permission があるよ」ということだけを意味している。
このアプリケーションごとの Permission を実際にユーザに付与することで効果を発揮する。
なお、Permission を束ねた Role という概念があるが今回は使用しない。(むしろ実際にはそっちを使うと思うが)
動作確認 (ユーザへの Permission が付与されていない状態)
今ユーザ自体はなんの Permission も持っていない状態。

この状態で以下を試していく。
/api/public の実行
% curl http://localhost:3010/api/public
{"message":"Hello from a public endpoint! You don't need to be authenticated to see this."
期待通り JWT が全く無くてもレスポンスが返る。
/api/private の実行
JWT なし
% curl http://localhost:3010/api/private
{"message":"Unauthorized"}
期待通り、認証エラーとなる。
JWT あり
Auth0 CLI から JWT (Access Token) 取得しておく。
% auth0 test token
 Client ID: CLI Login Testing [Generic] (**********************)
 Audience: Auth0 Practice API (https://auth0.com/**********************/api/auth0-practice-api)
 ▸    Domain    : **********************
 ▸    Client ID : **********************
 ▸    Type      : Generic

? Scopes
 ▸    A browser window needs to be opened to complete this client's login flow.
 ▸    Once login is complete, you can return to the CLI to view user profile information and tokens.

 Do you wish to proceed? Yes

Waiting for login flow to complete... done

=== [Auth0 Tenant ID].us.auth0.com token for CLI Login Testing

  TOKEN    TYPE   Bearer
  EXPIRES    IN   1440 minute(s)
  ACCESS  TOKEN   [Access Token]
これを使用して以下を実行。
curl -X GET 'http://localhost:3010/api/private' -H 'Authorization: Bearer [取得したAccess Token]

{"message":"Hello from a private endpoint! You need to be authenticated to see this."}%
期待通りレスポンスが返ってきた。
例えばここで、Access Token の一部を変更したりすると、以下のようなレスポンスになる。
{"message":"signature verification failed"}
/api/private-scoped を実行
API 側の RBAC 事前設定
scope を用いた検証の前には、Auth0 ダッシュボードの「Applications > APIs」配下で対象の API について「Enable RBAC」を ON にしておく必要がある。

その上で動作確認をしていく。
JWT なし
...は当然アクセスできないと思うので割愛。
JWT あり、かつ token 取得時の scope 指定なし
% auth0 test token
 Client ID: CLI Login Testing [Generic] (**************)
 Audience: Auth0 Practice API (https://auth0.com/**************/api/auth0-practice-api)
 ▸    Domain    : **************.us.auth0.com
 ▸    Client ID : **************
 ▸    Type      : Generic

? Scopes <-- この辺で scope 確認されたけど空のまま Enter している
 ▸    A browser window needs to be opened to complete this client's login flow.
 ▸    Once login is complete, you can return to the CLI to view user profile information and tokens.

 Do you wish to proceed? Yes

Waiting for login flow to complete... done

=== **************.us.auth0.com token for CLI Login Testing

  TOKEN    TYPE   Bearer
  EXPIRES    IN   1440 minute(s)
  ACCESS  TOKEN   [Access Token]
ちなみに認証時の scope はこんな感じで聞かれる。
? Scopes  [Use arrows to move, space to select, <right> to all, <left> to none, type to filter]
> [ ]  read:messages
チェックボックスを空にしておくと認証時の scope 指定自体が空になっているはず。
(実際は SPA 等で scope は固定しているだろうから、あまりこのケースは考える意味がないけど)
API 実行。
curl -X GET 'http://localhost:3010/api/private-scoped' -H 'Authorization: Bearer [Access Token]'
{"message":"Missing 'scope' claim"}
期待通り。scope 不足を指摘されている。
JWT 付与した場合、かつ token 取得時の scope 指定あり
今度はここで、scope のチェックを入れてみる。
? Scopes  [Use arrows to move, space to select, <right> to all, <left> to none, type to filter]
> [X]  read:messages
とはいえ、同じ結果になる。(ユーザに Permission がないため)
期待通り。
{"message":"Missing 'scope' claim"}
動作確認 (ユーザへの Permission が付与されている状態で)
Permission を付与してみた。

JWT 付与した場合、かつ token 取得時の scope 指定なし
操作は 1 つ前のセクションと同じ。
期待通り、以下のように scope 不足を指摘される。(あまり考える意味はないけど)
{"message":"Missing 'scope' claim"
JWT 付与した場合、かつ token 取得時の scope 指定あり
これがいわゆる scope 使用時の正常系。
期待通り、以下のように scope チェック成功時のレスポンスが返ってくる。
{"message":"Hello from a private endpoint! You need to be authenticated and have a scope of read:messages to see this."}
まとめ
- Auth0 側で API の RBAC を ON にする
- Auth0 のユーザに必要な Permission を与える
- API 側で scope <-> Permission 間の突合ロジックを入れておく
- Client 側で必要な scope を claim に含める
とすることで Auth0 上の RBAC が実現できることが理解できた。
ただ、Path ごとの制御の前に、アプリケーション自体へのブロック等をする場合、Auth0 の Action を使っても良さそうに思える。
以下あたりを使えば、API のロジックを介さずにまとめてチェックできそう。(Path ごとみたいなことを除けば)
Actions Triggers: post-login - Event Object
- event.authorization.roles
- event.transaction.requested_scopes
(最低このロールがない場合ログイン処理でブロックするみたいなイメージ)
一旦なんとなく知っておきたいことの味見検証的なものはできたので、あとは必要に応じて深く学んでいくy。