バージョン Laravel 5.6
プロジェクト名 PassportSample
1. Laravel Passportのインストール
$ cd PassportSample # プロジェクトルートに移動
$ composer require laravel/passport
2. auth設定ファイルを変更
config/auth.php
    'guards' => [
       //...
        'api' => [
-           'driver' => 'token',
+           'driver' => 'passport',
            'provider' => 'users',
        ],
    ],
3. Userモデルにtraitを追加
app/User.php
<?php
//...
+ use Laravel\Passport\HasApiTokens;

class User extends Authenticatable
{
-    use Notifiable;
+    use HasApiTokens, Notifiable;

//...
4. マイグレーションを実行
$ php artisan migrate
5. サービスドライバーにpassportのrouteを追加
app/Providers/AuthServiceProvider.php
//...
+ use Laravel\Passport\Passport;

class AuthServiceProvider extends ServiceProvider
{
    //...
    /**
     * Register any authentication / authorization services.
     *
     * @return void
     */
    public function boot()
    {
        $this->registerPolicies();

-       //
+       Passport::routes();
    }
}
6. Oauth Clientを自動生成
$ php artisan passport:install
生成されていることを確認
$ php artisan tinker
Psy Shell v0.8.17 (PHP 7.0.25 — cli) by Justin Hileman
>>> \DB::table('oauth_clients')->get();
=> Illuminate\Support\Collection {#775
     all: [
       {#776
         +"id": 1,
         +"user_id": null,
         +"name": "Laravel Personal Access Client",
         +"secret": "oNjx4p7OcdXwB3rO5u6qIzSvarZbqtzC30razDyu",
         +"redirect": "http://localhost",
         +"personal_access_client": 1,
         +"password_client": 0,
         +"revoked": 0,
         +"created_at": "2018-01-17 13:24:39",
         +"updated_at": "2018-01-17 13:24:39",
       },
       {#778
         +"id": 2,
         +"user_id": null,
         +"name": "Laravel Password Grant Client",
         +"secret": "qCOu7Y91IMlnb7uiyzROmeROKRUJmX8T7AykzwHf",
         +"redirect": "http://localhost",
         +"personal_access_client": 0,
         +"password_client": 1,
         +"revoked": 0,
         +"created_at": "2018-01-17 13:24:39",
         +"updated_at": "2018-01-17 13:24:39",
       },
     ],
   }
7. ダミーユーザーを作成
$ php artisan tinker
Psy Shell v0.8.17 (PHP 7.0.25 — cli) by Justin Hileman
>>> factory(App\User::class, 1)->create();
=> Illuminate\Database\Eloquent\Collection {#804
     all: [
       App\User {#800
         name: "Taurean Beahan MD",
         email: "satterfield.sven@example.net",
         updated_at: "2018-01-17 13:50:49",
         created_at: "2018-01-17 13:50:49",
         id: 1,
       },
     ],
   }
>>>
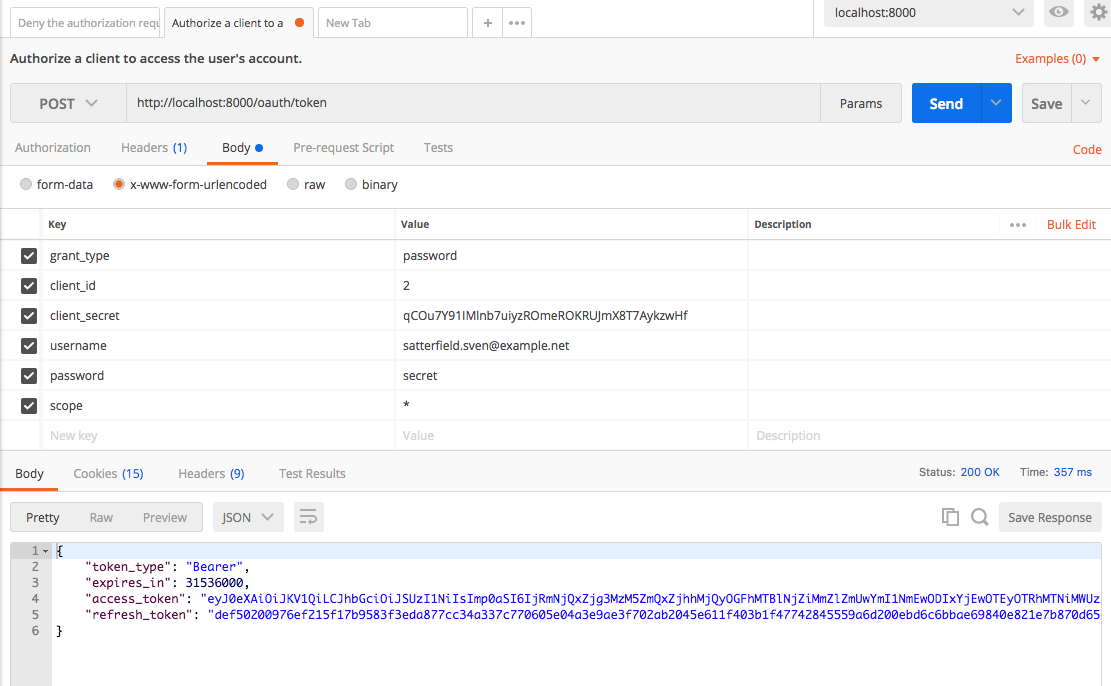
8. POSTMANでログインのテスト
9. ユーザー情報取得のエンドポイントを追加
routes/api.php
Route::group(['middleware' => 'auth:api'], function () {

    Route::get('me', function(){
        $user = Auth::user();
        return response()
            ->json(compact('user'));
    });

});
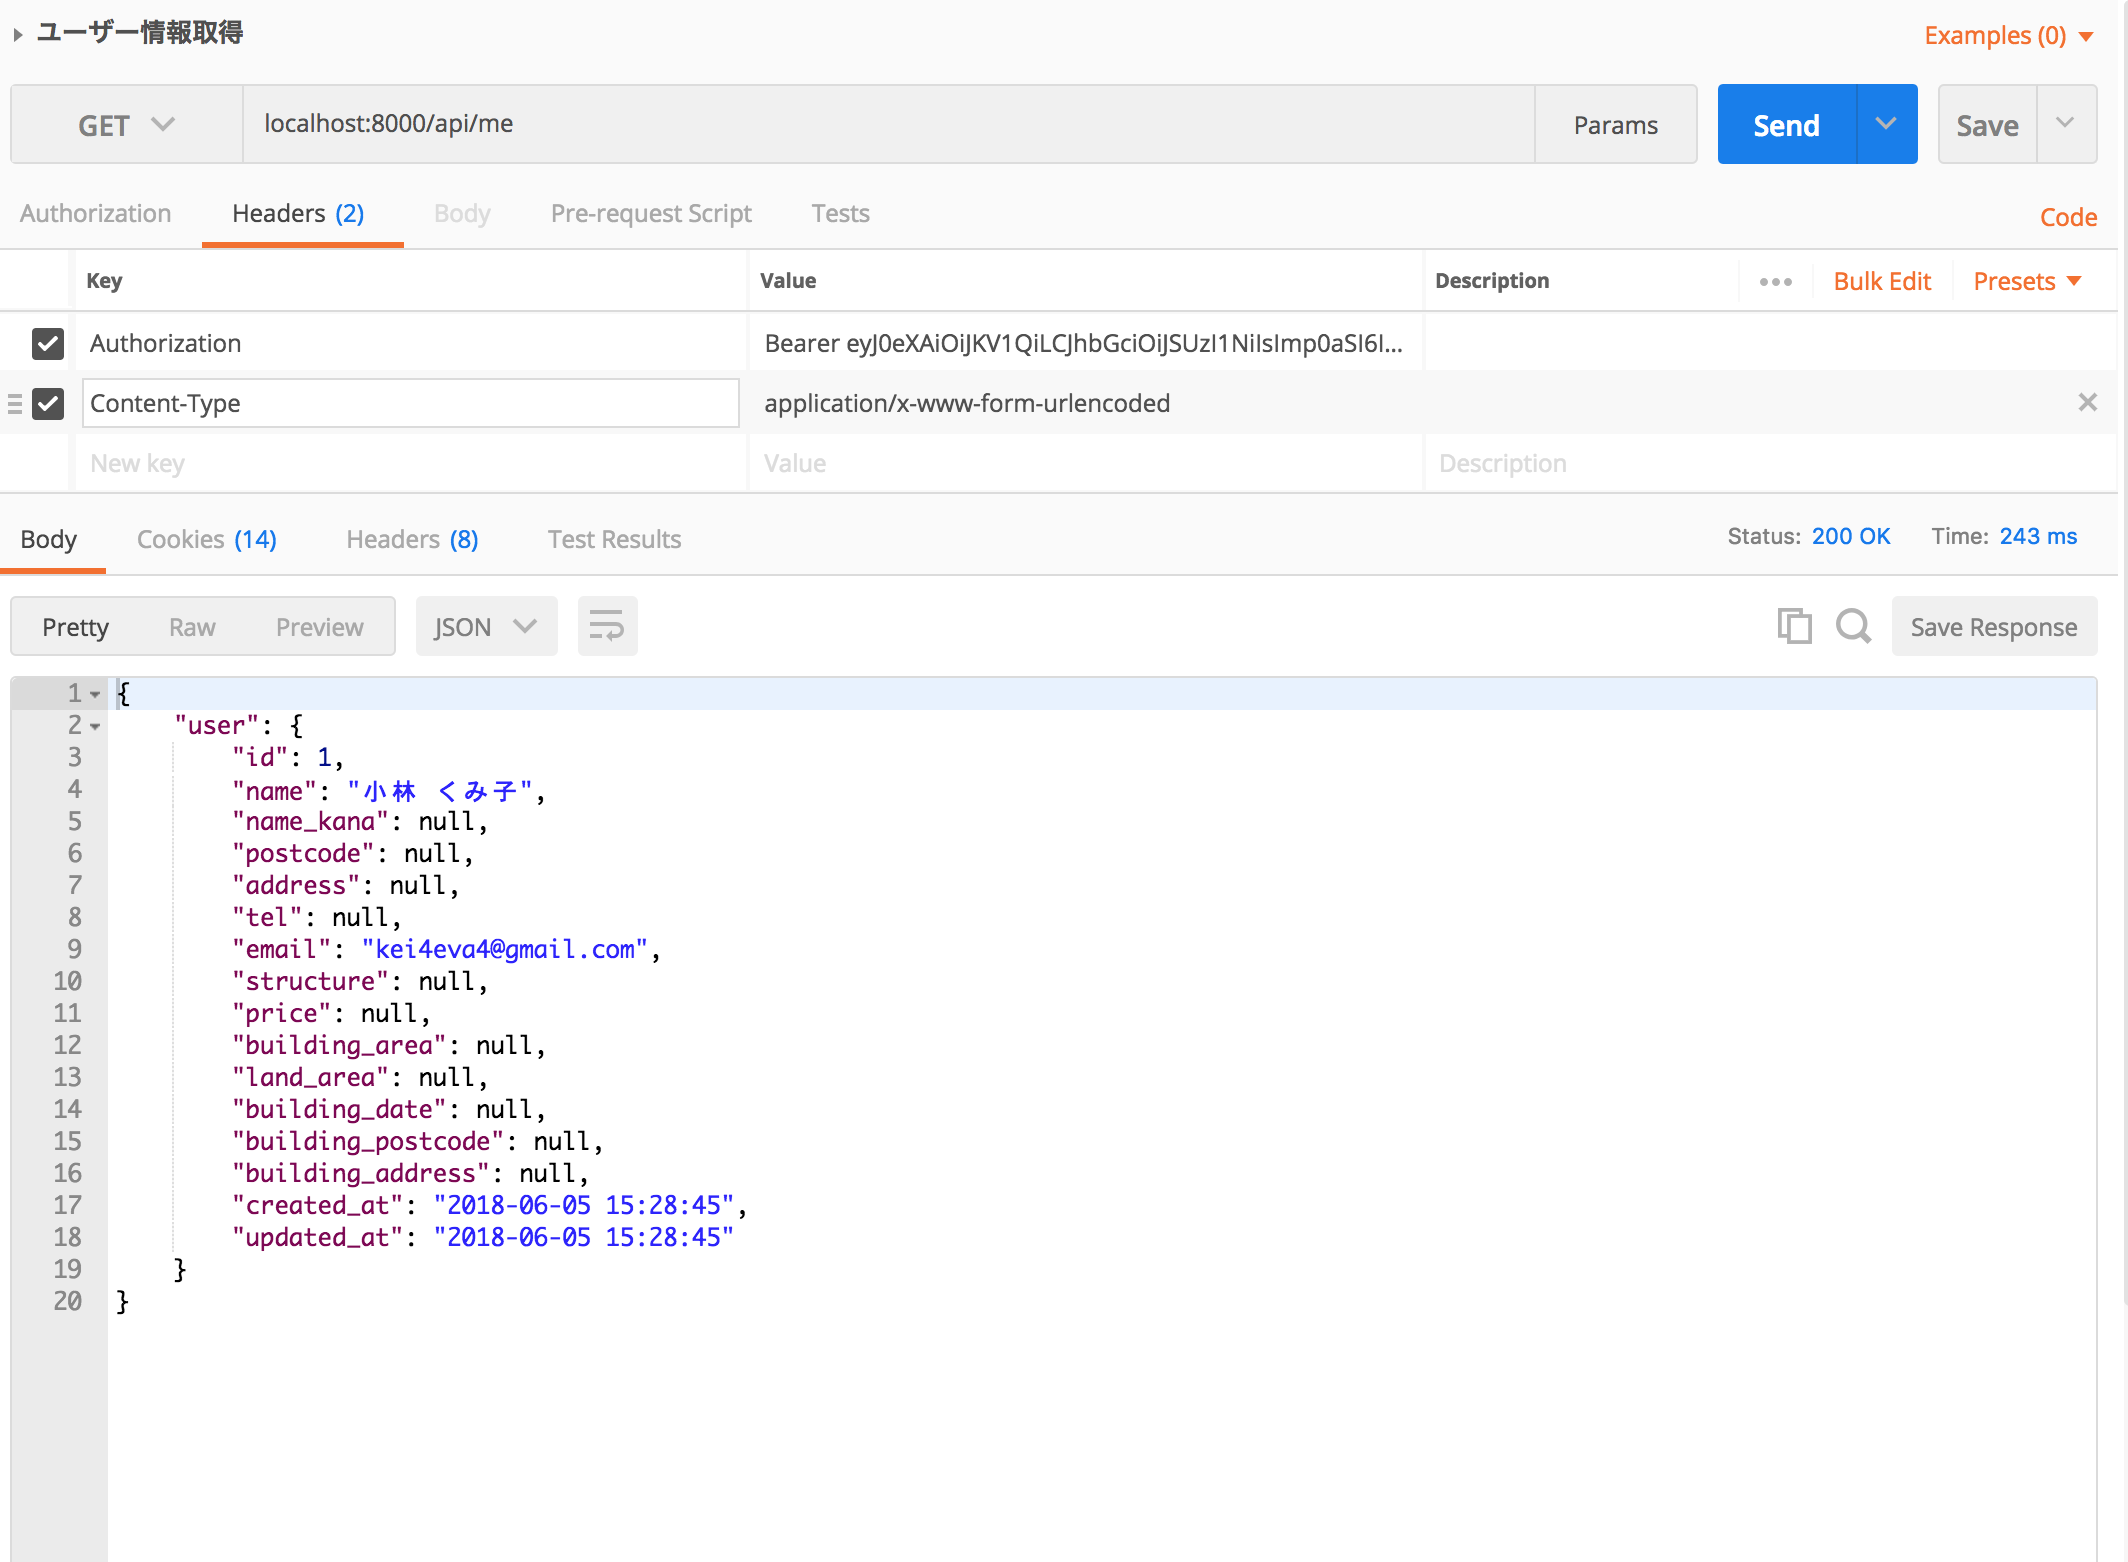
10. POSTMANでユーザー情報の取得のテスト

- 8で取得したtokenをヘッダーのAuthorizationに貼り付ける
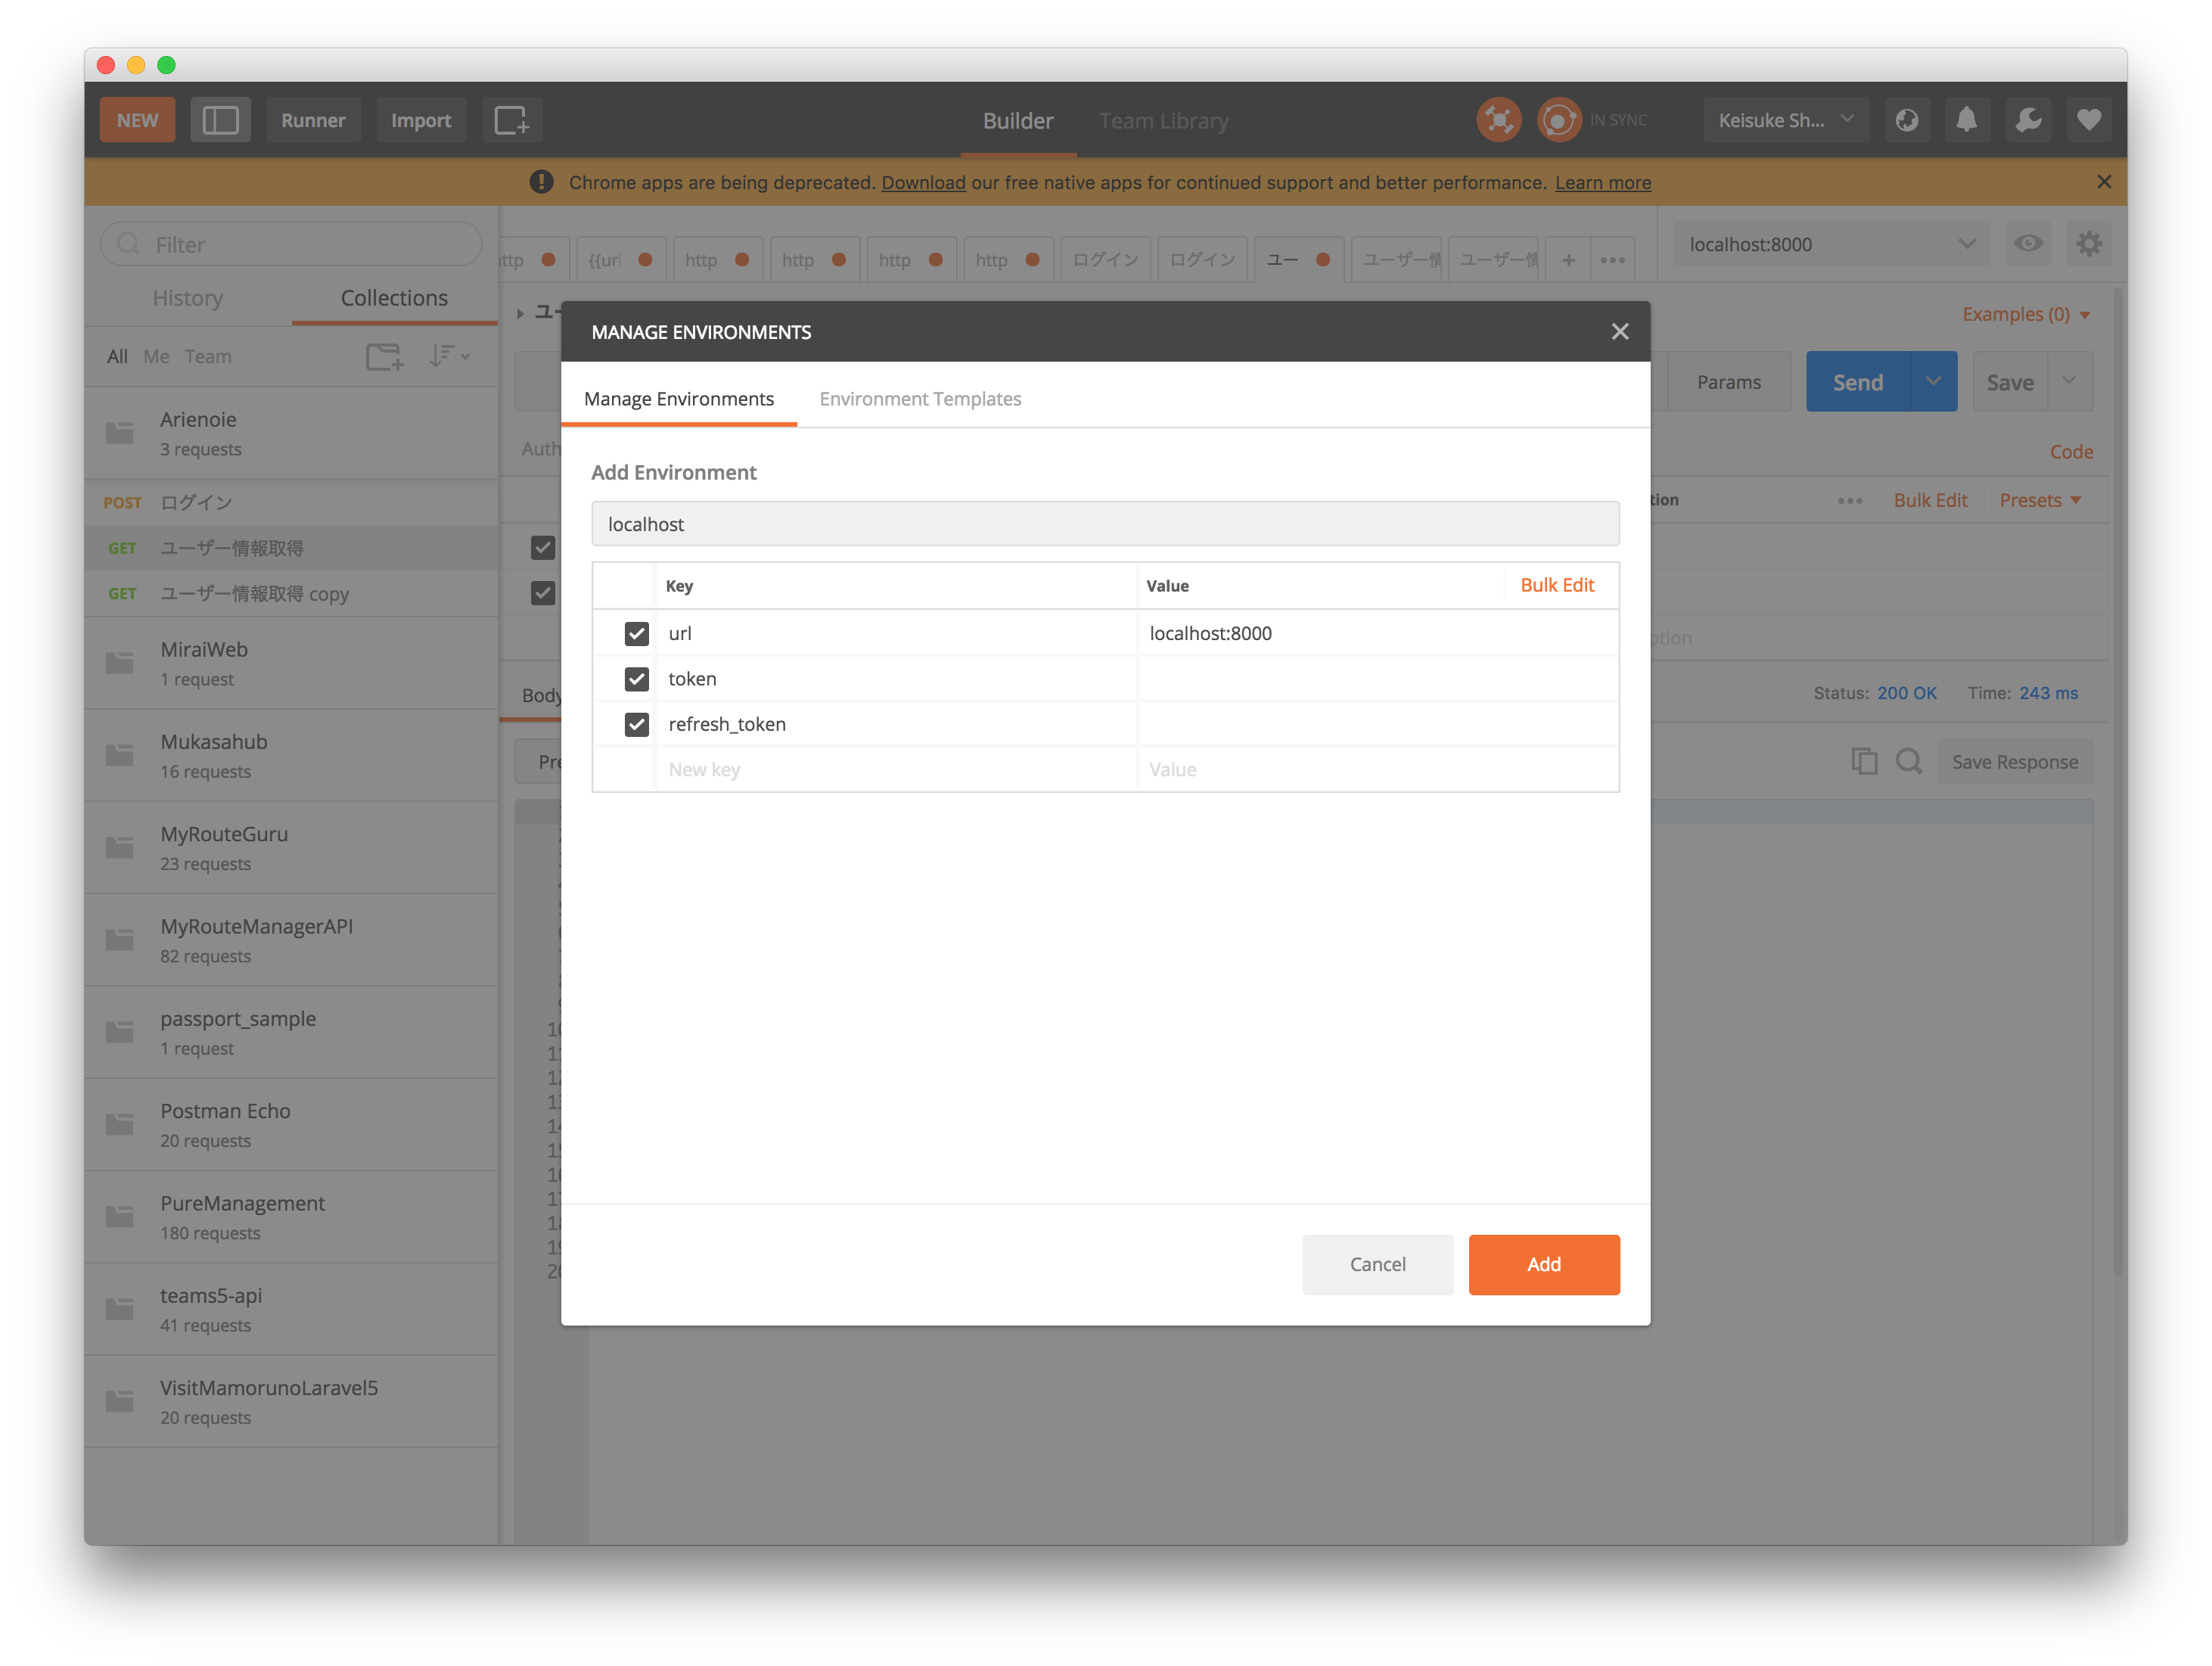
11. POSTMANの環境変数を設定

- 右上の設定 > Manage ENvironments > Addから環境を追加
- url, token, refresh_tokenを追加する
- urlにローカルサーバーのURLを入れ、tokenとrefresh_tokenは空のままにする
12. POSTMANのコレクションでパラメータの保存
- ログイン

- ユーザー情報取得

それぞれURLのホスト名部分を環境変数(url)に書き換えて名前をつけてリクエストを保存する
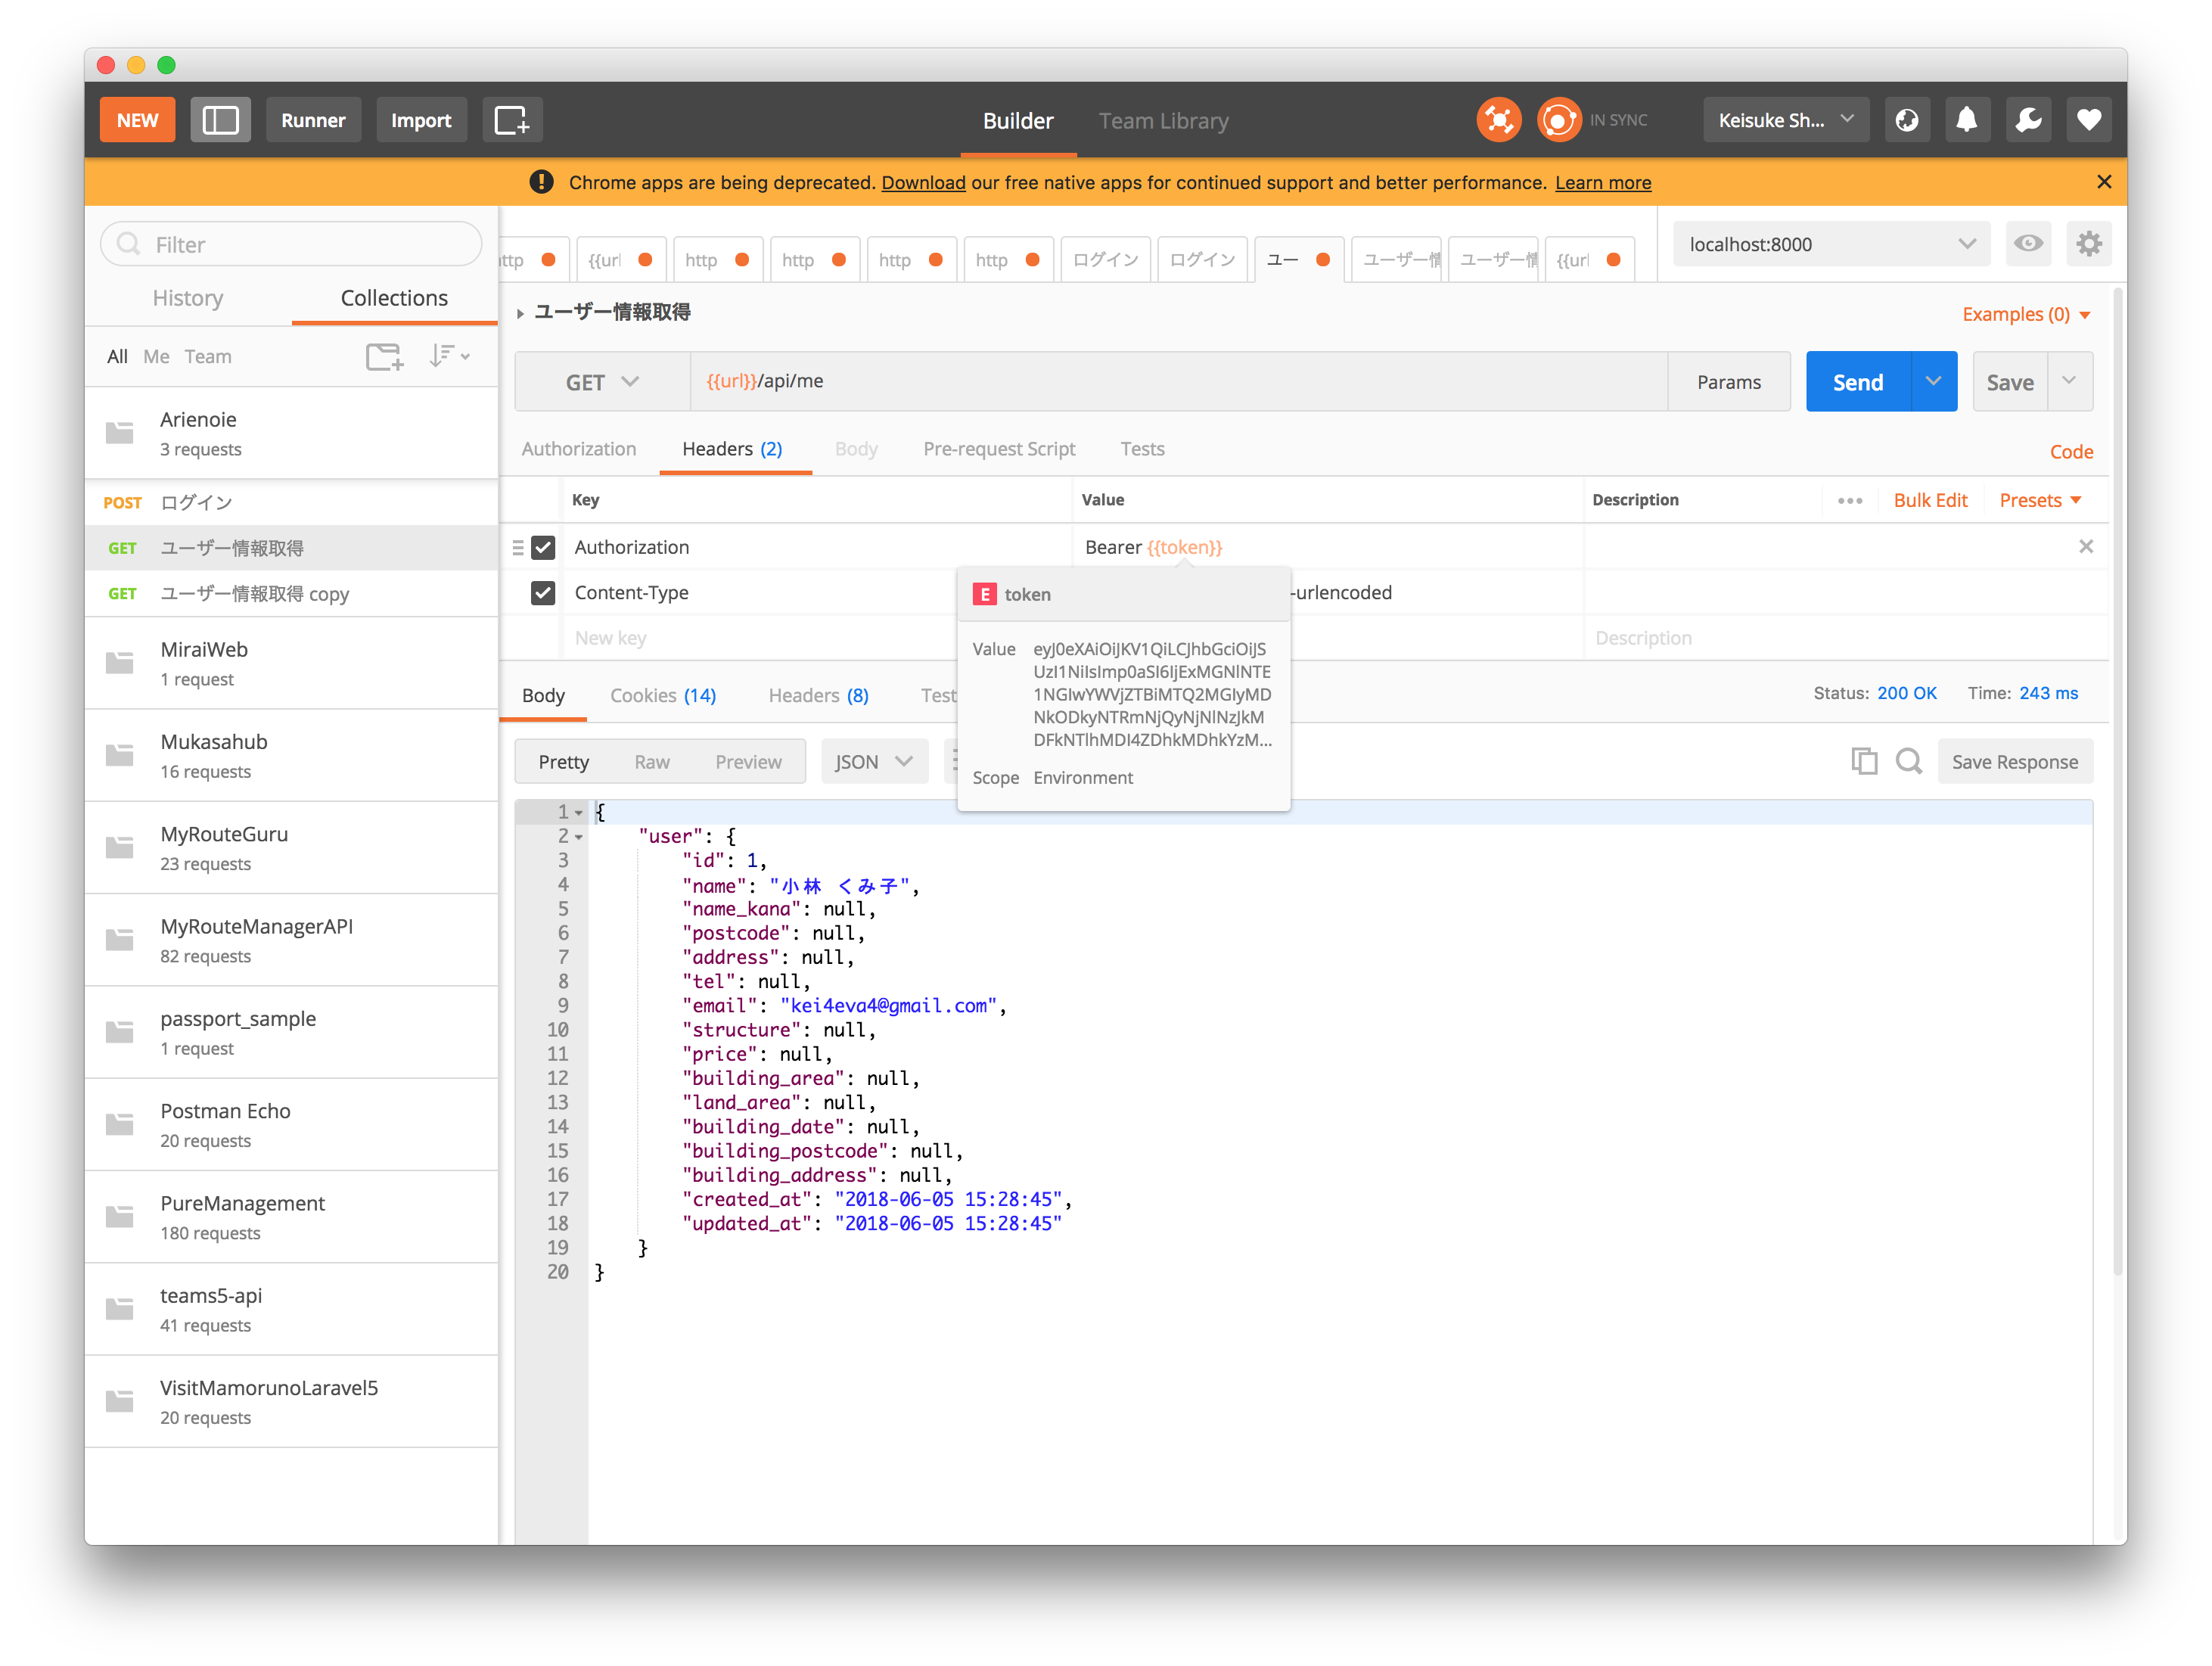
13. アクセストークンを変数化する

- ユーザー情報取得(認証が必要なルート)のリクエストのTokenほ環境変数(token)に書き換えて保存する

var data = JSON.parse(responseBody);
postman.setEnvironmentVariable("token", data.access_token);
postman.setEnvironmentVariable("refresh_token", data.refresh_token);
- ログイン時のテストスクリプトでaccess_token, refresh_tokenを環境変数に保存する

- ログイン時に自動でtokenが保存されていることが確認できる
