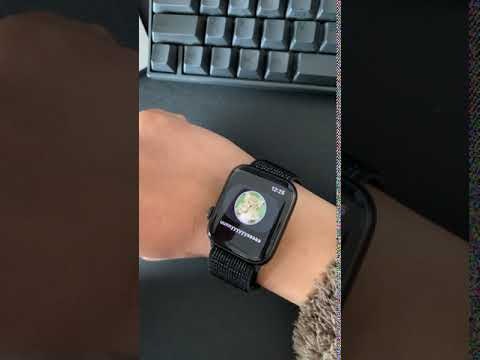
この記事でできるもの
ボタンを押すと「にゃあ」という猫 on Apple Watch
Step1. Hello, Watch!
-
- まずはOSアップデートから
- これしないとインストールできませんでした
- iOSからできなかったのでWatch本体の設定からインストールしました
-
アプリのbuild & install
- Hello World 簡単なWatchアプリ作成 がわかりやすかったです
- Watchアプリをインストールするときはビルド対象をWatchKit Appにします
- 以下が出るときはXcode再起動
Another launch session is already waiting to debug the app extension with
Step2. SwiftUIの勉強
-
- watchOSもSwift。まずはSwiftの書き方から
- 動画もあるみたいですが、僕はWebページの方見ながらやりました
-
SwiftUI Tutorialの4わかりづらく下記に進みました
Step3. 猫の画像をApple Watchに貼る
-
SwiftUI - Circular Image Example.には画像のサイズ調整までできるいい感じのコードがありました
- Image("neko")でneko.jpgを表示します
-
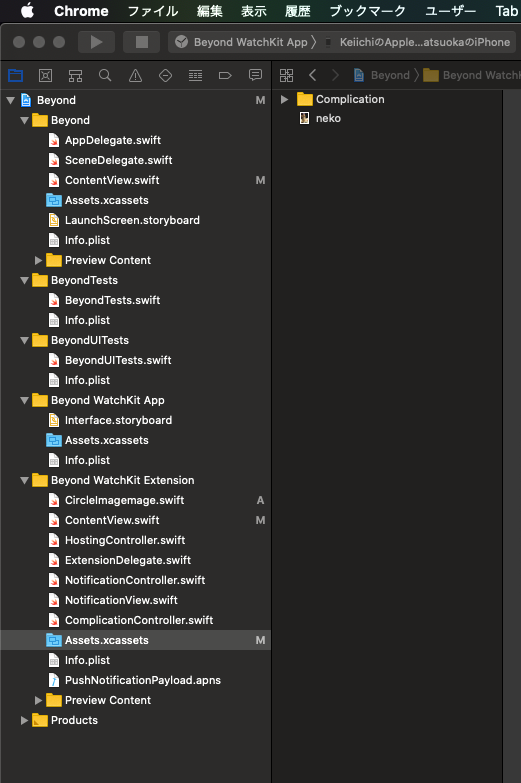
WatchKit ExtentionのAssets.xcasset以下に
neko.jpgをドラッグアンドドロップ -
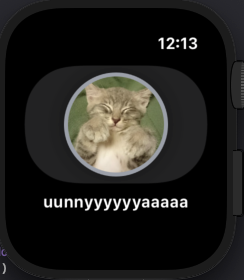
表示されました
Step4. 画像をボタンにする
1. SwiftUIでボタンを作成
VStack {
    Button(action: {

        self.buttonState.toggle()

    }) {
        Text("Button")
            .font(.headline)
    }

    if buttonState {
        Text("unnyyyyyyaaaaa")
            .font(.headline)
    }
}
2. 画像をボタンにする
-
stackoverflowにあるように下記のように設定したら動くようになりました
- オリジナルの画像をレンダリングするようにしないといけないみたいです
Image("neko").renderingMode(.original)
3. 画像ボタンのコード
VStack {
    Button(action: {

        self.buttonState.toggle()

    }) {
        VStack {
            Image("neko")
            .renderingMode(.original)
            .resizable()
            .frame(width: 100, height: 100)
            .clipShape(Circle())
            .overlay(
                Circle().stroke(Color.gray, lineWidth: 4))
                .shadow(radius: 10)
        }
    }

    if buttonState {
        Text("unnyyyyyyaaaaa")
            .font(.headline)
    }
}
4. ボタンを押すとテキストが変わります
Step5. ボタンを押すと「にゃあ」というようにする
- GitHubにあった水飲みアプリを参考にしました。
-
@ObservedObjectを使います- StateとObservableを使ってSwiftUIのビューを変更する方法がわかりやすかったです
- 以下引用
ObservedObjectとは
~省略~実装したクラスやモデルが持つプロパティを監視する
監視しているプロパティが更新されると変更が通知される
ObservableObjectを適用したクラスの一部実装にPublished属性を利用することができる
-
@Stateは変数、@ObservedObjectはクラスの変更を非同期にやってくれる、みたいな感じみたいです
- 再生する音源を用意します。今回は適当に拾ってきた
cat.mp3
- Xcodeに必要な設定をします
1. 音の再生を管理するclassを作成します
SoundPlayModel.swift
import Foundation
import AVFoundation

class SoundPlayModel: ObservableObject {
    var audioPlayer = AVAudioPlayer()

    init() {
        let sound = Bundle.main.path(forResource: "cat", ofType: "mp3")
        do {
            audioPlayer = try AVAudioPlayer(contentsOf: URL(fileURLWithPath: sound!))
        }
        catch {
            print(error)
        }
    }

    func play() {
        self.audioPlayer.play()
    }
}
2. ControllerからContentViewに渡します
HostingController.swift
class HostingController: WKHostingController<ContentView> {

    override var body: ContentView {
        return ContentView(soundPlayModel: SoundPlayModel())
    }
3. ObservedObjectでSoundPlayModelを宣言して受け取ります
ContentView.swift
struct ContentView: View {
    @ObservedObject var soundPlayModel: SoundPlayModel

# ~省略~

struct ContentView_Previews: PreviewProvider {
    static var previews: some View {
        ContentView(soundPlayModel: SoundPlayModel())
    }
}
4. 最終的なコード
ContentView.swift
import SwiftUI
import Combine
import AVFoundation

struct ContentView: View {
    @ObservedObject var soundPlayModel: SoundPlayModel
    @State private var buttonState = false

    var body: some View {

        VStack {
            Button(action: {

                self.buttonState.toggle()

                if self.buttonState {
                    self.soundPlayModel.play()
                }

            }) {
                VStack {
                    Image("neko")
                    .renderingMode(.original)
                    .resizable()
                    .frame(width: 100, height: 100)
                    .clipShape(Circle())
                    .overlay(
                        Circle().stroke(Color.gray, lineWidth: 4))
                        .shadow(radius: 10)
                }
            }

            if buttonState {
                Text("uunnyyyyyyaaaaa")
                    .font(.headline)
            }
        }
    }
}


struct ContentView_Previews: PreviewProvider {
    static var previews: some View {
        ContentView(soundPlayModel: SoundPlayModel())
    }
}


